1
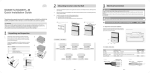
a) Refer to Fig. 1 and 2 for the recommended mounting height and position of the front and rear
sensors. You may need to make adjustments to them for your specific vehicle.
b) Work under the front and rear bumpers to check the internal structure of them before
marking the positions for drilling holes. Remove the bumpers if the view is blocked.
c) With chalk or marker, mark the position of sensors on the bumpers. Make sure that the
sensors can be pushed all the way in and that you can feed the wires through.
d) Drill the holes through the bumpers at the marks with the Φ22.3mm (7/8”) drill bit included.
Note: if drilling through metal bumper, you will need a bi-metal Φ22.3mm (7/8”) drill bit (not
included).
e) If necessary, smooth the sharp edge of the holes with a polishing head or small round file.
f) Run the sensor wires into the holes drilled. Push the sensors into the holes. When pushing
the sensors only apply pressure at the edges, not on the middle of the sensor to avoid
damage to the sensor element. The sensors are tapered for a snug fit.
g) Adjust the sensors for non-vertical bumper surface by rotating the sensors as needed.
h) For front sensors, run the sensor wires from the front bumper into the inside of the vehicle
through the existing wiring holes or rubber grommet in the fire wall, and then to the control
box in the back of the vehicle (hide the wire under the door or weather trim). Note: Keep the
sensor wires away from moving parts and engine heat.
i) For rear sensors, run the sensor wires from the rear bumper into the trunk or inside of the
vehicle through the existing small vent or rubber grommet in the rear of the trunk or vehicle,
and then to the control box.
Note: Do not cut the excess sensor wires to avoid signal loss. Sensors with wires cut also
void their warranty.
j) Attach sensor wires to the vehicle body with cable/wire ties so that they will not get in the
way of any moving parts and there are no loose wires hanging down.
k) Plug all sensors into their corresponding sockets at the control box.
Chart 1. Orientation of Obstacle, Distance Display, and Audible Alert
Reversing
Viewing from the Front of the Display
Obstacle
Distance
LEDs on the Left Side
of the Display
Responding to Rear Sensor D,C
If you find a sensor that is causing false alert, please check if the sensor hole in the bumper is too tight as instructed below,:
If a sensor causes false alert or gives inconsistent results, pull it out of its hole in the bumper for about 0.5 inch, tape it to the
bumper so it faces upward a little bit and test to see if the false alert will stop. If the false alert stops, then the hole drilled for the
sensor is a little bit tight which can apply pressure on the sensor and cause the system to give false alert.
If this is the case, then carefully enlarging the hole a little bit with a small round file should solve the problem.
Testing Your New Parking Sensor System
For the rear sensors, back up your vehicle slowly (about 3 miles per hour) to approximately
2.0m (6.6 ft) from a flat vertical surface such as a wall. Continue to back up slowly and check
the performance against Chart 1.
For the front sensors, do the same test while forward parking with braking.
Note: have somebody watch the vehicle while you are doing the test.
Using the Display
The display has a built-in beeper (audible alert) with On/Off Switch. The beeper sounds only
when the front sensors are working (when forward parking). There are seven (7) LED Lights (3
Blue, 2 Yellow, 2 Red) on each side of the two-digit distance display (Fig. 4). The color LED
lights show both orientation of obstacle (left and/or right) and Safe/Warning/Stop zone (Chart. 1)
indicated by blue/yellow/red LED lights.
-5-
Distance
Displaying
LEDs on the Right Side
of the Display
Responding to Rear Sensor B,A
Safe Zone 1 Blue Flashing
(> 2.0m)
No
Safe Zone 1 Blue Flashing
(2.0~1.5m)
Starting to
beep at 1.5m
Actual
distance
1 Blue Flashing
Warning 1 - 3 Blue on
Zone
(1.5~1.0m)
Fast
Actual
distance
1 - 3 Blue on
Warning 3 Blue/1 -2 Yellow on
Zone
(1.0~0.6m)
Faster
Actual
distance
1 -2 Yellow/3 Blue on
Stop Zone 3 Blue/2 Yellow/1 - 2 Red on
(0.6~0.3m)
Fastest
Actual
distance
1 - 2 Red/2 Yellow/3 Blue on
Stop Zone 3 Blue/2 Yellow/2 Red on
(0.3~0.0m)
Continuously
0.3 - 0.0
2 Red/2 Yellow/3 Blue on
--
1 Blue Flashing
Forward-Parking
Note: Only use Sensor A, B, C, and D as rear sensors, and Sensor E, F, G, and H as front sensors. Don't switch the front
sensors with the rear sensors or it may cause false alert such as continuous beeping and 0.0 display.
Installing Sensors in Metal Bumpers
If you have a continuous beeping or false alert problem after installation of the system, unplug all sensors from the control box,
and then plug back in one sensor at a time and test to find out which specific sensor(s) is causing the problem.
Beeping
(Audible
Alert)
Viewing from the Front of the Display
Obstacle
Distance
LEDs on the Left Side
of the Display
Responding to Front Sensor H,G
Beeping
(Audible
Alert)
Distance
Displaying
LEDs on the Right Side
of the Display
Responding to Front Sensor F,E
Safe Zone 1 Blue Flashing
(> 0.8m)
No
Warning 3 Blue/2 Yellow on
Zone
(0.8~0.6m)
Starting to
beep at 0.8m
Faster
Actual
distance
2 Yellow/3 Blue on
Stop Zone 3 Blue/2 Yellow/1 - 2 Red on
(0.6~0.3m)
Fastest
Actual
distance
1 - 2 Red/2 Yellow/3 Blue on
Stop Zone 3 Blue/2 Yellow/2 Red on
(0.3~0.0m)
Continuously
0.3 - 0.0
2 Red/2 Yellow/3 Blue on
--
1 Blue Flashing
Note: 1meter = 3.3feet
Detection Range of the System
The parking sensor system detects obstacle by emitting ultrasonic wave and receiving reflected ultrasonic wave from an
obstacle. Different materials have different reflection and absorption of the ultrasonic wave, and the actual detection distance
varies depending on what materials an obstacle is composed of. Human skin and clothes actually absorb the ultrasonic wave,
and can only reflect very small portion of the ultrasonic wave back to the sensors, hence the system may detect human skin
and clothes within a much shorter range compared to other materials. Drivers in these situations should pay more
attention while parking their vehicles.
-6-