1
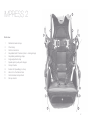
iMPRESS 2
User manual
Edition 05-2011
Contents
Thank you for flying ADVANCE ....................................................... 4
About ADVANCE .............................................................................. 5
The iMPRESS 2 ................................................................................ 6
Welcome on board ........................................................................ 6
Developed from the Pro’s - approved in ptractice ......................... 6
One philosophy - one concept ...................................................... 6
Outstanding features of the iMPRESS 2 ....................................... 7
Safety advice ................................................................................... 9
General information on paragliding ............................................... 9
Preparing the harness ....................................................................10
Delivery ........................................................................................10
Adjustments .................................................................................10
Comfort foam/back protection installation instructions ................12
Fitting the Speedbag ....................................................................12
Fitting the Windskirt .....................................................................14
Installing the emergency parachute .............................................14
Use in flight .....................................................................................18
General ........................................................................................18
Flying with Speedbag ...................................................................18
Flying with stirrup and Windskirt ..................................................18
Use of the speed system ..............................................................18
Flying without stirrup or Speedbag (freestyle) ..............................19
Using with other glider brands .....................................................19
Winching ......................................................................................19
Acro flying ................................................................................... 20
Tandem flying .............................................................................. 20
Maintenance, repairs and care ...................................................... 21
Maintenance ............................................................................... 21
Check ......................................................................................... 21
Repairs ........................................................................................ 22
Disposal ...................................................................................... 22
Technical details ............................................................................ 23
Technical data ............................................................................. 23
The materials ................................................................................24
Certification ..................................................................................24
Service............................................................................................ 25
ADVANCE service centre ............................................................ 25
The ADVANCE website ............................................................... 25
Warranty ..................................................................................... 25
Overview of components .............................................................. 27
Maintenance manual ..................................................................... 30
Inspection ...................................................................................... 31
Warranty card ................................................................................ 34
3
Thank you for flying ADVANCE
Congratulations on your choice of an iMPRESS 2 - a quality product
from ADVANCE. We are sure that you will spend many rewarding
hours in the air with it.
In this user manual you will find instructions and important information
about safety, care of the harness and maintenance, and that’s why
we recommend that you read this document carefully before your first
flight. The latest version of this manual as well as further updated information can be found at www.advance.ch. Any new safety-related
information concerning the product will also be published there. If
you
have any further questions or problems please contact your dealer or
get in touch directly with ADVANCE.
This user manual is an important component of the harness. If you sell
your iMPRESS 2 at a later date, please pass this manual on to the new
owner. Now we wish you a lot of satisfaction with your iMPRESS 2
and, as always, «happy landings».
Team ADVANCE
4
About ADVANCE
ADVANCE - a company based in Switzerland - is one of the world’s
leading paraglider manufacturers. Since it was founded in 1988, the
company has consistently pursued its own directions and concepts,
both in development and in production. The results are well-engineered products with distinctive characteristics.
ADVANCE attaches great importance to looking after its customers
after the sale and has built up a worldwide service network for this
purpose. Regular exchanges of experience with its customers bring
a steady flow of new insights that find their way into ADVANCE products, thus completing the «Circle of Service».
At the heart of the ADVANCE brand is a team of specialists who
share the passion of the customers who place their trust in the company’s products. With their thorough understanding of flying, they
contribute their valuable personal experiences and dedication to the
working processes.
For many years, ADVANCE has drawn on the world of competition for
its technical expertise. A small team of selected test and competition
pilots regularly aquire remarkable sporting successes with its prototypes, thus winning countless important international titles.
Total control of the production process and supervision of the work
procedures in ADVANCE’s own production facility in Vietnam ensure
a high standard of workmanship. Over many years, excellent relations
with fabric and line manufacturers have been established; the
ADVANCE know-how also finds its way directly into the development
of new materials.
5
The iMPRESS 2
Welcome on board !
The ADVANCE iMPRESS 2 is an aerodynamically optimized and versatile harness, of the latest generation. Developed for the use in competitions, it is also perfect for all those pilots who like the warmth of
the Speedbag during long flights. Due the fact that you can remove
the Speedbag with ease, this model is one of the few in its class that
can be used for freestyle flying and in winter with skis as well.
The iMPRESS 2 is derived from the very successful iMPRESS. However, the iMPRESS 2 is available now in three sizes allowing more
versatility for fitting pilots of different heights. Some details have been
changed from the iMPRESS, without affecting its legendary comfort.
Now, not only all of the ADVANCE Comp pilots fly with the iMPRESS,
but many top pilots using other makes of glider choose it as well.
One philosophy – one concept
Just like our gliders, ADVANCE harnesses are well engineered high
end products made from the best materials available. We are one of
the few paraglider manufacturers that actually make our own harnesses as well. They are produced in our own factory with our high
quality standards, using the most advanced techniques available.
The iMPRESS 2+ version has a thicker, LTF certified back protector,
and this provides even more protection and safety.
Developed by the Pro’s – approved in practice
The iMPRESS harness was developed and tested by Chrigel Maurer
(threetimes PWC Overal winner, European Champion and OLC Overall winner). Chrigel used an early prototype of this harness on his European XC Record flight in 2004 (323 km). His 10 hour flight certainly
proved the comfort of this design.
6
Outstanding features of the iMPRESS 2
Aerodynamically optimised
Extensive studies in the wind tunnel at the Technical High School in
Zurich confirmed the advantage of an aerodynamically optimised
design with a slim silhouette. These tests have been substantiated during many test flights and in daily practice. However, the position of the pilot (angle of the Speedbag) and the clothing (Speedarms)
are important factors that assist in reaching the best performance as
well.
Compact
A ballast system close to the harness’ centre of gravity and the central
position of the safety chute make launching very easy. The weight of
any additional ballast that the pilot chooses to carry is transmitted directly to the carabiners, allowing the harness and pilot to be a homogenous and compact unit. The ballast has minimal effect on the harness setup or feel.
Polar of OMEGA 7 28 at 100 kg take off weight
iMPRESS 2, model STANDARD
Comfortable
The pilot weight is equally distributed from the thigh area to shoul7
ders with no adverse squeezing or compression that may affect the
blood circulation and decrease concentration. The Speedbag offers
a lot of warmth and can be ventilated easily to stay comfortable even
on the longest flight.
Versatile - three alternatives in one harness
• Configuration with Speedbag; perfect aerodynamics and insulation,
offers the best comfort on long flights
• Configuration with Windskirt and stirrup; optimised aerodynamics
but less bulky and less weight
• Configuration without stirrup; ideal for freestyle use and in winter if
flying with skis.
Important details
• A well designed hydro-system promotes trouble-free drinking on
long flights
• Adaptable Speedbag with unrestricted adjustment of length and
angle
• Low clip in points
• Integrated pockets
• Functional cockpit
• Easy to use (grab) speed system
8
Safety advice
Paragliding harnesses, like all commercial available reserve parachutes are not at all suitable for free fall because of their construction.
The reserve parachute and its connection are not designed to withstand an abrupt opening.
All adjustments of the harness should definitely be made before flight.
The correct adjustment of a harness contributes significantly to its
correct functioning, safety, and comfort in flight.
The foam/protector in the pelvis/back area of the harness does not
provide complete and comprehensive protection from injury. It merely
serves to attenuate the energy of impacts, and thus minimise injury
which may result from a fall to the ground from a minimal height during imperfect takeoffs and landings.
When carrying out safety training over water you should be aware
that the foam/ protector floats in the water and can putt he pilot in a
head down attitude. There’s also a risk that the foam/protector will
eventually fill with water and sink – with the pilot.
General advice about paragliding
Flying a paraglider calls for appropriate training and a sound knowledge of the subject, and of course the requisite insurance cover and
licences. A pilot must be able to correctly assess the meteorological
conditions before taking off. His or her capabilities must be adequate
fort he actual paraglider.
Wearing an adequate helmet, suitable boots and clothing as well as
carrying an emergency parachute are essential. Before every flight
all items of equipment should be checked for damage and airworthiness. A proper pre-takeoff check must also be carried out.
Each pilot bears sole responsibility for his or her participation in the
sport of paragliding. Neither the manufacturer nor the seller of a paraglider can guarantee or be held responsible for the pilot’s safety.
9
Preparing the harness
Delivery
Options
Before the delivery of every ADVANCE harness the dealer must check
that the delivery package is complete, and that the basic assembly is
correct. The fully completed guarantee card, returned to ADVANCE,
will ensure that defects in the product attributable to manufacturing
faults are covered by the ADVANCE warranty (see Warranty in the
section «Service»).
• Speedbag
Detachable neoprene full length leg cover with integrated camera
pouch, cockpit with instrument mount and adjustable speed system.
• Windskirt
Perfectly fitting, detachable, short Neoprene cover with integrated
cockpit, adjustable step speed system with stirrup for flying the
harness without leg cover.
Package Contents
Adjustments
The iMPRESS 2 delivery package contains:
• Harness iMPRESS 2 including lightweight seatboard
• 2 Powerfly carabiners
• STANDARD version: 10 cm comfort foam
PLUS version: 18 cm back protector
• T-Locking system with automatic quick-release clips (chest and
leg straps combined)
• Safety chute internal container including handle
• Speed system
• Adaptive restraint system for the speed bar
• detachable radio / handy / photopocket
• User manual with warranty card and service booklet
Hang up the harness and sit in it. Close the harness buckles and
check out the most comfortable position for you. The pictures in this
manual show you all the different fitting possibilities. When setting
the harness up for the first time, we recommend fitting the back protection and installing your emergency chute to give a realistic feeling.
The white stitching lines in various locations on the webbing of the
harness represent the ‘basic settings’ as recommended by the
ADVANCE development team.
For your first test flight choose quiet weather conditions. If necessary,
repeat the whole adjustment procedure after the flight to improve on
your settings.
10
Info: You can find a short film about adjusting the harness
on www.advance.ch. The designer, threetimes PWC Overall
winner Chrigel Maurer, here shows you the perfect way to
adjust your iMPRESS 2 harness, in person.
ment during the launch phase. This allows a safe launch even with
the speed bag and full loading (water ballast), and guarantees that
there is a comfortable transition to the desired seating position after launch.
Tip: For your first flight in the new harness choose calm
conditions ideally. If necessary, readjust the harness after
flying by repeating the setting-up procedure, until you have
found your best flying position.
Adjustment of the chest strap
Caution: Be aware that the more prone or ‘laid back’ you are
in the harness increases the likelihood of the pilot and harness
twisting if in a spin.
Adjustments of the shoulder straps
The shoulder straps of the iMPRESS 2 harness permit easy adjustment of the desired seating position for various pilot sizes. The neoprene covered adjusters are located at hip height and can easily be
moved over a wide range of settings.
The distance between the hang points can be varied using the adjuster on the chest strap. The development team recommends the
optimal setting to be approximately shoulder width (approx 44 cm).
The chest strap uses automatic quick lock buckles and provides the
functionality of a Safe-T-System.
Caution: Always close the chest strap first, then the speedbag. Before every takeoff check - with a physical pull on the chest strap - that both quick-release fasteners are closed. Be sure to do this again if this is a second attempt after a failed takeoff. If the chest strap is not closed you can fall out of the harness - with fatal results.
Adjustment of the seating position
Adjustments of the leg straps
The leg straps should be adjusted to a length that allows easy move-
The relatively high fixed back strap enhances the effective suspension of the back and takes the pressure away from the shoulders.
11
With the two quick-adjust buckles you can adjust this position easily
in flight. This is the only adjustment you should do in flight depending
on the conditions, after you have set the harness to your ideal position.
The lumbar support can be adjusted very precisely to your preferred
position. This feature guards against unnecessary fatigue in the lower back.
These two adjustments are crucial for your comfort on long flights. If
you set them up well, you will be able to fly without any tension in the
stomach or shoulder muscles.
Adjustment of the seatboard angle
The angle of the seatboard can be adjusted easily and almost infinitely to suit your personal preferences. It is important to choose as
flat an angle as possible to avoid any pressure from the seatboard on
the back part of the thigh. When using the iMPRESS 2 for freestyle
without Speedbag or stirrup, you need to get a more angled position
(pull the front of the seatboard up to raise the knees). The angle of
the seat board can be quickly altered using the quick-adjust buckles.
This makes the iMPRESS 2 harness quite adaptable for cross country and freestyle pilots.
Comfort foam/back protector installation instructions
The comfort foam is an important element to get the most comfort
on long flights. This foam is not compatible with other harnesses and
is not LTF approved. Open the protector compartment and slide in
the comfort foam. The hard shell is already integrated in the harness
ex-factory. The protector must in every case be fitted into the compartment so that it does not slide around.
The PLUS version back protector is installed in the same way as the
comfort foam.
Caution : after the installation of the comfort foam, check
carefully that the reserve parachute handle works well.
Fitting the Speedbag
Attach the Speedbag to the matching velcro on the rear of the harness. Close both side zippers and fix the reserve handle (be sure it is
in the correct position).
Thread the four internal straps from the front of the Speedbag
through the harness attachment points and pull until the desired
length and angle is reached.
12
When you are adjusting the speedbag’s length whilst on the ground,
pass the webbing through the metal ‘pass-through’ buckle without doubling it back through. This allows you to fine-tune it in the air. When you are satisfied you have got the optimal position, you can fix
the setting by doubling the webbing back through the buckle to lock
it off.
Pull the speed bar line through the 3 side pulleys and the eyelet of the
Speedbag. Tension the speed system toward the front of the Speedbag with the help of the bungy from the leg loop – to the left or right
side depending on personal preference. If desired you can chose to
use a two step system.
Support the Speedbag on both sides by fitting the strengthened
openings over the main carabiners of the harness. Finally mount the
cockpit with the small screw-gate carabiners.
Info: The speedbag sizes only match the corresponding
harness sizes and they are not interchangeable.
Info: Because of the different harness circumference the
speedbag for the standard version is not interchangeable
with the PLUS version.
Fitting the Windskirt
Attach the neoprene Windskirt to the matching velcro on the rear of
the harness. Close both side zippers and fix the reserve handle (be
sure it is in the correct position).
The velcro located under the front of the seat board for additional
ballast also fixes the Windskirt perfectly to the harness. It stops flapping and slippage of the skirt.
Pull the speed system line through the three side pulleys and the
eyelet of the Windskirt. Loop the foot stirrup into both of the plastic
buckles and tension the speed system with the help of the bungy – to
the left or the right side depending on personal preference. This two
step system has been designed to provide a flexible solution enabling
the pilot to use just one leg. Support the Windskirt on both sides by
fitting the strengthened openings over the main carabiners of the harness.
Info: The windskirt sizes only match the corresponding
harness sizes and they are not interchangeable.
Info: Because of the different harness circumference the
windskirt for the STANDARD version is not interchangeable
with the PLUS version.
Installing the emergency parachute
The iMPRESS model is prepared for the attachment of the emergency parachute in an aerodynamically ideal position and close to the
centre of gravity. The correct mounting of the parachute is not complicated but must be carefully and exactly implemented – for your security. If you are unsure do not hesitate to contact someone with appropriate experience, or your ADVANCE dealer.
Inner bag and deployment handle
The parachute should be packed in a square shape that matches
the size of the delivered deployment bag. The handle is to be looped
onto the deployment bag. Check that during the installation of the
reserve, the attachment between the handle and the container is
located at the side.
14
First put the main attachment bridle and the lineloops in the compartment and then slide in the chute. The flaps of the deployment bag are
facing down when inserted into the harness. The deployment handle
can be fixed on the right side of the harness only. It is in good view
and can be reached easily. To ensure a correct deployment is possible when required, ensure that the three yellow plastic-coated release wires are cleanly routed.
Info: The reserve handles of the STANDARD version and the
PLUS version are not interchangeable.
Caution: Never connect the inner container to the reserve
parachute.
Caution: Always make sure that reserve parachute handle
works without a hitch.
Parachute connection with the harness
For attaching the reserve parachute to the harness you must connect
the harness bridle to the reserve bridle with a suitable screw link of at
least 2400 daN safe breaking load.
Caution: The bridles must be fixed at the screw link, for
example by using an elastic band. Never use sticky tape
instead.
Compatibility testing
Every new combination of emergency parachute and harness should
be checked by either the manufacturer of the harness or a qualified person. The deployment of the reserve parachute must be freely possible from the flying position and according to the manufacturer’s requirements.
Caution: Before every flight check that the reserve handle is
in the correct position and that the yellow securing cables
are correctly positioned.
16
Tip: The ADVANCE Team advise checking the position of the
handle in every flight to get used to its location.
Controllable safety systems (Rogallo)
Use the two red loops on the shoulders to fit this system. The webbings from this system can be placed in the channel and the standard bridle webbing can be folded loosely into the top pocket of the
harness out of the way. Please don’t be tempted to cut them - this
would stop a normal parachute being fitted at a later date.
Use in flight
General
Before every takeoff carry out the following pre-takeoff checks:
1.Helmet and harness chest strap done up, reserve ok
2.Lines free
3.Canopy open
4.Wind direction and strength assessed
5.Airspace and field-of-view clear
Caution: Always close the chest strap first, then the speedbag. Before every takeoff check - with a physical pull on the chest strap - that both quick-release fasteners are closed. Be sure to do this again if this is a second attempt after a failed takeoff. If the chest strap is not closed you can fall out of the harness - with fatal results.
Flying with Speedbag
In its Speedbag configuration, the iMPRESS 2 is fulfilling its job as efficiently as possible. When correctly set up, the harness transmits information from the wing directly to your lumbar area and enables you
to fly very sensitively. Pressure is equally distributed from your thigh
area to your shoulders with no adverse squeezing or compression
that may affect your blood circulation and decrease concentration.
The Speedbag offers a lot of warmth, but if you need to release the
warm air inside the bag, just bend a knee. You can ventilate the bag
easily and adjust your temperature to stay comfortable even on the
longest flight.
Flying with stirrup and Windskirt
Choose the same position as when flying with the Speedbag. With
the Windskirt you will not have the same aerodynamic benefits as the
Speedbag, or the same protection against cold air.
Use of the speed system
Because of the well designed tensioning of the speed system, the
first step position will always be accessible immediately, whether in
the speed bag or on the stirrup. Using the speed system whilst flying
with the Speedbag is easy - one leg is held straight to keep the tension on the Speedbag whilst the other leg pushes the first step of the
accellerator. Going to the second step is just as simple, with the foot
from the first step now maintaining the tension of the Speedbag, and
the speed system effectively operated with the other foot. This method of operation promotes an ‘active speed bar’ style of flying making
use of the increased sensitivity felt when using just one leg. It en18
courages the pilot not to just ‘lock-out’ the legs or going straight to
full extension when using an accelerator. This ‘two step, one leg’
method is equally suitable for use with the stirrup system when the
Speedbag is not fitted.
Flying without stirrup or Speedbag (freestyle)
You can fly the iMPRESS 2 in a more upright position if required. You
need to tilt the seatboard to seat you more vertically. You can use the
integrated pull back system for the speed system as well. This version
is very flexible and ideal for all freestyle flights and in winter when flying with skis.
Use with other glider brands
The iMPRESS harness can be used with any paragliders – there are
no restrictions.
Winching
ADVANCE harnesses are suitable for winch launching. The iMPRESS 2
may only be connected to the tow link using rope loops or maillons
(screw links) fixed directly to the main carabiners. If you are in any
doubt you should always consult the winch driver or someone authorised by the manufacturer.
19
Acro flying
The geometry and strength of the iMPRESS 2 means that it is capable of flying acro manoeuvres without problem; but this harness has
stowage for only one reserve parachute. As a matter of principle
ADVANCE would only recommend a harness with provision for two
reserves for acro flying.
Tandem flying
The iMPRESS 2 harness is not suitable for tandem flying due to its
design – whether for the pilot or passenger.
20
Maintenance, repairs and service
intervals
Care and Maintenance
Ultraviolet light, heat, moisture, salt water, aggressive cleaning agents,
improper storage or mechanical stress (dragging the harness over
the ground) will accelerate the ageing process.
The life of a harness can be extended significantly by observing the
following points:
• Do not unnecessarily expose the harness to sunlight before and
after the flight (UV light).
• Allow a wet or damp harness to dry completely by leaving it at room
temperature or outdoors in the shade.
➔ Always repack your safety chute.
• Do not expose the harness to excessive temperature fluctuations
and ensure adequate air circulation to prevent the formation of
condensation.
• Should the harness come into contact with salt water, rinse it
thoroughly with fresh water. ➔ Always repack your safety chute.
• Check the condition of all stitching and webbing regularly. Pay
special attention to the connection of the safety chute and the
stitching at the loops of the main hang points.
• Only clean the harness with fresh water and a little neutral soap if
necessary. Do not use solvents under any circumstances.
• Have the harness examined by an expert if it was subjected to
increased stress (such as a tree landing).
Most safety chute manufacturers advise regular check ups every 6
months or so, to make sure that the system works efficiently. Safety chutes should only be repacked by a well trained authorised person. In addition ADVANCE strongly recommends regular checking of
the loops, pins and any velcro/flap parts at the deployment system,
as part of a pre-flight routine check to establish it is in working order
before every flight.
Check
All your equipment must be given a check every 24 months (2 years).
With intensive use (more than 150 flying hours per year) an annual check is needed, after the first check. The check includes a visual assessment of the material, webbing parts and connections, the
most important sewing as well as the suspension carabiners. All
parts are inspected for tears, kinks, frayed seams, general damage
and evidence of serious misuse. Finally the overall condition of the
harness is rated and recorded in the service handbook.
You can find additional information about the check in this manual in
the section «Service», or at www.advance.ch.
21
Repairs
You should not attempt to repair a harness yourself as a general rule.
The various parts made with great precision and careful geometry.
For this reason, only the manufacturer or an authorised service centre may fit identical replacement parts or make repairs to the harness’
structure.
Disposal
Environmental protection plays an important role in the selection of
materials and the manufacture of an ADVANCE product. We use only
non-toxic materials that are subjected to continuous quality and environmental impact assessments. If your harness reaches the end of its
service life in a number of years’ time, please remove all metal parts
and dispose rest of the materials in a waste incineration plant.
22
Technical details
Technical data iMPRESS 2
S
M
L
Pilot size 1
cm
155 - 172
168 - 187
183 - 202
With of seatboard
cm
30/32
32/34
34/36
Depth of seatboard
cm
37
40
43
Hight of attachment points
cm
42
43
44
Weight harness STANDARD 2
kg
3.9
4.1
4.4
Weight Speedbag (light)
kg
1.7
1.8
1.9
Weight Windskirt (light)
kg
0.7
0.75
0.8
Weight comfortfoam
kg
0.74
0.8
0.92
Weight seatboard (light)
kg
0.24
0.26
0.3
Weight harness PLUS 2
kg
3.9
4.1
4.4
Weight Speedbag (light)
kg
1.7
1.8
1.9
Weight Windskirt (light)
kg
0.7
0.75
0.8
Weight back protector
kg
1.18
1.22
1.26
Weight seatboard (light)
kg
0.24
0.26
0.30
1 If you intend to fly mostly in an upright position (freestyle) in your iMPRESS 2, we suggest stepping-up a harness size due to the greater length in the back that is required
from sitting upright.
2 The weight of the harnesses are without rescue, comfort foam/back protection, seatboard but inclusive Powerfly carabiners, safety chute internal container and - handle.
23
The materials
Certification
We are continuously checking and testing the materials that we use.
Like all ADVANCE products, the iMPRESS 2 was developed and built
after exhaustive technical research and from the best materials available. We chose the selected materials very carefully following strong
quality controls.
Both versions have been tested and approved according to LTF /
DIN EN 1651 to 120 kg. The PLUS version is fitted with a LTF certified
back protector.
Outer and inner fabric
Nylon 210D Oxford PU coated
Main Leg and Shoulder straps
PES / V01 25 mm 2’000 kg
Chest strap
PA 44 mm 2’000 kg
Safe – T System
Hsi11, click-lock
24
Service
ADVANCE Service Centre
ADVANCE operates two company-owned service centres that carry
out annual checks and repairs of all types. The workshops based in
Switzerland and France are officially certified to carry out repairs by
the German Hanggliding and Paragliding Federation (DHV).
They possess many years’ experience and in-depth product-specific
know-how. ADVANCE’s worldwide service network includes other
authorised service centres that provide the same services. All service
facilities use original ADVANCE materials exclusively. You can find all
information on annual checks and repairs and the relevant addresses
at www.advance.ch.
The ADVANCE website
At www.advance.ch you will find detailed information on ADVANCE
and its products as well as useful addresses which you can contact
should you have any questions.
Among the things you will be able to do on the website are:
• to inform yourself about new safety-related expertise concerning
ADVANCE products,
• to download an application form in PDF format which you can use
to send in your paragliding equipment for a check at ADVANCE,
• to find an answer to a burning question among the FAQs
(Frequently Asked Questions),
• to subscribe for the ADVANCE Newsletter so that you will be
regularly informed by e-mail on news and products.
It is well worth visiting the ADVANCE website regularly because the
range of services offered is continuously being expanded.
Warranty
As part of the ADVANCE warranty, we undertake to rectify any defects in our products that are attributable to manufacturing faults. To
make a claim on the warranty notify ADVANCE immediately if a defect is discovered, and send the defective product in for inspection.
The manufacturer will then decide how a possible manufacturing fault
is to be rectified (repair, replacement of parts or replacement of the
product). This warranty is valid for three years from the date of purchase of the product.
• to complete the warranty card online up to 10 days after purchase,
enabling you to enjoy the full benefits of the ADVANCE warranty,
25
The ADVANCE warranty does not cover any claim other than those
indicated above. Claims in respect of damage resulting from careless
or incorrect use of the product (e.g. inadequate maintenance, unsuitable storage, overloading, exposure to extreme temperatures, etc.)
are expressly excluded. The same applies to damage attributable to
an accident or normal wear and tear.
Every ADVANCE paraglider and every ADVANCE harness is delivered
with a warranty card. In order to enjoy the full benefits of the ADVANCE
warranty, you are requested to return the completed warranty card
to ADVANCE within 10 days of purchase or to complete the relevant
form on the website in the «Warranty» section.
26
iMPRESS 2
10
1
Front view
1
3
3
8
1
2
3
4
5
6
7
8
9
10
11
12
8
4
Padded shoulder straps
Chest strap
Central connection
Adjustable Safe-T fastener (chest – and leg straps)
Adjustable padded leg straps
Angle adjustment strap
Speed system pulley with stopper
Cockpit fixation
Fixation for Speedbag or stirrup
Velcro to fix the Solario Vario
Central ballast compartment
Stirrup retractor
2
5
5
6
6
9
9
7
7
11
12
12
27
Side view
13
14
15
16
Covered emergency system connection
Emergency parachute handle
Big storage compartment with hydration system fixation
and back protector
radio holder
13
16
15
14
28
Serviceheft Service booklet
Carnet de maintenance
•
Gurtzeug/Harness/Sellette
Grösse/Size/Taille
iMPRESS 2
iMPRESS 2+
EAPR-GZ-7072/08
SML
Seriennummer/Serial number/Numéro de série
Eingestellt am/Ajusted on/Premier réglage
Unterschrift/Signature/Signature
Stempel Händler/Dealer stamp/Cachet du revendeur
30
Nachprüfung Inspection
Inspection
•
1. Nachprüfung/Inspection/Inspection
2. Nachprüfung/Inspection/Inspection
Datum/Date/Date
Datum/Date/Date
Von/From/Par
Von/From/Par
Unterschrift/Signature/Signature
Unterschrift/Signature/Signature
Durchgeführte Prüfarbeiten/Inspection made/Contrôles effectuées
Durchgeführte Prüfarbeiten/Inspection made/Contrôles effectuées
- Sichtkontrolle (Nähte, Bänder, Stoff, Reissverschlüsse)
Visual inspection of harness (seams, webbing, fabric, zippers)
Contrôle visuel (coutures, sangles, tissu, fermetures à glissière)
- Funktionskontrolle Rettungssystem
Function check of the emergency parachute
Contrôle du fonctionnement du parachute de secours
- Rettungsschirm frisch gefaltet
Packing of the emergency parachute
Pliage du parachute de secours
Allgemeiner Zustand/General condition on delivery/Etat général constaté
Allgemeiner Zustand/General condition on delivery/Etat général constaté
Bemerkungen/Remarks/Remarques
Bemerkungen/Remarks/Remarques
Stempel/Stamp/Cachet
Stempel/Stamp/Cachet
31
3. Nachprüfung/Inspection/Inspection
4. Nachprüfung/Inspection/Inspection
Datum/Date/Date
Datum/Date/Date
Von/From/Par
Von/From/Par
Unterschrift/Signature/Signature
Unterschrift/Signature/Signature
Durchgeführte Prüfarbeiten/Inspection made/Contrôles effectuées
Durchgeführte Prüfarbeiten/Inspection made/Contrôles effectuées
- Sichtkontrolle (Nähte, Bänder, Stoff, Reissverschlüsse)
Visual inspection of harness (seams, webbing, fabric, zippers)
Contrôle visuel (coutures, sangles, tissu, fermetures à glissière)
- Funktionskontrolle Rettungssystem
Function check of the emergency parachute
Contrôle du fonctionnement du parachute de secours
- Rettungsschirm frisch gefaltet
Packing of the emergency parachute
Pliage du parachute de secours
Allgemeiner Zustand/General condition on delivery/Etat général constaté
Allgemeiner Zustand/General condition on delivery/Etat général constaté
Bemerkungen/Remarks/Remarques
Bemerkungen/Remarks/Remarques
Stempel/Stamp/Cachet
Stempel/Stamp/Cachet
32
5. Nachprüfung/Inspection/Inspection
6. Nachprüfung/Inspection/Inspection
Datum/Date/Date
Datum/Date/Date
Von/From/Par
Von/From/Par
Unterschrift/Signature/Signature
Unterschrift/Signature/Signature
Durchgeführte Prüfarbeiten/Inspection made/Contrôles effectuées
Durchgeführte Prüfarbeiten/Inspection made/Contrôles effectuées
- Sichtkontrolle (Nähte, Bänder, Stoff, Reissverschlüsse)
Visual inspection of harness (seams, webbing, fabric, zippers)
Contrôle visuel (coutures, sangles, tissu, fermetures à glissière)
- Funktionskontrolle Rettungssystem
Function check of the emergency parachute
Contrôle du fonctionnement du parachute de secours
- Rettungsschirm frisch gefaltet
Packing of the emergency parachute
Pliage du parachute de secours
Allgemeiner Zustand/General condition on delivery/Etat général constaté
Allgemeiner Zustand/General condition on delivery/Etat général constaté
Bemerkungen/Remarks/Remarques
Bemerkungen/Remarks/Remarques
Stempel/Stamp/Cachet
Stempel/Stamp/Cachet
33
ADVANCE Thun AG
Uttigenstrasse 87
CH-3602 Thun
Garantiekarte Warranty Card
Carte de garantie
•
Gurtzeug/Harness/Sellette
Grösse/Size/Taille
iMPRESS 2
iMPRESS 2+
EAPR-GZ-7072/08
SML
Seriennummer/Serial number/Numéro de série
Kaufdatum/Date of purchase/Date d’achat
Wiederverkäufer/Dealer/Revendeur
Käufer/Owner/Propriétaire
Name/Name/Nom
Adresse/Address/Adresse
PLZ, Ort/ZIP, City/NPA, Ville
Telefon/Phone/Téléphone
++
/
e-mail
Garantiekarte innerhalb 10 Tagen nach Kaufdatum einsenden/Guarantee card to be posted within 10 days of delivery/Carte de garantie à renvoyer dans les 10 jours qui suivent la date d’achat
advance thun ag
u t t i g e n s t r a s s e 87
ch 3600 thun
f o n + 41 3 3 225 70 10
f a x + 41 3 3 225 70 11
w w w. a d v a n c e.c h
i n f o @ a d v a n c e.c h