1
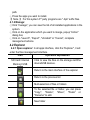
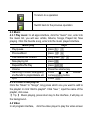
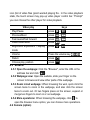
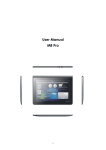
User Manual User Manual Android 4.0 Tablet PC Ver 1.0 Welcome Thanks for choosing this Tablet PC. In order to get familiar with this product quickly, please read this user manual carefully before using it. Important Notices ● This device has fragile components inside. Please avoid dropping it or pressing it with destructive force. ● This device is a precision electronic device. Please keep it away from water and moist environment. ● Please backup your data to your computer regularly, in case important personal data being deleted by mistake. When this device is used as a portable hard disk, please follow the correct file management instructions in this manual. We are not responsible for any file missing. ● Avoid using overload power, bending or pressing the power cord with force, which might result overheat and even causing a fire. ●Please use manufacturer approved charger and accessories only. Using any other types of charger or accessories is out of warranty and risks of danger. ●Please do not upgrade the firmware by yourself. This might cause damage to your tablet. Feature Summary OS: Android 4.0 system, experience more applications and functions. 3D capability: High performance 2D/3D Graphics Processing Unit, support FLASH 11.1 perfectly. Internet connection mode: Support WIFI,3G USB Dongle and USB Ethernet. Build-in G-sensor: easily play, enjoy visual and game pleasure. OTG function: USB2.0 high-speed interface, connect the PC, USB device at will. Battery Endurance: intelligent power management system, strong power, long video play time. Technical specifications OS Android 4.0 Output Speaker, stereo headphone Gravity induction Support G-sensor Gravity induction Network Build-in WIFI module, support 3G USB Dongle and wired Ethernet Audio MP3/WMA/FLAC/AAC/OGG/APE/WAV Video AVI/RMVB/MP4/MKV/FLV/DAT Photo JPEG, BMP, GIF, PNG E-book EPUB, TXT, FB2, PDF, PDB Expansion card Support maximum 32G I.Machines overview 1.1 Keys interface Power key menu key Power off state, long press this button to power on Power on state, Long press this button popup shutdown dialog box Power on state, short press this button to close the screen Press this button to open the present menu Press this button to unlocked the screen Backspace key VOL+ Press this button to return to the previous menu Press this button to increase volume VOL- Press this button to reduce volume II. Basic operation 2.1 charging and battery management The new battery will be in its best condition after 2-3 times full charge and discharge. It is recommended that charging for four hours to stop charging. The tablet can be charged with AC adapter when it is on or off. Please charge it by the adapter we supplied. Note: 1)Do not use other adapters to charge your tablet which can cause damage to the battery. 2)The tablet can not be charged via USB cable when connected to your PC. (Some models can be charged via USB, but charging time is much longer than DC port.) 3)When the machine shows that power is not enough, please charge in time, lest the automatic shutdown. 2.2 Power on & Power off 2.2.1 Power on: Please long press the power key" ",until the power on interface appears. The tablet initialization need certain of time, please be patient. 2.2.2 Power off: Please long press the power key" ", until popup the power off Dialog box, click "OK" to shut off. 【Note 】When encountered by illegal shutdown,restart will scan and repair disk, boot time will be longer, please be patient. 2.3 Lock/unlock the screen (sleep mode) 2.3.1 Auto standby: If you have no operation on device In the system default standby time or set standby time,it will turn off the LCD display,automatic into standby mode. 2.3.2 Manual standby: Short press the power key" ", device will enter the standby mode, to prevent mistaken operation, saving power. 2.3.3 unlock the screen: In standby mode, short press the power button " "will light the screen, and then hold " "icon on the screen, and drag it to " "icon,release it can unlock the screen. 2.4 Touch Panel You have several ways to operate your tablet as below: Click:You can touch screen by clicking to open programs or options Drag:Drag up and down on the touch screen can roll the interface. Press and hold the application's icon which you want to move, drag it to new location and then release your finger. 2.5 Reset When the tablet is frozen or does not respond to any keys or any operations, you may use a pin to reset the tablet. 2.6 Main interface The main interface has five main screens, you can slide left or right to switch. 2.6.1 Icons of main interface: : Click this icon to return to the previous window. : Click this icon to return to the home page. : Click this icon pop up programs list running in the back ground. : Click this icon to all application programs or widget interface. :Click this icon into the search. ●Delete shortcut: long press target shortcut icon, and then drag it directly to the "× Remove" location. " to enter ●Add homepage icon: in the main interface, click the " into all application programs and widget interface, long press the program icon or widget that you need to add, then it will be automatically added to the main interface, and drag this icon to the location where you want to place. ●Change wallpaper: In the main interface you can long press blank position, then popup an option box, choose and set the wallpaper. 2.6.2 Notice panel: It can view the information, event notice, device state and quick setup ●Open notice panel: Click the icon on the bottom right corner of the screen can open the notice panel. ●Open the quick settings panel: After open the notice panel, click " ", it will popup a quick settings panel. You can set up the wireless network, the screen rotation, the screen brightness and etc. 2.7 Gravity Sensor If you open the gravity sensor function, the screen will automatically rotate according to the device direction. Turn on or turn off the Gravity sensor In quick settings panel interface, choose "auto-rotate screen" on or off to open or close gravity sensor. And in settings interface, click "Display", then "Auto-rotate screen" to open or close. 2.8 Input methods switch Tap and hold the text field to edit text or change input method. 2.9 Extended storage card The device has extended storage card slot to support storing files and applications onto storage card. [Tip] 1, When the storage card is in use for reading or writing, do not take it out to avoid damaging the data and storage card. 2, When formatting the storage card on PC, please choose the FAT32 style. "→"setting" Unmount storage card: In the main interface, click the " →"storage", in SD card option, click unmount storage card. To takeout the storage card, please push it to the slot, and then release, that will automatically release the storage card. 2.10 Computer connection 1) When connect to PC with USB cable, it will automatically pop up a "USB connected" screen at the bottom right corner. Hold and slide the icon " " upwards with your finger if the "USB connected" screen disappeared. Press "Turn on USB storage" if you want to copy files between your computer and your tablet or TF card. Or press "Turn off USB storage" to safely disconnect from your computer. 2) Please do not change the directory name under the root directory to avoid the application error when reading files. 3) Make sure that the device has enough power, so as to avoid not being identified when connecting to computer. 【Note】 (1) When you connect to the computer, please ensure that the USB debugging function has been closed lest the computer cannot read data in the device; (2)Please confirm the computer communication operation has been stopped before removing. III. Basic setting In the main interface, click the " " -"setting" icon. Setting interface is divided into four categories as "WIRELESS & NETWORKS", "DEVICE", "PERSONAL" and "SYSTEM". 3.1 Wireless & Networks Including: Wi-Fi, Data usage, VPN, Portable hotspot and mobile networks. 3.1.1 WI-FI: The tablet can be connected to Wi-Fi network for high-speed Internet access and download. ①In setting interface, turn on the Wi-Fi network, the device will search Wi-Fi networks.. ②Choose the Wi-Fi network which you want to connect. Enter password if needed. 『Tip』① If you need to rescan for available networks, tap "scan" at the top right corner. ② Click "ADD NETWORK" then enter the SSID (name) of the network. If necessary, enter password or other network " configuration details and press "Save". ③By clicking " "Advanced", you can do more Wi-Fi advanced Settings. ④ In Wi-Fi settings interface, press the name of the network. Touch "Forget" in the dialog that opens. 3.1.2 VPN Add VPN network: Opens a screen that prompts you to select the type of VPN to add. You are then prompted for VPN configuration details. 3.1.3 Portable hotspot --- Apply to certain models only ①Portable Wi-Fi hotspot Check to share your tablet's mobile network data connection as a portable Wi-Fi hotspot. ②Portable Wi-Fi hotspot settings Open a screen with settings to turn the hotspot on and off and to set the SSID (the broadcast name) and security. ③Help Open a dialog with information about portable Wi-Fi hotspots, as well as information about where to learn more. 3.1.4 Mobile networks Tap Settings → Wireless & networks → Mobile networks to show options for roaming networks, network selection, operator selection, and access point names etc. 1)Modem power Turn on/off the modem power. 2) Data enabled Uncheck to prevent your tablet from transmitting data on any mobile network. This is useful if you are traveling in an area where you do not have a mobile data plan and want to avoid charges for data use on local carriers' mobile networks. Uncheck this setting does not prevent your tablet from transmitting data on other wireless networks, such as Wi-Fi. 3) Data roaming Uncheck to prevent your tablet from transmitting data on other carriers' mobile networks when you can't access your own carrier's mobile networks. 4) Access Point Names (GSM mobile networks only.) Opens the APNs screen, where you can select mobile access point configurations; or touch the Menu button in the Application bar to add a new APN. Consult your carrier about how to use the tools on this screen. 5) Use only 2G networks (GSM mobile networks only.) Check to obtain slightly better battery life, by preventing your tablet from connecting to higher-speed networks. 6) Network operators (GSM mobile networks only) Open a screen that searches for and displays mobile networks that are compatible with your tablet. Consult your carrier to understand the billing implications of selecting another carrier. Notice: The tablet can support 3G USB dongle to use mobile network. Or you may insert your SIM card when your tablet is with a built-in 3G module. 3.2 DEVICE Including sound, display, storage, battery and Apps. 3.2.1 Sound Volumes: Pressing the volume will popup a setting interface, you can set music, video, games & other media volume, notifications volume and alarms volume, then press OK. 3.2.2 Display Under "Settings", tap 'Display' to set Brightness, Wallpaper, Auto-rotate screen, Sleep and Font size. 1)Brightness: click the brightness, popup brightness Settings panel, drag the progress bar to adjust brightness. 2)Wallpaper: click the wallpaper, select wallpaper source (Gallery,Live Wallpapers,Wallpapers),choose your favorite wallpaper setting. 3)Sleep:The display has a screen timeout by default set to 2 min. If the unit is left inactive for that period of time, the screen will go dark as if turned off. However, it is simply in standby mode. Quick press the power button and a screen will appear with a white padlock button. This is your Screen Lock. 4)Auto-rotate screen: Turn on/off auto-rotate screen function. 5)Font size: The font we usually select normal by default set. 3.2.3 Storage: Click "storage" ,you can check the storage status of device, internal storage,SD card and usb storage. 3.2.4 Battery: It shows battery capacity left and elapsed time on battery. 3.2.5 Apps:You can view or setup applications of downloaded,on sd card and running state. 3.3 PERSONAL 1.Accounts & sync: you can add or manage synchronized account. 2.Location services: Including "Google's location service" ,"GPS satellites" and "location & google searching" 3.Security: Including "Screen security","Passwords","Device administration" and "Credential storage". 4.Language & input: Including "Language setting", "keyboard & input methods setting", "Speech" and "Mouse/Trackpad setting". 5.Backup & reset: you can backup and restore the system data. If you need to reset the device when severe error occurs or forgot the un-lock password, please make sure you have backuped the system resources . 3.4 System 1.Date & time: The date & time can be adjusted automatically or manually. 2.Accessibility: including service and system setting. 3.Developer options: Including "USB debugging", "development device ID", "Stay awake", "Allow mock locations”, "HDCP checking", "Desktop backup password", "User interface " and "APPS". 4.About tablet :Including "System updates", "Status", "Legal information" and device information. Click on "system updates", if shows some new versions available, just click and download. IV. Main apps In main interface, click on button to enter the all apps interface, slide the screen by tapping the touch panel, look up and choose the corresponding apps. Presently, the following mentioned apps are all ordinary software version, the operation instructions is only for your reference. 4.1 Apkinstaller In all apps interface, click Apkinstaller to enter install, manage and exit interface. 4.1.1 Install: Obtain the 3rd-party apps which can be suitable for Android platform, then copy them into this device and proceed the installation. ①Click"install", select path, it will automatically scan all the apps in this path. ②Press the apps you want to install. 【 Note 】 For this system 3rd party programs are ".Apk" suffix files. 4.1.2 Manage: ①Click "manage", you can view the list of all installed applications in the system. ②Click on the application which you want to mange, popup "Action" dialog box; ③Click on "Launch", "Export", "Uninstall" or "Cancel", complete management actions. 4.2 Explorer 4.2.1 Open explorer: In all apps interface, click the "Explorer", it will enter the files management interface. Icon Operation explanation SD Card/ Internal Memory/ USB Click to view the files on the storage card/the device/USB devices. Return to the main interface of the explorer Return to the previous list Multi-selection of files or folders To the selected file or folder, you can press "Copy", "Delete", "Move", "Paste" or "Rename" to edit. New folder To return to a operation Switch back to the previous operation 4.3 Music 4.3.1 Play music: In all apps interface, click the "music" icon, enter into the music list, you will see: artists, Albums, Songs, Played list, Now playing. Click the favorite song, enter into the music played interface. Music play keys / Play/pause press Previous/Next press / Fast rewind/fast forward Long press / Now playing list press Repeat/Shuffle Play press / Volume Press the volume key Switching to music library/party Press choose shuffle/add to playlist/delete etc corresponding button. " Lyric Press " 4.3.2 Create a new play list Click the "Music" "Songs", long press which one you want to add to the playlist click "Add to playlist". Click "new ", input the name of the playlist, click save. 【 Tip 】 Music playing, press return key to the interface ,it will play on the background.. 4.4 Video In all program interface, click the video player to play the video screen icon (list of video files (point wanted playing file . In the video playback state, the touch screen may pop-up video player control bar. "Prompt" you can choose the other player for video playback. . Video play keys / Play/Pause press Previous/Next press / Fast rewind/fast forward press / Video bookmarks press Brightness adjustment / display press / mode Volume Press the volume key / Return press Choose play position press 4.5 Browser 4.5.1 Open the webpage: Click the "Browser", enter the URL in the ". address bar and click " 4.5.2 Webpage view: Open the website, slide your finger on the screen to browse and view other parts of the webpage. 4.5.3 Zoom in/out webpage: When browsing the web, quick click the screen twice to zoom in the webpage, and also click the screen twice to zoom out. Or two fingers press on the screen, expand or merge two fingers to zoom in or out webpage. 4.5.4 More operations: When browsing the webpage, click " " to open the browser menu option, you can choose more operations. 4.6 Camera (option) You can shoot photos and video clips with sound by clicking the "camera"; or in the state of lock screen, directly click the " " icon, drag aperture to " " icon to turn on the camera. 4.6.1 Camera mode Built-in camera/video mode. The default model is the camera mode. " switch to video mode. Click " 4.6.2 The shooting action 1) In the camera mode, press the " " to take a photograph. 2) In the video mode, press the " " to start shooting the video, press again to stop shooting. 4.6.3 Change the shooting setting 1) Adjust the focus: Click " " to adjust the focal length along the arc sliding. 2) Shooting setting: Click the " " to shooting setting.click " "to exit the setting. In the camera mode, you can click " " setting to save location, " to select photo size,and restore the default settings; click " " to set the white balance. viewfinder mode; click " In video mode, you can click " " to select the save location and " to set the white balance. restore the default settings;click " 4.6.4 Brows photos or videos Enter into the camera or video mode, click the top right just shot thumbnail box, select the Gallery Browse or share with friends. In the video player application, also can click play taken video 4.7 E-mail 4.7.1 Set up E-mail E-mail application is accompanied with E-mail setup guide, you can add common Web-based E-mail service providers (such as Yahoo, Gmail and Hotmail) external POP3 or IMAP E-mail account ① Click the "Email", E-mail Setup guide appear to help you to set up. ② Enter your email account address and password. Click the Next button, select your mailbox types POP3, IMAP, or Exchange. Click the next button to check the mailbox to send and receive server if available. Tip: some email service providers not need to select the mailbox type of settings, such as gmail. ③ Enter the account name and you want to display your e-mail name, and then click Finish. ④If the mailbox is available, will automatically enter your inbox. 4.7.2 Delete the email account In the Inbox, click the " " settings,in mailbox setting, press delete accounts, popup dialog box, click OK. 4.7.3 Send mail You can send message to one or more recipients. Can manually add the recipient's e-mail address before sending. ① Click " ",Enter the recipient e-mail address. If necessary, press Cc / Bcc, enter the Cc or Bcc other recipient address. ② By topic, enter topic, click the compose e-mail, enter the required content. ③ Click the paperclip icon, add an attachment, insert the desired file, press send, then send email. 4.7.4 Receive E-mail E-mail messages kept on your email server can be downloaded to " to refresh. The tablet will connect to the the device. Click " server and sync/download mail to local folers. 4.8 E-book 4.8.1 Browse E-book In all apps interface, click the "book" icon to enter the bookshelf, browse the collection of books. Click the " " can switch to browse as a list. 4.8.2 Read books After entering the read interface, you can do the following read operation. : Brightness adjustment; :Bookmarks set; :Font size : Full screen reading setting; Press the menu button, there are more settings, including: jump page, books information, auto flip and so on. You can set according to your reading habits. 4.9 Gallery In the all apps interface, click the " Gallery " can browse pictures or video in the device. 4.9.1 Review images: ①Choose the folder and then click the picture which you need to open, it will automatically change to full screen. ②You can use two fingers press on the picture, expand or merge two fingers to zoom in or out this picture. ③Click " " "Slideshow ", pictures will be display as slide. ④Scroll to left or right to view the previous or next picture. 4.9.2 Edit and set the picture When viewing images in full screen mode, click on screen once" " menu options, you can choose the option you need to edit or do some settings to the picture. Click " " to delete picture; Click " " can share with friends. V. Accessories list Accessories name Host device Travel charger USB cable USB HOST transfer line User manual(this manual) Certificate of quality VI. Troubleshooting specification pcs pcs pcs pcs Quantity 1 1 1 1 pcs pcs 1 1 6.1 The product is not normal how to do? ①Recommend you press the reset button or recover the factory settings after restart. ②After restart, does it become normal? ③Use travel charger to charge to activate the battery, ensure it has certain power and then restart. ④Professionals upgrade system. 6.2 Cannot switch on the tablet Check the tablet's power level, please charge it before starting it. In case your tablet still cannot be switched on, you may reset it before you switch it on. 6.3 Why the standby time is too short sometimes? The battery life will be different in different temperature environment. In terms of usage, the actual using time is also affected by increased volume, frequent operation and other factors. 6.4 Why the Tablet PC running speed fast or slow? Due to the Tablet PC Android system software and hardware limit, or the device installed too many third-party software, memory take up much space, easily to cause the device response slow. Recommend to uninstall the less used software to optimize system. 6.5 No sound from earphone Check if volume is set to "0" or earphone may be broken, please change another one. 6.6 Big noise Check if there is dust in the earphone or speaker. Check if the file is broken. 6.7 Frozen to any operation Please use a pin to reset and then restart your tablet. 6.8 Screen drift or unresponsive screen To correct it, you may carry out panel calibration. Go to Settings → Accessibility → Touch panel calibration to calibrate it. 6.9 Application not workable Possible reasons may be that this app is not compatible with your OS or the downloaded .apk file is broken so you may need to download a full version.