1
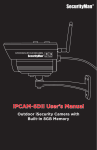
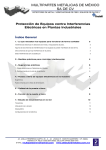
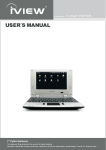
HD HVR 1080P IP Camera + Analog Solutions Quick Operation Guide This product is designed specially for security and surveillance field which is an outstanding digital surveillance product. It introduces embedded LINUX operating system which is more stable. It introduces standard H.264mp video compressed format and G.711A audio compressed format which insures the high quality image and low error coding ratio. Strong network services greatly enhance the network data transmission capacity and remote control capabilities. Main Screen & Setup NVR, DVR and HVR, 3 in 1 H.264 High profile compression algorithm ideal for standalone DVR Realtime live display up to 24/32 cameras. Pentaplex function: live, recording, playback, backup & remote access; Support Dual-streams, to make mobile monitoring very easy, flexible for network transmission Multiple control methods: IR Remote controller, USB mouse and front panel press button. Smart video detection: motion detection, video blind, video loss Smart camera settings: privacy masking, camera lock, color setting, and tittle display Pan Tile Zoom and Speed Dome Control: more than 60 protocols supported, preset, scan, auto pan, auto tour, pattern, auxiliary function supported. Easy backup methods: USB devices, remote network and client software backup Alarm triggering screen tips, buzzer, PTZ preset, e-mail & FTP upload Smart HDDs Management: non-working HDD hibernation, HDD faulty alarm, RAID function Powerful network software: built-in web server, multi-DVR client & SMS Networking access for remote live viewing, recording, playback, setting, system status, event log, email & ftp function Support DHCP / PPPoE / FTP / DNS / DDNS/ NTP / Email alarm / IP right management / IP search / network alarm center functions, support web client, standalone client and SDK With the sound system for the protection circuit, unique triple watchdog function, very low power consumption, to ensure technology, can monitor the whole run process of the equipment, can greatly reduce the maintenance cost. Enable strong multi-way synchronization with max 16 channels playback, realize the zero-delay between Page 1 / 19 playback channels Networking Protocol: support ONVIF 2.0, Support 80% IPCamera in the market Playback IE Page 2 / 19 BASIC OPERATION Hard Disk Installation 1 For the first use,please install the hard disk. 4CH series HVR support 1 SATA hard disk. 8CH / 16CH HVR Series support 2 SATA hard disks, Note: DVR can run and monitor normally without hard disk, while it can’t record and playback. Mouse Connection 4CH DVR has two USB at back panel for mouse and flask stick 8CH / 16CH DVR has 1 USB at back panel and 1 USB at front panel,the 2 USB could be used for mouse, 2 Turn On Plug the power supply and turn on the power supply switch. Power supply indicator light shining indicates turning on the video recorder. After finishing the startup you will hear a Beep, and the default setting of video output is multiple-window output mode. Note: Restart the power after the abnormal power off, DVR will automatically recover the state before power off. Turn off There are two methods to turn off the DVR which are soft switch and hard switch. Soft switch: Entering [Main menu] and choosing [Logout] in the [turn off the system] option is called soft switch. Hard switch: Pressing the power supply switch is called hard switch. Note: The setting information must be saved before replacing the battery otherwise information will lose. Page 3 / 19 3 Live Display After boot up Successfully, you should see the Live Display. Guide When you first time open, you should see Cloud Enable. If you don’t want to see this message anymore, then click Will no longer to prompted Click OK to bypass. Here is the Symbol means: 4 System Date / Time is list on the top right corner In each viewing window, camera channel number and recording symbol status icon will list on each channel window cornder. 1 Recording 3 Video loss 2 Motion 4 Camera lock 5 Mouse Right Click, then you should see the Popup Menu. And, Choose Main Menu Page 4 / 19 6 Super Basic User Name: admin Password: (no password) User Name: guest Password: (no password) Enter Wrong Password protection: (3) Enter wrong password continues 3 times, then Alarm Beeps. (5) Enter wrong password 5 times, HVR will Lock User and prevent to enter anymore. To Release from Lock down, wait for half hour will allow you try again, or you need to Power Off & Power on to release the Lock down. 7 For your system security, please modify your password after first login. Recording: By Default: Normal recording The system’s default set is 24 hours continuous recording. Set the recording parameters in the surveillance channel. You can enter [Main Menu]> [Record]> [Record Config] to set. Note: There is at least one read-write hard disk if the DVR records normally. Page 5 / 19 Description: 【Channel】 Choose the corresponding channel number to set the channel. Choose the “all” option to set the entire channels. 【Redundancy】Choose the recording file and backup in two hard disks. The one is read-write disk, another is redundant disk. 【Length】 Set the time length of each video file. 60minutes is default length. 【Prerecord】 Record 1-30 seconds before the action. (file length is decided by the code stream) 【Record Mode】Set video state: configuration, manual and stop. Schedule:Record according to the set video type (regular, detect and alarm) and time section. Manual: Click the “all” button & make the corresponding channel recording no matter it is in any state. Stop: Click the “stop” button & make the according channel stop recording no matter it is in any state. 【Week】 Weekday 【Period】Set the time section of common recording, The recording will start only in the set range. 【Recording Type】Set recording type: regular, detection or alarm. regular:Perform the regular recording in the set time section. The video file type is “R”. detect:Trigger the “motion detect”, “camera mask” or “video loss” signal. When above alarm is set as opening recording, the “detection recording” state is on. The video file type is “M”. alarm:Trigger the external alarm signal in the set time section. When above alarm is set as opening recording, the “detection recording” state is on. The video file type is “A”. 7 Change to Motion Detect Recording (Schedule Detection for Analog Recording) Right Click Mouse button and enter [Main Menu]> [Record]> [Record Config] to set. Note: There is at least one read-write hard disk if the DVR records normally. Page 6 / 19 8 Change All Channel to Motion Detection For Example: Select/Change Channel 1 to ALL Record Mode: select (•) Schedule Change Week from Mon to ALL Regular: Normal Recording Detect: Motion Detect Trigger Alarm: External device Trigger. Click OK when finish. Now, you just enable Schedule Recording to Motion Detection Recording. Enable Motion Detection 9 Right Click Mouse button and enter [Main Menu]> [Alarm]> [Motion Detect] to set. Page 7 / 19 Enable Motion Detection 1 0 For Example: Select Channel [1] Enable [√ ] first. Select Record Channel [1] [3] That means: When Channel [1] detect motion trigger, will enable recording on Channel 1 and Channel 3. Then, switch to Channel [2] on the top ... Repeat same steps until finish all channels and corresponding recording channels. Click OK when finish. After adjust to Schedule Recording and Alarm Motion Detect. Congratulation, you have Motion Detection Recording now. 1 1 How to Playback Video Right Click Mouse button and enter Playback OR, Right Click Mouse button and enter [Main Menu]> [Record]> [Record Config] to set. Page 8 / 19 1 Description: 2 1.Playback control 7.Channel option 2.Operating Tips 8.Date option 3. Record type 9.Storage Device option 4.Time progress bar options 10.File information 5.Switching time or file mode 11.File Option 6.File Search 12.Time 【File information】Start time,end time and size. 【File option】Choose the file to playback/backup. 【 playback control 】 Refer to the following sheet for more information. Page 9 / 19 1 3 Note: Frame by frame playback is only performed in the "pause" playback state. Partial enlarged: single pictures full-screen playback, can use the left mouse button box to choose any size area on the screen, click the left mouse button, the selected area will enlarge the regional image, double click the left mouse button to exit the partial enlarged images. Note: If the current resolution of one channel is beyong maximum resolution, it will be displayed as a red “X” when playback. 1 6 HDD Management Right Click Mouse button and enter [Main Menu]> [ Advanced ]> [ Storage ] Page 10 / 19 1 7 Storage Select HDD, and click Format Storage. It will format your HDD. (More detail functions please read User Manuals) Network Setup 1 8 Right Click Mouse button and enter [Main Menu]> [System]> [ Network ] to set. Page 11 / 19 1 Picture IP address is just an example, actual IP will be different. 9 Please Setup correct IP Address for HVR. Two Important Ports: HTTP Port: 80 TCP Port: 34567 Make sure Port Open and Forward in your Router Settings. (If you have difficult about Network Setup, please check our Network Setup Example on next pages.) Hybrid Configure (Analog + IP Camera) 2 Quick Reference: 0 Hybrid is combine Analog Camera + IP Camera Right Click Mouse button and enter [Main Menu]> [System]> [ Digital ] to set. Page 12 / 19 2 Select Channel Type 1 *NOTICE* HVR will reboot after you change Channel Type 2 What is Digital Channel meaning? 2 Here is the HVR channel maps. For example, 8 Channels HVR is select 960H 8 Channel as Default. *NOTICE* HVR will reboot after you change Channel Type 2 For Example: 3 I can change to 4 Channel D1 + 1CH 1080p IP Camera + 3CH 720p The Channel Number in sequence order: #1,2,3,4 is D1. #5 is 1080p IPC #6,7,8 are 720p IPC IPC (IP Camera) *NOTICE* HVR will reboot after you change Channel Type Page 13 / 19 2 For Example: 4 I can change to 2CH 1080p IP Camera + 2CH 720p IP Camera The Channel Number in sequence order: #1,2 are 1080p IPC #3,4 are 720p IPC IPC (IP Camera) *NOTICE* HVR will reboot after you change Channel Type 2 5 Channel Maps Reference: Here are All Channel Maps Page 14 / 19 2 6 How to Add IP Camera 2 Quick Reference: 0 Hybrid is combine Analog Camera + IP Camera Right Click Mouse button and enter [Main Menu]> [System]> [ Digital ] to set. Page 15 / 19 2 After Reboot, 3 You should see Digital Channel show more functions. Select Digital Channels 2 Select Channel First 4 Click Enable Then, choose Add Page 16 / 19 2 After click Add, 5 Click Search It will begin to Search your network devices, like ONVIF camera Note: Sometimes, you need to click Search button twice to find out your IP camera. Page 17 / 19 2 When you found the IP Camera, 6 Select the camera from the List, and then *Important* Double Click on Camera from the List. It will begin to copy information to the top. Our ONVIF Camera doesn’t require Password. But, some of the ONVIF camera, it require Password. Please make sure and enter correct information if you have password protection. Click OK when finish. 2 7 Note: Our ONVIF Camera doesn’t require Password. But, some of the ONVIF camera, it require Password. Please make sure and enter correct information if you have password protection. Page 18 / 19 Cick OK when Finish setting. 2 That should Finish Setup your IP camera. 8 Important Note: 1080p Digital channel can support 1080p/720p Camera type. 720p Digital channel can only support 720p Camera Type. If you see Red X on the screen, please check the resolution. Page 19 / 19 Remote Web Access: 1 Check Network Connection First. Before web operation,you need to connect the equipment with internet. Step1. Connect the equipment with the internet correctly. Step2. Set LAN following to the ninth term Network Setup in reference manuals first part. Step3. when Lan is connected,it needs to set up port mapping for public network access. Note:The device must be in the same network with PC,if cannot connect,pls check the device IP if it works fine. 2 Open Internet Explorer IE9 [ For First Time Use Only ] For the first time, we need to change Setting in the Internet Explorer for the first time use. Page 20 / 19 3 Internet Options Go to Security tab on the top. => Custom level [ For First Time Use Only ] For the first time, we need to change Setting in the Internet Explorer for the first time use. Page 21 / 19 4 Modify these ActiveX settings: Automatic prompting for ActiveX controls: (Enable) Download signed ActiveX controls: (Prompt) Download unsigned ActiveX controls: (Prompt) Click OK Click Yes, then OK again. Page 22 / 19 Now, we are ready to Access IP Camera with the 5 IP Address. type IP address in the Address Bar. Note: Not in the Google Search box. Notice for IE 11 Please add IP address into Compatibility Address List. If you have difficulty, See Troubleshooting Page 6 [ For First Time Use Only ] For the first time, we need to Install the ActiveX Plug-in. Click Install, then Login Page 23 / 19 7 Login Screen Then, you should see the Login Screen. Enter Use Name: admin Password: (none) Click Login Page 24 / 19 8 Connection & Video Quality Bit Rate Type If choose "Local Area Network", it's Main streams as Default (HD video) if Remote over Internet ,it's Extra streams. (Regular Video) Page 25 / 19 9 Now, you should able to see the HVR / Camera. For All other special functions, please check User Manual for more details. Page 26 / 19 1 0 Port Reference: HTTP Port: 80 Media Port: 34567 Mobile Software: vMEyeSuper for Android Meye for iPhone Notice for IE 11 Please add IP address into Compatibility Address List. If you have difficulty, See Troubleshooting Page Mobile Apps Page 27 / 19 1 Download Mobile App Software Android: vMEye Super iPhone: MEye Page 28 / 19 2 Mobile APP Example: Run Android App vMEyeSuper Go to Device List Click [ + ] at bottom Enter IP Camera IP address TCP Port: 34567 Page 29 / 19 Click OK when Finish Page 30 / 19 3 Click Live Preview Select IP Camera from the List Mobile APP Page 31 / 19 4 There you go. For All Other Details, please check IP camera User Manuals. Or check our Website for Support. Page 32 / 19 Trouble Shooting 1 If you are using Internet Explorer 11, You need to Add your current IP address into Compatbility View Settings go to Gear Icon, choose Compatibility View settings. Page 33 / 19 2 Enter IP Address and Click ADD then, Close it Close Internet Explorer 11 and Try again. 3 IP Search Utility cannot Find devices. 1. Make sure connect Power Correctly. 2. Make sure IP Search Utility is running on Main Network Card. If you have 2 network card, try disable others and make it simple first. 3. Unblock Firewall or AntiVirus to allow search. XMEye Cloud Net Access Page 34 / 19 1 You can use Cloud Access over the Internet. Cloud Access is pretty simple. All you need to know is: Cloud Enable [v] And, Your HVR Cloud ID Number. Page 35 / 19 2 To find out your Cloud ID Number Go Main Menu -> Info Page 36 / 19 3 Here is Your Serial No: Page 37 / 19 Go to the Website 4 www.xmeye.net Click by Device Enter ID and verify word. Click Login. That should do it. Page 38 / 19 5 And Make sure, the Port is open and forward correctly. Then You should able to see it. Page 39 / 19 6 Port Reference: HTTP Port: 80 Media Port: 34567 Mobile Software: vMEyeSuper for Android Meye for iPhone Notice for IE 11 Please add IP address into Compatibility Address List. If you have difficulty, See Troubleshooting Page Page 40 / 19 System Interface Video Audio Record and Playback Storage and backup Main processor Technical grade embedded microprocessor Operating system Embedded LINUX operating system System resource Multi-channel real-time recording synchronously, multi-channel realtime playback, multi-channel multi-user network operation, USB backup. Operation interface 16bit real color GUI interface support mouse operation Display screen 1/4/9/16screen (take analog channel as an example, other is base on the selected channel mode) Video standard NTSC Image encode H.264 (High Profile) Monitor quality Monitor: D1 ; VGA , HDMI : High definition (Support 1920x1080, 1280x720, 1440x900, 1280x1024, 1024x768, 800x600) Playback quality 1080p / 720p / D1 / HD1 / CIF Encode capability 4ch 960H real-time | 8ch D1 real-time | 2ch D1 + 14ch CIF real-time Decode capability 4ch 960H real-time | 1ch D1 real-time | 2ch D1 + 6ch CIF real-time Multi-mode video input Local analog input .. 4*960H 8CH*D1 16CH*D1 Local analog + network digital input .. 2*D1+(1*1080p+1*720p) Network digital input ... 8*960H / 4*720p / 2*1080p / 1*720p+7*D1 / 1*1080p+1*720p+2*D1) Motion detection Each channel can set 192(16*12) detection area, can set multi-level of flexibility (for local analog channel only) Audio compression G711A Bidirectional talk support Record Mode Manual > alarm > motion detection> timing Local playback 1-8ch playback synchronously (take local analog input for example, other is depended on the selected channel mode) Space occupation Video: CIF 4~5G/day*channel, D1 16~20G/day*channel Audio: 691.2M/day*channel Video storage Local HDD, Network Backup mode Network backup, USB portable HDD, USB imprint, SATA imprint Video input 4ch CVBS/BNC (1.0Vp-p, 75ohm) Video output 1ch CVBS/BNC (1.0Vp-p, 75ohm), 1ch VGA, 1ch HDMI Loop output optional Audio input Interface Other 4ch RCA, | 8ch RCA | 4ch RCA Audio input 1ch RCA Alarm input (available for 16ch model) Alarm Output (available for 16ch model) Network port RJ45 10M/100M PTZ control 1RS485, 1RS232 ; support most kinds of PTZ protocol USB port 2*USB 2.0 HDD port 4ch model 1SATA (max to 2TB) Power 12V/2A Consumption <15W (not include HDD) Temperature 0C ~ 55C Humidity 10% - 90% | 2SATA ports (max to 2TB each) Page 41 / 19