1
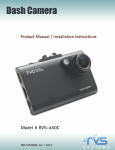
I1000 AV-in USER MANUAL
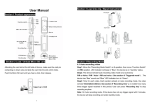
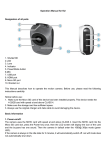
Check the logger structure diagram and structure of the profiles:
Rear View
Left View
01. On / off key
02. Reset button
Front view
03. AV OUT interface
04. Display
Right View
05.
06.
07.
08.
09.
10.
11.
12.
13.
14.
LOGO lens
SENSOR tune bit steering
Power indicator (blue)
Video button / DOWN keys.
Recording key / UP key
REC indicator (red)
MIC indicator (red)
USB interface
TF card slot
Remote control receiver sensor
15.
16.
17.
18.
19.
20.
21.
22.
23.
Toggle key / menu key.
Camera button / playback button
The G-SENSOR emergency lock key
CMOS sensor
Night Vision launch tube / LED flash
SENSOR lens
Speaker
Screw holes
Flat adhesive bracket pad / 3M adhesive
Key definitions and Features:
Power / fill light to open the key has two functions: ① The power on / off function ② fill light switch
① Power on / off function: Press and hold 3 seconds the【power button】to open the machine, the
working indicator light (blue), needs to read the card automatically enters the state of the recording mode,
the greater the card capacity, readthe longer the time, usually in about 3-5 seconds; LCD screen to enter
the state of the display video; REC indicator (blue) will blink, indicating that is video work; and then long
press for 3 seconds the 【power button】 the power of the machine automatically stop recording and
save the video file, the indicator (blue) and the REC indicator (blue) to extinguish.
② fill light switch: after turning on the machine, touch press the fill light to open key fill light to turn on /
off / automatic three-mode switch, automatic mode, the fill light sensor light by photosensitive resistor
brightness and opacity control.
RESET (reset) button: When the machine crashes, the RESET button in any mode, forced to
disconnect the power to restart.
Turn on key /
Video button has three functions: (1) one-button recording function (2) turn
function ③ switch the SENSOR forward shooting function
① a key video features: after booting the machine will automatically start recording
function; REC indicator (blue) will blink, said it is video work; touch short will stop the
recording press the 【record button】, while the REC indicator (blue color) will be off, to
stop recording and save the recording file; and then touch a short 【video】when the
REC indicator (blue) will not stop blinking, to resume recording function. (Note: the video
when the LCD is the long bright state, the recording sessions can be set in accordance
with customary selection)
②up / down function: state of the playback mode, touch short 【video key 】play turned the
role to browse video clips files, or in the state of the main menu mode, touch short 【video
key】play on the turn to visit the set to select.
③ switch the SENSOR forward shooting function: the machine will automatically start
recording when the charge of the inserted car; or manually open the car charger is not
plugged the machine automatically starts recording mode, when the reverse of the camera;
long press the video button] and maintain seconds to switch the "positive" camera function.
(Note: also rotate / reverse switch SENSOR is the LCD screen when reverse function /
reverse / reverse settings are automatically saved after shutdown)
【mute button 】 【up / down button 】has three functions: (1) a key to turn the mute function (2)
up / down function ③ switch SENSOR reverse shooting video
① a mute function: plug the car charger, the machine will automatically start recording
mode, the REC indicator will stop flashing, indicating that is recording (mute mode will
default to the last setting), touch short press the【 MIC key】 observed staticthe sound icon,
the icon color (white), said recording to silent mode, the icon has been flashing (blue)
indicated that they had to turn on the sound mode.
② up/down function: state of the playback mode, touch short press the MIC key, play the
next turn role to browse video clips file; or in the state of the main menu mode, touch short
press the 【MIC key】, play Flip role to browse settings to select.
③switch SENSOR reverse shooting: the machine will automatically start recording when the charge
of the inserted car; or manually open the car charger is not plugged, the state machine automatically
starts recording when the camera forward, long and maintain press the 【MIC key】3 seconds of
switching reverse camera function. (Note: The LCD screen when the switch SENSOR or reverse /
reverse is also rotating / anti / inverting the settings are automatically saved after shutdown)
menu key has four functions: (1) camera menu settings ② video menu settings ③ Playback
mode menu settings ④ backlight key to open the
① camera menu settings: In the camera mode, touch short press the Menu key to enter the camera
menu settings, and then touch the short double-click to exit the camera menu settings return to camera
mode.
② video menu settings: In video mode, touch short press the Menu key to enter the video menu settings,
and then touch the short triple-click to exit the recording menu settings return to recording mode.
③ Playback mode menu settings: Press and hold 3 seconds【playback】 to enter the playback camera
or video interface, touch short press the Menu key to delete the current file. (Note: photo or video
playback, press the Menu key can be used for the return key)
④ backlight key to open: open the machine in the state of the recording mode / camera
mode, long press the 【menu button】 and for three seconds, then turn off the LCD
backlight for 3 seconds; and then long press the 【menu key】 to restore the activation
LCD backlighting.
camera button / playback button has three functions: (1) a key camera functions ② playback
mode ③ Play / Pause
① a key camera functions: turning on the machine, the state of the recording mode; touch press
【Camera button / playback button】Switch to camera mode, and then touch short press【Camera button
/ playback button】, Take a Camera to complete back to camera standby.
② Playback mode: open the machine, the video mode / state of the camera mode; long【Camera
button / playback button】And for 3 seconds to enter the playback mode; browse view touch press in the
state of the playback mode,【Video button】 【MIC button】To the up / down, touch the short press
【Camera button / playback button】To play / pause the video file, then press and【Camera button /
playback button】For 3 seconds to exit the playback mode. (AV OUT operation sync)
② Play / Pause button long press: after turning on the machine, the video mode / camera mode state;
【Camera button / playback button】And for 3 seconds to enter the playback mode; browse view
touch press in the state of the playback mode,【Video button】
【MIC button】To the up / down, touch
the short press【Camera button / playback button】To play / pause the video file, then press and
【Camera button / playback button】For 3 seconds to exit the playback mode.
emergency lock key has three functions: ① camera switch button (2) emergency lock key ③
Enter key
① camera switch button: When the plug at the same time comes with the camera, after the boot
screen will be displayed on the video icon, touch press 【emergency lock key】 can switch camera
camera orientation.
② emergency lock key: plug the car charger, the machine will automatically start recording; REC
indicator (blue) will blink long by 3 seconds 【emergency lock key】 to start the emergency lock. (Note:
The camera can not be canceled when an emergency lock key)
③ confirm: the machine is turned on, video mode / camera mode state; touch short to enter the main
menu mode, press the【 Menu key】, in the state of the main menu mode, the browse view touch
short 【video button】 【MIC】 to scroll up / down, short-touch lock key 【emergency】 OK (OK),
select Settings. Can grow by 3 seconds 【playback】 to enter the playback of the camera or video
interface, touch the 【emergency lock key】to confirm the deletion of the current file.
Update the date and time functions:
① CD 【TIME.TXT】 file copy on the computer preparation date and time.
② in the state of the machine shut down, connect the computer USB interface to enter the
U-disk model, compiled【TIME.TXT】 files to the removable disk inside the machine, unplug
the USB data cable, power off the machine to restart the recorder. date and time will be
updated. (Note: the update, you must TF card into the card slot)
④ In the main menu mode of the machine to manually set the date and time.
Motion Detection Function:
When the machine is turned on, the recording standby state; chief 【emergency lock key】 and 3
seconds to enter the motion detection mode SENSOR sensor to the objects move, the beginning of the
video recording process, if not sensitive to objectsmobile video stop after 5 seconds; video mode key to
exit the motion detection mode, return to the recording standby mode.
Loop video, and coverage of video files
Plug the charger or car charger machine will automatically start recording, support for loop recording
and cover the interval between the recorded file fragments.
Low-power detection function:
When the machine detected low power shows the battery symbol low detection prompts on the LCD,
the machine will turn off automatically after 6 seconds or 13 seconds to save the video file. (Detection of
3.6V low power voltage)
Disk / camera / charge mode:
Machine plugged into the USB cable to the computer, there will be a selection box, short
press the 【video】【MIC key】to scroll up / down, choose U disk or PCCAM of mode touch,
touch short press the 【playback / camera key // OK (OK) 】 to determine the selection.
After setup is complete, the LCD will display the disk / camera / charging icon.
Collision sensing capabilities:
Plug the car to charge the machine will automatically start recording, measuring the dynamic
acceleration of the machine by gravity sensors, sensor to vehicle collision moving (left - right - front - rear)
direction and the vibration of the vehicle collision. In the event of a serious vehicle collision, is the
accident the first 10 seconds and 20 seconds after the save as a special file, this file will not be recycled
cover.