1
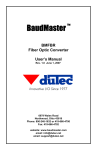
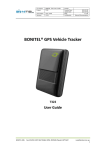
PERSONAL TRACER ‘Lite’
User Manual
Product Warranty (1 year)
Atex International warrants to you, the original purchaser, that each of its products will be free from defects in
materials and workmanship for one year from the date of purchase.
This warranty does not apply to any products which have been repaired or altered by persons other than repair
personnel authorized by Atex International, or which have been subject to misuse, abuse, accident or
improper installation. Atex International assumes no liability under the terms of this warranty as a
consequence of such events.
If an Atex International product is defective, it will be repaired or replaced at no charge during the warranty
period. For out-of-warranty repairs, you will be billed according to the cost of replacement materials, service
time and freight. Please consult your dealer for more details.
If you think you have a defective product, follow these steps:
1.
Collect all the information about the problem encountered. (For example: products used, other hardware
and soft- ware used, etc.) Note anything abnormal and list any onscreen messages you get when the
problem occurs.
2.
Call Atex International and describe the problem. Please have your manual, product, and any helpful
information readily available.
3. Carefully pack the defective product, and a photocopy proof of purchase date (such as your sales receipt)
in a shippable container. A product returned without proof of the purchase date is not eligible for
warranty service.
Technical Support and Assistance
1.
2.
Visit the Atex International web site at www.Atex.lu where you can find the latest information about the
product.
Contact your distributor, sales rep., or Atex International for technical support if you need additional
assistance. Please have the following information ready before you call:
– Product name and serial number
– Description of your peripheral attachments
– Description of your software (operating system, version, application software, etc.)
– A complete description of the problem
– The exact wording of any error messages
Packing List
Before setting up the system, check that the items listed below are included and in good condition :
•
•
•
•
•
PERSONAL TRACER
Battery
Wall Charger
USB charger cable
Car Charger
1
Safety Instructions
Follow these simple precautions to protect yourself from harm and the products from damage.
Status
All LED are
flashing
Cause
Battery low, SIM card or
Battery not installed,
Power switch is OFF
(Charger connected).
Yellow LED is ON NO GSM Signal
Green LED is ON NON-Valid GPS location
Solution
Check battery, SIM card,
charge battery,
switch power on
Please move to location where there is stronger signal
The GPS is searching for
Valid GPS location
It will take about 4 ~ 8 hours to fully charge the battery. You can charge and use the PERSONAL TRACER at
the same time. The charging time will be the same. Please use the supplied chargers for faster charge. The
PERSONAL TRACER can be charged from any other USB port, but charging time may be longer.
Caution!
There is a danger of a new battery exploding if it is incorrectly installed or is exposed to high
temperatures.
Do not attempt to recharge, force open, or heat the battery.
Replace the battery only with the same or equivalent type recommended by the
manufacturer. Discard used batteries according to the manufacturer's instructions.
Please avoid storing the device in an excessively hot or humid place.
Please do not leave the device in your car under direct sunshine with windows closed
The PERSONAL TRACER requires a GSM signal to send and receives messages. Without a GSM signal the
PERSONAL TRACER cannot send any messages.
IMPORTANT: GPS (Global Positioning System) signals must have open or limited access to an open sky view.
Without an open sky view they cannot report any valid locations.
2
1 Getting Started
1.1 Introduction
Thank you for purchasing the PERSONAL TRACER Personal GPS Tracker. Communication is done directly
between the PERSONAL TRACER and any GSM mobile phone using simplified SMS messages. Any GSM
SIM card can be used in the PERSONAL TRACER to start tracking. There are no costs involved other than the
purchase of a SIM card and SMS communication messages to start tracking. Your location can be displayed
using our Mapping Server, available for free over the internet: http://www.wiselocate.com —a low cost tracking
service solution. Applications can be for personal security, older person care, child safety and tracking,
undercover surveillance, car security systems and many other applications. The PERSONAL TRACER also
has Panic (SOS) and Park (GEO fencing) button functions.
PLEASE READ AND FOLLOW THE SETUP INSTRUCTIONS TO START TRACKING
1.2 Key Features/Descriptions
•
Park function
PERSONAL TRACER will send current/last known location messages to your mobile phone if movement is
detected and speed > 5 Km/H, or 3 movements are detected within 30 seconds.
•
Stop Motion Alert
PERSONAL TRACER will start to beep for 30 seconds when the unit stays motion- less for over 1 minute. If
the unit still detects no movement, PERSONAL TRACER will send a Stop Motion Alert activated message and
current/last known location messages to your mobile phone.
•
Request Current/Last Known Location
PERSONAL TRACER will send back current/last known location message to your mobile phone when you
send a request message (0).
PERSONAL TRACER will also send back current/last known location message- when receiving a missed
call (hang-up after a single ring).
•
Panic Button
PERSONAL TRACER will send Panic Button activated and current/last known location messages to your
mobile phone when the Panic Button has been pressed.
1.3
Important Notes before Starting
•
•
•
•
The power switch is specifically designed to be difficult to switch on/off (use pen or similar
utensil). Once the unit is on, please always keep it on
The SIM card being used in the unit should have the default PIN numbers, “0000”, or have no
PIN numbers
While connecting a USB cable to the unit, the red LED
should be on
When the battery is fully charged, the red led should be flashing
1.4 Installing the SIM card
IMPORTANT! — The SIM card being used in the unit must have the default PIN number, “0000”, or have no
PIN number programmed, and if using a pre-paid SIM card, that the account has funds available. The SIM
card must be installed as shown:
3
1. Press down and push to open the battery cover
This side up
This side down
2. Slide down cover and pull up the SIM card holder
3. Slide in the SIM card
1.5 Installing the Battery
1. Take the Li-ion battery
2. Slide in the battery
3. Press down on the battery
4. Push the battery cover back into the lock position
1.6 Charging the Battery
IMPORTANT: MAKE SURE TO SWITCH THE UNIT ON BEFORE CONNECTING THE CHARGER, (Use
ONLY the cable supplied with the unit).
The power switch is specifically designed to be difficult to switch on/off (use pen or similar to switch on). Once
the unit is on, please always keep it on unless you are required to switch off any mobile phone devices.
4
The battery shipped to you may not be fully charged. For the first time after SIM card and the Battery has been
installed and powered ON, please connect to a USB charger to fully charge the battery before using the
PERSONAL TRACER.
Power On/Off Switch
USB Power Connector
1.7 Button Locations
Panic Button (located on TOP of the PERSONAL TRACER)
Microphone
Park Switch
Status
LEDs
1.8 Setting up PERSONAL TRACER to Send Your First Messages to your Mobile Phone
PERSONAL TRACER can be configured using SMS messaging on a normal GSM mobile phone or using the
configuration menu program. PERSONAL TRACER must be enabled first before any command messages are
accepted.
The command messages that PERSONAL TRACER accepts can be sent from any GSM mobile phone directly
to your PERSONAL TRACER.
For PERSONAL TRACER to accept GSM messages it must start with the ‘Security ID code’.
The default number is: 0123456789
<Security ID>*<0>
e.g. Example: 0123456789*0
Do not add any extra spaces, commas etc between the commands. Send the commands exactly as
shown. If you do not receive any message go back to the Setup Communication phone number (section
1.8.4). Do not send 2 commands at the same time. Only one command at a time.
5
1.8.1 Communication/GSM Test:
•
Power up the PERSONAL TRACER Personal Tracker after installing SIM card and Battery pack.
•
Please wait until the Yellow LED (GSM signal ready) starts flashing.
•
To test communication you can ‘ring’ the SIM card number installed in PERSONAL
TRACER.
•
If you can hear the ring tone then the GSM signal communication is working.
1.8.2 GPS Test:
After the battery has been fully charged move the unit to an open space area holding the unit face up.
Figure 1.1: PERSONAL TRACER ready to use
For the first time, or if you do not use your PERSONAL TRACER for several days, it may take up to 5
minutes to get a valid GPS location. The GPS status (Green) LED will start flashing when you have
valid GPS location. The PERSONAL TRACER has a sensitive GPS receiver that allows tracking in
areas where there is only limited sky view, but cannot track where there is no sky view at all. The last
location before the PERSONAL TRACER lost GPS position is always saved as long as the battery has a
charge. When you remove the battery the last location will be lost and GPS receiver will require up to 5
minutes to get a new valid GPS location.
6
1.8.3
Enable Your Personal Tracker
0123456789*50
Tracker Enabled (No Feedback)
1.8.4 Setup Communication Phone Number
‘xxxxxxxxxx’ is your mobile phone number including country code. Example: +31212128322
0123456789*53*+xxxxxxxxxx
“Phone Number to Receive Custom Messages Changed”
If you do not receive a message go back to section 1.8.3. and try again.
1.8.5 Testing that your PERSONAL TRACER is working correctly
To test your PERSONAL TRACER is working correctly press the Panic Button on the top of the
tracker (SOS) for more then 3 seconds:
You will then receive an Activation/Location message like this:
PANIC Button Activated
Valid Location
Lat=3500.4511S
Long=17452.1300E
Speed=0 Km/H
Batt. Level: 96%
If you do not have a valid location then you will get a last known location. This can be all zeros if
the GPS did not find any valid location before
7
1.9
LED Status
There are 4 Status LED’s on your Personal Tracker PERSONAL TRACER unit. The indicators
give you the tracker’s status.
Blue LED (BT) is ON when the Park switch is turned ON
•
The Park alert will be activated if any speed is detected faster then
5 km/h or 3 movements within 30 seconds.
Green LED is the GPS status LED
•
If the GPS module is powered down (in sleep mode), the Green
LED will come ON or be flashing whenever movement is detected.
•
When the Green LED is ON, then the GPS module has power, but non-valid GPS location
data.
•
If Green LED is blinking, the GPS module has power and a valid
GPS location.
•
The Green LED (GPS status) will turn off after several minutes if no movement is detected.
Red LED is the Battery status LED
•
If the Red LED is OFF and the unit is switched ON, then the battery power is OK (no battery
charger connected).
•
If the battery charger is connected, then the battery status Red LED will be ON (after startup test
cycle).
•
If the battery charger is not connected and the Red LED is ON then the battery power is low
(less then 20%)
•
If the Red LED is blinking then the battery is fully charged (90% or
More).
Yellow LED is the GSM signal status LED
•
If the Yellow LED is blinking then the GSM module has a good signal and GSM module
working OK.
•
If the Yellow LED is ON then the GSM module is OK, but it has a weak or no GSM signal.
•
If the Yellow LED is OFF the GSM module is off, or there’s a module error, or no SIM card is
installed. (After the unit powers up
(10-20 seconds) the LED will be on or flashing).
•
If the battery voltage is very low, or the battery is not installed (or not installed correctly) all
LEDS will flash every few seconds. Please make sure that the power on/off switch is ON, the
SIM card installed and the battery installed.
8
2 Learning to use your Personal Tracker
2.1
Communication Command Messages
The command messages are made simple to enter from any GSM mobile phone. Once an option
has been updated a confirm message will be sent to your mobile phone. These command
messages can be sent from any GSM mobile phone directly to your PERSONAL TRACER.
Messages must be exactly formatted as shown and no extra spaces must be added or inserted. For
the PERSONAL TRACER to accept the GSM message it must start with the ‘Security ID code’. This
number is default “0123456789’. If you change this number then you must start with the changed
‘Security ID code’ first, (security ID code is ‘0123456789’)
2.2
Request Current/Last Known GPS location
2.2.1 Send SMS Command (0)
PERSONAL TRACER will send back current/last known location when the following SMS
command message is sent:
0123456789*0
Valid Location
Lat= 3623.6111N Long= 12121.2345E
Speed= 23 Km/H
Batt. Level: 96%
2.2.2 Missed Call
PERSONAL TRACER will also send back current/last known location when receiving a missed call
(hang-up after a single dial).
NOTE: Not all GSM service providers have the same settings for missed calls. If you do not receive any
returned messages, please try SIM card from other providers.
2.3
Park Function
2.3.1
Enable Park Function 1 (via SMS)
0123456789*1
Park Enable Confirm
9
2.3.2
Enable Park Function 2 (via switch)
Push UP Park switch
2.3.3
Disable Park Function
0123456789*2
Park Disable Confirm
Please note that Park Function disabled command message will not disable the Park function when
the Park button has physically been turned ON.
The Park Function can be enabled by SMS message or when the
‘Park’ switch is turned ON. Once Park function alert has been activated the option will be
automatically disabled. When the Park Function switch is used you must switch it off and switch back
on to enable it again
2.4
Panic Alert Message
Whenever you press the Panic button (“SOS” on top of PERSONAL TRACER) for more then 3
seconds you will send a Panic activation and current location messages to your mobile phone.
PANIC Button Activated
Valid Location
Lat= 3623.6111N Long= 12121.2345E Speed= 23
Km/H
Batt. Level: 59%
10
2.5
Stop Motion Alert
PERSONAL TRACER will start to beep for 30 seconds when the unit stays motion- less for over 1
minute. If the unit still detects no movement, PERSONAL TRACER will send Stop Motion alert
activated and current/last know location messages to your mobile phone
2.5.1
Enable Stop Motion Alert
0123456789*3
Motion Enable Confirm
2.5.2
Disable Stop Motion Alert
0123456789*4
Motion Disable Confirm
If Stop Motion alert is enabled you must move (vibrate) the PERSONAL TRACER at least once
every 1 minute. If no movement or vibration is detected the internal buzzer will beep for 30 seconds.
You must move the PERSONAL TRACER within the 30 seconds. If not the PERSONAL TRACER
will send
‘Motion alert activated’ and location message to your mobile phone. Once Motion alert has been
activated it will automatically disable and will not send further messages.
Please make sure the Park function is OFF when using Motion Alert.
2.6
Low Battery Warning Messages
A low battery warning will be sent when battery power is less then
20%.
2.6.1
Enable Low battery Warning
0123456789*5
Low battery warning message:
11
Low Battery Voltage Valid Location
Lat=3623.6111N
Long-12121.2345E
Speed=23Km/H
Batt.Level: 19%
2.6.2
Disable Low Battery Warning
0123456789*6
2.7
Calling the Personal Tracer
You can call PERSONAL TRACER, and using the built-in microphone you can listen to the other
user speaking into the personal tracer. The unit will automatically pick up the phone call after 4 rings.
2.8
Dial-out Numbers (3) From the Personal Tracker
PERSONAL TRACER will send Panic button activated and current/last known location messages to
your mobile phone when the Panic button has been pressed. After the message has been sent,
PERSONAL TRACER will start to dial out to 3 other numbers so that the device user can talk over
the built-in microphone for additional security.
2.8.1
Setup Dial-out Phone Number 1
0123456789*54*xxxxxxxxxxx
Dial Out Phone Number 1 Updated with number xxxxxxxx
2.8.2
Setup Dial-out Phone Number 2
0123456789*55*yyyyyyyyyy
Dial out phone no. 2 updated with number yyyyyyyyyy
12
2.8.3
Setup Dial-out Phone Number 3
0123456789*56*zzzzzzzzzzz
Dial out phone no. 3 updated with number zzzzzzzzzzz
You can configure up to 3 phone numbers to dial out to when the Panic button is activated. It will
start to dial out after the Panic button message is sent and will dial the first configured number first. If
busy or cannot connect it will dial number 2 and if that number is also busy then it will dial number 3.
It will try up to 3 times to dial all numbers configured. Once connected to any number it will not dial
out to any other number configured. You can erase or delete any number by sending a ‘blank’
phone number using the same command code. (See below)
2.8.4
Erase Dial out Phone Number 3 (for example)
0123456789*56*
Dial out phone no. 3 updated
13
3 Security Code Setup
3.1 Change Security ID code
0123456789*52*8888888888
Security ID Code Changed
The above sample will change the security ID code to
‘8888888888’. All new messages will have to start with the new security ID code after the update.
Your PERSONAL TRACER will only accept text messages that have the correct ‘Security ID’ code.
3.2
Reset Security ID code:
*** To reset the security ID code back to ‘0123456789’ you MUST
follow the exact steps below.
1. Power up the PERSONAL TRACER
2. Connect charger cable
3. Wait till the GSM LED starts flashing
4. Switch Park button ON
5. Press and hold down Panic Button for more than 3 seconds until all
LED will flash at the same time!
The security ID code will now be set back to ‘0123456789’
14
4 Map Server Software
4.1
Display your location on Free Map Server
The location message received can be displayed using our Free
Map Server.
To display your location go to: www.wiselocate.com
You don’t need to Log in.
The map will then be shown.
Enter Longitude and Latitude values from the messages sent by PERSONAL TRACER and press the
“Valider” button.
A pushpin will appear to show exact position
15