1
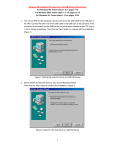
USB to RS232 Adapter User’s Manual 34000212 Rev0 Table of Contents Warnings .................................................................................. 3 Introduction ............................................................................... 4 USB to RS232 Adapter Package Contents ................................ 4 Setup Procedure ....................................................................... 5 Setup Procedure for Windows 98, ME, and 2000................ 5 Setup Procedure for Windows XP..................................... 10 Obtaining Technical Assistance............................................... 13 Limited Product Warranty ....................................................... 14 2 NOTICE: This equipment has been tested and found to comply with the limits for a “Class A” digital device, pursuant to Part 15 of the FCC rules. These limits are designed to provide reasonable protection against harmful interference when the equipment is operated in a commercial environment. This equipment generates, uses and can radiate radio frequency energy and if not installed and used in accordance with the instruction manual, may cause interference to radio communications. Operation of this equipment in a residential area is likely to cause harmful interference, in which case the user will be required to correct the interference at the user’s own expense. This digital apparatus does not exceed the “Class A” limits for radio noise emissions from digital apparatus set out in the Radio interference regulations of the Canadian Department of Communications. Trademarks Microsoft, MS, MS-DOS, XENIX are registered trademarks and Windows, Windows NT, LAN Manager, and Win32 are trademarks of Microsoft Corporation. Note: Notes contrast from the text to emphasize their importance. Warning: These messages alert you to specific procedures or practices; serious consequences may result including injury if you disregard them. Copyright 2002 Para Systems, Inc. Unauthorized reproduction prohibited. 3 Introduction Monitoring and managing a UPS through USB can be accomplished by using the MINUTEMAN USB to RS232 Adapter cable. Simply connect the RS232 end of the USB to RS232 Adapter cable to one end of the RS232 cable that comes with the UPS. Connect the other end of the RS232 cable to the DB9 port on the UPS. Connect the USB end of the USB to RS232 Adapter cable to the computer’s USB port. Once the USB driver software is loaded, the UPS can be monitored and managed by the MINUTEMAN SentryII power management/diagnostic software without tying up a serial port on the computer. USB to RS232 Adapter Cable USB to RS232 Adapter Package Contents The contents of your package are: 7 7 USB to RS232 Adapter Cable 3.5” Floppy Diskette The 3.5” Floppy Diskette contains the USB device driver, USB setup software, and the User’s Manual. 4 Setup-Procedure Setup Procedure (Requires Windows 98, ME, 2000, or XP) The following items must be obtained before attempting to setup the USB to RS232 Adapter: UPS with the RS232 cable, RS232 Adapter with the USB cable attached (provided), the USB Driver/USB setup file (enclosed diskette) and a PC with Windows 98 or higher. Setup Procedure for Windows 98, ME, 2000 1. 2. 3. 4. 5. 6. 7. 8. Connect the USB end of the USB to RS232 Adapter Cable to the USB Port on the computer. Connect the RS232 end of the USB to RS232 Adapter Cable to one end of the RS232 Cable. Connect the other end of the RS232 Cable to the DB9 port on the UPS. Plug the UPS’s power cord into the AC wall outlet. Turn on the UPS. Turn the computer on and let it boot-up. Insert the floppy diskette with the USB Driver/USB setup files into the appropriate drive. Windows will display the following message (first time only): New Hardware Found USB Device Windows has found new hardware and is locating the drivers for it. 5 9. The Hardware wizard will guide you through installing the USB Driver. Click Next. 10. The Hardware wizard will search for the best USB Driver. Click Next. 11. Check, Specify a location. Click Browse. 6 12. Open the appropriate 3.5” Floppy Drive. Open the USB folder. Open the Driver folder. Click OK. 13. Windows will search for the new USB Driver. Click Next. 14. Windows has found the USB Driver for the USB device. Click Next. 7 15. Windows has found the best Driver for this USB device. Click Next. 16. Windows is copying the USB Driver files to your “C:” drive. Click Next. 17. Windows is finished installing the USB Driver. Click Finish. 8 18. On the Desktop, right click “My Computer”. Open Properties. 19. Open the Device Manager. 20. Open Ports (COM & LPT). This tells which com-port the USB to RS232 Adapter is using. Click OK. 20. Start the SentryII/Power Monitoring Software. Open settings and change the com-port to the appropriate com-port for the USB to RS232 Adapter. 21. The Setup Procedure is complete. 9 Setup Procedure for Windows XP 1. 2. 3. 4. 5. 6. 7. 8. Connect the USB end of the USB to RS232 Adapter Cable to the USB Port on the computer. Connect the RS232 end of the USB to RS232 Adapter Cable to one end of the RS232 Cable. Connect the other end of the RS232 Cable to the DB9 port on the UPS. Plug the UPS’s power cord into the AC wall outlet. Turn on the UPS. Turn the computer on and let it boot-up. Insert the floppy diskette with the USB Driver/USB setup files into the appropriate drive. Windows will display the following message (first time only): 9. The Hardware wizard will guide you through installing the USB Driver software. The Hardware wizard will install the USB driver software automatically. Click Next. 10. The Hardware wizard is installing the USB driver software. 10 11. The Hardware wizard has finished installing the USB driver software. Click Finish. 12. The System Settings have been changed. You must restart the computer before the new settings will take effect. Click Yes. 11 13. Once the computer has rebooted, on the desktop, right click on My Computer. Open properties. Open the Hardware Tab. Open the Device Manager. 14. Open Ports (COM & LPT). This tells which com-port the USB to RS232 Adapter is using. 15. Close the Device Manager. 16. Start the SentryII/Power Monitoring Software. Open Settings and change the com-port to the appropriate com-port for the USB to RS232 Adapter. 17. The Setup Procedure is complete. 12 Obtaining Technical Assistance For Technical Support on the Web, please visit the Support section of our Web site or visit our online Discussion Forum at www.minutemanups.com In order to diagnose the problem you are having, our technicians need the following information from you. Installation Site: Company Name: Address: State: City: ZIP code: Contact Person’s Name: Phone Number: Computer System: Operating System and version: System Manufacturer: System Model Number: UPS: Model Name/Number: Serial Number: Type of option: What are the symptoms? Technical Support Please have the information listed above ready when you contact us. You can reach us by calling: Phone: 1-972-446-7363 Fax: 1-972-446-9011 13 LIMITED PRODUCT WARRANTY Para Systems Inc. (Para Systems) warrants this equipment, when properly applied and operated within specified conditions, against faulty materials or workmanship for a period of three years from the date of original purchase by the end user. For equipment sites within the United States and Canada, this warranty covers repair or replacement of defective equipment at the discretion of Para Systems. Repair will be from the nearest authorized service center. Replacement parts and warranty labor will be borne by Para Systems. For equipment located outside of the United States and Canada, Para Systems only covers faulty parts. Para Systems products repaired or replaced pursuant to this warranty shall be warranted for the remaining portion of the warranty that applies to the original product. This warranty applies only to the original purchaser who must have properly registered the product within 10 days of purchase. The warranty shall be void if (a) the equipment is damaged by the customer, is improperly used, is subjected to an adverse operating environment, or is operated outside the limits of its electrical specifications; (b) the equipment is repaired or modified by anyone other than Para Systems or Para Systems-approved personnel; or (c) has been used in a manner contrary to the product's operating manual or other written instructions. Any technical advice furnished before or after delivery in regard to use or application of Para Systems’s equipment is furnished without charge and on the basis that it represents Para Systems’s best judgment under the circumstances, but it is used at the recipient's sole risk. EXCEPT AS PROVIDED HEREIN, PARA SYSTEMS MAKES NO WARRANTIES, EXPRESSED OR IMPLIED, INCLUDING WARRANTIES OF MERCHANTABILITY AND FITNESS FOR A PARTICULAR PURPOSE. Some states do not permit limitation of implied warranties; therefore, the aforesaid limitation(s) may not apply to the purchaser. EXCEPT AS PROVIDED ABOVE, IN NO EVENT WILL PARA SYSTEMS BE LIABLE FOR DIRECT, INDIRECT, SPECIAL, INCIDENTAL, OR CONSEQUENTIAL DAMAGES ARISING OUT OF THE USE OF THIS PRODUCT, EVEN IF ADVISED OF THE POSSIBILITY OF SUCH DAMAGE. Specifically, Para Systems is not liable for any costs, such as lost profits or revenue, loss of equipment, loss of use of equipment, loss of software, loss of data, cost of substitutes, claims by third parties, or otherwise. The sole and exclusive remedy for breach of any warranty, expressed or implied, concerning Para Systems’s products and the only obligation of Para Systems hereunder, shall be the repair or replacement of defective equipment, components, or parts; or, at Para Systems’s option, refund of the purchase price or substitution with an equivalent replacement product. This warranty gives you specific legal rights and you may also have other rights, which vary from state to state. Longer term and F.O.B. job site warranties are available at extra cost. Contact Para Systems (1-972-446-7363) for details. 14