1
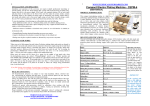
COMPACT BARREL ELECTROPLATING MACHINE (MANUAL & AUTOMATIC) USER MANUAL Design: This compact barrel electroplating machine is designed and suitable for cleaning, stripping, activating or coating of all sorts of parts via conducting electrical current by electrochemical means. There are two types of this machine available: Manual rotating machine; Motorised (automatic) machine (6-7 RPM). Principles of the electroplating process: The process involves covering a certain metal so that an adherent and durable film of any other metal can then be applied. The process is performed in a tank containing a solution of that metal, by means of electrolytic action induced by a current from a source of electric power. The barrel electroplating machine is connected to a source of electric power and converts its energy into direct current of up to 15 volts. Upon immersion of the cathode and the anode into the solution an electric current moves through the solution thus completing the electric circuit which triggers the process of motion of metal ions from the solution resulting in a coating of the cathode (the item to be plated) by the atoms of the metal. At the same time an equal amount of the same metal is discharged from the anode into the solution. This process is widely used in jewellery and the electronics industry, decorating, crafts, arts, etc (Gold, Silver, Copper, Nickel, Chrome, Rhodium plating / forming etc.) Machine applications: If you are a beginner please feel free to contact us at any time regarding our electroplating course for beginners. Technical specification: INPUT OUTPUT (V) OUTPUT (A) BARREL x BARREL’S DIMENSIONS (MM) ESTIMATED BARREL CAPACITY TURNING VERSION AVAILABLE GAUGE FILTER x TANK x TANK VOLUME STRAPPING OPTION SS ANODE (cleaning, gold, silver process) WEIGHT UNIT DIMENSIONS (MM) 220V - 240VAC / 110V – 120VAC 0 - 15 VDC 0 – 4 ADC 1 120(D) X 65 20 (RINGS) /0.5 L/1 KG MANUAL & AUTOMATIC A 1 (1000 McF+) 1 (200 x 90 x 90 mm) 1L YES YES (400 X 70 mm) x 1 2.8 Kg 350(W) X 230(D) X 130(H) Delivery specification: Please make sure the delivery includes the following components: Barrelling machine x 1; Barrel with an aluminium mesh x 1; Plastic tank x 1; Stainless steel anode for cleaning & Gold and Silver plating processes; Instruction manual (downloadable). Some useful points for beginners: To prepare your articles for electroplating it is important to ensure that all oil, grease, paint or other materials are removed prior to processing. The most common cause of poor quality forming/plating is insufficient preparation. It is recommended to use ultrasonic or electromagnetic cleaners, sand cabinets or alternatively vigorous brushing with soapy water is satisfactory for removal polishing compound. In any case, use an electro cleaning process before starting any type of plating process. Also make sure that you do not touch the object with your hands after cleaning. Installation and Operation: Installation and operation of this unit does not require either deep professional knowledge or specific training and it can be easily used by beginners. After making sure that you have all the necessary materials place the unit in a suitable level position. Please do not move this machine by means of the rotating wheel and never touch the body when power is on. Thickness and quality of a coating is a complex function of electric current, voltage, temperature of the solution, time of exposure, correct position of the cathode in the tank, correct distance between the anode and the object, quality of chemicals and user’s experience (knowledge). This machine can be used for barrel, tank or brash plating. Once the machine is properly placed on a worktop please make sure that it is installed correctly (please see pictures below): 1. Unscrew the plastic lock-nut from the open side of the barrel and take out the plastic disc with a level mark from its plastic rod. Now your barrel is in the open position and you can load it (on 1/3) with any suitable objects you wish to clean, strip, activate or plate. (Please see picture below): 2. Please do not overload the barrel as it can damage your machine or increase plating time. Please also do not open the other side of the barrel as it has a contact with a negative source. When all required objects are in the barrel put the plastic disc (lid) back on its place and fix it on the central plastic rod by the plastic nut. Now screw the lock-nut back and tighten it slightly. Please repeat the same operation each time you need to load or unload the barrel if you use the same barrel for all processes. 3. Place the anode (stainless steel belt) inside the plastic tank. Make sure that the anode is placed in the tank in the correct way, namely the toll (bent) part of the anode should be at the rear of the machine to connect a negative (black) clamp power supply. 4. Place this plastic tank with the anode under the barrel so that the barrel rotates inside the tank freely and they do not touch each other. The plastic tank has a small gap on one wall that must be placed in the correct position between the barrel and the machine: 5. Now the anode can be connected to the positive power source by RED clamp that can be found on the back panel of this machine. 6. Also connect the barrel to a negative power source by BLACK clamp as shown on the picture below. Now your machine is ready to work. REMEMBER: The ampere gauge shows amperes range only when the anode and barrel are in the solution and are under voltage (switched on) Starting your work: Prepare the solution you wish to use and fill the tank up to level mark which should be just about 10-15 mm UNDER the lock-nut. Prior to switching the unit on make sure that the voltage regulator (the knob on the front panel with 0-9 digits) is in the extreme left position. (Please see the picture on page No: 1). Also check that red and black clamps are connected correctly. Now switch the power ‘On’ (by Potentiometer with a pointed knob) – the “Power” indicator switched on. When you turn the voltage regulator to a correct position – the right indicator “015Vdc” will switch on. Please note that it will be brighter on a higher voltage. When you connect all wires and get a correct voltage (usually position 5-7 (around 1.5V per one digit) on the knob) start to rotate the barrel by using either the handle or the motor. Please note that plating time and layer quality depends on rotating speed and your experience. It is usually 5-10 RPM. When the objects have been plated to a desired level (you will see this inside the barrel) switch off the machine, take out the barrel from the tank, open the plastic lid (disc) of the barrel, take finished objects out of the barrel and place them into any bigger glass or plastic container and then clean them together with the barrel in rinsing water. Now the barrel is ready to be loaded again with other objects which are ready to be plated. Pen-stick or a brush-probe may also be connected to this machine. To do that just connect the red clamp to a pen or brash and then connect the black clamp to the object to be plated. The “Stripping” option (two-position black switch on the front panel) is widely used for stripping process. It changes polarity in the barrel (tank) to the opposite one on its own. Just choose the correct position (for either plating or stripping) of the switch for the desired process to proceed. You can also use this machine for a standard tank plating process. For this purpose just use any suitable plastic or glass container. Fill this container with the required solution. Then place an anode (metal sheet) in the solution and connect it to a positive (red) clamp. Now please connect the object to be plated to any metal rod (aluminium, copper, steel) via a copper or aluminium wire and place the rod on the top of this container filled with solution. Please make sure that the object is fully immersed in the solution. Please note that the ampere gauge starts to show amperage range only from 1+ ampere. Most electrochemical processes require amperage lower than 1 A. If you see that the ampere meter’s coil on your machine does NOT move during the process – it means that this process requires less than 1 A and is correct. You can see whether your machine is under voltage by the right (showing) indicator. You can also check whether the process is going on by checking the solution inside the barrel. You will be able to see some small bubbles in the solution around the objects being plated and the solution is white in colour. If you still wish to increase the amperage do the following: - Add 1-2 drops of sulphuric acid to the solution (first check the solution data sheet); - Increase voltage; - Increase the number of the objects being plated and the area of the anode but always remember that the lower the amperage the better the result. So always try to hold the ampere gauge’s coil at “0” position if data sheet does not advise otherwise. Maintenance: Always make sure that the machine is kept clean and stored in a dry place. Never keep chemicals and solutions in the tanks. Safety instructions: All electrochemical processes are subject to two main hazardous effects: electrical injury and poisoning by solutions and their gases. To avoid electrical injury the user must not touch bare leads of the Unit with unprotected hands. Always use rubber gloves. This will also be useful to protect hands from the effect of the solutions. It will also be necessary to provide the operating area with a rubber mat to stand on. Some chemicals may be deadly poisonous and in combination often produce corrosive and poisonous gases. Therefore, all general safety measures should be undertaken when working with them including eye protection, skin protection, inhaling protection etc. Always keep children away from the work area. Ensure proper ventilation of the work area. The user should carefully follow all instructions provided by the chemicals supplier. TECHNICAL SUPPORT [email protected] or www.technicalsupermarket.com