1
User Manual
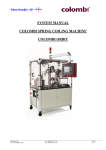
COLOMBI ORBIT
Saldovägen 9B
S-175 62 Järfälla Sweden
Tel:+46(0)8/795 27 30
Fax:+46(0)8/761 08 03
1 off 21
35107201
1
MACHINE DESCRIPTION .............................................................................................. 3
1.1 System Operator........................................................................................................... 3
2
ORBIT................................................................................................................................ 4
2.1 ORBIT consists of: ....................................................................................................... 4
2.1.1 Options for position 1, basic unit:.......................................................................... 4
2.1.2 Options for position 2, action head: ....................................................................... 4
3
UNPACKING and INSTALLATION ............................................................................... 5
3.1 Interface for Spring Coiling Machine ........................................................................ 5
4
SAFETY ............................................................................................................................. 6
4.1 Emergency Stops and Safety Protection .................................................................... 6
4.1.1 Emergency Stop ..................................................................................................... 6
4.1.2 Resetting After an Emergency Stop ....................................................................... 6
5
STARTING THE SYSTEM ............................................................................................... 7
5.1 Power up and prepare for production........................................................................ 7
6
ADJUSTMENTS ............................................................................................................... 8
6.1 Adjustments by Trained Personnel ............................................................................ 8
6.1.1 Password................................................................................................................. 8
6.2 ORBIT—Related menus .............................................................................................. 8
6.2.1 ORBIT TEST ......................................................................................................... 9
6.2.2 Heater info .............................................................................................................. 9
6.2.3 Load info .............................................................................................................. 10
6.2.4 Status indicators ................................................................................................... 10
6.2.5 Function buttons in Orbit test menu..................................................................... 10
7
LOAD CALIBRATION................................................................................................... 11
7.1 Check of Load Cell Installation ................................................................................ 11
7.2 LOAD CALIBRATION ............................................................................................. 12
7.2.1 Calibration of Load Cell....................................................................................... 12
7.3 LOAD CELL CALIBRATION INFORMATION .................................................. 14
7.4 LOAD SETUP ............................................................................................................ 15
7.4.1 Load info .............................................................................................................. 15
7.4.2 Function buttons in Load setup menu .................................................................. 16
8
LENGTH CONTROL...................................................................................................... 17
8.1 Automatic offset information.................................................................................... 17
8.2 CALIBRATION Length Control and LOAD Test................................................. 18
9
TROUBLESHOOTING................................................................................................... 19
9.1 Error Messages........................................................................................................... 19
9.1.1 Spring is too short. ............................................................................................... 19
9.1.2 Spring is too long. ................................................................................................ 19
9.1.3 The ORBIT revolver does not stop at the correct position. ................................. 20
9.1.4 Spring coiling machine is not ready. .................................................................... 20
10 MAINTENANCE............................................................................................................. 21
10.1 The pneumatic system: .............................................................................................. 21
10.2 Electro-mechanical system........................................................................................ 21
Saldovägen 9B
S-175 62 Järfälla Sweden
Tel:+46(0)8/795 27 30
Fax:+46(0)8/761 08 03
2 off 21
35107201
1 MACHINE DESCRIPTION
This manual describes the COLOMBI ORBIT with length test feedback, heater
and load testing.
The PLC controller is an Allen Bradley SLC500 with a 1000 color panel display as an
operator interface.
1.1
System Operator
The ORBIT test system is easy to use and requires no special user training to make minor
adjustments, such as modifying ejection times or changing probes. For making basic
adjustments, some commands are available directly from the control panel display, such as for
adjustment of length control and calibration of load cells.
Saldovägen 9B
S-175 62 Järfälla Sweden
Tel:+46(0)8/795 27 30
Fax:+46(0)8/761 08 03
3 off 21
35107201
2 ORBIT
ORBIT is an option for spring coiling machines or spring separators.
ORBIT is a platform that can be complemented with options such as heat treatment, length
controlling, load test and rejection of faulty springs, and the distribution of springs to one or
more delivery points.
2.1 ORBIT consists of:
1. Basic unit: Double-ORBIT featuring a round feed-table with a revolver, which has one
input and two outputs for springs.
2. Option: UP and DOWN action head.
2.1.1
Options for position 1, basic unit:
a) Cool-down blasting after heat treatment
b) Extra inputs
c) Extra outputs
2.1.2
a)
b)
c)
d)
Options for position 2, action head:
Heat treatment station
Length controlling statio n (faulty springs rejected)
Length testing station with feedback
Load testing station (faulty springs rejected)
Saldovägen 9B
S-175 62 Järfälla Sweden
Tel:+46(0)8/795 27 30
Fax:+46(0)8/761 08 03
4 off 21
35107201
3 UNPACKING and INSTALLATION
♦ Connect air pressure: min. 5.5 bar–max. 7 bar
♦ Connect electrical power feed to system.
3.1
Interface for Spring Coiling Machine
ORBIT is started with an external signal from the line. ORBIT signals the coiling machine to
produce one spring and deliver it to the ORBIT.
The coiling machine is then set to the ready mode and awaits new signals from ORBIT (the
line).
Saldovägen 9B
S-175 62 Järfälla Sweden
Tel:+46(0)8/795 27 30
Fax:+46(0)8/761 08 03
5 off 21
35107201
4 SAFETY
To fulfill the safety requirements of the European directive 89/392/EEC and OSHA, these
machines are equipped with protective safety hoods and emergency stop buttons.
4.1
Emergency Stops and Safety Protection
4.1.1
Emergency Stop
If the emergency stop button is pressed or if the covering safety hoods are opened, the air
pressure is expelled and the servomotors stop.
4.1.2
Resetting After an Emergency Stop
The emergency stop button is reset by pulling it straight out. To reset the machine, press the
RESET button. Correct the problem in accordance with any error messages and then
acknowledge the error messages. Close the protective hoods and restart the machine.
It is possible to run the machine without the protective hoods if the key is turned to the
SERVICE position.
The machine will then be able to be run in the manual mode only (external signals are
blocked).
A machine that is delivered without safety equipment
many not be put into service until it has been built in to
system that fulfils the applicable regulations.
Saldovägen 9B
S-175 62 Järfälla Sweden
Tel:+46(0)8/795 27 30
Fax:+46(0)8/761 08 03
6 off 21
35107201
5 STARTING THE SYSTEM
5.1
Power up and prepare for production
Refer to section 1.1 in system manual for startup procedure.
Saldovägen 9B
S-175 62 Järfälla Sweden
Tel:+46(0)8/795 27 30
Fax:+46(0)8/761 08 03
7 off 21
35107201
6 ADJUSTMENTS
6.1
Adjustments by Trained Personnel
Because the adjustments below require a certain amount of skill and experience, we
recommend that they be performed by personnel who know the machine.
6.1.1
Password
To gain access to the menu ORBIT TEST, the correct password mus t be entered. After
entering the 4-digit password, press ENTER to open the ORBIT TEST menu.
The menu for entering the four-digit password.
Adjustments on ORBIT are made when the system is not in production.
Turn the key to the SERVICE position.
6.2 ORBIT—Related menus
LOAD CALIBRATION
CALIBRATION TEST (describes procedures for calibration)
LOAD SETUP
DIAMETER TEST
Saldovägen 9B
S-175 62 Järfälla Sweden
Tel:+46(0)8/795 27 30
Fax:+46(0)8/761 08 03
8 off 21
35107201
6.2.1
ORBIT TEST
The ORBIT TEST menu is used to adjust the load and length control, and for setting the
compression to OFF or ON. This mode permits manual operation of up and down movements
by the ORBIT head and indexing of the revolver.
Accessing this menu puts machine in cycle off mode.
Key must be in SERV position to enable use of some functions.
NOTE: After having returned to the menu MAIN MENU from ORBIT TEST and pressing
the button F1 CYCLE ON, ORBIT resets itself by emptying all of the revolver test sockets of
springs through the outlet for faulty springs. The revolver is then filled until two approved
springs are in the delivery position.
6.2.2 Heater info
HEATER
F3: Sets current for the heater.
Saldovägen 9B
S-175 62 Järfälla Sweden
Tel:+46(0)8/795 27 30
Fax:+46(0)8/761 08 03
9 off 21
35107201
6.2.3 Load info
LOAD
CURRENT VALUE: Actual load on load.
6.2.4 Status indicators
6.2.5 Function buttons in Orbit test menu
F1: Makes one test spring.
F2: Moves Orbit nest one position.
F3: Sets current for the heater.
F4:
F5:
F6:
F8: Select menu.
F9:
F10: Slides Orbit head up/down.
F11:.Heats spring in nest, if Orbit head is down.
F13: Opens diatest for spring eject.
F14: Resets load value.
F15: Eject spring in diatest.
F16: Resets alarms if present.
Saldovägen 9B
S-175 62 Järfälla Sweden
Tel:+46(0)8/795 27 30
Fax:+46(0)8/761 08 03
10 off 21
35107201
7 LOAD CALIBRATION
Choose the menu LOAD CALIBRATION.
When calibrating the load cell, the revolver shall be removed from ORBIT.
Removing the ORBIT revolver: Unscrew the revolver's center screw, lift up the lock washer
that is under the center screw and pull the revolver out from the side.
7.1
Check of Load Cell Installation
Check that the load cell is correctly installed and that it does not touch the hole in which it is
mounted. Check, using shims of about 0.1 mm, that there is space between the detector and
the hole in the plate. Check that no debris or other foreign matter has fallen into the space
between the load cell and the hole. If necessary, remove the detector and clean the hole.
Figure 1. Amplifier
Switches
Ampifier board
Load cell
P1
Saldovägen 9B
S-175 62 Järfälla Sweden
Tel:+46(0)8/795 27 30
Fax:+46(0)8/761 08 03
P2
11 off 21
35107201
7.2
LOAD CALIBRATION
LOAD CALIBRATION
To calibrate the load cell, two known weights are required. The heaviest should be 30% more
than the spring load to be tested. The lighter weight should weigh half as much as the heavier
weight.
During calibration, the load tester is adjusted for no- load and two known loads. If you choose
a heavier load of about 250 grams, the lighter load should be half as much, meaning 100-150
grams.
7.2.1
Calibration of Load Cell.
Calibration begins with the load cell unloaded. Check that the signal from the load cell has the
correct amplification at zero- load. The signal shall be about 10% and can be read on the scale
in the menu window. Any necessary adjustments to 10% are made with the potentiometer P2.
Sensitivity is adjusted with the potentiometer P1 on the amplifier panel (see Figure 1).
Press F4 and enter the value "0" grams.
Store the zero- load by pressing F5.
Saldovägen 9B
S-175 62 Järfälla Sweden
Tel:+46(0)8/795 27 30
Fax:+46(0)8/761 08 03
12 off 21
35107201
Place the heavier load (~250 grams) on the load cell.
Press F6 and enter the known value of the heavier load.
Store the heavier load by pressing F7.
When calibrating with the maximum load, you should try to attain as large a load signal as
possible, although not over 80%, at maximum load plus the tolerance. To make a rough
adjustment of the signal, use the switches (see Figure 1) on the amplifier panel. The lower the
number of the switch, the higher load signal attained for a given load. NOTE: If a switch
position is changed, zero- load calibration must be repeated. (See Section 7.2)
Check the function by removing the load; the scale should show 0 or very close to 0. Place the
weight on the load cell again. The indicated value should be close to the actual load value.
Remove the heavier load, place the lighter load (100-150 grams) on the load cell and check
that the display shows the correct value. (If an incorrect value is shown, check that the load
cell is not touching the plate on which the load cell is mounted.)
Calibration of load cell is now complete.
The load cell values are shown in the info box diagram both as percentages of the maximum
value and in grams.
F1 resets load cell.
Saldovägen 9B
S-175 62 Järfälla Sweden
Tel:+46(0)8/795 27 30
Fax:+46(0)8/761 08 03
13 off 21
35107201
7.3
LOAD CELL CALIBRATION INFORMATION
Saldovägen 9B
S-175 62 Järfälla Sweden
Tel:+46(0)8/795 27 30
Fax:+46(0)8/761 08 03
14 off 21
35107201
7.4
LOAD SETUP
7.4.1
Load info
CURRENT LOAD: Actual load on load cell.
F9 NOMINAL WEIGHT: Desired spring force for spring.
F10 TOLERANCE +: Maximum force tolerance for spring, force outside this value rejects
measured spring.
F11 TOLERANCE -: Minimum force tolerance for spring, force outside this value rejects
measured spring.
F12 ZERO LOAD: Tares load cell if pressed with a spring in position over load cell.
Saldovägen 9B
S-175 62 Järfälla Sweden
Tel:+46(0)8/795 27 30
Fax:+46(0)8/761 08 03
15 off 21
35107201
7.4.2
Function buttons in Load setup menu
F8: Select menu
F9: Load 1 nominal weight
F10: Load 1 +tolerance
F11: Load 1 –tolerance
F12: Tare or zero load
Saldovägen 9B
S-175 62 Järfälla Sweden
Tel:+46(0)8/795 27 30
Fax:+46(0)8/761 08 03
16 off 21
35107201
8 LENGTH CONTROL
8.1 Automatic offset information
ACTUAL SPRING: Spring configuration selected in SPRING CONFIG menu.
PITCH ADJUSTED: Offset position of pitch tool when coiling spring in, adjusted by
feedback from length control.
Saldovägen 9B
S-175 62 Järfälla Sweden
Tel:+46(0)8/795 27 30
Fax:+46(0)8/761 08 03
17 off 21
35107201
8.2
CALIBRATION Length Control and LOAD Test
Figure 8. ORBIT with step gauge.
Remove the revolver; see Chapter 7. Choose the menu ORBIT TEST.
Run the ORBIT slide down, button F10.
Using block gauges or a step gauge, if supplied, adjust the positions of the micrometer screws.
Saldovägen 9B
S-175 62 Järfälla Sweden
Tel:+46(0)8/795 27 30
Fax:+46(0)8/761 08 03
18 off 21
35107201
9 TROUBLESHOOTING
9.1
Error Messages
If problems arise, the system stops the machine and an error message is shown on the control
panel screen. After the problem has been corrected, the error message is acknowledged by
pressing the F16 button.
Possible cause is displayed when alarm occurs.
9.1.1
9.1.2
Spring is too short.
This message is displayed when five
a) Check that the spring length is
consecutive springs do not reach the lower
correct.
of the two micrometers.
b) Check the electrode distance.
c) Check that the electrodes are clean.
d) Check the electrical system.
Spring is too long.
This message is displayed when five
a) Check that the spring length is
consecutive springs reach the upper of the
correct.
two micrometers.
b) Check the electrode distance.
c) Check that the electrodes are clean.
d) Check the electrical system.
Saldovägen 9B
S-175 62 Järfälla Sweden
Tel:+46(0)8/795 27 30
Fax:+46(0)8/761 08 03
19 off 21
35107201
9.1.3
9.1.4
The ORBIT revolver does not stop at the correct position.
The ORBIT revolver does not stop at its
Check the sensor-distance at the sensor
positions.
for the revolver's position indication.
Spring coiling machine is not ready.
This message indicates that no springs
The sensor does not detect the springs.
have passed through the ring sensor within The sensitivity of the sensor can be
three seconds of send ing the start signal.
adjusted with a small screwdriver.
No springs are delivered. Check the
spring coiler and spring- feed tube.
Saldovägen 9B
S-175 62 Järfälla Sweden
Tel:+46(0)8/795 27 30
Fax:+46(0)8/761 08 03
20 off 21
35107201
10 MAINTENANCE
10.1
The pneumatic system:
The system requires no lubrication.
10.2
Electro-mechanical system
Check and clean the electrodes every 400 hours.
Check that the electrodes and air cylinders are securely mounted every 400 hours.
Saldovägen 9B
S-175 62 Järfälla Sweden
Tel:+46(0)8/795 27 30
Fax:+46(0)8/761 08 03
21 off 21
35107201