1
12165578 A1
2012-01
EN
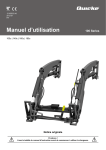
Operator’s Manual
100 Series
100c | 140c | 160c | 180c
Original instructions
Caution!
Read through the entire instruction manual before you begin to use the loader.
x
66476
3
Content
CONTENT
1 PREFACE.................................................. 3
1.1 General information.......................................... 3
1.2 Identification...................................................... 3
1.2.1 Model and serial number................................ 3
1.3 Alignment reference..........................................4
2 DESCRIPTION.......................................... 5
2.1 Definitions.......................................................... 5
2.1.1 Model - definitions...........................................5
2.1.2 Third function (Only applicable to models
160c-180c)............................................................... 5
2.1.3 ErgoDrive........................................................ 5
2.1.4 Position indicator (Only applicable to models
160c-180c)............................................................... 5
2.1.5 Control valve................................................... 5
2.1.6 Tool carrier (Only applicable to models
160c-180c)............................................................... 5
2.1.7 Hose kit........................................................... 5
2.1.8 SoftDrive (Only applicable to models
140c-180c)............................................................... 5
2.1.9 Parallel linkage kit - optional (Only applicable
to models 160c-180c).............................................. 6
2.1.10 Pin-on bucket (Only applicable to models
100c-140c)............................................................... 6
2.2 Tool carrier (Only applicable to models
160c-180c)................................................................ 6
3 SAFETY INSTRUCTIONS.........................7
3.1 General information.......................................... 7
3.1.1 Guards.............................................................7
3.1.2 Warning decals............................................... 7
3.2 Explanation of warning levels..........................7
3.3 Explanation of symbols.................................... 8
3.3.1 Responsibility.................................................. 8
3.4 Installing the loader.......................................... 9
3.4.1 Joystick operation........................................... 9
3.5 Protection equipment........................................9
3.5.1 Roll Over Protective Structure (ROPS)......... 10
3.5.2 Counterweight and tread width..................... 10
3.6 Operation.......................................................... 11
3.6.1 Operator's position........................................ 11
3.6.2 Workplace..................................................... 11
3.6.3 Load stability................................................. 13
3.7 Risk factors during work................................ 15
3.7.1 During transport............................................ 15
3.7.2 Spare parts................................................... 16
3.8 Position of warning decals.............................17
4.3.3 Check list...................................................... 21
4.4 Disconnecting the loader............................... 21
4.5 Coupling the loader.........................................22
4.6 Tractor/loader hydraulic controls.................. 24
4.7 Operation of the loader...................................24
4.7.1 Directly-operated control valve..................... 25
4.7.2 ErgoDrive Cable Operated............................ 25
4.7.3 Loader with parallel linkage (optional).......... 25
4.7.4 Loader without mechanical self-levelling.......25
4.7.5 Directly-operated control valve..................... 25
4.7.6 Operation of the loader................................. 26
4.7.7 ErgoDrive Cable Operated............................ 27
4.8 SoftDrive (optional) (Not applicable to model
100c)........................................................................29
4.8.1 Description.................................................... 29
4.9 Working with the loader..................................29
4.9.1 Counterweight and tread width..................... 30
4.9.2 Load stability................................................. 31
4.10 Coupling and uncoupling tools....................33
4.10.1 Disconnecting the tool, Euro 8 tool carrier
(Only applicable to models 160c-180c)................. 33
4.10.2 Connecting the tool, Euro 8 tool carrier (Only
applicable to models 160c-180c)........................... 35
5 LUBRICATION AND
MAINTENANCE......................................... 37
5.1 Lubrication points........................................... 37
5.2 Storage............................................................. 37
5.3 Hydraulic system.............................................37
5.3.1 Hoses and cylinders..................................... 37
5.3.2 Checking the hydraulic connections............. 38
5.3.3 Repairing the hydraulic cylinders.................. 38
6 TROUBLESHOOTING............................ 40
7 ACCESSORIES.......................................43
7.1 3rd service........................................................43
7.2 Boom suspension, SoftDrive...........................43
7.3 Parallel linkage kit........................................... 43
8 SPECIFICATIONS................................... 44
9 WIRING DIAGRAM................................. 45
10 WARRANTY CONDITIONS.................. 46
EC Declaration of Conformity............................. 46
4 DRIVING INSTRUCTIONS......................18
18606
4.1 General information........................................ 18
4.1.1 Counterweight............................................... 18
4.1.2 Track............................................................. 18
4.1.3 Track............................................................. 19
4.1.4 Joystick operation......................................... 19
4.2 Tractor/loader hydraulic controls.................. 19
4.3 Installing the loader........................................ 20
4.3.1 Fitting the bucket (Not applicable to models
160c and 180c)...................................................... 20
4.3.2 Fitting the position indicator (Only applicable to
models 160c-180c)................................................ 21
1
2
18606
Content
Preface
1 PREFACE
1.1 General information
Warning!
Careless or incorrect use may result in serious
injury or fatality to the driver or others. Observe
the safety instructions.
This operator's manual describes the operation and
maintenance of a compact loader. The information in the
operator's manual was correct when this manual went to
press. Please visit your dealer if there is anything you do
not understand in the manual.
One operator's manual is supplied with every machine in
order to show the driver how it should be operated and
maintained. Read and use the information so that you can
use the machine in a safe manner, in combination with short
stoppages. This machine is designed with simple service in
mind, and it can be maintained with normal hand tools.
Read and study the text in the operator's manual thoroughly
before you begin to use the machine. If you are not an
experienced driver, study the operator's manual and ask an
experienced driver to explain things to you. Your dealer can
help you by teaching you about operation and suitable work
methods. Keep this operator's manual readily available,
preferably inside the tractor. Get a new operator's manual if
the old one is damaged or is misplaced.
Warning!
Read through the entire operator's manual
before you begin to use the product.
We reserve the right to introduce changes to the design and
specification, or improvements at any time, without prior
notice or commitment.
Important!The loader subframe is designed suit specific
models of tractors. Do not install a loader subframe on
another model of tractor without prior permission from the
manufacturer.
Fig.1 Read through the entire operator's manual before you
begin to use the product.
Installation and operation instructions for implements and
accessories are not included in this operator's manual. Use
the publications supplied with each implement.
1.2 Identification
1.2.1 Model and serial number
Each loader has a machine sign (A) with an identification
number. The sign is located on the inside of the left arm.
A
72074
Fig.2 Position of machine sign.
3
Preface
The sign specifies:
Product, type, date of manufacture, weight, reference and
serial number.
The type (1), serial number (2) and date of manufacture (3)
must always be quoted during service questions or when
spare parts are needed.
A. Type - model
B. Serial number
C. Date of manufacture
A
C
B
Fig.3 Machine sign.
Cylinders, valves, control cables and hoses are also
equipped with machine signs or punched/printed order
numbers.
Fig.4 Marking of components, e.g., cylinder.
When ordering replacement control cables, please specify
the control cable length (L) and make of control valve.
L
Fig.5 Indicate length when ordering control cable.
1.3 Alignment reference
Throughout this operator's manual, references to the
right and left are seen from the operator's seat in forward
direction.
4
72074
Note.Some illustrations in this operator's manual may show
a different model of tractor or loader, compared with your
loader. The same information applies to your equipment
unless otherwise specified, however.
Description
2 DESCRIPTION
2.1 Definitions
2.1.1 Model - definitions
Model
Skidsteer or
Euro tool carrier
Position indicator
Pin-on bucket
100c
X
140c
X
Parallel linkage
kit (optional)
Third function
(optional)
160c
X
X
X
X
180c
X
X
X
X
2.1.2 Third function (Only applicable to
models 160c-180c)
Optional hydraulic function for operating the implement's
hydraulics.
The electrical diverter valve is fitted to the front part of
the loader, designed for implements which have hydraulic
functions.
2.1.3 ErgoDrive
The ErgoDrive system is composed of a control valve and
mechanical joystick as well as hydraulic connections and
control cables for specified tractor models.
2.1.4 Position indicator (Only applicable
to models 160c-180c)
Device to indicate the angular position of the implement.
2.1.5 Control valve
Valve intended for controlling the operation of the loader.
2.1.6 Tool carrier (Only applicable to
models 160c-180c)
Type 8 = Euro in compliance with ISO 23206.
SSL = Skid Steer Loader Style
2.1.7 Hose kit
Hoses and hydraulic components for connecting the loader
to the tractor's original valve.
2.1.8 SoftDrive (Only applicable to models
140c-180c)
78459
Boom suspension, improves driver comfort and reduces
stress on the tractor and loader when driving in rough
surfaces.
5
Description
2.1.9 Parallel linkage kit - optional (Only
applicable to models 160c-180c)
Enables the tool to maintain the same angle during the
entire lifting and lowering movement.
2.1.10 Pin-on bucket (Only applicable to
models 100c-140c)
Directly connect the tool to the loader using the four
locking pins.
2.2 Tool carrier (Only applicable to
models 160c-180c)
The loader can be equipped with two different types of tool
carriers. Euro 8 or SSL (skid steer loader). Please contact
your dealer to ask about suitable options for your loader.
Important!Incorrectly designed tool carriers can damage
the loader. Do not fit any implement without first checking
with the manufacturer.
Use only implements adapted to the loader and suited for
the work at hand.
X
Fig.6 The loader can be equipped with different tool carriers.
Fig.7 Implement hooks SSL (skid steer loader) (21).
6
78459
Fig.8 EURO (8) implement hooks per ISO 23206.
Safety instructions
3 SAFETY INSTRUCTIONS
3.1 General information
Driver safety is one of the most important matters when
a new loader is designed. The designer builds in as many
safety functions as possible. However, several accidents
occur every year which could have been avoided by a few
seconds of reflection and more careful operation of the
machine.
Avoid personal injury. Read the following personal safety
instructions and insist that everybody who works with you,
or for you, also complies with the instructions.
Only use implements which have been approved by the
manufacturer for use with the loader.
3.1.1 Guards
This operator's manual contains a number of illustrations
which show guards removed for better visibility. Never
use the machine with guards removed. If a guard has been
removed for service or repairs, re-install the guard before
the machine is taken back into service.
3.1.2 Warning decals
Warning decals are installed at various places on the loader
and the implements. Localise, read and find out what the
decals mean before the loader and the implements are used.
See section 3.8 Position of warning decals.
Do not cover or remove any of the warning decals. If a
warning decal is missing or illegible, replace it with a new
decal. New warning decals are available from your dealer.
Fig.9 Locate, read and find out what the decals mean before
the loader and implement are used.
3.2 Explanation of warning levels
When you see the safety alert symbol and the signal word
on decals or in the operator's manual, the instructions
MUST be followed since they are related to your own
personal safety.
Warning!
Means that an accident could occur if the
instruction is not followed. The accident might
lead to serious personal injury or fatality.
Caution!
Means that an accident could occur if the
instruction is not followed. An accident could
lead to personal injury.
Fig.10 Safety alert symbol.
72325
The following texts and instructions do not refer to personal
safety, but are used consistently in the operator's manual to
provide tips about operation or service of the machine.
7
Safety instructions
Important!Means that an accident could occur if the
instruction is not followed. The accident might lead to
damage to the property or to the process, or personal injury.
Note.Refers to extra information which could facilitate the
understanding or implementation of a certain task.
3.3 Explanation of symbols
A Operator's manual. Read the operator's manual — it contains
important information for your safety.
B Safety symbol. Information adjacent to this symbol refers to
your personal safety and must be observed.
C Implement lock. Verify that coupled implement is secured
correctly and locked in place.
D Risk of crushing. Never stand between the front of the
tractor and the cross-tube on the loader.
E Risk of falling. Do not use the loader to lift or transport
people.
F Attention. Information adjacent to this symbol refers to your
personal safety and refers to the section in the instruction
manual.
3.3.1 Responsibility
Caution!
Always store this operator's manual as well as the
tractor's own operator's manual in the tractor.
•
•
8
If there is no operator's manual included with the
tractor then obtain one from the dealer before fitting
and using the loader.
Read through all material carefully and learn how to
use the equipment in a safe and correct manner.
DO NOT ALLOW people who are not trained or
otherwise qualified to drive the machine.
Fig.11 Always store this operator's manual as well as the
tractor's own operator's manual in the tractor.
72325
•
Safety instructions
3.4 Installing the loader
Warning!
The loader must not be connected in series with
any of the tractor's functions. Working with the
loader requires the operator's full attention.
Fig.12 The loader must not be connected in series with any of
the tractor's functions.
Caution!
The tractor and loader use fluids under high
pressure when working. Check all components
and keep them in good condition.
Make sure that no hydraulic components,
especially hoses, are damaged in contact with
moving components.
Fig.13 NEVER use fingers or hands for leakage detection.
3.4.1 Joystick operation
Warning!
The loader must not be operated with a
programmable joystick or other equipment that
enables automatic loader movements.
If the loader is connected to a tractor valve with a
programmable joystick, see the tractor's user manual for
information on how the programmable function can be
inactivated.
Fig.14 The loader must not be operated with a programmable
joystick or other equipment that enables automatic loader
movements.
3.5 Protection equipment
Warning!
If the tractor is equipped with a seatbelt, it must
be used and be correctly adjusted during work.
Change damaged seat belts before the machine is
used.
72325
Fig.15 Wear the seat belt when working.
9
Safety instructions
3.5.1 Roll Over Protective Structure
(ROPS)
The tractor must be equipped with Roll Over Protective
Structure (ROPS) - frame or cab.
Warning!
Only use a loader on a tractor equipped with
ROPS. If possible, use the tractor and loader
with ROPS in the upright and locked position
and with the safety belt fastened and correctly
adjusted. When driving in areas with limited
height clearance and ROPS lowered, never
use the safety belt. ALWAYS reset ROPS to
the upright and locked position as soon as
circumstances allow.
Fig.16 Rollover risk - wear the seatbelt.
3.5.2 Counterweight and tread width
Caution!
Check that the machine has ballast
(counterweight) at the rear to stabilise
the machine's load-carrying ability. The
counterweight is essential for maintaining control
of the machine.
Refer to section 4 Driving instructions in the operator's
manual for information on the counterweight and tread
width. Also refer to the tractor operator's manual for further
information.
Important!Incorrectly designed implements can damage
the loader. For this reason, do not install third party
implements without making sure that it has been approved
by the loader manufacturer.
3.5.2.1 Before work
10
Fig.17 Familiarise yourself with the working area before
starting. Maintain a safe distance from electrical cables and
other obstructions.
72325
Familiarise yourself with the working area and terrain.
ALWAYS inspect the site before starting work. Look out for
holes in the ground, stones and other hidden dangers.
• Do NOT drive a machine which is damaged or lacks
any component. Make sure that the recommended
maintenance work has been done before the machine is
used.
• Check all controls regularly and adjust as necessary.
Ensure that the tractor's brakes are adjusted to pull
evenly.
• Check all screws and nuts regularly for tightening,
especially those that fix the tractor wheels. See section
5 Lubrication and maintenance for information about
tightening torques.
• Ensure that the loader is correctly mounted to the
tractor, and that all pins are secured.
• Change worn components before the machine is used.
Safety instructions
3.6 Operation
3.6.1 Operator's position
Caution!
Only operate the machine when sitting in the
driver's seat.
Fig.18 Only operate the machine when sitting in the driver's
seat.
•
•
•
Drive carefully and think about safety.
Always leave the brake pedals locked to each other.
NEVER use parted brakes with a loader mounted to
avoid the risk of losing control of the tractor and/or the
tractor overturning.
Always adjust the speed to the current conditions.
Never drive so fast that you cannot stop quickly in an
emergency situation.
Fig.19 Always leave the brake pedals locked to each other.
3.6.2 Workplace
Always check the machine's surroundings and ensure
that all individuals, especially children, and animals have
moved away before starting or driving the machine.
You may not hear any shouting to attract your attention
from individuals on the outside when you are sitting in the
cab with the door closed.
Fig.20 Before starting, make sure that no individuals are within
the vicinity of the machine.
Make sure that the bucket or other implement is correctly
installed in the tool carrier and that the pins are in the
locked position. Press the front end of the implement
against the ground to make sure that the implement is
properly secured.
72325
Fig.21 Make sure that the implement is secured by pressing its
front end against the ground.
11
Safety instructions
Familiarise yourself with the working area and terrain. Pay
attention to vertical clearance and limitations that arise due
to the increased reach.
Fig.22 Familiarise yourself with the working area before
starting. Maintain a safe distance from electrical cables and
other obstructions.
Warning!
Do NOT use the loader or the bucket as a
working platform.
Fig.23 Do NOT use the loader or the bucket as a working
platform.
Warning!
Do NOT use the loader to lift or transport people.
Fig.24 Do NOT use the loader to lift or transport people.
12
72325
With standard fittings, the loader is not designed for lifting
that requires one person to be in the vicinity of the loader.
For this type of handling, the loader must be equipped with
a safety device that prevents the loader from falling down if
a hydraulic failure were to occur.
Contact your dealer for more information.
Safety instructions
Warning!
Do NOT stand, walk or work under a lifted
loader. Make sure that you keep people,
especially children and animals, away from the
working area.
•
•
Always keep an eye on your workplace.
Never carry out work with an implement that requires
another person to be in the vicinity of the loader, e.g.
handling large sacks or pallets.
Fig.25 Do NOT stand, walk or work under a lifted loader.
3.6.3 Load stability
Warning!
Always look at the implement. Objects can fall or
roll backwards onto the driver when the loader is
raised.
Only lift loads which can be contained in, and are
intended for, the specific implement.
Some implements should be equipped with a
collapse protector.
Fig.26 Pay attention to the implement, objects may fall off.
Warning!
If the tractor is only equipped with Roll Over
Protective Structure (ROPS), and does not have
a Falling Objects Protective Structure (FOPS),
there is only limited protection against falling
loads. The driver risks injury if the load falls
when the loader is operated at height.
FOPS is not designed to protect against all falling
loads. It is therefore critical to use an implement
that prevents the load from falling.
Exercise caution when working with raised loads.
The tractor should not be operated on public
roads with a load in the implement.
•
Only use implements that are approved for the relevant
application.
•
Make sure that the load is positioned securely in the
implement. In terms of loose material, the implement
must not be overfilled, and for solid material, the load
must not stick up above the rear of the implement.
72325
Fig.27 Only lift loads which can be contained in, and are
intended for, the specific implement.
13
Safety instructions
•
Adjust the tilt angle of the implement when the load is
raised so that the load is not aimed at the driver
Fig.28 Exercise caution when working with raised loads.
Warning!
Reduce speed before cornering to avoid
overturning the machine.
Avoid sudden turns when driving down slopes.
•
•
Always leave the engine in gear to obtain engine
braking when driving downhill. Do not allow the
tractor to roll freely. Use the same gear when driving
downhill as when driving uphill.
Lower the loader as far as possible when moving. Keep
in mind that the higher you lift the loader, the higher
the centre of gravity, resulting in increased risk of the
tractor overturning.
Fig.29 Lower the load and reduce the speed when cornering.
3.6.3.1 Machine stability
Warning!
Do not work on or near steep slopes.
The tractor must always be kept a distance from
the edge that is equal to or greater than the
height of the bank or ditch.
•
•
Drive straight up or down slopes (not horizontally).
Avoid braking sharply or driving away at speed. Lower
the loader as far as possible.
Drive the tractor forwards up slopes with an empty
bucket. Fill the bucket and then reverse slowly down
the slope.
Fig.30 Keep at a distance when working near slopes.
Warning!
Before you leave the operator's seat:
1.
2.
3.
4.
5.
6.
Lower the loader and implement to the ground.
Apply the handbrake securely.
Move the gear lever to the neutral or park position.
Shut the engine off.
Remove the ignition key.
Move the control handle through all positions, then
return the control handle to the centre position in order
to unload the hydraulic pressure.
14
72325
Fig.31 Lower the loader and remove the ignition key.
Safety instructions
Warning!
Lock the joystick in neutral to prevent
inadvertent operation of the loader.
Fig.32 Lock the joystick in the neutral position.
Warning!
Never stand between the front of the tractor and
the loader's cross tube.
Fig.33 Never stand between the front of the tractor and the
loader's cross tube.
3.7 Risk factors during work
3.7.1 During transport
Caution!
When the machine is used for carrying or
transporting loads on public roads, by day or
at night, the warning signs may not be visible.
When this occurs, make sure that extra warning
material is used.
When transporting bulky load on public roads, make sure
that SMV-emblem, lights and reflectors are visible and use
extra warning devices if needed.
When driving either with or without a load, always lower
the loader as far as possible to give maximum visibility and
allow others to see you at all times.
• Remove or tilt up the implement to minimise the risk of
damage in the event of collision.
• Leave a margin for the vehicle's extra length and
weight when cornering, braking etc.
• Make sure that lamps and reflectors are visible during
road transport and are not obscured by the implement.
72325
Warning!
The loader may not be moved during transport.
When transporting on public roads, the control
lever must be locked in neutral.
Fig.34 During transport
Fig.35 Lower the loader to obtain maximal visibility.
15
Safety instructions
The loader may not be moved during transport. When
transporting on public roads, the control lever must be
locked in neutral.
3.7.1.1 During service
Do NOT do any service on the loader when the tractor
engine is running or hot, or when the machine is moving.
Fig.36 Before service, read the instructions and remove the
ignition key.
Caution!
Watch out for pressurised hydraulic fluid.
NEVER use fingers or hands for leakage
detection. The fluid which flows out from small
holes can be almost invisible. Use a piece of wood
or cardboard instead.
•
•
Undo hydraulic couplings slowly. Keep your hands and
fingers away from loosened couplings.
Get medical attention at once if fluid penetrates your
skin. Serious reactions and/or infections can rapidly
occur if the oil is not removed at once by surgical
operation.
Fig.37 NEVER use fingers or hands for leakage detection.
3.7.2 Spare parts
16
72325
When a spare part is needed for periodic maintenance or
service, use only genuine, original equipment spare parts to
restore your equipment to original specifications.
The manufacturer is not responsible for damages that may
occur due to installation of non-approved parts and/or
accessories.
Safety instructions
112
3
676
3.8 Position of warning decals
A
C
B
D
72325
A. Warning decal on loader beam, 2 pcs. (located on the
inside)
(Art. no. 1123676)
B. Warning decal on lower part of loader on right and left
side, 2 pcs.
(Art. no. 1123673)
C. Warning decal on bearing box, 1 pcs.
(Art. no. 1123674)
D. Warning decal on cross tube, 1 pcs. (not applicable to
Pin-on)
(Art. no. 11135077)
17
Driving instructions
4 DRIVING INSTRUCTIONS
4.1 General information
4.1.1 Counterweight
Caution!
Overturning and slipping risk. The tractor
can overturn or start slipping and thus cause
personal injury. Check that a counterweight is
fitted which is suitable for the implement and
working space.
The size of the counterweight varies with its placement and
the tractor's equipment (model, rim and tyre combination,
etc.). Check that the required counterweight is in place
so that the tractor does not overturn and loses traction
when the brakes are suddenly applied with a fully loaded
implement. Please read the tractor's operator's manual or
contact your dealer.
A 4-wheel drive tractor has the advantage of traction from
the front axle. Use the counterweight at the rear to maintain
the correct front/rear axle loading and avoid abnormally
large stresses on the front axle when the loader is used.
Recommended allocation of gross weight (with empty
implement) on the tractor's front and rear axles:
Tractor
Front axle
Back axle
4WD
40%
60%
4.1.2 Track
Caution!
Overturning risk. The tractor can overturn if its
track is too narrow. Increase to maximum track
for best stability.
A
18
B
Fig.38 Increase to maximum track for best stability.
78420
To increase stability, the tractor's track must be as wide as
possible. Maximum width (A) across front wheels.
Install the rear tyres and adjust the rear wheels to the
maximum recommended track (B).
Study the tractor's operator's manual for information about
recommended tyres, track and adjustment.
For tractors/loaders with a high centre of gravity or an
unusual configuration, a wider minimum track width may
be needed to achieve the same stability.
Driving instructions
4.1.3 Track
Caution!
Overturning risk. The tractor can overturn if its
track is too narrow. Increase to maximum track
for best stability.
The tractor's track must be as wide as possible for the
location in which it is used.
Minimum tread settings recommended provide static
stability on a side slope of 15 degrees with loader
positioned just off the ground.
Unless otherwise stated by the tractor manufacturer, the
minimum track width should be selected from the table.
For tractors/loaders with a high centre of gravity or an
unusual configuration, a wider minimum track width may
be needed to achieve the same stability.
A
0199-a
Fig.39 Track
TRACTOR MASS
(weight)
MINIMUM REAR TREAD
SETTING (A)
kg
pounds
mm
inches
Less than
2,250
Less than
4,960
1,575
62,.0
2,250–3,650
4,950–8,030
1,675
65.9
More than
3,650
More than
8,030
1,825
71.8
4.1.4 Joystick operation
Warning!
The loader must not be operated with a
programmable joystick or other equipment that
enables automatic loader movements.
If the loader is connected to a tractor valve with a
programmable joystick, see the tractor's user manual for
information on how the programmable function can be
inactivated.
Fig.40 The loader must not be operated with a programmable
joystick or other equipment that enables automatic loader
movements.
4.2 Tractor/loader hydraulic controls
The loader's hydraulic system can be connected to the
tractor hydraulic system in two ways.
Using option 1, the tractor hydraulic system is connected to
the loader control valve.
Option 2 involves using the tractor's mid-mounted
hydraulic valve to control the loader's movement.
The loader is equipped with a third hydraulic function (1).
If the rear part of the tool is more than 15cm above the
ground, there is the risk of the houses coming loose during
disconnection.
1
78420
Fig.41 Extra hydraulic function for implements.
19
Driving instructions
4.3 Installing the loader
Warning!
The loader must not be connected in series with
any of the tractor's functions. Working with the
loader requires the operator's full attention.
Caution!
Risk of crushing and jamming Air in hydraulic
hoses and cylinders can cause jerky, unexpected
movement. Use all controls carefully at low
engine speed.
Caution!
Risk of crushing and jamming Keep hands and
feet away from moving components. Do NOT use
your fingers to check components or to tend to
holes/pins — use a mandrel or a steel rod.
Fig.42 The loader must not be connected in series with any of
the tractor's functions.
Lift the loader up onto the base. Holes for attaching the
lifting hooks are found on the inside of the knee plates.
Note.Ensure that the loader's locking pins are removed from
the bearing box before fitting the subframe to the loader.
Fig.43 Hole for attachment of lift hooks.
Connect the hoses to the valve in accordance with the
marking.
1. Lifting cylinder, piston rod - yellow
2. Lifting cylinder, base - green
3. Bucket cylinder, base - blue
4. Bucket cylinder, piston rod - red
Before installation, depressurise the hydraulic system.
Warning!
The control valve must be connected to a oil
return. This oil return may never be pressureised
since that will damage the control valve.
18
18
Fig.44 Connect hoses to valve.
The valve's joystick control must be connected to the
valve so that the loader is lifted when the lever is moved
backwards.
4.3.1 Fitting the bucket (Not applicable to
models 160c and 180c)
Using the locking pins, fit the bucket when the loader is
fitted to the tractor. The locking pins must be placed in the
holes on the bucket as shown.
20
78420
Fig.45 Fitting the bucket (Not applicable to models 160c and
180c)
Driving instructions
4.3.2 Fitting the position indicator (Only
applicable to models 160c-180c)
The position indicator can be mounted on the left or right
tilt cylinder.
Set the implement in a horizontal position and adjust the
reference point (A) to indicator (B) on the indicator rod
(C). Make sure that the indicator rod runs freely in the
guides and adjust as needed. Incorrect installation can cause
damage to the indicator.
4.3.3 Check list
Fig.46 Install the position indicator on the tilt cylinder.
When the loader has been installed - check carefully
that everything works before it is taken into service. The
following points must always be checked. Mark them off
and make the adjustments where necessary.
1. Check that everything has been installed in accordance
with the installation instructions.
2. Check that the necessary counterweight is fitted with
regard to the implements and application area.
3. Check that all screws are tightened.
4. Check that the locking pins are secured. Test loader
operation.
5. Make sure that the front wheels clear the loader and
subframe there is full wheel lock and oscillation — if
this is not the case, oscillation stops or limitation of
steering lock must be installed.
6. Check that no oil leakage occurs.
7. Operate all loader functions several times to remove air
from the system.
8. Check the tractor oil level - top up as necessary.
9. Check that the lock pins engage when an implement is
connected.
10. Check that the loader does not have any visible defects.
4.4 Disconnecting the loader
Caution!
Risk of crushing and jamming
The loader may fall downwards.
Always fit the bucket to the loader before the
loader is disconnected from the tractor.
Park the tractor and the loader on flat, firm ground.
Tilt the implement forwards and lower the loader so that the
rear part of the implement is 10 - 15 cm above the ground.
78420
Caution!
If the rear section of the implement is more that
15 cm above the ground then there is risk that
hoses may become worn during uncoupling. 100
series
Fig.47 Tilt the implement forward.
21
Driving instructions
Fold the parking stands down to the ground. The parking
stands are installed in the front part of the loader.
Fix the stay in each parking stand.
Fig.48 Lower the parking stands.
Remove the securing pin from locking pin (E) and remove
locking pin (E) from the subframe on the left/right bearing
boxes.
During operation:
• Release the parking brake and remove foot from
accelerator pedal.
• Move the control handle to the lowering position, so
that the lifting cylinders are completely compressed.
E
Fig.49 Remove the locking pin.
Carefully fold the implement upwards. This will make the
rear of the loader lift, and come loose from the base.
• Stop the tractor and eliminate the oil pressure to the
loader cylinders using the control valve.
• Disconnect the hoses and install dust guards on the
quick release couplings.
• Reverse the tractor carefully until it is completely free
from the loader.
• Refit the locking pins and locking cotters on both sides.
Important!Make sure that you position the hoses so that
they do not catch on the tractor.
Fig.50 Carefully tilt the implement upwards.
4.5 Coupling the loader.
Caution!
Risk of crushing and jamming
Air in hydraulic hoses and cylinders can cause
erratic operation.
Run the engine at low speed and make slow
movements with the joystick to purge any air
from the hydraulic system.
22
78420
Caution!
Risk of crushing and jamming
Keep hands and feet away from moving
components. Do NOT use your fingers to check
the alignment of holes or pins — use a mandrel or
a steel rod.
Driving instructions
Caution!
Risk of crushing and jamming
If the loader valve is in a depressurised or float
position then sudden and unforeseen movements
may occur when the hydraulics are connected.
Important!Make sure that the hoses are positioned on the
loader so that they do not catch on the tractor. Ensure that
the locking pins are removed from the loader's bearing
boxes.
Drive the tractor forwards carefully until the subframe
upright slowly enters the bearing box.
Connect the hydraulics. If there is any difficulty in coupling
the quick release couplings, this will be because the oil
pressure has not been eliminated. Depressurise the system.
Important!Never use force on quick release couplings by
striking the valve ball. This may mean that it is damaged
in such a way that the coupling does not open when
compressed (the oil can only pass in one direction). Ensure
that none of the hoses are interchanged — follow markings
1-4.
Fig.51 The subframe upright enters the bearing box.
Tilt the implement downward in order to securely settle the
bearing box in the subframe upright.
Carefully raise the loader so that the radius at the front of
the bearing boxes meets the sleeve on the subframe.
Fig.52 Bearing box pin enters saddle in subframe upright.
Lift the loader, install the locking cotter and the locking pin
(E), one on each side.
E
78420
Fig.53 Fit locking pin.
23
Driving instructions
Fold the parking stands in to the storage position.
Fig.54 Fold the parking stands in to the storage position.
4.6 Tractor/loader hydraulic controls
The loader's hydraulic system can be connected to the
tractor hydraulic system in two ways.
Using alternative 1, the tractor hydraulic system is
connected to the loader control valve. With this alternative,
there are the following variants:
• Directly-operated control valve
• ErgoDrive
Option 2 involves using the tractor's mid-mounted
hydraulic valve to control the loader's movement.
The loader can be equipped with a third (1) hydraulic
function for the implement.
1
Fig.55 Extra hydraulic function for implements.
4.7 Operation of the loader
Caution!
Only manoeuvre the machine from the driver’s
seat.
24
78420
Warning!
The loader may not be moved during transport.
When transporting on public roads, the control
lever must be locked in neutral.
Driving instructions
Warning!
If the tractor is equipped with a seatbelt, it must
be used and be correctly adjusted during work.
Change damaged seat belts before the machine is
used.
4.7.1 Directly-operated control valve
If the joystick is released when the float position for
lowering is selected, the function continues to be active. In
all other positions, if the joystick is released, it returns to
the neutral position and the functions are deactivated.
4.7.2 ErgoDrive Cable Operated
Fig.56 Wear the seat belt when working.
If the joystick is released when the float position for
lowering is selected, the function continues to be active. In
all other positions, if the joystick is released, it returns to
the neutral position and the functions are deactivated.
4.7.3 Loader with parallel linkage
(optional)
The loaders may be equipped with mechanical self-leveling.
Parallel links keep the implement in the same angular
position during the entire lifting/lowering movement.
4.7.4 Loader without mechanical selflevelling
The implement changes its angle in relation to the ground
during the entire lift/lowering movement. See section 8
Specifications.
4.7.5 Directly-operated control valve
Control valve, mechanically operated.
The control valve is equipped with a control lever of
joystick type, located by the operator's seat. The lever is
directly connected to the hydraulic control valve.
78420
Fig.57 Control valve, mechanically operated.
25
Driving instructions
The control valve can be locked in neutral position to stop
unintentional loader movements. To lock the control lever,
pull out the lock pin to the locked position. Check that the
control lever is locked by trying to move it in all directions.
If the lever does not lock, contact your dealer.
90°
Fig.58 Control lever.
4.7.6 Operation of the loader
4.7.6.1 Raise/lower the loader
Move the lever backwards (1) to lift the loader.
Move the lever forwards (2) to lower the loader.
2
1
Fig.59 Raise/lower the loader.
4.7.6.2 Loader's float position
Caution!
The float position in combination with bucket
work or implement work may only be used at low
speeds.
3
Move the lever forwards into the float position (3) and
release the lever to lower the loader without any downward
force.
To cancel the float function, move the lever backwards
slightly (out of the float position) and release it.
26
78420
Fig.60 Float position lowering.
Driving instructions
4.7.6.3 Emptying/opening up the implement
Right-hand fitting: Move the lever to the left (4) to open up
the attachment.
Move the lever to the right (5) to angle the implement
downward.
4
5
Fig.61 Empty/angle implement upwards.
4.7.6.4 Third hydraulic function (optional)
The third hydraulic function is controlled with a switch (A)
which can be fitted to the front of the joystick control.
When the switch for the third hydraulic function is
released, the joystick immediately returns to controlling the
implement.
A
Fig.62 Switch for third hydraulic function.
4.7.7 ErgoDrive Cable Operated
Control valve, mechanically operated.
78420
Fig.63 Mechanical control valve
27
Driving instructions
The control valve is equipped with a control lever of
joystick type, located by the operator's seat. The lever is
connected to the hydraulic control valve via two control
cables. The joystick can be locked in neutral to prevent
inadvertent operation of the loader.
Open
Lock
0136-b
Fig.64 Control lever of joystick type, ErgoDrive.
4.7.7.1 Operation of the loader
4.7.7.2 Raise/lower the loader
Move the lever backwards (1) to lift the loader.
Move the lever forwards (2) to lower the loader.
2
1
Fig.65 Raise/lower the loader.
4.7.7.3 Loader's float position
Caution!
The float position in combination with bucket
work or implement work may only be used at low
speeds.
3
Move the lever forwards into the float position (3) and
release the lever to lower the loader without any downward
force.
To cancel the float function, move the lever backwards
slightly (out of the float position) and release it.
Fig.66 Loader's float position.
4.7.7.4 Emptying/opening up the implement
Right-hand fitting: Move the lever to the left (4) to open up
the attachment.
Move the lever to the right (5) to angle the implement
downward.
4
5
28
78420
Fig.67 Empty/angle implement upwards.
Driving instructions
4.7.7.5 Third hydraulic function (optional)
The third hydraulic function is controlled with a switch
(A) on the front of the joystick control, combined with
movement of the joystick to the left or right.
When the switch for the third hydraulic function is
released, the joystick immediately returns to controlling the
implement.
A
0137-a
Fig.68 Switch for third hydraulic function.
4.8 SoftDrive (optional) (Not applicable
to model 100c)
SoftDrive can be engaged during most applications, but
can be disengaged using the shut-off valve (2) when careful
operation with accurate control of the loader is required.
Caution!
Risk of jamming.
Risk of crushing/pinching when you connect the
hydraulic system.
Lower the bucket to the ground, turn off engine
and remove the pressure in the hydraulic
system by moving the control lever to all control
positions before connecting or disconnecting the
system.
Open
Closed
1
2
Fig.69 Mechanical deactivation of boom suspension.
4.8.1 Description
This equipment damps the vertical movements of the loader
when driving on uneven ground.
Note.The accumulator (1) used in the SoftDrive system is
pre-charged and cannot be re-charged. Contact your dealer
for service.
Caution!
The accumulator (1) is pressurised. Repair,
maintenance and commissioning must only be
done by authorised personnel.
Warning!
Do not open the accumulator before the gas and
oil side is depressurised. The cylinder contains
nitrogen, which can cause a risk of suffocation.
No work may be done on the pressure vessel.
Welding, drilling or opening the tank by force is
not allowed.
4.9 Working with the loader
78420
Warning!
Risk of electric shock, crushing and jamming.
When driving with the loader lifted, make sure
that there is enough room between the loader and
power lines, barn roofs, etc.
29
Driving instructions
Caution!
Risk of crushing and jamming
People can be inside the working area.
Make sure that nobody is close to the tractor
when work starts. Only operate the tractor when
sitting in the intended place in the driver's seat.
Caution!
Risk of crushing and jamming
Lower the tool to the ground, lock the brakes and
shut the engine off before you climb off of the
tractor. Remove the ignition key if the machine is
left without supervision.
If you work with the loader on an uphill slope, drive
straight upwards, fill the bucket and reverse downhill.
Driving along the side of a slope can cause overturning.
Warning!
Do NOT use the loader or the bucket as a
working platform.
Fig.70 Do NOT use the loader or the bucket as a working
platform.
Warning!
Do NOT use the loader to lift or transport people.
DO NOT ALLOW people who are not trained or otherwise
qualified to drive the machine.
4.9.1 Counterweight and tread width
Caution!
Check that the machine has ballast
(counterweight) at the rear to stabilise
the machine's load-carrying ability. The
counterweight is essential for maintaining control
of the machine.
•
Fig.71 Do NOT use the loader to lift or transport people.
Move the tyres to the widest recommended setting to
increase stability.
Read section 4 Driving instructions in the operator's
manual for information about the counterweight and
track width. Also read the tractor operator's manual for
further information.
Important!Incorrectly designed implements can damage
the loader. For this reason, do not install third party
implements without making sure that it has been approved
by the loader manufacturer.
30
78420
•
Driving instructions
Make sure that the bucket or other implement is correctly
fastened on the tool carrier and that the pins are in the
locked position. Press the tip of the implement against the
ground (1) to make sure that the implement is firmly fixed.
0385
Fig.72 Make sure that the implement is secured by pressing its
front end against the ground.
Warning!
Do NOT stand, walk or work under a lifted
loader. Make sure that you keep people,
especially children and animals, away from the
working area.
Fig.73 Do NOT stand, walk or work under a lifted loader.
4.9.2 Load stability
Warning!
Always look at the implement. Objects can fall or
roll backwards onto the driver when the loader is
raised.
Only lift loads which can be contained in, and are
intended for, the specific implement.
Some implements should be equipped with a
collapse protector.
Fig.74 Pay attention to the implement, objects may fall off.
Warning!
If the tractor is only equipped with Roll Over
Protective Structure (ROPS), and does not have
a Falling Objects Protective Structure (FOPS),
there is only limited protection against falling
loads. The driver risks injury if the load falls
when the loader is operated at height.
FOPS is not designed to protect against all falling
loads. It is therefore critical to use an implement
that prevents the load from falling.
Exercise caution when working with raised loads.
The tractor should not be operated on public
roads with a load in the implement.
78420
•
Only use implements that are approved for the relevant
application.
31
Driving instructions
•
Make sure that the load is positioned securely in the
implement. In terms of loose material, the implement
must not be overfilled, and for solid material, the load
must not stick up above the rear of the implement.
Fig.75 Only lift loads which can be contained in, and are
intended for, the specific implement.
•
Adjust the tilt angle of the implement when the load is
raised so that the load is not aimed at the driver
Fig.76 Exercise caution when working with raised loads.
4.9.2.1 Machine stability
Warning!
Do not work on or near steep slopes.
The tractor must always be kept a distance from
the edge that is equal to or greater than the
height of the bank or ditch.
•
•
Drive straight up or down slopes (not horizontally).
Avoid braking sharply or driving away at speed. Lower
the loader as far as possible.
Drive the tractor forwards up slopes with an empty
bucket. Fill the bucket and then reverse slowly down
the slope.
Fig.77 Keep at a distance when working near slopes.
Warning!
Reduce speed before cornering to avoid
overturning the machine.
Avoid sudden turns when driving down slopes.
•
32
Always leave the engine in gear to obtain engine
braking when driving downhill. Do not allow the
tractor to roll freely. Use the same gear when driving
downhill as when driving uphill.
Lower the loader as far as possible when moving. Keep
in mind that the higher you lift the loader, the higher
the centre of gravity, resulting in increased risk of the
tractor overturning.
Fig.78 Lower the load and reduce the speed when cornering.
78420
•
Driving instructions
The most effective way to fill the bucket is to drive straight
into the mound with the bucket horizontal. Raise the
loader slightly once the bucket is forced into the mound, to
facilitate filling. Then angle the bucket backward to retain
the load in the bucket.
Note.Remove material from the top first when working in
deep material.
Fig.79 Drive straight in, lift the load and tilt the bucket
backwards.
Reverse away from the mound. Lower the bucket slowly.
Sudden stops when lowering the bucket quickly can
damage the loader's and/or tractor's hydraulic system.
Fig.80 Reverse, lower the loader slowly.
During grading work, angle the bucket downwards, so that
the cutting edge on the bucket comes into contact with the
ground, to avoid damage to the bottom of the bucket.
Important!To avoid damage to the loader, do not angle the
bucket back fully when grading. The bucket floor should
not be angled more than 45° from the ground.
Fig.81 Operating technique when grading
4.10 Coupling and uncoupling tools
4.10.1 Disconnecting the tool, Euro 8
tool carrier (Only applicable to models
160c-180c)
Raise the loader about 1 meter off the ground and position
the implement level to the ground.
Turn off the tractor engine and lock the loader control lever
in the neutral position.
Apply the parking brake.
0384
78420
Fig.82 Lift the load horizontal to the ground, turn off the
engine, lock control lever in neutral position.
33
Driving instructions
Move the locking lever to the disengaged position (position
1).
Note.It is easiest to move the locking lever to the open
position if the loader has been lifted by about 1 metre.
1
Caution!
Risk of jamming.
The lock lever is spring loaded in position 1.
Fig.83 Move the locking lever to the disengaged position
(position 1).
Lower the loader to the ground and continue lowering the
loader until the implement is disconnected from the loader's
tool carrier.
Reverse away from the implement.
0377
Fig.84 Lower the loader until the tool is loose.
If no implement is coupled to the tool carrier, the
mechanism should be put into the closed position, position
2.
To put the locking lever into the closed position, angle the
tool carrier up, or close the locking lever manually. Check
the locking.
2
34
78420
Fig.85 Locking lever in closed position, position 2.
Driving instructions
4.10.2 Connecting the tool, Euro 8
tool carrier (Only applicable to models
160c-180c)
Move the locking lever to the disengaged position (position
1).
It is easiest to move the locking lever to the open position if
the loader has been lifted by about 1 metre.
Caution!
Risk of jamming.
The lock lever is spring loaded in position 1.
1
Fig.86 Move the locking lever to the disengaged position
(position 1).
Angle up the tool carrier. Raise/lower the loader sufficiently
so that the tool carrier can be angled forwards to its end
position on the right/left side of the tool carrier, around
100mm under the hooks.
Carefully drive the tractor forwards and position the tool
carrier under the implement hooks. Insert the hooks by
raising the loader.
This coupling procedure must be tested in each case to
make sure that there is no interference, depending on the
combination of implement and accessory.
0382
Fig.87 Angle the tool carrier
The implement should follow the tool carrier movements
when it is angled upwards. If both the implement's tools
are not firmly fixed in the tool carrier, the tool must
be repositioned against the ground and the connection
procedure must be repeated.
0383
78420
Fig.88 Position the tool carrier under the implement hooks.
35
Driving instructions
Angle the implement up with the loader at a low height
(100mm) above the ground to ensure safe fixing of the
implement. Before beginning work, always inspect the tool
carrier's locking pins to ensure correct implement fitting.
Important!Read this before operating loader:
0373
Fig.89 Angle the implement up with the loader at a low height
to hook on the locking pins.
Warning!
Risk of crushing and jamming
Incorrectly locked implements can come loose.
Always check to ensure implement is locked in
position by forcing the front of the implement
against the ground and visually confirm that
the tool carrier locking pins are in the engaged
position.
0385
36
78420
Fig.90 Make sure that the implement is secured by pressing its
front end against the ground.
Lubrication and maintenance
5 LUBRICATION AND MAINTENANCE
Warning!
Never stand between the front of the tractor and
the loader's cross tube.
Fig.91 Never stand between the front of the tractor and the
loader's cross tube.
5.1 Lubrication points
Lubricate the following grease nipples with universal
grease every 10 operating hours.
Warning!
Risk of crushing and jamming
The loader may fall downwards.
Lower the loader to the ground before you start
greasing.
NA on 100c/140c
Grease nipples on every pivot pin on both sides of the
loader.
5.2 Storage
Apply a thin layer of grease on visible piston rods in order
to protect them.
NA on 100c/140c
Fig.92 Grease nipples on every pivot pin on both sides of the
loader.
5.3 Hydraulic system
Check the oil level in the tractor hydraulic oil tank
regularly, with the loader lowered to the ground. Use the oil
specified in the tractor's operator's manual.
5.3.1 Hoses and cylinders
Read this before checking the hydraulic system for leakage:
69638
Warning!
Pressurised oil.
Hydraulic oil at high pressure can be injected
into the body in the event of leakage and cause
serious injury, blindness or fatality. Leakage may
be invisible.
Use approved protective safety glasses and
protect the skin using strong leather gloves for
example. Use cardboard or wood for leakage
detection. If fluid has entered the skin then it
MUST be removed within a couple of hours by a
doctor who can treat this type of injury.
Fig.93 NEVER use fingers or hands for leakage detection.
37
Lubrication and maintenance
Check hoses and connections for wear and leakage
at regular intervals. Ensure that hoses have sufficient
clearance and do not scrape against other components.
Replace damaged hoses and tighten all connections.
The cylinders are double-acting. They must always be
maintained in good condition for optimal function. Leaks,
internal or external, affect performance and may be
dangerous.
This loader requires a hydraulic system that works at
high pressure. Only use spare parts approved by the
manufacturer.
5.3.2 Checking the hydraulic connections
Check that all hoses and adapters are tightened and that
they do not leak.
5.3.3 Repairing the hydraulic cylinders
The removal, repair and fitting of the hydraulic cylinders
require special tools to prevent damage to internal
components. We recommend you to have your cylinders
repaired by an authorised dealer.
Check that all screws are tightened to the specified torque,
first after 10 hours of operation and then every 50 hours of
operation thereafter.
38
Fig.94 NEVER use fingers or hands for leakage detection.
69638
5.3.3.1 Checking the subframe screw union
Lubrication and maintenance
5.3.3.2 Tightening torques - Screw union
Tighten all the screws on the loader and all fasteners, except
in the cases where the tightening torque is specified in the
assembly instructions.
The torques apply to clean, dry threads. Lubricated threads
may mean that the fastener is tightened too hard. Damaged
or dirty threads can cause torque values to be too low.
A torque amplifier may be needed when tightening screws
to high torque values.
Tightening torques should be checked immediately after
installation, and several times after a short period of use.
Incorrect tightening can damage the structure of the loader
and/or tractor.
69638
Grade 5 (Class 8.8) Screw
Grade 8 (Class 10.9) Screw
Diameter
Torque
Diameter
Torque
1 /4”
10 lb-ft (13.6 Nm)
1 /4”
11 lb-ft (14.9 Nm)
5/16”
20 lb-ft (27.1 Nm)
5/16”
24 lb-ft (32.5 Nm)
3/8”
35 lb-ft (47.5 Nm)
3/8”
44 lb-ft (59.7 Nm)
7/16”
55 lb-ft (75 Nm)
7/16”
71 lb-ft (96.3 Nm)
1/2”
85 lb-ft (100 Nm)
1/2”
114 lb-ft (154.6 Nm)
5/8”
170 lb-ft (230 Nm)
5/8”
222 lb-ft (301 Nm)
3/4”
300 lb-ft (405 Nm)
3/4”
325 lb-ft (440.6 Nm)
M8
27.1 Nm (20 lb-ft)
M8
32.5 Nm (24 lb-ft)
M10
54.2 Nm (40 lb-ft)
M10
63.7 Nm (47 lb-ft)
M12
94.9 Nm (70 lb-ft)
M12
108.4 Nm (80 lb-ft)
M14
119.3 Nm (88 lb-ft)
M14
176.3 Nm (130 lb-ft)
M16
189.8 Nm (140 lb-ft)
M16
271.2 Nm (200 lb-ft)
M20
385 Nm (284 lb-ft)
M20
542.3 Nm (400 lb-ft)
39
Troubleshooting
6 TROUBLESHOOTING
Faulty functioning of the loader is frequently caused by
factors not related to the loader:
• Check the oil level in the tractor's hydraulic tank. Top
up to the correct level.
• Make sure that the correct oil is used. Only use the oil
specified in the tractor's operator's manual. The wrong
oil can cause foaming, heating and internal leakage.
• Make sure that hoses and couplings are correctly
installed and connected to the tractor. Hydraulic
couplings must be fully inserted.
• Check the oil for contamination and moisture. Change
the oil and filter as necessary.
• Check hoses and couplings for leakage, abrasion and
twist.
• Low temperatures can cause slow movements or cause
the loader to function irregularly until the normal
working temperature is reached. Check whether the
oil is holding its normal working temperature before
testing the loader.
• When a hose kit is used, make sure that the tractor
valve has been adjusted for double action. Check that
the flow control has been set to the maximum value.
• Move the loader's cylinders to their end positions
several times to remove air from the hoses and
cylinders.
Most problems which occur with the loader are simple in
nature and can be easily rectified. Use the "Troubleshooting
table" on the following pages to help you localise and solve
problems.
Please contact your dealer for further assistance.
Problem
Possible cause
Action
Lifting and implement cylinders do not
function
Low hydraulic oil level.
Check and top up with hydraulic oil.
Hydraulic hoses connected incorrectly.
Check and connect the hoses correctly.
Hydraulic hoses to/from control valve
are “blocked”.
Check hoses for damage (kinks, twists,
etc.).).
Loader control valve or tractor's main
Contact your dealer.
reduction valve has got stuck in the open
position.
Low system pressure from pump.
Contact your dealer.
40
Hydraulic quick-release couplings not
fully inserted.
Check the connection. Change
coupling(s) if necessary.
Blocked hydraulic hose/pipe.
Look for damage to hose/pipe which
could block oil flow between cylinder
and control valve.
Piston unit damaged (does not seal).
Contact your dealer.
Blocked control valve.
Contact your dealer.
Damaged quick-release coupling.
Change quick-release coupling.
72053
Lift or implement cylinders not working. Break in control cables for control valve. Inspect. Change if necessary.
Troubleshooting
Problem
Possible cause
Action
Lift and/or implement cylinders working Hydraulic hoses connected incorrectly.
in the wrong direction compared to lever
deflection.
Control cables for single lever control
connected incorrectly.
Connect hydraulic hoses to correct
socket.
Air in hydraulic oil (generally shown by Low hydraulic oil level.
foaming).
Check and top up with hydraulic oil to
correct level.
Air leakage in hydraulic pump suction
side.
Contact your dealer.
Contact your dealer.
Foaming due to wrong type of hydraulic Read the tractor operator's manual and
oil being used.
top up using the recommended type of
hydraulic oil.
Slow or jerky lifting movement.
Low hydraulic oil level. Cold hydraulic
oil.
Check and top up with hydraulic oil. Let
the hydraulic oil warm up to working
temperature.
Engine speed too low (hydraulic pump
speed is then too low).
Increase engine speed to improve loader
performance.
Too heavy load in bucket. Material
weight exceeds loader's specified
capacity.
Reduce the load in the bucket.
Control valve cable system binds or is
damaged.
Contact your dealer.
Air in the hydraulic oil.
See “Air in the hydraulic oil”.
Hydraulic quick-release couplings not
fully inserted.
Check the couplings. Repair or change.
Restriction in hydraulic hose or pipe
(hoses/pipes have become twisted or
crushed).
Contact your dealer.
Lifting cylinder piston unit leaks.
Contact your dealer.
Pressure limiting valve working
irregularly or set too low.
Contact your dealer.
Internal leakage in control valve (bypass Contact your dealer.
flow in valve).
Noise from the system's pressure
limiting valve (squeaking)
72053
Insufficient lifting capacity.
Inadequate capacity in hydraulic pump.
See “Inadequate pump capacity”.
Cold hydraulic oil.
Let the hydraulic oil warm up to working
temperature.
Too heavy load in bucket. Material
weight exceeds loader's specified
capacity.
Reduce the load in the bucket.
Pressure limiting valve set lower than
specification.
Contact your dealer.
Restriction in hydraulic hose, pipe or
quick-release coupling.
Contact your dealer.
Engine speed too low.
Increase engine speed.
Too heavy load in bucket. Material
weight exceeds loader's specified
capacity.
Reduce load.
Pressure limiting valve set lower than
specification.
Contact your dealer.
Piston in lifting cylinders leaks.
Contact your dealer.
Internal leakage in control valve.
Contact your dealer.
41
Troubleshooting
Problem
Possible cause
Action
Damaged hydraulic pump.
Contact your dealer.
The load drops with the control valve's
spool into neutral position. Note:
Depending on the loader model, the
value that the loader is allowed to sink
by is between 0.5 and 1.5 mm, measured
at the piston rod.
Piston in lifting cylinders leaks.
Contact your dealer.
Internal leakage in control valve.
Contact your dealer.
Solenoid valve spool(s) do not return to
neutral position.
Control valve centring spring is
damaged.
Contact your dealer.
Control valve spool binds in its bore.
Contact your dealer.
Control lever or cable system binds.
Find the reason for binding and repair it.
Loose hydraulic unions.
Tighten loose connections.
Damaged hydraulic hoses, pipes,
couplings or O-rings in couplings.
Find the reason for the leakage and
change the damaged component.
Damaged O-ring in control valve.
Contact your dealer.
External hydraulic oil leakage.
Control valve or cable system binds and Contact your dealer.
prevents valve spool from returning to
centre position.
Piston rod seal in cylinder leaks.
Contact your dealer.
Cold hydraulic oil.
Let the hydraulic oil warm up to working
temperature. Increase engine speed.
Engine speed too low.
Increase engine speed.
Low hydraulic oil flow.
Please refer to the tractor operator's
manual for service recommendations.
Restriction in hydraulic hose.
Contact your dealer.
Fault in hydraulic pump.
Contact your dealer.
Lifting cylinder piston rods bent.
Abnormally high shock loading during
lowering movement.
Contact your dealer.
Bucket cylinder piston rods are bent
when bucket cylinders are extended.
Grading or excavation work with bucket Contact your dealer.
cylinders fully extended.
Inadequate pump capacity.
42
72053
Control valve spool or housing damaged Contact your dealer.
and/or worn.
Accessories
7 ACCESSORIES
Not all accessories fit all loaders. Please contact your dealer
for information on compatibility with your loader.
7.1 3rd service
3rd service (1). The electric diverter is used for hydraulic
implements.
1
Fig.95 Extra hydraulic function.
7.2 Boom suspension, SoftDrive
Reduces stresses on tractor and loader, and improves
operator comfort.
0372
Fig.96 Boom suspension.
7.3 Parallel linkage kit
Enables the tool to maintain the same angle during the
entire lifting and lowering movement.
71473
Fig.97 Parallel linkage kit
43
Specifications
8 SPECIFICATIONS
A
D
B
E
F
H
G
C
Parallel linkage (optional)
Non-parallel linkage
160c
180c
100c
140c
160c
180c
103/2615
111/2815
75/1900
95/2425
103/2615
111/2815
B Lifting height below 95/2415
flat implement
103/2615
69/1760
88/2230
95/2415
103/2615
C Dimension to pivot 56/1415
point
61/1550
51/1290
56/1410
56/1415
61/1550
D Calculated height to 54/1360
pivot point
56/1430
41/1035
54/1360
54/1360
56/1430
E Tipping angle on
top
52
53
51
50
52
53
F Breaking up angle
on top
47
42
98
98
123
121
G Breaking up angle
at ground level
43
40
30
23
40
38
H Calculated
undermining
80
120
120
75
80
120
2116/960
3704/1680
750/340
1124/510
1720/780
3020/1370
A Lift height to pivot
point
Max lifting force
lb/kg (800 mm
from arm centre at
ground level).
44
77951
Technical data may vary, depending on tractor model and implement.
71634
R
E F
Loader 160c/180c
C
D
A
B
A
B
C
D
E
F
Standard configuration
C
D
R
A
B
Q
B
C
D
F E
A
B
C
D
R
A
Q
18MPa
Parallell rod kit +
3rd function options
F
3rd function kit option
18MPa
E
Parallell rod kit option
F E
Q
Wiring diagram
9 WIRING DIAGRAM
45
Warranty Conditions
10 WARRANTY CONDITIONS
ÅLÖ AB undertakes, for a period of 12 (twelve) months from the day that the loader/equipment was delivered to the purchaser,
to replace or repair components which need to be rectified due to faults in the material or manufacturing. This is on condition
that the fault is immediately notified to the supplier, and that the faulty loader/component is made freely available to the
supplier.
For replaced components, the warranty is valid only for the remaining duration of the original warranty.
The warranty does not cover faults caused by accidents, inadequate maintenance, modification or incorrect installation by the
purchaser. When heavily worn components are replaced under warranty, the purchaser shall be charged for the time that they
have been used.
No compensation will be given for personal injury, stoppage, consequential damage or other losses.
Testing or fault diagnosis at the request of the purchaser will be carried out without charge to the purchaser if defects are
established in that connection.
Otherwise the purchaser is charged for all costs.
Temporary repairs or extra costs incurred since work has been done outside ordinary working hours will not be compensated.
EC DECLARATION OF CONFORMITY
(Directive 2006/42/EC, Annex 2A)
ÅLÖ AB
Brännland 300
SE-901 37 Umeå, Sweden
Tel. +46 (0)90 17 05 00
Hereby certifies that:
From January 2010, the front loader models described in this operator's manual (see front page)
A. manufactured in conformity with the provisions in the COUNCIL DIRECTIVE
dated 17 May 2006 on mutual approximation of the laws of the Member States relating to machinery, 2006/42/EC, with
special reference to Annex 1 of the Directive on essential safety and health requirements in relation to the construction and
manufacture of machines.
dated 15 December 2004 on the approximation of the laws of the Member States on electromagnetic compatibility,
2004/108/EC.
B. manufactured according to the following harmonised standards:
EN ISO 12100-1, -2, EN ISO 4413:2010, EN ISO 14892, EN 12525:2000, EN 954-1, EN 60204-1.
SMP Svensk Maskinprovning AB, Fyrisborgsgatan 3, SE-754 50 Uppsala, Sweden, has carried out voluntary type control for
ÅLÖ AB. The certificate has number: SEC/09/2050 – front loader.
The person authorised to compile technical documentation at ÅLÖ AB is Tomas Nygren, Product Development Director.
46
55934
Umeå, 1 January 2010
Olle Pehrsson
Managing Director
67202
47
67202
48
x
ÅLÖ AB, SE-901 37 UMEÅ, SWEDEN
www.alo.se