Download User Manual - Trick
Transcript
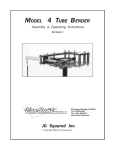
MODEL 3 TUBE B ENDER
Assembly & Operating Instructions
JD Squared Inc.
© Copyright 2004 by J D Squared Inc.
ASSEMBLY
1) The bender may be mounted to anything rigid enough not to twist or move during the bending operation. To mount the bender
drill two 3/4" holes 2" inches apart through the mounting surface. The front cover shows the bender mounted on the optional
pedestal. NOTE: You can use the Frame Base to help position the holes the correct distance apart for drilling.
2) Assemble the bender's frame assembly as shown below.
7/8" Frame Pin
3/4" Bolts & Washers
1" Frame Pin
Rachet
Upper Frame Link
1" OD Frame Spacer Tubes
Rachet Pin
Lower Frame Link
Swing Lever
1" Collar
Degree Plate
Frame Base
1" Washer
Your Mounting Surface
1" Hex Nut
3/4" Nuts and Washers
Figure 1 - Exploded view of the Frame Assembly with Degree Plate
A) Place the Frame Base on your mounting surface aligned with your drilled 3/4" holes.
B) Place the Lower Frame Link with the notched side to the left on top of the Frame Base aligned with the two 3/4" holes.
C) Assemble the Rachet and Swing Lever exactly as shown in figures 1,2 & 4 using the 3/4" pin and two 1/8" spring pins.
The Swing Lever must rotate almost a full 180 degrees . If the Swing Lever is installed upside down you will be unable
to engage the next ratchet tooth during bending. Please, double check it. For hydraulic adapter installation see page 3.
D) Place the Swing Lever and the 1" Collar on one of the two Spacer Tubes (1" OD tubes). Do not tighten collar.
E) Install the Upper Frame Link, Ratchet assembly and 1" Spacer Tubes as shown above. Hand tighten the bolts.
F) Insert the 1" Frame Pin into the 1" Frame Link
hole. Slide the 7/8" Frame Pin into hole #5.
Tighten the 3/4" nuts as tightly as possible, while
insuring the two pins are perfectly vertical and
slide easily through their respective holes.
G) Raise the Swing Lever to the middle of the Tube
Spacer and lock into position with the 1" Collar.
H) Install Degree Plate as shown. Use only your
hand to snug down the nut. This nut is never
wrench tightened. This allows you to easily adjust
the Degree Plate while bending.
Figure 2 - Completed Frame Assembly with Degree Plate
-1-
3) The two Drive Links are assembled next. Using the
two 3/4" OD Drive Link Spacer Tubes, two 1/2" bolts,
four 1/2" washers and two 1/2" nuts, assemble the two
Drive Links as shown in figure 3. The word 'TOP' must
be face up on both links. This is very important
because three of the four 7/8" drive holes are offset to
the right. Hand tighten only. Insert the two pins into
their respective holes to help alignment. Lay the
assembly on its side to further help alignment and
wrench tighten securely.
1" Frame Pin
7/8" Drive Pin
1/2" Bolts & Washers
Drive Link
3/4" OD Drive Link Spacer Tubes
Drive Link
1/2" Nuts and Washers
Figure 3 - Drive Link assembly
4) Remove all pins from the Drive Link assembly. With the word 'TOP' facing up, Install the Drive Link assembly into the Frame
assembly using the 1" Frame Pin. See figure 4. The bender is now assembled and ready for the die set to be installed.
NOTE: The bender requires a handle made of 1" x 2" rectangular tubing with a wall thickness of .083" or .095", cut to 54" long.
The bender does not come with a handle because the shipping cost alone are more than an entire length of this tubing. We can
supply it if absolutely necessary at an additional cost, however in keeping with the budget minded idea of the Model 3 Bender, it
is less expensive to supply your own handle. There is absolutely no need to fabricate a fancier handle. A simple piece of rectangular
tubing works the best. NOTE: A 54" long handle should allow the average user to bend 1 3/4" x .095" wall mild steel tubing using
just one hand. If bending chromemoly, DOM or larger tubing and find you desire more leverage to reduce the bending effort
required, you may extend the handle as needed. Usually a 2 ft. extension is sufficient. If bending smaller tubing, 1" OD for example,
we generally use a handle only 24" long.
Figure 4 - Completed bender without die set installed
-2-
Model 3 Bender Hydraulic Adapter Assembly
10 Ton Hydraulic
Cylinder
Clevis Pin
Hydraulic Swivel Block
Yoke
Threaded Extension Rod
Bender with hydraulics installed.
Adapter Components: Excluding the hydraulics:
Hydraulic Swivel Block
Yoke
Threaded Extension Rod
Clevis Pin
Recommended Cylinder:
Enerpac RC1014 or the O.T.C. (Power Team) Part# C1014C or an equivalent cylinder. These porta-power cylinders are rated
at 10 tons and have a 14" stroke. On the front of the cylinder is a 2 1/4" x 14 TPI thread.
Recommended Power Unit:
We offer several hydraulic pumps suitable for the Model 3 Bender. However, any power unit may be used that has an output
of at least 1500-2500 PSI. The average bending pressure will generally be below 1300 PSI. Tested examples: 1 3/4" x .095" mild
steel - 800 PSI, 1 5/8" x .083" 4130 chromemoly - 1300 PSI, 1 1/2" solid round bar stock - 3100 PSI. Note that the air-over-hydraulic
10,000 PSI pumps deliver less volume and therefore bend slower than the air-over-hydraulic 3,000 PSI pumps. A pressure gauge
is highly recommended. If the bender is operated at a pressure higher than 2500 PSI the followbar pin may bend. This pin has
been designed to be the bender’s weak link and therefore acts as a warning indicator of over loading. In other words, if you bend
the followbar pin, STOP BENDING IMMEDIATELY. For safe reliable operation do not operate the bender at pressures above 2500
PSI.
Assembly:
Remove the outer 3/4" bolt, sleeve and ratchet assembly from the bender’s frame. Notice that through the hydraulic swivel
block is machined a 2 1/4" x 14 TPI thread and a slight shoulder. The shoulder should face away from the drive links towards
the rear of the cylinder. This will allow the cylinder to be screwed all the way flush with the swivel block's front. Place the previously
removed 1" OD sleeve into the cylinder swivel block. Using the 3/4" bolt, nut and washers, install the Swivel block into the bender
as shown above. Screw the hydraulic cylinder into the block as far as it will go or until its front surface is flush with the swivel block's
front surface. The quick disconnect fitting on the rear of the cylinder should point down towards the ground to relieve stress on
the hose. If it does not, unscrew the cylinder out of the swivel block until it does, but no further.
If the cylinder has a stud installed into the end of its ram, it must be removed. This will expose a threaded hole in the end
of the ram. Screw the Threaded Extension Rod into the cylinder's ram until it bottoms out. Now, screw the Yoke onto the threaded
rod until it bottoms out. Rotate the swivel clockwise (to prevent it from unscrewing off the threaded rod) until it may be slid onto
the outer 3/4" drive link sleeve as shown above in figure 5. Install the Clevis Pin through the Yoke.
Hook up the pump and hose. Extend and retract the cylinder several times to purge air from the system.
-3-
Die Set Components
A Die Set refers to the components that are used in the bender to hold the tubing or pipe during the bending operation. This
section does not describe the operation of the bender. This section's purpose is to simply familiarize you with the different
components that make up a 'Die Set'. Knowing how the different die set parts interact with each other is essential in operating
the bender correctly. The die set must match the size of the tubing or pipe being bent. For example, never bend 1 1/2" tubing in
a 1 5/8" die set. This may damage the followbar's inserts.
First, let's explain the difference between tubing and pipe. Tubing is specified by its outside diameter and a wall thickness.
For example, 1 1/2" x .095" tubing has an outside diameter of 1 1/2" and a wall thickness of .095". On the other hand, pipe is
specified loosely on its inside diameter. We say loosely because the pipe's size may not actually be its inside diameter. Confused
yet? Just remember pipe is commonly used for the purpose of transporting fluids. Fluid flow is only concerned with the inside
area of the pipe and the outside makes no difference what so ever. Pipe wall thickness is specified as a schedule number and
is obtained from a pipe chart. Another example, 1 1/2" schedule 40 pipe has an outside diameter of 1.900" (larger than 1 7/8")
and a wall thickness of .145" and an inside diameter of 1.610" (near 1 5/8"). So, when ordering die sets be careful to specify whether
it's a tube or pipe size die set.
ROUND GROOVE DIES:
A Round groove die set consists of three main elements:
1) Forming Die
This is the part that the tube or pipe actually bends around. It has a circular groove machined around its circumference.
Please note that this groove is machined with a specially designed profile to help in reducing flattening of the bend's outside.
If you lay a section of tubing into the forming die you will notice that it will NOT completely seat into the die's groove. This is
normal for tube size dies and becomes very important as the tube's wall thickness gets thinner. However, forming dies that
are machined for 'Pipe' instead of tubing are generally not manufactured with this profile and the pipe may completely seat
in the groove. Pipe is much more forgiving when it comes to bending it because of its thicker wall. Stamped into the top is
Drive Holes
U-Strap
Bolt
Forming Die without drive holes
Forming Die with drive holes
the Outside diameter of the tube or pipe and the centerline radius (CLR) of the forming die. Above is pictured a 3/4" die with
a 2 1/4" CLR and a 1 1/2" die with a 4 1/2" CLR.
Drive holes are drilled into most dies with a radius of 3" or larger. When the 7/8" drive pin is inserted into the drive links,
it will pass through these holes. This is how the drive links rotate the forming die. The 1" drive holes are drilled oversize to
permit easy insertion of the 7/8" drive pin.
Die sets with a radius smaller than 3" will generally not have drive holes because there is no room to drill them. As
explained in the following section on how to operate the bender, the diameter of the tubing or pipe is so small the bender
can be operated without the use of the ratchet mechanism.
2) U-Strap
U-straps are sized to the OD of the pipe or tubing being bent. The
size is stamped onto them.
U-Strap for round groove dies
-4-
3) Followbar (Also referred to as the Pressure Die)
The Followbar is the component that presses the tubing into the forming die to create the bend. Shown in the illustration
below, it consists of three main parts: a backing block, an angled rear insert and a straight 0 degree front insert. This multipart
design allows the inserts, if damaged or worn out, to be inexpensively replaced without having to purchase a whole followbar
assembly. The Inserts are permanent cast from a special bearing grade anti-galling material to protect the tubing from
scratching during the bending process and then CNC machined to size. They are silverish in color but are NOT aluminum.
REPLACING INSERTS
Groove
The placement of the inserts into the backing block
Chamfered
must be done properly or poor quality bends will result.
On This
Front
Notice one insert is marked 0 degrees. The other insert
Side Of
Straight
will be marked with the angle that is appropriate for the
Insert
Insert
radius of the forming die (usually 3 or 5 degrees). The
angle in the rear insert helps to support the tube or pipe
Rear
after the point of bend, greatly reducing flattening. When Angled
bending, the angled insert will always be closer to the
Insert
forming die, and the U-strap for that matter, than the 0
degree insert. Notice in the figure to the right, that the tall
side of the angled insert must face the U-strap side of the
die.
The front 0 degree insert has a chamfer machined
1/2"
into one side of its groove. This chamfer must face away
Backing
from the rear insert, thus allowing the tube or pipe to slide Locking
Block
Bolts
through easier.
To replace the inserts, simply lay the Backing Block
flat with the engraving facing up. The Backing Block may
1 1/2" OD Followbar Assembly
or may not be as thick as the inserts. If it is thinner, place
spacers under the Backing Block so that when the inserts are inserted they are centered in the dovetails. This is important.
Now tighten the 1/2" locking bolts and you're done.
Forming Die
Drive holes (5)
U-Strap Pin
U-Strap Bolt
Tube
1
2
Straight
Insert
Followbar
U-Strap
Angled Insert
Die set components
COMPLETE ROUND GROOVE DIE SET
Above is pictured all of the components which make up a complete die set for round tubing or pipe. In the figure to right,
you can see two red lines drawn at 90 degrees apart. These lines are marked as 1 and 2. Line 1 runs from the center of
the forming die's center hole to approximately the middle of the angled rear insert. Line 2 runs from that point parallel to the
tubing. This illustrates the basic principle of how the components relate to each other. It is vital that when bending the rear
insert is positioned as shown. For example, suppose the followbar in engraved with hole 6 as shown, but you install it in
hole 7. The rear insert will be shifted to the right of line 1 and the angle machined into it will have no effect during bending.
This will generally cause flattening of the tubing's outer side and may also cause wrinkling. If you experience this problem
and you have the followbar installed in the correct hole, the rear insert's bending position can be easily checked. Simply place
a short piece of tubing into the bender as if your were actually going to bent it. Apply enough bending force to remove any
play but not actually bend the tubing. Now hold a 90 degree carpenter's square above the bender so that its outside edges
are positioned similar to the red lines shown. The center of the angled rear insert should be roughly at the corner of the square.
I say roughly because some dies are designed to shift the insert slightly to the left or right of center to improve bend quality.
However, this will generally be less than 1/4". If as in the example above, you placed the followbar in the wrong hole, the
insert will be very noticably off center and almost always to the right of red line 1.
-5-
SQUARE AND RECTANGULAR GROOVE DIES:
Square groove dies operate similar to the round groove dies explained earlier with these exceptions:
1 ) The bottom of the groove has a raised crown machined into it. This starts the depression in the bottom
side of the tubing during bending to prevent the tube from kinking and helps keep the sides reasonably
straight. Note that square tubing will always sink in on the outside and inside of the bend.
2 ) The U-strap clamp uses a bolt to tightly secure the tubing to the die block. This bolt presses against
a H shaped steel plate to prevent the
bolt from marring the tubing. To the
right is an illustration of the tubing
installed in the forming die.
3 ) The followbar does not utilize inserts.
It is machined from one solid piece.
4 ) You must lubricate both the outside
of the tubing and the COMPLETE
groove in the forming die before
bending. Square tubing tends to
wedge itself into the forming die while
bending and generally requires a
large rubber mallet to tap it out when
finished. The bigger the tubing, the
worse the problem. Without lubricant
it can be very difficult to remove the
Followbar
tubing from the die. This problem is
U-Strap
not specific to the Model 3 Bender,
but to ALL benders utilizing a one
piece die.
H PLate
Square die set components
DEGREE POINTER INSTALLATION
Current production forming dies are made to accept a degree pointer. This is supplied as a straight piece of
3/32" copper coated steel rod. The illustration below shows the pointer installed on the forming die. You will need
pliers and a wire cutter to fit the pointer. First install the die set into the bender, preferably with a length of tubing
installed also. On the backside of the forming die's die block, you will see a thin groove with a washer and bolt
installed next to it. Using the illustration below as a guide, bend the wire pointer to fit, making sure it clears the
U-strap and drive links. Allow approximately 1/16" clearance above the degree markings. Notice we've placed a
small bend in the pointer's lower end so that it aligns with the degree markings. This makes it easier to read when
bending. When you are happy with
the fit, tighten the pointer lock bolt to
secure the pointer onto the forming
die. The pointer should be left on
the die even after the die is removed
from the bender. When storing the
die set be careful not to bend up the
pointer. However, this is just
Pointer Lock Bolt
common 3/32" copper coated TIG
welding rod, so if you do manage to
mangle,
damage,
decimate,
disfigure, batter, hurt, mutilate, warp,
destroy, lose, smash, wreck, maim,
ravage, sabotage, trash, demolish,
vandalize,
incapacitate, ruin,
obliterate, cripple, (... deep breath
...)
spoil, break, annihilate,
Die Block
brutalize, make inoperable, or
otherwise extinguish its very
existence, just visit your local
welding supply to get a new one.
Pointer
Pointer installed on the backside of the Die Block
-6-
Die Set Installation and Bending Procedure
There are two types of forming dies provided for the Model 3 Bender. Those with drive holes and those without. The drive holes
are the five 1" holes drilled in a circular pattern around the forming die's center hole. A 7/8" diameter pin inserts through the drive
links and through the forming die's drive holes when in operation. The drive holes are drilled 1/8" oversize to provide easier pin
installation. To prepare for bending, follow the steps below depending on the type of die set. NOTE: The procedures below
describe using the degree indicator. To install an indicator onto your forming die, please refer to that section earlier in this manual.
WITH DRIVE HOLES:
Place the forming die into the bender using the 1"
frame pin. If bending square tubing, thoroughly lubricate
the forming die's groove. However, if bending round
tubing or pipe, NEVER lubricate the forming die's groove.
If you do, the tube will tend to slip backwards in the die
while bending, which in turn causes the tubing to kink or
wrinkle. Place the tube into the forming Die. Install the UStrap with the shorter 7/8" U-strap pin. If necessary,
tighten the U-strap bolt to prevent the tube from slipping
through the die will bending. It's a good idea to cut a slice
out of a bigger piece of tubing place it between the bolt and
tubing to prevent the bolt from dimpling the tubing. If
bending thin wall tubing (.065" or thinner) you must
Bending with drive holes and ratchet
always use the U-strap bolt.
Next, using the 7/8" Followbar Pin, place the Followbar
into the bender. See page 5 for the correct way to install the Followbar. Lightly spray some lubricant on the outside of the tubing
so that the tubing will slide through the Followbar easily. Any spray lubricant works well. If you are bending tubing with a wall
thickness of .065" or thinner you may want to skip the lube entirely. This will help the followbar stick to the tubing during ratchet
repositioning and generally helps prevent wrinkling. Make sure all pins are completely seated in their holes. Failure to do this
may cause damage to the bender links or worse yet the operator may slip and fall.
Place the 1" x 2" box tube handle over the Swing Lever making sure the Handle is as far forward as possible on the Swing
Lever. Rotate the Swing Lever fully counter-clockwise. Engage the Rachet onto the outer 3/4" drive link spacer tube. Lightly pull
on the handle to preload the tubing. Do not pull hard enough to actually bend the tubing. Using a free hand, loosen the degree
plate nut. Rotate the degree plate until the die's pointer is at 0 degrees and then hand tighten the nut to secure it into position.
Now you're ready to bend. Pull on the handle in a clockwise direction until the Swing Lever cannot rotate any further. Return the
Swing Lever to the starting position. Initially release the Ratchet easily so as not to move the tubing and minimize spring back.
Reengage the ratchet and pull again. When the last Ratchet tooth is reached, return the Swing Lever to its starting position.
Remove the 7/8" Drive Pin and rotate the Drive Links counter-clockwise until the Drive Pin may be reinstalled through another
hole in the Bending Die. Be careful not to move the tube. Now repeat the above bending sequence until the desired degree of
bend is obtained. To release the tubing from the bender, remove the handle from the Swing Lever. Insert it diagonally through
the 3/4" drive link spacer tubes and pull counter-clockwise. The Followbar will release its grip and the tubing may be removed.
WITHOUT DRIVE HOLES:
These dies typically have a center line
radius of less than 3". Because the radius of
the die is so small, drive holes cannot be
drilled into the die. This does not present a
problem as the tube sizes for these dies is of
relatively small diameter and is easily bent.
The ratchet is not used.
Die installation procedure:
Swing the ratchet assembly out of the
way as shown below. Place the forming die
into the bender. Place the tubing to be bent in
the bender and using the 5 1/4" long drive pin
(not the shorter U-Strap pin that is usually
used) install the U-strap. If desired, tighten
the U-strap bolt to secure the tubing to the die.
Handle installed and ready to bend without drive holes
This is not mandatory and may be omitted if
the tubing shows no signs of slipping through
the die while bending. Now install the followbar being sure the word 'TOP' is facing up. Rotate the drive links until their front edge
pushes directly on the U-strap pin as shown in figure 6. Place the handle diagonally through the drive links' two 3/4" spacer tubes.
Lightly pull on the handle to preload the tubing. Do not pull hard enough to actually bend the tubing. Using a free hand, loosen
the degree plate nut. Rotate the degree plate until the die's pointer is at 0 degrees and then hand tighten the nut to secure it into
position. Now, simply pull the handle and observe the pointer until the desired degree is reached.
-7-
EXAMPLE BEND
The first thing you need to do is to determine the actual starting location of a bend produced by the Bending Die you installed
in the bender. This can vary between die sets and must be checked for every die set purchased. In the below example we are
using 1 1/2" O.D. tubing and a Bending Die with a Center Line Radius of 6 1/2".
Here's the procedure:
A) Place a piece of tubing (app. 2 1/2' long) into the bender so that exactly 12" extends out from the edge of the die to the
end of the tubing when the tubing is fully seated in the Bending Die's groove. Place a little bending pressure on the tube
so as to seat the tubing in the Bending Die. Not enough to start bending the tubing just enough to seat it in the groove.
NOTE: If you lay a small length of tubing in the groove of a Bending Die you will notice the tubing does not seat to the
bottom of the groove. The Bending Dies
are deliberately machined this way so
that during the bending operation a side
force is developed in the tubing. This
helps to reduce flat spotting and wrinkles.
B) Using a Black Magic Marker mark a line
on the tubing precisely at the edge of the
die. See figure 7.
C) Bend the tube to an exact 90 degrees.
Use a carpenters square to check the
angle. You will have to overbend the tube
a little to account for springback. How
much to overbend will come with practice.
If you overbend the tube a little don't worry.
Because cold worked steel has memory,
you can place the tube in a vise or anything
else that will retain it, and simply unbend
it. Obviously this only works for small
Figure 7
amounts of overbend. If the tubing is
Mark here at the saw cut edge of
underbent, it will be necessary to put it
die (not at the followbar's insert)
back into the bender.
D) With the tube bent correctly to 90 degrees
locate the actual start of the bend. To do this, measure from the end of the tube to the far end of the 90 degree bend.
In the example in figure 8 this came out at 20 1/4". Subtract 6 1/2" for the centerline radius (CLR) of the Bending Die,
another 3/4" for the radius of the tubing not seated in the die, and 1/8" for springback. (Substitute the CLR and tube radius
to match your die set). The 1/8" figure for springback is an approximation, not an exact figure. However it is usually very
close to the real thing and may be used without worry to determine the actual starting location of the bend. So:
20 1/4" - 6 1/2" - 3/4" - 1/8" = 12 7/8"
Now subtract from the 12 7/8" the original 12" we had
marked earlier and you find that the bend will actually
start 7/8" in from the edge of the bending die. Now we
know for example, if we want 40" from the end of the
tubing to the start of the bend, we must subtract 7/8"
from 40" and set the tubing 39 1/8" from the edge of
the Bending Die.
Another example, you want 36" from the bottom to the
top of a rollbar. Tube size is 1 3/4" and you have an
actual bend start 1/2" inside of the Bending Die's edge.
The CLR of the Bending Die is 7 1/2". So: 36" - 1/2"
(Actual Bend start) - 7 1/2" (CLR of die) - 7/8" (Half of
the tubing diameter) - 1/8" (Springback) = 27". Set the
tube 27" from the edge of the Bending Die and make
the bend.
Figure 8
-8-
Example hoop :
Preparation is the key to making accurate bends. To make multiple bends in one section of tubing you will need a universal
protractor. The protractor is then clamped, using a machinist v-block and a radiator hose clamp, to the tube. Make sure the pointer
indicates '0' before making your first bend. Also using a carpenter's level, make sure the tube is entering the bender level. On the
second bend if you turn the tube so that the pointer again reads '0' and the carpenter's level indicates the tube is level, both bends
will be on the same plane with no noticeable twist.
First step is to draw a sketch of the intended shape and all measurements. Figure 9 below is the desired hoop. The Bending Die
has a centerline radius (CLR) of 6 1/2". The tube O.D. is 1 1/2". We determined earlier, using the method described on page 4,
that the Bend Start measurement is 3/4" behind the edge of this particular Bending Die set.
Figure 9- Example hoop.
1) Determine the total length of tubing needed. Using a calculator and the formula below let's add it all up.
6 1/2" (CLR of bend) x 90 (Number of degrees of bend) x .0175 = Length of tubing used in a bend.
Using the formula above we get 6 1/2" (CLR of bend) x 90 (Degrees of bend) x .0175 = 10.2375. Let's round this off to 10 1/4" inches
(10.250"). This is the amount of tubing used in the bend. We have two bends so we double this and get 20 1/2". Add to this the
straight sections and we get 20 1/2" (tubing in bends) + 27 (the center section) + 13 1/2" for the left upright + 13 1/2" for the right
upright = 74 1/2" of tubing needed. It's usually a good idea to leave a couple of inches extra on the end. Remember, it's easier
to remove tubing then to add it. So let's add 2" to 74 1/2".
2) We cut our tube to 76 1/2". It's generally easier to work from the center out when making two bends in a tube. Divide 74 1/2"
by 2 and our center point is 37 1/4" from the end of the tube. Place a mark on the tubing 37 1/4" in from one edge and mark the
tubing so you will know which side is the 37 1/4 side and which side is 39 1/4". Notice we didn't use the 76 1/2" measurement that
we cut our tubing to. This way we only have to cut 2" off one end of the finished tube instead of 1" off each end. The first bend
is made on the short 37 1/4" side.
3) Using the method described on page 4 we determine that the tube should extend 12 5/8" from the edge of the Bending Die.
Below is the equation from page 4.
20" (Height of hoop) - 6 1/2" (CLR of die) - 3/4" (1/2 of tube's dia.) - 1/8" (Springback) - 3/4" (Bend Start) = 11 7/8".
After making the bend we have half our hoop completed. The top of the bend is 20" from the bottom of the tube.
4) Now for the other bend. First we need to determine how much the tube stretched in the bend area. From figure 9 we see that
the tube should be 20 3/4" from the outside edge to our 37 1/4" center mark. However after measuring from our center mark to
the outside edge of the bend we now have 21" and not the planned 20 3/4". This 1/4" increase is due to springback and the tube
stretching in the area of the bend.
-9-
If we now repeated the second bend, using the same 12 5/8" from the end of the tubing + 2" for the extra tubing we allowed, we
would end up with a hoop 1/2" too wide. This is because the 1/4" stretch developed in the first bend will also be developed in the
second bend, giving us 1/2" total increase in width. Not a good deal if you only want a 40" wide hoop. So what's the solution. Actually
there is two ways to do it.
FIRST METHOD:
Look at figure 9 and notice the second bend starts at the top of the hoop and not at the top of the upright as the first bend did. Also
the start of the second bend is drawn as 13 1/2" from the center mark. If you take the 13 1/2" measurement and subtract the 1/
4" of growth that was developed in the first bend and another 1/4" to compensate for the second bend's growth you end up with
13". Subtract another 3/4" to account for the 3/4" Bend Start location on the Bending Die set and we have a final setting of 12 1/
4". Notice we did not subtract an 1/8" for springback. This is accounted for already in the 1/4" we added for the second bend's
growth. Set the tube so that the Bending Dies edge is exactly 12 1/4" from the center mark. Make sure the universal protractor
reads '0' and the carpenter's level is centered. As one final check you can also measure from the far side of the completed bend
to the edge of the bending die. See figure 10. This measurement should read:
40" (width of hoop) - 3/4" (radius of tube not in bending die) - 1/8" (springback allowance) = 39 1/8"
Make the second bend. Measure the height of the second upright and cut off the extra tubing we allowed for earlier.
Figure 10
SECOND METHOD:
The second method is basically the opposite of the first method. The second bend will start at the bottom of the upright and NOT
at the top of the hoop as in the first method and as shown in figure 10. We use the same method as used to bend the first bend
with a few exceptions. First calculate the starting point for the second bend as shown below:
20" (total height of hoop) - 6 1/2" (CLR of bending die) - 3/4" (Bend Start) = 12 3/4"
Add 2" to account for the extra tubing we allowed earlier. Also add the 1/4" growth developed in the first bend and another 1/4"
for the second bend. DO NOT ADD 1/8" SPRINGBACK. Once again this is already accounted for in the 1/4" growth of the second
bend. We end up with:
12 3/4" + 2" (extra tubing) + 1/2" (growth for both bends) = 15 1/4"
Set the tube's end at 15 1/4" from the Bending Die's edge. Make sure the universal protractor reads '0' and the carpenter's level
is centered. Make the second bend. Measure the height of the second upright and cut off the extra tubing we allowed for earlier.
Thank you for purchasing the Model II Bender. Any further questions please call.
© Copyright 2004 by J D Squared Inc.
- 10 -


