1
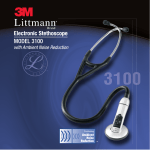
MEDICAL UNIVERSITY OF SOUTH CAROLINA Pediatric Emergency and Critical Care Telemedicine MUSC Pediatrcic ED Telemedicine Laptop User’s Guide Medical University of South Carolina Division of Pediatric Critical Care 135 Rutledge Ave MSC 566 Charleston, SC 29425 Phone 843.792.2618 • Fax 843.792.3022 1 TABLE OF CONTENTS Logging in to the Laptop ........................... 3 Cisco Jabber Video .................................... 3 Using the Headset .................................... 4 Locking Drawer ........................................ 5 Using the Stethoscope .............................. 5 Between Use ............................................ 6 TROUBLESHOOTING ................................. 7 Contact Information ................................. 8 2 L O G G IN G IN T O T H E L AP T O P C IS C O JA B B E R V ID E O 1. Turn laptop on. 2. Connect the headset/microphone to the USB port on the laptop if not already connected. 3. If you wish to use the wireless mouse instead of the touchpad, turn it on with the switch located on the bottom of the mouse. 4. Select “pedsed” User ID on the Windows login page. 5. Connect to a WiFi connection by clicking the network connection icon in the lower right corner of the screen. Then select the appropriate muscsecure and login using your NetID and password. 1. Click the Cisco Jabber icon pinned to the taskbar at the bottom of the screen or double-‐click the Cisco Jabber icon on your desktop screen. 2. Jabber should be set to automatically log you in. If not, the username and login is “pedsed.” 3. There are multiple ways to place a call: a. Enter a name, number, or IP address in the field labeled “Type name, number, or address”, then press “Start” on the appropriate number in the list below. b. Select the appropriate name/number from the “Favorites” list and press “Start”. 3 c. Select the appropriate name/number from the “History” and press “Start.” • End call To control the far-‐end camera, click the icon shown below in the upper right corner. That will bring up the joystick control above the control bar, which allows you to zoom in and out and control the direction of the remote camera. To share your computer screen, or a specific program running on your computer (example: a web page on Internet Explorer), click on the share screen icon on the control bar (second from the right), then select what you want to share from the menu presented. Once the call is connected, the control bar appears at the bottom of the Jabber window when you move your mouse over the window. U S IN G T H E H E A D S E T In order to ensure confidentiality of telecommunications conducted via your laptop, the included headset should be used any time your communication may be overheard. The headset also allows for clearer communication if there is ambient noise. Position your microphone near the tip of your chin to avoid breathing noise being transmitted too loudly. You can check audio settings in the “settings” window (see below) The icons on the control bar, in order from left to right, are: • • • • • Display self-‐view Freeze/unfreeze near-‐end video Mute/unmute near-‐end microphone Volume control/mute Share laptop screen and programs 4 to confirm that Jabber is using the headset for audio functions. Press the power button on the Littmann BlueTooth Stethoscope to turn it on. L O C K IN G D R A W E R The stethoscope and printed user’s manual are located in the locking drawer underneath the keyboard. To access the drawer, enter “C,” then “1234,” then hit the key button. U S IN G T H E S T E T H O S C O P E The Littmann BlueTooth Stethoscope operates utilizing the “Littmann Stethoscope” software on the attached laptop. Ensure the BlueTooth dongle is plugged in to a USB port on the laptop. Double-‐click the “Littmann Stethoscope” icon on the desktop to open the Littmann TeleSteth software. The login username is “pecct11.” The password is “PECCT11tele” (case sensitive). In the TeleSteth window select the name of the stethoscope from the drop-‐down box (PECCT11) Click the stethoscope icon to the left of the drop-‐ down box to pair the stethoscope with the computer. On the Littmann stethoscope, press the “M” button to bring up the menu, then press “M” again to connect the stethoscope. Login: Username – PECCT# Password – PECCT#tele 5 Once you have joined the session, you can place the ear buds of the stethoscope in your ears and hear whatever is auscultated by the stethoscope at the remote site. B E T W E E N U S E You may leave the laptop plugged in and powered on between uses, although it should be intermittently restarted to check for automatic updates to software. You can also check for updates by typing “Windows Update” in the Search field on the Start menu, and opening the Windows Update program. The remote site participant will “Host a Session,” which will create a Session ID. Select “Join a Session,” and enter the Session ID they provide in the pop-‐up box. Store the stethoscope in the locking drawer between uses. 6 TROUBLESHOOTING See the Jabber User Guide on the desktop screen for more detailed instructions on the use of the Jabber software and troubleshooting. SETTINGS The sign-‐in settings in Jabber can be accessed from the sign-‐in window by clicking the tools icon just beneath the password box. That will list the server addresses used to sign in, which should be as below: Internal Server: gatekeeper.musc.edu External Server: bc.musc.edu SIP Domain: musc.edu These addresses should already be entered. If not connected to an Ethernet wall jack via an Ethernet cord, you will need to be connected to a WiFi network. Once logged in, the settings icon is located in the upper right hand corner of the Jabber window. Click on that, then click “settings.” From there you can modify the sign-‐in settings as above, and check or modify the audio or video settings. In the “Audio” section, you can choose the microphone and speakers that you want to use from the dropdown boxes (either headphones or computer microphone/speakers) and test to make sure they’re functioning. Both the microphone and speakers should be set to “Logitech USB Headset.” The microphone slider allows you to speak into the microphone and visually see that the output is in the “recommended range.” The “Test” button next to the speaker selection will play chimes through the headset or speakers, depending on which is selected. 7 CONTACT INFORMATION OneVision Technical Support: (877) 866-‐9800 • Available 24/7 for equipment support (i.e. Cisco cart, camera, TotalExam camera, and stethoscope). • [email protected] • Please have cart serial number available when calling. o Press Home button (on remote) -‐> Settings -‐> System Information -‐> Module serial number MUSC IT Support • Call for problems related to network and calling. • Michael Haschker: (843) 792-‐8314 • Lori Upshur: (843) 864-‐9951 (daytime only) • OCIO-‐IS-‐[email protected] If these resources cannot address the problem, call Dr. David McSwain (919) 672-‐8866 or email [email protected]. 8