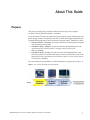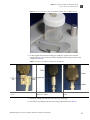
1
USER GUIDE
Applied Biosystems SOLiD® EZ Bead™
Emulsifier
Catalog Number 4448419
Publication Part Number 4441486 Rev. E
Revision Date October 2011
Emulsion
Preparation
Emulsion
PCR
Emulsion Cleanup and
Bead Enrichment
For Research Use Only. Not intended for any animal or human therapeutic or diagnostic use.
Information in this document is subject to change without notice.
LIFE TECHNOLOGIES AND/OR ITS AFFILIATE(S) DISCLAIM ALL WARRANTIES WITH RESPECT TO THIS DOCUMENT, EXPRESSED OR IMPLIED, INCLUDING
BUT NOT LIMITED TO THOSE OF MERCHANTABILITY OR FITNESS FOR A PARTICULAR PURPOSE. IN NO EVENT SHALL LIFE TECHNOLOGIES AND/OR ITS
AFFILIATE(S) BE LIABLE, WHETHER IN CONTRACT, TORT, WARRANTY, OR UNDER ANY STATUTE OR ON ANY OTHER BASIS FOR SPECIAL, INCIDENTAL,
INDIRECT, PUNITIVE, MULTIPLE OR CONSEQUENTIAL DAMAGES IN CONNECTION WITH OR ARISING FROM THIS DOCUMENT, INCLUDING BUT NOT
LIMITED TO THE USE THEREOF.
NOTICE TO PURCHASER: LIMITED USE LABEL LICENSE: Research Use Only
The purchase of this product conveys to the purchaser the limited, non-transferable right to use the purchased amount of the product only to perform internal
research for the sole benefit of the purchaser. No right to resell this product or any of its components is conveyed expressly, by implication, or by estoppel.
This product is for internal research purposes only and is not for use in commercial applications of any kind, including, without limitation, quality control and
commercial services such as reporting the results of purchaser's activities for a fee or other form of consideration. For information on obtaining additional
rights, please contact [email protected] or Out Licensing, Life Technologies, 5791 Van Allen Way, Carlsbad, California 92008.
TRADEMARKS
The trademarks mentioned herein are the property of Life Technologies Corporation or their respective owners.
Microsoft and Windows are registered trademarks of Microsoft Corporation in the United States and other countries.
Covaris is a registered trademark of Covaris, Inc.
Latitude is a registered trademark of Dell.
© 2011 Life Technologies Corporation. All rights reserved.
Part Number 4441486 Rev. E
October 2011
Contents
About This Guide . . . . . . . . . . . . . . . . . . . . . . . . . . . . . . . . . . . . . . . . . . . . . . . . 7
Purpose . . . . . . . . . . . . . . . . . . . . . . . . . . . . . . . . . . . . . . . . . . . . . . . . . . . . . . . . . . . . . . . . . . . . . . . . . . . . . . 7
Prerequisites . . . . . . . . . . . . . . . . . . . . . . . . . . . . . . . . . . . . . . . . . . . . . . . . . . . . . . . . . . . . . . . . . . . . . . . . . 8
Safety information . . . . . . . . . . . . . . . . . . . . . . . . . . . . . . . . . . . . . . . . . . . . . . . . . . . . . . . . . . . . . . . . . . . . . 8
Safety alert words . . . . . . . . . . . . . . . . . . . . . . . . . . . . . . . . . . . . . . . . . . . . . . . . . . . . . . . . . . . . . . . . . 8
SDSs . . . . . . . . . . . . . . . . . . . . . . . . . . . . . . . . . . . . . . . . . . . . . . . . . . . . . . . . . . . . . . . . . . . . . . . . . . . . 8
Safety labels on instruments . . . . . . . . . . . . . . . . . . . . . . . . . . . . . . . . . . . . . . . . . . . . . . . . . . . . . . . 8
■ CHAPTER 1 Choose the Scale of Preparation of Templated Beads,
Prepare the Oil Master Mix, and Pre-rinse the Amplifier Pouch . . . . 11
Review the general workflow to prepare and sequence a library . . . . . . . . . . . . . . . . . . . . . . . . . . . . 12
Choose the scale of preparation of templated beads . . . . . . . . . . . . . . . . . . . . . . . . . . . . . . . . . . . . . . . 13
Materials and equipment required . . . . . . . . . . . . . . . . . . . . . . . . . . . . . . . . . . . . . . . . . . . . . . . . . . . . . . 13
Before you begin . . . . . . . . . . . . . . . . . . . . . . . . . . . . . . . . . . . . . . . . . . . . . . . . . . . . . . . . . . . . . . . . . . . . . 13
Prepare the Oil Master Mix . . . . . . . . . . . . . . . . . . . . . . . . . . . . . . . . . . . . . . . . . . . . . . . . . . . . . . . . . . . . . 14
Pre-rinse the SOLiD® EZ Bead™ Amplifier Pouch . . . . . . . . . . . . . . . . . . . . . . . . . . . . . . . . . . . . . . . . . . 16
■ CHAPTER 2
Prepare and Run the Emulsifier (E10) . . . . . . . . . . . . . . . 17
Prepare and run the Emulsifier (E10) . . . . . . . . . . . . . . . . . . . . . . . . . . . . . . . . . . . . . . . . . . . . . . . . . . . . 18
Prepare the P1 Beads (E10) . . . . . . . . . . . . . . . . . . . . . . . . . . . . . . . . . . . . . . . . . . . . . . . . . . . . . . . 18
Install the oil phase (E10) . . . . . . . . . . . . . . . . . . . . . . . . . . . . . . . . . . . . . . . . . . . . . . . . . . . . . . . . . 18
Prepare the aqueous phase (E10) . . . . . . . . . . . . . . . . . . . . . . . . . . . . . . . . . . . . . . . . . . . . . . . . . . 21
Set up and run the Emulsifier (E10) . . . . . . . . . . . . . . . . . . . . . . . . . . . . . . . . . . . . . . . . . . . . . . . . . 22
Collect the emulsion (E10) . . . . . . . . . . . . . . . . . . . . . . . . . . . . . . . . . . . . . . . . . . . . . . . . . . . . . . . . 23
■ CHAPTER 3
Prepare and Run the Emulsifier (E20) . . . . . . . . . . . . . . . 25
Prepare and run the Emulsifier (E20) . . . . . . . . . . . . . . . . . . . . . . . . . . . . . . . . . . . . . . . . . . . . . . . . . . . . 26
Prepare the P1 Beads (E20) . . . . . . . . . . . . . . . . . . . . . . . . . . . . . . . . . . . . . . . . . . . . . . . . . . . . . . . 26
Install the oil phase (E20) . . . . . . . . . . . . . . . . . . . . . . . . . . . . . . . . . . . . . . . . . . . . . . . . . . . . . . . . . 26
Prepare the aqueous phase (E20) . . . . . . . . . . . . . . . . . . . . . . . . . . . . . . . . . . . . . . . . . . . . . . . . . . 29
Set up and run the Emulsifier (E20) . . . . . . . . . . . . . . . . . . . . . . . . . . . . . . . . . . . . . . . . . . . . . . . . . 30
Collect the emulsion (E20) . . . . . . . . . . . . . . . . . . . . . . . . . . . . . . . . . . . . . . . . . . . . . . . . . . . . . . . . 32
Applied Biosystems SOLiD® EZ Bead™ Emulsifier Getting Started Guide
3
Contents
■ CHAPTER 4
Prepare and Run the Emulsifier (E80) . . . . . . . . . . . . . . . 33
Prepare and run the Emulsifier (E80. . . . . . . . . . . . . . . . . . . . . . . . . . . . . . . . . . . . . . . . . . . . . . . . . . . . 34
Prepare the P1 Beads (E80) . . . . . . . . . . . . . . . . . . . . . . . . . . . . . . . . . . . . . . . . . . . . . . . . . . . . . . . 34
Install the oil phase (E80) . . . . . . . . . . . . . . . . . . . . . . . . . . . . . . . . . . . . . . . . . . . . . . . . . . . . . . . . . 34
Prepare the aqueous phase (E80) . . . . . . . . . . . . . . . . . . . . . . . . . . . . . . . . . . . . . . . . . . . . . . . . . . 37
Set up and run the Emulsifier (E80) . . . . . . . . . . . . . . . . . . . . . . . . . . . . . . . . . . . . . . . . . . . . . . . . 38
Collect the emulsion (E80) . . . . . . . . . . . . . . . . . . . . . . . . . . . . . . . . . . . . . . . . . . . . . . . . . . . . . . . . 39
■ CHAPTER 5
Prepare and Run the Emulsifier (E120) . . . . . . . . . . . . . . 41
Prepare and run the Emulsifier (E120) . . . . . . . . . . . . . . . . . . . . . . . . . . . . . . . . . . . . . . . . . . . . . . . . . . .
Prepare the P1 Beads (E120) . . . . . . . . . . . . . . . . . . . . . . . . . . . . . . . . . . . . . . . . . . . . . . . . . . . . . .
Install the oil phase (E120) . . . . . . . . . . . . . . . . . . . . . . . . . . . . . . . . . . . . . . . . . . . . . . . . . . . . . . . .
Prepare the aqueous phase (E120) . . . . . . . . . . . . . . . . . . . . . . . . . . . . . . . . . . . . . . . . . . . . . . . . .
Set up and run the Emulsifier (E120) . . . . . . . . . . . . . . . . . . . . . . . . . . . . . . . . . . . . . . . . . . . . . . .
Collect the emulsion (E120) . . . . . . . . . . . . . . . . . . . . . . . . . . . . . . . . . . . . . . . . . . . . . . . . . . . . . . .
■ APPENDIX A
42
42
42
45
46
47
Ordering Information . . . . . . . . . . . . . . . . . . . . . . . . . . . . . 49
Required kits (E10) . . . . . . . . . . . . . . . . . . . . . . . . . . . . . . . . . . . . . . . . . . . . . . . . . . . . . . . . . . . . . . . . . . . 49
Required kits (E20) . . . . . . . . . . . . . . . . . . . . . . . . . . . . . . . . . . . . . . . . . . . . . . . . . . . . . . . . . . . . . . . . . . . 50
Required kits (E80) . . . . . . . . . . . . . . . . . . . . . . . . . . . . . . . . . . . . . . . . . . . . . . . . . . . . . . . . . . . . . . . . . . . 51
Required kits (E120) . . . . . . . . . . . . . . . . . . . . . . . . . . . . . . . . . . . . . . . . . . . . . . . . . . . . . . . . . . . . . . . . . . 52
Required consumables . . . . . . . . . . . . . . . . . . . . . . . . . . . . . . . . . . . . . . . . . . . . . . . . . . . . . . . . . . . . . . . . 53
Required equipment . . . . . . . . . . . . . . . . . . . . . . . . . . . . . . . . . . . . . . . . . . . . . . . . . . . . . . . . . . . . . . . . . . 54
Optional equipment . . . . . . . . . . . . . . . . . . . . . . . . . . . . . . . . . . . . . . . . . . . . . . . . . . . . . . . . . . . . . . . . . . . 56
■ APPENDIX B
Troubleshooting . . . . . . . . . . . . . . . . . . . . . . . . . . . . . . . . . 57
■ APPENDIX C The Covaris® S2 System . . . . . . . . . . . . . . . . . . . . . . . . . . . . 59
Operation notes . . . . . . . . . . . . . . . . . . . . . . . . . . . . . . . . . . . . . . . . . . . . . . . . . . . . . . . . . . . . . . . . . . . . . . 60
Covaris® S2 programs . . . . . . . . . . . . . . . . . . . . . . . . . . . . . . . . . . . . . . . . . . . . . . . . . . . . . . . . . . . . . . . . . 61
■ APPENDIX D Instrument Warranty Information . . . . . . . . . . . . . . . . . . . 63
Computer configuration . . . . . . . . . . . . . . . . . . . . . . . . . . . . . . . . . . . . . . . . . . . . . . . . . . . . . . . . . . . . . . . 64
Limited product warranty . . . . . . . . . . . . . . . . . . . . . . . . . . . . . . . . . . . . . . . . . . . . . . . . . . . . . . . . . . . . . . 64
Damages, claims, and returns . . . . . . . . . . . . . . . . . . . . . . . . . . . . . . . . . . . . . . . . . . . . . . . . . . . . . . . . . 66
4
Applied Biosystems SOLiD® EZ Bead™ Emulsifier Getting Started Guide
Contents
■ APPENDIX E
Safety . . . . . . . . . . . . . . . . . . . . . . . . . . . . . . . . . . . . . . . . . . . 67
Instrumentation safety . . . . . . . . . . . . . . . . . . . . . . . . . . . . . . . . . . . . . . . . . . . . . . . . . . . . . . . . . . . . . . . . 68
Symbols on instruments . . . . . . . . . . . . . . . . . . . . . . . . . . . . . . . . . . . . . . . . . . . . . . . . . . . . . . . . . . 68
Location of safety labels on instruments . . . . . . . . . . . . . . . . . . . . . . . . . . . . . . . . . . . . . . . . . . . . 69
General instrument safety . . . . . . . . . . . . . . . . . . . . . . . . . . . . . . . . . . . . . . . . . . . . . . . . . . . . . . . . . 69
Physical hazard safety . . . . . . . . . . . . . . . . . . . . . . . . . . . . . . . . . . . . . . . . . . . . . . . . . . . . . . . . . . . . 70
Electrical safety . . . . . . . . . . . . . . . . . . . . . . . . . . . . . . . . . . . . . . . . . . . . . . . . . . . . . . . . . . . . . . . . . . 70
Workstation safety . . . . . . . . . . . . . . . . . . . . . . . . . . . . . . . . . . . . . . . . . . . . . . . . . . . . . . . . . . . . . . . 71
Safety and electromagnetic compatibility (EMC) standards . . . . . . . . . . . . . . . . . . . . . . . . . . . . 71
Chemical safety . . . . . . . . . . . . . . . . . . . . . . . . . . . . . . . . . . . . . . . . . . . . . . . . . . . . . . . . . . . . . . . . . . . . . . 73
General chemical safety . . . . . . . . . . . . . . . . . . . . . . . . . . . . . . . . . . . . . . . . . . . . . . . . . . . . . . . . . . 73
SDSs . . . . . . . . . . . . . . . . . . . . . . . . . . . . . . . . . . . . . . . . . . . . . . . . . . . . . . . . . . . . . . . . . . . . . . . . . . . 74
Chemical waste safety . . . . . . . . . . . . . . . . . . . . . . . . . . . . . . . . . . . . . . . . . . . . . . . . . . . . . . . . . . . . 74
Safety alerts . . . . . . . . . . . . . . . . . . . . . . . . . . . . . . . . . . . . . . . . . . . . . . . . . . . . . . . . . . . . . . . . . . . . . . . . . 76
Specific alerts for instrumentation . . . . . . . . . . . . . . . . . . . . . . . . . . . . . . . . . . . . . . . . . . . . . . . . . 76
Documentation and Support . . . . . . . . . . . . . . . . . . . . . . . . . . . . . . . . . . . . . 77
Related documentation . . . . . . . . . . . . . . . . . . . . . . . . . . . . . . . . . . . . . . . . . . . . . . . . . . . . . . . . . . . . . . . . 77
Obtaining support . . . . . . . . . . . . . . . . . . . . . . . . . . . . . . . . . . . . . . . . . . . . . . . . . . . . . . . . . . . . . . . . . . . . 77
Index . . . . . . . . . . . . . . . . . . . . . . . . . . . . . . . . . . . . . . . . . . . . . . . . . . . . . . . . . . 79
Applied Biosystems SOLiD® EZ Bead™ Emulsifier Getting Started Guide
5
Contents
6
Applied Biosystems SOLiD® EZ Bead™ Emulsifier Getting Started Guide
About This Guide
Purpose
This getting started guide provides the information that you need to prepare
emulsions with the SOLiD® EZ Bead™ Emulsifier.
To use the SOLiD® System, DNA libraries to be sequenced require amplification on P1
Beads during emulsion PCR (ePCR), followed by enrichment of the templated beads.
Templated bead preparation can be performed using the SOLiD® EZ Bead™ System:
• SOLiD® EZ Bead™ Emulsifier: To prepare emulsions containing library template
and P1 Beads (see this guide).
• SOLiD® EZ Bead™ Amplifier: To perform emulsion PCR (ePCR) [refer to the
Applied Biosystems SOLiD® EZ Bead™ Amplifier Getting Started Guide
(Part no. 4443494)].
• SOLiD® EZ Bead™ Enricher: To wash and enrich the templated beads. After
enrichment, perform a Terminal Transferase reaction to modify the 3′ends of the
library [refer to the Applied Biosystems SOLiD®EZ Bead™ Enricher Getting Started
Guide (Part no. 4443496)].
The enriched beads are deposited on a slide and the library sequenced (see Figure 1).
Figure 1 The SOLiD® EZ Bead™ System workflow
Applied Biosystems SOLiD® EZ Bead™ Emulsifier Getting Started Guide
7
About This Guide
Prerequisites
Prerequisites
This service guide is intended for service personnel who have been specifically trained
by Applied Biosystems. Applied Biosystems is not liable for damage or injury that
results from the use of this manual by unauthorized or untrained parties.
This guide uses conventions and terminology that assume a working knowledge of the
Microsoft® Windows® operating system, the Internet, and Internet-based browsers.
Safety information
Note: For general safety information, see this section and Appendix E, “Safety” on
page 67. When a hazard symbol and hazard type appear by an instrument hazard, see
the “Safety” Appendix for the complete alert on the instrument.
Safety alert words
Four safety alert words appear in Life Technologies user documentation at points in
the document where you need to be aware of relevant hazards. Each alert word—
IMPORTANT, CAUTION, WARNING, DANGER—implies a particular level of
observation or action, as defined below:
IMPORTANT! – Indicates information that is necessary for proper instrument
operation, accurate chemistry kit use, or safe use of a chemical.
CAUTION! – Indicates a potentially hazardous situation that, if not avoided, may
result in minor or moderate injury. It may also be used to alert against unsafe practices.
WARNING! – Indicates a potentially hazardous situation that, if not avoided, could
result in death or serious injury.
DANGER! – Indicates an imminently hazardous situation that, if not avoided, will
result in death or serious injury. This signal word is to be limited to the most extreme
situations.
Except for IMPORTANTs, each safety alert word in an Life Technologies document
appears with an open triangle figure that contains a hazard symbol. These hazard
symbols are identical to the hazard symbols that are affixed to Applied Biosystems instruments
(see “Safety symbols” on page 68).
SDSs
The Safety Data Sheets (SDSs) for any chemicals supplied by Applied Biosystems or
Ambion are available to you free 24 hours a day. For instructions on obtaining SDSs,
see “SDSs” on page 74.
IMPORTANT! For the SDSs of chemicals not distributed by Life Technologies or
Ambion contact the chemical manufacturer.
Safety labels on
instruments
8
The following CAUTION, WARNING, and DANGER statements may be displayed on
Life Technologies instruments in combination with the safety symbols described in the
preceding section.
Applied Biosystems SOLiD® EZ Bead™ Emulsifier Getting Started Guide
About This Guide
Safety information
Hazard
symbol
English
Français
CAUTION! Hazardous chemicals. Read the Safety
Data Sheets (SDSs) before handling.
ATTENTION! Produits chimiques dangereux. Lire
fiche technique associée au produit avant toute
manipulation.
CAUTION! Hazardous waste. Refer to SDS(s) and
local regulations for handling and disposal.
ATTENTION! Déchets dangereux. Lire fiche
technique associée et prendre connaissance de la
régulation locale associées à la manipulation et
l'élimination des déchets.
DANGER! High voltage.
DANGER! Haute tension.
WARNING! To reduce the chance of electrical
shock, do not remove covers that require tool access.
No user-serviceable parts are inside. Refer servicing
to Life Technologies qualified service personnel.
AVERTISSEMENT! Pour éviter les risques
d’électrocution, ne pas retirer les capots dont
l’ouverture nécessite l’utilisation d’outils.
L’instrument ne contient aucune pièce réparable par
l’utilisateur. Toute intervention doit être effectuée par
le personnel de service qualifié venant de chez Life
Technologies.
CAUTION! Pinch hazard.
ATTENTION! Risque de pincement.
Applied Biosystems SOLiD® EZ Bead™ Emulsifier Getting Started Guide
9
About This Guide
Safety information
10
Applied Biosystems SOLiD® EZ Bead™ Emulsifier Getting Started Guide
1
Choose the Scale of Preparation of
Templated Beads, Prepare the Oil
Master Mix, and
Pre-rinse the Amplifier Pouch
This chapter provides information on how to choose the scale of preparation of
templated beads and describes how to prepare Oil Master Mix and how to pre-rinse
the SOLiD® EZ Bead™ Amplifier Pouch:
“Review the general workflow to prepare and sequence a library” on page 12
“Choose the scale of preparation of templated beads” on page 13
“Before you begin” on page 13
“Prepare the Oil Master Mix” on page 14
“Pre-rinse the SOLiD® EZ Bead™ Amplifier Pouch” on page 16
Chapter 2, “Prepare and Run the Emulsifier (E10)” on page 17
Chapter 3, “Prepare and Run the Emulsifier (E20)” on page 25
Chapter 4, “Prepare and Run the Emulsifier (E80)” on page 33
Chapter 5, “Prepare and Run the Emulsifier (E120)” on page 41
Applied Biosystems SOLiD® EZ Bead™ Emulsifier Getting Started Guide
11
1
Chapter 1 Choose the Scale of Preparation of Templated Beads, Prepare the Oil Master Mix, and Pre-rinse the Amplifier
Pouch
Review the general workflow to prepare and sequence a library
Steps
References
Quantitate/Titrate the library
5500 Series SOLiD® Systems Fragment Library
Preparation User Guide [Part no. 4460960)
5500 Series SOLiD® Systems Mate-Paired Library
Preparation User Guide [Part no. 4460958)
“Prepare and Run the Emulsifier (E10)” on page 17
Emulsify the beads
“Prepare and Run the Emulsifier (E20)” on page 25
“Prepare and Run the Emulsifier (E80)” on page 33
“Prepare and run the Emulsifier (E120)” on page 42
Amplify the beads
Enrich the templated beads
Applied Biosystems SOLiD® EZ Bead Enricher Getting
Started Guide (Part no. 4443494)
Modify the 3′ ends of the DNA
Applied Biosystems SOLiD® EZ Bead Enricher Getting
Started Guide (Part no. 4443494)
Deposit beads,
perform bead sequencing
12
Applied Biosystems SOLiD® EZ Bead Amplifier
Getting Started Guide (Part no. 4443494)
5500 Series SOLiD® Sequencers Operation Guide
[Part no. 4456991)
Applied Biosystems SOLiD® EZ Bead™ Emulsifier Getting Started Guide
Chapter 1 Choose the Scale of Preparation of Templated Beads, Prepare the Oil Master Mix, and Pre-rinse the Amplifier
Pouch
1
Choose the scale of preparation of templated beads
You can prepare templated beads according to the amount of library that you want to
amplify :
Scale of preparation
Average yield of templated beads
E10
125 million
E20
250 million
E80
1 billion
E120
2.2 billion
Materials and equipment required
See “Ordering Information” on page 49 for a list of equipment, kits, and consumables
necessary for this procedure.
Before you begin
• Construct the DNA library of interest [refer to 5500 Series SOLiD® Systems
Fragment Library Preparation User Guide (Part no. 4460960) and 5500 Series SOLiD®
Systems Mate-Paired Library Preparation User Guide (Part no. 4460958)].
• Prepare and quantitate the DNA library before proceeding with emulsion
preparation [refer to 5500 Series SOLiD® Systems Fragment Library Preparation User
Guide (Part no. 4460960) and 5500 Series SOLiD® Systems Mate-Paired Library
Preparation User Guide (Part no. 4460958)].
• Optional: Titrate the library. The optimal titration point of most libraries is
between 0.6 pM and 1.0 pM. We recommend starting with a titration point of
0.8 pM for a new library. Increase or decrease the titration as needed.
• Install the SOLiD EZ Bead Emulsifier in a different location than the location used
to enrich the emulsion. Emulsification and enrichment in different locations
prevent contamination of the sample. To prevent contamination, do not install the
Emulsifier in the same room as the SOLiD EZ Bead Amplifier and SOLiD EZ Bead
Enricher. For more information, refer to the Applied Biosystems SOLiD® EZ Bead™
Emulsifier Site Preparation Guide (Part no. 4452499) and the Applied Biosystems
SOLiD® EZ Bead™ Enricher Site Preparation Guide (Part no. 4454036).
Applied Biosystems SOLiD® EZ Bead™ Emulsifier Getting Started Guide
13
1
Chapter 1 Choose the Scale of Preparation of Templated Beads, Prepare the Oil Master Mix, and Pre-rinse the Amplifier
Pouch
Prepare the Oil Master Mix
Note: A single Emulsifier Oil Pack Kit (Part no. 4457185) yields approximately 240 mL
of Oil Master Mix, which is six 50-mL Falcon® tubes containing 40-mL of Oil Master
Mix each. The 240-mL of Oil Master Mix is enough for:
• E10 scale: 8 runs (E10 emulsions + E10 bag rinses)
– OR –
• E20 scale: 6 runs (E20 emulsions + E20 bag rinses)
– OR –
• E80 scale: 2 runs (E80 emulsions + E80 bag rinses)
– OR –
• E120 scale: 2 runs (E120 emulsions + E120 bag rinse)
1. Prepare the Oil Master Mix in a 50-mL Falcon® tube.
Item
Volume
Stabilizer 1
1.8 mL
Stabilizer 2
400 µL
Mineral oil
37.8 mL
Total volume
40 mL
a. Use a 3-mL syringe to dispense 1.8 mL of Stabilizer 1 into the 50-mL Falcon®
tube (see Figure 1). To ensure no air bubbles are in the syringe, aspirate some
reagent into the syringe and fully dispense it back into the reagent bottle.
Then slowly aspirate the correct volume.
b. Use a 1-mL syringe to dispense 400 µL of Stabilizer 2 into the 50-mL Falcon®
tube (see Figure 1). Make sure no air bubbles are in the syringe; follow the
procedure in step 1a.
Table 1 Syringes with Stabilizers 1 and 2
Stabilizer 1 (1.8 mL)
14
Stabilizer 2 (400 µL)
Applied Biosystems SOLiD® EZ Bead™ Emulsifier Getting Started Guide
Chapter 1 Choose the Scale of Preparation of Templated Beads, Prepare the Oil Master Mix, and Pre-rinse the Amplifier
Pouch
1
c. Pour mineral oil (approximately 37.8 mL) into the tube that has Stabilizers 1
and 2 so that the final volume is 40 mL.
2. Cap the Falcon® tube. Use a vortexer to mix the solution so that a whirlpool down
to the bottom of the tube is created (see Figure Figure/table titles are not
recommended in procedures.). After the whirlpool has been created, continue to
whirlpool-vortex the mixture for another 30 seconds.
Whirlpool created
during vortexing.
Correct method.
Whirlpool not created.
Incorrect method.
3. Pour the mixture into the Oil Mix Bottle (in the Emulsifier Oil Pack Kit).
4. Repeat steps 1 through 3 FIVE additional times. Use a new 50-mL Falcon® tube
each time.
5. After performing steps 1 through 3 a total of SIX times, you should have
approximately 240 mL of Oil Master Mix in your Oil Mix Bottle.
6. Shake (by hand) the bottled mix for 30 seconds.
7. If the Oil Master Mix will be used the same day: De-gas at room temperature for
at least 30 minutes in a dark location (such as in a cupboard or drawer).
If the Oil Master Mix will NOT be used the same day: De-gas and store the Oil
Master Mix at 4°C in a 4°C refrigerator.
The Oil Master Mix can be stored at 4°C for up to two weeks. Before
using the stored Oil Master Mix, shake (by hand) the bottled mix for 30 seconds. Let
the Oil Master Mix reach room temperature and de-gas for 1 hour in a dark location
(such as in a cupboard or drawer).
STOPPING POINT
Applied Biosystems SOLiD® EZ Bead™ Emulsifier Getting Started Guide
15
1
Chapter 1 Choose the Scale of Preparation of Templated Beads, Prepare the Oil Master Mix, and Pre-rinse the Amplifier
Pouch
You have completed preparation of the SOLiD EZ Bead Oil Master Mix. Proceed to
bead emulsification according to the scale of preparation that you want:
• Chapter 2, “Prepare and Run the Emulsifier (E10)” on page 17
• Chapter 3, “Prepare and Run the Emulsifier (E20)” on page 25
• Chapter 4, “Prepare and Run the Emulsifier (E80)” on page 33
• Chapter 5, “Prepare and Run the Emulsifier (E120)” on page 41
Pre-rinse the SOLiD® EZ Bead™ Amplifier Pouch
IMPORTANT! The Oil Master Mix can be stored at 4 °C for up to two weeks. Before
using the stored Oil Master Mix, shake (by hand) the bottled mix for 30 seconds. Let
the Oil Master Mix reach room temperature and de-gas for 1 hour in a dark location
(such as in a cupboard or drawer).
IMPORTANT! If you are amplifying the library with the SOLiD EZ Bead Amplifier, then
pre-rinse the pouches used with the Amplifier before emulsifying the library.
1. Unscrew the cap from the nozzle of the SOLiD EZ Bead Amplifier Pouch.
2. Use a Pipet-Aid® pipette and a serological pipette of the appropriate volume to
add Oil Master Mix to the Amplifier Pouch (see ).
Volume of Emulsifier Reagents (E10, E20, E80, or E120) – Oil Master Mix to
add to an Amplifier E-Small or E-Large Pouch
Scale
Pouch to use
Volume of Oil Master
Mix to add (mL)
E10, E20
SOLiD EZ Bead Amplifier E-Small Pouch
10
E80, E120
SOLiD EZ Bead Amplifier E-Large Pouch
20
3. Tightly screw the cap onto the nozzle of the Amplifier Pouch to ensure that the
pouch does not leak.
4. Place the Amplifier Pouch on the bench top. Massage the pouch for 2 to 3 minutes
to ensure that the Oil Master Mix coats the inner surface of the pouch.
5. Over a waste container, unscrew the cap(s), then drain the Oil Master Mix into the
container.
6. Gently squeeze the Amplifier Pouch to expel any remaining Oil Master Mix from
the pouch.
7. Drain the Amplifier Pouch upside-down for at least 20 minutes on a layer of clean
lint-free wipes (Kimwipes® Cleaning Wipes). After draining the pouch, the pouch
is ready for use.
IMPORTANT! Do not re-use Oil Master Mix from pre-rinsing.
8. Screw the cap(s) tightly on the nozzle(s) until the Amplifier Pouches are ready for
use. Use the pre-rinsed Amplifier Pouches the same day.
16
Applied Biosystems SOLiD® EZ Bead™ Emulsifier Getting Started Guide
2
Prepare and Run the Emulsifier
(E10)
This chapter explains how to prepare and run the Emulsifier for the E10 scale:
“Choose the scale of preparation of templated beads” on page 13
“Prepare the Oil Master Mix” on page 14
“Pre-rinse the SOLiD® EZ Bead™ Amplifier Pouch” on page 16
“Prepare the P1 Beads (E10)” on page 18
“Install the oil phase (E10)” on page 18
“Prepare the aqueous phase (E10)” on page 21
“Set up and run the Emulsifier (E10)” on page 22
“Collect the emulsion (E10)” on page 23
Applied Biosystems SOLiD® EZ Bead™ Emulsifier Getting Started Guide
17
2
Chapter 2 Prepare and Run the Emulsifier (E10)
Prepare and run the Emulsifier (E10)
Prepare and run the Emulsifier (E10)
Note: You can thaw the Emulsifier reagents on ice as you prepare the P1 Beads and
install the oil phase (see , “Prepare the aqueous phase (E10)” on page 21).
Prepare the P1
Beads (E10)
1. If you are amplifying the library with the SOLiD EZ Bead Amplifier, then it is
recommended to pre-rinse the pouches used with the Amplifier before
emulsifying the library (see “Pre-rinse the SOLiD® EZ Bead™ Amplifier Pouch”
on page 16).
2. Vortex and pulse-spin one tube of Emulsifier E10 – P1 Beads.
3. Ensure that the P1 Beads are completely resuspended, then pipet 220 µL of P1
Beads into a 1.5-mL DNA LoBind Tube.
4. Place the tube of beads in a magnetic rack for at least 1 minute. After the solution
clears, remove and discard the supernatant.
5. Resuspend the beads in 220 µL Emulsifier E10 – BB Solution.
6. Sonicate the beads using the Bead Block Declump program on the Covaris® S2
System (for program conditions, see “Bead Block Declump” on page 61), then
pulse-spin the tube.
7. Place the tube of beads in a magnetic rack for at least 1 minute. After the solution
clears, remove and discard the supernatant.
8. Resuspend the beads in 220 µL of 1X TEX Buffer.
9. Store the beads at 4°C until ready for use.
Install the oil phase
(E10)
1. Unscrew and retain the cap with impeller of the Emulsifier E-Small Jar.
2. Tare the E-Small Jar on an analytical balance.
3. Pour 10.4 g of Oil Master Mix into the E-Small Jar (see “Prepare the Oil Master
Mix” on page 14).
4. Screw the cap with the impeller on the E-Small Jar.
5. Install the jar on the Emulsifier:
a. Turn the knob clockwise to open the compartment door.
b. Pull the arm back at the base towards the opening of the compartment.
c. Slide the jar into the groove of the base of the compartment until the jar stops
against the back of the groove.
d. Allow the arm to rest against the jar (see Figure 2).
e. Rotate the jar so that the port on the cap is to the left of the impeller shaft.
18
Applied Biosystems SOLiD® EZ Bead™ Emulsifier Getting Started Guide
Chapter 2 Prepare and Run the Emulsifier (E10)
Prepare and run the Emulsifier (E10)
2
Figure 2 The jar rests on the back of the groove and the arm is against the jar
6. Fit the impeller head into the locking slot. Slide the coupler down until the
coupler clicks to a stop to ensure that the impeller head is firmly in place in the
coupler (see Table 2).
Table 2 How to fit the impeller head into the locking slot
1. Align the locking slot with the impeller
head.
2. Fit the impeller head into the groove
below the coupler.
3. Slide the coupler over the impeller
head.
7. Attach the tubing with the Luer-Lok to the port of the cap.
8. Insert the 3-stop tubing with one stop in the pump cassette (see Table 3).
Applied Biosystems SOLiD® EZ Bead™ Emulsifier Getting Started Guide
19
2
Chapter 2 Prepare and Run the Emulsifier (E10)
Prepare and run the Emulsifier (E10)
Table 3 How to insert the tubing into the pump cassette
1. Using your right hand, hold
the pump cassette with your
thumb and forefinger.
3. Pull the tubing slightly to
slide the tubing into the pump
cassette.
2. Using your left hand, grasp
the tubing with your thumb and
forefinger above the black stop.
4. Slide the tubing until the
stop is aligned with the stop
fixture on the outside edge of
the pump cassette.
5. Pull the tubing slightly
towards the inside of the pump
cassette to fit the stop snugly
into the fixture.
a. Repeat step 8 to insert the tubing with the second stop at the other end of the
pump cassette. Ensure that the tubing is in the inner groove opposite the
second stop (see Table 3) and that the tubing is in the correct orientation
(see Figure 3).
Figure 3 Correct orientation of the Emulsifier Tubing
b. Install the pump cassette into the roller-head of the pump (see Figure 5 on
page 21).
c. Turn the pinch wheel in the pump cassette counter-clockwise so that the
mark is in the blue zone (see Figure 4 on page 20). This adjustment maintains
correct tubing tension for normal pump operation.
Figure 4 Turn the pinch wheel in the pump cassette so that the mark is in the blue zone
9. Position the tubing so that it threads through the tubing tab (see Figure 5).
20
Applied Biosystems SOLiD® EZ Bead™ Emulsifier Getting Started Guide
Chapter 2 Prepare and Run the Emulsifier (E10)
Prepare and run the Emulsifier (E10)
2
10. Close the door of the compartment, then turn the knob counter-clockwise to lock
the door (see Figure 5).
Figure 5 Placement of Emulsifier E-Small AQ Tube, Tubing, and E-Small Jar
Tubing tab
SOLiD EZ Bead Emulsifier
E-Small AQ Tube
Prepare the
aqueous phase
(E10)
SOLiD EZ Bead Emulsifier
Tubing in pump cassette
SOLiD EZ Bead Emulsifier
E-Small Jar
1. Thaw on ice:
• Emulsifier E10 – P1 reagent, then vortex the reagent for a few seconds, and
pulse-spin.
• Emulsifier E10 – P2 reagent, then vortex the reagent for a few seconds, and
pulse-spin.
• Library template.
Place on ice:
Emulsifier E10 – Aqueous Master mix. Do not vortex
2. Place the Emulsifier E-Small AQ Tube on ice for filling.
3. Prepare a 1:10 dilution of P1 Reagent by adding 4 µL of P1 reagent to 36 µL of
Low TE Buffer in a 1.5-mL DNA LoBind Tube.
4. Add the appropriate volume to the AQ Tube in this order:
E10 Reagent
Volume (µL)
Aqueous Master Mix
7400 - X†
1:10 diluted P1 Reagent
30.8
Undiluted P2 Reagent
46.2
Library template
X
† X = Volume of library template. Use a Pipet-Aid® pipette fitted with a 10-mL serological pipette
to dispense Aqueous Master Mix into the E-Small AQ Tube.
Applied Biosystems SOLiD® EZ Bead™ Emulsifier Getting Started Guide
21
2
Chapter 2 Prepare and Run the Emulsifier (E10)
Prepare and run the Emulsifier (E10)
5. Screw on the cap to the AQ Tube, then swirl to mix the solution. Place the
AQ Tube back on ice.
Set up and run the
Emulsifier (E10)
1. Power on the Emulsifier.
2. Ensure that the Oil Master Mix in the Emulsifier Jar is at room temperature.
3. Vortex, then pulse-spin the tube of prepared P1 beads.
4. Sonicate the prepared P1 Beads using the Covalent Declump 1 program on the
Covaris® S2 System (for program conditions, see “Covalent Declump 1” on page
61), then pulse-spin the tube.
IMPORTANT! Perform steps 5 and 6 below as quickly as possible before the beads
settle in the aqueous phase. If the beads settle before step 6, swirl the aqueous
phase again, then perform step 6.
5. Immediately add the beads to the aqueous phase, then swirl the AQ Tube until the
suspension is uniformly brown.
6. Immediately load the AQ Tube onto the Emulsifier, then attach the tubing to the
cap of the AQ Tube (see Figure 5 on page 21). Ensure that the beads have not
settled.
CAUTION! PINCH HAZARD. Moving Parts. Moving parts can crush,
pinch and cut. Keep hands clear of moving parts while operating the
instrument. Disconnect power before servicing.
7. Start the run:
a. Press the scale-selection button
to select the E10 scale on the instrument
key panel (see Figure 6 on page 23).
b. Press the start button
. The motor starts and runs for ~10 seconds before
the pump starts. The middle light on the panel is lit yellow.
IMPORTANT! Do not open the door of the emulsifier while a run is in
progress. Opening the door automatically aborts the run, and the emulsion is
not properly prepared. If you open the door in error, set up and prepare the
emulsion again (see “Prepare the P1 Beads (E10)” on page 18).
The run time is ~10 minutes. After the run is complete, the Emulsifier stops
automatically, the right light on the panel is lit green, and the panel says,
“Complete.”
IMPORTANT! To stop the run, press the stop button
, then press the stop
button again to confirm that you want to stop the run. The left light on the
panel is lit red, and the panel says, “Run aborted.”
Stop the run only if the Emulsifier malfunctions. If you stop the run
before the run is complete, then discard the emulsion because it is not
properly prepared. Troubleshoot, if necessary (see Appendix B,
“Troubleshooting” on page 57), then prepare and install the reagents
again for the appropriate scale of emulsification.
22
Applied Biosystems SOLiD® EZ Bead™ Emulsifier Getting Started Guide
Chapter 2 Prepare and Run the Emulsifier (E10)
Prepare and run the Emulsifier (E10)
2
Figure 6 How to use the Emulsifier
Emulsification scales
Select scale of run
Stop run
Start run
Light color
Collect the
emulsion (E10)
Meaning
Green
Run is complete
Yellow
Instrument is running
Red
Run aborted, failed run, or error
1. Ensure that the run is finished. When the run is finished, the clock says “00:00.”
2. Turn the knob clockwise to unlock the compartment door, then open the door.
3. Slide the coupler up and away from the impeller head.
4. Gently pull the impeller head from the coupler.
5. Swing out the arm at the base, then remove the impeller and the jar from the
compartment.
6. Detach the tubing from the port on the cap of the jar.
7. Remove the pump cassette, tubing, and AQ Tube from the instrument as one unit.
8. To release the tubing from the pump cassette, turn the pinch wheel clockwise to
the silver zone, then remove the tubing.
9. Discard the used AQ Tube and tubing. Store the pump cassette on top of the
Emulsifier.
IMPORTANT! The pump cassette is part of the instrument and is not disposable.
10. Close the door of the compartment, then turn the knob counter-clockwise to lock
the door.
11. Immediately perform emulsion PCR (ePCR) on the emulsion using the SOLiD EZ
Bead Amplifier [refer to the Applied Biosystems SOLiD® EZ Bead™ Amplifier
Getting Started Guide (Part no. 4443494)].
Applied Biosystems SOLiD® EZ Bead™ Emulsifier Getting Started Guide
23
2
24
Chapter 2 Prepare and Run the Emulsifier (E10)
Prepare and run the Emulsifier (E10)
Applied Biosystems SOLiD® EZ Bead™ Emulsifier Getting Started Guide
3
Prepare and Run the Emulsifier
(E20)
This chapter explains how to prepare and run the Emulsifier for theE20 scale:
“Choose the scale of preparation of templated beads” on page 13
“Prepare the Oil Master Mix” on page 14
“Pre-rinse the SOLiD® EZ Bead™ Amplifier Pouch” on page 16
“Prepare the P1 Beads (E20)” on page 26
“Install the oil phase (E20)” on page 26
“Prepare the aqueous phase (E20)” on page 29
“Set up and run the Emulsifier (E20)” on page 30
“Collect the emulsion (E20)” on page 32
Applied Biosystems SOLiD® EZ Bead™ Emulsifier Getting Started Guide
25
3
Chapter 3 Prepare and Run the Emulsifier (E20)
Prepare and run the Emulsifier (E20)
Prepare and run the Emulsifier (E20)
Note: You can thaw the Emulsifier reagents on ice as you prepare the P1 Beads and
install the oil phase (see, “Prepare the aqueous phase (E20)” on page 29).
Prepare the P1
Beads (E20)
1. If you are amplifying the library with the SOLiD EZ Bead Amplifier, then it is
recommended to pre-rinse the pouches used with the Amplifier before
emulsifying the library (see “Pre-rinse the SOLiD® EZ Bead™ Amplifier Pouch”
on page 16).
2. Vortex and pulse-spin one tube of Emulsifier E20 – P1 Beads.
3. Ensure that the P1 Beads are completely resuspended, then pipet 330 µL of P1
Beads into a 1.5-mL DNA LoBind Tube.
4. Place the tube of beads in a magnetic rack for at least 1 minute. After the solution
clears, remove and discard the supernatant.
5. Resuspend the beads in 330 µL Emulsifier E20 – BB Solution.
6. Sonicate the beads using the Bead Block Declump program on the Covaris® S2
System (for program conditions, see “Bead Block Declump” on page 61), then
lpulse-spin the tube.
7. Place the tube of beads in a magnetic rack for at least 1 minute. After the solution
clears, remove and discard the supernatant.
8. Resuspend the beads in 330 µL of 1X TEX Buffer.
9. Store the beads at 4°C until ready for use.
Install the oil phase
(E20)
1. Unscrew and retain the cap with impeller of the Emulsifier E-Small Jar.
2. Tare the E-Small Jar on an analytical balance.
3. Pour 15.7 g of Oil Master Mix into the E-Small Jar (see “Prepare the Oil Master
Mix” on page 14).
4. Screw the cap with the impeller on the jar.
5. Install the jar on the Emulsifier:
a. Turn the knob clockwise to open the compartment door.
b. Pull the arm back at the base towards the opening of the compartment.
c. Slide the jar into the groove of the base of the compartment until the jar stops
against the back of the groove.
d. Allow the arm to rest against the jar (see Figure 7).
e. Rotate the jar so that the port on the cap is to the left of the impeller shaft.
26
Applied Biosystems SOLiD® EZ Bead™ Emulsifier Getting Started Guide
Chapter 3 Prepare and Run the Emulsifier (E20)
Prepare and run the Emulsifier (E20)
3
Figure 7 The jar rests on the back of the groove and the arm is against the jar
6. Fit the impeller head into the locking slot. Slide the coupler down until the
coupler clicks to a stop to ensure that the impeller head is firmly in place in the
coupler (see Table 4).
Table 4 How to fit the impeller head into the locking slot
1. Align the locking slot with the impeller
head.
2. Fit the impeller head into the groove
below the coupler.
3. Slide the coupler over the impeller
head.
7. Attach the tubing with the Luer-Lok to the port of the cap.
8. Insert the 3-stop tubing with one stop in the pump cassette (see Table 5).
Applied Biosystems SOLiD® EZ Bead™ Emulsifier Getting Started Guide
27
3
Chapter 3 Prepare and Run the Emulsifier (E20)
Prepare and run the Emulsifier (E20)
Table 5 How to insert the tubing into the pump cassette
1. Using your right hand, hold
the pump cassette with your
thumb and forefinger.
3. Pull the tubing slightly to
slide the tubing into the pump
cassette.
2. Using your left hand, grasp
the tubing with your thumb and
forefinger above the black stop.
4. Slide the tubing until the
stop is aligned with the stop
fixture on the outside edge of
the pump cassette.
5. Pull the tubing slightly
towards the inside of the pump
cassette to fit the stop snugly
into the fixture.
a. Repeat step 8 to insert the tubing with the second stop at the other end of the
pump cassette. Ensure that the tubing is in the inner groove opposite the
second stop (see Table 5) and that the tubing is in the correct orientation
(see Figure 8).
b. Install the pump cassette into the roller-head of the pump (see Figure 10 on
page 29).
Figure 8 Correct orientation of the Emulsifier Tubing
c. Turn the pinch wheel in the pump cassette counter-clockwise so that the
mark is in the blue zone (see Figure 9 on page 28). This adjustment maintains
correct tubing tension for normal pump operation.
Figure 9 Turn the pinch wheel in the pump cassette so that the mark is in the blue zone
9. Position the tubing so that it threads through the tubing tab (see Figure 10).
28
Applied Biosystems SOLiD® EZ Bead™ Emulsifier Getting Started Guide
Chapter 3 Prepare and Run the Emulsifier (E20)
Prepare and run the Emulsifier (E20)
3
10. Close the door of the compartment, then turn the knob counter-clockwise to lock
the door (see Figure 10).
Figure 10 Placement of Emulsifier E-Small AQ Tube, Tubing, and E-Small Jar
Tubing tab
SOLiD EZ Bead Emulsifier
E-Small AQ Tube
Prepare the
aqueous phase
(E20)
SOLiD EZ Bead Emulsifier
Tubing in pump cassette
SOLiD EZ Bead Emulsifier
E-Small Jar
1. Thaw on ice:
• Emulsifier E20 – P1 reagent, then vortex the reagent for a few seconds, and
pulse-spin.
•
Emulsifier E20 – P2 reagent, then vortex the reagent for a few seconds, and
pulse-spin.
• Library template.
Place on ice:
Emulsifier E20 – Aqueous Master mix. Do not vortex
2. Place the Emulsifier E-Small AQ Tube on ice for filling.
3. Prepare a 1:10 dilution of P1 Reagent by adding 5 µL of P1 reagent to 45 µL of
Low TE Buffer in a 1.5-mL DNA LoBind Tube.
4. Add the appropriate volume to the AQ Tube in this order:
E20 Reagent
Volume (µL)
Aqueous Master Mix
11060 - X†
1:10 diluted P1 Reagent
46
Undiluted P2 Reagent
69
Applied Biosystems SOLiD® EZ Bead™ Emulsifier Getting Started Guide
29
3
Chapter 3 Prepare and Run the Emulsifier (E20)
Prepare and run the Emulsifier (E20)
E20 Reagent
Library template
†
Volume (µL)
X
X = Volume of library template. Use a Pipet-Aid® pipette fitted with a 25-mL serological pipette
to dispense Aqueous Master Mix into the E-Small AQ Tube.
5. Cap the AQ Tube and swirl to mix the solution. Place the AQ Tube back on ice.
Set up and run the
Emulsifier (E20)
1. Power on the Emulsifier.
2. Ensure that the Oil Master Mix in the Emulsifier Jar is at room temperature.
3. Vortex, then pulse-spin the tube of prepared P1 beads.
4. Sonicate the prepared P1 Beads using the Covalent Declump 1 program on the
Covaris® S2 System (for program conditions, see “Covalent Declump 1” on page
61), then pulse-spin the tube.
IMPORTANT! Perform steps 5 and 6 below as quickly as possible before the beads
settle in the aqueous phase. If the beads settle before step 6, swirl the aqueous
phase again, then perform step 6.
5. Immediately add the beads to the aqueous phase, then swirl the AQ Tube until the
suspension is uniformly brown.
6. Immediately load the AQ Tube onto the Emulsifier, then attach the tubing to the
cap of the AQ Tube (see Figure 10 on page 29). Ensure that the beads have not
settled.
CAUTION! PINCH HAZARD. Moving Parts. Moving parts can crush,
pinch and cut. Keep hands clear of moving parts while operating the
instrument. Disconnect power before servicing.
7. Start the run:
a. Press the scale-selection button
to select the E20 scale on the
instrument key panel (see Figure 11 on page 31).
b. Press the start button
. The motor starts and runs for ~10 seconds before
the pump starts. The middle light on the panel is lit yellow.
IMPORTANT! Do not open the door of the emulsifier while a run is in
progress. Opening the door automatically aborts the run, and the emulsion is
not properly prepared. If you open the door in error, set up and prepare the
emulsion again (see “Prepare the P1 Beads (E20)” on page 26).
The run time is ~10 minutes. After the run is complete, the Emulsifier stops
automatically, the right light on the panel is lit green, and the panel says,
“Complete.”
30
Applied Biosystems SOLiD® EZ Bead™ Emulsifier Getting Started Guide
Chapter 3 Prepare and Run the Emulsifier (E20)
Prepare and run the Emulsifier (E20)
3
IMPORTANT! To stop the run, press the stop button
, then press the stop
button again to confirm that you want to stop the run. The left light on the
panel is lit red, and the panel says, “Run aborted.”
Stop the run only if the Emulsifier malfunctions. If you stop the run
before the run is complete, then discard the emulsion because it is not
properly prepared. Troubleshoot, if necessary (see Appendix B,
“Troubleshooting” on page 57), then prepare and install the reagents
again for the appropriate scale of emulsification.
Figure 11 How to use the Emulsifier
Emulsification scales
Select scale of run
Stop run
Start run
Light color
Meaning
Green
Run is complete
Yellow
Instrument is running
Red
Run aborted, failed run, or error
Applied Biosystems SOLiD® EZ Bead™ Emulsifier Getting Started Guide
31
3
Chapter 3 Prepare and Run the Emulsifier (E20)
Prepare and run the Emulsifier (E20)
Collect the
emulsion (E20)
1. Ensure that the run is finished. When the run is finished, the clock says “00:00.”
2. Turn the knob clockwise to unlock the compartment door, then open the door.
3. Slide the coupler up and away from the impeller head.
4. Gently pull the impeller head from the coupler.
5. Swing out the arm at the base, then remove the impeller and the jar from the
compartment.
6. Detach the tubing from the port on the cap of the jar.
7. Remove the pump cassette, tubing, and AQ Tube from the instrument as one unit.
8. To release the tubing from the pump cassette, turn the pinch wheel clockwise to
the silver zone, then remove the tubing.
9. Discard the used AQ Tube and tubing. Store the pump cassette on top of the
Emulsifier.
IMPORTANT! The pump cassette is part of the instrument and is not disposable.
10. Close the door of the compartment, then turn the knob counter-clockwise to lock
the door.
11. Immediately perform emulsion PCR (ePCR) on the emulsion using the SOLiD EZ
Bead Amplifier [refer to the Applied Biosystems SOLiD® EZ Bead™ Amplifier
Getting Started Guide (Part no. 4443494)].
32
Applied Biosystems SOLiD® EZ Bead™ Emulsifier Getting Started Guide
4
Prepare and Run the Emulsifier
(E80)
This chapter explains how to prepare and run the Emulsifier for the E80 scale:
“Choose the scale of preparation of templated beads” on page 13
“Prepare the Oil Master Mix” on page 14
“Pre-rinse the SOLiD® EZ Bead™ Amplifier Pouch” on page 16
“Prepare the P1 Beads (E80)” on page 34
“Install the oil phase (E80)” on page 34
“Prepare the aqueous phase (E80)” on page 37
“Set up and run the Emulsifier (E80)” on page 38
“Collect the emulsion (E80)” on page 39
Applied Biosystems SOLiD® EZ Bead™ Emulsifier Getting Started Guide
33
4
Chapter 4 Prepare and Run the Emulsifier (E80)
Prepare and run the Emulsifier (E80)
Prepare and run the Emulsifier (E80)
Note: You can thaw the Emulsifier reagents on ice as you prepare the P1 Beads and
install the oil phase (see , “Prepare the aqueous phase (E80)” on page 37).
Prepare the P1
Beads (E80)
1. If you are amplifying the library with the SOLiD EZ Bead Amplifier, then it is
recommended to pre-rinse the pouches used with the Amplifier before
emulsifying the library (see “Pre-rinse the SOLiD® EZ Bead™ Amplifier Pouch”
on page 16).
2. Vortex and pulse-spin one tube of Emulsifier E80 – P1 Beads.
3. Ensure that the P1 Beads are completely resuspended, then pipet 1430 µL of P1
Beads into a 2.0-mL DNA LoBind Tube.
4. Place the tube of beads in a magnetic rack for at least 1 minute. After the solution
clears, remove and discard the supernatant.
5. Resuspend the beads in 1430 µL Emulsifier E80 – BB Solution.
6. Sonicate the beads using the Bead Block Declump program on the Covaris® S2
System (for program conditions, see “Bead Block Declump” on page 61), then
pulse-spin the tube.
7. Place the tube of beads in a magnetic rack for at least 1 minute. After the solution
clears, remove and discard the supernatant.
8. Resuspend the beads in 1430 µL of 1X TEX Buffer.
9. Store the beads at 4°C until ready for use.
Install the oil phase
(E80)
1. Unscrew and retain the cap with impeller of the Emulsifier E-Large Jar.
2. Tare the E-Large Jar on an analytical balance.
3. Pour 67.9 g of Oil Master Mix into the E-Large Jar (see “Prepare the Oil Master
Mix” on page 14).
4. Screw the cap with the impeller on the jar.
5. Install the jar on the Emulsifier:
a. Turn the knob clockwise to open the compartment door.
b. Pull the arm back at the base towards the opening of the compartment.
c. Slide the jar until it stops against the two posts at the rear of the
compartment.
d. Allow the arm to rest against the jar (see Figure 12).
e. Rotate the jar so that the port on the cap is to the left of the impeller shaft.
34
Applied Biosystems SOLiD® EZ Bead™ Emulsifier Getting Started Guide
Chapter 4 Prepare and Run the Emulsifier (E80)
Prepare and run the Emulsifier (E80)
4
Figure 12 Rest the arm against the jar
6. Fit the impeller head into the locking slot. Slide the coupler down until the
coupler clicks to a stop to ensure that the impeller head is firmly in place in the
coupler (see Table 6).
Table 6 How to fit the impeller head into the locking slot
Coupler
Coupler
Locking slot
Impeller head
Locking slot
Locking slot
Impeller head
Impeller head
1. Align the locking slot with the impeller
head.
2. Fit the impeller head into the groove
below the coupler.
3. Slide the coupler over the impeller
head.
7. Attach the tubing with the Luer-Lok to the port of the cap.
8. Insert the 3-stop tubing with one stop in the pump cassette (see Table 7 on page
36).
Applied Biosystems SOLiD® EZ Bead™ Emulsifier Getting Started Guide
35
4
Chapter 4 Prepare and Run the Emulsifier (E80)
Prepare and run the Emulsifier (E80)
Table 7 How to insert the tubing into the pump cassette
1. Using your right hand, hold
the pump cassette with your
thumb and forefinger.
3. Pull the tubing slightly to
slide the tubing into the pump
cassette.
2. Using your left hand, grasp
the tubing with your thumb and
forefinger above the black stop.
4. Slide the tubing until the
stop is aligned with the stop
fixture on the outside edge of
the pump cassette.
5. Pull the tubing slightly
towards the inside of the pump
cassette to fit the stop snugly
into the fixture.
a. Repeat step 8 to insert the tubing with the second stop at the other end of the
pump cassette. Ensure that the tubing is in the inner groove opposite the
second stop (see Table 7) and that the tubing is in the correct orientation
(see Figure 13).
Figure 13 Correct orientation of the Emulsifier Tubing
b. Install the pump cassette into the roller-head of the pump (see Figure 15 on
page 37).
c. Turn the pinch wheel in the pump cassette counter-clockwise so that the
mark is in the blue zone (see Figure 14). This adjustment maintains correct
tubing tension for normal pump operation.
Figure 14 Turn the pinch wheel in the pump cassette so that the mark is in the blue zone
9. Position the tubing so that it threads through the tubing tab (see Figure 15).
36
Applied Biosystems SOLiD® EZ Bead™ Emulsifier Getting Started Guide
Chapter 4 Prepare and Run the Emulsifier (E80)
Prepare and run the Emulsifier (E80)
4
10. Close the door of the compartment, then turn the knob counter-clockwise to lock
the door (see Figure 15).
Figure 15 Placement of Emulsifier E-Large AQ Tube, Tubing, and E-Large Jar
Tubing tab
SOLiD EZ Bead Emulsifier
E-Large AQ Tube
Prepare the
aqueous phase
(E80)
SOLiD EZ Bead Emulsifier
Tubing in pump cassette
SOLiD EZ Bead Emulsifier
E-Large Jar
1. Thaw on ice:
• Emulsifier E80 – P1 reagent, then vortex the reagent for a few seconds, and
pulse-spin.
• Emulsifier E80 – P2 reagent, then vortex the reagent for a few seconds, and
pulse-spin.
• Library template.
Place on ice:
Emulsifier E80 – Aqueous Master mix. Do not vortex
2. Place the Emulsifier E-Large AQ Tube on ice for filling.
3. Prepare a 1:10 dilution of P1 Reagent by adding 21 µL of P1 reagent to 189 µL of
Low TE Buffer in a 1.5-mL DNA LoBind Tube.
4. Add the appropriate volume to the AQ Tube in this order:
E80 Reagent
Volume (µL)
Aqueous Master Mix
48000 - X†
1:10 diluted P1 Reagent
200
Undiluted P2 Reagent
300
Library template
X
† X = Volume of library template. Use a Pipet-Aid® pipette fitted with a 50-mL serological pipette
to dispense Aqueous Master Mix into the E-Large AQ Tube.
Applied Biosystems SOLiD® EZ Bead™ Emulsifier Getting Started Guide
37
4
Chapter 4 Prepare and Run the Emulsifier (E80)
Prepare and run the Emulsifier (E80)
5. Cap the AQ Tube and swirl to mix the solution. Place the AQ Tube back on ice.
Set up and run the
Emulsifier (E80)
1. Power on the Emulsifier.
2. Ensure that the Oil Master Mix in the Emulsifier Jar is at room temperature.
3. Vortex, then pulse-spin the tube of prepared P1 beads.
4. Sonicate the prepared P1 Beads using the Covalent Declump 3 program on the
Covaris® S2 System (for program conditions, see “Covalent Declump 3” on page
61), then pulse-spin the tube.
IMPORTANT! Perform steps 5 and 6 below as quickly as possible before the beads
settle in the aqueous phase. If the beads settle before step 6, swirl the aqueous
phase again, then perform step 6.
5. Immediately add the beads to the aqueous phase, then swirl the AQ Tube until the
suspension is uniformly brown.
6. Immediately load the AQ Tube onto the Emulsifier, then attach the tubing to the
cap of the AQ Tube (see Figure 15 on page 37). Ensure that the beads have not
settled.
CAUTION! PINCH HAZARD. Moving Parts. Moving parts can crush,
pinch and cut. Keep hands clear of moving parts while operating the
instrument. Disconnect power before servicing.
7. Start the run:
a. Press the scale-selection button
to select the E80 scale on the instrument
key panel (see Figure 16 on page 39).
b. Press the start button
. The motor starts and runs for ~10 seconds before
the pump starts. The middle light on the panel is lit yellow.
IMPORTANT! Do not open the door of the emulsifier while a run is in
progress. Opening the door automatically aborts the run, and the emulsion is
not properly prepared. If you open the door in error, set up and prepare the
emulsion again (see “Prepare the P1 Beads (E80)” on page 34).
The run time is ~15 minutes. After the run is complete, the SOLiD EZ Bead
Emulsifier stops automatically, the right light on the panel is lit green, and
the panel says, “Complete.”
IMPORTANT! To stop the run, press the stop button
, then press the stop
button again to confirm that you want to stop the run. The left light on the
panel is lit red, and the panel says, “Run aborted.”
Stop the run only if the SOLiD EZ Bead Emulsifier malfunctions. If
you stop the run before the run is complete, then discard the emulsion
because it is not properly prepared. Troubleshoot, if necessary (see
Appendix B, “Troubleshooting” on page 57), then prepare and install
the reagents again for the appropriate scale of emulsification.
38
Applied Biosystems SOLiD® EZ Bead™ Emulsifier Getting Started Guide
Chapter 4 Prepare and Run the Emulsifier (E80)
Prepare and run the Emulsifier (E80)
4
Figure 16 How to use the Emulsifier
Emulsification scales
Select scale of run
Stop run
Start run
Light color
Collect the
emulsion (E80)
Meaning
Green
Run is complete
Yellow
Instrument is running
Red
Run aborted, failed run, or error
1. Ensure that the run is finished. When the run is finished, the clock says “00:00.”
2. Turn the knob clockwise to unlock the compartment door, then open the door.
3. Slide the coupler up and away from the impeller head.
4. Gently pull the impeller head from the coupler.
5. Swing out the arm at the base, then remove the impeller and the jar from the
compartment.
6. Detach the tubing from the port on the cap of the jar.
7. Remove the pump cassette, tubing, and AQ Tube from the instrument as one unit.
8. To release the tubing from the pump cassette, turn the pinch wheel clockwise to
the silver zone, then remove the tubing.
9. Discard the used AQ Tube and tubing. Store the pump cassette on top of the
Emulsifier.
IMPORTANT! The pump cassette is part of the instrument and is not disposable.
10. Close the door of the compartment, then turn the knob counter-clockwise to lock
the door.
11. Immediately perform emulsion PCR (ePCR) on the emulsion using the SOLiD EZ
Bead Amplifier [refer to the Applied Biosystems SOLiD® EZ Bead™ Amplifier
Getting Started Guide (Part no. 4443494)].
Applied Biosystems SOLiD® EZ Bead™ Emulsifier Getting Started Guide
39
4
40
Chapter 4 Prepare and Run the Emulsifier (E80)
Prepare and run the Emulsifier (E80)
Applied Biosystems SOLiD® EZ Bead™ Emulsifier Getting Started Guide
5
Prepare and Run the Emulsifier
(E120)
This chapter explains how to prepare and run the Emulsifier for the E120 scale:
“Choose the scale of preparation of templated beads” on page 13
“Prepare the Oil Master Mix” on page 14
“Pre-rinse the SOLiD® EZ Bead™ Amplifier Pouch” on page 16
“Prepare the P1 Beads (E120)” on page 42
“Install the oil phase (E120)” on page 42
“Prepare the aqueous phase (E120)” on page 45
“Set up and run the Emulsifier (E120)” on page 46
“Collect the emulsion (E120)” on page 47
Applied Biosystems SOLiD® EZ Bead™ Emulsifier Getting Started Guide
41
5
Chapter 5 Prepare and Run the Emulsifier (E120)
Prepare and run the Emulsifier (E120)
Prepare and run the Emulsifier (E120)
Note: You can thaw the Emulsifier reagents on ice as you prepare the P1 Beads and
install the oil phase (see , “Prepare the aqueous phase (E120)” on page 45).
Prepare the P1
Beads (E120)
1. If you are amplifying the library with the SOLiD® EZ Bead™ Amplifier, then we
recommend pre-rinsing the pouches used with the Amplifier before emulsifying
the library (see “Pre-rinse the SOLiD® EZ Bead™ Amplifier Pouch” on page 16).
2. Vortex and pulse-spin one tube of Emulsifier E120 – P1 Beads.
3. Ensure that the P1 Beads are completely resuspended, then pipet 1430 µL of
P1 Beads into each of TWO 2.0-mL DNA LoBind Tubes for a total of 2860 µL of
P1 Beads.
4. Place both tubes of beads in a magnetic rack for at least 1 minute. After the
solution clears, remove and discard the supernatant.
5. Resuspend EACH tube of beads in 1430 µL Emulsifier E120 – BB Solution.
6. Sonicate EACH tube of beads using the Bead Block Declump program on the
Covaris™ S2 System (for program conditions, see “Bead Block Declump” on
page 61), then pulse-spin the tubes.
7. Place BOTH tubes of beads in a magnetic rack for at least 1 minute. After the
solution clears, remove and discard the supernatant.
8. Resuspend the beads in EACH tube in 715 µL of 1X TEX Buffer.
9. Combine the two tubes of beads into one tube. Use 300 µL of 1X TEX Buffer to
rinse out any remaining beads in the empty tube, then add them into the first
tube. Discard the empty tube.
10. Place the tube of beads in a magnetic rack for at least 1 minute. After the solution
clears, remove and discard the supernatant.
11. Resuspend the beads in 1430 µL of 1X TEX Buffer.
12. Store the beads at 4°C until they are ready for use.
Install the oil phase
(E120)
1. Unscrew and retain the cap with impeller of the Emulsifier E-Large Jar.
2. Tare the E-Large Jar on an analytical balance.
3. Pour 67.9 g of Oil Master Mix into the E-Large Jar (see “Prepare the Oil Master
Mix” on page 14).
4. Screw the cap with the impeller on the jar.
5. Install the jar on the Emulsifier:
a. Turn the knob clockwise to open the compartment door.
b. Pull the arm back at the base towards the opening of the compartment.
c. Slide the jar until it stops against the two posts at the rear of the
compartment.
d. Allow the arm to rest against the jar (see Figure 17).
42
Applied Biosystems SOLiD® EZ Bead™ Emulsifier Getting Started Guide
Chapter 5 Prepare and Run the Emulsifier (E120)
Prepare and run the Emulsifier (E120)
5
e. Rotate the jar so that the port on the cap is to the left of the impeller shaft.
Figure 17 Rest the arm against the jar
6. Fit the impeller head into the locking slot. Slide the coupler down until the
coupler clicks to a stop to ensure that the impeller head is firmly in place in the
coupler (see Table 8).
Table 8 How to fit the impeller head into the locking slot
Coupler
Coupler
Locking slot
Impeller head
Locking slot
Locking slot
Impeller head
Impeller head
1. Align the locking slot with the impeller
head.
2. Fit the impeller head into the groove
below the coupler.
3. Slide the coupler over the impeller
head.
7. Attach the tubing with the Luer-Lok to the port of the cap.
8. Insert the 3-stop tubing with one stop in the pump cassette (see Table 9 on page
44).
Applied Biosystems SOLiD® EZ Bead™ Emulsifier Getting Started Guide
43
5
Chapter 5 Prepare and Run the Emulsifier (E120)
Prepare and run the Emulsifier (E120)
Table 9 How to insert the tubing into the pump cassette
1. Using your right hand, hold
the pump cassette with your
thumb and forefinger.
3. Pull the tubing slightly to
slide the tubing into the pump
cassette.
2. Using your left hand, grasp
the tubing with your thumb and
forefinger above the black stop.
4. Slide the tubing until the
stop is aligned with the stop
fixture on the outside edge of
the pump cassette.
5. Pull the tubing slightly
towards the inside of the pump
cassette to fit the stop snugly
into the fixture.
a. Repeat step 8 to insert the tubing with the second stop at the other end of the
pump cassette. Ensure that the tubing is in the inner groove opposite the
second stop (see Table 9) and that the tubing is in the correct orientation
(see Figure 18).
Figure 18 Correct orientation of the Emulsifier Tubing
b. Install the pump cassette into the roller-head of the pump (see Figure 20 on
page 45).
c. Turn the pinch wheel in the pump cassette counter-clockwise so that the
mark is in the blue zone (see Figure 19). This adjustment maintains correct
tubing tension for normal pump operation.
Figure 19 Turn the pinch wheel in the pump cassette so that the mark is in the blue zone
9. Position the tubing so that it threads through the tubing tab (see Figure 20).
44
Applied Biosystems SOLiD® EZ Bead™ Emulsifier Getting Started Guide
Chapter 5 Prepare and Run the Emulsifier (E120)
Prepare and run the Emulsifier (E120)
5
10. Close the door of the compartment, then turn the knob counter-clockwise to lock
the door (see Figure 20).
Figure 20 Placement of Emulsifier E-Large AQ Tube, Tubing, and E-Large Jar
Tubing tab
SOLiD EZ Bead Emulsifier
E-Large AQ Tube
Prepare the
aqueous phase
(E120)
SOLiD EZ Bead Emulsifier
Tubing in pump cassette
SOLiD EZ Bead Emulsifier
E-Large Jar
1. Thaw on ice:
• Emulsifier E120 – P1 reagent, then vortex the reagent for a few seconds, and
pulse-spin.
• Emulsifier E120 – P2 reagent, then vortex the reagent for a few seconds, and
pulse-spin.
• Library template.
Place on ice:
Emulsifier E120 – Aqueous Master mix. Do not vortex.
2. Place the Emulsifier E-Large AQ Tube on ice for filling.
3. Prepare a 1:10 dilution of P1 Reagent by adding 21 µL of P1 reagent to 189 µL of
Low TE Buffer in a 1.5-mL DNA LoBind Tube.
4. Add the appropriate volume to the AQ Tube in this order:
E120 Reagent
Volume (µL)
Aqueous Master Mix
48000 - X†
1:10 diluted P1 Reagent
200
Undiluted P2 Reagent
300
Library template
X
† X = Volume of library template. Use a Pipet-Aid® pipette fitted with a 50-mL serological pipette
to dispense Aqueous Master Mix into the E-Large AQ Tube.
Applied Biosystems SOLiD® EZ Bead™ Emulsifier Getting Started Guide
45
5
Chapter 5 Prepare and Run the Emulsifier (E120)
Prepare and run the Emulsifier (E120)
5. Cap the AQ Tube and swirl to mix the solution. Place the AQ Tube back on ice.
Set up and run the
Emulsifier (E120)
1. Power on the Emulsifier.
2. Ensure that the Oil Master Mix in the Emulsifier Jar is at room temperature.
3. Vortex, then pulse-spin the tube of prepared P1 beads.
4. Sonication of P1 beads:
a. Sonicate the prepared P1 Beads two times, using the Covalent Declump 3
program on the Covaris S2 System (for program conditions, see “Covalent
Declump 3” on page 61).
b. Pulse-spin the tube.
IMPORTANT! Perform steps 5 and 6 below as quickly as possible before the beads
settle in the aqueous phase. If the beads settle before step 6, swirl the aqueous
phase again, then perform step 6.
5. Immediately add the beads to the aqueous phase, then swirl the AQ Tube until the
suspension is uniformly brown.
6. Immediately load the AQ Tube onto the Emulsifier, then attach the tubing to the
cap of the AQ Tube (see Figure 20 on page 45). Ensure that the beads have not
settled.
CAUTION! PINCH HAZARD. Moving Parts. Moving parts can crush,
pinch and cut. Keep hands clear of moving parts while operating the
instrument. Disconnect power before servicing.
7. Start the run:
a. Press the scale-selection button
to select the E120 scale on the
instrument key panel (see Figure 21 on page 47).
b. Press the start button
. The motor starts and runs for ~10 seconds before
the pump starts. The middle light on the panel is lit yellow.
IMPORTANT! Do not open the door of the emulsifier while a run is in
progress. Opening the door automatically aborts the run, and the emulsion is
not properly prepared. If you open the door in error, set up and prepare the
emulsion again (see “Prepare the P1 Beads (E120)” on page 42).
The run time is ~15 minutes. After the run is complete, the SOLiD EZ Bead
Emulsifier stops automatically, the right light on the panel is lit green, and
the panel says, “Complete.”
IMPORTANT! To stop the run, press the stop button
, then press the stop
button again to confirm that you want to stop the run. The left light on the
panel is lit red, and the panel says, “Run aborted.”
Stop the run only if the SOLiD EZ Bead Emulsifier malfunctions. If
you stop the run before the run is complete, then discard the emulsion
because it is not properly prepared. Troubleshoot, if necessary (see
Appendix B, “Troubleshooting” on page 57), then prepare and install
the reagents again for the appropriate scale of emulsification.
46
Applied Biosystems SOLiD® EZ Bead™ Emulsifier Getting Started Guide
Chapter 5 Prepare and Run the Emulsifier (E120)
Prepare and run the Emulsifier (E120)
5
Figure 21 How to use the Emulsifier
Emulsification scales
Select scale of run
Stop run
Start run
Light color
Collect the
emulsion (E120)
Meaning
Green
Run is complete
Yellow
Instrument is running
Red
Run aborted, failed run, or error
1. Ensure that the run is finished. When the run is finished, the clock reads “00:00.”
2. Turn the knob clockwise to unlock the compartment door, then open the door.
3. Slide the coupler up and away from the impeller head.
4. Gently pull the impeller head from the coupler.
5. Swing out the arm at the base, then remove the impeller and the jar from the
compartment.
6. Detach the tubing from the port on the cap of the jar.
7. Remove the pump cassette, tubing, and AQ Tube from the instrument as one unit.
8. To release the tubing from the pump cassette, turn the pinch wheel clockwise to
the silver zone, then remove the tubing.
9. Discard the used AQ Tube and tubing. Store the pump cassette on top of the
Emulsifier.
IMPORTANT! The pump cassette is part of the instrument and is not disposable.
10. Close the door of the compartment, then turn the knob counter-clockwise to lock
the door.
11. Immediately perform emulsion PCR (ePCR) on the emulsion using the SOLiD EZ
Bead Amplifier [refer to the Applied Biosystems SOLiD® EZ Bead™ Amplifier
Getting Started Guide (Part no. 4443494)].
Applied Biosystems SOLiD® EZ Bead™ Emulsifier Getting Started Guide
47
5
48
Chapter 5 Prepare and Run the Emulsifier (E120)
Prepare and run the Emulsifier (E120)
Applied Biosystems SOLiD® EZ Bead™ Emulsifier Getting Started Guide
A
Ordering Information
Order one or more of the kits according to the scale of emulsion preparation.
Required kits (E10)
Required Applied Biosystems kits (E10)
Item (part number)†
Applied Biosystems SOLiD® EZ Bead™ Emulsifier
E10 Reagent Kit (4452720)
Components
Box 1:
• SOLiD EZ Bead Emulsifier E10 – Aqueous Master Mix
• SOLiD EZ Bead Emulsifier E10 – P1 Beads
Box 2:
• SOLiD EZ Bead Emulsifier E10 – P1 Reagent
• SOLiD EZ Bead Emulsifier E10 – P2 Reagent
• SOLiD EZ Bead Emulsifier E10 – BB Solution
Box 3:
• SOLiD EZ Bead Emulsifier Reagent – 1X TEX Buffer
• SOLiD EZ Bead Emulsifier Reagent – 1X Low TE Buffer
SOLiD®
EZ Bead™ Emulsifier Oil Pack Kit
(4457185)
SOLiD EZ Bead Emulsifier Oil Kit:
• SOLiD EZ Bead Emulsifier Oil Kit – Stabilizer 1
• SOLiD EZ Bead Emulsifier Oil Kit – Stabilizer 2
• SOLiD EZ Bead Emulsifier Oil Kit – Oil
SOLiD EZ Bead Emulsifier Oil Accessory Kit:
• SOLiD EZ Bead Emulsifier Oil Kit– Oil Mix Bottle
• SOLiD EZ Bead Emulsifier Oil Kit– Oil Funnel
SOLiD® EZ Bead™ Emulsifier E10 Accessories Kit
(4453065)
SOLiD EZ Bead Emulsifier E-Small Jar Pack
SOLiD EZ Bead Emulsifier E-Small AQ Tube Pack
SOLiD EZ Bead Emulsifier Tubing Pack
SOLiD® EZ Bead™ E10 System Consumables, 4pack (4453093)‡
SOLiD EZ Bead Emulsifier E10 Reagent Kit
SOLiD EZ Bead Emulsifier E10 Accessories Kit
SOLiD EZ Bead Amplifier E10 Accessories Kit
SOLiD EZ Bead Enricher E10 Reagent Kit
SOLiD EZ Bead Enricher Buffer Kit
SOLiD EZ Bead Enricher Accessories Kit
† Applied Biosystems has validated this protocol using this specific material. Substitution may adversely affect system performance.
Applied Biosystems SOLiD® EZ Bead™ Emulsifier Getting Started Guide
49
A
Appendix A Ordering Information
Required kits (E20)
‡ The kit includes consumables for all three instruments of the SOLiD EZ Bead System: the Enricher, Amplifier, and Emulsifier.
Required kits (E20)
Required Applied Biosystems kits (E20)
Item (part number)†
Applied Biosystems SOLiD®
EZ Bead™ Emulsifier E20
Reagent Kit
(4452721)
Components
Box 1:
• SOLiD EZ Bead Emulsifier E20 – Aqueous Master Mix
• SOLiD EZ Bead Emulsifier E20 – P1 Beads
Box 2:
• SOLiD EZ Bead Emulsifier E20 – P1 Reagent
• SOLiD EZ Bead Emulsifier E20 – P2 Reagent
• SOLiD EZ Bead Emulsifier E20 – BB Solution
Box 3:
• SOLiD EZ Bead Emulsifier Reagent – 1X TEX Buffer
• SOLiD EZ Bead Emulsifier Reagent – 1X Low TE Buffer
SOLiD® EZ Bead™
Emulsifier Oil Pack Kit
(4457185)
SOLiD EZ Bead Emulsifier Oil Kit:
• SOLiD EZ Bead Emulsifier Oil Kit – Stabilizer 1
• SOLiD EZ Bead Emulsifier Oil Kit – Stabilizer 2
• SOLiD EZ Bead Emulsifier Oil Kit – Oil
SOLiD EZ Bead Emulsifier Oil Accessory Kit:
• SOLiD EZ Bead Emulsifier Oil Kit– Oil Mix Bottle
• SOLiD EZ Bead Emulsifier Oil Kit– Oil Funnel
SOLiD® EZ Bead™
Emulsifier E20 Accessories
Kit (4453076)
SOLiD EZ Bead Emulsifier E-Small Jar Pack
SOLiD EZ Bead Emulsifier E-Small AQ Tube Pack
SOLiD EZ Bead Emulsifier Tubing Pack
SOLiD® EZ Bead™ E20
System Consumables,
4-pack (4453094)‡
SOLiD EZ Bead Emulsifier E20 Reagent Kit
SOLiD EZ Bead Emulsifier E20 Accessories Kit
SOLiD EZ Bead Amplifier E20 Accessories Kit
SOLiD EZ Bead Enricher E20 Reagent Kit
SOLiD EZ Bead Enricher Buffer Kit
SOLiD EZ Bead Enricher Accessories Kit
† Applied Biosystems has validated this protocol using this specific material. Substitution may adversely affect
system performance.
‡ The kit includes consumables for all three instruments of the SOLiD EZ Bead System: the Enricher,
Amplifier, and Emulsifier.
50
Applied Biosystems SOLiD® EZ Bead™ Emulsifier Getting Started Guide
Appendix A Ordering Information
Required kits (E80)
A
Required kits (E80)
Required Applied Biosystems kits (E80)
Item (part number)†
Applied Biosystems SOLiD®
EZ Bead™ Emulsifier E80
Reagent Kit
(4452722)
Components
Box 1:
• SOLiD EZ Bead Emulsifier E80 – Aqueous Master Mix
• SOLiD EZ Bead Emulsifier E80 – P1 Beads
Box 2:
• SOLiD EZ Bead Emulsifier E80 – P1 Reagent
• SOLiD EZ Bead Emulsifier E80 – P2 Reagent
• SOLiD EZ Bead Emulsifier E80 – BB Solution
Box 3:
• SOLiD EZ Bead Emulsifier Reagent – 1X TEX Buffer
• SOLiD EZ Bead Emulsifier Reagent – 1X Low TE Buffer
SOLiD® EZ Bead™
Emulsifier Oil Pack Kit
(4457185)
SOLiD EZ Bead Emulsifier Oil Kit:
• SOLiD EZ Bead Emulsifier Oil Kit – Stabilizer 1
• SOLiD EZ Bead Emulsifier Oil Kit – Stabilizer 2
• SOLiD EZ Bead Emulsifier Oil Kit – Oil
SOLiD EZ Bead Emulsifier Oil Accessory Kit:
• SOLiD EZ Bead Emulsifier Oil Kit– Oil Mix Bottle
• SOLiD EZ Bead Emulsifier Oil Kit– Oil Funnel
SOLiD® EZ Bead™
Emulsifier E80 Accessories
Kit (4453070)
SOLiD EZ Bead Emulsifier E-Large Jar Pack
SOLiD EZ Bead Emulsifier E-Large AQ Tube Pack
SOLiD EZ Bead Emulsifier Tubing Pack
SOLiD® EZ Bead™ E80
System Consumables,
4-pack (4453095)‡
SOLiD EZ Bead Emulsifier E80 Reagent Kit
SOLiD EZ Bead Emulsifier E80 Accessories Kit
SOLiD EZ Bead Amplifier E80 Accessories Kit
SOLiD EZ Bead Enricher E80 Reagent Kit
SOLiD EZ Bead Enricher Buffer Kit
SOLiD EZ Bead Enricher Accessories Kit
† Applied Biosystems has validated this protocol using this specific material. Substitution may adversely affect
system performance.
‡ The kit includes consumables for all three instruments of the SOLiD EZ Bead System: the Emulsifier,
Amplifier, and Enricher.
Applied Biosystems SOLiD® EZ Bead™ Emulsifier Getting Started Guide
51
A
Appendix A Ordering Information
Required kits (E120)
Required kits (E120)
Required Applied Biosystems kits (E120)
Item (part number)†
Components
Applied Biosystems
SOLiD® EZ Bead™
Emulsifier E120 Reagent
Kit
(4465555)
Box 1:
• SOLiD EZ Bead Emulsifier E120 – Aqueous Master Mix
• SOLiD EZ Bead Emulsifier E120 – P1 Beads
Box 2:
• SOLiD EZ Bead Emulsifier E120 – P1 Reagent
• SOLiD EZ Bead Emulsifier E120 – P2 Reagent
• SOLiD EZ Bead Emulsifier E120 – BB Solution
Box 3:
• SOLiD EZ Bead Emulsifier Reagent – 1X TEX Buffer
• SOLiD EZ Bead Emulsifier Reagent – 1X Low TE Buffer
SOLiD® EZ Bead™
Emulsifier Oil Pack Kit
(4457185)
SOLiD EZ Bead Emulsifier Oil Kit:
• SOLiD EZ Bead Emulsifier Oil Kit – Stabilizer 1
• SOLiD EZ Bead Emulsifier Oil Kit – Stabilizer 2
• SOLiD EZ Bead Emulsifier Oil Kit – Oil
SOLiD EZ Bead Emulsifier Oil Accessory Kit:
• SOLiD EZ Bead Emulsifier Oil Kit– Oil Mix Bottle
• SOLiD EZ Bead Emulsifier Oil Kit– Oil Funnel
SOLiD® EZ Bead™
Emulsifier E120
Accessories Kit (4465569)
SOLiD EZ Bead Emulsifier E-Large Jar Pack
SOLiD EZ Bead Emulsifier E-Large AQ Tube Pack
SOLiD EZ Bead Emulsifier Tubing Pack
SOLiD® EZ Bead™ E120
System Consumables,
4-pack (4465571)‡
• SOLiD EZ Bead Emulsifier E120 Reagent Kit
• SOLiD EZ Bead Emulsifier E120 Accessories Kit
• SOLiD EZ Bead Amplifier E120 Accessories Kit
• SOLiD EZ Bead Enricher E120 Reagent Kit
• SOLiD EZ Bead Enricher Buffer Kit
• SOLiD EZ Bead Enricher Accessories Kit
† Applied Biosystems has validated this protocol using this specific material. Substitution may adversely affect
system performance.
‡ The kit includes consumables for all three instruments of the SOLiD EZ Bead System: the Emulsifier, Amplifier,
and Enricher.
52
Applied Biosystems SOLiD® EZ Bead™ Emulsifier Getting Started Guide
Appendix A Ordering Information
Required consumables
A
Required consumables
Required consumables
Item
†
Ethylene glycol
Source
American Bioanalytical
AB00455-01000
1.5-mL DNA LoBind Tubes
Eppendorf
022431021
(Falcon®) high-clarity polypropylene conical
centrifuge tube, 9400 RCF rating, sterile,
50 mL
Becton Dickinson
BD™ slip-tip, disposable tuberculin syringe,
1 mL
Becton Dickinson
BD™
Becton Dickinson
syringe,
Luer-Lok™
tip, 3 mL
352070
309602
309585
Portable Pipet-Aid®, with 110V recharger
Portable
Pipet-Aid®,
Corning
10 mL
Stripette®,
with 220V recharger
serological pipette,
Drummond, 4-000-200
Corning
4488
Corning Stripette®, serological pipette,
25 mL
Corning
50 mL
Drummond, 4-000-100
Stripette®,
serological pipette,
Filtered pipettor tips
Corning
4489
Corning
4490
MLS‡
† Applied Biosystems has validated this protocol using this specific material. Substitution may adversely affect
system performance.
‡ For the SDS of any chemical not distributed by Applied Biosystems, contact the chemical manufacturer. Before
handling any chemicals, refer to the SDS provided by the manufacturer, and observe all relevant precautions.
Applied Biosystems SOLiD® EZ Bead™ Emulsifier Getting Started Guide
53
A
Appendix A Ordering Information
Required equipment
Required equipment
Required equipment
Item†
Source
SOLiD EZ Bead Emulsifier
Applied Biosystems
The system includes:
4448419
• SOLiD EZ Bead Emulsifier
• Applied Biosystems SOLiD® EZ Bead™
Emulsifier Getting Started Guide and
Applied Biosystems SOLiD® EZ Bead™
Emulsifier Quick Reference Card
Covaris® S2 System
• Applied Biosystems
4387833 (110 V)
(110 V for U.S. customers)
• Applied Biosystems
4392718 (220 V)
(220 V for international customers)
or
Covaris®
The system includes:
• Covaris® S2 sonicator
• Latitude® laptop from Dell Inc.
• MultiTemp III Thermostatic Circulator
• Covaris®-2 series Machine Holder for
(one) 1.5-mL microcentrifuge tube
• Covaris®-2 series Machine Holder for
(one) 0.65-mL microcentrifuge tube
• Covaris®-2 series Machine Holder for
(one)
13 mm × 65 mm tube
• Covaris®-2 Series Machine Holder for
(one) microTUBE
• Covaris® microTUBE Prep Station
• Covaris® Water Tank Label Kit
• Covaris® microTUBEs (1 pack of 25)
For system materials summary, refer to
“Covaris® S2 System Materials Summary,”
in the SOLiD® 4 System Site Preparation
Guide (Part no. 4448639).
6-Tube Magnetic Stand
Applied Biosystems
AM10055
54
Analytical balance, 250-g capacity
Major Laboratory Supplier (MLS)‡
Vortexer
MLS
Pipettors, 20 µL
MLS
Applied Biosystems SOLiD® EZ Bead™ Emulsifier Getting Started Guide
Appendix A Ordering Information
Required equipment
A
Required equipment
Item†
Source
Pipettors, 200 µL
MLS
Pipettors, 1000 µL
MLS
Ice bucket
MLS
Picofuge
MLS
† Applied Biosystems has validated this protocol using this specific material. Substitution may adversely affect
system performance.
‡ For the SDS of any chemical not distributed by Applied Biosystems, contact the chemical manufacturer. Before
handling any chemicals, refer to the SDS provided by the manufacturer, and observe all relevant precautions.
Applied Biosystems SOLiD® EZ Bead™ Emulsifier Getting Started Guide
55
A
Appendix A Ordering Information
Optional equipment
Optional equipment
Optional equipment
Item†
Source
SOLiD EZ Bead Amplifier
Applied Biosystems
The system includes:
4448418
• SOLiD EZ Bead Amplifier
• 220-V power cable
• Pouch filling station
• Pouch frame
• Netbook and cables
• USB cord (connecting cord)
• Applied Biosystems SOLiD EZ Bead
AmplifierGetting Started Guide and Applied
Biosystems SOLiD EZ Bead Amplifier Quick
Reference Card
SOLiD EZ Bead Enricher
Applied Biosystems
The system includes:
4448420
• SOLiD EZ Bead Enricher
• 220-V power cable
• Waste bottle‡
• Small bottle racks with bottles attached‡
• Large bottle racks with bottles attached‡
• Laptop and cables
• USB cord (connecting cord)
• Applied Biosystems SOLiD® EZ Bead™
Enricher Getting Started Guide and Applied
Biosystems SOLiD® EZ Bead™ Enricher
Quick Reference Card
† Applied Biosystems has validated this protocol using this specific material. Substitution may adversely affect
system performance.
‡ Supplied inside the instrument.
56
Applied Biosystems SOLiD® EZ Bead™ Emulsifier Getting Started Guide
B
Troubleshooting
Observation
Aqueous phase not pumped into oil
phase
Possible cause
Recommended action
Tubing or pump cassette not properly
installed
If no aqueous phase has reached the
oil phase:
1. Press stop button twice to stop run.
2. Correctly install tubing in pump
cassette (see the “Install the oil
phase” procedure on page 18,
page 26, or page 34.
3. Correctly position pinch wheel.
4. Swirl the AQ Tube until the
suspension is uniformly brown,
then immediately load the AQ tube
in instrument.
5. Restart run.
Applied Biosystems SOLiD® EZ Bead™ Emulsifier Getting Started Guide
57
B
58
Appendix B Troubleshooting
Applied Biosystems SOLiD® EZ Bead™ Emulsifier Getting Started Guide
The Covaris® S2 System
C
This appendix covers:
■
Operation notes . . . . . . . . . . . . . . . . . . . . . . . . . . . . . . . . . . . . . . . . . . . . . . . . . . . . . 60
Fill the tank . . . . . . . . . . . . . . . . . . . . . . . . . . . . . . . . . . . . . . . . . . . . . . . . . . . . . . . . . . 60
De-gas the water . . . . . . . . . . . . . . . . . . . . . . . . . . . . . . . . . . . . . . . . . . . . . . . . . . . . . . 60
Set the chiller . . . . . . . . . . . . . . . . . . . . . . . . . . . . . . . . . . . . . . . . . . . . . . . . . . . . . . . . . 60
Perform required maintenance of the Covaris® S2 System . . . . . . . . . . . . . . . . . . 60
■
Covaris® S2 programs . . . . . . . . . . . . . . . . . . . . . . . . . . . . . . . . . . . . . . . . . . . . . . . . 61
Bead Block Declump . . . . . . . . . . . . . . . . . . . . . . . . . . . . . . . . . . . . . . . . . . . . . . . . . . 61
Covalent Declump 1 . . . . . . . . . . . . . . . . . . . . . . . . . . . . . . . . . . . . . . . . . . . . . . . . . . . 61
Covalent Declump 3 . . . . . . . . . . . . . . . . . . . . . . . . . . . . . . . . . . . . . . . . . . . . . . . . . . . 61
Applied Biosystems SOLiD® EZ Bead™ Emulsifier Getting Started Guide
59
C
Appendix C The Covaris® S2 System
Operation notes
Operation notes
Note: For important instrument safety information, refer to the Covaris® S2 System
manual.
Fill the tank
De-gas the water
Set the chiller
Perform required
maintenance of the
Covaris® S2
System
Fill the tank with fresh deionized water to the proper fill line (fill-line level “15” is
recommended). The water should cover the visible part of the tube.
De-gas the water for 30 minutes. To maintain de-gassed water, keep the pump
continuously on during operation and sample processing.
Set the chiller temperature to between 2°C to 5°C to ensure that the temperature
reading in the water bath displays 5°C. The circulated water chiller should be
supplemented with 20% ethylene glycol.
The Covaris® S2 System requires regular maintenance to work properly. Perform the
tasks in the table below (see Table 10):
Table 10 Required maintenance of the Covaris® S2 System
Required maintenance task
60
Frequency to perform task
De-gas water for 30 minutes prior to use
Before every use
Change water
Daily
Clean with bleach
Every two weeks
Applied Biosystems SOLiD® EZ Bead™ Emulsifier Getting Started Guide
Appendix C The Covaris® S2 System
Covaris® S2 programs
C
Covaris® S2 programs
Bead Block
Declump
Table 11 Bead Block Declump: 1 cycle Treatment 1 followed by 1 cycle Treatment 2
Treatment 1
Treatment 2
Duty Cycle
1%
5%
Intensity
5
5
Cycles/Burst
50
100
Time
5 sec
60 sec
Target wattage power
performance estimate (W)‡
2
10
‡ Not programmed.
Covalent
Declump 1
Table 12 Covalent Declump 1: 1 cycle Treatment 1 followed by 1 cycle Treatment 2
Treatment 1
Treatment 2
Duty Cycle
2%
5%
Intensity
6
9
Cycles/Burst
100
100
Time
5 sec
30 sec
Target wattage power
performance estimate (W)‡
4
15
‡ Not programmed.
Covalent
Declump 3
Table 13 Covalent Declump 3: 3 cycles: Treatment 1 followed by Treatment 2
Treatment 1
Treatment 2
Duty Cycle
2%
5%
Intensity
6
9
Cycles/Burst
100
100
Time
5 sec
30 sec
Target wattage power
performance estimate (W)‡
4
15
‡ Not programmed.
Applied Biosystems SOLiD® EZ Bead™ Emulsifier Getting Started Guide
61
C
62
Appendix C The Covaris® S2 System
Covaris® S2 programs
Applied Biosystems SOLiD® EZ Bead™ Emulsifier Getting Started Guide
D
Instrument Warranty Information
This appendix covers:
■
Computer configuration . . . . . . . . . . . . . . . . . . . . . . . . . . . . . . . . . . . . . . . . . . . . . . 64
■
Limited product warranty . . . . . . . . . . . . . . . . . . . . . . . . . . . . . . . . . . . . . . . . . . . . 64
■
Damages, claims, and returns . . . . . . . . . . . . . . . . . . . . . . . . . . . . . . . . . . . . . . . . . 66
Applied Biosystems SOLiD® EZ Bead™ Emulsifier Getting Started Guide
63
D
Appendix D Instrument Warranty Information
Computer configuration
Computer configuration
Applied Biosystems supplies or recommends certain configurations of computer
hardware, software, and peripherals for use with its instrumentation. Applied
Biosystems reserves the right to decline support for or impose extra charges for
supporting nonstandard computer configurations or components that have not been
supplied or recommended by Applied Biosystems. Applied Biosystems also reserves
the right to require that computer hardware and software be restored to the standard
configuration prior to providing service or technical support. For systems that have
built-in computers or processing units, installing unauthorized hardware or software
may void the Warranty or Service Plan.
Limited product warranty
Limited warranty
Applied Biosystems warrants that all standard components of its SOLID® EZ Bead™
Emulsifier, SOLiD® EZ Bead™ Amplifier, or SOLiD® EZ Bead™ Enricher will be free
of defects in materials and workmanship for a period of one (1) year from the date the
warranty period begins. Applied Biosystems will repair or replace, at its discretion, all
defective components during this warranty period. After this warranty period, repairs
and replacement components may be purchased from Applied Biosystems at its
published rates. Applied Biosystems also provides service agreements for postwarranty coverage. Applied Biosystems reserves the right to use new, repaired, or
refurbished instruments or components for warranty and post-warranty service
agreement replacements. Repair or replacement of products or components that are
under warranty does not extend the original warranty period.
Applied Biosystems warrants that all optional accessories supplied with its SOLID EZ
Bead Emulsifier, SOLiD EZ Bead Amplifier, or SOLiD EZ Bead Enricher, such as
peripherals, will be free of defects in materials and workmanship for a period of ninety
(90) days from the date the warranty begins. Applied Biosystems will repair or replace,
at its discretion, defective accessories during this warranty period. After this warranty
period, Applied Biosystems will pass on to the buyer, to the extent that it is permitted
to do so, the warranty of the original manufacturer for such accessories.
With the exception of consumable and maintenance items, replaceable products or
components used on or in the instrument are themselves warranted to be free of
defects in materials and workmanship for a period of ninety (90) days.
Applied Biosystems warrants that chemicals and other consumable products will be
free of defects in materials and workmanship when received by the buyer, but not
thereafter, unless otherwise specified in documentation accompanying the product.
Applied Biosystems warrants that for a period of ninety (90) days from the date the
warranty period begins, the tapes, diskettes, or other media bearing the operating
software of the product, if any, will be free of defects in materials and workmanship
under normal use. If there is a defect in the media covered by the above warranty and
the media is returned to Applied Biosystems within the ninety (90) day warranty
period, Applied Biosystems will replace the defective media.
Applied Biosystems does not warrant that the operation of the instrument or its
operating software will be uninterrupted or error free.
64
Applied Biosystems SOLiD® EZ Bead™ Emulsifier Getting Started Guide
Appendix D Instrument Warranty Information
Limited product warranty
D
Warranty period
effective date
Any applicable warranty period under these sections begins on the earlier of the date
of installation or ninety (90) days from the date of shipment for hardware and software
installed by Applied Biosystems personnel. For all hardware and software installed by
the buyer or anyone other than Applied Biosystems, and for all other products, the
applicable warranty period begins the date the product is delivered to the buyer.
Warranty claims
Warranty claims must be made within the applicable warranty period, or, for
chemicals or other consumable products, within thirty (30) days after receipt by the
buyer.
Warranty
exceptions
The above warranties do not apply to defects resulting from misuse, neglect, or
accident, including without limitation: operation with incompatible solvents or
samples in the system; operation outside of the environmental or use specifications or
not in conformance with the instructions for the instrument system, software, or
accessories; improper or inadequate maintenance by the user; installation of software
or interfacing, or use in combination with software or products, not supplied or
authorized by Applied Biosystems; modification or repair of the product not
authorized by Applied Biosystems, relocation or movement of the instrument by
Customer or any third party not acting on behalf of AB; or intrusive activity, including
without limitation computer viruses, hackers or other unauthorized interactions with
instrument or software that detrimentally affects normal operations. Without limiting
the abovementioned and for avoidance of doubt, computer hardware, monitors,
accessories, software or other products not purchased from or supplied by Applied
Biosystems (“Non-AB Product”) are not covered under the foregoing warranty even if
such Non-AB Product is integral to functional use of an Applied Biosystems product.
Warranty limitations
THE FOREGOING PROVISIONS SET FORTH APPLIED BIOSYSTEMS' SOLE
AND EXCLUSIVE REPRESENTATIONS, WARRANTIES, AND OBLIGATIONS
WITH RESPECT TO ITS PRODUCTS, AND APPLIED BIOSYSTEMS MAKES NO
OTHER WARRANTY OF ANY KIND WHATSOEVER, EXPRESSED OR IMPLIED,
INCLUDING WITHOUT LIMITATION, WARRANTIES OF MERCHANTABILITY
AND FITNESS FOR A PARTICULAR PURPOSE, WHETHER ARISING FROM A
STATUTE OR OTHERWISE IN LAW OR FROM A COURSE OF DEALING OR
USAGE OF TRADE, ALL OF WHICH ARE EXPRESSLY DISCLAIMED.
THE REMEDIES PROVIDED HEREIN ARE THE BUYER'S SOLE AND
EXCLUSIVE REMEDIES. WITHOUT LIMITING THE GENERALITY OF THE
FOREGOING, IN NO EVENT SHALL APPLIED BIOSYSTEMS BE LIABLE,
WHETHER IN CONTRACT, TORT, WARRANTY, OR UNDER ANY STATUTE
(INCLUDING WITHOUT LIMITATION, ANY TRADE PRACTICE, UNFAIR
COMPETITION, OR OTHER STATUTE OF SIMILAR IMPORT) OR ON ANY
OTHER BASIS, FOR DIRECT, INDIRECT, PUNITIVE, INCIDENTAL, MULTIPLE,
CONSEQUENTIAL, OR SPECIAL DAMAGES SUSTAINED BY THE BUYER OR
ANY OTHER PERSON OR ENTITY, WHETHER OR NOT FORESEEABLE AND
WHETHER OR NOT APPLIED BIOSYSTEMS IS ADVISED OF THE POSSIBILITY
OF SUCH DAMAGES, INCLUDING WITHOUT LIMITATION, DAMAGES
ARISING FROM OR RELATED TO LOSS OF USE, LOSS OF DATA, FAILURE OR
INTERRUPTION IN THE OPERATION OF ANY EQUIPMENT OR SOFTWARE,
DELAY IN REPAIR OR REPLACEMENT, OR FOR LOSS OF REVENUE OR
PROFITS, LOSS OF GOOD WILL, LOSS OF BUSINESS, OR OTHER FINANCIAL
LOSS OR PERSONAL INJURY OR PROPERTY DAMAGE.
Applied Biosystems SOLiD® EZ Bead™ Emulsifier Getting Started Guide
65
D
Appendix D Instrument Warranty Information
Damages, claims, and returns
NO AGENT, EMPLOYEE, OR REPRESENTATIVE OF APPLIED BIOSYSTEMS
HAS ANY AUTHORITY TO MODIFY THE TERMS OF THIS LIMITED
WARRANTY STATEMENT OR TO BIND APPLIED BIOSYSTEMS TO ANY
AFFIRMATION, REPRESENTATION, OR WARRANTY CONCERNING THE
PRODUCT THAT IS NOT CONTAINED IN THIS LIMITED WARRANTY
STATEMENT, AND ANY SUCH MODIFICATION, AFFIRMATION,
REPRESENTATION, OR WARRANTY MADE BY ANY AGENT, EMPLOYEE, OR
REPRESENTATIVE OF APPLIED BIOSYSTEMS WILL NOT BE BINDING ON
APPLIED BIOSYSTEMS, UNLESS IN A WRITING SIGNED BY AN EXECUTIVE
OFFICER OF APPLIED BIOSYSTEMS.
THIS WARRANTY IS LIMITED TO THE BUYER OF THE PRODUCT FROM
APPLIED BIOSYSTEMS AND IS NOT TRANSFERABLE.
Some countries or jurisdictions limit the scope of or preclude limitations or exclusion
of warranties, of liability, such as liability for gross negligence or willful misconduct, or
of remedies or damages, as or to the extent set forth above. In such countries and
jurisdictions, the limitation or exclusion of warranties, liability, remedies or damages
set forth above shall apply to the fullest extent permitted by law, and shall not apply to
the extent prohibited by law.
Damages, claims, and returns
Damages
Claims
Returns
If shipping damage to the product is discovered, contact the shipping carrier and
request inspection by a local agent. Secure a written report of the findings to support
any claim. Do not return damaged goods to Applied Biosystems without first securing
an inspection report and contacting Applied Biosystems Technical Support for a
Return Authorization (RA) number.
After a damage inspection report is received by Applied Biosystems, Applied
Biosystems will process the claim unless other instructions are provided.
Do not return any material without prior notification and authorization.
If for any reason it becomes necessary to return material to Applied Biosystems,
contact Applied Biosystems Technical Support or your nearest Applied Biosystems
subsidiary or distributor for a return authorization (RA) number and forwarding
address. Place the RA number in a prominent location on the outside of the shipping
container, and return the material to the address designated by the Applied
Biosystems representative.
66
Applied Biosystems SOLiD® EZ Bead™ Emulsifier Getting Started Guide
E
Safety
This appendix covers:
■
Instrumentation safety . . . . . . . . . . . . . . . . . . . . . . . . . . . . . . . . . . . . . . . . . . . . . . . . . 68
Symbols on instruments . . . . . . . . . . . . . . . . . . . . . . . . . . . . . . . . . . . . . . . . . . . . . . . 68
Location of safety labels on instruments. . . . . . . . . . . . . . . . . . . . . . . . . . . . . . . . . . 69
General instrument safety . . . . . . . . . . . . . . . . . . . . . . . . . . . . . . . . . . . . . . . . . . . . . . 69
Physical hazard safety . . . . . . . . . . . . . . . . . . . . . . . . . . . . . . . . . . . . . . . . . . . . . . . . . 70
Electrical safety . . . . . . . . . . . . . . . . . . . . . . . . . . . . . . . . . . . . . . . . . . . . . . . . . . . . . . . 70
Workstation safety . . . . . . . . . . . . . . . . . . . . . . . . . . . . . . . . . . . . . . . . . . . . . . . . . . . . 71
Safety and electromagnetic compatibility (EMC) standards . . . . . . . . . . . . . . . . . 71
■
Chemical safety . . . . . . . . . . . . . . . . . . . . . . . . . . . . . . . . . . . . . . . . . . . . . . . . . . . . . . . 73
General chemical safety . . . . . . . . . . . . . . . . . . . . . . . . . . . . . . . . . . . . . . . . . . . . . . . . 73
SDSs . . . . . . . . . . . . . . . . . . . . . . . . . . . . . . . . . . . . . . . . . . . . . . . . . . . . . . . . . . . . . . . . 74
Chemical waste safety . . . . . . . . . . . . . . . . . . . . . . . . . . . . . . . . . . . . . . . . . . . . . . . . . 74
■
Safety alerts . . . . . . . . . . . . . . . . . . . . . . . . . . . . . . . . . . . . . . . . . . . . . . . . . . . . . . . . . . 76
Specific alerts for instrumentation . . . . . . . . . . . . . . . . . . . . . . . . . . . . . . . . . . . . . . . 76
Applied Biosystems SOLiD® EZ Bead™ Emulsifier Getting Started Guide
67
E
Appendix E Safety
Instrumentation safety
Instrumentation safety
Note: The products accompanying this manual are for demonstration purposes only
and are not for sale.
Symbols on
instruments
Electrical
symbols on instruments
The following table describes the electrical symbols that may be displayed on Life
Technologies instruments.
Symbol
Description
Indicates the On position of the main power switch.
Indicates the Off position of the main power switch.
Indicates a standby switch by which the instrument is switched on to the
Standby condition. Hazardous voltage may be present if this switch is on
standby.
Indicates the On/Off position of a push-push main power switch.
Indicates a terminal that may be connected to the signal ground reference
of another instrument. This is not a protected ground terminal.
Indicates a protective grounding terminal that must be connected to earth
ground before any other electrical connections are made to the instrument.
Indicates a terminal that can receive or supply alternating current or voltage.
Indicates a terminal that can receive or supply alternating or direct current
or voltage.
Safety symbols
The following table describes the safety symbols that may be displayed on Life
Technologies instruments. Each symbol may appear by itself or with text that explains
the relevant hazard (see “Safety labels on instruments” on page 8). These safety
symbols may also appear next to DANGERS, WARNINGS, and CAUTIONS that occur
in the text of this and other product-support documents.
Symbol
Description
Indicates that you should consult the manual for further information and to
proceed with appropriate caution.
Indicates the presence of an electrical shock hazard and to proceed with
appropriate caution.
68
Applied Biosystems SOLiD® EZ Bead™ Emulsifier Getting Started Guide
Appendix E Safety
Instrumentation safety
Symbol
E
Description
Indicates a pinch hazard and to proceed with appropriate caution.
Indicates the presence of a hot surface or other high-temperature hazard
and to proceed with appropriate caution.
Environmental
symbols on instruments
The following symbol applies to all Applied Biosystems electrical and electronic
products placed on the European market after August 13, 2005.
Symbol
Description
Do not dispose of this product as unsorted municipal waste. Follow
local municipal waste ordinances for proper disposal provisions to reduce
the environmental impact of waste electrical and electronic equipment
(WEEE).
European Union customers:
Call your local Applied Biosystems Customer Service office for equipment
pick-up and recycling. See www.appliedbiosystems.com for a list of
customer service offices in the European Union.
Location of safety
labels on
instruments
General
instrument safety
The SOLiD® EZ Bead™ Emulsifier contains warnings at the locations shown below:
• The pinch hazard label is to the right of the pump head.
• The remaining labels are near the power input.
WARNING! PHYSICAL INJURY HAZARD. Use this product only as specified
in this document. Using this instrument in a manner not specified by Life
Technologies may result in personal injury or damage to the instrument.
WARNING! PHYSICAL INJURY HAZARD. Using the instrument in a manner
not specified by Applied Biosystems may result in personal injury or damage to
the instrument.
WARNING! PHYSICAL INJURY HAZARD. Using this product in a manner
not specified by Applied Biosystems may result in personal injury or damage to
the instrument.
Applied Biosystems SOLiD® EZ Bead™ Emulsifier Getting Started Guide
69
E
Appendix E Safety
Instrumentation safety
Moving and lifting the instrument
CAUTION! PHYSICAL INJURY HAZARD. The instrument is to be moved and
positioned only by the personnel or vendor specified in the applicable site
preparation guide. If you decide to lift or move the instrument after it has been
installed, do not attempt to lift or move the instrument without the assistance of
others, the use of appropriate moving equipment, and proper lifting techniques.
Improper lifting can cause painful and permanent back injury. Depending on
the weight, moving or lifting an instrument may require two or more persons.
Operating the instrument
Ensure that anyone who operates the instrument has:
• Received instructions in both general safety practices for laboratories and specific
safety practices for the instrument.
• Read and understood all applicable Safety Data Sheets (SDSs). See “About SDSs”
on page 74.
Cleaning or decontaminating the instrument
CAUTION! Before using a cleaning or decontamination method other than
those recommended by the manufacturer, verify with the manufacturer that the
proposed method will not damage the equipment.
Physical hazard
safety
Pinch hazard
CAUTION! PINCH HAZARD. Moving Parts. Moving parts can crush, pinch
and cut. Keep hands clear of moving parts while operating the instrument.
Disconnect power before servicing.
Solvents and pressurized fluids
WARNING! PHYSICAL INJURY HAZARD. Always wear eye protection when
working with solvents or any pressurized fluids.
Electrical safety
WARNING! ELECTRICAL SHOCK HAZARD. Severe electrical shock can
result from operating the SOLiD EZ Bead Emulsifier without its instrument
panels in place. Do not remove instrument panels. High-voltage contacts are
exposed when instrument panels are removed from the instrument.
Power
WARNING! ELECTRICAL HAZARD. Grounding circuit continuity is required
for the safe operation of equipment. Never operate equipment with the
grounding conductor disconnected.
70
Applied Biosystems SOLiD® EZ Bead™ Emulsifier Getting Started Guide
Appendix E Safety
Instrumentation safety
E
WARNING! ELECTRICAL HAZARD. Use properly configured and approved
line cords for the voltage supply in your facility.
WARNING! ELECTRICAL HAZARD. Plug the system into a properly
grounded receptacle with adequate current capacity.
Fuses
CAUTION! Replace only with the same TYPE and RATING FUSE. Use only
250V, 2A SB fuses when replacing the fuse.
Overvoltage rating
The Emulsifier has an installation (overvoltage) category of II, and is classified as
portable equipment.
Workstation safety
Correct ergonomic configuration of your workstation can reduce or prevent effects
such as fatigue, pain, and strain. Minimize or eliminate these effects by configuring
your workstation to promote neutral or relaxed working positions.
CAUTION! MUSCULOSKELETAL AND REPETITIVE MOTION HAZARD.
These hazards are caused by potential risk factors that include but are not
limited to repetitive motion, awkward posture, forceful exertion, holding static
unhealthy positions, contact pressure, and other workstation environmental
factors.
To minimize musculoskeletal and repetitive motion risks:
• Use equipment that comfortably supports you in neutral working positions and
allows adequate accessibility to the keyboard, monitor, and mouse.
• Position the keyboard, mouse, and monitor to promote relaxed body and head
postures.
Safety and
electromagnetic co
mpatibility (EMC)
standards
This section provides information on:
• U.S. and Canadian safety standards
• Canadian EMC standard
• European safety and EMC standards
• Australian EMC Standards
U.S. and Canadian safety
standards
The Emulsifier has been tested to and complies with standard:
Applied Biosystems SOLiD® EZ Bead™ Emulsifier Getting Started Guide
71
E
Appendix E Safety
Instrumentation safety
UL 61010-1:2nd Edition, CSA C22.2 No. 61010-1, “Safety Requirements for Electrical
Equipment for Measurement, Control, and Laboratory Use, Part 1: General
Requirements.”
Canadian EMC standard
This instrument has been tested to and complies with ICES-001, Issue 3: “Industrial,
Scientific, and Medical Radio Frequency Generators.”
European safety and EMC
standards
Safety
This instrument meets European requirements for safety (Low Voltage Directive 2006/
95/EC). This instrument has been tested to and complies with standards EN 610101:2001, “Safety Requirements for Electrical Equipment for Measurement, Control and
Laboratory Use, Part 1: General Requirements.”
EMC
This instrument meets European requirements for emission and immunity (EMC
Directive 2004/108/EC). This instrument has been tested to and complies with standard
EN 61326 (Group 1, Class B), “Electrical Equipment for Measurement, Control and
Laboratory Use – EMC Requirements.”
Australian EMC Standards
This instrument has been tested to and complies with standard AS/NZS 2064, “Limits
and Methods Measurement of Electromagnetic Disturbance Characteristics of
Industrial, Scientific, and Medical (ISM) Radio-frequency Equipment.”
72
Applied Biosystems SOLiD® EZ Bead™ Emulsifier Getting Started Guide
Appendix E Safety
Chemical safety
E
Chemical safety
General chemical
safety
Chemical hazard warning
WARNING! CHEMICAL HAZARD. Before handling any chemicals, refer to
the Safety Data Sheet (SDS) provided by the manufacturer, and observe all
relevant precautions.
WARNING! CHEMICAL HAZARD. All chemicals in the instrument, including
liquid in the lines, are potentially hazardous. Always determine what chemicals
have been used in the instrument before changing reagents or instrument
components. Wear appropriate eyewear, protective clothing, and gloves when
working on the instrument.
WARNING! CHEMICAL HAZARD. Four-liter reagent and waste bottles can
crack and leak. Each 4-liter bottle should be secured in a low-density
polyethylene safety container with the cover fastened and the handles locked in
the upright position. Wear appropriate eyewear, clothing, and gloves when
handling reagent and waste bottles.
WARNING! CHEMICAL STORAGE HAZARD. Never collect or store waste in
a glass container because of the risk of breaking or shattering. Reagent and
waste bottles can crack and leak. Each waste bottle should be secured in a lowdensity polyethylene safety container with the cover fastened and the handles
locked in the upright position. Wear appropriate eyewear, clothing, and gloves
when handling reagent and waste bottles.
Chemical safety guidelines
To minimize the hazards of chemicals:
• Read and understand the SDSs provided by the chemical manufacturer before
you store, handle, or work with any chemicals or hazardous materials. (See
“About SDSs” on page 74.)
• Minimize contact with chemicals. Wear appropriate personal protective
equipment when handling chemicals (for example, safety glasses, gloves, or
protective clothing). For additional safety guidelines, consult the SDS.
• Minimize the inhalation of chemicals. Do not leave chemical containers open. Use
only with adequate ventilation (for example, fume hood). For additional safety
guidelines, consult the SDS.
• Check regularly for chemical leaks or spills. If a leak or spill occurs, follow the
manufacturer’s cleanup procedures as recommended in the SDS.
• Comply with all local, state/provincial, or national laws and regulations related to
chemical storage, handling, and disposal.
Applied Biosystems SOLiD® EZ Bead™ Emulsifier Getting Started Guide
73
E
Appendix E Safety
Chemical safety
SDSs
About SDSs
Chemical manufacturers supply current Safety Data Sheets (SDSs) with shipments of
hazardous chemicals to new customers. They also provide SDSs with the first
shipment of a hazardous chemical to a customer after an SDS has been updated. SDSs
provide the safety information you need to store, handle, transport, and dispose of the
chemicals safely.
Each time you receive a new SDS packaged with a hazardous chemical, be sure to
replace the appropriate SDS in your files.
Obtaining SDSs
The SDS for any chemical supplied by Life Technologies is available to you free
24 hours a day. To obtain SDSs:
1. Go to www.appliedbiosystems.com, click Support, then select SDS.
2. In the Keyword Search field, enter the chemical name, product name, SDS part
number, or other information that appears in the SDS of interest. Select the
language of your choice, then click Search.
3. Find the document of interest, right-click the document title, then select any of the
following:
• Open – To view the document
• Print Target – To print the document
• Save Target As – To download a PDF version of the document to a
destination that you choose
Note: For the SDSs of chemicals not distributed by Applied Biosystems, contact the
chemical manufacturer.
Chemical waste
safety
Chemical waste hazards
CAUTION! HAZARDOUS WASTE. Refer to Safety Data Sheets and local
regulations for handling and disposal.
WARNING! CHEMICAL WASTE HAZARD. Wastes produced by Applied
Biosystems instruments are potentially hazardous and can cause injury, illness,
or death.
WARNING! CHEMICAL STORAGE HAZARD. Never collect or store waste in
a glass container because of the risk of breaking or shattering. Reagent and
waste bottles can crack and leak. Each waste bottle should be secured in a lowdensity polyethylene safety container with the cover fastened and the handles
locked in the upright position. Wear appropriate eyewear, clothing, and gloves
when handling reagent and waste bottles.
74
Applied Biosystems SOLiD® EZ Bead™ Emulsifier Getting Started Guide
Appendix E Safety
Chemical safety
E
Chemical waste safety guidelines
To minimize the hazards of chemical waste:
• Read and understand the Safety Data Sheets (SDSs) provided by the
manufacturers of the chemicals in the waste container before you store, handle, or
dispose of chemical waste.
• Provide primary and secondary waste containers. (A primary waste container
holds the immediate waste. A secondary container contains spills or leaks from
the primary container. Both containers must be compatible with the waste
material and meet federal, state, and local requirements for container storage.)
• Minimize contact with chemicals. Wear appropriate personal protective
equipment when handling chemicals (for example, safety glasses, gloves, or
protective clothing). For additional safety guidelines, consult the SDS.
• Minimize the inhalation of chemicals. Do not leave chemical containers open. Use
only with adequate ventilation (for example, fume hood). For additional safety
guidelines, consult the SDS.
• Handle chemical wastes in a fume hood.
• After emptying a waste container, seal it with the cap provided.
• Dispose of the contents of the waste tray and waste bottle in accordance with
good laboratory practices and local, state/provincial, or national environmental
and health regulations.
Waste disposal
If potentially hazardous waste is generated when you operate the instrument, you
must:
• Characterize (by analysis if necessary) the waste generated by the particular
applications, reagents, and substrates used in your laboratory.
• Ensure the health and safety of all personnel in your laboratory.
• Ensure that the instrument waste is stored, transferred, transported, and disposed
of according to all local, state/provincial, and/or national regulations.
IMPORTANT! Radioactive materials may require special handling, and disposal
limitations may apply.
Applied Biosystems SOLiD® EZ Bead™ Emulsifier Getting Started Guide
75
E
Appendix E Safety
Safety alerts
Safety alerts
For the definitions of the alert words IMPORTANT, CAUTION, WARNING, and
DANGER, see “Safety alert words” on page 8.
Specific alerts for
instrumentation
76
CAUTION! PINCH HAZARD. Moving Parts. Moving parts can crush, pinch
and cut. Keep hands clear of moving parts while operating the instrument.
Disconnect power before servicing.
Applied Biosystems SOLiD® EZ Bead™ Emulsifier Getting Started Guide
Documentation and Support
Related documentation
For the latest documentation on the SOLiD® EZ Bead™ System and SOLiD System, go
to:
http://www3.appliedbiosystems.com/AB_Home/Support/index.htm
Obtaining support
For the latest services and support information for all locations, go to:
www.lifetechnologies.com.
At the Life Technologies web site, you can:
• Access worldwide telephone and fax numbers to contact Life Technologies
Technical Support and Sales facilities.
• Search through frequently asked questions (FAQs).
• Submit a question directly to Technical Support.
• Order Life Technologies user documents, SDSs, certificates of analysis, and other
related documents.
• Download PDF documents.
• Obtain information about customer training.
• Download software updates and patches.
Applied Biosystems SOLiD® EZ Bead™ Emulsifier Getting Started Guide
77
Documentation and Support
Obtaining support
78
Applied Biosystems SOLiD® EZ Bead™ Emulsifier Getting Started Guide
Index
C
O
CAUTION, description 8
chemical safety 73
chemical waste safety 74, 75
Ordering Information 49
overvoltage category (rating) 71
P
D
DANGER, description 8
documentation, related 77
physical hazard safety 70
pressurized fluids, safety 70
R
E
electrical safety 70
electromagnetic compatibility standards. See EMC
standards
EMC standards 71
ergonomics, safety 71
G
guidelines
chemical safety 73
chemical waste disposal 74
chemical waste safety 75
H
hazard icons. See safety symbols, on instruments 68
hazard symbols. See safety symbols, on instruments
hazards. See safety
I
IMPORTANT, description 8
installation category 71
instrument operation, safety 70
M
moving and lifting safety, instrument 70
moving parts, safety 70
MSDS. See SDS
radioactive waste, handling 75
repetitive motion, safety 71
S
safety
before operating the instrument 69
chemical 73
chemical waste 74
electrical 70
ergonomic 71
guidelines 73, 74, 75
instrument operation 70
moving and lifting instrument 70
moving parts 70
physical hazard 70
pressurized fluids. See also compressed gases,
safety
repetitive motion 71
solvents 70
standards 71
workstation 71
safety labels, on instruments 8, 69
safety standards 71
safety symbols, on instruments 68
SDSs
about 8
description 74
obtaining 74, 77
Set up the EZ Bead™ Emulsifier 11, 17, 25, 33, 41
solvents, safety 70
Applied Biosystems SOLiD® EZ Bead™ Emulsifier Getting Started Guide
79
Index
standards
EMC 71
safety 71
symbols, safety 68
T
training, information on 77
W
WARNING, description 8
waste disposal, guidelines 75
waste profiles, description 75
workstation safety 71
80
Applied Biosystems SOLiD® EZ Bead™ Emulsifier Getting Started Guide
Headquarters
5791 Van Allen Way | Carlsbad, CA 92008 USA | Phone +1 760 603 7200 | Toll Free in USA 800 955 6288
For support visit www.appliedbiosystems.com/support
www.lifetechnologies.com