1
!
!
!
CHDK
! Extra Features
!
!
!
®
! !For! Canon
Powershot® Cameras
! User Quick Start Guide
!
© CHDK User Quick Start Guide - Dec. 2011 V1.9.1 An0n
!
!
!
!
!
!
!
!
!
!
!
!
!
!
!
!
!
!
!
!
Canon Hack Development Kit
User Quick Start Guide
V.1.9.1 © December 2011
!
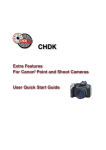
CHDK
Canon Hack Development Kit
For Canon Cameras with CHDK
User Quick Start Guide
For installation instructions go to
http://chdk.wikia.com/wiki/CHDK
V.1.9.1
© December 2011
!
!
!
!
!
1
!Notes
2
Acknowledgements
3
4
CHDK Introduction
Using CHDK
7
8
OSD (On Screen Display)
Main Menu
8
15
Extra Photo Operations
Video Parameters
16
19
RAW Parameters
Edge overlay
20
21
Custom curves
Histogram Parameters
24
26
Zebra Parameters
OSD Parameters
35
36
Visual Settings
Scripting Parameters
38
47
Miscellaneous Stuff
History of CHDK
48
49
Stereo Data Maker
KAP
49
50
Bracketing notes
RAW notes
52
53
Bad pixel notes
Edge overlay notes
54
55
Curves notes
USB Remote notes
56
57
Grids notes
Scripting notes
59
59
Flash notes
Examples
63
65
FAQs and Facts
Miscellaneous info
67
68
Links
Legal Notes
69
INDEX
!
!
!
!
!
C
O
N
T
E
N
T
S
2
Acknowledgements
CHDK has to be one of the most innovative improvements to any camera that has ever come along since
the beginning of photography. Started out by some people who only wanted RAW out of their rawcrippled cameras, it has now grown into one of the most adaptable, flexible, and full-featured operating
systems of any cameras ever made. We are all extremely grateful for the work that everyone has put into
this arena of discovery, implementation, coding, sharing, camera testing, (especially with the unknown,
and possibly high risk), and those that provide all the information on the Wiki pages (and elsewhere in
the world). Those who have contributed to this great stride in the world of photography deserve a huge
vote of thanks.
Many thanks go to the original developers vitalyb, and GrAnd, ewavr, owenjm, Harvester, jeff666,
[mr.anon], MX3, Fingalo, Allbest, CHDKLover, BarneyFife, also to Jucifer and PhyrePhoX, and to
cosmograph for the excellent CHDK logo, and to all the others mentioned or not, in History of CHDK,
See: page 47
Other contributors include, acseven (the forum), achurch, acid2000, ADamb, ArtDen, atalwar, Atnas, auj,
awdark,, barberofcivil, Basq, Bg~, bondo, bperrybap, brabl2, brake, Brend R, bygbit, cail, chdkj, chr,
cormac, cppasm, cyril42e, danielmewes, Darkness, DataGhost, DavidB, diablo, Divalent, ehmu,
elecktro255, ERR99, fantomas4o, fboesch, fbonomi, fe50, fishpepper, f_m_b, fudgey, funnel, gajownik,
Grin, Hacki, HarpoMa, hiker_jon, h-v-n, iax, ihar, Intrnst, image13, jstanley0, Keoeeit, KevB m2tk,
ma_jk, MartinBudden, mattkime, Microfunguy, mipa87, mkmenuts, mproko, mrblack51, mrowl, MrSpoon,
msl, mweerden, nandoide, neszt, nimrod, nirschi, Novex, oldgit, outslider, pedropaislopes, peregrine,
pev69, philmoz, pixeldoc2000, PlasmaHH, quietschi, RaduP, revivery, reyalp, Rorschach, rudi, sharky,
shenty, Smartkiller, snc, snowsnapshots, srsa_4c, stift, stevetm2, syahmixp, taliesin,Thorwak, tillo,
toinech, tommi2water, TPC, tr1stan, tsvstar, ultimA, uvvv, Velo, viulian, vit40, waldo, waterwingz, whim,
whoever, wontolla, xiaofeng, Yarvieh, Yossar, zeno, zfeet, and for a significant discovery which has been
!Notes
2011 camera releases, including the SX40HS, can work with SD cards formatted up to 32GB - it is no
longer required to partition the card to have CHDK autoboot.
The following steps should work on any card up to 32GB
- format the card in the camera
- copy the full CHDK download (unzipped) to the SD card (DISKBOOT.BIN, and PS.FI2 plus the
CHDK directory)
- lock the card and start the camera with the rear playback button
- press the Menu button and select 'Firm Update...' from the bottom of the first menu
- when CHDK reboots enter <ALT> mode
- select 'Make Card Bootable' from the 'Miscellaneous Stuff' CHDK menu
- restart the camera and CHDK should now autoboot
Thanks to philmoz.
named ‘Canon Basic’ - Oren Isacson and Alfredo Ortega
and more to come……. Many thanks.
And to the firmware dumpers and language translators - Many thanks.
Thanks to Graystar for the Allbest 50 manual, and to the writers of the online Morebest manual *, and
everyone else who has contributed however small or large to CHDK and the Wiki pages.
*(these pages are based upon those and updated to reflect the latest changes to what has become the
combined collaborative CHDK)
Please report errors &/or omissions to the CHDK forum: –
http://chdk.setepontos.com/index.php/topic,1167.0.htmlß
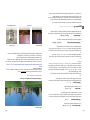
Front cover photo – Canon Powershot SX230HS 1
Canon is a registered ® ™ Trademark of Canon Inc.
PowerShot is a registered ® ™Trademark of Canon Inc.
70
3
L
Language! 35
Legal notes! 68
Line color! 29
Links! 67
Load curve profile!
Load grid from file!
RAW notes! 50
RAW parameters 16, 38, 52
RAW sum! 39, (38)
RBF font! 35, 41, 47
Record mode 4, 6, 35, 36, 42, 51, 52
Remote parameters! 36
Remote zoom!
37
Reset options to default 43
21
29, 56
M
Main menu! 8
Make card bootable! 43, 45
Manual focus! 10, (6, 11, 42, 65)
Menu button 4, 8, 14, 27
Menu in OSD!
26
Memory browser! 44
Memory (Filespace) indicators 7
Memory info-show!
43
Mini Console! 38
MF (Manual Focus)! 6, 42
Miscellaneous info!
65
Miscellaneous stuff 38
Miscellaneous values 7, 29, 30, 31, 47
Mute during zooming ! 15
!
S
Save RAW! 16, 52
Scene luminance! 31
Scripting notes! 57
Scripting parameters! 36 (56, 64)
SD card 4, 16, 33, 35, 39, 44, 45,
46, 51, 64, 66
SD (Subject Distance) ! 10, 31
SDM (Stereo Data Maker) 48, (47)
Show misc values!
29, 44
Show OSD! 26, 34
Show USB Remote 28
Shutter speed 9, 12, 13, 27, 30, 39,
!
N!
!
49, 52, 61, 65
Shortcut button(s)!
5, 6, 8, 43
Splash screen! 4, 42
Subj. dist.! 10, 11, 31
Swap partitions 43, 45 !
Symbols! 27
ND filter state 9, 65
Notes! 49
Noise 17, 28, 39
Numerical Units! 6
O
Optical zoom!
15
OSD (On Screen Display) 7
OSD in review mode! 34
OSD layout editor!
28, (6, 14, 32,
T
Text file reader! 41
Tv! 9, 11, 12, 13, 30, 64
!
U
33)
OSD parameters! 26, (14, 27, 58)
Overexp. value! 30
Override aperture 9, 30
Override shutter speed! 9, 27
P
USB remote 28, 36, 55, 56
USB remote notes 55, 56
User menu! 27, (8, 28)
Using CHDK!
4
V
Value factor! 6, 9, 10, 11, 12, 27
Video parameters! 15
-Video bitrate! 15
-Video quality! 15
Video Quality Control 15
Visual settings! 35
Volts max.! 32
Volts min.! 32
Panorama mode! 19
Pause Video 15
Power of flash! 14
Print button!
4, 5, 43
Propcase / Params data page ! 44
PTP interface! !
66
Purge RAW!
38, 39, 40
R
RAW indicator! 7, 32
RAW average!
38, (39)
RAW develop!
18, 21, 38, 51
RAW merge!
38, 39, 51
RAW toggle!
4, 16
W
Warning threshold
32
Z
Zebra parameters! 24
Zoom! 6, 10, 15, 20, 30, 31, 37, 42
Zoom value! 30
Introduction
! !
"
! Cameras
Welcome
to CHDK, for users of Canon!" Powershot
Q. What is the CHDK program?
A. CHDK enhances the capabilities of your camera in a non-destructive, non-permanent way.
!
After loading of CHDK program your camera will have the following extra functionality:
!
•!
Shutter-priority (Tv) exposure - via shutter value override feature
!
•!
Aperture-priority (Av) exposure - via aperture value override feature
Shooting in RAW, with RAW Average, RAW Sum, and RAW Develop features,
•
!
save as .DNG (Digital Negative for wider compatibility)
!
•!
Live histogram (RGB, blended, luminance and for each RGB channel)
!
•!
Zebra mode (a live view of over and under-exposed areas of your picture)
Depth-of-field (DOF)-calculator, Hyperfocal-calculator with instant Hyperfocal and
•
Infinity focus-set, and more
!
•!
Battery indicator
!
•!
RAW and Video space-remaining gauges with custom low-limit alerts
!
•!
USB cable and wireless remote shutter release
Motion-detection trigger - automatically fires camera on motion detection. (Able to
•
capture lightning strikes.)
!
•!
Customizable high-speed continuous (burst) Shutter-based (Tv), aperture-based (Av) and
!
!
ISO-based exposure bracketing (unlimited shots)
!
•!
Focus bracketing (unlimited shots)
!
•!
Adjustable Video quality and size (compression) adjustable while recording
!
•!
Elimination of 1 GB video-size limit (for many DigicII cameras)
!
•!
Zoom during video function (for cameras without this feature)
!
•!
Shutter, Aperture, and ISO Overrides
!
•!
Ultra-long shutter speeds - up to 64 seconds (much longer for supported cameras)
!
•!
Ultra-fast shutter speeds - up to 1/10,000" and higher
!
•!
High-speed Flash Sync at all speeds up to 1/64,000 of a second
!
•!
Custom user-editable visible Grids for framing, cropping, and alignment
!
•!
File browser
!
•!
Text reader
!
•!
Calendar
!
•!
Games"
!
•!
Fully customizable CHDK display, info placement, user-colors, fonts in menus, etc.
!
•!
Custom CHDK User Menu (for instant recall of up to 10 favorite functions)
!
•!
Scripts execution - including exposure bracketing, focus bracketing, intervalometer, etc
!
•!
And other features too numerous to mention here.
The new features are accessed through CHDK-specific menus, rather than the default camera menus.
As CHDK is continually evolving, new features are added as they are developed. Updating occasionally
will ensure you have all the latest features for your camera.
Check out the Camera Features and Downloads pages for information on finding the right build for your
needs.
!
!
Go to:- http://chdk.wikia.com/wiki/Downloads
4
Using CHDK
Index!
!!
To Start – ! Auto load method
!
!
!
!
!
!
!
!
Cameras that have an SD card that has been prepared as bootable and is locked (write protected,
with the slide tab on the side of the card), will load CHDK automatically when turned on. This
is usually called the “Autoload” or “Autoboot” method, using a camera version specific file
“DISKBOOT.BIN”
The card lock is bypassed by CHDK and photos and video are able to be saved as normal.
– !Manual load method
When the SD card has a camera specific file, which for some versions is “PS.FIR”, and others
“PS.FI2”, the card is left unlocked and then:
B
1. Switch the camera on in Play mode, not Record mode,
2. Press the MENU button, then press UP once (or scroll down the menu list)
3. An option to update the firmware appears, Select that option (press FUNC.SET)
4. Confirm the update, (OK-press FUNC.SET)
C
See:- http://chdk.wikia.com/wiki/Bootable_SD_card
for instructions to make memory card bootable, and information on the loading process.
!
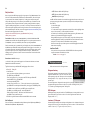
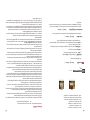
The CHDK splash screen will appear for about 2 seconds, while the Print button blue led flashes,
confirming that CHDK has now loaded into the camera’s memory. (The splash screen can be disabled
in Main Menu > Miscellaneous stuff).
Splash screen logo! !
D
!
! !
!
!
!
!
!
!
!
!
!
!
!
CHDK will now be running in the background. Some features are enabled by default, for example,
battery and file space indicators. However, most features are disabled by default.
•
To make changes to how CHDK operates, you start by entering <ALT> mode.
!
!
A
Acknowledgements
2!
Adaptor lens scale 30 !
AF Key ! 15
<ALT> mode 5, 6, 7, 8, 10, 18, 27,
36, 42, 43, 48, 51, 52, 53, 54, 56, 64
!!
69
E
Edge overlay! 19, 53, 54
Extra Photo Operations! 8, 13
Ev! 7, 9, 12, 14, 17, 20, 21, 24, 30,
48
<ALT> mode button ! 43
ALT +/- debug action! 46
Aperture! 9, 11, 30, 31, 47, 48, 49, 65
Auto ISO ! 12, 13, (8, 30)
Auto magnify! 24
Auto select 1st entry @ menu 26
Autoscroll delay! 41
Av! 9, 11, 30, 57, 64
Examples! 59
! -Fast shutter 61
! -Force flash
59
! -Grids! 62
! -HDR ! 60, 61
! -KAP 65
! -Motion detect 61
! -SDM! 62
Exif Makers notes 66
Extra Long Exposure 9
!
Bad pixel notes! 52, 53
Bad pixel removal!
18, 52, 53
Battery indicator! 7, 28, 32
Benchmark! 44, 45
Blue led! 4
Bracketing in continu’s mode 11, 48
Bracketing notes! 49
Bv! 30
F
Fast EV Switch 7, 14
Fast Video Control 15
FAQ! 63
File browser!
38, (6, 18, 20, 39,
40, 41)
Filespace! 33
Fill color! 29
Flashlight !
42
Flash notes! 59
Focal length 6, 10, 13, 28, 30, 47
Force flash in moviemode 59
Force manual flash 14
Force flash pics! 59!
Calendar! 40
Canon overexp. value! 30
CCHDK.CFG! 14, 54, 66
CHDK Shell (compiler) 46
Clear override values at start! 13
Clear video params at start! 15
Clock!
34, (7, 16, 47)
Colors!
18, 21, 29, 35, 41, 42, 43
Create badpixel.bin 52
Create card with 2 partitions 45
Current Script! 7, 36
Custom Auto ISO!
12, 13
Custom curves! 20, 54
Custom timer 11, 16, 49
Curves notes 54
G
Games!
42
Grid! 29, 34, 53
Grids notes! 56
Grids pics 62
H
HDR!!
11, 40, 49, 60, 61
Histogram illustrations! 22, 23, 24
Histogram parameters! 21
History of CHDK!
47
Hyperfocal 31, (3, 6, 10, 32)
Dark frame subtraction! 17
Debug parameters!
43
Defaults! 15, 35, 37
Depth of field 9, 31, 32, 49
Disable LCD! 43
Disable Overrides 8, 14
Display (DISP.) button! 5, 6, 8, 10 26,
I
Introduction!
3
ISO! 6, 8, 10, 12, 13, 30, 39, 43, 44,
49, 57
J
JPEG! 16, 17, 18, 50, 52, 54
29, 43
K
DNG
16, 18, 38, 46, 50, 52, 53
DOF calculator 25, 28, 31, 47, 67
Downloading files via USB 46, (36)
Draw palette!
43
!
KAP (Kite Aerial Photography)
49, 62
68
5
Legal notes
<ALT> Mode
This User Guide is Copyright © under the terms of the GNU General Public License, Free
Documentation License, as published by the Free Software Foundation.
When <ALT> mode is enabled the function of certain buttons on the camera will change, allowing
you to start accessing CHDK features. For example, pressing the FUNC.SET button will display the
CHDK Script menu, rather than the usual function associated with FUNC.SET.
This User Guide is not for resale, it is a free distribution. distributed in the hope that it will be useful
but WITHOUT ANY WARRANTY; without even the implied warranty of MERCHANTABILITY or
FITNESS FOR A PARTICULAR PURPOSE.
•
There are different ways to enter <ALT> mode, depending on the style of camera.
A Series – Press the Direct Print button (A momentary short press)
G Series – Press the Shortcut / Print button *
S Series – Press the Shortcut / Print button *
GPL:
SD / IXUS Series – Press the Direct Print button
SX 200 – Press the Direct Print button
* This file is part of CHDK.
* Copyright © 2007 - 2011 The CHDK Team
* CHDK - CHDK Wiki
! SX10!, 20, 30 – Press the Shortcut / Print button
* This program is free software; you can redistribute it and/or modify
!
Note: Check the Wiki for your camera's CHDK Specialties, for instance the MODE button for
!
!
* it under the terms of the GNU General Public License as published by
* the Free Software Foundation; either version 2 of the License, or
* (at your option) any later version.
* This program is distributed in the hope that it will be useful,
*
<ALT> on certain models e.g. A480
* See note on page 6 about Shortcut button.
!
Also, while in <ALT> mode the following buttons are reassigned:
* but WITHOUT ANY WARRANTY; without even the implied warranty of
A Series –
Exposure/Erase
* MERCHANTABILITY or FITNESS FOR A PARTICULAR PURPOSE. See the
G Series –
S Series –
AF Frame Selector / Erase – Toggles RAW capture mode!! !
FUNC.SET – Toggles RAW capture mode
* GNU General Public License for more details.
* You should have received a copy of the GNU General Public License
* along with this program; if not, write to the Free Software
* Foundation, Inc., 51 Franklin Street, Fifth Floor, Boston, MA,
SD / IXUS Series – DISP. – Toggles RAW capture mode
! SX 200 –! ! ! ! ! “ ! ! ! “ ! ! “ !! “! !
“
SX10!, 20, 30 – AF Frame Selector / Erase – Toggles RAW capture mode!
•
02110-1301 USA
!
Canon® !is a registered
® ™ Trademark of Canon Inc.
PowerShot is a registered ® ™Trademark of Canon Inc.
Mac, Macintosh, Mac OS, and Mac logo are registered ® ™ Trademarks of Apple Inc.
registered in the U.S. and other countries.
!Photoshop® is a registered ® ™ Trademark of Adobe Systems Incorporated.
Windows is a registered ® ™Trademark of Microsoft Corp.
registered in the U.S. and other countries.
!
- Toggles RAW capture mode
See notes on page 43 about <ALT> button.
Common to most cameras
• MENU – Displays the main CHDK menu
• FUNC.SET – Display the Script menu
• DISP. Button -- Return to previous menu
• Full Shutter press – Executes the selected Script, or pauses the running script
The following functions are available any time CHDK is loaded.
Common to most cameras
•
•
•
•
! ! !
Half Shutter + Left – Toggle Zebra on /off
Half Shutter + Right – Toggle OSD on /off
Half Shutter + Up – Toggle Histogram on/off (on recent versions Half shoot+down).
Half Shutter + Down – Toggle Overrides (Half Shutter + Left on a few models ? )
! ! !
! ! ! !
! ! !
! ...(Contd. P6)
6
More keys and shortcuts:
In manual focus mode - (with <ALT>)
Up – Set MF to infinity
Down – to set MF distance to hyperfocal distance (based on f /stop and zoom focal-length).
67
Links
FAQ
CHDK for Dummies The Very First
Steps
Guide
On the IXUS / SD series the DISP. button is used to instantly set MF (manual focus) distance to
infinity.
User Manual at Wiki
Zoom-in / Zoom-out – can be assigned to manual focus in Main Menu > Miscellaneous stuff.
Cardtricks (Memory card formatting)
Left – Decrease Value Factor,
Right – Increase Value Factor.
Hi-Speed Shutter & Flash-Sync
See:- Extra Photo Operations Page 9.
In OSD layout editor –
Display (DISP. button) Change the number of pixels the OSD (on-screen display) elements are
moved by.
"DoF Stacking" using CHDK Focus
Bracketing
Grids
http://chdk.wikia.com/wiki/FAQ
http://chdk.wikia.com/wiki/CHDK_for_Dummies
http://chdk.setepontos.com/index.php/topic,964.0.html
http://chdk.wikia.com/wiki/CHDK_User_Manual
http://chdk.setepontos.com/index.php/topic,1167.0.htmlß
http://chdk.wikia.com/wiki/Samples:_High-Speed_Shutter_
%26_Flash-Sync
http://chdk.wikia.com/wiki/DoF_Stacking
http://chdk.wikia.com/wiki/Grids
Lua Scripting
Left – Open context menu.
http://chdk.wikia.com/wiki/UBASIC
UBASIC
http://chdk.wikia.com/wiki/Software
Software Overview / Link list
In File Browser –
Right – make selection
Zoom-in / Zoom-out – Scroll-By-page in File Browser and File Reader modes.
Half-shoot – Scroll one page forward in File Reader mode.
Menu numerical units –
Zoom-in / Zoom-out – To enter numerical values in menus the zoom lever/switch is used to change
the unit value, ie: 1, 10, 100. The unit value is indicated in the top LH corner of the OSD. When doing
this, first select the menu item to be changed, then change the unit value with the zoom lever /switch,
then change the selected menu item.
SX10, SX20 (And certain other models with separate playback and record buttons ) - To turn the
camera on directly into record mode, hold the On /Off button for approx. one second. When switched
on, pressing the shutter button full or half will switch to record mode from playback mode.
* Cameras with a Shortcut button
can be configured in Miscellaneous stuff to use either, –
Shortcut, Flash, Timer, ISO, or Video buttons to enter <ALT> mode, the Shortcut button is the default,
press the button with a short momentary press, and for the original Canon function, press and hold
slightly longer. - See: <ALT> mode button on Page 43.
When you enter <ALT> mode, the indicator “ <ALT> “ will appear at the bottom middle of the OSD.
In <ALT> mode you can now use CHDK Scripts, and also enter the CHDK Main Menu. When you
have finished customizing how CHDK operates, and / or using scripts, press the <ALT> mode button to
exit <ALT> mode. You can now use the camera to take photos or video, and it’s operation will be
changed by the options you set in CHDK.
Download page for latest builds etc
http://chdk.setepontos.com/index.php/board,35.0.html
http://chdk.wikia.com/wiki/Downloads
http://chdk.setepontos.com/index.php/topic,
ALTMENGD.ZIP Text files
http://chdk.wikia.com/wiki/CameraFeatures
How To Test Your Camera
instructions for in camera
Curve Anthology
USB Remote Cable
Sample photos, videos, etc.
GPL License
DOF Calculator
RAW Samples
Image processing & other software
Dave Mitchell"s installers, etc
CHDK on Flickr
CHDK on Twitter
CHDK on Facebook
1214.msg28449.html#msg28449
http://www.curvemeister.com/support/curvemeister2/help/
Articles/CurveMoves.htm
http://chdk.wikia.com/wiki/USB_Remote_Cable
http://wikia.com/wiki/Samples:_HDR
http://www.gnu.org/copyleft/gpl.html
http://chdk.wikia.com/wiki/CHDK_firmware_usage/
AllBest#Quick-Set_Hyperfocal_.
26_Infinite_Manual_Focus_Distances
http://chdk.wikia.com/wiki/Samples:_RAW
http://chdk.wikia.com/wiki/Software#CHDK_related
http://www.zenoshrdlu.com/kapstuff/zchdkstuff.html
http://www.flickr.com/groups/chdk/pool/
http://twitter.com/CHDKnews
http://www.facebook.com/group.php?gid=71065475036
66
7
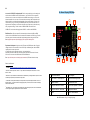
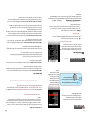
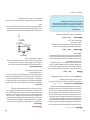
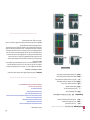
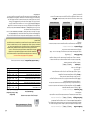
On-Screen Display (OSD) Map
A note on the CCHDK.CFG configuration file. This file, among other things, is where settings the
user has made to the CHDK Overrides, OSD elements, etc. are saved. If this file is corrupted for
whatever reason, it can cause some weird behavior from CHDK camera settings, so to test for this find and rename the file so a new one will be created at the next startup, if this eliminates the erratic
behavior the old file can be deleted. Remember though, all your personal settings will be gone. It is
advisable to keep a copy of a known good CCHDK.CFG file from your camera version to use as a
replacement for a corrupted one, and to add it to other SD cards for that camera, to have them ready
with your preferred settings. The file is found at /CHDK/ CCHDK.CFG on the SD card.
4a
3
10
CCHDK.CFG can be edited with the application CFGEDIT - available at the CHDK Wiki.
4b
Exif Makers Notes. For more accurate Exif information than is shown on the OSD for CHDK
overrides, look at the Exif Makers Notes in the extended Exif information of a JPEG image. That will
be the more correct information, not the abbreviated information shown in the normal Exif data.
9
8
See: http://chdk.setepontos.com/index.php/topic,3541.msg33201.html#msg33201
Experimental development is being done on the PTP feature for CHDK cameras, this will provide
computer control of a camera similar to Canon’s EOS Utility and Remote Capture, but with CHDK
capability such as remote script control.
As at May 2010 so far the supported cameras are: (for experimental use)
A480-100b, A540-100b, A590-100e, A610-100e and 100f, A650-100d, A710-100a, A720-100c,
SX1-201a, SX10-101a and 102b, SX200-100c, IXUS700/SD500-101a.
7
See:- http://chdk.setepontos.com/index.php/topic,4338.0.html (PTP Interface thread at forum)
2
6
1
11
5
Endnotes and References
1
SX230HS http://www.cameralabs.com/reviews/Canon_PowerShot_SX230_HS/verdict.shtml
2
Win1250 – East European Latin , Win1251 – Cyrillic, Win1252 – West European Latin, Win1254 – Turkish ,
Win1257 – Baltic
3
Whenever a script is loaded there is extra demand for available memory, loading the default script when no other
is needed may help camera performance when using CHDK.
1
<ALT> Mode indicator
6
Live Histogram
2
Mini Console - Current Script info.
7
RAW shots remaining Indicator
3
Battery Indicators
8
Miscellaneous Values
4a
File-Space Indicators - icon/text
9
Extra Photo Operations - Overrides
4b
File-Space Indicator - vertical bar
10
Temperature Indicator
5
Clock
11
Fast EV Switch Indicator
4
CHDK-Shell is a handy GUI for developers to easily download, compile and manage the CHDK sources on a
Windows platform., it is written with AutoIt scripting language (easy to customize, the source code is included) by
whim from the CHDK forum.
5
Apple MacOS users - set up Image Capture preferences to open either Image Capture, Canon Camera Window,
or other image management application when a camera is detected.
See: OSD Parameters on Page 26 for display settings.
8
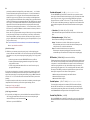
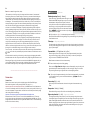
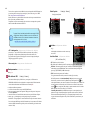
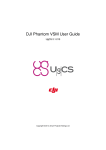
Main Menu!
The Main Menu is the top-level menu from which all
CHDK functions are enabled and customized.
To access the Main Menu, set the camera to <ALT> mode
and press the MENU button.
In <ALT> mode press the camera MENU button,
use the !
Directional & FUNC.SET buttons
to navigate the menus.
!
!
!
!
!
!
Extra Photo Operations
!
!
!
!
!
!
!
!
!
Like Canon’s menus, pressing
the FUNC.SET button will
select the highlighted menu
option. Pressing the DISP.
button will move back one
menu level. Pressing the MENU
button will exit the current
operation.
!
!
!
!
!
65
Q. What’s the future for CHDK ?
A. There’s no doubt that clever people will continue to develop more features, scripts, etc., and more
cameras will be ported, CHDK will be refined, until it is released as v1.0, and perhaps beyond, which
seems to be very close, so the future looks good for CHDK. This User Guide has been written up to
December 2011. For further firmware revisions refer to the changelog. Have fun with and enjoy
CHDK !
!
See:- http://chdk.wikia.com/wiki/Changelog
Want to have a say?, then go to :- http://chdk.wikia.com/wiki/Talk:CHDK (Discussion at the CHDK wiki,
or go to :- http://chdk.setepontos.com/ (The official CHDK forum - English, - other language forums
links available at the Wiki homepage - http://chdk.wikia.com/wiki/CHDK).
!
!
----------------------------------------------------------------------------------------------
Miscellaneous info.
CHDK supported cameras might not always perform as a menu entry might imply, because you can
enter a parameter does not mean the camera can necessarily perform the task, the cameras have hardware
limits that restrict them. (some have less than others)
Extra long exposure capability is not yet available on all CHDK cameras, the cameras listed below are
supported at this time. (May 2010)
< Main Menu
A30, A540, A550, A560, A570, A590, A630, A710, G9
IXUS70/SD1000, IXUS80/SD1100, IXUS870/SD880, IXUS90/SD790, IXUS950/SD850,
IXUS970/SD890, S3, S5, SX1, SX10, SX200, D10 (Dec ’11).
Disable Overrides
Allows the use of a half-press + DOWN button press to quickly
toggle any override settings on and off. The status of the
overrides will appear where the normal override settings are
displayed in the OSD - in your chosen warning color !
!
Extra long exposure means these cameras are capable of exposure times of up to 2000 seconds, helpful
for Astrophotography and other specialized applications.
(See: "Visual Settings" Page 35) !
!
!
• Off - Turns off the "Disable Overrides" shortcut option.
• On - Starts out with any override settings DISABLED. In the OSD you will see "NO OVERRIDES"
• Disable - Starts out with any override settings enabled.
The "On" and "Disabled" options allow you to use this feature in your User Menu (P27)
as the quick override toggle instead of using any shortcut key. Some cameras may not have
the shortcut feature available.
!
Enable [•] / Disable [ ]
• Include AutoISO & Bracketing!
Includes Auto ISO and Bracketing settings in the "Disable Override" settings. If not enabled then
the Auto ISO and Bracketing settings will not be turned on or off by the "Disable Override"
shortcut button.
CHDK Cameras without standard manual focus, can take advantage of the CHDK focus override,
All of the IXUS series (except IXUS980/SD990), and these others at this time - (May 2010) - A450,
A460, A470, A480, A550, A560, A2000, TX1.
Cameras without an actual aperture/iris mechanism use the ND (neutral density) filter to achieve an
exposure method similar to an actual aperture. CHDK provides control of the ND filter for users to
make their own shutter speed adjustments. The CHDK supported cameras listed below have an ND filter
only, and no actual aperture/iris mechanism.
IXUS series (except IXUS 300), A450, A460, A470, A480, A530, A550, A560, A2000, TX1.
Some high end Powershot cameras, such as the G series, have both an aperture and an ND filter.
Commonly seen when checking the camera version with the VERS.REQ method, is the E18 error,
this means sometime during the camera’s life it has encountered a possible malfunction of the lens
assembly, if the camera is working ok there is no cause for concern.
64
9
performed by an authorized Canon Repair Facility, would void the warranty." ... and ... In further
discussion with Canon about this specific hack, their response is: "If it is not Canon firmware the
warranty would be void." Is it an "upgrade" of the camera firmware when the firmware remains
untouched? It's up to you to decide. Don't use it if you are not willing to take the slightest chance.
Many, many people have used CHDK on their cameras (including some very experimental versions)
and there is no confirmed report of any permanent malfunction. Thus, CHDK appears to be quite safe
to use as long as you make sure that it's the CHDK and not a real firmware update (A real firmware
update which is not an official Canon update could alter or completely ruin the camera and will
void the warranty). Addressing their second comment (i.e. "if it is not Canon firmware") - CHDK is
NOT firmware, by very definition, FIRMware is software that remains in the memory of the device
when it is not using any power source.
However, this is not a legal opinion and the user accepts all risk of using it. And as a practical matter, if
you send your camera in for warranty service, and Canon says your warranty is void because they
found evidence of CHDK on your memory card, there is not much you can really do (what are you
going to do? Spend thousands of dollars suing them to get your camera repaired?) However, you can
just wipe or remove the card.";)
!
TV in the OVERRIDES display in the OSD. This feature allows you to override the camera’s
shutter speed in all auto and manual modes with the speed you select. This feature allows shutter
speeds as long as 64 seconds, (or longer if your camera has CHDK Extra Long Exposure
support) and as short as 1/100,000th of a second, in 1/3rd EV steps. This setting is affected by
the “Value factor” and the “Shutter speed enum type” settings below. Please note that the actual
speeds available are dependent on the camera used and other conditions such as the aperture
setting.
• Value factor
[Off, 1/100k – 100] or [Off , 1,10,100]
! Enables the Override shutter speed and sets the Value factor, the use of which is described
! below.
• Shutterspeed enum type [Ev Step , Factor]
! Select the method of determining the override shutter speed.
Ev Step – The method most of us will use. Enables the first set of options above.
See:- http://forums.dpreview.com/forums/readflat.asp?forum=1010&thread=23168653&page=2
More at: - http://chdk.wikia.com/wiki/FAQ
Q. How do I use scripts?
A. CHDK allows you to automate your camera by running "scripts", small and simple programs
written in a short-hand version of BASIC, or Lua. You can use some pre-made scripts like bracketing,
intervalometer etc., or write your own scripts using the scripting language. To use a script, you have
to do this:
!
!
!
!
!
Override shutter speed [0 – 100] <Extra Photo Operations < Main Menu
1 - Put the script you want to use into the CHDK/ SCRIPTS-folder on your SD card
2 - Load the script (Main menu>Scripting parameters>Load script from file) and adjust
script parameters as needed...
3 - To run the script, press the shutter button while in <ALT> mode. You can also stop it by
pressing the shutter button again.
If a script does not work properly, try to increase the "script shoot delay" parameter, which is a small
time-delay after a shot is taken, before the next line of the script is executed. Some scripts also may
require certain camera settings. For example the generic bracketing script: go to MENU > Review and
switch it to "off". Use P, Tv, Av or M mode and activate the camera function where you want to have
bracketing.
For example: Activate the focus slider when you want to have focus bracketing. Activate the exposure
compensation slider in P mode when you want to have exposure bracketing, and so on.
For more, go to:- Scripting notes Page 57,
and http://chdk.wikia.com/wiki/UBASIC/TutorialScratchpad
!
!
Q. May I suggest a new feature?
A. Yes you certainly can, although not every wish can be fulfilled. Please note that the CHDK is not
able to change any standard behavior of the camera, because it does not modify the original
firmware. CHDK can just "extend" current functionality.
See: Feature requests at the CHDK Forum.
!
!
!
!
The Override shutter speed is shown in seconds. Select the desired shutter speed and
set the Value factor to 1 to enable the override function.
Factor – This method will enable the second set of options above.
The shutter speed is determined by multiplying the selected value factor with the
selected shutter speed. This method is useful in analytical and research photography.
ND filter state [ Off / In / Out] (For cameras with an ND Filter)
When the camera detects a really bright scene, it will swing the ND filter inline with the lens and
sensor. This makes the scene look darker and will affect the exposure (but not depth of field like
a real aperture / iris would). With the ND filter in, the camera can select a slower shutter speed
without over-exposing the entire scene. Also, with the ND filter swung in, the camera will
capture an image with an aperture of f/8 - This is an artificial aperture value caused by the ND
filter swung in. With CHDK, you can choose to keep the ND filter out, and just select a faster
shutter speed to compensate. To do this, Select one of the options from ! ! 'Off' means the camera will automatically control the ND filter state.
! ! 'In' means the ND filter is swung in.
! ! 'Out' means the ND filter is kept out.
Override Aperture
[Off , 2.77 – 16.00] <Extra Photo Operations < Main Menu
For cameras with an actual aperture/iris. mechanism (IXUS / SD models have ND filter).
AV in the OSD. This feature allows you to override the camera’s aperture settings. Simply
select the desired aperture setting and the camera will use that setting in all auto and manual
modes. Please note that the actual aperture values available depend on the camera.
Override Subj. Dist. Valu
[0 – 65535]
SD in the OVERRIDES display in the OSD. This feature allows you to specify, to the millimeter,
the manual focus distance. To focus the camera at the override distance you must half-press the
shutter.
10
• Value factor (mm)
[Off, 1, 10, 100, 1000]
FACTOR in the OVERRIDES display in the OSD. The Value factor is used to enable the
“Override Subj. Dist Valu” (OSDV), and also to quickly set the focus distance. When updating
the “Override Subj. Dist. Valu” with the left/right buttons, the value will be changed by the
amount set in the “Value factor.” So “1” changes the OSDV by 1 mm, “10” changes by 10 mm,
and so forth. In this way the OSDV can be updated faster than trying to change the override from
1 to 450 mm by pressing the rocker 449 times.
For cameras without Manual Focus, (IXUS /SD series, and some A series) SD Overrides can be
used to manage focusing, either by entering values in this menu, or by using shortcut keys.
Enter a choice of unit value, either 1, 10, 100, or 1000, this will change the Subj. Dist. Value by
the unit value you entered, ie: if the Value factor is 10, and the Subj. Dist. is 10 then the focus
will be 10 x 10 = 100 mm from the lens.
These Manual Focus adjustments can also be achieved with shortcut keys. In <ALT> mode,
using the Left/Right keys to adjust the Value Factor and the Zoom lever to adjust the Subject
Distance, (or on cameras without a zoom lever use the Display (DISP.) button) Infinity is
immediately selected by pressing the Up key, and for Hyperfocal adjustment based on current Fstop and zoom focal length, press the Down key. The subject distance values are displayed as
part of OVERRIDES on the OSD. Remember to exit <ALT> mode to shoot pictures with these
adjustments applied. Also remember to uncheck "clear overrides @ start" setting if you want to
continue with the current settings.
Override ISO value [0 – {ISO max for camera}]
ISO:.. in the OVERRIDES display in the OSD. This feature allows you to override the camera’s
ISO setting. Select the desired ISO setting and the camera will use that setting in all auto and
manual modes.
[Off, 1, 10, 100]
• Value factor
The factor is used to enable the ISO override, and to set a multiplier against the “Override ISO
value” set above. So if you want to use an ISO of 1200, you would set the “Override ISO value”
to 12, and the “Value factor” to 100. This arrangement exists to speed the setting of a custom
ISO.
Note: Although CHDK may show a higher or lower setting, minimum and maximum ISO
overrides will mainly be determined by the camera hardware limits, CHDK enables “fine
tuning” of ISO settings, See: Custom Auto ISO on pages 12, 13.
!
!
!
See:- Exif Makers notes at Miscellaneous Info.
Also:OSD Parameters on Pages 26, 27, and 28 for “Show State Displays” of overrides in the OSD.
63
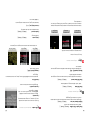
FAQs and Facts
Q. Can CHDK damage your camera"?
A. Short answer: It is unlikely, but theoretically possible. CHDK comes with no warranty for any
use; you use it at your own risk. CHDK is created by reverse engineering an undocumented system
that directly controls hardware. Because of this, it is impossible to be certain that it is completely
safe.
Long answer: It is very unlikely that CHDK will permanently harm your camera. There have been no
confirmed reports of CHDK damaging a camera, and both the original firmware and the CHDK
developers take precautions to avoid situations where this could happen. There are at least two ways in
which CHDK could theoretically do damage:1). By commanding physical hardware to do something it was not designed to do. For example, it is
possible to command the lens hardware to move when the lens is closed. (1) It is also possible to move
lens hardware beyond limits allowed by Canons firmware, using scripts or overrides. See UBASIC/
Scripts:_Tele-Macro-Mode (2) and Talk:UBASIC/Scripts # Tele-Super-Macro_Mode_Comments (3).
2). By overwriting the internal flash ROM where the Canon firmware is kept, rendering the camera unbootable. Since CHDK does not ever intentionally write to internal flash, it would take an extremely
unlikely sequence of events to make this happen.
It's worth noting that neither of these cases have resulted in actual damage, and both required direct
input from the user.
If you are concerned about this, you can minimize your risk by avoiding untested development builds
(such as the autobuilds, or test builds posted on the forum) and being careful about what scripts you
run.
1. http://chdk.setepontos.com/index.php/topic,2335.0.html
2. http://chdk.wikia.com/wiki/UBASIC/Scripts:_Tele-Macro-Mode
3. http://chdk.wikia.com/wiki/Talk:UBASIC/Scripts#Tele-SuperSee: http://chdk.wikia.com/wiki/FAQ
Q. When I switch off my camera and then switch it on again, the CHDK program does not work,
What's wrong?
A. When you update your camera with CHDK, it doesn't actually change the firmware. Because it is just
a memory-resident program, it only remains in the camera's memory until the camera is turned all the
way off. So, if something goes wrong and camera does not respond, you can always switch the
camera off (or remove the battery, and perhaps delete it from the memory card) to return to the
original firmware.
!
See:- http://chdk.wikia.com/wiki/FAQ!
!
!
Q. Does using the CHDK program void your warranty?
A. Please bear in mind that CHDK comes with no warranty for any use; you use it at your own risk.
What follows is just a few thoughts, and is not a legal opinion. Many believe that using the CHDK
does not harm your warranty, since it is said to be loaded into the memory only temporarily (turn off
the cam and it's gone completely) and that it leaves the original camera firmware untouched.
Canon Tech Support *says: "Unfortunately, any upgrades to the software of the camera not
62
11
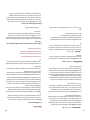
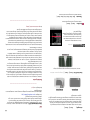
Bracketing in continuous mode < Extra Photo Operations < Main Menu
Grids pics
!
!
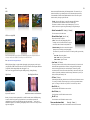
Golden Ratio! !
Bracketing is the practice of making several exposures of a scene,
with each exposure differing from the next by predetermined steps
in exposure or focus settings. Bracketing is used to easily capture
a range of exposures so that the best exposure can be selected at a
later time. Bracketing is also used to create a series of exposures
which will be combined using methods such as HDR processing.
!
!
!
Rulers!
!
!
Diagonal Method
The bracketing features are enabled when the camera drive mode
is set to continuous, and custom timer with some models.
!
!
Stereo Data Maker
!
!
!
!
!
!
!
!
!
!
!
!
Usage Tip: If you wish to fire off individual frames and still have
bracketing for each one, after the first shot lightly let-up on the
shutter button to a half- press position. The next full-press will
give you another bracketed shot. This process can be repeated
for as many bracketing steps as you need. Giving you finer
control over the number of bracketed exposures you may require.
!
Photos courtesy of Stereo Data Maker http://stereo.jpn.org/eng/sdm/index.htm
!
!
!
!
!
!
!
!
!
!
!
!
Set camera Custom Timer in Canon Menu
See: Bracketing notes: Page 49.
KAP
!
(Kite Aerial Photography)
• TV bracketing value
!
[Off, 1/3 – 4 Ev]
Set this value to bracket via exposure time. A value of 1 will
double or halve the exposure time for the following exposures.
• AV bracketing value
!
!
!
Courtesy Tom Benedict
!
[Off, 1/3 – 4 Ev]
Set this value to bracket via aperture. A value of 1 will open or
close the aperture by 1 stop for the following exposures.
• Subj. Dist. Bracket Value
[0 – 100]
Set this value to enable focus bracketing. This feature is only
enabled during manual focus mode on some versions. It allows you to specify the manual focus
distance in millimeters. This value is multiplied by the Value factor below to arrive at the final
value.
12
61
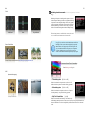
HDR Panorama
[Off, 1, 10, 100, 1000]
• Value factor (mm)
Used as a multiplier for Distance bracketing value.
[0 – 100]
• ISO bracketing value
Set this value to bracket via ISO. This value is multiplied by the Value factor below to arrive at
the final ISO value that will be used for bracketing. A value of 2, with a Value factor of 10, will
increase or decrease the ISO by 20 for following exposures.
[Off, 1, 10, 100]
• Value factor
Used as a multiplier for the ISO bracketing value.
located at 48°25#13.4$N, 123°22#11.1$W]]
+/–
The British Columbia Parliament Buildings in Victoria, BC -
[+/-, –, +]
• Bracketing type
With all bracketing types the first exposure uses the current exposure settings of the camera. On
following exposures the exposure settings are adjusted as described below.
This bracketing type will alternatively apply the bracketing value by first subtracting then
adding. The sequence goes like this…
0 Ev, -1Ev, +1Ev, -2Ev, +2Ev, -3Ev, +3Ev, etc. Bracketing will continue until you release the
shutter. So for example lets say you set the TV bracketing to “2 Ev”, and when you half-press
the shutter you notice an exposure time of 1 second. When you fully depress the shutter you will
get exposures at these times: 1 sec, # sec, 4 sec, 1/15 sec, 15 sec, 1/60 sec, 15 sec, 1/250 sec,
15 sec, etc.
–
This bracketing type works as above but will only reduce the exposure value. Using the above
example, the exposure times would be 1 sec, # sec, 1/15 sec, 1/60 sec, 1/250 sec, etc.
+
This bracketing type works as above but will only increase the exposure value. Using the above
example, the exposure times would be 1 sec, 4 sec, 15 sec. Once the camera’s limit is reached,
subsequent exposures will occur at the maximum (or minimum) setting.
This file is licensed under Creative"Commons Attribution"2.5"License
In short: you are free to distribute and modify the file as long as you attribute it’s author(s) or licensor(s).
Attribute to Ryan Bushby
Source:
http://commons.wikimedia.org/wiki/Image:British_Columbia_Parliament_Buildings_-_Pano_-_HDR.jpg
This image was created by stitching together 20 sets of HDR images each created from 3 exposures. This
makes for a total of 60 photographs used to create this image. I used CHDK to allow for the taking of
several bracketed shutter speed exposures without re-metering in between.
The final image is 35 mega-pixels. The whole process is described here:http://wiki.highinbc.yi.org/index.php/OffTopic:Photography/BC_Parliament_Buildings_HDR_mosaic
Motion Detect!
!
!
!
!
!
!
!
Fast Shutter
!
Enable [•] / Disable [ ]
• Clear Bracket Values on Start !
Enable this option to turn off bracketing when the camera is turned off.
Enable [•] / Disable [ ]
• Add raw-suffix
In bracketing mode you now have the option to add a suffix to the raw filename, so that later you
can easily identify the RAWs that were created during bracketing, it is disabled at default.
Custom Auto ISO
< Extra Photo Operations < Main Menu
!
!
!
!
!
!
!
!
!
!
From GrAnd!
! !
Courtesy of kittenmoon
This feature has 2 purposes: Allow the user to define the exact ranges of ISO used in
Auto ISO and Auto-HI. As an example: Expand the Auto ISO range from 80-200 to 50-400.
Give additional information to the camera to allow it to select the optimal shutter speed (to avoid
blur or get the right artistic exposure) and ISO instead of some sub-optimal default...
As an example - Use a faster shutter and higher ISO when shooting sports, but go for a slower
!
!
!
!
!
!
!
!
!
!
60
13
HDR
shutter and minimal ISO when shooting still landscapes) Method - The camera will try to
maintain lowest ISO as long as shutter speed is no-slower than user defined (more below).
Custom Auto ISO will kick-in whenever ISO HI /Auto ISO is chosen. This allows a quick
manual override by choosing a specific ISO value.
!
! Example: Camera set ISO 100 at 1/8s. Auto ISO configured to ISO50-400 at
! 1/15s: Auto ISO will shift to ISO200 to maintain 1/15s shutter speed.
! This feature is available in all modes except for Shutter priority (Tv). It is also
! disabled in stitch assist to prevent using different settings for each panorama part.
!
!
•
!
Enable Custom Auto ISO Enable [•] / Disable [ ]
This is the master switch for this feature.!
HDR from a single RAW
• Minimal Shutter Speed [Auto 1/8 -etc]
!
!
Note: The examples above are copyright ©, they remain the property of their respective owners and
are not for commercial use. Thanks to the owners for use in this User Guide.
See:- http://www.flickr.com/groups/hdr/pool/
• User Factor (1/FL/factor)
HDR (High Dynamic Range) is a popular branch of photography gaining acceptance over the last few
years particularly. CHDK has made this much easier for the low end because of RAW capture (HDR from
a single RAW), and bracketing (Multiple shots with stepped Tv, etc).
!
! now !many applications
!
! that! are capable
!
!
! including
!
!
There
are
of !HDR processing,
Photoshop
.
!
!
!
High Altitude!
!
! !
!
!
Ultra High Speed Shutter
!
!
!
!
!
!
!
!
!
! Here you have basically two options:
1) Auto - This is for use when photographing still-life,
!
landscapes, etc. It will use the factors below to prevent
!
camera shake, but will assume the subject holds still.
2) Numerical setting - hint to the camera what the optimal
! shutter speed is for the subject you are photographing.
! The camera will try to use this value or a faster one as much as possible (to prevent blur),
! e.g:
!
1/8s - 1/30s - Slow moving subjects.
!
1/60s - 1/125s - Kids, Pets, general movement
!
1/250s - 1/1000s - Sports, Fast action
This setting accounts for the user’s ability to hold the camera steady. It is based on the old
rule that the shutter speed should be no less than 1/focal-length. Start by dividing the
effective focal length of the lens by the actual focal length. The answer is generally
somewhere around 6. Then increase or reduce this amount by a self-assessed value of your
steadiness. If you think your hands are steadier than average then decrease by 20%. If you
think you’re shaky then increase by 20%.
• IS Factor (Tv*factor)
!
In determining the ISO setting, the effectiveness of the IS system will be taken into account.
Use a setting of 4 if the IS is effective enough to give you a two-stop reduction in shutter
speed. Use a setting of 2 if the IS isn’t very effective, or 8 if the IS is very effective.
• Max ISO HI (x10)
From FBonomi!
!
Italy from 39.5 km altitude
!
!
!
!
Sets the maximum “HI” ISO that the camera can select.
!!!!!
!!
From Princeton University USA,
Helium Plasma research, at ~80 microseconds
Recently (Late 2010), Canon has produced the G12, and S95 Powershot cameras with HDR processing
in camera, which is done by producing 3 bracketed shots of a scene at different exposures, then
combining them in camera to create one HDR image, does this sound familiar ? … And in 2011 the
SX40HS has exposure and focus bracketing, and NightScapes mode to combine several images to reduce
digital noise at high ISO.
• Max ISO Auto (x10)
Sets the maximum “Auto” ISO that the camera can select.
• Min ISO (x10)
Sets the minimum “Auto” ISO that the camera can select.
!
Clear override values@start
Enable [•] / Disable [ ]
Extra Photo Operations overrides will be cleared for the next time the camera is started.
14
Enable Fast EV Switch?
Enable [•] / Disable [ ]
Warning: This feature is not properly workable on all cameras yet.
!
See: http://chdk.setepontos.com/index.php/topic,2595.msg24211.html#msg24211
and: http://chdk.setepontos.com/index.php/topic,2501.msg23321.html#msg23321
Turns the UP and DOWN buttons into quick EV compensation buttons. You no longer have to
press the FUNC.SET or MENU buttons to adjust your EV settings while shooting. By pressing
! UP! or DOWN
!
!
!
! or decreased.
!
! There !is also a screen display!
the
buttons
the! EV is increased
showing your chosen EV-compensation settings by whatever step-size you have chosen (see
!
!
!
!
!
!
Step
Size
(1EV)?)
below).
It! is advisable
to! move !the OSD! EV override
display" over the
camera's own to prevent confusion.
You will see a real-time change in the EVF/LCD as you change your EV values with this shortcut. It also works while the Zebra Mode is engaged. You can fine-tune the Zebra alert just by
pressing the UP and DOWN buttons with half shoot.
When used in conjunction with the Curves "Auto DR" Mode you should never miss another
blown highlight or dropped shadow again.
One drawback: If using the up and down buttons during a half-press to see Zebra alerts while
changing the EV setting, it will toggle your "Disable Overrides" on and off if you have that
feature engaged as well. A small price to pay for the ability to have these amazing features. One
work-around, set the EV step-size to 1/2 what you normally would use, then the
"Disable Overrides" shortcut will always toggle back to the original ON (or OFF) on every 2nd
EV +/- press, effectively resetting it where you wanted it in the first place.
Note also: This change is not saved between camera power-downs. If you would always like to
start out with a small negative preset EV value to avoid blown highlights, then use Canon's own
EV compensation setting for your startup EV value. This Fast EV Switch will reflect that value
on startup.
!: Enabled when Fast EV Switch is enabled.
": Use OSD parameters > OSD layout editor to move display.
59
Flash notes
Notes on Force flash: From PhyrePhoX, for strobists - an option to manually override flash (for all
cameras), even for (IXUS / SD cams, no need for a script anymore. Important: when enabled, this will
not only override flash power, but also enable the CHECK if flash is needed, in other words your camera
will use flash even in bright sunlight and even if you disabled the flash, of course the flash will not fire on
cameras with popup flashes when the flash is not popped up. There are three values for the flash to be set
- low, middle and POWERFUL, be careful, don’t flash at home kids…. This feature more or less created
- by ewavr, and code from PhyrePhoX - thanks.
For cameras with dedicated movie buttons, there is an extra menu item - Force flash only in moviemode,
when this is checked, the Force flash feature will be enabled for taking photos when recording a video.
Note: There is another advantage by using force flash - On cameras with adjustable flash intensity there
will not be a pre-flash when the intensity is set manually, which will help greatly when using slave
flashes.
See:– http://chdk.setepontos.com/index.php/topic,1365.msg39384.html#msg39384
and:- Force flash pics. - below
!
!
!
!
!
!
----------------------------------------------------------------------------------------------
Examples
Force flash pics
!
!
!
!
!
!
!
!
!
!
Pics thanks to walqas
• Step Size (1EV)? [1/6 Ev, 1/3 Ev, 1/2 Ev, 2/3 Ev, 5/6 Ev, 1Ev, and on - ]
When using the Fast EV shortcut feature you can adjust how much you want to change the
EV compensation with each UP or DOWN keypress. Step size is increments. A major
improvement over the adjustment levels and steps in the original firmware.
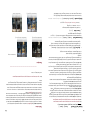
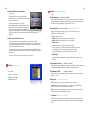
Force manual flash
Enable [•] / Disable [ ] < Extra Photo Operations < Main Menu
For optional control over camera flash output, use with Power of flash [ 0, 1, 2 ] to give 3
separate steps up in flash output power.
!!
Manual flash: low power (0) ! !
!
!
!
Manual flash: medium power (1)
• Power of flash [ 0, 1, 2 ]
Used with Force manual flash to adjust flash output.
0 = Low, 1 = Medium, 2 = Very High
!
!
More at:- Flash notes, and Force flash pics. on page 59
Quality override ! [ Superfine, Fine, Normal, off ]
< Extra Photo Operations < Main Menu
!For recent
!
!
!
!
camera
versions
without
Canon Superfine setting (SX200, SX20, etc)
Canon setting is used when “off” is selected, settings are saved in CCHDK.CFG
!
!
!
!
!!
!
Manual flash: high power (2)
Manual flash: Camera
58
15
@default g
@param h
@default
@param i
@default
@param j
@default
8
Reg Mode(0-no,1-incl,2-excl)
h 0
Measure Mode (1-Y,0-U,2-V)
i 1
Burst/Preview (sec,0=off)
j 0
if a<1 then a=1
if b<1 then b=1
if c<0 then c=0
if g<1 then g=1
if f<1 then f=1
if j<0 then j=0
e=e*100
j=j*1000
print ">[";a;",";b;"] threshold: ";c
x=30000
if j>0 then goto "md_burst"
!:md_singleshot
press "shoot_half"
t=0
do
md_detect_motion a, b, i, x, d, c, 1, t, h, 1, 1, a, f, 0, g, e
until t>0
click "shoot_full"
goto "md_singleshot"
!:md_burst
press "shoot_half"
t=0
do
md_detect_motion a, b, i, x, d, c, 1, t, h, 1, 1, a, f, 0, g, e
until t>0
press "shoot_full"
let X=get_tick_count
!:contloop
let U=get_tick_count
let V=(U-X)
if V<j then goto "contloop"
release "shoot_full"
goto "md_burst"
----------------------------------------------------------------------------------------------------------------------------------------------------
This is an example script for study, please do not copy from here as it may not be exact.
http://chdk.wikia.com/wiki/UBASIC/Scripts:Lightning_script_--_Fudgey
See:- FAQ-How do I use scripts? Page 64
!
and:- Scripting Tutorial Page - http://chdk.wikia.com/wiki/UBASIC/TutorialScratchpad
!
!
also:- http://chdk.wikia.com/wiki/UBASIC/Scripts
Tip: For using intervalometer, and long exposure scripts - to save battery and LCD use a piece of "
round plastic / unconnected a/v cable in the camera video transfer port and LCD will be off, although not
as much saving as when display is turned off (Which may not be possible with some other settings).
!
!
----------------------------------------------------------------------------------------------
Video Parameters
< Main Menu
[ Bitrate or Quality ]
Video compression modes.
Video Mode
!
Bitrate – dictates a constant data rate.
Video compression (and hence, video quality) expands or
contracts as necessary to maintain the data rate constant.
!
Quality – Sets a constant compression level, ensuring a defined level of quality regardless of
how much data that level requires.
Note: From owners reports of testing Quality overrides, it is evident that settings above the
standard Canon setting gain little if any higher quality, however file sizes will increase
significantly. Lower settings (minor), will lose little in quality but will reduce file size.
Excess Bitrate and Quality settings can cause memory buffer overload, and stop
recording, a red ! will show on the OSD.
[ 0.25, 0.5, 0.75, 1, 1.25, 1.5, 1.75, 2, 2.5, 3 ]
The compression factor for Bitrate compression. 0.25 is the most compressed /least quality and
3 is the least compressed / best quality.
Video Bitrate
[ 1 - 99 ] < Video Parameters < Main Menu
The compression factor for Quality compression. 1 is the most compressed / least quality and 99
is the least compressed / best quality. (Roughly ~70 - 80 is Canon equivalent).
Video Quality
Clear Video Params on Start?
Enable [•] / Disable [ ]
When enabled this will clear all your custom video compression settings back to the camera's
own defaults on startup.
Enable [•] / Disable [ ] < Video Parameters
Only a few cameras are supported. Pause and unpause video by pressing LEFT / RIGHT while
recording. Note: When using this function the remaining video-record time calculation is reset,
so the change is shown immediately in the OSD.
Fast Video Control
Enable [•] / Disable [ ]
When enabled, using the UP / DOWN button will increase or decrease video quality or
bit-rate (depends on which one is enabled in the Video Mode override) - While you are
recording.
Video Quality Control ? !
Enable [•] / Disable [ ] < Video Parameters
This feature allows you to use the camera’s optical zoom during video recordings.
Enable Optical Zoom
Mute During Zooming
Enable [•] / Disable [ ]
To eliminate focus mechanism noise. Please note that the zoom mechanism sound is very loud in
video, which is probably why it was disabled by the manufacturer.
AF key
< Video Parameters < Main Menu
(Shutter button - half press, or FUNC.SET button) During video recording - camera makes a
single autofocus scan.
16
Show Remaining Videotime [ Don’t, hh:mm:ss, KB /s, both ] < Video Parameters
Displays a position-able OSD element to show the video bit-rate, and the remaining video
recording-time, on the SD card,…
•
•
•
•
Don't - No display of remaining recording time and/or video data-rate.
hh:mm:ss - Display a clock of remaining video-recording time left.
KB/s - Display video recording bandwidth (data-rate) in Kilobytes per Second.
Both - Display remaining video-recording time in both hours /mins/secs, and video
!
data-rate in Kilobytes per Second.
• Refresh Rate (~sec)
< Video Parameters < Main Menu
Due to the nature of video's variable bit-rate and compression methods, subject dependent,
the "Show Remaining Videotime" has to be updated regularly by re-polling the card-space
and the bit-rate to calculate a fairly accurate time-remaining estimate. Choose, in seconds,
how often that you want this Video-Recording time-remaining to be updated. Shorter periods
of time are less accurate from each on-screen update to the next.
!
!
!
!
!
RAW Parameters
Save Raw
!
< Main Menu
Enable [•] / Disable [ ]
Enables the saving of RAW files. Enabling RAW does not
disable JPEG, both are saved. Also required for saving DNG.
(See Page 5 for RAW toggle shortcut button)
! Note: By not allowing a camera to auto-focus, ie: pressing the
! shutter all the way too fast, the camera might not save a
! RAW image.
!
Exceptions < Raw parameters < Main Menu
!
!
Enable [•] / Disable [ ]
• Disable @ Video Record?
Some cameras, the S-Series in particular, have a dedicated "Video Record" button where you
can engage that and also shoot individual still-frames during video recording. It was found
that RAW file-saving can interfere in this process. Turning this option on will ensure that you
don't miss a shot or video.
Enable [•] / Disable [ ]
• Disable RAW @ Sports
Disable RAW saving when the Mode-Dial is turned to Sports Mode. This ensures that fast
action sequences won't be missed due to RAW file-saving time, when forgetting to disengage
the RAW feature.
Enable [•] / Disable [ ]
• Disable RAW @ Burst
Disable RAW file-saving when using burst mode. Again, a handy override for when RAW is
not needed during fast burst-sequence shots (RAW enabled would certainly increase time
between shots)
Enable [•] / Disable [ ]
• Disable RAW @ Timer
Disable RAW file-saving when using the camera's Custom Timer mode (similar to the safety
feature for the burst mode).
57
Scripting notes
Well! where do we start, it is well known that Scripts and Scripting deserves a manual of it’s own, but
for this limited size User Guide we will have to be content with a very brief overview.
Definition of a Script: A simple program in a utility language, another term for macro or batch file.
In computer programming, a computer script is a list of commands, or instructions, that are executed by a
certain program or scripting engine. They are usually just text documents that contain instructions written
in a certain scripting language (ie: uBASIC, Lua). This means most scripts can be opened and edited
using a basic text editor. However, when opened by the appropriate scripting engine, the commands
within the script are executed.
In CHDK, scripts are used to automate a command or multiple commands to the camera in order to have
the camera perform certain actions, ie: to hold the shutter open for a particular length of time, or to force
a particular Av or ISO setting, (and many more actions). Nearly anything you can do by pressing buttons
on your camera with your own fingers, you can also do automatically with these script commands. Note
also that many scripts are universal for all relevant cameras, while others are camera model specific.
Inventive script programmers, the experienced, and the not so experienced, have been active from the
beginning of CHDK, with many short and simple, and also the more complex scripts being made freely
available to the CHDK community. Scripts such as: motion detect, time lapse.
Here is an example script -
UBASIC/Scripts: Lightning script -- Fudgey
Written for/on: Powershot S5 IS
Also works on: A540, A550, A590 so far.
Doesn't work on: A720 IS and some others.
This is basically a very fast and responsive motion detection script. This will definitely solve your
problems if you want to catch lightning, (thus the title) or anything fast, however some objects will blur
when the light conditions are insufficient. Enjoy this script!
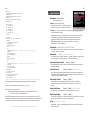
Script Code (save as "Lightning script.bas" to your /CHDK/SCRIPTS / folder)
---------------------------------------------------------------------------------------------------------------------------------------------------rem Author: fudgey - based on BarneyFife's MD Lightning6 and MLuna's Motion Detect
scripts
rem Tested on A570IS, Allbest build 16
rem For bursts, set the camera in continuous shooting mode and set j>0
rem If j>0 in single shot mode, you will see your shot for j seconds on screen.
@title Fast MD with Burst/Preview 080205
@param a Columns
@default a 6
@param b Rows
@default b 4
@param c Threshold (0-255)
@default c 10
@param d Compare Interval (ms)
@default d 1
@param e Trigger Delay (0.1 sec)
@default e 42
@param f Rows to Exclude
@default f 0
@param g Pix-Step(speed/accuracy adj)
56
17
!
Home made ! !
switch using a! !
keychain light.! !
!
!
A range of some
available
devices
to buy.
• Disable RAW @ EV Bracketing
Enable [•] / Disable [ ]
Disable RAW file-saving when you are using any of the high-speed bracketing features.
• Disable RAW @ Edgeoverlay
Enable [•] / Disable [ ]
Disable RAW saving while using Edge overlay.
• Disable RAW @ Auto
Check the extensive forum thread:http://chdk.setepontos.com/index.php?PHPSESSID=7973386aacdc6fb7e1b409702af56bbb&topic=294.0
Enable built-in CHDK remote support
First, ensure you are running a reasonably up-to-date CHDK build. Some early builds did not support
remote shutter release control via USB, and some only by script.
Now enable remote support via the CHDK menu: Main Menu > Miscellaneous Stuff > Remote
Parameters > Enable Remote
Note. If you enable the "Sync Delay" then the shutter will release after you stop the voltage to the USB
port. This was done because it was found to sync the shutters on 2 cameras for stereo imagery is much
better as the voltage drops. (It can also be useful if a switch has poor-quality contacts, in which case the
rise in voltage when it closes may not occur quickly enough to trigger CHDK's remote function.) Under
most single-camera circumstances, however, you won't need this unless you need to sync the shutter
release more accurately to the voltage trigger signal for specialized reasons.
Also note: When downloading images to computer with USB it will be necessary to uncheck
“Enable remote” in Scripting Parameters - [ ]
----------------------------------------------------------------------------------------------
Enable [•] / Disable [ ]
Displays a "RAW Disabled" OSD warning in a selectable color when any of the RAW FileSaving Exceptions are enabled and RAW file-saving is turned on.
Dark Frame Subtraction
< Raw parameters < Main Menu
Controls the application of the Dark Frame Subtraction feature of the Camera to a RAW shot.
Dark Frame Subtraction is a function used to reduce the effects of sensor noise when the
exposure time is 1.3 seconds or longer.
• Auto – Performs a DFS on exposures 1.3 seconds or longer.
• Off – Never performs a DFS.
• On – Always performs a DFS.
By always performing a dark-frame subtraction the noise caused by the hot-pixels will be
removed from any image. There will be an increase in processing time.
Enable [•] / Disable [ ]
When shooting in continuous mode, this will only create a RAW
capture for the first image. Subsequent images will not have
RAW captures. This allows rapid continuous shooting.
RAW File in Dir with JPEG! Enable [•] / Disable [ ]
Grids notes
Grids are an overlay for the EVF / LCD display that can help you with composition, cropping, subject /
image alignment, and other novel things. Normally most cameras only offer you one simple option, a
"Rule of Thirds" composition grid, but with CHDK the sky is now the limit on what you want displayed
on your viewfinder for these handy photographer's tools.
You can Load and run the Grid files from "OSD Parameters" > "Grid" > "Load Grid from File..." When
not in <ALT> mode you can quickly turn the Grid Overlay (and all other CHDK OSD elements) on or off
with a simple Half-Shutter-Press + Right-Navigation button combination.
Or put the "Grid" > "Show Grid Lines" menu toggle on your fast-access Custom User-Menu if not wishing
to turn off all of CHDK displays.
!
• Warn when Exception?
Only First RAW in Series
And see: Downloading via USB, on page 46.
See:- Grid Tutorial & User Contributions!
Enable [•] / Disable [ ]
Disable RAW saving while using Auto shoot mode.!
!
See also: Grids Pics - Page 62.
Saves RAW files in the same folder as the JPEG files. If disabled
then RAW files are always saved in the 100CANON folder.
RAW File Prefix [CRW_, SND_, IMG_]
RAW File Extension
[.CRW, .CR2, .THM, .WAV, .JPG]
Set the extension to be used on RAW files, so the files are visible when you connect the camera
via USB. (See: Downloading via USB, on page 46.)
[.CRW, .CR2, .THM, .WAV, .JPG]
Using more than one extension with the same prefix can cause a problem with USB listing.
See:http://chdk.setepontos.com/index.php/topic,2045.msg18862.html#msg18862 Thanks reyalp.
RAW subtract extension
!
----------------------------------------------------------------------------------------------
< Raw parameters < Main Menu
CHDK lets you name RAW files with any combination of the standard prefixes IMG_, CRW_,
SND. If you are going to process the RAW files with DNG4PS-2 then setting a prefix of IMG_
will allow DNG4PS-2 to retrieve EXIF data from the accompanying JPEG.
18
RAW develop < Raw parameters < Main Menu
55
USB Remote notes
Using a USB cable, a low voltage power supply, and a push button switch, you can construct a device
that will allow you to remotely trigger the shutter of your CHDK-enabled camera. Remote triggers are
most often used in low-light situations when pressing the shutter button on the camera could introduce
picture spoiling camera shake, but can also be useful in other circumstances - for instance if you wish to
trigger the shutter with your foot, or with an electronic signal from another device, ie. wireless IR or RF.
In order to trigger a CHDK camera remotely, you will need to connect a suitable triggering device to the
USB socket of the camera, ensure "Enable remote" is selected in CHDK, select a shoot mode (i.e. not
playback mode, movie mode, alt mode, etc) with CHDK still running, operate the trigger!
Use this feature to process a RAW file and create a JPEG from it. When selected, a file browser
window is displayed. Select a RAW file and press FUNC.SET, press FUNC.SET again to clear
the message, then press the <ALT> button to exit <ALT> mode. Finally, press the shutter. The
RAW file will then be processed into a JPEG. The interesting aspect of this feature is that the
processing will occur with the camera’s current settings. So you can use the MyColors settings
to create Vivid and Sepia versions of the same image, or simply tweak the sharpness or contrast
settings. Normally, you would have to set MyColors before the image is taken, and you would
get only one image, it's a bit like using the RAW image as one would have used a film negative
to process photos in a darkroom, making multiple changed photos with the one "negative".
USB Remote Cable
This feature is for RAW files created with CHDK, not the Canon native RAW of some cameras.
Bad pixel removal [ Off, Average, RAWconv ] < Raw parameters < Main Menu
!
!
!
To remove defective pixels effects in an image. Once you have generated a list with all the "bad"
pixels for your camera, CHDK can remove them automatically.
See explanation at:- Bad pixel Notes on pages 52, 53, (including "Create badpixel.bin")
!
DNG format
Enable [•] / Disable [ ]
Automatic conversion of RAW image to the DNG format, in the camera. This format can be read
by many image editing programs. Also includes meta data like EXIF and white-balance / color
matrix information. For this feature to be activated, the CHDK file badpixel.bin is required, it
can be generated either on a Windows PC (See: Pages 52, 53 for important information), or
directly in the camera from the RAW menu.
This file contains specific information on camera-pixel errors. The DNG files created have the
same file extension as described in RAW, and can be reset manually to DNG. There is also an
automatic function to rename for most cameras. DNG format is now the preferred method of
CHDK RAW capture.
!
Triggering devices
The triggering device should incorporate a power supply - a battery, for instance - that has its negative (or
ground) terminal connected to pin 4 of a mini-USB cable and its positive terminal connected to pin 1 of a
mini-USB cable via a momentary push-to-make switch. The power supply should provide a voltage that
is no greater than 5V (or you can risk damage to your camera), but which must be greater than or equal to
the minimum voltage specified on the Camera-Features page. This is a low power circuit, ~0.5mA, and
only requires light duty components.
See:- http://chdk.wikia.com/wiki/CameraFeatures
Homemade USB remote cable
A popular method for remotely triggering CHDK-enabled cameras involves constructing a simple
triggering device from a 3V CR2032 coin battery, a USB extension cable, and a push switch. The
camera's USB cable is then attached to the camera at one end and to the triggering device by the other
end. Below is a circuit diagram of such a switch.
‘DNG’ file extension
Enable [•] / Disable [ ]
To distinguish DNG from RAW files. The DNG RAW image files will be stored as
<filename>.DNG with this option enabled, otherwise the extension from the "RAW file
extension" menu entry is used.
See: Downloading via USB, on page 46.
RAW buffer cached
Enable [•] / Disable [ ]
When enabled, saves the DNG file using the RAW buffer (recommended).
!
More about RAW
The easy way to transfer RAW files to your computer is to use a memory card reader. The
most versatile way to work with RAW is to use the DNG format (Digital NeGative). This
format can be produced in camera. The resulting DNG files can then be processed with
Photoshop or many other popular photo processing applications.
!
If you are cutting up a commercially-made USB extension cable, then wires 1 and 4 are red and black,
respectively, according to the USB standard. It seems that even cheaply made USB cables follow this
standard. Recent cameras have a combined USB and AV connector, a "splitter" type cable & connector is
required.
Note that the 3V CR2032 battery might not be enough to trigger the camera, if not, you may need to use a
different power source, e.g. three 1.5V AAA cells connected in series.
See also:- Raw notes on page 50
54
19
From ultimA's notes, 22 /August /2010 (edited) –
“The functionality of “Lock Edge overlay” has changed, and has been renamed - “Panorama mode”.
Previously its greatest use was to enable loading a saved overlay to your camera. But the loading code
has been changed so that locking the overlay before loading a stored one is not necessary anymore.
“Panorama mode” now means “Stay in Frozen mode while locked, while capturing new overlays on a
full shutter press”. This means that while the lock is on and the overlay is “Frozen”, normal behavior is
not restored if taking a new picture. The camera will instead update the edge overlay and stay in Frozen
mode. This allows easily taking large panorama pictures, a feature that was missing previously!
Also, there is a new menu item, "Filter edges", to optionally enable pre-filtering on the viewport data
instead of postfiltering the Edge overlay results as previously. This results in a much nicer image, as you
will see, This filtering option produces less false-edges and makes the edge detection usable in even very
noisy environments. "Filter edges" is used as an option (can be enabled or disabled) to avoid the extra
overhead required, which on some cameras might slow Edge overlay operation.
If you are in Frozen mode, when the overlay is displayed (for example during half-press) the message
"Frozen" is on the screen. If this text is displayed, it is in Frozen mode, and you are able to save the
overlay. In Frozen mode the edge overlay does not get updated during half-press, it is only being
displayed. You have to be in Frozen mode to save. Just take a shot and the overlay will be in memory
after that - even when not displayed on the screen, as long as you are in Frozen mode, then you can save
the image, this is a small behavioral change, it seems more logical and more consistent”
To move an overlay - with a loaded overlay first switch to <ALT> mode, then press a Directional button to move the overlay continuously until you release the button, or click the button to move in
steps.
It would be advisable to make a log of the saved edge overlays, keeping a description together with the
file number and date of the file, to keep track of them over time, perhaps adding GPS information as well.
When using new Edge overlay for the first time, start with a fresh CCHDK.CFG configuration file, just
go to the old one and delete it. There are new configs. with the new Edge overlay which might cause
some conflicts. Disable Edge overlay when using the Canon Panorama Stitch Assist mode.
!
!
----------------------------------------------------------------------------------------------
Edge overlay
< Main Menu
Enable edge overlay Enable [•] / Disable [ ]
Creates and overlays a high-contrast outline of the edges in a scene.
With the default CHDK settings the Edge overlay will be visible while
the shutter button is half-pressed. Once a picture is taken, the
overlay will be frozen and it will not update until a second picture is
taken, allowing you to align image features in the new shot to the
previous one. During that time you can use the camera’s Directional
buttons –
in ALT-mode to move the overlay of the previous
picture Up, Down, Left, or Right.
See: Edge overlay notes - Page 53., for further description and instructions.
Zebra mode should be disabled when using the Edge overlay, and disable Edge overlay when using
Canon Stitch Assist mode.
Filter edges! < Edge overlay < Main Menu
! ! option
! applies
!
!
!
! to the! edge! overlay. It makes the overlay redraw slower but cleans
This
noise
filtering
the overlay of noise that appears in low-light scenes. To reduce overhead of Edge overlay, use 'Filter
edges' only when required.
Panorama Mode [ Off, Right, Down, Left, Up, Free ]
When this option is not set to Off, the edge overlay will not update continuously, but only when
images are taken. Except for the very first image, you will always see the overlay of the previous
image in frozen mode. "FROZEN" is shown in the OSD.
Note: Panorama mode returns to Off on each camera startup.
Off - Does not lock the overlay and it will keep updating.
When set to either Right, Down, Left or Up, the camera will automatically move the overlay in the
opposite direction by the amount corresponding to the "Pano overlap (%)" setting. This is useful so
that you can align the next image of a panorama series in the corresponding directions.
Free - The overlay will not update continuously, and it will not be moved automatically in any direction,
Curves notes
Custom Curves
Enables the use of custom "curve" profiles to adjust the exposure of RAW and JPEG images.
Please read this long thread - Custom processing for JPEG (Tone curve, CA ...) :http://chdk.setepontos.com/index.php/topic,932.0.html , at the CHDK Forum, for its full functions and
use. As well as downloading a custom-curve editor (for PC) to create your own profiles. For those of you
new to curve adjustments to exposures there's a nice little overview to what they do and how they might
affect an image in this Curve Anthology:
http://www.curvemeister.com/support/curvemeister2/help/Articles/CurveMoves.htm
Difference between CV and CVF curves: CV curves are the standard RGB curves. CVF curves are
special versions of the curves which intends to avoid color shift side effect of the RGB curves. They are
an approximation of the luminance curves. Except the SYSCURVES.CVF file, it is recommended to put
the curves files in the \curves directory.
!
!
----------------------------------------------------------------------------------------------
(it will be centered), however, you can use the Directional buttons –
move it manually.
in ALT-mode to
Pano overlap (%) [ 0 - 100]
Set the overlay offset for Panorama mode, affects each of the options in Panorama mode except
"Free".
Enable [•] / Disable [ ]
When enabled, the Edge overlay will be visible even without half-pressing the shutter button.
Always show
Edge overlay threshold
[ 0 - 255 ] < Edge overlay < Main Menu
This setting adjusts the Edge-overlay sensitivity. Lower values create edges along lower contrast /
lower-brightness edges, but can potentially cause more noise. Higher values create edges only on the
highest contrast/ brightest boundaries, and therefore fewer, finer, and more well defined lines. The
downside of using higher values is that some edges might be missed. In general, lower values are more
useful with low-light scenes, while higher values are more useful with bright scenes. If you get too
much noise, try the Filter edges option.
20
Edge overlay color < Edge overlay < Main Menu
53
[Off] With this setting no Bad pixel removal processing takes place.
[RawConv] This setting means - intended for use with post processing raw converter software to remove
the bad pixels later in the workflow. With this setting CHDK just sets the bad pixel to the value 0 (zero),
without any other calculation or modification. Most RAW-capable apps. will detect this and apply their
own algorithms. This option is ignored in DNG mode (in DNG mode bad pixels are always averaged by
CHDK).
Quote from senior developer ewavr - ‘You can compare bad pixel removal quality in both modes, IMO,
"RAWConv" mode is preferred, because CHDK interpolation is very unsophisticated’.
After creating an overlay, navigate to this menu item and Press FUNC.SET to save.
For further description refer again to Edge overlay notes - Page 53.
[Average] With this setting CHDK calculates the color for the bad pixel based on its four neighbor
pixels with a simple average calculation and then interpolates - bad neighbor pixels will be ignored in this
calculation.
When selected press FUNC.SET to display the standard color selection palette, to choose an
edge-overlay highlighting color. Choose a color then press FUNC.SET again to register that
color with this function.
Enable in Play
Enable [•] / Disable [ ]
Enables edge-overlay to be displayed in playback mode.
Save Edge Overlay < Edge overlay < Main Menu
Forum discussion: http://chdk.setepontos.com/index.php?topic=3098.msg28955#msg28955
re: "Average" and RAWconv"
Load Edge Overlay < Edge overlay < Main Menu
Note: With DNG format enabled, bad pixels identified by badpixel.bin are always removed (interpolated / averaged) by CHDK. This does not affect the "Bad pixel removal" option, which also
fixes user specified pixels.
Load+Set Zoom
Enable [•] / Disable [ ]
When this function is activated, the zoom position is saved with the currently loaded edgeoverlay .
Press FUNC.SET takes you to Edge folder, choose a saved edge overlay to load, Press
FUNC.SET to load.
!
Custom curves
!
----------------------------------------------------------------------------------------------
< Main Menu
Enables the use of custom "curve" profiles to adjust the exposure of
RAW and JPG images. (Cameras with 12 bit sensors are not yet
supported-May 2010).
Difference between CV and CVF curves:
CV curves are the standard RGB curves.
CVF curves are special versions of the curves which intends to avoid color shift side effect of
the RGB curves. They are an approximation of the luminance curves.
Except the SYSCURVES.CVF file it is recommended to put the curves files in the
CHDK /CURVES directory.
!
See:- http://chdk.setepontos.com/index.php/topic,932.0.html
Enable Curve [ None, Custom, +1EV, +2Ev, Auto DR]
• None - No curve profile is applied.
• Custom - A custom curve profile is applied as-is.
The following three options require that you have a SYSCURVES.CVF file in your /CHDK folder,
this file is included in the "complete" CHDK packages. It is also contained in a file at http://chdk.setepontos.com/index.php?action=dlattach;topic=932.0;attach=1816 which also
contains the editor.
Edge overlay notes
Description for builds prior to 0.9.9 r928 - (original code and part of description from early CHDK
developer hiker_jon)
A valuable feature for anyone needing to align features for panorama stitching or for doing stop-frame
animations. Similar to an "onion-skinning" mode (see Google) in animation software. During shoot mode
half or full press this feature adds an overlay based on the image edges, additionally a grid that matches
the Canon frame is added.
Use the left, right, up or down buttons to shift the overlay (use it in <ALT> mode to avoid changing the
Canon options). The edge overlay is frozen when taking a shot. The frozen edges are displayed from
then on when the shutter gets half-pressed, FROZEN is shown in the OSD. When you shoot again it goes
back to the original behavior - showing the edges of the current image on half-press. This behavior is
useful when shooting stereo pairs. For panoramas you would want to freeze the edges after every full
press. Zebra mode should be disabled when using the Edge overlay.
During the later part of 2010, developer ultimA gave the Edge overlay a major overhaul, (with input
from forum member f_m_b), adopted in changeset 0.9.9 r928, Some of the changes are visible to the
user, such as some new menu entries and a new order of the entries. Other important changes are less
visible, such as rewriting of the code and its effect on the use of the Edge overlay, mainly the changes to
memory use, and the “Sobel” edge detecting method. Cameras with low memory reserves can now use
Edge overlay without the crashes experienced before the changes.
Due to the limitation to short 8.3 file names in the file browser of current DryOS-based cameras the
file "SYSCURVES.CVF" should be placed on the memory card by a card reader, in the CHDK File
Browser the file name is shown in shortened format as "SYSCUR~1.CVF".
52
21
• +1EV - Increases shadow detail by 1EV step.
Bad pixel notes
• +2EV - Increases shadow detail by 2EV steps.
Bad, or hot pixels affect DNG images especially for long exposures. Using “Bad pixel removal” in the
Main Menu > RAW parameters menu, CHDK can remove them automatically, after the "bad" pixels
for your camera have been identified ("badpixel.bin"), Use this option to remove defective pixels
directly while taking an image - this also affects any associated JPEG image, To obtain this list of hotpixel coordinates you need to capture a "dark frame" by shooting an image with the lens completely
capped. For shutter speeds longer than 1 to 10 seconds, it's wise to keep a collection of dark-frames on
hand for each exposure length that you will be using in the future, as more warm and hot-pixels appear
with extended shutter speeds. After that you can use this program: http://ewavr.nm.ru/chdk/show_bad.zip
Read more about this program & how to use it here:
• Auto DR (auto dynamic range):
Auto DR with Zebra is intended to be used for the direct application of the curves to the shot - and
not for post processing (the feature is just mimic of the Fuji S100 +200, +400 Dynamic Range).
The workflow is:
1. - Activate Zebra display
2. - Activate Auto DR
3. Use the camera EV negative compensation to reduce the Zebra overblown highlights shown
on screen. You can use the (+/-) button on the back of the camera.
4. Take the shot. You will directly get the JPG without post processing. The luminance of the
darker areas will be raised while the highlight is compressed.
During the RAW develop process, you need to set the EV comp. to the value that you used to
reduce the highlight blown out when you took the RAW. Care should be taken with in camera
develop since it is a tricky art there (for White Balance issues in particular).
If the scene does not require you to reduce exposure to avoid blown highlights, the Auto DR
feature does not do anything.
http://chdk.wikia.com/wiki/CHDK_firmware_usage/AllBest#Hot-Pixel_Removal_.
28Build_100-16_and_later.29
From build 0.9.9 - 1039 a menu entry "Create badpixel.bin" is included in the Main Menu > RAW
parameters menu, available if the camera has DNG support. This is a scriptless operation to create the
file "badpixel.bin", (necessary to enable DNG), and overwrite any existing "badpixel.bin".
Switch to record mode (there is a reminder dialog if still in display mode), Select "Create badpixel.bin" in
the RAW menu, press FUNC./SET, and the operation commences, taking approx. 20 to 40 seconds, you
will notice the camera takes 2 shots, the blue print LED will come on briefly during each shot, wait for
the process to complete, you will see a display of the number of bad pixels, - that number can be
disturbing to some, a figure such as 15,000 or even more is not uncommon. You can check for the file
with the File Browser.
Load Curve Profile
Load your choice of curve profile from the /CHDK/CURVES folder. All curve profile files
except for SYSCURVES.CVF should be in this folder.
!
!
See also:- Curves notes on page 54.
Instructions for BADPIXEL.LUA script…
(As of build 1039, this script is obsolete. Support for it will be removed in the future, use “Create
badpixel.bin” from the RAW menu instead)
Histogram parameters
* Q. When I select the script with FUNC./SET, nothing happens, How do I run it?
Enables and customizes the Live Histogram feature.
A. From fe50-
Thanks fe50
Ok, then follow me...
- power your camera on, half-press the shutter, to go to record mode
- press PRINT, then press FUNC./SET
- select "Load script from file", go 2 steps down to the TEST/ folder, press FUNC./SET
- select "BADPIXEL.LUA", press FUNC./SET
- start the script with the SHUTTER !
- wait until you see "press SET to save....." (This may take 30 seconds or so, please be patient)
- press FUNC./SET to store the badpixel.bin automatically in the right place (/CHDK/badpixel.bin)
- press PRINT to leave the <ALT> mode, press PRINT again to enter <ALT> mode
- press MENU, go to the "RAW parameters", enter it with FUNC./SET
- enable the settings "Save RAW" , "DNG format" and "DNG file extension"
- press PRINT to leave the <ALT> mode again
Now RAW saving in DNG format is enabled, transfer the DNG files with a card reader.
< Main Menu
Histogram Anatomy
The horizontal component of a histogram runs from 0 to 255. What is
important to understand is the “0” and “255” are not values…they are
labels representing a color value. When you see a line in the middle of
the histogram (label “127”) it’s saying “this is how many ‘127’s there
are in the image.”
The vertical component of a histogram is the count of pixels at a given level. The bottom is zero and the
top represents the largest count of values for a label. So if you have a 7MP image and every color is
“127”, then the top of the histogram represents 7 million pixels.
RGB Histogram
RGB histograms simply count pixels at each level. The RGB histogram of an image of three boxes (red,
green, and blue) where every color has a value of 127 would be a single line in the middle of the
histogram (at label “127”.)
Bad Pixel Removal !
Luminance (Y) Histogram
Here we will briefly try to understand the meaning of the menu options of [Off, Average, RAWconv] in
Luminance histograms attempt to factor in the perceived brightness of colors. A luminance histogram of
an image of three boxes (red, green, and blue) where every color has a value of 127 will show three lines
at labels “38” (red- x 0.3), “75” (green x 0.59), and “14” (blue x .11).
Main Menu > Raw parameters > Bad pixel removal
22
Show live histogram [Don"t, Always, Shoot] < Histogram parameters < Main Menu
Don’t show histogram on LCD.
• Don"t –
• Always – Always show the histogram on the LCD.
Only show the histogram when shutter is half-pressed.
• Shoot –
Histogram layout
[RGB, Y, RGB Y, R G B, RGB all, Y all, Blend, Blend Y]
• RGB – Displays the RGB histogram only.
• Y–
Displays the luminance histogram only.
• RGB Y – Displays RGB above luminance.
• R G B – Displays three histograms, one for each color.
• RGB all – Displays all 5 variations of histograms with RGB on top.
Displays all 5 variations of histograms with luminance on top.
• Y all –
•
•
Blend – Combines the three histogram of the R G B display into one.
Blend Y – Same as Blend but with the addition of luminance below.
51
Sources, and for further study :–
http://www.cambridgeincolour.com/tutorials/camera-sensors.htm
http://designorati.com/articles/t1/photoshop
http://encyclopedia2.thefreedictionary.com/bit%20depth
http://www.wildtramper.com/sw/crw/crw.html
http://www.howtofixcomputers.com/forums/digital-photo/bitdepth-chdk-raw-files-powershot-79781.html
http://en.wikipedia.org/wiki/RAW_image_format
http://www.photoxels.com/tutorial_raw.html
http://insights.betterphoto.com
http://chdk.setepontos.com/index.php?
PHPSESSID=7973386aacdc6fb7e1b409702af56bbb&board=15.0
!
!
----------------------------------------------------------------------------------------------
Raw Develop (for RAW files created with CHDK, not the Canon native RAW of some cameras)
Main Menu > RAW Parameters > RAW Develop !
Histogram Screenshots
RGB Y
!
RGB!
!
!
!
RGB#Y
Another feature from CHDK developer ewavr. This allows you to select any RAW file on your SD card
and then process it into a JPG file so that you may view it in your camera. Exceptionally handy after
using any of the RAW Merge features so you can see the result without the need of a computer and extra
RAW processing software.
Choose "RAW Develop" and a file-browser is displayed. Navigate to the RAW file that you want to
process into a JPG file. After pressing FUNC.SET to select your file, you will be asked to "Switch
Camera to Record Mode and take one shot." Press FUNC.SET again to back out of this menu, then use
the <ALT> toggle button to exit <ALT> mode. Press the shutter button. Instead of taking an image, it will
take that selected RAW file and now make a JPG file from it. It will be named according to whatever last
JPG filename is in that folder and increment it by 1. Keep in mind that the EXIF data on this new JPG file
will not reflect the original RAW file. It will use whatever camera settings were available at the time that
you take the RAW Developing Shot for the resulting EXIF data.
Note: RAW file-saving must be turned ON for this feature to work. If RAW is not turned on, or you select
a JPG file for "developing", then no action will take place.
! !
RGB
!
!
----------------------------------------------------------------------------------------------
#
!
RGB#all
!!
Y all
50
23
RAW notes
It may be said that CHDK owes it's existence to the desire for saving RAW in RAW barren Powershot
cameras. By inspired work on the Firm update procedure with these cameras, it was discovered that
RAW was actually a disabled function of the original firmware, and with further genius, enabling RAW
saving and other functions saw the beginnings of the CHDK.
The name RAW actually suggests that this is a file without any changes straight from the camera's
sensor, and with CHDK this is the case. In some cameras this is not the case, some have had some
kind of processing such as sharpening, adding of a header file, Exif data, compression, and even white
balance, it could be suggested even unknown processing (except to the manufacturer).
Knowing that the RAW file will contain more depth or digital information is the motivator for saving
RAW, so that in processing, more digital information is available to work with.
Most RAW enabled cameras save as 12 bits per pixel or 14 bits per pixel whereas CHDK is 10 or
12 bpp, depending on the camera model, this is still far more than the 8 bit JPEG depth, This means you
can make a wider range of adjustments without compromising picture quality.
RAW is therefore a powerful option that most advanced digital cameras make available to photographers
who do not want the camera to apply any in-camera processing to the captured RAW data, preferring to
do that themselves in post-processing. Shooting with RAW still has a fundamental principle to apply
though - it won't correct mistakes that are made in the shooting procedure, exposure and other parameters
are still required to be correct at shoot time for a high quality image. You cannot take a grossly
underexposed or overexposed picture in RAW, and expect to be able to "correct your mistakes".
RAW data takes longer to write to a memory card and there is a need to post-process every single picture.
These two requirements might be a major hindrance depending on the type of photography you do. If
you need to take pictures in rapid succession, and your digital camera does not provide a large enough
RAW buffer, you will be hampered by the extra amount of time it takes to write a large RAW image file
to the memory card. Camera RAW files are typically 2–6 times larger than JPEG files. While use of RAW
formats avoids the compression artifacts inherent in JPEG, fewer images can fit on a given memory card.
Post-processing every single image is also a chore that not many amateur photographers (and some
professional photographers) enjoy doing. This means that, for most practical purposes, amateur
photographers will find that saving in RAW is not an interesting option, and that shooting in JPEG is
more than sufficient.....Unless...You are unsure of the white balance to use or need accurate colour
reproduction of a subject, or you want optimum control over sharpness, contrast, saturation;
Many photographers are finding that they do want the control that RAW gives them.
With some cameras, and also with CHDK, you can have the advantage of saving RAW and JPEG, this
means having the option to just keep the RAWs that you need for optimum processing, or otherwise just
keeping the JPEGs if you are pleased with the camera's processing. For many, saving in JPEG is more
than adequate. JPEG files are compressed, and, compared to RAW, they are smaller, save faster, and more
images can fit on a memory card. Many professional photographers shoot at the highest JPEG image
quality. Remember also RAW can be disabled for certain shooting conditions, see the RAW parameters
menu for “Disable RAW @ burst” etc.
There is no single RAW format; formats can be similar or radically different. Different manufacturers use
their own proprietary and typically undocumented formats, which are collectively known as RAW
format. The DNG (Adobe) format has been put forward as a possible universal standard. Using the DNG
format also means being able to work with the files in the future if other proprietary methods disappear.
Processing CHDK RAW is possible using a number of available applications, particularly DNG4PS-2,
free software created for CHDK, others are listed at the CHDK Wiki.
Recently it has been recommended to use the in camera DNG conversion, producing a widely compatible
DNG image file, recognized by the popular image editors. Using the DNG format also has the advantage
of downloading over USB, including the Exif data from the corresponding JPEG.
See: Downloading via USB, on page 46.
!
Blend
!
Blend#Y
• Histogram mode [Linear, Log] < Histogram parameters < Main Menu
!
!
Determines how the Y-axis (vertical) of the histogram will be scaled. Log is useful for
scenes with a large amount of a single color, such as an overcast sky (lots of gray.)
In this example the image is both over and
under exposed (the scene has a very wide
dynamic range)
A 10 MP camera might have its Y-axis scaled like this...
Linear
10,000,000 pixels
7,500,000
“
6,250,000
“
5,000,000
“
3,750,000
“
2,500,000
“
1,250,000
“
1
“
Log
10,000,000 pixels
1,000,000
“
100,000
“
10,000
“
1,000
“
100
“
10
“
1
“
Show histogram over/under EXP
Enable [•] / Disable [ ]
EXP in on-screen display. If parts of a scene are over or under exposed, then this setting will
display “EXP” above the histogram, and a red dot at the end that is exceeding exposure limits.
Ignore boundary peaks [0 – 32]
Another tool for controlling the scaling of the histogram. If you know that a scene will contain
large amounts of black or white (e.g a moon shot) you can set how many levels from the left or
right edges of the histogram to ignore, if those levels peak in the histogram. This will increase
the visibility of the smaller portion of the histogram.
24
Auto magnify
Enable [•] / Disable [ ]
N.NNx in on-screen display. Another tool for controlling the scaling of the histogram. This
option will magnify the Y-axis (vertical) if less than 20% of the histogram area is filled. The
purpose of this function is to make the histogram easier to read when there are very tall peaks.
This function lies somewhere between the Linear and Log options above. A red dot over a peak
indicates that it’s been clipped due to the magnification. The amount of magnification applied is
displayed over the histogram.
No Magnification!!
!
!
With Magnification
!
!
!
!
!
!
!
!
!
!
!
!
!
!
!
!
!
!
!
!
!
!
EV Grid Enabled
!
!
!
!
!
!
49
KAP
Kite aerial photography (KAP) is a hobby and a type of photography. A camera is lifted using a
kite and is triggered either remotely or automatically to take aerial photographs. The camera rigs can
range from the extremely simple, consisting of a trigger mechanism with a disposable camera, to
complex apparatuses using radio control and digital cameras. On some occasions it can be a good
alternative to other forms of aerial photography.
(From Wikipedia - http://en.wikipedia.org/wiki/Main_Page)
CHDK scripting has become popular among the Kappers, automating cameras, and reducing the need for
mechanical apparatus.
See: Example Pics on Page 62.
!
!
Show Histo Ev Grid Enable [•] / Disable [ ] < Histogram parameters < Main Menu
Adds 4 or 5 vertical lines to the histogram dividing the histogram by full stops.
!
!
!
----------------------------------------------------------------------------------------------
Bracketing notes
"Bracketing" is the taking of a series of shots with an incremental, usually subtle change in a variable
between each one. Bracketing can be done with changes in shutter speed (Tv), ISO, aperture value (Av),
Focus, etc, and though a bit challenging, several variables can be bracketed in combination, as well.
Usually bracketing is done in order to cover a range of the variable values in an effort to capture the best
of several shots, ie: to capture a perfectly exposed shot. Cameras enabled to bracket out of the box are
usually either DSLRs or high end compacts, and they usually only bracket for exposure, (AEB) and
mostly 3 shots maximum, CHDK allows bracketing in all the values mentioned above and for as many
shots as you want, for HDR imaging for example. Bracketing can be done with specialized scripts as
well, ie: to create HDR timelapse series.
Bracketing can be done hand held, "on the fly" so to speak, and is most likely done in "Continuous
shooting" mode, also in Custom Timer mode if the camera can take multiple shots in that mode. A tripod
is recommended for most bracketed series though to avoid alignment issues when stacking in processing.
Usually, the photos are viewed after download side by side as thumbnails (or further scrutinized in a
browser), the "pick(s) of the bunch" is kept, and the rest are discarded.
(Note: When using Custom Timer mode for bracketing, the shutter button requires just one press, not
held down as in Continuous mode)
Zebra parameters
< Main Menu
Focus Bracketing is the taking of a series of photographs where the point of focus is moved incrementally
between each shot. This is usually applied to macro applications where depth of field is notoriously
shallow. But there's something much more fun we can do with a handful of focus bracketed shots!
"DoF Stacking" (Depth of Field Stacking) is where we combine a selection of focus bracketed photos in a
similar manner to the way that three or more images are combined to make single HDR photos.
Presumably, the term "stacking" most likely comes from the physical stacking of different negatives to
obtain a desired effect of a photo during film processing in a darkroom. (Anyone remember those?) The
resulting image from DoF stacking can have usually paradoxical qualities; the superb detail of a macro
shot with the depth of field of a landscape shot. CHDK makes it possible.
Zebra is a feature that indicates over and under
exposed areas of the scene. When the shutter is halfpressed, the areas of the scene that are under or over
exposed will turn red. The zebra effect can also be
applied to existing images by half-pressing the shutter
during playback mode.
See: http://chdk.wikia.com/wiki/DoF_Stacking
Draw Zebra
Enable [•] / Disable [ ]
Enables the drawing of over/ under exposure indicators.
!
Zebra mode
[Blink 1, Blink 2, Blink 3, Solid, Zebra 1, Zebra 2]
Determines how the over/ under exposed areas will be indicated.
!
----------------------------------------------------------------------------------------------
!
48
25
Tv bracketing in continuous-shooting mode, long-exposure feature by Fingalo and A560 support
followed. The first cameras to be supported were all based on the Canon Digic II! processor using the
VxWorks! operating system. Later 'hacks' included Digic III cameras with VxWorks! or DRYOS!
operating system. Richard Lemieux investigated the limited accuracy of the camera's distance reading.
ewavr (aka 'Zosim') had already discovered how to read the memory-mapped hardware registers that the
camera's keys, SD card status and USB-connection status were connected to.
• Blink 1 – Solid coverage, blinks every $ second.
• Blink 2 – Solid coverage, blinks every second.
On certain cameras, it was then possible for the software to prevent the camera going into download
mode when a voltage (+3 to +5V) was applied to the USB connection (by plugging into the PC, for
example). The USB status could be read like any key on the camera. This feature was included in the
SDM and Fingalo builds and this release of SDM takes the concept further by allowing two cameras to
be highly synchronized for stereo photography. New cameras were ported, the original WIKI transferred
to the current one and in November 2007 a CHDK forum opened to continue discussion outside of 'DP
Review'. At the end of December 2007, discussion transferred to the 'CHDK Forum'.
• Zebra 2 – Striped coverage, thick diagonal lines.
• Blink 3 – Solid coverage, blinks every two seconds.
• Solid – Solid coverage, no blinking.
• Zebra 1 – Striped coverage, thin diagonal lines.
Zebra Solid
Zebra 1
Zebra 2
Stereo Data Maker! (SDM)
Yahoo StereoData Maker Group : -! http://tech.groups.yahoo.com/group/StereoDataMaker
UnderExposure threshold !
A customized CHDK with features designed for making 3D-Stereo images. (As well as numerous
features for 2D photography). It provides on-screen (EVF /LCD) stereo information and can save the
accompanying stereo-image’s data to different file-types. See:- http://stereo.jpn.org/eng/index.html for a
myriad of support programs for creating and displaying stereo images made with SDM-CHDK (Stereo
Data Maker CHDK). MX3's Motion Detection feature (see below) is also included together with script
commands for controlling the LEDs, all of Fingalo's build 124 features, ewavr’s Video Compression and
USB 'cable release'. A560, A570,G7, IXUS700 (SD500) and IXUS800 (SD700) builds are also provided.
all the features of Fingalo 128 and selected features from the AllBest builds.
The website includes a design for electronics that enables full-speed continuous-mode synchronized
stereo shooting with external flash at shutter speeds up to 1/1000 sec.
Other features are":Drift-free synchronization at up to 1/20,000 sec with twinned-cameras for virtually no additional cost.
No hardwiring required and no vulnerable external equipment.
Single-shot, delayed single-shot and full-speed continuous-mode synchronized-shooting with external
flash at shutter-speeds up to 1/1000 sec.
Synchronizing of any number of multiple cameras with fixed or progressive flash-delay.
Overriding of shutter-speed to provide values from 65 seconds to 1/40,000 sec in 1/3EV increments.
On-screen-display options include two 'Rangefinder' modes that allow you to set the near and far-point
distance by using the lens telephoto setting as a rangefinder.
The resulting scene-deviation is then displayed as a horizontal bar-graph .. coloured red if it exceeds your
maximum-permissible deviation and required-aperture is indicated.
<ALT> + FUNC.SET then moves lens to calculated optimum-focus for the subject-range.
'Get image-stack' in continuous-shooting mode acquires images at varying focus positions for creating
extended depth-of-field images. 'Show SDM Configuration' for quick overview of settings.
On-screen displays individually enabled and all enabled displays toggled on/off by shutter half-press +
key_right.
Thanks to - David - Microfunguy
!
!
[0 – 32]
Controls the sensitivity of exposure indication. 0 is less sensitive and 32 is very sensitive.
OverExposure threshold !
[0 – 32]
Controls the sensitivity of exposure indication. 0 is less sensitive and 32 is very sensitive.
Restore original screen
Enable [ • ] / Disable [ ]
This option only applies to Zebra Blink modes.
!When!exposure
! indicators
!
! all of!the original
!
are! visible,
Canon indicators are erased. When this
option is enabled, the original Canon screen items (such as exposure) are redrawn between
blinks.
Restore OSD !
Enable [ • ] / Disable [ ]
Zebra parameters < Main Menu
This option only applies to Zebra Blink modes.
When exposure indicators are visible, all of the CHDK half-shutter indicators are erased. When
this option is enabled, the CHDK half-shutter indicators (such as DOF calculator) are redrawn
between blinks.
Draw over zebra !
[Histo, OSD, Nothing]
This option applies to all Zebra modes.
When exposure indicators are visible, nothing else is displayed on the screen. This option
specifies which additional indicators will be drawn.
Histo – Only the live histogram is drawn with the exposure indicators.
OSD – The entire CHDK OSD is drawn with the exposure indicators.
Nothing – Nothing else is drawn with the exposure indicators.
Enable [ • ] / Disable [ ]
Overexposed areas are indicated by the color of the channel that is overexposed. Underexposed
areas are ignored.
RGB zebra ! (overexp. Only)
26
Black – All channels are overexposed.
Red – Red channel is overexposed.
Green – Green channel is overexposed.
Blue – Blue channel is overexposed.
Cyan – Green and blue channels are overexposed.
Magenta – Red and blue channels are overexposed.
Yellow – Red and green channels are overexposed.
!
!
!
!
!
Solid!
!
OSD Parameters
Show OSD
!
!!
!
Zebra
!
< Main Menu
Enable [•] / Disable [ ]
The CHDK On Screen Display.
• Hide OSD? [ Don"t, In Play, On Display, both ]
• Don't - always shows the OSD icons/elements
• In Play - hides them in playback
• On Display - hides them when you toggle the CANON icons on/off with the display
button (does not work for the evf)
• both - hides OSD in both playback and by "display button cycling", helpful to those who
don’t need the battery and other indicators in their playback screens.
Center Menu
Enable [•] / Disable [ ]
An adjustment to the CHDK Menu screens to place them evenly on the LCD screen.
Auto Select 1st Entry @ Menu
Enable [•] / Disable [ ]
Quickly position the menu-selection cursor on the first entry in any CHDK menu. Instead of
having to press DOWN once to enter the menu options it will now start out already on the first
menu option.
47
History of CHDK
From Stereo Data Maker site:- http://stereo.jpn.org/eng/sdm/chdk.htm :
!
!
!
and - http://stereo.jpn.org/eng/index.html
!
During the second half of 2006, programmer 'VitalyB' studied a disassembly of the firmware update for an
(IXUS / SD camera in order to understand the Canon firmware-update procedure.
With that knowledge, he was able to write his own program that installed itself and then downloaded a
copy of the Canon firmware by blinking an LED.
The program was installed in playback mode via the standard 'Firmware Update' option.
The hack copies the original initialization firmware and modifies it so that less ram is available to the OS.
A custom process is then run in an area of ram that is not accessible to the OS.
After studying the camera firmware, he developed the "RAW enabler" that allowed A610 users to save
uncompressed 10-bit RAW images as well as the JPG images.
Adam Dunkel's uBASIC interpreter was included to allow support for scripting and Pablo d'Angelo
improved the parser to replace line-numbers with labels.
The initial builds provided a 'live' histogram, scripting, three-exposure-bracketing and, to the irritation of
many users, displayed "hello world" on the screen. Support for A620, A630 and A710is quickly followed.
Log/linear histograms were added followed by RGB histograms and a layout editor for the on-screen
displays (OSD) allowed the user to move them to the most convenient locations.
Future development would rely on cameras and their firmware dumps being available.
It was published on a Russian website and when 'discovered' in mid December, a poster on DP Review
forum 'Canon Talk' said "sounds very interesting. surprised no interest in it."
That would soon change ... in February 2007 'DP Review' reported another programmer 'GrAnd' had
added display of miscellaneous values (focal distance, zoom step and factor, hyper-focal distance) and a
battery meter.
Users were initially wary that this 'hack' may damage their cameras but after others had tested it they
became enthusiastic about each new feature.
GrAnd added shadow and highlight-clipping warnings to the histogram, a DOF calculator (based on the
real aperture-value) displayed on shutter half-press and percentage-capacity indication for the battery
with adjustable min/max voltage.
A file-browser and text-reader followed together with 'flash-light', choice of prefix, extension and savelocation for RAW files.
Instead of loading each time the camera was turned-on, CHDK was next made auto-loading by using a
'locked' SD card containing a DISKBOOT.BIN file.
After booting, the file DISKBOOT.BIN is 'hidden' so that the camera is not in a permanent boot-state.
A calendar and clock were added together with text-reader auto-scroll, support of RBF fonts and initial
support for the S3IS.
The DOF calculator for the S3IS was based on interpolation of the lens focal-lengths.
By request, GrAnd started an English-language WIKI and also provided a very convenient, ready-to-use
Windows environment for would-be CHDK developers.
GrAnd also developed all the essential tools and functions that we now regard as the basic CHDK.
This major innovation made it possible for relatively inexperienced programmers to develop their own
specialized builds. The first was SDM in June 2007, followed in September by MX3's motion-detection
and then Fingalo's enhanced uBasic scripting commands.
Other people provided downloads of firmware and ports of the basic CHDK to additional camera models.
The A640, A700, A710, G7, IXUS700, A570 (by Rossig/MX3) and IXUS800 were soon supported and
new video features added.
46
!
27
The size of the 1st partition is fixed to 2MB in the code (not changeable in the CHDK menu), but
you can change it there and compile your own build, if you know how, using whim’s CHDK
Shell, - http://www.box.net/shared/njaq9vvozu 4
Normally the creation of a partition deletes all data on the card, the swap command should not
delete any data, but you should test this"first!
The partitions can also be created manually with a card reader on a computer, the 1st partition
must be less than 4GB and formatted with FAT16.
Enable Symbols
Enable [•] / Disable [ ]
To display Menu Symbols
With Symbols
!
!
!
!
!
To prepare SD cards, and make them bootable for auto starting of CHDK,
the applications Cardtricks, or SDMInst.exe, are used on Windows OS,
and SDMInst for Mac OS. For installation information and instructions,
see the supplement to this User Guide:
!
!
!
!
!
Without Symbols
http://chdk.wikia.com/wiki/File:CHDK_Installation_Guide.pdf
User Menu < OSD parameters < Main Menu
• ALT +/- debug action < Debug parameters < Miscellaneous Stuff < Main Menu
Action for the +/- key (on IXUS / SD series DISP. is used instead) values are [None],
[Dmp RAM] -> a complete memory (RAM) dump will be written to the SD card
[Page] in this mode the page shown in the propcase viewer can be changed (double-press
changes the paging direction - up/down)
• Show saving time < Debug parameters < Miscellaneous Stuff
Remote parameters
< Miscellaneous stuff < Main Menu
See: Page 36
DNG visible via USB
Enable [•] / Disable [ ]
This feature enables the display of DNG files on your computer, via USB connection.
CHDK RAW and DNG files can be downloaded to a computer with the USB cable under the
correct conditions; Instructions from CHDK forum senior member fe50:• disable remote in Remote parameters
• use .CR2 as file name extension (set up in the CHDK RAW menu)
• before you connect the camera to the computer's USB port you must power off and power on
the camera (important !)
• connect the camera, do not use the Windows transfer assistant - open the Windows Explorer,
• !transfer (copy, e.g. with drag & drop or cut & paste) the images to your hard disc.
!MacOS users - use Image Capture or Canon Camera Window to open when camera is detected. 5
You can also transfer RAW images in the DNG format this way, but you must use .CR2 filename
extension in CHDK; after transferring the files you have to rename them (give them the correct
extension - .DNG).
Add frequently used menu items to make a custom easy
access menu.
User Menu Enable < OSD parameters < Main Menu
!!!
[ Off, On, On Direct, Edit ]
• Off - Disables use of the User Menu
• On - Enables the User Menu when in <ALT> mode and pressing [HALF-PRESS] + MENU.
• On Direct - When entering <ALT> mode your User Menu will be automatically displayed
without having to press the MENU button. You can reach the main menu by scrolling to the
top or using a [HALF-PRESS] + MENU shortcut keys.
• Edit - Enters the editing mode for the User Menu.
To copy other menu-items to build your custom User Menu (Up to 10 entries)...
Still in OSD parameters, select User Menu Enable [ Edit], now browse to any menu and
select the item you want to add to the User Menu, then press the Exposure/Erase
button
or the equivalent button on your camera. The item has now been added to your User Menu. Each
new item is added as the lowest on the menu. To delete an item, in Edit mode, select the item
and press
button (or equivalent). When editing is complete remember to set the User Menu
Enable option back from "Edit" to either "On" or "On Direct".
Customizing hint / reminder: Some CHDK features require 2 or more options that work
together. An example, "Override Shutter Speed" might also need its associated "Value Factor"
selection and the "Shutter Speed Enum Type" if you frequently change that too. Be sure to
copy any related menu items together so they are still available where you need them in your
custom menu.
28
User Menu as Root
Enable [•] / Disable [ ] < OSD parameters < Main Menu
Enable [•] / Disable [ ] < OSD parameters < Main Menu
45
!
!
Toggles the behavior of the Menus when the User Menu is turned ON. When this option is set
then the User Menu will be the first one to be seen, and the main menu can be reached by using
the [HALF-PRESS] + MENU shortcut keys, or just selecting the top entry “Main Menu”.!
Show State Displays
A720IS
!
!
!
Memory Card Benchmarks Example
!
!
!
!
!
!
(Guide only, many variables to be considered)
Displays the Override, Bracketing, and Override Disabled settings in their own position-able
information area.
Write
SD-card model, size
Show Temperature < OSD parameters < Main Menu
• Off - No display of camera component temperatures.
• Optical - Displays the temperature of the optical elements (most assume this is used for the
IS mechanism and Zoom / Focus motors). When the camera is first turned on this will most
accurately reflect the environmental temperature.
• CCD - Display the temperature of the CCD. Let's you know when it might be getting too
warm. Or when it's cold enough to take lower-noise images.
• Battery - Displays the temperature of the battery compartment.
Speed (Kb/s)
Write Write Read
(RAW) (Mem) (64k) (64k)
Canon, 16MB (bundled)
A-DATA Speedy, 2GB (FAT16)
Kingston, 2GB Ultimate
Transcend, SD 4GB, Standard (FAT16 fresh format)
Transcend, SD 2GB, 80x
Transcend, microSD 2GB, Standard speed, MLC
ByteStor, SD 1GB, 50x
SanDisk, SD 1GB, Ultra II 60x
SanDisk, SD 2GB, Ultra II 60x (fresh format)
SanDisk, SDHC 4GB, Ultra II 60x (FAT16 fresh)
Sandisk, SD 2GB, Extreme III 133x (fresh format)
EMTEC, SD 2GB, 60x (FAT16 fresh)
!!!
NOTE: 3rd party LI-ION battery packs may always report a constant temperature,
!!!!!!!!!!!!!!!!!!!!!!e.g; 25°C or 28°C.
!
2254
2254
2254
2254
2254
2254
2254
2254
2254
2254
2254
2254
1859
3164
10326
3980
7629
5358
8060
8840
9600
8718
10686
8073
1754
2532
7692
3623
5505
5468
6132
5591
7123
5627
7594
7407
3508
5572
6742
5930
6476
9153
7021
6606
8445
6715
8316
8672
• all - Displays all 3 values.
in Fahrenheit - !!
Enable [•] / Disable [ ]
! Default is Centigrade, check this for Fahrenheit.!
• Create card with two partitions (See Notes section at end for late news)
! Note: Not all models have a separate temperature sensor for each component, and due to
! differences in design, values reported by different models may not be directly comparable.
!
Show USB Remote
[ Off, Icon, Text]
Displays the USB remote indicator with an icon depicting a USB socket, or as text - <USB>
indicating that a remote shutter release can now be used.
OSD layout editor < OSD parameters < Main Menu
!
Enter Layout Editor
Histogram selected
!
BEWARE: This can DELETE ALL data on the card#!
This feature is used with SDHC cards larger than 4GB, on supported cameras (needs
multi partition support) it will create a small FAT16 partition with a size of 2MB for
CHDK and a larger partition formatted as FAT32 to store the images. On such a
prepared card the camera boots up CHDK from the small partition, then the partitions
are automatically swapped, this way the full capacity of the FAT32 partition can be used. The
partitions are not shown correctly under MS Windows, only one of the two partitions is shown, to
access the other partition without a special system driver, the partitions should be swapped with
"Swap partitions"
The OSD items can be rearranged to suit personal preferences and to avoid the Canon items on
the display.
This option creates a 2 MB FAT partition on the SD card, that's fixed on the code for now. Copy
the CHDK firmware extensions to this partition and load them, (The DISKBOOT.BIN and
PS.FI2 files). Then select "Make card bootable" in "Main Menu > Miscellaneous stuff", so it does
not complain when you write-protect the card.
Next step is to select "Swap partitions" in "Main Menu > Miscellaneous stuff", this will hide this
small partition and make the larger FAT32 one visible. We need to format it, and copy CHDK
files DISKBOOT.BIN and PS.F I2 to it too, so we can perform "swap partitions" again. So
format it in FAT32, copy CHDK, insert it on the camera and load CHDK using "Firmware
Update", Select "Swap partitions" and "Make card bootable", write-protect the SD card, (lock
with slider on side of SD card) and power-cycle the camera. It should now load CHDK from the
small 2 MB partition, but have access to the larger FAT32 partition to store pictures, video and
the CHDK folders.
DOF calculator selected
!!
!
When a feature is selected you can use the camera’s Directional buttons –
to
move it around. A red highlight is displayed giving the name of the feature being moved and
its position in X, Y format.
44
29
• FUNC.SET button - Switch between display features.
The values are generally shown unsigned - that's because the propcase viewer doesn't know
whether a value is supposed to be signed or unsigned, and treats everything as unsigned.
"65152" is just the same value as "-384" when considered as an unsigned short rather than a
signed short. Shows the task list, only on VxWorks cameras.
• !PropCase / ParamsData page
!
!
!
• 4-Direction switch /rocker (Directional buttons –
< Debug parameters < Miscellaneous Stuff
Grid < OSD parameters < Main Menu
[ 0 -128 ] Search pages, each page shows 10 values
!
Property cases (PropertyCase or PropCase) are basically variables in the camera's RAM
that we can read and write from CHDK by using uBasic commands get_prop and set_prop.
"Under the hood" some other uBasic commands work by changing propcases, making it
possible to use them in a portable way. Some propcases are read only. Often writing to a
propcase will have a different effect than pressing the corresponding buttons on the camera's
user interface. Typically this means that while you can change something like the shutter
speed and the change will be effective in your photo, it may not be updated to the camera's
on-screen display.
To find out which Property case a function changes see:
!
!
!
Opens the Grid Lines menu. This menu allows you to select and display a custom defined grid.
See the grid tutorial in the CHDK Wiki.
!
!
!
!
!
Show grid lines
Enable [•] / Disable [ ]
Enables the display of custom grids.!
Load grid from file…
Displays the file selection screen. Use the camera’s
Directional buttons
to select a grid file and
press FUNC.SET to select it.
http://chdk.setepontos.com/index.php/topic,2666.new.html#new
!
!
Property cases are different for Digic II and Digic III cameras.
) moves the selected feature.
• Display (DISP.) button – Toggles between 1 pixel per move or 10 pixels per move.
!
!
!
!
!
!
!
!
!
!
!
!
…………...Current grid.…………….!
!
!
!
!
!
!
!
!
!
!
!
!
Rulers Grid
!
The name of the currently loaded grid.
EXAMPLE: A570IS ISO is at #149, not #21 like on the S3IS, and the white
balance control is #268, not #206. Furthermore, some Digic III cameras (G7,
SD800IS, SD900) use the Digic II property set.
You are advised to confirm that these properties are appropriate for your camera
before you attempt to change them.
• Task list start < Debug parameters < Miscellaneous Stuff < Main Menu
Where to display from. If you set this to more than there are tasks running on the camera,
it will show the last twelve, adjusting on the fly as tasks get created and then deleted.
Override grid colors
Enable [•] / Disable [ ]
This setting will override the grid colors defined in a CHDK grid file. It will not override
the grid colors of the original Canon grids selected from the Canon menu.
Line color
Select a color for the grid lines.
Fill color
Press the FUNC.SET button to view the color selection table.
Press the FUNC.SET button to select a color.
!
!
• Show misc values
Enable [•] / Disable [ ]
Displays various values for service and programming purposes.
• Memory browser < Debug parameters < Miscellaneous Stuff < Main Menu
Similar role as previous.
• Benchmark < Debug parameters < Miscellaneous Stuff < Main Menu
Test write and read speed of the camera and SD cards. To compare memory cards.
Since this function during the first pass provides inaccurate values a 2nd run should always
be carried out, only the values of this 2nd run are meaningful.
Example next page...
Also see:- Grids notes on page 56.
Miscellaneous Values < OSD parameters < Main Menu
!
Show misc values ! [Don"t, Always, Shoot]
• Don"t – Don’t show misc values on LCD.
• Always – Always show the misc values on the LCD.!
• Shoot – Only show the misc values when shutter is half-pressed.
Show values in video
Enable [•] / Disable [ ]
Displays the Miscellaneous values when the camera is in video mode.
30
Show Zoom
Enable [•] / Disable [ ]
Z:n/n.nx in Miscellaneous Values. Displays the current Zoom position of the lens.
Z:n = zoom position, from 1 to 14
• Show Zoom value as [X, FL, EFL]
Method of displaying the Zoom position of the lens
X – as a multiple of the shortest focal length, as in 6X.
FL – as the actual focal length of the lens, as in 34.8 mm.
EFL – as the effective focal length, (35 mm Equivalent, as in 210 mm).
Adaptor Lens Scale, 100= 1x [0 – 1000]
Adjusts the zoom value above by a multiplier, which is based on the converter lens that is
installed on the camera. For a 0.7x wide converter use 70. For a 1.75x tele converter use
175.
Show ‘real’ Aperture
!!
Enable [•] / Disable [ ]
Av in Miscellaneous Values. This is the actual aperture setting after any override aperture
adjustments have been applied.
Show ‘real’ ISO !
!
!
Enable [•] / Disable [ ]
I-R in Miscellaneous Values. Displays the actual ISO value after overrides or bracketing have
been applied.
Show ‘market’ ISO!!
!
Enable [•] / Disable [ ]
I-M in Miscellaneous Values. Displays Canon’s ISO value, which is not always the same as
the actual ISO value.
Show ISO only in Autoiso mode!
!
Enable [•] / Disable [ ]
Display the ISO value only when the camera is in Auto ISO mode.
Show Set Exposure Ev (Tv+Av) !
!
Enable [•] / Disable [ ]
Evs in Miscellaneous Values.
Show camera exposure value based on the values of shutter speed and aperture.
Show Measured Ev (Bv+Sv) ! !
Enable [•] / Disable [ ]
(brightness value + scene sensitivity set in a camera)
Show Set Bv (Brightness Value) !
Enable [•] / Disable [ ]
Bvs in Miscellaneous Values.
Internal-brightness scenes through recalculation of the parameters established in the camera. Just
Av-Sv + Tv.
Show Measured Bv !
!
!
43
<ALT> Mode button
Cameras with a shortcut button can assign from a number of buttons to use as the <ALT>
button, choose from PRINT, SHORTCUT, FLASH, TIMER, ISO, or VIDEO buttons, the
PRINT button is the default.
Cameras that use the PRINT button as the default, but can assign another button as an
alternative for use in waterproof enclosures etc; DISP. for A570, A590, A720, FACE for
SX100, ISO button for A650, FE ( ) for G9,
DISP., AE/FE LOCK ( ) and LIGHT METERING/JUMP for G10, G11, G12.
Disable LCD Off
[ Alt, Script, Always, Never]
Alt: LCD remains on in <ALT> mode, Script: LCD on during script execution. Always: LCD
always on. Never: LCD off disabled, behaves as set in Canon Power Save mode. For long
intervals you should disable the Power Saving options of the camera.
Draw palette
Allows inspection of colours and transparencies by (almost) full screen. Use the numbers of
the desired colours to select them in Visual Settings menu. Use arrows to navigate palette,
press FUNC.SET to select a color, press MENU to exit.
Show build info
Displays the current version of CHDK in use, ie: 0.9.9 - 1491, date Dec 17 2011.
Show memory info
Displays free RAM available, also CHDK size and load address.
Make card bootable...
Option to enable auto load of CHDK at startup. Memory cards must have FAT12 or FAT16
format for the bootable partition. Large cards formatted in camera will be FAT32. After
selecting this option turn the camera off then remove the SD card and write protect, or “lock”,
the card. Reinstall the card.
Swap partitions
For cameras with multi partition support. To access each partition on a multi partition
memory card, (in computer OS's that only read one partition) Press FUNC.SET to change to
the currently inactive partition. Also see:- Page 45 "Create card with two partitions"
Reset options to default…
Reset all functions and displays back to CHDK default values.
Note:- By this operation you will lose all your personal settings.
Debug Parameters
< Miscellaneous Stuff < Main Menu
!
In this menu internal data on the functioning of CHDK is available.
• !Debug data display
Enable [•] / Disable [ ]
< Debug parameters < Miscellaneous Stuff
Shows debug data on the OSD, values are: [None, Props, Params, Tasks]
Displays the measured brightness value, as written in the Exif data.
Show http://chdk.wikia.com/wiki/PropertyCase variables
Show Overexp. Value (No Flash!)
Enable [•] / Disable [ ]
Indicates a calculated overexposure value. Av-Bv-Sv + Tv
42
31
Games
!
!
!
Show Canon overexp. Value ! !
Enable [•] / Disable [ ]
Indicates the overexposure value calculated by the camera.
< Miscellaneous Stuff < Main Menu
!
!
Show Scene luminance (cd/m2) !
Enable [•] / Disable [ ]
B in Miscellaneous Values.
Run average in standard illumination scenes candelas per square meter… calculated from a ratio
to Bv = 12.5.
Yes, games! Choose your favorite!
Switch to Playback mode for games.
!
!
!
!
!
!
!
!
Arrow buttons - move
FUNC.SET - choose level (Moves counter should be 0).
Erase / +/- – restart current level
DISP. - show 'about' info!
Zoom rocker - undo / redo moves
Use MENU button to exit.! !
!
!
!
!
!
!
!
!
!
!
DOF Calculator < OSD parameters < Main Menu
!
!
!
!
!
!
The Depth Of Field Calculator displays 5 distances in meters…
•
•
•
•
Sokoban
! !!
SD – Distance to the subject (Near Limit + DOF*0.33). Also called the Focal Plane.
NL – Near Limit. The distance where acceptable sharpness begins.
FL – Far Limit. The distance where acceptable sharpness ends.
DOF – the Distance between the Near Limit and the Far Limit.
• HYP - Hyperfocal distance. Depending on the aperture and zoom settings, the hyperfocal
distance reflects the optimal distance for an object to be photographed, i.e. the sharpness of
that object will be the sharpest at this specific distance.
!!
!
Reversi! !
!
!!
!
Connect 4!
!
• Show DOF calculator [Don't, Separat, In Misc]
!
• Don"t – Disables display of the DOF calculator
• Separate – Displays the DOF values apart from the Misc values.
• In Misc – Displays the DOF values with the Misc values.
Mastermind
If colours are not displayed properly, try entering and exiting Canon menus before entering <ALT> mode.
Canon Subj. Dist. as Near Limit Enable [•] / Disable [ ]
Flash-light
For Cameras with fold out LCD. Turns the LCD panel into a flashlight! When in Record Mode
and the LCD panel is swiveled facing forward, the LCD display turns all-white so you can see
your way around in the dark, or to illuminate some close object while setting up to take a
photograph.
Show splash screen on load
!
!
!
!
Use zoom buttons for MF
Enabling this value affects the way the subject distance is calculated.
Enable [•] / Disable [ ]
Enabling this value affects the way the subject distance is calculated.
Experimentation may be required to clarify these 2 preceding settings, they will affect script
commands that establish focus, and some other camera behavior, such as focus bracketing.
Enable [•] / Disable [ ]
The following 5 settings will determine which DOF values will appear in the OSD. When the
“Show DOF calculator” is set to “Separat”, all 5 values are always displayed. When it is set
to “In Misc” then only the enabled values below are displayed as part of the Miscellaneous
Values.
Show Subj. Dist. in Misc.
Enable [•] / Disable [ ]
Enable to show Subj. Dist. in Miscellaneous values on the OSD.
!
Startup sound
!
Use EXIF subj. Dist. (Propcase #65)
Mostly personal preference,
shows build info, also indicates
CHDK is loading.
Tip: Camera startup will be
slightly faster if splash
screen is disabled.
!
!
!
Enable [•] / Disable [ ]
Might be handy to know if someone else is using your camera.
Enable [•] / Disable [ ]
For a more precise adjustment of manual focus.
Show Near Limit in Misc.
Enable [•] / Disable [ ]
Enable to show Near Limit in Miscellaneous values on the OSD.
Show Far Limit in Misc.
Enable [•] / Disable [ ]
Enable to show Far Limit in Miscellaneous values on the OSD.
Show Hyperfocal Dist. in Misc.
Enable [•] / Disable [ ]
Enable to show in Hyperfocal Dist. Miscellaneous values on the OSD.
32
Show Depth of Field in Misc. Enable [•] / Disable [ ]
Text file reader
41
< Miscellaneous Stuff < Main Menu
Enable to show in Miscellaneous values on OSD.
Subject distance from lens
Enable [•] / Disable [ ]
! When enabled, distances displayed are measured from the front of the lens rather than the
sensor. This is useful for macro photography.
Raw
< OSD parameters < Main Menu
This utility can be used to read a text file stored on the SD
card. (Very convenient!, you can keep onboard instructions.)
• Open new file…
Displays a file browser window, opened to the CHDK /
BOOKS directory. You can select a txt file to view. Press
FUNC.SET to open the file.
• Select RBF font
Open the file browser in the CHDK/FONTS directory. Allows you to select a different font for
displaying text.
Show RAW shoot remain !
!
Enable [•] / Disable [ ]
! Calculates how many RAW captures will fit in the current free memory and displays that
number next to the RAW indicator.
• Open last opened file
Will display the most recent text file that was viewed.
Show RAW state ! !
Enable [•] / Disable [ ]
! “RAW” in OSD. Enables the display of the RAW indicator.
Warning threshold [0 – 200]
! Turns the RAW indicator red when the number of RAW shots remaining drops below the
! threshold value.
Battery
• Codepage [Win1251, DOS]
Select the text file format.
!
!
!
< OSD parameters < Main Menu
!
!
!
Hooray for the battery indicator !
!
!
Controls the display of the battery indicators on the LCD
!
!
!
Change Font!
!
!
Change Color!!
!
Yellow Text Color
As with other menus, fonts and colours can be changed to suit all preferences.
• Wrap by words !
Enables word-wrap.
!
Change Battery Min.
& Max. Volts
!
!
Set Show Battery
Percentage
!
!
Showing Yellow
Battery Icon
!
Enable [•] / Disable [ ]
• Enable autoscroll !
!
Enable [•] / Disable [ ]
When enabled the text file will scroll automatically.
!
Set the maximum and minimum voltages to match fully charged and discharged batteries,
the battery icon fill color will reduce as voltage lowers and will change to red color close
to minimum voltage.!
!
• Autoscroll delay (sec) [ 0 – 60 ]
Determines how long the system waits before scrolling the text file.
Use MENU button to exit.
!
40
33
! 2 ) Delete all RAW files in a selected folder
Useful when:
- You keep RAW files in the same folder as JPG files,
- You only want to get rid of some RAW files. (Very important
- shots in some other folder).
- You know which folder has a lot of out-takes.
Go to CHDK File Browser and inside DCIM folder select
the folder you want (E.g. "102CANON") and push the left
button to display the popup menu. Select "Purge RAW". A
warning will ask you to confirm and all the RAW files in ONLY that folder will be erased. This
option works like the previous one but only on the selected Canon folder, the rest are
untouched.
3 ) Delete some or all RAW files in a list.
Useful when You want to protect specific RAW files (to use them later for HDR)
Go to CHDK File Browser, enter DCIM folder, enter a sub folder (E.g. "102CANON") push
the left button to display the popup menu. Select "Purge RAW". A warning will ask you to
confirm and all the RAW files will be gone.
Now the useful thing of this option is that you can mark the RAW files you DON'T want to
erase (protect files). The Purge RAW function will erase the rest of the RAW files ignoring the
marked ones.
!
See:- http://chdk.setepontos.com/index.php/topic,557.msg4454.html#
Filespace
< OSD parameters < Main Menu
Show Filespace Icon
Enable [•] / Disable [ ]
Displays a small SD card shaped icon on the screen to show how much filespace is left on the
SD card. Opaque means remaining free space. Transparent means that space has been used. Use
the OSD Layout Editor to position the icon anywhere on the screen.
Show Space Bar [ Don"t, Horizon, Vertical ] < Filespace < OSD parameters
Displays a thin SD capacity remaining "fuel-gauge" icon on the screen. Location is
position-able in the OSD Layout Editor.
•
•
•
•
Don't - Turn off this feature.
Horizon - Displays the bar-graph gauge in a horizontal orientation.
Vertical - Displays the bar-graph gauge in a vertical orientation.
Size on Screen
Changes the display size of the "Space Bar" SD-capacity gauge.
1/ 4 - the bar-graph only goes 1/4th the width or height of the EVF/LCD display.
1/ 2 - the bar-graph goes 1/2 the width or height of the EVF/LCD display.
1 - the bar-graph goes the full width or height of the EVF/LCD display.
• Width/Height
Change the width (for vertical space-bar) or height (for horizontal space-bar) in 1-pixel
increments.
Calendar
Show Filespace in Percent
< Miscellaneous Stuff
Yes, a calendar!!
!
!
!
Select Year - Up / Down
Select Month - Left / Right
!
Use MENU button to exit.
!
Enable [•] / Disable [ ]
Displays the SD card space remaining in a percentage of its total capacity. (Toggles between this
and the MB option.) OSD display element positionable in the OSD Layout Editor.
Show Filespace in MB
Enable [•] / Disable [ ]
Displays the SD-card space remaining in Megabytes. Toggles between this and the percentage
option. (see above).
Warning Unit < Filespace < OSD parameters
Don't - Don't display a warning when the free SD-card space is getting low.
Percent - Change the space remaining display to the warning color when the percentage
reaches or goes below your selected "% Threshold" (see below).
MB - Change the space remaining display to the warning color when the Megabytes reaches
or goes below your selected "MB Threshold (see below).
• % Threshold < Filespace < OSD parameters
Setting used in conjunction with above "Warning Unit" feature. Set the amount of SD-card
space percentage remaining when you want that OSD element to turn to your chosen warning
color.
34
• MB Threshold < Filespace < OSD parameters
Setting used in conjunction with the above "Warning Unit" feature. Set this to how many
megabytes when the space remaining feature turns to your chosen warning color.
Note: This can be used in conjunction with a handy script if you need to ration the amount of
photos you take on a long vacation.
!
!
See this:
http://chdk.wikia.com/wiki/UBASIC/Scripts:_Photo_Rations script.
Clock
< OSD parameters < Main Menu
39
• RAW Sum
Using the selected RAW files, this will combine them into one file. Working on an additive
principle. Meaning, if you take five 65-second exposures, then RAW Sum them together, the
resulting image will be equivalent to the brightness level of a 5 minute, 25 second exposure.
• RAW Average
This RAW Merge feature will, as it says, average all the frames together. Very convenient if
taking several identical frames at high ISOs at high shutter speeds. This will merge them
together, effectively obliterating any noise, as the noise gets averaged out. The more frames
used, the less noise visible.
• Purge RAW < File Browser < Miscellaneous Stuff
• Show Clock
!
With this function the RAW files can be deleted in 3 different ways...
Displays an OSD real-time clock.
• Don't - No clock display.
• Normal - Displays HH:MM
• Seconds - Displays HH:MM:SS
!
!
!
!
• Clock Format
Caution ! Erasing files in the camera is an irreversible operation#!
Backup important images first, the data on your SD card can get damaged or
deleted#!
The first step is to delete the JPG outtakes in playback mode (using Canon's
interface).
12-hour or 24-hour format toggle. When 12-hour format is
used then the chosen 12-Hour Clock AM/PM indicators are
enabled.
Also influences the temperature format. 12h - Fahrenheit.
• 12h Clock Indicator
• PM - Displays AM or PM suffix on the OSD Clock
• P - Shorthand version of A or P for AM and PM on the OSD Clock (to save real-estate space).
Ultra-shorthand version of AM or PM. Displays a simple "." after the time to indicate PM,
no character is displayed for AM. Examples: 10:30 = 10:30 AM, 11:15. = 11:15 PM
(note the small period after the 15).
!
!
!
!
The 3 options for the Purge RAW function and erase the
corresponding RAW files:
1 ) Delete all RAW files in DCIM folder including
subfolders
Useful when:
- You keep a separate folder for RAW files.
- You set up the camera to create a new folder everyday
(several days trek, holidays etc).
- You want to erase the occasional mischievous RAW file stored in a different folder.
Go to CHDK File Browser, select DCIM folder, push the left button to display the popup menu
and select "Purge RAW" (See image above). A warning will ask you to confirm (See image
next page) and voila! You have regained some SD space.
This feature will search through all the folders in DCIM looking for a RAW file (CRW /CR2
prefix or file extension) and if it finds one then will look for its JPG partner anywhere inside
DCIM (comparing the 4 digit number assigned by the camera). If it is not found, the RAW file
is erased.
• @ Shutter Half-press Show
Shows the OSD clock during a half-press of the shutter button.....
• Don't - No clock display on a half-press.
• Full - Shows full clock time during half-press.
• Seconds - Only counts off the seconds in the clock display during a half-press. Helpful when
doing manual timings between consecutive shots without having to quickly call up some
intervalometer script.
Show OSD in Review Mode < OSD parameters < Main Menu
Displays the OSD when in REVIEW mode. Do not confuse this with Playback mode. Review
mode is when your last taken photo is temporarily being displayed as you hold down the shutterbutton (and press FUNC.SET to lock it into Review Mode) or when you have your Canon's
Menu "Review" options turned on. This allows you to keep your on-screen grid and other
settings visible when reviewing the photo to see if you got the framing or other settings as you
had intended.
38
35
…….…..........................Default Script...............................................
!
!
!
!
!
!
!
Visual Settings! < Main Menu
The name of the currently loaded script is displayed in the Mini Console area at the bottom
of the LCD on the left hand side.
Use this menu to make changes to the appearance of all CHDK
menus, texts, backgrounds, etc., choose font types, sizes, colors.
The Mini Console area is where script information is displayed, messages included by diligent
script authors to keep users informed of the progression of a script, and to direct input from the
user for setting script parameters. Messages are defined by the “print” command in scripts.
Language
Lets you choose another language if you have the
appropriate .lng-file in the CHDK /LANG/f older of
your SD card.
OSD codepage
• Times to Repeat
[ 5 ]
Set a number for times for script to repeat.
• Display Delay!
[ 3]
Menu RBF font
In seconds
!
Choose the Codepage. [ Win1250 - 1257 ]
To enable display of alphabetical characters for different languages.2
!
Choose another font (RBF format) for the CHDK menus. If you have chosen a RBF font but
want to switch back to the original built-in font, just choose an "illegal" RBF font (Try to load a
uBASIC script as a RBF font, for example).
More at: Scripting Notes, page 57 and How do I use scripts? page 64.
Miscellaneous stuff
…………………….....Colors……………………....!
< Main Menu
Change any of the display colors for all text and icons. If you
don't change them they will remain as their defaults.
There are opaque colors and transparent colors, and also some
"special effect" colors. Note that record mode and playback
mode use different color tables. So it may happen that you pick
a nice color in playback mode, and in record mode it will look
totally different. But there are also colors which will stay the
same in both modes. Some examples for A-series cams:
0x11 (white), 0xFF (black), 0x22 (red), 0x55 (green), 0x44 (transparent light grey).
File browser!
Browse files in the various CHDK folders.
!
!
Use UP / DOWN directional buttons to highlight, FUNC.SET button to
select a folder, RIGHT button to select a file, LEFT button for pop up menu
for Cut, Copy, Delete, Select Inverse, RAW sum, RAW average,
Purge RAW, Sub from marked, DNG -> CHDK RAW.
!
!
Also see:- Draw palette, Page 43.
• RAW Merge
When selecting (highlighting) files in the File browser mode, by using the RIGHT directional
button, there are 2 functions available on the LEFT directional button menu.
If after using either of these features you would like to see the resulting images without
having to load them into a computer and using RAW viewing software, use the "RAW Develop"
feature on the "RAW Parameters" menu to create a JPG file for playback in the camera.
When using either of these options the resulting new RAW file will use whatever last filename
was selected for merging as the prefix to the new RAW filename, and a WAV suffix will be
added to it so you know which last-of-a-sequence files were used for merging. This also
circumvents any confusion later when using utilities like DNG4PS with trying to merge
corresponding JPG EXIF data with the original RAW data, where filenames could get drastically
out of order by creating new JPG filename numbers.
!
!
Green Menu Text
!
!
!
Green Cursor Background
!
!
!
!
!
!
!!
Pink Menu Background
36
Scripting Parameters
< Main Menu
Load Script from File...
37
..............................…….synchable remote..................................…..
• Enable Synchable Remote
Enter <ALT> mode, press FUNC.SET to go to the SCRIPTS
Folder, select a script, press FUNC.SET again to load it, set
any required parameters to suit your needs (such as in this
screenshot, “Times to Repeat”, “Display Delay” - see the
script’s documentation), then press MENU to finish. Stay in
<ALT> mode, press the Shutter button to run the script. To
interrupt a running script press the Shutter button. To return to normal shooting, exit <ALT>
mode. CHDK saves your last user-selected script parameters from one session to the next.
The default script is the one you load when you don't need a script. 3
New scripts can be added to the SCRIPTS folder as they become available.
Script shoot delay (.1s)
After an image is captured, indicates how long to delay the execution of the next script
command. A value of 0 executes immediately. A value of 10 executes the next script command
one second after capture. Mainly used to minimize camera movement before the script starts,
and to allow the camera to finish other tasks.
Script Autostart
[Off, On, Once]
When enabled, the script listed under “current script” will execute immediately the camera is
turned on, remember this when you see your camera operating by itself after it is turned on.
Enable [•] / Disable [ ]
Enables synchable scriptless remote as used in Stereo Data Maker. This changes the previous
operation so that after the first press to focus, you then press and hold until the Print button blue
LED shows (Ready to shoot indication) and then release to fire the shutter. The shutter fires on a
falling voltage which might be more reliable on some cameras.
• Enable Synch
Enable [•] / Disable [ ]
Used to synchronize 2 or more cameras when all connected to the same USB-Remote signal.
• Enable Synch Delay! Enable [•] / Disable [ ]
Allows you to fine-tune the USB-Remote triggering speed to match
that of other cameras when using more than 1 camera. (For stereo
imagery, multi-frame stop-action Matrix (the movie) type effects,
etc.) Rate of delay is adjusted with the settings below.
• Sync Delay 1ms
USB-Remote Sync delay in 1ms increments (1/1000th of a second).
• Sync Delay 0.1s
USB-Remote Sync delay in 0.1s increments (1/10th of a second).
• Enable Remote Zoom! Enable [•] / Disable [ ]
To enable the zoom by remote control function. !
Remote Parameters
• Zoom Time-out 0.1s
• Enable Remote
Enable [•] / Disable [ ]
Toggles the remote USB cable detection state, to use with scripts and manually.
When this is enabled a remote switch can be used to trigger the shutter. Have the camera
in! normal record mode and not in <ALT> mode. This is the same as pressing the shutter
manually in all normal camera operations, while reducing or eliminating camera shake. To
make or obtain a remote switch refer to - Remote notes on page 55.
Manual usage: To auto-focus and set exposure metering, a short press of the USB
remote trigger will execute a shutter half-press, then a second press will do a full shutter-press.
In other words... if USB remote is enabled, pressing / releasing the remote button is equivalent
to pressing the shutter halfway, to complete the shot, momentarily release and press the remote
button again within 0.5s, which will "push" the shutter all the way. This might require a bit of
practice to reliably shoot each time. A USB icon or text can be shown on the OSD, see “Show
USB Remote” on page 28.
[
2 - 10 ]
Set a value for time-out, 0.1s x 2 up to 10.
Load Default Param Values
CHDK normally saves your last user-selected script parameters from one session to the next.
Press FUNC.SET when the menu cursor is on this option resets them to the default parameters as
programmed into the script when first ran. A simple way to go back to a script's defaults after
you've gotten hopelessly lost in many changes or just need a quick way to return to base settings.
Parameters Set
Allows for the selection of 0 to 9 (ten) optional parameter sets for each script. If you select a
new Parameter Set and then change your user-setting script parameters, CHDK will now
remember your settings for each set. (The script parameter sets are saved in a CHDK/DATA /
directory named by the script in use at the time.) Now you can have up to 10 favorite settings for
any one script. The next time you load the same script your favorite defaults can be called-up by
just selecting numbers 0 to 9.
Save params
Note: When downloading images to a computer by USB it will be necessary to uncheck
“Enable remote” - Enable [ ] / Disable
!
Enable [•] / Disable [ ]
Save current parameter settings.
For more detailed information on the above and how to use !in scripts, see:
!
!
See: USB Remote notes, page 55.
!
http://chdk.wikia.com/!wiki/USB_Remote_Cable