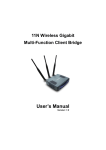
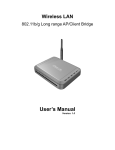
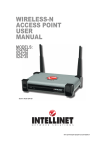
Download User`s Manual - Pliki do pobrania
Transcript
11N Wireless Multi-Function Client Bridge User’s Manual Version: 1.0 Multi-Function Gigabit Wireless-N Client Bridge Version 1.0 Table of Contents 1 INTRODUCTION............................................................................................................................... 5 1.1 1.2 1.3 1.4 1.5 1.6 a) b) 2 UNDERSTANDING THE HARDWARE.......................................................................................... 9 2.1 2.2 3 FEATURES AND BENEFITS ...........................................................................................................5 PACKAGE CONTENTS .................................................................................................................6 SAFETY GUIDELINES ..................................................................................................................6 SYSTEM REQUIREMENTS ............................................................................................................6 APPLICATIONS ...........................................................................................................................7 NETWORK CONFIGURATION ........................................................................................................8 Ad-hoc (peer-to-peer) Mode................................................................................................................... 8 Infrastructure Mode ................................................................................................................................ 8 HARDWARE INSTALLATION ..........................................................................................................9 IP ADDRESS CONFIGURATION .....................................................................................................9 WEB CONFIGURATION.................................................................................................................11 3.1 3.2 3.2.1 3.2.2 3.2.3 3.2.4 3.2.4.1 3.2.4.2 3.2.4.2.1 3.2.4.2.2 3.2.4.2.3 3.2.4.2.4 3.2.4.2.4.1 3.2.4.2.4.2 3.2.4.2.4.3 3.2.4.2.4.4 3.2.4.2.5 3.2.4.2.6 3.2.4.2.7 3.2.4.2.8 3.2.4.3 3.2.4.3.1 3.2.4.3.2 3.2.4.3.3 3.2.4.3.4 3.2.4.3.4.1 3.2.4.3.5 3.2.4.4 3.2.4.4.1 3.2.4.4.2 3.2.4.4.3 3.2.4.4.4 3.2.4.5 3.2.4.5.1 3.2.4.5.2 3.2.4.5.3 3.2.4.5.4 3.2.4.5.4.1 3.2.4.5.4.2 3.2.4.5.4.3 3.2.4.5.5 3.2.4.5.6 LOGGING IN............................................................................................................................. 11 SYSTEM ..................................................................................................................................12 STATUS ..................................................................................................................................13 SCHEDULE ..............................................................................................................................13 EVENT LOG .............................................................................................................................14 MONITOR ................................................................................................................................15 SWITCHING BETWEEN OPERATING MODES .................................................................................17 ACCESS POINT OPERATING MODE.............................................................................................19 STATUS ..................................................................................................................................19 BASIC .....................................................................................................................................19 ADVANCED ..............................................................................................................................21 WIRELESS SECURITY MODE......................................................................................................22 SECURITY DISABLED ................................................................................................................22 WEP (WIRED EQUIVALENT PRIVACY) ........................................................................................23 WPA (WI-FI PROTECTED ACCESS) / PRE-SHARED KEY ...............................................................25 WPA RADIUS (802.1X) .........................................................................................................26 FILTER ....................................................................................................................................27 CLIENT LIST ............................................................................................................................28 VLAN ....................................................................................................................................28 WMM (WIRELESS MULTIMEDIA)................................................................................................29 CLIENT BRIDGE OPERATING MODE ............................................................................................30 STATUS ..................................................................................................................................30 BASIC .....................................................................................................................................30 ADVANCED ..............................................................................................................................32 AP PROFILE ............................................................................................................................33 MANAGE AP PROFILE ..............................................................................................................33 WMM (WIRELESS MULTIMEDIA)................................................................................................33 WDS OPERATING MODE ..........................................................................................................35 STATUS ..................................................................................................................................35 BASIC .....................................................................................................................................35 ADVANCED ..............................................................................................................................36 WMM (WIRELESS MULTIMEDIA)................................................................................................38 REPEATER OPERATING MODE ...................................................................................................39 STATUS ..................................................................................................................................39 BASIC .....................................................................................................................................40 ADVANCED ..............................................................................................................................42 WIRELESS SECURITY MODE......................................................................................................43 SECURITY DISABLED ................................................................................................................43 WEP (WIRED EQUIVALENT PRIVACY) ........................................................................................44 WPA (WI-FI PROTECTED ACCESS) / PRE-SHARED KEY ...............................................................46 FILTER ....................................................................................................................................47 CLIENT LIST ............................................................................................................................47 2 Multi-Function Gigabit Wireless-N Client Bridge 3.2.4.5.7 3.3 3.3.1 3.3.2 3.4 3.4.1 3.4.2 3.4.3 3.4.4 3.4.5 3.4.6 3.4.7 3.5 3.5.1 3.5.2 Version 1.0 WMM (WIRELESS MULTIMEDIA)................................................................................................48 NETWORK .............................................................................................................................49 STATUS ..................................................................................................................................49 LAN / DHCP CLIENT, SERVER .................................................................................................49 MANAGEMENT ........................................................................................................................50 ADMIN ....................................................................................................................................50 SNMP ...................................................................................................................................51 FIRMWARE UPGRADE ...............................................................................................................52 RESTORE TO FACTORY DEFAULT ...............................................................................................52 BACKUP SETTINGS...................................................................................................................53 RESTORE SETTINGS.................................................................................................................53 REST ......................................................................................................................................54 TOOLS ....................................................................................................................................55 TIME SETTING .........................................................................................................................55 DIAGNOSIS ..............................................................................................................................56 APPENDIX A – SPECIFICATIONS .........................................................................................................57 HARDWARE SUMMARY ..................................................................................................................................57 RADIO SPECIFICATIONS ................................................................................................................................57 SOFTWARE FEATURES ..................................................................................................................................58 MANAGEMENT .............................................................................................................................................59 ENVIRONMENT & PHYSICAL ...........................................................................................................................59 APPENDIX B – FCC INTERFERENCE STATEMENT.........................................................................60 INDEX ..........................................................................................................................................................61 3 Multi-Function Gigabit Wireless-N Client Bridge Version 1.0 Revision History Version Date Notes 1.0 July 10, 2009 Initial Version 4 Multi-Function Gigabit Wireless-N Client Bridge Version 1.0 1 Introduction ECB9300 is a multi-functioned 11n product with 7 major multi-functions, is designed to operate in every working environment for enterprises. ECB9300 is a Wireless Network device that delivers up to 3x faster speeds and 2x extended coverage than 802.11g devices. ECB9300 supports home network with superior throughput, performance and unparalleled wireless range. To protect data during wireless transmissions, ECB9300 encrypts all wireless transmissions through WEP data encryption and supports WPA/WPA2. ECB9300 also supports IEEE 802.1x Supplicant function in CB mode. Its MAC address filter allows users to select stations with access to connect network. In addition, the function of user isolation protects private network between client users. ECB9300 thus is the best product to ensure network safety for enterprises. 1.1 Features and Benefits Features Benefits High Speed Data Rate Up to 150Mbps Capable of handling heavy data payloads such as MPEG video streaming 10/100 Fast Ethernet Support up to 100Mbps networking speed IEEE 802.11n draft Compliant and backward compatible with 802.11b/g Fully compatible with IEEE 802.11b/g/n devices Multi-Function, 7 functions Allowing users to select different mode in various environment Point-to-point, Point-to-multipoint Wireless Connectivity Allowing to transfer data from buildings to buildings WDS (Wireless Distributed System) Making wireless AP and Bridge mode simultaneously as a wireless repeater Universal Repeater The easiest way to your wireless network's coverage Support Multi-SSID function (4 Allowing clients to access different networks through a SSID) in AP mode single access point and to assign different policies and functions for each SSID by manager WPA2/WPA/ IEEE 802.1x support Powerful data security 802.1x Supplicant support (CB & CR mode) More powerful data security in Client Bridge mode MAC address filtering in AP mode Ensuring secure network connection User isolation support (AP mode) Protecting the private network between client users. 5 Multi-Function Gigabit Wireless-N Client Bridge Version 1.0 PPPoE function support (CR mode) Easy to access the internet via ISP service authentication Keep personal setting Keeping the latest setting when firmware upgrade SNMP Remote Configuration Management Helping administrators to remotely configure or manage the Access Point easily QoS (WMM) support Enhancing user performance and density 1.2 Package Contents Open the package carefully, and make sure that none of the items listed below are missing. Do not discard the packing materials, in case of return; the unit must be shipped in its original package. ¾ ¾ ¾ ¾ 1* 11N multi-function Client Bridge (ECB9300) 1* 12V/1A Power Adapter 1* Ethernet Cable 1* 2dBi 2.4GHz Dipole Antennas ¾ 1*QIG ¾ 1*CD (User’s Manual) 1.3 Safety Guidelines In order to reduce the risk of fire, electric shock and injury, please adhere to the following safety guidelines. h h h h h h h h Carefully follow the instructions in this manual; also follow all instruction labels on this device. Except for the power adapter supplied, this device should not be connected to any other adapters. Do not spill liquid of any kind on this device. Do not place the unit on an unstable stand or table. This unit may drop and become damaged. Do not expose this unit to direct sunlight. Do not place any hot devices close to this unit, as they may degrade or cause damage to the unit. Do not place any heavy objects on top of this unit. Do not use liquid cleaners or aerosol cleaners. Use a soft dry cloth for cleaning. 1.4 System Requirements The following are the minimum system requirements in order configure the device. h PC/AT compatible computer with a Ethernet interface. h Operating system that supports HTTP web-browser 6 Multi-Function Gigabit Wireless-N Client Bridge Version 1.0 1.5 Applications The wireless LAN products are easy to install and highly efficient. The following list describes some of the many applications made possible through the power and flexibility of wireless LANs: a) Difficult-to-wire environments There are many situations where wires cannot be laid easily. Historic buildings, older buildings, open areas and across busy streets make the installation of LANs either impossible or very expensive. b) Temporary workgroups Consider situations in parks, athletic arenas, exhibition centers, disasterrecovery, temporary offices and construction sites where one wants a temporary WLAN established and removed. c) The ability to access real-time information Doctors/nurses, point-of-sale employees, and warehouse workers can access real-time information while dealing with patients, serving customers and processing information. d) Frequently changed environments Show rooms, meeting rooms, retail stores, and manufacturing sites where frequently rearrange the workplace. e) Small Office and Home Office (SOHO) networks SOHO users need a cost-effective, easy and quick installation of a small network. f) Wireless extensions to Ethernet networks Network managers in dynamic environments can minimize the overhead caused by moves, extensions to networks, and other changes with wireless LANs. g) Wired LAN backup Network managers implement wireless LANs to provide backup for missioncritical applications running on wired networks. h) Training/Educational facilities Training sites at corporations and students at universities use wireless connectivity to ease access to information, information exchanges, and learning. 7 Multi-Function Gigabit Wireless-N Client Bridge Version 1.0 1.6 Network Configuration To better understand how the wireless LAN products work together to create a wireless network, it might be helpful to depict a few of the possible wireless LAN PC card network configurations. The wireless LAN products can be configured as: a) Ad-hoc (or peer-to-peer) for departmental or SOHO LANs. b) Infrastructure for enterprise LANs. a) Ad-hoc (peer-to-peer) Mode This is the simplest network configuration with several computers equipped with the PC Cards that form a wireless network whenever they are within range of one another. In ad-hoc mode, each client is peer-to-peer, would only have access to the resources of the other client and does not require an access point. This is the easiest and least expensive way for the SOHO to set up a wireless network. The image depicts a network in ad-hoc mode. b) Infrastructure Mode The infrastructure mode requires the use of an access point (AP). In this mode, all wireless communication between two computers has to be via the AP. It doesn’t matter if the AP is stand-alone or wired to an Ethernet network. If used in standalone, the AP can extend the range of independent wireless LANs by acting as a repeater, which effectively doubles the distance between wireless stations. The image below depicts a network in infrastructure mode. 8 Multi-Function Gigabit Wireless-N Client Bridge Version 1.0 2 Understanding the Hardware 2.1 Hardware Installation 1. Place the unit in an appropriate location after conducting a site survey. 2. Plug one end of the Ethernet cable into the LAN port of the device and another end into your PC/Notebook. 3. Plug one end of another Ethernet cable to WAN port of the device and the other end into you cable/DSL modem (Internet) 4. Insert the DC-inlet of the power adapter into the port labeled “DC-IN” and the other end into the power socket on the wall. This diagram depicts the hardware configuration PC, Cable/DSL Modem Ethernet Client Bridge/AP AC/DC cable Power Outlet 2.2 IP Address Configuration This device can be configured as a Bridge/Router or Access Point. The default IP address of the device is 192.168.1.2 (In Client Bridge Mode as default)In order to log into this device, you must first configure the TCP/IP settings of your PC/Notebook. 1. In the control panel, double click Network Connections and then double click on the connection of your Network Interface Card (NIC). You will then see the following screen. 9 Multi-Function Gigabit Wireless-N Client Bridge Version 1.0 2. Select Internet Protocol (TCP/IP) and then click on the Properties button. This will allow you to configure the TCP/IP settings of your PC/Notebook. 3. Select Use the following IP Address radio button and then enter the IP address and subnet mask. You may follow the example below. Please Ensure that the IP address and subnet mask are on the same subnet as the device. For Example: Device IP address: 192.168.1.2 PC IP address: 192.168.0.10 PC subnet mask: 255.255.255.0 4. Click on the OK button to close this window, and once again to close LAN properties window. 10 Multi-Function Gigabit Wireless-N Client Bridge Version 1.0 3 Web Configuration 3.1 Logging In 1. 2. 3. 4. 5. 6. To configure the device through the web-browser, enter the IP address of the Bridge (default: 192.168.1.2) into the address bar of the web-browser and press Enter. Make sure that the device and your computers are configured on the same subnet. Refer to Chapter 2 in order to configure the IP address of your computer. After connecting to the IP address, the web-browser will display the login page. Enter admin for both the user name and password. After logging in you will see the graphical user interface (GUI) of the device. The navigation drop-down menu on left is divided into five main sections: System: This menu includes the status, schedule, event log, and monitor. Wireless: This menu includes status, basic, advanced, security, WPS, Client list, VLAN, and WMM. Through this section, you can also change the device operating mode, such as Access Point, Client Bridge, WDS Bridge, or Universal Repeater. Network: This menu includes status, and LAN. Management: This menu includes the admin setup, SNMP, firmware upgrade, save/restore backup and device reset. Tools: Displays the time zone, power saving, and diagnostics. Logout: To logout the system. Need to open up a new browser window in order to login again. 11 Multi-Function Gigabit Wireless-N Client Bridge Version 1.0 3.2 System Click on the System link on the navigation drop-down menu. You will then see five options: Operation Mode, Status, Schedule, Event Log, and Monitor. Each option is described in detail below. I 12 Multi-Function Gigabit Wireless-N Client Bridge Version 1.0 3.2.1 Status Click on the Status link under the System drop-down menu. The status page displays a summary of current system settings. Information such as operating mode, system up time, firmware version, serial number, kernel version and application version are displayed in the ‘System’ section. LAN IP address, subnet mask, and MAC address are displayed in the ‘LAN’ section. In the ‘WLAN’ section, the frequency, channel is displayed. Since this device supports multiple-SSIDs, the details of each SSID, such as ESSID and its security settings are displayed in the ‘SSID_#’ section. 3.2.2 Schedule Click on the Schedule link in the navigation menu. Prior to setting schedule, time zone must be set in the Tools menu. Schedules can be created to specify the occasions to enforce the rules. For example, if you want enable power saving on Mon-Fri from 3pm to 8pm, you could create a schedule selecting Mon, Tue, Wed, Thu, and Fri and enter a Start Time of 3pm and End Time of 8pm. 13 Multi-Function Gigabit Wireless-N Client Bridge Version 1.0 Click on the Add button to add a new schedule. . Schedule Description: Specify a name for the schedule. Service: Select a service. Days: Select the days at which you would like the schedule to be effective. Time of Day: Place a check in the All Day box if you would like the schedule to be active for 24 hours. If you do not use the 24 hours option, you may specify a start time and end time. Click on the Apply button to add this schedule into the list. 3.2.3 Event Log Click on the Event Log link on the navigation menu. The device automatically records important events in its internal memory. Order records will be over-written by the latest ones when it is out of internal memory. 14 Multi-Function Gigabit Wireless-N Client Bridge Version 1.0 Save: Click on the Save button to save the log into a text file on your computer. Clear: Click on the Clear button to clear the log on the screen. Refresh: Click on the Refresh button to refresh the log. 3.2.4 Monitor Click on the Monitor link in the navigation drop-down menu. This page displays the transmitted and received packet statistics of the wired (LAN & WAN) and wireless interface. You may change the auto-refresh time by selecting the number of seconds from the drop-down list. 15 Multi-Function Gigabit Wireless-N Client Bridge Click Version 1.0 to view the history records. 16 Multi-Function Gigabit Wireless-N Client Bridge 3.2.4.1 Version 1.0 Switching between Operating Modes Each of the operating modes offers different features. In order to switch the operating mode, select it from the System >> Operation Mode A dialog box will appear to notify you that the system will restart in order for the change to take effect. Click on the OK button to continue. Please wait while the device counts down and restarts into the new operating mode. 17 Multi-Function Gigabit Wireless-N Client Bridge Version 1.0 Each of the operating modes is described in detail in this chapter. Refer to the following sections for each operating mode: o o o o 3.2.4.2 Access Point Operating Mode 3.2.4.3 Client Bridge Operating Mode 3.2.4.4 WDS Bridge Operating Mode 3.2.4.5 Repeater Operating Mode 18 Multi-Function Gigabit Wireless-N Client Bridge 3.2.4.2 Version 1.0 Access Point Operating Mode In order to configure the device as an Access Point, select Access Point from the Operating Mode dropdown list. A dialog box will appear to notify you that the system will restart in order for the change to take effect. Click on the OK button to continue. Please wait while the device counts down and restarts into the new operating mode. Once the device has restarted into Access Point mode, you will see a new drop-down menu with nine options which are: Status, Basic, Advanced, Security, Filter, WPS, Client List, VLAN, and WMM. Each of the options is described in detail below. 3.2.4.2.1 Status Click on the Status link under the Wireless drop-down menu. This page will display the current wireless settings such as SSID, Channel, Security and BSSID (MAC address) 3.2.4.2.2 Basic Click on the Basic link under the Wireless drop-down menu. This page will display the current wireless settings such as SSID, Channel, Security and BSSID (MAC address). 19 Multi-Function Gigabit Wireless-N Client Bridge Version 1.0 • Radio: Choose to Enable or Disable the wireless radio. • Mode: This drop-down list is fixed to AP as this is the Access Point operating mode. • Band: Select the IEEE 802.11 mode from the drop-down list. For example, if you are sure that the wireless network will be using only IEEE 802.11g clients, then it is recommended to select 802.11g only instead of 2.4 GHz B+G which will reduce the performance of the wireless network. You may also select 802.11B+G+N. If all of the wireless devices you want to connect with this router can connect in the same transmission mode, you can improve performance slightly by choosing the appropriate "Only" mode. If you have some devices that use a different transmission mode, choose the appropriate "Mixed" mode. • ESSID#: This device allows up for four SSIDs, select the SSID# that you would like to configure from the drop-down list. ESSID: The SSID is a unique named shared amongst all the points of the wireless network. The SSID must be identical on all points of the wireless network and cannot exceed 32 characters. Auto Channel: The device can automatically select the clearest channel in the environment. If auto channel is disabled, then you must select a channel from the drop-down list. Channel: Select a channel from the drop-down list. The channels available are based on the country’s regulation. A wireless network uses specific channels in the wireless spectrum to handle communication between clients. Some channels in your area may have interference from other electronic devices. Choose the clearest channel to help optimize the performance and coverage of your wireless network. Click on the Apply button to save the changes. 20 Multi-Function Gigabit Wireless-N Client Bridge Version 1.0 3.2.4.2.3 Advanced Click on Advanced link under the Wireless drop-down menu. This page allows you to configure the fragmentation threshold, RTS threshold, beacon period, transmit power, DTIM Period, etc. Fragment Threshold: Packets over the specified size will be fragmented in order to improve performance on noisy networks. Specify a value between 256 and 2346. The default value is 2346. RTS Threshold: Packets over the specified size will use the RTS/CTS mechanism to maintain performance in noisy networks and preventing hidden nodes from degrading the performance. Specify a value between 0 and 2347. The default value is 2347. Beacon Period: Beacons are packets sent by a wireless Access Point to synchronize wireless devices. Specify a Beacon Period value between 20 and 1024. The default value is set to 100 milliseconds. DTIM Period: A DTIM is a countdown informing clients of the next window for listening to broadcast and multicast messages. When the wireless Access Point has buffered broadcast or multicast messages for associated clients, it sends the next DTIM with a DTIM Period value. Wireless clients detect the beacons and awaken to receive the broadcast and multicast messages. The default value is 1. Valid settings are between 1 and 10. Data Rate: You may select a data rate from the drop-down list, however, it is recommended to select auto. This is also known as auto-fallback. N Data Rate: You may select a data rate for 802.11n from the drop-down list, however, it is recommended to select auto. This is also known as auto-fallback. 21 Multi-Function Gigabit Wireless-N Client Bridge Version 1.0 Channel Bandwidth: You may select a channel bandwidth in order to improve the efficiency of the network, however, it is recommended to select Auto 20/40MHz. This is also known as auto-fallback. Preamble Type: Select a short or long preamble. For optimum performance it is recommended to also configure the client device as the same preamble type. CTS Protection: CTS (Clear to Send) can be always enabled, auto, or disabled. By enabled CTS, the Access Point and clients will wait for a ‘clear’ signal before transmitting. It is recommended to select auto. Tx Power: You may control the transmit output power of the device by selecting a value from the drop-down list. This feature can be helpful in restricting the coverage area of the wireless network. Click on the Apply button to save the changes. 3.2.4.2.4 Wireless Security Mode Click on the Security link under the Wireless drop-down menu. To protect your privacy this mode supports several types of wireless security: WEP WPA, WPA2, and 802.1x RADIUS. WEP is the original wireless encryption standard. WPA provides a higher level of security. The following section describes the security configuration in detail. 3.2.4.2.4.1 Security Disabled Click on the Security link under the Wireless drop-down menu. ESSID Selection: As this device supports multiple SSIDs, it is possible to configure a different security mode for each SSID (profile). Select an SSID from the drop-down list. Broadcast SSID: Select Enable or Disable from the drop-down list. This is the SSID broadcast feature. When this option is set to Enable, your wireless network name is broadcasted of your signal coverage. If encryption is set to NONE, users will be able to access the AP without authentication. When this is disabled, you must enter the Wireless Network Name (SSID) on the client manually to connect to the network. WMM: Choose to Enable or Disable WMM. This is the Quality of Service (QoS) feature for prioritizing voice and video applications. This option can be further configured in WMM under the Wireless drop-down menu. 22 Multi-Function Gigabit Wireless-N Client Bridge Encryption: Select Disable from the drop-down list. Enable 802.1x Authentication: Place a check in this box if you would like to use RADIUS authentication. This option works with a RADIUS Server to authenticate wireless clients. Wireless clients should have established the necessary credentials before attempting to authenticate to the Server through this Gateway. Furthermore, it may be necessary to configure the RADIUS Server to allow this Gateway to authenticate users. You will then be required to specify the RADIUS Server’s IP address, port, and password. Click on the Apply button to save the changes. 3.2.4.2.4.2 Version 1.0 WEP (Wired Equivalent Privacy) Click on the Security link under the Wireless drop-down menu. WEP is an acronym for Wired Equivalent Privacy, and is a security protocol that provides the same level of security for wireless networks as for a wired network. WEP is less secure as compares to WPA encryption. To gain access to a WEP network, you must know the key. The key is a string of characters that you use for password. When using WEP, you must determine the level of encryption. The type of encryption determines the key length. 128-bit encryption requires a longer key than 64-bit encryption. Keys are defined by entering in a string in HEX (hexadecimal - using characters 0-9, A-F) or ASCII (American Standard Code for Information Interchange - alphanumeric characters) format. ASCII format is provided so you can enter a string that is easier to remember. The ASCII string is converted to HEX for use over the network. Four keys can be defined so that you can change keys easily. A default key is automatically generated when WEP is enabled. 23 Multi-Function Gigabit Wireless-N Client Bridge Version 1.0 ESSID Selection: As this device supports multiple SSIDs, it is possible to configure a different security mode for each SSID (profile). Select an SSID from the drop-down list. Broadcast SSID: Select Enable or Disable from the drop-down list. This is the SSID broadcast feature. When this option is set to Enable, your wireless network name is broadcast to anyone within the range of your signal. If you're not using encryption then they could connect to your network. When this is disabled, you must enter the Wireless Network Name (SSID) on the client manually to connect to the network. WMM: Choose to Enable or Disable WMM. This is the Quality of Service (QoS) feature for prioritizing voice and video applications. This option can be further configured in WMM under the Wireless drop-down menu. Encryption: Select WEP from the drop-down list. Authentication Type: Select Open System, Shared Key, or auto. Authentication method from the drop-down list. An open system allows any client to authenticate as long as it conforms to any MAC address filter policies that may have been set. All authentication packets are transmitted without encryption. Shared Key sends an unencrypted challenge text string to any device attempting to communicate with the AP. The device requesting authentication encrypts the challenge text and sends it back to the access point. If the challenge text is encrypted correctly, the access point allows the requesting device to authenticate. It is recommended to select Auto if you are not sure which authentication type is used. Key Length: Select a 64-bit or 128-bit WEP key length from the drop-down list. Key Type: Select a key type from the drop-down list. 128-bit encryption requires a longer key than 64-bit encryption. Keys are defined by entering in a string in HEX (hexadecimal - using characters 0-9, A-F) or ASCII (American Standard Code for 24 Multi-Function Gigabit Wireless-N Client Bridge Version 1.0 Information Interchange - alphanumeric characters) format. ASCII format is provided so you can enter a string that is easier to remember. Default Key: You may choose one of your 4 different WEP keys from below. Encryption Key 1-4: You may enter four different WEP keys. Enable 802.1x Authentication: Place a check in this box if you would like to use RADIUS authentication. This option works with a RADIUS Server to authenticate wireless clients. Wireless clients should have established the necessary credentials before attempting to authenticate to the Server through this Gateway. Furthermore, it may be necessary to configure the RADIUS Server to allow this Gateway to authenticate users. You will then be required to specify the RADIUS Server’s IP address, port, and password. Click on the Apply button to save the changes. 3.2.4.2.4.3 WPA (Wi-Fi Protected Access) / Pre-shared Key Click on the Security link under the Wireless drop-down menu. WPA (Wi-Fi Protected Access) is designed to improve upon the security features of WEP (Wired Equivalent Privacy). The technology is designed to work with existing Wi-Fi products that have been enabled with WEP. WPA provides improved data encryption through the Temporal Integrity Protocol (TKIP), which scrambles the keys using a hashing algorithm and by adding an integrity checking feature which makes sure that keys haven’t been tampered with. ESSID Selection: As this device supports multiple SSIDs, it is possible to configure a different security mode for each SSID (profile). Select an SSID from the drop-down list. Broadcast SSID: Select Enable or Disable from the drop-down list. This is the SSID broadcast feature. When this option is set to Enable, your wireless network name is broadcast to anyone within the range of your signal. If you're not using encryption then they could connect to your network. When this is disabled, you must enter the Wireless Network Name (SSID) on the client manually to connect to the network. 25 Multi-Function Gigabit Wireless-N Client Bridge WMM: Choose to Enable or Disable WMM. This is the Quality of Service (QoS) feature for prioritizing voice and video applications. This option can be further configured in WMM under the Wireless drop-down menu. Encryption: Select WPA pre-shared key from the drop-down list. WPA Type: Select TKIP, AES, or WPA2 Mixed. The encryption algorithm used to secure the data communication. TKIP (Temporal Key Integrity Protocol) provides per-packet key generation and is based on WEP. AES (Advanced Encryption Standard) is a very secure block based encryption. Note that, if the bridge uses the AES option, the bridge can associate with the access point only if the access point is also set to use only AES. Pre-shared Key Type:: The Key Type can be passphrase or Hex format. Pre-Shared Key: The key is entered as a pass-phrase of up to 63 alphanumeric characters in ASCII (American Standard Code for Information Interchange) format at both ends of the wireless connection. It cannot be shorter than eight characters, although for proper security it needs to be of ample length and should not be a commonly known phrase. This phrase is used to generate session keys that are unique for each wireless client. Click on the Apply button to save the changes. 3.2.4.2.4.4 Version 1.0 WPA RADIUS (802.1x) Click on the Security link under the Wireless drop-down menu. WPA encryption. WPA (Wi-Fi Protected Access) was designed to improve upon the security features of WEP (Wired Equivalent Privacy). The technology is designed to work with existing Wi-Fi products that have been enabled with WEP. WPA provides improved data encryption through the Temporal Integrity Protocol (TKIP), which scrambles the keys using a hashing algorithm and by adding an integrity checking feature which makes sure that keys haven’t been tampered with. This option works with a RADIUS Server to authenticate wireless clients. Wireless clients should have established the necessary credentials before attempting to authenticate to the Server through this Gateway. Furthermore, it may be necessary to configure the RADIUS Server to allow this Gateway to authenticate users. 26 Multi-Function Gigabit Wireless-N Client Bridge Version 1.0 ESSID Selection: As this device supports multiple SSIDs, it is possible to configure a different security mode for each SSID (profile). Select an SSID from the drop-down list. Broadcast SSID: Select Enable or Disable from the drop-down list. This is the SSID broadcast feature. When this option is set to Enable, your wireless network name is broadcast to anyone within the range of your signal. If you're not using encryption then they could connect to your network. When this is disabled, you must enter the Wireless Network Name (SSID) on the client manually to connect to the network. WMM: Choose to Enable or Disable WMM. This is the Quality of Service (QoS) feature for prioritizing voice and video applications. This option can be further configured in WMM under the Wireless drop-down menu. Encryption: Select WPA RADIUS from the drop-down list. WPA Type: Select TKIP, AES, or WPA2 Mixed. The encryption algorithm used to secure the data communication. TKIP (Temporal Key Integrity Protocol) provides per-packet key generation and is based on WEP. AES (Advanced Encryption Standard) is a very secure block based encryption. Note that, if the bridge uses the AES option, the bridge can associate with the access point only if the access point is also set to use only AES. RADIUS Server IP Address: Specify the IP address of the RADIUS server. RADIUS Server Port: Specify the port number of the RADIUS server, the default port is 1812. RADIUS Server Password: Specify the pass-phrase that is matched on the RADIUS Server. Click on the Apply button to save the changes. 3.2.4.2.5 Filter You will be able to block out connections from unauthorized MAC Address by setting filter policy. 27 Multi-Function Gigabit Wireless-N Client Bridge Version 1.0 Check on the Enable Wireless MAC Filtering Type in Description as a note for your own reference Enter the MAC address that you allow for accessing to your device Press Add to apply the policy Click Apply for the setting to take effect 3.2.4.2.6 Client List Click on the Client List link under the Wireless drop-down menu. This page displays the list of Clients that are associated to the Access Point. The MAC address and signal strength for each client is displayed. Click on the Refresh button to refresh the client list 3.2.4.2.7 VLAN Click on the VLAN link under the Wireless drop-down menu. A VLAN (Virtual LAN) is a group of hosts with a common set of requirements that communicate as if they were attached to the same wire, regardless of their physical location. 28 Multi-Function Gigabit Wireless-N Client Bridge Version 1.0 Virtual LAN: Choose to Enable or Disable the VLAN features. SSID1 Tag: Specify the VLAN tag. Click on the Apply button to save the changes. 3.2.4.2.8 WMM (Wireless Multimedia) Click on the WMM link under the Wireless drop-down menu. WMM is Quality of Service (QoS) for wireless and ensures that voice and video applications get priority in order to run smoothly. Specify the priority and then click on the Apply button. 29 Multi-Function Gigabit Wireless-N Client Bridge Version 1.0 3.2.4.3 Client Bridge Operating Mode In order to configure the device as an Access Point, select Client Bridge from the Operating Mode drop-down list. A dialog box will appear to notify you that the system will restart in order for the change to take effect. Click on the OK button to continue. Please wait while the device counts down and restarts into the new operating mode. Once the device has restarted into Client Bridge mode, you will see a new drop-down menu with fice options which are: Status, Basic, Advanced, AP Profile, and WMM. Each of the options is described in detail below. 3.2.4.3.1 Status Click on the Status link under the Wireless drop-down menu. This page will display the current wireless settings such as SSID, Channel, Security and BSSID (MAC address) 3.2.4.3.2 Basic Click on the Basic link under the Wireless drop-down menu. This page will display the current wireless settings such as SSID, Channel, Security and BSSID (MAC address). 30 Multi-Function Gigabit Wireless-N Client Bridge Version 1.0 • Radio: Choose to Enable or Disable the wireless radio. • Mode: This drop-down list is fixed to Client as this is the Client Bridge operating mode. • Band: Select the IEEE 802.11 mode from the drop-down list. For example, if you are sure that the wireless network will be using only IEEE 802.11g clients, then it is recommended to select 802.11g only instead of 2.4 GHz B+G which will reduce the performance of the wireless network. You may also select 802.11B+G+N. If all of the wireless devices you want to connect with this router can connect in the same transmission mode, you can improve performance slightly by choosing the appropriate "Only" mode. If you have some devices that use a different transmission mode, choose the appropriate "Mixed" mode. • Site Survey: Click on the Site Survey button to view a list of Access Points in the area. The Site Survey page displays information about devices within the 802.11b/g/n frequency. Information such as channel, SSID, BSSID, encryption, authentication, signal strength, and operating mode are displayed. Select the desired device and then click on the Add to AP Profile button. SSID: The SSID is a unique named shared amongst all the points of the wireless network. The SSID must be identical on all points of the wireless network and cannot exceed 32 characters. Status: Displays the current status of the device. Channel: The channels available are based on the country’s regulation. A wireless network uses specific channels in the wireless spectrum to handle communication between clients. Some channels in your area may have interference from other electronic devices. Click on the Apply button to save the changes. 31 Multi-Function Gigabit Wireless-N Client Bridge Version 1.0 3.2.4.3.3 Advanced Click on Advanced link under the Wireless drop-down menu. This page allows you to configure the fragmentation threshold, RTS threshold, beacon period, transmit power, DTIM Period, etc. Fragment Threshold: Packets over the specified size will be fragmented in order to improve performance on noisy networks. Specify a value between 256 and 2346. The default value is 2346. RTS Threshold: Packets over the specified size will use the RTS/CTS mechanism to maintain performance in noisy networks and preventing hidden nodes from degrading the performance. Specify a value between 0 and 2347. The default value is 2347. Beacon Period: Beacons are packets sent by a wireless Access Point to synchronize wireless devices. Specify a Beacon Period value between 20 and 1024. The default value is set to 100 milliseconds. DTIM Period: A DTIM is a countdown informing clients of the next window for listening to broadcast and multicast messages. When the wireless Access Point has buffered broadcast or multicast messages for associated clients, it sends the next DTIM with a DTIM Period value. Wireless clients detect the beacons and awaken to receive the broadcast and multicast messages. The default value is 1. Valid settings are between 1 and 10. Data Rate: You may select a data rate from the drop-down list, however, it is recommended to select auto. This is also known as auto-fallback. N Data Rate: You may select a data rate for 802.11n from the drop-down list, however, it is recommended to select auto. This is also known as auto-fallback. Preamble Type: Select a short or long preamble. For optimum performance it is recommended to also configure the client device as the same preamble type. Click on the Apply button to save the changes. 32 Multi-Function Gigabit Wireless-N Client Bridge Version 1.0 3.2.4.3.4 AP Profile Click on the AP Profile link under the Wireless drop-down menu. This page allows you to configure the profile of the Client Bridge including Security Setting exactly the same as the Access Point. 3.2.4.3.4.1 Manage AP Profile 1. Press Add/Edit to add/modify the SSID(s) of your device. 2. Setting Encryption type from Encryption dropdown list. (See 3.2.4.2.4.2 to 3.2.4.2.4.4) 3. Press Save to save your setting. 4. 5. 6. 7. Check one of the SSID in the table to Move Up or Move Down the display order Delete Selected to delete the SSID on check. Delete All to delete all SSID from the table Connect to configure your device using the SSID on check 3.2.4.3.5 WMM (Wireless Multimedia) Click on the WMM link under the Wireless drop-down menu. WMM is Quality of Service (QoS) for wireless and ensures that voice and video applications get priority in order to run smoothly. Specify the priority and then click on the Apply button. 33 Multi-Function Gigabit Wireless-N Client Bridge Version 1.0 34 Multi-Function Gigabit Wireless-N Client Bridge Version 1.0 3.2.4.4 WDS Operating Mode In order to configure the device as an Access Point, select WDS from the Operating Mode drop-down list. A dialog box will appear to notify you that the system will restart in order for the change to take effect. Click on the OK button to continue. Please wait while the device counts down and restarts into the new operating mode. Once the device has restarted into WDS mode, you will see a new drop-down menu with four options which are: Status, Basic, Advanced, and WMM. Each of the options is described in detail below. 3.2.4.4.1 Status Click on the Status link under the Wireless drop-down menu. This page will display the current wireless settings such as SSID, Channel, Security and BSSID (MAC address) 3.2.4.4.2 Basic Click on the Basic link under the Wireless drop-down menu. This page will display the current wireless settings such as SSID, Channel, Security and BSSID (MAC address). 35 Multi-Function Gigabit Wireless-N Client Bridge Version 1.0 • Radio: Choose to Enable or Disable the wireless radio. • Mode: This drop-down list is fixed to WDS as this is the Wireless Distribution operating mode. • Band: Select the IEEE 802.11 mode from the drop-down list. For example, if you are sure that the wireless network will be using only IEEE 802.11g clients, then it is recommended to select 802.11g only instead of 2.4 GHz B+G which will reduce the performance of the wireless network. You may also select 802.11B+G+N. If all of the wireless devices you want to connect with this router can connect in the same transmission mode, you can improve performance slightly by choosing the appropriate "Only" mode. If you have some devices that use a different transmission mode, choose the appropriate "Mixed" mode. Channel: Select a channel from the drop-down list. The channels available are based on the country’s regulation. A wireless network uses specific channels in the wireless spectrum to handle communication between clients. Some channels in your area may have interference from other electronic devices. Choose the clearest channel to help optimize the performance and coverage of your wireless network. MAC Address #: Specify the MAC address (BSSID) of up to four devices within the WDS. • Set Security: Setting data encryption type. (See 3.2.4.2.4.2 to 3.2.4.2.4.4) Click on the Apply button to save the changes. 3.2.4.4.3 Advanced Click on Advanced link under the Wireless drop-down menu. This page allows you to configure the fragmentation threshold, RTS threshold, beacon period, transmit power, DTIM Period, etc. 36 Multi-Function Gigabit Wireless-N Client Bridge Version 1.0 Fragment Threshold: Packets over the specified size will be fragmented in order to improve performance on noisy networks. Specify a value between 256 and 2346. The default value is 2346. RTS Threshold: Packets over the specified size will use the RTS/CTS mechanism to maintain performance in noisy networks and preventing hidden nodes from degrading the performance. Specify a value between 0 and 2347. The default value is 2347. Beacon Interval: Beacons are packets sent by a wireless Access Point to synchronize wireless devices. Specify a Beacon Period value between 20 and 1024. The default value is set to 100 milliseconds. DTIM Period: A DTIM is a countdown informing clients of the next window for listening to broadcast and multicast messages. When the wireless Access Point has buffered broadcast or multicast messages for associated clients, it sends the next DTIM with a DTIM Period value. Wireless clients detect the beacons and awaken to receive the broadcast and multicast messages. The default value is 1. Valid settings are between 1 and 10. Data Rate: You may select a data rate from the drop-down list, however, it is recommended to select auto. This is also known as auto-fallback. N Data Rate: You may select a data rate for 802.11n from the drop-down list, however, it is recommended to select auto. This is also known as auto-fallback. Channel Bandwidth: You may select a channel bandwidth in order to improve the efficiency of the network, however, it is recommended to select Auto 20/40MHz. This is also known as auto-fallback. Preamble Type: Select a short or long preamble. For optimum performance it is recommended to also configure the client device as the same preamble type. CTS Protection: CTS (Clear to Send) can be always enabled, auto, or disabled. By enabled CTS, the Access Point and clients will wait for a ‘clear’ signal before transmitting. It is recommended to select auto. Tx Power: You may control the transmit output power of the device by selecting a value from the drop-down list. This feature can be helpful in restricting the coverage area of the wireless network. Click on the Apply button to save the changes. 37 Multi-Function Gigabit Wireless-N Client Bridge Version 1.0 3.2.4.4.4 WMM (Wireless Multimedia) Click on the WMM link under the Wireless drop-down menu. WMM is Quality of Service (QoS) for wireless and ensures that voice and video applications get priority in order to run smoothly. Specify the priority and then click on the Apply button. 38 Multi-Function Gigabit Wireless-N Client Bridge 3.2.4.5 Version 1.0 Repeater Operating Mode In order to configure the device as an Access Point, select Repeater from the Operating Mode drop-down list. A dialog box will appear to notify you that the system will restart in order for the change to take effect. Click on the OK button to continue. Please wait while the device counts down and restarts into the new operating mode. Once the device has restarted into Repeater mode, you will see a new drop-down menu with eight options which are: Status, Basic, Advanced, Security, Filter, WPS, Client List, and WMM. Each of the options is described in detail below. 3.2.4.5.1 Status Click on the Status link under the Wireless drop-down menu. This page will display the current wireless settings such as SSID, Channel, Security and BSSID (MAC address) 39 Multi-Function Gigabit Wireless-N Client Bridge Version 1.0 3.2.4.5.2 Basic Click on the Basic link under the Wireless drop-down menu. This page will display the current wireless settings such as SSID, Channel, Security and BSSID (MAC address). • Radio: Choose to Enable or Disable the wireless radio. • Mode: This drop-down list is fixed to WDS as this is the Wireless Distribution operating mode. • Band: Select the IEEE 802.11 mode from the drop-down list. For example, if you are sure that the wireless network will be using only IEEE 802.11g clients, then it is recommended to select 802.11g only instead of 2.4 GHz B+G which will reduce the performance of the wireless network. You may also select 802.11B+G+N. If all of the wireless devices you want to connect with this router can connect in the same transmission mode, you can improve performance slightly by choosing the appropriate "Only" mode. If you have some devices that use a different transmission mode, choose the appropriate "Mixed" mode. • ESSID#: This device allows up for four SSIDs, select the SSID# that you would like to configure from the drop-down list. ESSID: The SSID is a unique named shared amongst all the points of the wireless network. The SSID must be identical on all points of the wireless network and cannot exceed 32 characters. • Channel: Select the channel as you wish to use for your device Click on the Apply button to save the changes. 40 Multi-Function Gigabit Wireless-N Client Bridge • Version 1.0 Site Survey: Click on the Site Survey button to view a list of Access Points in the area. The Site Survey page displays information about devices within the 802.11b/g/n frequency. Information such as channel, SSID, BSSID, encryption, authentication, signal strength, and operating mode are displayed. Select the desired device and then click on the Add to AP Profile button. SSID: The SSID is a unique named shared amongst all the points of the wireless network. The SSID must be identical on all points of the wireless network and cannot exceed 32 characters. Status: Displays the current status of the device. Channel: The channels available are based on the country’s regulation. A wireless network uses specific channels in the wireless spectrum to handle communication between clients. Some channels in your area may have interference from other electronic devices. Click on the Apply button to save the changes. 41 Multi-Function Gigabit Wireless-N Client Bridge Version 1.0 3.2.4.5.3 Advanced Click on Advanced link under the Wireless drop-down menu. This page allows you to configure the fragmentation threshold, RTS threshold, beacon period, transmit power, DTIM Period, etc. Fragment Threshold: Packets over the specified size will be fragmented in order to improve performance on noisy networks. Specify a value between 256 and 2346. The default value is 2346. RTS Threshold: Packets over the specified size will use the RTS/CTS mechanism to maintain performance in noisy networks and preventing hidden nodes from degrading the performance. Specify a value between 0 and 2347. The default value is 2346. Beacon Interval: Beacons are packets sent by a wireless Access Point to synchronize wireless devices. Specify a Beacon Period value between 20 and 1000. The default value is set to 100 milliseconds. DITM Period: A DTIM is a countdown informing clients of the next window for listening to broadcast and multicast messages. When the wireless Access Point has buffered broadcast or multicast messages for associated clients, it sends the next DTIM with a DTIM Period value. Wireless clients detect the beacons and awaken to receive the broadcast and multicast messages. The default value is 1. Valid settings are between 1 and 10. Data Rate: You may select a data rate from the drop-down list, however, it is recommended to select auto. This is also known as auto-fallback. N Data Rate: You may select a data rate for 802.11n from the drop-down list, however, it is recommended to select auto. This is also known as auto-fallback. Channel Bandwidth: You may select a channel bandwidth in order to improve the efficiency of the network, however, it is recommended to select Auto 20/40MHz. This is also known as auto-fallback. 42 Multi-Function Gigabit Wireless-N Client Bridge Version 1.0 Preamble Type: Select a short or long preamble. For optimum performance it is recommended to also configure the client device as the same preamble type. CTS Protection: CTS (Clear to Send) can be always enabled, auto, or disabled. By enabled CTS, the Access Point and clients will will wait for a ‘clear’ signal before transmitting. It is recommended to select auto. Tx Power: You may control the transmit output power of the device by selecting a value from the drop-down list. This feature can be helpful in restricting the coverage area of the wireless network. Click on the Apply button to save the changes. 3.2.4.5.4 Wireless Security Mode Click on the Security link under the Wireless drop-down menu. To protect your privacy this mode supports several types of wireless security: WEP WPA, WPA2, and 802.1x RADIUS. WEP is the original wireless encryption standard. WPA provides a higher level of security. The following section describes the security configuration in detail. 3.2.4.5.4.1 Security Disabled Click on the Security link under the Wireless drop-down menu. ESSID Selection: As this device supports multiple SSIDs, it is possible to configure a different security mode for each SSID (profile). Select an SSID from the drop-down list. Broadcast SSID: Select Enable or Disable from the drop-down list. This is the SSID broadcast feature. When this option is set to Enable, your wireless network name is broadcast to anyone within the range of your signal. If you're not using encryption then they could connect to your network. When this is disabled, you must enter the Wireless Network Name (SSID) on the client manually to connect to the network. WMM: Choose to Enable or Disable WMM. This is the Quality of Service (QoS) feature for prioritizing voice and video applications. This option can be further configured in WMM under the Wireless drop-down menu. Encryption: Select Disable from the drop-down list. Click on the Apply button to save the changes. 43 Multi-Function Gigabit Wireless-N Client Bridge 3.2.4.5.4.2 Version 1.0 WEP (Wired Equivalent Privacy) Click on the Security link under the Wireless drop-down menu. WEP is an acronym for Wired Equivalent Privacy, and is a security protocol that provides the same level of security for wireless networks as for a wired network. WEP is less secure as compares to WPA encryption. To gain access to a WEP network, you must know the key. The key is a string of characters that you use for password. When using WEP, you must determine the level of encryption. The type of encryption determines the key length. 128-bit encryption requires a longer key than 64-bit encryption. Keys are defined by entering in a string in HEX (hexadecimal - using characters 0-9, A-F) or ASCII (American Standard Code for Information Interchange - alphanumeric characters) format. ASCII format is provided so you can enter a string that is easier to remember. The ASCII string is converted to HEX for use over the network. Four keys can be defined so that you can change keys easily. A default key is automatically generated when WEP is enabled. ESSID Selection: As this device supports multiple SSIDs, it is possible to configure a different security mode for each SSID (profile). Select an SSID from the drop-down list. Broadcast SSID: Select Enable or Disable from the drop-down list. This is the SSID broadcast feature. When this option is set to Enable, your wireless network name is broadcast to anyone within the range of your signal. If you're not using encryption then they could connect to your network. When this is disabled, you must enter the Wireless Network Name (SSID) on the client manually to connect to the network. 44 Multi-Function Gigabit Wireless-N Client Bridge Version 1.0 WMM: Choose to Enable or Disable WMM. This is the Quality of Service (QoS) feature for prioritizing voice and video applications. This option can be further configured in WMM under the Wireless drop-down menu. Encryption: Select WEP from the drop-down list. Authentication Type: Select Open System, Shared Key, or auto. Authentication method from the drop-down list. An open system allows any client to authenticate as long as it conforms to any MAC address filter policies that may have been set. All authentication packets are transmitted without encryption. Shared Key sends an unencrypted challenge text string to any device attempting to communicate with the AP. The device requesting authentication encrypts the challenge text and sends it back to the access point. If the challenge text is encrypted correctly, the access point allows the requesting device to authenticate. It is recommended to select Auto if you are not sure which authentication type is used. Key Length: Select a 64-bit or 128-bit WEP key length from the drop-down list. Key Type: Select a key type from the drop-down list. 128-bit encryption requires a longer key than 64-bit encryption. Keys are defined by entering in a string in HEX (hexadecimal - using characters 0-9, A-F) or ASCII (American Standard Code for Information Interchange - alphanumeric characters) format. ASCII format is provided so you can enter a string that is easier to remember. Default Key: You may choose one of your 4 different WEP keys from below. Encryption Key 1-4: You may enter four different WEP keys. Enable 802.1x Authentication: Place a check in this box if you would like to use RADIUS authentication. This option works with a RADIUS Server to authenticate wireless clients. Wireless clients should have established the necessary credentials before attempting to authenticate to the Server through this Gateway. Furthermore, it may be necessary to configure the RADIUS Server to allow this Gateway to authenticate users. You will then be required to specify the RADIUS Server’s IP address, port, and password. Click on the Apply button to save the changes. 45 Multi-Function Gigabit Wireless-N Client Bridge 3.2.4.5.4.3 Version 1.0 WPA (Wi-Fi Protected Access) / Pre-shared Key Click on the Security link under the Wireless drop-down menu. WPA (Wi-Fi Protected Access) is designed to improve upon the security features of WEP (Wired Equivalent Privacy). The technology is designed to work with existing Wi-Fi products that have been enabled with WEP. WPA provides improved data encryption through the Temporal Integrity Protocol (TKIP), which scrambles the keys using a hashing algorithm and by adding an integrity checking feature which makes sure that keys haven’t been tampered with. ESSID Selection: As this device supports multiple SSIDs, it is possible to configure a different security mode for each SSID (profile). Select an SSID from the drop-down list. Broadcast SSID: Select Enable or Disable from the drop-down list. This is the SSID broadcast feature. When this option is set to Enable, your wireless network name is broadcast to anyone within the range of your signal. If you're not using encryption then they could connect to your network. When this is disabled, you must enter the Wireless Network Name (SSID) on the client manually to connect to the network. WMM: Choose to Enable or Disable WMM. This is the Quality of Service (QoS) feature for prioritizing voice and video applications. This option can be further configured in WMM under the Wireless drop-down menu. Encryption: Select WPA pre-shared key from the drop-down list. WPA Type: Select TKIP, AES, or WPA2 Mixed. The encryption algorithm used to secure the data communication. TKIP (Temporal Key Integrity Protocol) provides per-packet key generation and is based on WEP. AES (Advanced Encryption Standard) is a very secure block based encryption. Note that, if the bridge uses the AES option, the bridge can associate with the access point only if the access point is also set to use only AES. Pre-shared Key Type:: The Key Type can be passphrase or Hex format. Pre-Shared Key: The key is entered as a pass-phrase of up to 63 alphanumeric characters in ASCII (American Standard Code for Information Interchange) format at both ends of the wireless connection. It cannot be shorter than eight characters, although for proper security it needs to be of ample length and should not be a 46 Multi-Function Gigabit Wireless-N Client Bridge Version 1.0 commonly known phrase. This phrase is used to generate session keys that are unique for each wireless client. Click on the Apply button to save the changes. 3.2.4.5.5 Filter You will be able to block out connections from unauthorized MAC Address by setting filter policy. Check on the Enable Wireless MAC Filtering Type in Description as a note for your own reference Enter the MAC address that you allow for accessing to your device Press Add to apply the policy Click Apply for the setting to take effect 3.2.4.5.6 Client List Click on the Client List link under the Wireless drop-down menu. This page displays the list of Clients that are associated to the device. The MAC address and signal strength for each client is displayed. Click on the Refresh button to refresh the client list 47 Multi-Function Gigabit Wireless-N Client Bridge Version 1.0 3.2.4.5.7 WMM (Wireless Multimedia) Click on the WMM link under the Wireless drop-down menu. WMM is Quality of Service (QoS) for wireless and ensures that voice and video applications get priority in order to run smoothly. Specify the priority and then click on the Apply button. 48 Multi-Function Gigabit Wireless-N Client Bridge Version 1.0 3.3 Network 3.3.1 Status Click on the Status link on the Network navigation drop-down menu. This page will display the current LAN settings such as IP address, subnet mask, and MAC address. 3.3.2 Click on the Network link on the navigation drop-down menu. You will then see three options: Status, LAN, and WAN. Each option is described in detail below. LAN / DHCP Client, Server Click on the LAN link on the Network navigation drop-down menu. This page will allow you to configure the device as a static or dynamic IP address, along with DHCP server settings. 49 Multi-Function Gigabit Wireless-N Client Bridge Version 1.0 Bridge Type: Select Static IP or Dynamic IP from the drop-down list. If you select Static IP, you will be required to specify an IP address and subnet mask. If Dynamic IP is selected, then the IP address is received automatically from the external DHCP server. IP Address: Specify an IP address. IP Subnet Mask: Specify a subnet mask for the IP address. 802.1d Spanning Tree: Select Enable or Disable from the drop-down list. Enabling spanning tree will avoid redundant data loops. DHCP Server: Select Enable or Disable from the drop-down list. If this is enabled, you will be required to specify the lease time, start and end IP address range, and domain name. If DHCP server is disabled, then all the clients connected to this device will need to acquire an IP address from the DHCP server behind this device. Lease Time: Select a lease time from the drop-down list. Start IP: Specify the starting IP address for the DHCP server to assign IP addresses. End IP: Specify the last IP address for the DHCP server to end assigning IP addresses. Domain Name: Specify a domain name. Click on the Apply button to save the changes. 3.4 Management 3.4.1 Click on the Management link on the navigation drop-down menu. You will then see four options: Admin, SNMP, Firmware, and Configure. Each option is described in detail below. Admin Click on the Admin link on the Management navigation drop-down menu. This page allows you to configure a new password to login to the device. It is recommended to change the default password for security reasons. 50 Multi-Function Gigabit Wireless-N Client Bridge Version 1.0 Old Password: Specify the old password of the device. New Password: Specify a new password. Repeat New Password: Re-type the new password. Click on the Apply button to save the changes. 3.4.2 SNMP Click on the SNMP link on the Management navigation drop-down menu. This option allows you to assign the contact details, location, community name and trap settings for SNMP. This is a networking management protocol used to monitor networkattached devices. SNMP allows messages (called protocol data units) to be sent to various parts of a network. Upon receiving these messages, SNMP-compatible devices (called agents) return data stored in their Management Information Bases. . SNMP Active: Choose to enable or disable the SNMP feature. SNMP Version: You may select a specific version or select All from the drop-down list. Read Community Name: Specify the password for access the SNMP community for read only access. Set Community Name: Specify the password for access to the SNMP community with read/write access. System Location: Specify the location of the device. 51 Multi-Function Gigabit Wireless-N Client Bridge Version 1.0 System Contact: Specify the contact details of the device. Send SNMP Trap: Specify the IP address of the computer that will receive the SNMP traps. Trap Active: Choose to enable or disable the SNMP trapping feature. . Trap Manager IP: Specify the password for the SNMP trap community. Click on the Apply button to save the changes. 3.4.3 Firmware Upgrade Click on the Firmware link in the navigation menu. This page allows you to upgrade the firmware of the device in order to improve the functionality and performance. Ensure that you have downloaded the appropriate firmware from the vendor’s website. Connect the device to your PC using an Ethernet cable, as the firmware cannot be upgraded using the wireless interface. Click on the Browse button to select the firmware and then click on the Apply button. 3.4.4 Restore to Factory Default Click on the Configure link in the navigation menu Click on the Reset button to reset the device to the factory default settings. Once the dialog box appears, click on the OK button to confirm the action. Note: The current settings will be lost. 52 Multi-Function Gigabit Wireless-N Client Bridge Version 1.0 Click on the OK button to continue. You will then see the Rebooting page. Please wait while the system is rebooting. Note: Do no un-plug the device during this process as this may cause permanent damage. 3.4.5 Backup Settings Click on the Configure link in the navigation menu Click on the Save button you will be provided with download link Click on download link to save file to your local disk. 3.4.6 Restore Settings Click on the Configure link in the navigation menu 53 Multi-Function Gigabit Wireless-N Client Bridge Version 1.0 Click on the Browse button to select the file that has been backed up and then click on the Upload button. 3.4.7 Rest Press Apply to reset your device. 54 Multi-Function Gigabit Wireless-N Client Bridge Version 1.0 3.5 Tools 3.5.1 Click on the Tools link on the navigation drop-down menu. You will then see four options: Time zone, power saving, diagnosis, and reset. Each option is described in detail below. Time Setting Click on the Time Setting link in the navigation menu. This feature allows you to configure, update, and maintain the correct time on the device’s internal system clock as well as configure the time zone. The date and time of the device can be configured manually or by synchronizing with a time server. Note: If the device losses power for any reason, it will not be able to keep its clock running, and will not display the correct time once the device has been restarted. Therefore, you must re-enter the correct date and time. Time Zone: Select your time zone from the drop-down list. NTP Time Server: Specify the NTP server’s IP address to synchronize the device’s clock to a Network Time Server over the Internet. Daylight Saving: Place a check in this box to enable daylight savings time. And select the date/time from the drop-down list. Click on the Apply button to save the changes. 55 Multi-Function Gigabit Wireless-N Client Bridge Version 1.0 3.5.2 Diagnosis Click on the Diagnosis link in the navigation menu. This page allows to Ping a device to check if it is active. Address to Ping: Specify the IP address to ping and then click on the Start button. The result will then display in the field below. 56 Multi-Function Gigabit Wireless-N Client Bridge Version 1.0 Appendix A – Specifications Hardware Summary MCU RT3050, 320MHz Memory 32MB SDRAM Flash 4MB Expansion Slots N/A Physical Interface z LAN: One 10/100Mbps z Reset Button z Power Jack LEDs Status z Power/ Status z LAN (10/100Mbps) z WLAN (Wireless Connection) Power Requirements z Power Supply: 90 to 240 VDC ± 10%, 50/60 Hz (depends on different countries) z Device: 7.5V/1A Regulation Certifications z FCC Part 15/UL, CE Radio Specifications Frequency Band 2.400~2.484 GHz Media Access Protocol Carrier sense multiple access with collision avoidance (CSMA/CA) Modulation Technology - OFDM: BPSK, QPSK, 16-QAM, 64-QAM - DBPSK, DQPSK, CCK Operating Channels 11 for North America, 14 for Japan, 13 for Europe Receive Sensitivity - IEEE802.11n MCS0 @ -79dBm MCS7 @ -61dBm - IEEE802.11g 6Mbps@ -90dBm 54Mbps@ -70dBm - IEEE802.11b 1Mbps@ -87dBm (Typical) 11Mbps@ -87dBm 57 Multi-Function Gigabit Wireless-N Client Bridge Available transmit power Version 1.0 - IEEE802.11n/g 17dBm@6~9 Mbps / MCS0 17dBm@12~18 Mbps / MCS2 15dBm@24~36 Mbps / MCS4 14dBm@48~54 Mbps / MCS6 - IEEE802.11b 17.5dBm@1, 11Mbps Antenna *1 Detachable Dipole antenna Peak Gain = 2 dBi (Reverse) Software Features Topology Infrastructure Operation Mode Client Bridge / Access Point / WDS AP / WDS Bridge / Client Router / Router / Universal Repeater LAN DHCP Server DHCP Client Wireless Wireless Mode – 11b / 11g / 11n / Disable Transmission Rate ¾ 11 b/g: 54, 48, 36, 24, 18, 12, 11, 9, 6, 5.5, 2, 1 in Mbps ¾ 11n: MCS Index Guard Interval 800ns Guard Interval 400ns 20MHz (Mbps) 40MHz (Mbps) 20MHz (Mbps) 40MHz (Mbps) 0 6.5 13.5 7.2 15 1 13 27 14.4 30 2 19.5 40.5 21.7 45 3 26 54 28.9 60 4 39 81 43.3 90 5 52 108 57.8 120 6 58.5 121.5 65 135 7 65 135 72.2 157.5 Signal Strength Bandwidth Selection- 40/20 MHz for 11n Security WEP Encryption-64/128 bit WPA Personal (WPA-PSK using TKIP or AES) WPA Enterprise (WPA-EAP using TKIP) 802.1x Authenticator 802.1x Supplicant- MD5/TTLS (CB & CR mode) Hide SSID in beacons Multiple SSID with 802.1q VLAN tagging (up to 4 SSIDs) in AP mode 58 Multi-Function Gigabit Wireless-N Client Bridge Version 1.0 MAC Filter(AP mode) WLAN L2 isolation(AP mode) Wireless STA (Client) connected list (Idle/Connection Time, Pkt statistics) QoS WMM Management Configuration Web-based configuration (HTTP)/Telnet Firmware Upgrade Upgrade firmware via web-browser Keep latest setting when f/w update Administrator Setting Administrator password change Reset Setting Reboot Reset to Factory Default System monitoring Status, Statistics and Event Log SNMP V1, V2c MIB MIB I, MIB II (RFC1213) and Private MIB Bandwidth Measurement IP range and bandwidth management Backup & Restore Settings through Web Environment & Physical Temperature Range Operating: 0°C to 45°C (32°F to 113°F) Storage: -20°C to 70°C (-4°F to 158°F) Humidity (non-condensing) 5%~95% typical Dimensions 125mm (L) x 108mm (W) x 31mm (H) Weight 350g 59 Multi-Function Gigabit Wireless-N Client Bridge Version 1.0 Appendix B – FCC Interference Statement Federal Communication Commission Interference Statement This equipment has been tested and found to comply with the limits for a Class B digital device, pursuant to Part 15 of the FCC Rules. These limits are designed to provide reasonable protection against harmful interference in a residential installation. This equipment generates uses and can radiate radio frequency energy and, if not installed and used in accordance with the instructions, may cause harmful interference to radio communications. However, there is no guarantee that interference will not occur in a particular installation. If this equipment does cause harmful interference to radio or television reception, which can be determined by turning the equipment off and on, the user is encouraged to try to correct the interference by one of the following measures: z z z z Reorient or relocate the receiving antenna. Increase the separation between the equipment and receiver. Connect the equipment into an outlet on a circuit different from that to which the receiver is connected. Consult the dealer or an experienced radio/TV technician for help. FCC Caution: Any changes or modifications not expressly approved by the party responsible for compliance could void the user's authority to operate this equipment. This device complies with Part 15 of the FCC Rules. Operation is subject to the following two conditions: (1) This device may not cause harmful interference, and (2) this device must accept any interference received, including interference that may cause undesired operation. IMPORTANT NOTE: FCC Radiation Exposure Statement: This equipment complies with FCC radiation exposure limits set forth for an uncontrolled environment. This device complies with FCC RF Exposure limits set forth for an uncontrolled environment, under 47 CFR 2.1093 paragraph (d)(2). This transmitter must not be co-located or operating in conjunction with any other antenna or transmitter. 60 Multi-Function Gigabit Wireless-N Client Bridge Version 1.0 Index 8 802.1x, 2, 3, 6, 20, 22, 23, 30, 32, 33, 40, 42, 43, 49, 51, 52, 68 A Access Point Operating Mode, 17 admin, 11 Advanced, 2, 3, 17, 19, 23, 24, 33, 34, 35, 37, 39, 43, 44, 46, 48, 52, 53 Applications, 7 ASCII, 21, 22, 23, 30, 32, 33, 35, 41, 42, 43, 50, 51, 52 B Backup Settings, 3, 64 Band, 18, 29, 38, 47, 67 Beacon Period, 19, 39, 48 Broadcast SSID, 20, 21, 23, 24, 30, 31, 32, 34, 40, 41, 43, 44, 49, 50, 51, 53 HEX, 21, 22, 30, 32, 41, 42, 50, 51 I Introduction, 5 IP Address Configuration, 9 K Key Length, 22, 31, 42, 51 Key Type, 22, 23, 32, 33, 35, 42, 43, 51, 52 L LAN / DHCP Client, Server, 3, 55 Logging In, 11 M Management, 3, 6, 11, 61, 62, 69 N C Channel, 17, 18, 19, 28, 29, 37, 39, 46, 47, 48, 68 Client Bridge Operating Mode, 2, 16, 28 Client List, 2, 3, 17, 26, 35, 37, 45, 46, 54 Community, 62 CTS Protection, 20, 40, 48 D Data Rate, 5, 19, 39, 48 DHCP, 3, 5, 55, 56, 57, 58, 68 Diagnosis, 3, 66 DITM Interval, 19, 39, 48 DNS Address, 57 Dynamic IP Address, 58 Network Configuration, 8 P Package Contents, 6 Power Saving, 3, 66 PPPoE, 3, 6, 56, 59 PPTP, 3, 56, 60, 68 Preamble Type, 20, 39, 48 R Repeater Operating Mode, 3, 16, 46 Reset, 3, 63, 66, 67, 69 Restore to Factory Default, 3, 63 Router, 56 RTS Threshold, 19, 39, 48 E Encryption, 20, 22, 23, 24, 30, 31, 33, 34, 35, 40, 42, 43, 44, 49, 50, 52, 53, 68 ESSID, 13, 18, 20, 21, 23, 24, 30, 31, 32, 34, 38, 40, 41, 43, 44, 47, 49, 50, 51, 53 Event Log, 2, 12, 14, 69 F FCC, 3, 67, 70 Features and Benefits, 5 Firmware Upgrade, 3, 62, 69 Fragment Threshold, 19, 39, 48 S Safety Guidelines, 7 Schedule, 2, 12, 13, 14 Security Disabled, 2, 3, 20, 30, 40, 49 SNMP, 3, 6, 11, 61, 62, 69 Spanning Tree, 56 Specifications, 67 Statistics, 2, 15, 69 Status, 2, 3, 12, 13, 17, 25, 28, 29, 37, 46, 55, 67, 69 Switching between Operating Modes, 2, 16 System, 12 System Requirements, 7 H T Hardware Installation, 9 Time Zone, 3, 65 61 Multi-Function Gigabit Wireless-N Client Bridge Tools, 3, 11, 13, 65 Trap, 62 Tx Power, 20, 40, 49 V VLAN, 2, 11, 17, 26, 68 W WAN, 3, 9, 11, 15, 55, 56, 57, 58, 59, 60 WDS Operating Mode, 2, 37 Version 1.0 Web Configuration, 11 WEP (Wired Equivalent Privacy), 2, 3, 21, 22, 23, 30, 32, 33, 41, 42, 43, 49, 51, 52 Wireless Operating Modes, 2, 16 Wireless Security Mode, 2, 3, 20, 30, 40, 49 WMM, 2, 3, 6, 11, 17, 20, 22, 23, 24, 26, 28, 30, 31, 33, 34, 35, 37, 40, 42, 43, 44, 45, 46, 49, 50, 52, 53, 54, 68 WPA (Wi-Fi Protected Access) / Pre-shared Key, 2, 3, 22, 32, 42, 51 WPS (Wi-Fi Protected Setup), 2, 25 62


