1
Afinia H800 3D Printer
Unpackaging
for Windows and Mac OS X
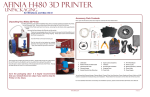
Accessory Pack Contents
Next, open the Accessory Pack and verify the contents with those listed below:
Unpacking Your Afinia 3D Printer
Your Afinia 3D Printer comes with the Installation Disc, Manual (on the
installation disc), Unpack and Setup Guide (this
document), and Accessories.
3
1
4
2
The Afinia H800 3D Printer
weighs over 40 pounds and
should be team lifted.
Remove the power cord and 4 perf boards from the top foam piece.
6
Remove top foam from the box. Lift the foam ring and plastic bag from around the printer.
5
With two people, carefully lift the Printer from the box.
Remove the foam between the Extruder and the printer.
Filament
USB Cable
3.
4.
5.
6.
7.
8.
9.
10.
Power Cord
Power Supply
Putty Knife
FR-4 (Perf) Boards (4)
Snipping Pliers
Nozzle Wrench
Spare Nozzle
Hex Wrenches
9
7
Lift the foam sheet below the printer and remove the Accessory Pack, Power Supply,
Putty Knife, and Snipping Pliers.
1.
2.
8
10
Lift the top cover and carefully lift out the foam above the platform.
Open the front door and carefully remove the two pieces of foam from under the
platform. Tip each foam piece back until it is lying flat, then turn the foam counterclockwise until the left end of the foam is through the door and remove.
You will need the Filament Spool, Power Supply and Power Cable, and USB Cable to complete the Hardware Setup and
Installation. Please follow the instructions on the other side of this document.
For more detailed information on the Setup and Installation process, please see the Afinia 3D Printer User’s Manual on your
installation disc.
Use the snipping pliers to carefully cut the 6 yellow-labeled
retaining strap loops from around the Print Head rails.
Cut only the straps!
Save the foam and packaging!
www.afinia.com
15.08.31
Afinia H800 3D Printer
Installation & sETUP Guide
for Windows and Mac OS X
To install and set up your Afinia 3D Printer, please follow these steps:
For more information, please see the Afinia 3D Printer User’s Manual!
4. Prepare the Platform
Before you start printing, the platform must be prepared so that the model adheres to the platform enough to be printed
without the model moving. There are several options for preparing the platform, such as clipping the supplied perf board
onto the heater bed, that are discussed in the User’s Manual.
(the Manual is on the installation disc)
1. Setting Up the Printer
Always have the print surface you will be using installed before Leveling or Auto-Leveling.
A. Connect the power adapter to the power interface and turn on the power switch.
B. Press and hold the Initialize button until the printer beeps.
5. Level the Print Platform
C. Thread the filament into the Filament Tube.
To print correctly, the platform must be level. Perform the following steps:
A. Open the Maintenance dialog box from the 3D Print menu.
B. Click the To: button to bring the platform to the height shown, then slowly increment the height
until the platform is about 2mm from the nozzle, clicking To: after each increase.
C. Use the five position buttons to check that the platform at all four corners and the
center are the same distance from the nozzle.
D. Adjust the platform if the platform is not the same distance from the nozzle at all five
points until it is level. Turn the three 3 platform dials until all four corners and the
center of platform are allclose to the same distance from the nozzle.
D. Feed the filament through the tube until about 4 inches of filament extends from the end
of the tube.
E. Put the ABS plastic spool onto the holder with the end of the filament pointing up from the
back and replace the magnetic cover.
F. Insert about 2 inches of the end of the filament into the left top side of the extruder.
G. Long-press the Filament button. The extruder will run when the nozzle is hot enough.
Turning a dial clockwise will raise the platform above that dial.
2. Install the Software and Drivers
6. Auto-Level the Platform
Mac
After physically leveling the platform, run the Auto-Level utility which will help accomodate an uneven print surface.
Insert the Installation Disc into your Mac. Open the disc, go into the Mac folder, and double-click the Afinia Mac
Setup.pkg icon. Follow the prompts through the installation. The drivers will be added and the Afinia software will be
installed to the Applications folder.
Windows
Insert the Installation Disc in your PC. Start the Afinia 3D Printer setup.exe file and install it to the specified directory.
Follow the Installer instructions to be sure the drivers and software are in place before connecting the Afinia 3D Printer to
the PC.
For installation on Windows XP, you will need to manually specify the driver location.
•
•
If you are installing from the Installation Disc, select the disc as the location of the drivers.
If you are installing from a downloaded installer, the drivers are copied to the Program files\Afinia\Afinia 3D
Printer\Drivers folder; load the drivers from that location during the hardware installation. For more details on this
process, please see the User’s Manual.
A. Select Auto Level from the 3D Print menu.
B. The printer will run through a 9-point calibration routine.
C. Once the routine is complete, click the OK button to start the Nozzle Height detection.
7. Auto-Detect Nozzle Height
The Auto-Detect Nozzle Height will run after the Auto-Level. You can also run Nozzle Height
Detect manually from the 3D Print menu.
If you are using a print surface other than the supplied Perf Boards, you must run the Nozzle
Height manually.
A. Click the OK button after the Auto-Level completes.
B. The Printer will raise the platform until the nozzle contacts the height probe.
C. The detected nozzle height will be displayed and automatically set for you.
3. Load the Print Material Filament using the Software
This process will be the same on both Mac and Windows.
A. Start the Afinia 3D Software (refer to the software install procedure if you
have not already installed it), and select Initialize from the 3D Print menu.
B. After the Printer has initialized, select Maintenance from the 3D Print
menu. Click the Extrude button. After the printer nozzle has warmed up
to 260° C, the printer will beep.
C. Once the nozzle is heated, push the filament into the hole at the top of the
extruder head and hold it there with gentle pressure until the extruder
motor starts to pull it through. A thin filament of material will extrude for a
short period of time.
www.afinia.com
15.08.31