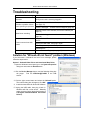
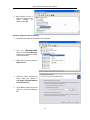
1
Afinia
H-Series 3D Printer
Version 1.1
Afinia H-Series 3D Printer User’s Manual
2
Afinia H-Series 3D Printer User’s Manual
TABLE OF CONTENTS
Introduction .................................................................................................... 5
Safety Precautions ..................................................................................... 5
Protection ................................................................................................... 5
Overview ......................................................................................................... 6
Unpacking the Afinia H-Series 3D Printer ................................................... 7
Installing the Afinia H-Series 3D Printer ...................................................... 8
Attaching the Filament Spool ...................................................................... 8
Driver and Software Installation .................................................................. 9
Installing the Printer .................................................................................... 9
Loading the Print Material Filament .......................................................... 10
Getting Ready to Print ................................................................................. 11
Preparing the Platform .............................................................................. 11
Starting the Afinia 3D Program ................................................................. 12
Initializing the Printer ................................................................................ 12
Leveling the Print Platform........................................................................ 13
Calibrating the Nozzle Height ................................................................... 13
Other Maintenance Options ...................................................................... 14
Printing with the H-Series 3D Printer ......................................................... 16
Loading a 3D Model ................................................................................. 16
View Options ............................................................................................ 17
Model Transformations ............................................................................. 18
Placing Models onto the Build Platform .................................................... 19
Print Setup Options .................................................................................. 20
Printing ..................................................................................................... 23
Print Options ............................................................................................. 23
3D Model Removal ....................................................................................... 25
Removing Support Material ...................................................................... 26
3D Printer Maintenance ............................................................................... 27
Changing the Filament/Spool ................................................................... 27
Vertical Calibration.................................................................................... 27
Cleaning the Nozzle ................................................................................. 28
Removing / Changing the Nozzle ............................................................. 29
Cleaning the Platform ............................................................................... 29
Lubrication of Bearings ............................................................................. 29
Spare Parts............................................................................................... 29
Tips & Tricks................................................................................................. 30
Status Indicator ............................................................................................ 30
Troubleshooting ........................................................................................... 31
Solution for "Winusb.dll not found" problem (Windows) ............................ 31
Specifications............................................................................................... 33
Printer Physical Characteristics ................................................................ 33
Specifications ........................................................................................... 33
Environmental specifications .................................................................... 33
Technical Support ........................................................................................ 34
3
Afinia H-Series 3D Printer User’s Manual
FCC ID: 026-H479
This device complies with Part 15 of the FCC Rules. Operation is subject to the following two conditions: (1)
this device may not cause harmful interference, and (2) this device must accept any interference received,
including interference that may cause undesired operation.
Changes or modifications not expressly approved by the party responsible for compliance could void the
user's authority to operate the equipment.
NOTE: This equipment has been tested and found to comply with the limits for a Class B digital device,
pursuant to Part 15 of the FCC Rules. These limits are designed to provide reasonable protection against
harmful interference in a residential installation. This equipment generates, uses, and can radiate radio
frequency energy and, if not installed and used in accordance with the instructions, may cause harmful
interference to radio communications. However, there is no guarantee that interference will not occur in a
particular installation. If this equipment does cause harmful interference to radio or television reception,
which can be determined by turning the equipment off and on, the user is encouraged to try to correct the
interference by one or more of the following measures:
• Reorient or relocate the receiving antenna.
• Increase the separation between the equipment and receiver.
• Connect the equipment into an outlet on a circuit different from that to which the receiver is
connected.
• Consult the dealer or an experienced radio/TV technician for help.
4
Afinia H-Series 3D Printer User’s Manual
Introduction
Congratulations on purchasing an Afinia H-Series 3D Printer. The Afinia H-Series 3D Printer is
designed with ultimate portability and simplicity in mind. The system and software allow you to
print great models in a few easy steps, even if you have never used a 3D printer before. The
Afinia H-Series 3D printer combines years of experience and innovation to make printing 3D
models easy through its reliably simple hardware and software design.
Safety Precautions
Please read this section carefully before using the printer.
•
•
•
•
•
•
The printer can only be used with the power adapters supplied by Afinia, or the product
may be damaged, with a risk of fire.
To avoid burning or model deformation, do not touch the model, nozzle, or the platform by
hand or any other part of the body while the printer is working or immediately after it has
finished printing.
Protective glasses should always be worn when removing support material, especially
PLA.
The brown sections of the currently supplied gloves melt at around 200º C; please do not
hold the extruder block with the gloves.
There is a slight smell from ABS when it is being extruded. A well-ventilated room is
recommended; however when printing, keep the printer away from any drafts as this can
affect the warping of ABS prints.
When ABS is burnt it releases toxic fumes. Never set the nozzle temperature high
enough to burn the material.
The following classifications are used in this manual:
CAUTION: Indicates a potentially hazardous situation which, if not avoided, may
result in minor or moderate injury.
WARNING: Indicates a potentially hazardous situation which, if not avoided, may
result in serious injury.
GLOVES: When performing certain maintenance procedures, the machine may
be hot and gloves are required to avoid burns.
SAFETY GLASSES: Wear safety glasses to avoid injury to your eyes.
Protection
•
•
•
•
The printer must not be exposed to water or rain, or damage may occur.
Do not shut down the Afinia H-Series 3D Printer or pull out the USB cable when loading a
digital model or the model data may be lost.
When using the “Extrude” function, keep at least 50mm between the nozzle and the
platform. If too close, the nozzle may get blocked.
The printer is designed to work properly at an ambient temperature of between 60°F and
85°F and humidity of between 20% and 50%. Operating outside these limits may result
in low quality models.
5
Afinia H-Series 3D Printer User’s Manual
Overview
The Afinia H-Series 3D Printer primarily consists of the Extruder, Print Platform, Material Spool,
and Filament, all supported by the Pedestal. The Printer is initialized with a single switch, and
calibrating the position of the print platform is done using the included Afinia software.
The Afinia 3D software sends the print data from a Mac or PC to the Printer over a single USB
cable. The Print Platform moves both vertically and front-to-back while the Extruder moves
left-to-right, providing the necessary 3 axes of operation (see Figure 2). The Extruder delivers
the Filament from the Material Spool into the Nozzle, which heats the filament to printing
temperature and deposits it on the Platform.
Filament
Tube
Extruder
Guard
Filament
Guide
Plastic
Filament
Nozzle
Material
Spool
Power
Switch
Platform
Pedestal
Status
Indicator
Power
Connection
Initialization
Switch
USB
Port
Figure 1: Front and Back views of the Afinia H-Series 3D Printer
Figure 2: Axes of Operation
Z Axis:
Vertical
Extruder or Y Axis:
Left to Right
Platform or X Axis:
Front to Back
6
Afinia H-Series 3D Printer User’s Manual
Unpacking the Afinia H-Series 3D Printer
Remove the Installation Disc, Manual, Quick Start Guide, and Accessories Pack from the box.
Next, lift the Afinia H-Series 3D printer from the box. Remove the foam from both sides of the
Printer and set the Printer on its base with the back of the Printer
facing you.
There are 2 packaging clips that protect the Printer during shipping
that need to be removed. Both clips should be saved in the
event that you need to ship the Printer in the future!
The first clip to be removed is used to hold the Extruder assembly in
place during shipping. Carefully peel the strapping tape down, and
then slide the clip down and off the Printer.
The second clip is used to help keep the Platform Arm secure during
shipping. To remove the clip, place your hand under the platform
X-axis arm and gently lift. Do not lift the arm by holding onto the
platform!
Once the platform arm has been lifted a few inches, rotate the top of
the clip towards the front of the printer. Once in the correct position,
the clip will slip over the Z-axis arm.
Next, open and check the contents of the Accessory Pack:
•
Reel of Filament (1, Natural)
•
Nozzle Wrench
•
Power Supply
•
Hex Wrenches
•
Power Cable
•
Spare screws & washers
•
USB Cable
•
Gloves (1 pair)
•
FR-4 (Perf) Board (3)
•
Putty Knife
•
FR-4 Board Clips (6)
•
Exacto Knife and blades
•
FR-4 Board Cleaning Tool (3)
•
Snipping Pliers
•
Filament Guide Tube
•
Tweezers
•
Filament Hanger
You will need the Power Supply and Cable, Hex Wrenches, Filament Spool, Filament Hanger,
Filament Tube, and USB Cable to complete the Afinia H-Series 3D Printer installation.
7
Afinia H-Series 3D Printer User’s Manual
Installing the Afinia H-Series 3D Printer
Attaching the Filament Spool
Attach the Filament Spool with these steps:
A. Connect the power adapter to the power
interface and turn on the power switch.
B. Install the ABS plastic spool holder and filament guide. Unscrew the lower right screw
from the left side of the Printer. Use this same screw to attach the spool holder with the
bottom right lip of the spool holder locked onto the printer’s corner and the top of the
holder mounted over the upper left screw.
C. Put the ABS Material Spool onto the holder with the end of the filament pointing up from
the back. Thread the filament through the Filament Guide at the top of the spool holder.
D. Insert the end of filament into one end of the Filament tube. Feed the filament through
the tube until about 4 inches of filament protrudes from the tube.
8
Afinia H-Series 3D Printer User’s Manual
Driver and Software Installation
Mac
Insert the Installation Disc into your Mac. Open the disc, go into the Mac folder, and
double-click the Afinia Mac Setup.pkg icon. Follow the prompts through the installation.
The drivers will be added and the Afinia 3D Software will be installed to the Applications
folder.
Windows
Insert the Installation Disc into your PC. If the installer does not launch automatically, start
the Afinia H-Series 3D Printer setup.exe file in the PC directory on the installation disc and
install to the specified directory (default is Program files\Afinia\Afinia 3D Printer).
Note: This installs the Afinia H-Series 3D Printer software, the Afinia H-Series 3D Printer
drivers, and the Afinia H-Series 3D Printer sample files into your Program files\Afinia\Afinia
3D Printer folder.
Follow the instructions in the Installer to be sure the drivers and software are all in place
before attempting to use the Printer. The instructions below will follow the same order as
those in the Installer.
Installing the Printer
USB Connection
Mac
Simply connect the Printer to your Mac using the USB connection on the back of the Printer.
Windows Vista, and Windows 7
As part of the installation, the 3D Printer drivers are pre-installed and you will be prompted to
connect the Printer to your PC. The Printer will be recognized and automatically installed when it
is connected to your PC.
Windows XP
Since XP does not have the driver pre-installation ability,
the drivers must be manually installed when the Printer
is connected to the PC. Follow these steps:
A. Connect the printer to a computer with the USB
cable. If the computer displays the “Found New
Hardware Wizard” window, choose No, not this
time, and click the Next button.
B. Choose Install from a list or specific location
(Advanced) and click Next.
9
Afinia H-Series 3D Printer User’s Manual
C. Select the option to Search removable
media; the drivers are located on the
installation disc.
If you are installing from a download, click
Browse, then navigate to C:\Program
files\Afinia\Afinia 3D Printer\Driver, then
Next.
D. If the following dialog box appears, click
Continue Anyway, and the drivers will install
automatically.
Loading the Print Material Filament
This process will be the same on both Mac and
Windows.
A. Start the Afinia H-Series 3D Software (refer to
the software install procedure if you have not
already installed it), and select Maintenance
from the 3D Print menu. Click the Extrude
button. After the printer nozzle has warmed
up to 260° C, the printer will beep; you can
also monitor the nozzle temperature in the
Maintenance window.
B. Once the nozzle is heated, push the
filament into the hole at the top of the
extruder head and hold it there with
gentle pressure until the extruder motor
starts pulling it through the extrusion
head. The extruder will extrude a thin
filament of material for a short period of
time.
10
Afinia H-Series 3D Printer User’s Manual
Getting Ready to Print
Preparing the Platform
Before you start printing, the platform must be prepared so that the model adheres to the platform
enough to be printed without the model moving. At the same time, you will want the model to be
easy to remove from the platform after printing. There are several options for preparing the
platform:
FR-4 Board (Glass-reinforced Epoxy Laminate)
Many users have reported excellent results by using a piece of FR-4 Board to cover the build
platform. FR-4 Board is a perforated, glass-reinforced epoxy laminate sheet.
When using FR-4 Board, the first layer of the raft pushes
plastic into all the perforations, and this provides a strong
mechanical bond with the surface that prevents it from
later lifting. The FR-4 Board can be either taped down
(with masking tape or double-sided tape), or clipped to
the platform as shown in the picture to the right. Make
sure the clips are on the front and back of the platform
only to avoid interfering with the platform movement!
It can be easier to remove the model from the FR-4
Board after the model has cooled down. As the plastic
cools, it shrinks away from the perforations, which make
it easier to pull out.
Some FR-4 Boards may work better than others. For consistent printing, it is recommended that
you use the FR-4 Board included with the Printer.
Blue Masking Tape
Many
users
have
reported
successfully using Blue Masking Tape
as a platform surface. Simply cover
the platform with a layer of blue
masking tape with as little overlap as
possible and print onto the tape.
Replace the tape when it wears out.
Whichever
platform
preparation
method you use, the two factors that
most reduce the risk of warping on
large prints are ensuring that the
platform is well leveled and well
pre-heated.
11
Afinia H-Series 3D Printer User’s Manual
Starting the Afinia 3D Software
If the application is not already open, click the Afinia 3D icon on the desktop (Windows) or in the
Applications folder (Mac). The software should open and appear as shown below:
Windows version
Mac version
Initializing the 3D Printer
Before anything can be printed, the printer must be initialized. Click the Initialize option from the
3D Print menu. The printer will beep and the initialization procedure will begin. The printer will
then return the platform and print head to the printer’s origin and beep again when it is ready.
Windows version
Mac version
The front Initialization Switch can also be used for initialization. Hold down the Initialization
Switch for one second to trigger the initialization procedure. The printer will beep and the
initialization procedure will begin. The printer will then return the platform and print head to the
printer’s origin and beep again when it is ready.
TIP: If your printer is not responding properly, the first thing to try is to re-initialize the printer by
clicking the Initialize option from the 3D Print menu.
12
Afinia H-Series 3D Printer User’s Manual
Leveling the Print Platform
Before calibrating the nozzle height, always check the vertical nozzle distance from each corner
and center of the print platform. Open the Maintenance dialog box from the 3D Print menu.
If you already know the nozzle height, enter that height minus 1.8mm in the To: box, then click the
To: button. If your nozzle height is 135.3, for example, enter 133.5.
If you do not yet know the nozzle height, Click the To: button to bring the platform to the displayed
height, then slowly increment the height until the platform is about 2 mm from the nozzle, clicking
To: after each increase.
Use the five position buttons to check that the platform at all four corners and the center are the
same distance from the nozzle.
If the platform is not the same distance from the
nozzle at all five points, you will need to adjust the
platform until it is level. There are 3 screws under
the platform that are used to level the platform.
Leveling screws
Loosening a screw will raise the related corner of
the platform, while tightening the screw will lower
the same part of the platform. Adjust the screws as
needed until all four corners and center of platform
are the same vertical distance from the nozzle.
Always recalibrate the nozzle height after leveling the platform.
Calibrating the Nozzle Height
This section is probably the most important of the entire manual. Please read it carefully to
ensure that you understand the nozzle height setup procedure, as it is vital to successful 3D
printing.
To print successfully, the platform should be set to start at a distance of 0.2mm from the nozzle.
As each printer is slightly different, this distance needs to be calibrated before starting to print.
To determine the correct nozzle distance, please follow these steps:
1. Open the Maintenance dialog box from the 3D Print menu and click the Center button.
The current nozzle height is indicated as shown in the Maintenance dialog images above.
In the Windows example, the platform is currently at the bottom of the printer; the Mac
example has the platform 135.5mm from the bottom.
2. Enter the height to which you want the platform to move to into the textbox and click the To
button. In the above Windows example, the platform will move to 121 mm above the
platform’s origin. In the Mac example, the platform is already at the height selected.
3. Check the distance between the nozzle and the platform. If the platform is currently at
121mm and appears to be about 12mm away from the nozzle, change the number in the
text box to by 9mm to 130 and click the To button. Use small increments from there when
calibrating the nozzle to avoid striking the platform into the nozzle.
13
Afinia H-Series 3D Printer User’s Manual
4. Once you are about 1mm away from the nozzle, increase the number in the text box by
0.1mm increments and click the To button. Repeat until you get 0.2mm from the nozzle.
TIP: An easy way to check the
distance between the nozzle
and platform is to fold a piece of
paper in two, which will be
about 0.2mm thick. Use this
as a spacer to gauge the
distance between the nozzle
and platform.
5. Once you have the platform within
0.2mm of the nozzle, click the Set
Nozzle Height button to save the
current nozzle height.
6. Check the nozzle height at all four corners of the platform. Repeat the Platform Leveling
and Nozzle Height Calibration processes if needed.
You may need to recalibrate the nozzle height after moving the printer or changing the
printing platform if you find the models are not adhering to the platform properly or are
warping.
TIP: If you crash the platform into the nozzle while making height adjustments, it is good practice
to re-initialize the printer, before undertaking any other operations.
Other Maintenance Options
Extrude
Squeezes material out of the nozzle. Click this button, and the nozzle is heated. When the
temperature is high enough (260° C), the material is squeezed out of the nozzle. The system
beeps before material starts extruding, and it beeps again when finished. When changing the
material (see page 27), use this function to load the new material to the nozzle. It can also be used
to test whether the nozzle is working correctly.
Withdraw
When the material runs out, or the nozzle needs to be changed, click this button. Once the
nozzle is up to temperature (260°C) and the printer beeps, gently pull out the material.
New Spool
The New Spool button is used so the software can keep track of how much material has been
used, and warn you if you don’t have enough material left to print your model.
Click the button and enter the value of how many grams of material you have on the current spool.
If it is a new spool, the quantity should be set to 700 grams. You can also specify whether the
material you are printing with is ABS or PLA.
Mac version
Windows version
14
Afinia H-Series 3D Printer User’s Manual
TIP: An empty spool weighs about 280 grams. If you are installing a partially used spool, weigh it,
and subtract 280 grams from the weight. Enter that value into the material Weight text box.
Status
This area displays the current temperature of the nozzle and platform and if either element is
currently being heated.
Nozzle & Platform Position Controls
The five buttons (FL, FR, Center, NL, NR) control the position of the nozzle and the platform.
The nozzle moves to the left and right; the platform moves forward and backward.
The To button controls the height of the platform, and is used in the nozzle height calibration
procedure described on page 13.
The To Bottom button returns the platform to the lowest position.
Set Nozzle Height
Takes whatever value you have in the To box and saves it as the Nozzle height to use during
printing.
Stop All
Stops heating and all the movement of the printer. Once you click this button, the current model
being printed is cancelled. You CANNOT resume a print job once the printer has been stopped.
After you use the Stop All function, you will need to re-initialize the printer.
Pause Print
This button allows you to pause a print in mid-progress while allowing you to resume the print job
where it left off. This is very useful if, for example, you want to change the material color mid-print.
Another use for pausing a job mid-print is to allow fasteners to be inserted into printed cavities and
then printed over to lock the fastener into place.
This option is only available when the printer is actively printing.
Table Heat 1 hr
Click the Table Heat 1 hr button to heat the table to 105º C for a full hour.
Stop Preheat (Windows) / Stop Heat (Mac)
This button will halt any heating of the table, either the 1 hour heat or the 15 minute preheat from
the 3D Print menu. This option only appears when the table is actively being heated by one of
these two operations.
15
Afinia H-Series 3D Printer User’s Manual
Printing with the H-Series 3D Printer
Loading a 3D Model
Click File / Open or the Open icon on the toolbar
(Windows only) and select the model you want to
open.
The Afinia 3D Printer software only
supports STL files (which is the standard input
format for 3D printing files) and the UP3 format.
Mac version
Windows version
You can open several models
and print them all at the same
time. Simply repeat the open
model procedure for each
model you want to add (see
Placing Models onto the Build
Platform, page 19, for more
information).
Insert Copy
You can also add multiple
copies of the same model to the
platform by selecting Insert
Copy from the right-click
options (Windows) or by
selecting Copy from the Tools menu.
Multiple parts,
Windows version
Select the number of copies from the list.
You will need to reposition the models after the copies have been added.
Unloading the Model, Windows
Click the left mouse button on the
model to select it, and then click
Unload on the toolbar, or click the
right mouse button while over the
model and a context menu will
appear. Choose Unload using
the model name or Unload All
models if you have more than one
file open and want to remove all
of them.
Unloading the Model, Mac
Use either the Unload or Unload All button in the right tool pane. Click the Unload button to
remove the currently selected model, or Unload All to clear all models from the workspace.
16
Afinia H-Series 3D Printer User’s Manual
Saving the model
Choose the model and select Save from the File menu. The file is saved in UP3 format with the
file size being 13%-18% of the original STL file size. This is a convenient format for users to
archive or transfer files.
Note on STL files: For a model to print correctly, all the faces of the models need to have their
normal facing outwards. The Afinia H-Series 3D Printer Software uses model color to indicate
whether a model is OK or not. The default color used by the software when opening a model is a
light grey/pink color. If the normal are facing the wrong way, then the model is colored in red.
Fixing STL Files
The Afinia 3D Printer software includes a Fix option that attempts to fix any model that includes
bad surfaces. Under the Edit menu in Windows you will see the Fix option, and under the Tools
menu in Mac will be the Autofix option. Select the model with inverted surfaces, and click the
Fix or Autofix option to attempt a repair of the bad surfaces.
Merging Models
If you have loaded more than one
part onto the platform, you can
combine them into a single file by
using the Merge option from the Edit
menu in Windows or the Tools menu
in Mac. Simply open all the models
you want to merge, arrange them the
way you want on the platform, and
click the Merge option. When you
then save the file, all the components
will be saved as a single STL file.
Multiple parts,
Mac version
View Options
To observe the target model in different ways, use the mouse to control the view.
Rotate
Press the middle mouse button and move the mouse.
from different angles.
The view can be rotated and observed
Pan
Press Ctrl and the middle mouse button at the same time and move the mouse.
view to pan. You can also use the arrow keys to pan the view.
Scale
Rotate the mouse wheel.
The view will zoom in or out.
17
This causes the
Afinia H-Series 3D Printer User’s Manual
View
The system has eight preset standard views
available, with the default view being Fit. Click
the View button on the toolbar (Windows) or the
View menu to select the View options.
After selecting an option, the caption under the
View button will show the selected view name.
Windows version
Mac version
Model Transformations
Model Transformation can be achieved through the Edit menu or the toolbar:
Mac version
Windows version
Moving the Model
Click the Move button and choose or input the distance you want to move into
the text box. Then choose the axis (direction) in which you want to move.
Each time you click the axis button the model will move again.
For example: To move the model -5mm along Z axis (or down 5mm):
Windows
1. Click Move
2. Input -5 in the text box
3. Click the Z axis button
Windows TIP:
Mac
1. Select the Move option
2. Input 5 in the text box
3. Click the Z- button
If you hold down the Ctrl key, you can drag the model to a position.
18
Afinia H-Series 3D Printer User’s Manual
Rotating the Model
Click the Rotate button on the toolbar, choose or input how many degrees you
want to rotate in the text box, and then choose the axis of rotation.
o
For example: To rotate the model around Y axis by 30 .
Windows
1. Click Rotate
2. Input 30 in the text box
3. Click the Y axis button
Mac
1. Select the Rotate option
2. Input 30 in the text box
3. Click the Y+ button.
Tip: Positive numbers rotate the model counterclockwise; negative numbers rotate the model
clockwise.
Scaling the Model
Click the Scale button on the toolbar, choose or input a scaling factor in the
text box, and then scale the model uniformly by applying that scaling factor.
If you only want to scale along one axis, click the axis around which you want
the change to be applied.
Example 1: Scale up the model uniformly by 2.0 times.
Windows
1. Click Scale
2. Input 2.0 in the text box
3. Click the Scale button
Mac
1. Select the Scale option
2. Input 2.0 in the text box
3. Click the Scale button
Example 2: Scale up the model by 1.2 times along the Z axis only.
Windows
1. Click Scale
2. Input 1.2 in the text box
3. Click the Z Axis button
Mac
1. Select the Scale option
2. Input 1.2 in the text box
3. Click the Z+ button
Placing Models onto the Build Platform
Appropriately placing your models on the platform can have an effect on print quality.
TIP:
In general, try to place your model in the center of the platform.
Auto Place
Click the Auto Place button, on the far right of the toolbar, to automatically place the model on the
platform. When there is more than one model on the platform, using Auto Place is
recommended.
By Hand (Windows)
Press the Ctrl key and choose the target model by pressing and holding the left mouse button.
Move the mouse and drag the model to the desired position.
Using the Move button
Click the Move button (Windows) or the Move parameter (Mac) on the toolbar, choose or input the
distance in the text box, and then choose the axis for the direction in which you want to move.
NOTE: When more than one model is open, the gap between each model should be kept to at
least 12mm to prevent the models sticking together.
19
Afinia H-Series 3D Printer User’s Manual
Print Setup Options
Click the Setup option in the 3D Print menu. The following dialog box pops up:
Mac version
Print Settings
Windows version
Z Resolution
This setting specifies the print resolution or layer thickness of the printer.
0.4mm per layer, in 0.05mm increments.
Options are 0.2mm to
Base Height
This sets the thickness of the Support Raft before the support layer is printed under the part.
The printer starts with a raft of non-solid material in
which all the lines of support material are printed
along the Y-axis. Layers of support material are built
up for as many millimeters as you have specified. It
is on this Support Raft that the first layers of dense
support are printed along the X-axis; the model itself
is printed on top of the dense support material.
The default value for this setting is 2mm.
Part Settings
Angle
The Part Angle determines at what point solid (dense) support material gets used. If the angle is
smaller than the selected setting, the printer will add solid fill layers under the part surface. The
thickness of this solid (dense) support is determined by the “dense” parameter under the Support
options as described below.
Surface
This setting determines how many layers form the bottom face of a part when it is not solid. For
example, if you set it to 3, the machine will print 3 complete layers before going into non-solid
mode.
This does not affect the side wall thickness on non-solid parts, which are all the same thickness
(approximately 1.5mm) regardless of the fill mode.
20
Afinia H-Series 3D Printer User’s Manual
Fill Settings
There are four ways to fill the interior of the parts, as described below.
The part is nearly solid plastic, giving you the
strongest structure.
This Fill setting is
recommended for functional engineering
parts.
The interior of the part is filled with a
reasonably small scaffold structure. This is
the default Fill setting.
Mac setting: Solid
Mac setting: Loose
Mac setting: Big Hole
Mac setting: Hollow
The interior of the part is filled with a medium
spaced scaffold structure.
The interior of the part is filled with a large
spaced scaffold structure, using the least
amount of material.
Support Settings
Dense
This represents how many layers of dense support material is
printed directly beneath the model. The greater the number
of dense support layers, the more stable the print will be but
the support will be more difficult to remove.
Angle
The Support Angle setting specifies the Angle at which support material gets used. For example,
if 10° is selected, support material only gets used if angle of surface is less than 10° from
horizontal (so support material is almost not used unless there is a direct overhang). If set to 50°,
support material is used for any surface that is less than 50° away from horizontal.
Angle set to > 10º
Angle set to > 50º
21
Afinia H-Series 3D Printer User’s Manual
There is a balance between minimizing the amount of support
material and maintaining the quality of the part, as well as
minimizing the difficulty of removing support material.
The orientation of the part on the print platform is critical in
determining both how much support material gets used and how
difficult the support material will be to remove.
As a general rule, it is easier to remove support material from the
outside of a part than from the inside. As can be seen in the
picture to the right, the part would use a lot more support material
if printed with the opening facing downwards than if it were facing
upwards.
Space
This setting specifies the distance between the lines of non-solid support material. Changing this
parameter changes the balance between the quantity of support material used, ease of support
material removal, and part print quality. Only advanced users should change the Space setting.
Area
This setting specifies the surface area above which support
2
material gets used. When you choose 5mm , for example,
there will be no support if the overhanging area is less than
2
5mm . While a little material is saved and a slightly faster
print speed is achieved when this setting is increased, the
stability of the part may be reduced during printing.
Other Settings
Stable Support
Stable Support creates support that is more solid, and the model is less likely to distort, but the
support material will be more difficult to remove.
TIP: All setup and configuration settings aside from the Nozzle Height Calibration are stored in
the software, not on the Afinia H-Series 3D Printer. If you move the printer to a different
computer, you will need to repeat all the calibration and setup procedures.
22
Afinia H-Series 3D Printer User’s Manual
Printing
TIP: One of the keys to successful printing on the Afinia H-Series 3D Printer is platform
preparation and preheating. Particularly with large parts, there is a tendency for the edges of
the part to lift from the platform (which can be a little cooler than the center) and cause the
parts to warp. The best results will be achieved if:
•
•
•
•
The platform is perfectly level
The nozzle height is correctly set
The printer is being run in a room that is not too cold (warmer than 65° F) and free of drafts
The platform is very well preheated
Please ensure the following points are taken care of before printing:
Connect the 3D printer, initialize it, and set up the printing system. Load the model and place it
properly on the virtual platform of the 3D Software window. Check if there is enough material for
the model (the software will, generally, tell you if there is not enough material when you begin the
print). If not, change the sppol to a new one.
2
For models over 40mm in surface area, it is recommended that you preheat the build platform.
Click the Table Preheat 15 k option in the 3D Print menu to preheat the platform. Let the
platform heat to at least 100°C before beginning to print.
Click Print from the 3D Print menu.
Print Options
Nozzle Height
You can make changes to the Nozzle Height using this setting, but it is not recommended unless
you know that the value you are entering in is correct.
If the nozzle is too far from the platform during printing, the material may not adhere correctly to
either the platform or to the previous layer.
If the nozzle height is set too high, the platform can raise up into contact with the nozzle itself,
potentially damaging the nozzle.
It is recommended that you use the Calibrate Nozzle Height process as listed on page 13 to
make any changes rather than in the Print dialog.
Quality
Options are Normal, Fast, or Fine. This setting determines the speed at which the printer moves.
As a general rule, the slower you print the better the quality of the parts, although there are
exceptions to this rule.
For tall parts, running at Fast speed can be problematic as the printer can vibrate to the extent that
print quality is affected.
23
Afinia H-Series 3D Printer User’s Manual
For large surface area parts, the Fine setting can be problematic as the part takes longer to print
and the corners of the raft are more likely to lift from the platform.
UnSolid Model
This function is useful for printing STL files that are not perfect. A perfect STL file is a fully
enclosed surface, with no holes in the surface skin, and no overlapping surfaces. If your file is
not perfect, this option should allow you to print it anyway.
No Raft
While you can choose to skip the Raft with this option, it is not recommended. The raft adds
stability to the adhesion between the part as it is printing and the platform.
Heat Platform After Finish
Checking this option will keep the platform temperature at a higher level after printing is complete.
This can make it easier to remove the model from the platform, depending on the platform
preparation.
TIP: Once the print has started, you can unplug the PC from the printer.
the printer’s internal memory, so the PC is no longer required
The print job is stored in
Calculating model costs
The easiest way to calculate the cost of the material that will be used for your model is to use the
Print Preview option under the 3D Print menu. The application will calculate the total weight of
material used, including the raft and any support material.
Use the weight from the Print Preview to determine the cost to print the model using the following
formula:
Cost of Spool
Cost to Print = Weight of Model X
Full Filament Weight
(
)
Use the full weight of the filament that you purchased, not the current weight of the spool. For
instance, if you purchased a 700g spool of ABS filament, you would divide the cost of the spool by
700g to get the cost per gram of material.
The main factors that affect model cost are the Fill and Support settings. For example, you are
printing a cube measuring 30mm x 30mm x 30mm with a layer thickness of 0.2mm. With the
Support settings left at their default values, the following quantities of material will be used for each
of the four Fill settings:
PC Fill Setting
Mac Fill Setting
Weight of Model
17.2 g
12.0 g
9.4 g
8.5 g
In this instance, the model printed at the lowest density Fill setting will be about half the cost as
printing it at the highest density Fill setting, but that ratio does not apply to all models. Each
model will have a different relationship between the amount of material used and the Fill and
Support settings. Always run a Print Preview if you are calculating the printing costs of any given
model.
24
Afinia H-Series 3D Printer User’s Manual
3D Model Removal
When the model has finished printing, the printer will beep, and the nozzle and platform stop
heating.
It is very strongly recommended that you do not attempt to remove the finished model from the
platform while in the printer. If you do, you may bend the entire platform assembly so that it is no
longer perpendicular to the printer head.
Remove the printer platform from the printer by removing the 2 screws at the bottom of the
platform.
If you are using the FR-4 Board platform method, simply
remove the clips holding the board to the platform and
place the board with the model still attached on a flat
surface.
Gently slide a spatula or chisel under the model and
slowly wiggle it back and forth to lift the support
material from the platform.
Remember to use gloves as the platform and model
may still be hot and to prevent injury from any tool
being used to help release the model from the FR-4
Board.
TIP: Depending on the platform preparation method you are using,
the model may be easier to remove from the printer when it is still
hot. If you want to heat the platform before removing your model,
use the Table Heat option from the 3D Print menu.
CAUTION: It is strongly recommended that you do not attempt to remove the
model from the platform while the platform is still attached to the printer. Doing
so may damage the printer or affect the platform level and nozzle height
calibration.
GLOVES: It is recommended that gloves be worn as the platform may still be hot
and to prevent injury from any tool being used to help remove the model from the
platform.
25
Afinia H-Series 3D Printer User’s Manual
Removing Support Material
Printed models are composed of two parts. One part is the model itself, and the other part is the
support material used to support any overhanging parts of the model.
The support material is the same physical material as the model material, but printed at a much
lower density. Support material is very easy to distinguish from the model material, making it
easier to remove.
The left picture above shows the teapot with its support material still attached, while the right
picture shows the teapot with support material removed.
The support material can be removed using a combination of tools. Some material can easily be
removed by hand. Support material close to the model is easier to remove using tools such as
wood carving chisels, long nose pliers, or wire cutters.
GLOVES/SAFETY GLASSES: The support material and the tools are sharp.
Wear gloves and safety glasses when removing the part from the printer.
ALWAYS WEAR GLOVES AND SAFETY
GLASSES WHEN REMOVING THE SUPPORT
MATERIAL!
26
Afinia H-Series 3D Printer User’s Manual
3D Printer Maintenance
Changing the Filament/Spool
First withdraw the leftover material from the printer.
Initialize the printer and choose
Maintenance from the 3D Print menu. Click the Withdraw button and the nozzle will start to
heat. When the nozzle reaches the correct temperature, the printer will beep and you can gently
withdraw the material.
Once the old filament has been removed, place a new spool of material on the spool holder, and
pull it through the filament tube, until the material is about 10cm out of the tube, then insert it into
the hole at the top of the extruder head.
Click the Extrude button. After the printer nozzle has warmed up to 260° C, the printer will beep.
Gently push the filament into the hole at the top of the extruder head with a little downward
pressure until the extruder mechanism starts to feed the filament through on its own.
After the new filament has been loaded, use the
New Spool function to help the printer keep track
of the amount of filament is now available.
TIP: If you are loading a different color filament
than the last spool, run the Extrude function
a few times once the new spool is in place
but before printing your next model. This
will help extrude out any remaining filament
material of the previous color.
CAUTION: If the nozzle is blocked, remove the nozzle and clean it.
GLOVES: The extruder and platform are hot.
this area of printer.
Use gloves when working in
Vertical Calibration
The Vertical Calibration procedure allows you to ensure that the Printer
Platform is perfectly horizontal and that the Printer prints consistently in
the X, Y, and Z directions.
First, print the supplied Calibration Model on your Printer at the scale of
the part when initially opened. The calibration file is in C:\Program
Files\Afinia\Example.
After the Calibration Model is printed, remove the platform without
removing the parts.
27
Afinia H-Series 3D Printer User’s Manual
Open the Calibrate dialog from the 3D Print menu.
Measure the X1 and X2 length, as shown in the pictures
below.
IMPORTANT NOTE: Before you enter any new
calibration values, always click the Reset button,
otherwise the new values get added to the old values.
Before you enter any new values, the bar at the very top
of the screen should read: XY: 0.00 deg / XZ: 0.00 deg.
Measure the calibration print from front left to rear right corners of the
printed parts on the platform to determine the X1 measurement, and
the rear left to front right to determine the X2 measurement.
Be sure that you are not including the raft or support material when
taking these measurements!
Enter the measured X1 and X2 values into the appropriate boxes.
Checking the X1 Measurement
Next, carefully remove the Front Center ‘L’ shaped component
from the platform and check the inside angle. If it is not 90º,
measure the exact distance in millimeters that the end of the
long arm of the part would need to move to get the angle to be
90º and enter that distance into the Z box. If the angle is less
than 90º, the value to be put into the Z box will be a positive
value. If the angle is more than 90º, the value to put into the Z
box will be a negative value. For example, if the end of the
long arm is 1.3 mm above the surface, enter -1.3 in the Z box.
Finally, measure the long arm of the Front Center component from the
inside of the angle to the end, which should be 40mm at full scale. Enter
the exact measured value into the H box of the Calibrate dialog box.
Click OK to record all these values and exit the calibration window.
Cleaning the nozzle
After a lot of printing, the nozzle may be covered with a layer of oxidized filament. When the
printer is printing, this oxidized filament may melt on the nozzle, and may create discolored spots
on the model. To avoid this you need to regularly clean the nozzle.
Preheat the nozzle as the first step in order to melt the oxidized filament. Use the Extrude button
on the Maintenance dialog box, and then click the To Bottom button. Wait until the material is
finished extruding, then remove the extruded filament.
Use a heat-resistant material such as 100 percent cotton cloth or soft paper and a pair of pliers.
With the material between the pliers and the nozzle, apply gentle pressure with the pliers and turn
the pliers to remove the oxidized filament material. Do not apply heavy pressure!
28
Afinia H-Series 3D Printer User’s Manual
Remember, the nozzle heats up to 260° C (500° F) – that’s over two and a half times the boiling
point of water. Do not touch the nozzle or nozzle mount with bare skin during this process!
TIP: Removing and soaking the nozzle in acetone will help remove excess material from the
nozzle. Ultrasonic cleaning baths will also work.
Removing / Changing the Nozzle
If the nozzle becomes blocked, you may need to
remove it in order to unblock or change it altogether.
To remove the nozzle, use the nozzle wrench
provided in the toolkit that comes with your Afinia
H-Series 3D Printer.
TIP: Heating the nozzle will generally make it
easier to remove.
WARNING: Be careful when handling the heated nozzle and nozzle wrench once the
nozzle has been removed!
Cleaning the Platform
Regardless of the method of preparing the platform that you have chosen, a smooth surface will
improve your results.
•
•
If you are using the FR-4 Board as the print surface, you should remove any remaining
filament material from the surface of the board before printing again.
If you are using blue masking tape on the platform, you will need to replace the tape once
it becomes uneven. You may need to remove excess adhesive from the platform during
the process of replacing the tape.
Lubrication of Bearings
The 3 axial bearings on the Afinia H-Series 3D Printer may occasionally require a bit of lubrication
to keep it operating smoothly. The recommended grease to use is lithium grease.
When lubricating the bearings, first clean off as much old grease as possible from the bearings
before applying new grease to the bearing. Slide the platform several times in the appropriate
direction to spread the grease evenly.
If you have any questions about lubricating the bearings, please contact Technical Support (see
page 34 for contact information).
Spare Parts
Most of the plastic parts on the printer can be printed by the Afinia H-Series 3D Printer itself. If
you need spare parts for your printer, the files for the printable parts can be found in the
C:\Program Files (x86)\Afinia\Example\Spare Part folder.
29
Afinia H-Series 3D Printer User’s Manual
Tips & Tricks
Preheat the platform before printing
Large parts can sometimes have their corners lift from the platform, which causes the part to
distort. This is caused by uneven heat across the surface of the platform. Preheating the
platform before beginning large parts is essential to minimize this lifting.
Position the parts as close to the center of the platform as possible
The center of the platform is where the heating is most regulated, which helps to keep the support
raft adhered to the platform. Try to avoid printing any object near the edges of the platform.
Decrease print time where possible
The faster you can print parts, the less lifting from the platform you are likely to get.
to increase print quality include:
•
•
•
•
Some ways
If possible, try to avoid printing large parts in solid mode
Set the layer resolution to as large a value as possible while still retaining the quality
needed for the finished part
Print the part in Normal or Fast mode
If printing multiple parts at once, reduce the number of parts that are being printed
Regularly check the nozzle height calibration
The nozzle height can change for a number of reasons, such as changing the position of the
printer, adding a new layer of surface preparation to the platform, or removing and replacing the
FR-4 Board. To check or change the nozzle height, please see Calibrating the Nozzle Height
on page 13.
Regularly check that the platform is level
To get the best results out of your Afinia H-Series 3D printer, the print platform must be perfectly
lined up with the Nozzle. This means that when you set the nozzle height, the nozzle should be
exactly the same distance from the platform at all four platform corners and in the center. If this is
not the case, please follow the Leveling the Print Platform procedure detailed on page 13.
Status Indicator
The table below explains what each Status Indicator state means.
LED State
Indicates:
Solid Red
Printer is not initialized
Solid Green
Printer is Ready
Flashing 10 times per second
Data is transferring to printer
Flashing 5 times per second
1. Extruder is heating
or
2. Extrude or Withdraw Material function in progress
Flashing about 2 times per second
Printing in progress
Flashing about every 2 seconds
Printing has stopped
30
Afinia H-Series 3D Printer User’s Manual
Troubleshooting
Problem or Error message
Solution
No power
Verify power cord is securely plugged in
Extruder or platform fails to
reach operating temperature
Material not extruding
Verify printer has initialized.
(see page 13)
Heater is damaged.
If not, initialize the printer
Contact Technical Support (page 34)
Material is stuck in the extruder; remove the material (see
page 27)
The nozzle is clogged and needs to be cleaned out (see
page 28)
Make sure the USB cable is connected to the printer, and to
the PC
Cannot communicate with
printer
Unplug the USB cable, then plug in again
Reset the printer—power off then power on
Restart the PC
Others
Contact Technical Support (see page 34)
Solution for "Winusb.dll not found" problem (Windows)
If you encounter a “Winusb.dll not found” error message, please
follow the steps below:
Option 1: Uninstall Older Driver and Auto-Install New Driver
1. Open the Windows control panel, go to the System Properties
dialog box and select the Hardware tab.
2. Click the Device Manager button, and the following dialog box
will popup.
Find the 3DPrinter@FreeMC in the USB
section.
3. Click the right mouse button and select the Uninstall option.
The confirm dialog box will appear. Click OK.
4.
Install the latest Afinia H-Series 3D Software.
5. Unplug the USB cable, then plug it back in.
Windows will find a new device. Manually
select the driver folder (the default location is
C:\Program files\Afinia\Afinia 3D Printer\
Drivers).
31
Afinia H-Series 3D Printer User’s Manual
6. There should now be a
new driver section in the
device
manager
as
shown to the right.
Option 2: Update the driver manually
1. Install the latest Afinia H-Series 3D Printer Software.
2. Find the 3DPrint@FreeMC
driver in the Device Manager
dialog box (it should be located
in the USB section).
3. Right click the entry and select
Update Driver.
4. Select the Afinia H-Series 3D
Driver folder (the default is
C:\Program Files\Afinia\Afinia
3D Printer\Drivers).
5. A Free Motion Card entry should
appear in the Device Manager
list.
32
Afinia H-Series 3D Printer User’s Manual
Specifications
Printer Physical Characteristics
Printing Material
ABS or PLA Plastic Filament
Material Color
White
Layer Thickness
0.20 – 0.40 or 0.25-0.35 mm,
depending on model
Print Speed
10-100 cm /h
Print Size
140×140×135mm
Printer Weight
11 lb. (5 KG)
Printer Size
245 × 260 × 350 mm
3
Specifications
Power Requirements
100-240 VAC, 50-60 Hz, 200W
Model Support
Auto-generated Support
Input Format
STL, UP3
Workstation compatibility
Win XP/Vista/Win7/Mac OSX
Environmental specifications
Ambient temperature
60°F~85°F
Relative humidity
20%~50%
33
Afinia H-Series 3D Printer User’s Manual
Technical Support
For technical questions or support issues, contact Afinia Technical Support:
PH: 952-279-2643
[email protected]
www.afinia.com
Please have the Model and Serial Number of your Afinia H-Series 3D Printer available when
contacting Technical Support.
Date of Purchase:
Place Purchased:
Serial Number:
(Located on back of Printer)
Notes
34