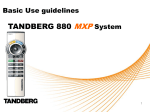
1
Short User Manual TANDBERG MXP systems - English Software version F1 D13388.01 This document is not to be reproduced in whole or in part without permission in writing from: Table of Contents General Use............................................................................................................................... 3 The Remote Control ........................................................................................................... 3 The Menu ........................................................................................................................... 4 On Screen Indicators.......................................................................................................... 5 Video Calls................................................................................................................................. 6 Make a Call......................................................................................................................... 6 Answer an incoming Call.................................................................................................... 6 End Call .............................................................................................................................. 7 Phone Book ........................................................................................................................ 8 Move Camera ..................................................................................................................... 8 Presentation ....................................................................................................................... 9 Picture Layouts................................................................................................................. 10 TANDBERG Short User manual - 3 General Use The Remote Control The system is controlled with a remote control. Think of the remote control as a mobile or cellular phone with number keys and call keys. Use the arrow keys and OK to navigate the menu. The system’s most commonly used functions are also accessible directly from the remote control. 1. Mic Off turns your microphone on and off. 2. Arrow keys are used for navigation in the menu and for moving the camera when the menu is hidden. 3. Volume + and – adjusts the system volume. 4. The Layout key toggles between full screen and different picture layouts. 5. Cancel takes you back one step in the menu system. Use Cancel to delete characters in an input field. 6. Press the Call key to place a call. 7. Camera presets define specific camera positions. Press and hold a number key for 1 second to save the current camera position to that number key. To activate a preset whilst in a call, simply press and release that number key. 8. Snapshot takes a snapshot of your video. (Only while you are in a call) 9. The Presentation key switches to a predefined presentation source. 10. Press OK/Menu to show the menu and to select menu items. 11. Use Zoom + and – to zoom the camera in and out. 12. Selfview displays your outgoing video. Press Selfview again to turn selfview off. 13. Store and recall your video contacts via the system Phone Book for easy placement of calls. 14. Use the red End Call key to end the current call. Pressing this key when not in a call will place the system in Standby mode. 15. Number/Letter keys function in the same manner as with a mobile or cellular phone. 16. Press Touch Tones when you are in a call and need to dial extension numbers etc. (instead of presets). TANDBERG Short User manual - 4 The Menu When the system is not in use, it is in standby mode. The screens are black. Wake up the system by picking up or pressing any key on the remote control. When the system is switched on, you will see the welcome screen. The welcome screen presents the menu and displays your Main Camera image in the background (Main Camera is system default). Your dial in numbers and system name are displayed in the upper right corner. Your ISDN Number and IP Number are the numbers that your contacts need to place a video call to you. The menu is the Interface you will use to control the system. The menu contains: Make a Call, Standby, Phone Book, Move Camera, Presentation, MultiSite Services and Control Panel. When you are in a call, Add Another Call and End Call will be available via the red and green buttons (see pictures below). The menu outside a call and in a call. When you are in a call, the menu automatically times out after 15 seconds. Press OK/Menu to bring it back. You can also hide the menu manually by pressing Cancel (X). If the system does not respond: Make sure that the system is switched on by using the On/Off switch located at the rear of the Codec (see figure below). Verify that your monitor is switched on. To switch the monitor on you normally push the power button on the front of the monitor (depending on monitor type). TANDBERG Short User manual - 5 On Screen Indicators The system has a number of icons signaling different settings: Volume Off This indicator is shown when the volume is turned off. Press Volume + to turn the volume back on. Microphone Off This indicator is shown when the microphone is turned off. The indicator will start to flash if audio is detected in the room during a call and the microphone is turned off. Press the Mic off button again to turn the microphone back on. Be aware that many calls tend to be connected automatically with the Mic set to Off. The icon will start to flash when you start speaking. Remember to turn the microphone on before a meeting. Secure Conference, AES This double padlock indicator is shown when AES encryption (Secure Conference) is active. Secure Conference, DES This Padlock indicator is shown when DES encryption (Secure Conference) is active. Not Secure Conference This open padlock indicator is shown during the initialization phase for encryption. During this period the call is not secure. Floor This indicator is shown when you are displayed in full screen in a MultiSite conference. TANDBERG Short User manual - 6 Video Calls Make a Call To make a call, choose Make a Call from the main menu. If you are already in a call, choose Add another Call to call another participant (if your system has MultiSite capabilities). Pressing the green key on the remote has the same effect as pressing the green button in the menu. You can enter a number manually in the input field or select the book icon to select a contact from the phone book. The TANDBERG system can place both video calls and telephone calls. For video calls, choose Place Video Call in the call menu. For telephone calls, choose Place Telephone Call. Call Settings specifies the quality of the call. In most cases you can leave call settings unchanged. If your TANDBERG system has MultiSite capabilities, you can call several participants at the same time. Choose Add Video Call or Add Telephone Call in the call menu and and more dial fields will appear. Answer an incoming Call You can receive calls anytime, even when the system is in standby mode. But remember to ensure the system is switched on using the On/Off switch located at the rear of the Codec. How to answer an incoming call: 1. To accept an incoming call, press OK or the green key on the remote control. 2. Press the red key on the remote control to reject the incoming call. 3. If you don't want any incoming calls, choose Do Not Disturb. If Do Not Disturb is on, the system will automatically reject all incoming calls. TANDBERG Short User manual - 7 If Auto Answer is set to On, an incoming call will connect automatically. You can set Auto Answer on or off in Administrator Settings - General. End Call The remote control works much like a mobile/cellular phone. Press End Call from the menu or the red key on the remote control. In the End Call dialog box, press End Call again. Press Cancel (x) to continue the call. How to end a call: 1. Press the red key on the remote control or End Call from the menu 2. Press the red key on the remote control again or OK to confirm that you want to end the call. How to end a MultiSite call: 1. Press the red key on the remote control or End Call from the menu. 2. A list of participants appears allowing you to end each separate call. Select a participant and press OK or the red key. 3. Press End All Calls if you want to end the whole conference. Note that switching off the monitor(s) will not end a call. To end a call you must press the red key. TANDBERG Short User manual - 8 Phone Book Phone Book stores up to 200 contacts including the last numbers dialed. Using the Phone Book is time saving and can reduce the amount of false calls due to wrong numbers or call settings. The contacts are sorted alphabetically. Navigate the phone book with arrow keys or letter keys, searching on the first letter (like on a mobile/cellular phone). Press arrow to the left to select a button. You will see that the last selected contact will be marked. Edit and Delete will apply to the marked contact. The last calls placed from the system are displayed under the Last Numbers Dialed entry in the Phone Book. Choose MultiSite to save a group of contacts, making it quicker to place a MultiSite call. How to make a call using Phone Book: 1. Press Phone Book on the remote control or from the menu. 2. Choose a contact using arrow keys or letter keys. 3. Press OK to select the contact. This will take you to the Call menu, where you may edit the number or call settings before you place the call. Alternatively press the green Call key on the remote control to call directly. Move Camera There are several ways to move the camera: Choose Move Camera from the main menu. Use the arrow keys to pan and tilt the camera. Press OK when done. When the menu is hidden, the arrow keys will work on the camera. Hide the menu with the Cancel (X) key and adjust the camera with the arrow keys. Use Camera Presets. Press a number and the camera will move to a predefined position (when you are in a call). Use Camera Tracking. (See TANDBERG user manual) Use the TANDBERG Tracker. (See separate documentation) TANDBERG Short User manual - 9 Presentation The Presentation functionality enables you to show PC, DocCam (Document Camera), VCR, AUX and VNC sources in addition to your Main Camera. This is perfect for meetings where you would like to show a PowerPoint presentation for instance. You can even use arrow keys up and down on the remote control to activate Page Up/Down on the PC. (This only applies when using VNC). Use Presentation outside a call to make a local presentation for the people in your own meeting room. Use Presentation when you are in a call to make a presentation for the far end as well. The quickest way to show a presentation is to use the presentation key on the remote control. The presentation key shows a predefined video source, PC is default. It is possible to change the presentation source in Administrator Settings - Presentations Settings. Choose Presentation from the main menu if you want to select a video source manually. The Presentation menu offers you all available video sources: Main Camera, PC, DocCam, VCR, AUX and VNC. Live PC images When showing a presentation from your laptop PC, remember to connect your PC to the video system with a VGA cable. Make sure that your PC transmits the image to the VGA Output. On most laptop PCs you must press a special key combination to switch the image. Note: The image will appear smoother on the system if your presentation is already displaying in full screen on your PC prior to connecting your PC to the video system. VGA Cable TANDBERG Short User manual - 10 Picture Layouts The Layout key on the remote control has two behaviours depending on the Picture Layout setting in Administrator Settings (see Control Panel - Administrator Settings – General – Screen Settings). It can provide either a Picture in Picture (PIP) or a Picture outside Picture (POP). POP is recommended for wide screens. Picture in Picture With Picture in Picture (PIP), the layout key makes it possible to see an extra picture in a smaller view. Pressing Layout will bring up a picture in picture in the corner of the screen. Press Layout again to move it to the other corners of the screen and finally hide it. You can also hide it directly by pressing and holding Layout for 1 second. PIP will always appear on the main monitor. Automatic PIP is the system's default setting. That means that you will automatically show Picture in Picture when it is suitable (see Control Panel - Administrator Settings - Presentation Settings). How to use Layout with Picture in Picture: Press Layout once to bring up a picture in picture. Press Layout three more times to move it around in the corners of the screen. The fourth time you press Layout, it will disappear. Pressing and holding Layout for 1 second will hide the small picture directly from any position. Remote view Presentation Example of Picture in Picture TANDBERG Short User manual - 11 Picture outside Picture (for wide screens) With Picture outside Picture (POP), pressing the layout key on the remote control will bring up compositions of the pictures that are optimized for wide screens. Press once to get an extra picture in a smaller view. Press twice to get side-by-side view. Press again to go back to full screen view. You can also go back to full screen directly by pressing and holding Layout for 1 second. It is recommended to use Picture outside Picture for wide screen monitor systems. How to use Layout (Picture outside Picture): Press Layout once to get the 1+3 layout. You see a big far end picture and a smaller picture of yourself in the upper right corner. If you use Duo Video, you see a big picture of the Duo Video and small pictures of the far end and yourself. Press Layout again to get the side-by-side layout (1+1). You see two equally big images of the far end and yourself. The third time you press Layout you go back to normal full screen view. Pressing and holding Layout for 1 second will bring you back to full screen anytime. Remote view Selfview Presentation Example of Picture outside Picture Example of Side by Side Example of Full screen view