1
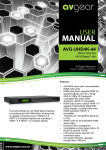
AVG-UHS41
Features
AVG-UHS41 is a HDMI switcher
accommodating 4 HDMI inputs and 1 output.
4 HDMI inputs
Supports Hot-plugging
Compliant with HDMI 1.4 and
transmitting 4K signals
High bandwidth: 10.2Gbps
HDCP1.4 compliant, supports autodetection for input HDCP
compliance status
Supports EDID management,
including 5 embedded EDID
formats, 10 (max) user-definable
EDID data, and automatic EDID
capture.
Intuitive indicators for power, switch
mode, I/O connection status and
audio output signal
Convenient online firmware
updates
AVG-UHS41
PLEASE READ THIS PRODUCT MANUAL CAREFULLY
BEFORE USING THIS PRODUCT.
This manual is only for operation instruction only, and
is not to be used in a maintenance capacity. The
functions described in this version are current as at
March 2015. Any changes of functions and
operational parameters will be updated in future
manual versions. Please refer to your dealer for the
latest product details.
Version 1.0 1/3/15
AVG-UHS41
SAFETY OPERATION GUIDE
In order to guarantee the reliable operation of the equipment and safety of the
user, please abide by the following procedures in installation, use and
maintenance:
1. The system must be earthed properly. Please do not use two blade plugs
and ensure the AC power supply ranges from 100v to 240v and from 50Hz
to 60Hz.
2. Do not install the switcher in an environment where it will be exposed to
extreme hot or cold temperatures.
3. This unit will generate heat during operation, please ensure that you allow
adequate ventilation to ensure reliable operation.
4. Please disconnect the unit from mains power if it will be left unused for a
long time.
5. Please DO NOT try to open the casing of the equipment, DO NOT attempt to
repair the unit. Opening the unit will void the warranty. There are high
voltage components in the unit and attempting to repair the unit could result
in serious injury.
6. Do not allow the unit to come into contact with any liquid as that could result
in personal injury and product failure.
AVG-UHS41
TABLE OF CONTENTS
Introduction .............................................................................................................. 1
Introduction to the AVG-UHS41.................................................................... 1.1
Features ....................................................................................................... 1.2
What’s in the Box.......................................................................................... 1.3
Panel Description of the AVG-UHS41 ..................................................................... 2
Front Panel ................................................................................................... 2.1
Rear Panel.................................................................................................... 2.2
System Connection .................................................................................................. 3
Usage Precautions ....................................................................................... 3.1
System Diagram ........................................................................................... 3.2
Connection Procedure .................................................................................. 3.3
ARC Solution ................................................................................................ 3.4
Application .................................................................................................... 3.5
System Control ......................................................................................................... 4
Front Panel Control ...................................................................................... 4.1
IR Control ..................................................................................................... 4.2
RS232 Control .............................................................................................. 4.3
Software Installation/Removal .......................................................... 4..3.1
Basic Settings ................................................................................... 4..3.2
RS232 Communication Commands ................................................. 4..3.3
EDID Management ....................................................................................... 4.4
Firmware Upgrade .................................................................................................... 5
Specification ............................................................................................................. 6
Supported Input Video Formats .................................................................... 6.1
Panel Drawing .......................................................................................................... 7
Troubleshooting & Maintenance ............................................................................. 8
AVG-UHS41
1. Introduction
1.1. Introduction to the AVG-UHS41
AVG-UHS41 is a HDMI switcher incorporating 4 HDMI inputs and 1 output.
Inputs are selectable using the front panel buttons or IR Remote, the corresponding
indicator on the front panel will illuminate to show real-time I/O connection status.
Compliant with HDMI 1.4& HDCP1.4, AVG-UHS41 can transmit a non-compressed
4K signal.
AVG-UHS41 boasts comprehensive audio capacities including PCM, Dolby Digital,
DTS, and DTS-HD. The AVG-UHS41 provides an ARC audio output socket to
transfer ARC audio to Receivers etc.
AVG-UHS41 supports convenient online firmware updates through the USB port.
1.2 Features
4 HDMI inputs
Support Hot-plugging
Compliant with HDMI 1.4, capable to transmit 4K signals
High bandwidth: 10.2Gbps
HDCP1.4 compliant, supports auto-detection for input HDCP compliance
status
Supports EDID management, including 5 embedded EDID data, 10
(max) user-definable EDID data, and EDID data is automatically
captured and copied
Intuitive indicators for power, switch mode, I/O connection status and audio
output signal
Convenient online firmware updates
1.3 What’s in the Box
1 x AVG-UHS41
2 x Mounting ears (separate from AVG-UHS41)
4 x Screws
4 x Plastic cushions
1 x IR Remote
1 x Power Adapter (DC 5V 1A)
1 x User Manual
Note: Please confirm if the product and the accessories are all included, if not,
please contact your dealer.
AVG-UHS41
2. Panel Description
2.1 Front Panel
No. Name
①
Power
Description
Illuminates red once powered on
Bi-colored LED indicator for audio source
Illuminates green when the audio is de-embedded from
the HDMI signal.
②
AUDIO
③
Mode
④
Input
Illuminates yellow when ARC audio is present.
Bi-colored indicator for switch mode
illuminates yellow when in auto-switching mode
Illuminates green in manual switch mode.
Green Indicator for current source.
SOURCE/AUTO
Used to select and cycle through the video sources.
Used as a switch mode selector. Press and hold for 3
Seconds or more to select auto-switch mode or manual.
⑤
⑥
FIRMWARE
seconds or more to switch between auto-switch mode and
USB port, used for firmware updates & USB powering
Note: Output HDCP compliance status depends on the input signal. When the input
signal has HDCP, then the output signal will contain HDCP and vice versa.
AVG-UHS41
2.2 Rear Panel
No.
Name
Description
HDMI input ports. 4 in total, connect with HDMI or DVI
source device such as DVD/ Blu-ray, supports input
①
IN
②
OUT
③
AUDIO
signals up to 4k& 1080p 3D
ARC audio output ports, connect with Receiver
HDMI output port, connect to HDMI display
Audio output port, connect with a receiver to pass HDMI
signal or output ARC audio
Serial control port, connect with control device (e.g. a PC) to
④
RS232
control AVG-UHS41
⑤
IR IN
⑥
EDID
⑦
DC 5V
Connect with IR receiver to collect infrared signal
4-pin EDID DIP switchers to set EDID data, “1” stands for
“On”,
“0” stands for “Off”. Dial the switchers to change EDID data
referring to the table in 4.4 EDID Management.
Power port, plug a DC 5V power adapter into this port
Note: Pictures shown in this manual are for reference only, different models may
vary slightly.
AVG-UHS41
3. System Connection
3.1 Usage Precautions
1) System should be installed in a clean environment with temperature and humidity
maintained to within equipment specification.
2) All of the power switches, plugs, sockets and power cords should be insulated and
safe.
3) All devices should be connected before power on.
3.2 System Diagram
The following diagram illustrates typical input and output connections that can be
utilized with the AVG-UHS41:
AVG-UHS41
3.3 Connection Procedures
Step1. Connect HDMI/ DVI source device(s) (e.g. Blu-ray DVD) to the HDMI
INPUT ports of AVG-UHS41 with HDMI cables.
Step2. Connect HDMI displays to the HDMI OUTPUT port of AVG-UHS41 with a
HDMI cable.
Step3. Connect an amplifier to the audio output port.
Step4. Connect an IR Receiver to the IR IN to enable IR control.
Step5. Connect the control device (e.g. a PC) to the RS232 port to enable
RS232 control.
Step6. Plug a DC 5V power adapter to the power port of AVG-UHS41.
Note: All the ports support hot-plugging.
3.4 ARC Solution
The ARC (Audio Return Channel) enables a display, via a single HDMI cable, to
either send or receive audio via HDMI, upstream or downstream, depending on
system set-up and user preferences, increasing user flexibility. Connect the devices
as per the following figure:
Note: All utilized devices including the HDMI cable should support Audio Return
Channel functionality when connected to Audio Return Channel-enabled devices.
3.5 Application
Reliable performance for control and transmission makes the AVG-UHS41 ideal in
the IT computer space, signal monitoring, conference systems, television broadcast,
education, banking and security institutions etc.
AVG-UHS41
4. System Control
4.1 Front Panel Control
The SOURCE/AUTO button on the front panel can be used to change the input
source and select switch mode.
Switch input source: Press the button to switch through inputs 1~4, the
corresponding indicator illuminates green for monitoring.
Change the switch mode: Input signals support auto-switching and manual
switching. Press and hold SOURCE/AUTO button for 3 seconds or more to
switch between the two modes. (Default: Manual switching.)
In auto-switching mode, source selection abides by the following principles:
o New input principle
Once detecting a new input signal, AVG-UHS41 switches to this new
signal automatically.
o Power rebooting principle
Once rebooted, AVG-UHS41 will automatically select input 1 as input
source even if there is no connection to input 1.
o Signal removing principle
Once a currently displayed signal is removed the AVG-UHS41 will detect all input
signals with a priority from INPUT 1 to INPUT 4. It will switch the first available
source to the output.
In manual-switch mode, once rebooted, AVG-UHS41 will output the source signal
before rebooting.
AVG-UHS41
4.2 IR Control
Connect an IR receiver to the IR IN port, users can control the device via the
included IR remote. Here is a brief introduction to the IR remote:
MENU:
Mute: press to mute/ unmute output
Audio: switch between HDMI signal
and ARC audio
Source/Auto: share the same function
with SOURCE/AUTO button on the
INPUTS:
1~4: press to switch input source,
correspond to input 1~4 separately
Prev/ Next: switch to the previous/ next
input source in the order 1~4
4.3 RS232 Control
AVG-UHS41 provides a 3.5mm RS232 port for serial port control. Connect the AVGUHS41 to the control device (e.g. a PC) with a RS232 cable and set the
communication parameters, the control device is then able to control the AVGUHS41 via control PC or other..
4.3.1 Installation/removal of RS232 Control Software
Installation: Copy the control software file to the computer connected with the
AVG-UHS41.
Removal: Delete all the control software files in the corresponding file path.
4.3.2 Basic Settings
Firstly, connect AVG-UHS41 with an input device and an output device. Then,
connect it with a computer which has installed RS232 control software. Double-click
the software icon to run this software.
Here we take the software CommWatch.exe as example. The icon is showed as
below:
AVG-UHS41
The interface of the control software is shown as below:
Parameter
Configuration area
Monitoring area,
indicates whether
the command sent
Command Sending
area
Please set the communication parameters of COM number, baud rate, data bit, stop
bit and the parity bit correctly, only then will you be able to send commands from the
Command Sending Area.
4.3.3 RS232 Communication Commands
Baud rate: 9600;
Data bit: 8;
Stop bit: 1;
Command
Function
[x]B1.
Parity bit: none.
Feedback Example
Switch audio and video signal of
AV: x -> 1
input x synchronously, x=1~4
0B0.
Switch off output
Mute On
0B2.
Switch on output
Mute Off
AV: x -> 1
600%
601%
Query operation status, including
Manual/ Auto Switch
I/O connection, switch mode, and
ACR mode
Switch Device System/
Switch Device System
Activate auto switch mode to detect
all input signals with priority from
INPUT 1 to INPUT 4 and transfer
Auto Switch
AVG-UHS41
Command
Function
Feedback Example
the first available signal to the
output device.
602%
Activate manual switch
Manual Switch
Upgrade EDID data via serial port,
x stands for the serial number of
the DIP switcher status
EDIDUpgrade[x]. x=1~5, correspond to embedded EDID Upgrade OK!
EDID 1~5 separately
x=6~15, correspond to the 10
custom EDID
Switch on/off ARC audio output
ARC [x]&
Audio Return System
(x=1)
x=1, switch on ARC audio output
x=2, switch off ARC audio output
Switch Device System
(x=2)
Note:
1. In the above commands, “[”and “]” are symbols for easy reading and do not need
to be typed in actual operation.
2. Type in the complete commands including ending symbol “.”.
3. Load the desired EDID file to the RS232 control software after sending command
EDIDUpgrade[x]. , it will show “EDIDUpgrade OK!” after the upgrade is
completed.
AVG-UHS41
4.4 EDID Management
AVG-UHS41 includes convenient EDID management to create reliable
communication between the display and sources.
In factory default status (Status: 0000), AVG-UHS41 will pass through the signals
directly, input & output devices process the signasl automatically. You can change
the EDID data by adjusting the 4-pin EDID DIP switcher.
Invoke EDID data:
Here is an introduction to the EDID data options available:
Embedded EDID data: 5 sets in total, the chart below illustrates the 5 Embedded
EDID data:
No.
Switcher Status
EDID information
1
0001
1080P 3D 2CH
2
0010
1080P 3D Muiltichannel
3
0011
1080P 2D 2CH
4
0100
1080P 2D Muiltichannel
5
0101
3840x2160 2D (30Hz)
Custom EDID data: max at 10 memories, custom EDID data (.bin) and program
the data into the device by sending command EDIDUpgrade[x]..
EDID Copy: automatically capture the EDID data of the display and copy to input
devices
Upgrade EDID data:
EDID data supports upgrades via the serial port. Follow these steps to upgrade the
EDID data:
Send command to upgrade the saved EDID data one by one.
Step1.
Copy the upgrade file (.bin) to PC.
Step2.
Send the command EDIDUpgrade[x]. via the RS232 control software.
x is the serial number of EDID data
x=1~5, corresponds to the 5 embedded EDID data listed on the above chart
separately;
x=6~15, corresponds to the 10 custom EDID separately;
Step3.
Click Load File and select the desired upgrade file (.bin). Press Send
to start the upgrade.
AVG-UHS41 will return “EDID Upgrade OK!” when the upgrade finishes. Reboot the
unit, users can adjust the dip switchers on the rear panel to invoke the upgraded
EDID.
AVG-UHS41
5. Firmware Upgrade
AVG-UHS41 boasts a USB port for online firmware upgrades on the front panel.
Follow these steps to upgrade the firmware:
Step1.
Copy the upgraded software (see as below) and the latest upgrade file
(.bin) to PC.
Step2.
Connect the USB ports of AVG-UHS41 and the PC via a USB cable.
Step3.
Double-click the update software icon (left), it will enter the upgrade
interface shown as below (right):
Step4.
Select the right port number from the dropdown PORT list, and click
Open to load the upgrade file. Click Update to start firmware upgrade.
Note: 1. The USB port can also be used to power the device.
2. The COM port number connected with PC needs to be within the range 1-9
AVG-UHS41
6. Specification
Product Model
AVG-UHS41
HDMI Standard HDMI 1.4, supports HDMI Deep Color, full 3D & 4Kx2K@30Hz
HDCP
HDCP 1.4 compatible
Video Signal
Supports VESA and SMPTE Video
480p/1024x768/720p//1280x800/1080p/3840x2160@30Hz
ARC
HDMI supports ARC function
Bandwidth
10.2Gbps
IR Control
IR IN, DC 5V,connect to the IR receiver and receives the IR signal
of the IR remote
Input
HDMI x 4
3.5mm(IR IN) x 1
Output
HDMI x 1
3.5mm(audio) x 1
Other
Connector
RS232(3.5mm) x 1
DIP(EDID for
4P) x 1
HDMI
Connector
Type A
3.5mm
Connector
IR IN x1 / audio x 1 /RS232 x 1
Chassis
Dimension
W194xH11.4xD80(mm), ultra-thin
Raw Materials
Aluminum chassis
Weight
Approx160g
Power Supply
DC 5V 1A
Consumption
5W
Temperature
﹣10 ~ ﹢40℃
Reference
Humidity
10%-90%
Power Connector x 1
AVG-UHS41
6.1 Supported Input Video Formats
Input Resolution
HDMI
DVI
720 x 480p@60Hz
720 x 480i@30Hz
720 x 576p@50Hz
720 x 576i@25Hz
1280 x720p@50Hz
1280 x720p@60Hz
1920 x 1080p@25Hz
1920 x 1080p@50Hz
1920 x 1080p@60Hz
1920 x 1080i@25Hz
1920 x 1080i@30Hz
1920 x 1080p@30Hz
3840 x 2160p@25Hz
3840 x 2160p@30Hz
1080p 3D@60Hz
Note: AVG-UHS41 supports 4k&1080p 3D HDMI signal, please use quality HDMI
cables compliant with HDMI1.4 for reliable transmission when connecting.
AVG-UHS41
7. Panel Drawing
8. Troubleshooting & Maintenance
Problems
Color loss or no video
signal output on HDMI
display
No HDMI signal output
from the AVG-UHS41
while local HDMI inputs
are connected and
working
Splash screen on output
devices
Causes
Solutions
The connection cables
may not be connected
correctly or may have a
fault.
Check whether the cables
are connected correctly
and in good working
condition.
Poor quality of the HDMI
cable.
Change for another cable.
Wrong RS232
Cannot control AVGcommunication
UHS41 by control device
(e.g. a PC) through RS232 parameters
port
AVG-UHS41 is faulty
Picture Static becomes
stronger when connecting
the video connectors
Poor grounding
Make sure the RS232
communication
parameters are correct.
Send it to authorized
dealer for repairing.
Check the grounding and
make sure unit is
grounded well.
If your problem persists after following the above troubleshooting steps, seek further
help from an authorized dealer.