1
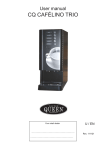
User Manual
QUEEN PEARL with base cabinet
PEARL (integral)
Serves chilled still and carbonated water.
Your retailer
...............................................................................
...............................................................................
U / EN
Rev 090914
1. Contents.
1.
2.
3.
4.
4.
5.
6.
7.
WATER LINE
Contents
Notes for the user
Using the machine
Installation Queen Pearl with base cabinet
Installation Queen Pearl for integrated fitting
Care and maintenance, replacing a water filter
Cleaning the machine
Important
2.
2
3
4
5-6
7-9
10
11
12
2. Notes for the user
Queen Pearl
WATER LINE
Thank you for choosing a Queen Pearl water dispenser - we hope you will enjoy the benefits
of using it.
Queen Pearl is supplied with a base cabinet.
Pillar with 2 tap outlets and base cabinet with cooler.
Base cabinet made from stainless steel plate with painted side panels. Top board in wood.
Dispenses both chilled still and chilled carbonated water.
Read the manual carefully before using the machine for the first time.
It contains important instructions for the correct and safe use of
the machine. Always keep the manual in a place that can be easily accessed by the user.
Technical data:
Height
Width
Depth
Power supply
Cold water connection
Cooling capacity
Refrigerant
Power
Automatic water replenishment
Chilled water
Carbonated water
Gas dome + nipple
Water filter
Carbon dioxide cylinder *
*Carbon dioxide cylinders may be
Pearl
480 (tap pillar)
170 (tap pillar)
230V / 10A
1/2”
40 litres per hour
HFC-134A
Single phase, 453W
Yes
Yes
Yes
supplied
supplied
No
height 580 x width 185
purchased from your local
gas distributor.
TECHNICAL SPECIFICATIONS,
Chiller System AS45
Drink temperature
5–8 °C
Power supply
Coolant
Vessel volume
Weight
230 V, 50 Hz
R 134a
14 l
32 kg
External dimensions
Width
Height
Depth
435 mm
490 mm
415 mm
3.
Pearl with base cabinet
1325
400
400
230V / 10A
1/2”<B>
40 litres per hour
HFC-134A
Single phase, 647W
Yes
Yes
Yes
supplied
integral
No
height 580 x width 185
3. Using the machine Queen Pearl
WATER LINE
Outlet for carbonated water
Outlet for still water
Chilled drink outlet.
Queen Pearl has two chilled drink outlets.
Hold a glass under the outlet for your selected drink.
Pull the handle forwards and the water will flow
for as long as you keep the handle pulled.
See Figure 1.
Figure 1
4.
4. Installation
Queen Pearl with base cabinet
WATER LINE
Installation must be carried out by a qualified fitter.
Installation of Queen Pearl base cabinet.
1.
Place the machine on a flat surface that is impermeable to
water.
2.
(If necessary, use a spirit level and adjust using the
machine’s adjustable feet).
3.
Make sure air is able to circulate freely around the machine.
(Min. 10cm).
IMPORTANT!
The machine must be disconnected from the mains
before any work is carried out.
Disconnect the power supply cable from the wall socket.
The end customer/ user is responsible for ensuring that
the water connection is compliant with the manufacturer’s
instructions.
NOTE
WORKING WITH THE CONNECTIONS
Hold the connection and press the hose as far into
the connection’s body as possible.
Disconnecting the John Guest connection
Push the grey ring out towards the connection and
pull out the hose.
If the water hoses need to be cut, make a
straight cut in order to prevent leakage.
5.
4. Installation
Queen Pearl with base cabinet
WATER LINE
Installation must be carried out by a qualified fitter.
Installation of Queen Pearl with base cabinet.
Install the machine using the supplied
water hoses and gas dome.
4.
Undo the rear section of the machine.
5.
Mount the gas dome (A) on the carbon dioxide
cylinder (B) and then fit the supplied nipple on
the gas dome. Connect the carbon dioxide
cylinder to the cooling unit using the
water hose (C).
6.
Connect the supplied 1/2” hose to
the machine (D) and then to the water main.
It is recommended that you connect the hose to
a shut-off tap.
Check that no kinks or sharp bends have formed
on the hoses during connection.
7.
Fit the tap bosses, see Figure 1.
8.
Fit the drip tray (E).
9.
Connect the plug to an
earthed 230V 10A wall socket.
E
A
C
Water
IN
B
D
Figure
1.
10. Flush out approx. 2.5 litres of chilled still water
and then approx. 2.5 litres of carbonated water
before putting the machine into use.
6.
4. Installation Queen Pearl for integrated fitting
WATER LINE
Installation must be carried out by a qualified fitter. CHILLER SYSTEM
INSTALLATION AND SITING: See page 12.
Installation of Queen Pearl for integrated fitting
A
1.
The machine must be placed on a flat surface that is
impermeable to water. The tap pillar shall be fitted on
material that has a high stress tolerance and is impermeable
to water.
2.
Install the machine using the supplied water filter, hose
connections, water hoses and gas dome.(If necessary, use a
spirit level).
3.
Installation in cabinet. NB The cooling unit must be
installed in a well-ventilated area that is at normal room
temperatur, (approx. 16°C - 28°C). Make sure air is able to
circulate freely around the cooling unit.
IMPORTANT!
The machine must be disconnected from the mains
before any work is carried out. Pull the mains cable from
the wall socket.
The end customer/ user is responsible for ensuring that
the water connection is compliant with the manufacturer’s
instructions.
NOTE
WORKING WITH THE CONNECTIONS
Hold the connection and press the hose as far into
the connection’s body as possible.
(Figure
1.
Disconnecting the John Guest connection
Push the grey ring out towards the connection and pull out
the hose.
If the water hoses need to be cut, make a straight cut in
order to prevent leakage.
Fitting the tap pillar.
4.
(Figure
2.
5.
Fit the tap pillar (A) by drilling a 50mm diameter
hole in the bench top. See Figure 1.
Screw the tap pillar into position using the
supplied fittings.
See Figure 2.
7.
4. Installation Queen Pearl for integrated fitting
WATER LINE
Installation must be carried out by a qualified fitter.
Installation of Queen Pearl for integrated fitting
6.
Connect the water hose from carbonated water
on the cooling unit to carbonated water on the tap
pillar. Then connect the water hose from cold water
on the cooling unit to cold water on the tap pillar.
7.
Mount the gas dome (A) on the carbon dioxide
cylinder (B) and then fit the supplied nipple on
the gas dome. Connect the carbon dioxide
cylinder to cooling unit inlet CO2 using the hose (C).
8.
Fit the water filter (D) and connect the filter to the
water cooling unit inlet using the hose (E).
9.
Connect the supplied 1/2” hose to the water filter
and then to the water main. It is recommended that
you connect the hose to a shut-off tap.
Check that no kinks or sharp bends have formed
on the hoses during connection.
10. Fit the drip tray and the tap bosses.
See page 9.
Drain
valve
C
E
A
11.
IMPORTANT! Fill with water
Before starting the cooling unit, it must be filled
with water. Lift the cooling unit cover and fill
the cooling tank with tap water until water runs out
from the drain valve.
Water IN
D
B
12. Connect the plug to an earthed 230V 10A
wall socket.
13. Flush out approx. 2.5 litres of chilled still water
and then approx. 2.5 litres of carbonated water
before putting the machine into use.
8.
4. Installation Queen Pearl for integrated fitting
WATER LINE
Installation of drip tray and tap handles.
Installation must be carried out by a qualified fitter.
14.. Place the drip tray under the tap pillar. See Figure 3.
Figure
3.
Drip tray
Figure
4.
15.. Screw the supplied handles in position.
See Figure 4.
9.
5. Care and maintenance
Water Line
Fitting and replacing the water filter. To be replaced every 6 months.
The machine is supplied with a water filter that must be replaced every 6 months
in order to retain the quality of the water.
REPLACEMENT OF WATER FILTER
1.
2.
The water filter can be replaced under pressure.
Remove the filter cartridge by rotating it a quarter turn. See Figure 1.
Fit the new filter cartridge by rotating it a quarter turn. See Figure 1.
Figure
1
Water filter
Only use Coffee Queen water filters: Article no.: 1505344
3.
IMPORTANT!
Before the machine is put back into use:
Hold a glass under the outlet for your selected drink.
Pull the cold water handle forwards until water comes out.
See Figure 2.
Figure 2.
10.
6. Cleaning the machine
Daily cleaning Queen Aqua Pearl
Daily cleaning or as required.
Clean with a moist, non-abrasive cloth.
Empty and clean the drip tray and the drip tray insert every day.
11.
7. Important
WATER LINE
Important
Do not make any alterations to the machine. Doing so may result in personal injury and cause the
machine to break down.
The machine should stand on a flat surface so that it will function properly.
The machine must be placed on a surface that is impermeable to water so that any leaks
will be visible. Make sure that no kinks are formed in the hose during installation or when
machine is moved into position. The machine’s hose and HVAC connections must be checked
on a regular basis. Make sure that no leakage has occurred in connection with installation.
With a water connection, there is always a danger of leakage, regardless of any safety equipment
used.
If the machine is to be put into storage for an extended period of time, it must be completely
drained of water.
Shut off the water taps if the machine is not to be used for an extended period of time.
Before carrying out any maintenance, the machine must be disconnected from the mains
electricity supply by pulling the plug from the wall socket.
INSTALLATION AND SITING: CHILLER SYSTEM
The system is designed to be used in standard environments in accordance with
CSN standard 33 2000-3 and is included in climate class N.
It must not be sited close to a heating source or exposed to direct sunlight.
The system is designed to be used in ambient temperatures of
between 6°C (minimum) and 28°C (maximum).
The system must not be used or sited in areas with an ambient temperature below 0°C.
ELECTRICAL CONNECTION
Connect the system to 220–240 V, 50 Hz and 10 A. The electrical installation plug must be compliant
with applicable CSN regulations, EN and ISO standards. If the cable is damaged, it must be
replaced by qualified personnel. This is to prevent accidents.
TEMPERATURE AND SETTINGS:
The temperature of chilled drinks is controlled by means of a mechanical temperature regulator
between 3°C and 10°C. There is a scale from 1 to 7 on the temperature regulator.
(1 = approx. 10°C, 7 = approx. 3°C, 0 = off).
CONNECTION AND SERVICE:
The condenser shall be cleaned every 6 months in conjunction with replacing the water filter.
When cleaning, use compressed air. Do not place anything on the chiller that may hinder air circulation.
Only clean when the chiller is not under power!
All installation work must be carried out by qualified personnel.
12.
WATER LINE
FOR SERVICE
Please contact
Your local retailer
...............................................................................
...............................................................................
...............................................................................
CREM International AB
Box 960, SE-671 29 ARVIKA, Sweden
Tel.: +46 (0)570 477 00, Fax: +46 (0)570-47719
E-mail: [email protected] www.creminternational.com
Art. no. 1730010