Download HVA/HVM User manual - Crem International
Transcript
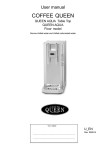
User manual
HVA/HVM
Hot water automat
Your retail dealer
U_GB
...............................................................................
Rev. 080915
...............................................................................
...............................................................................
1234567890123456789012345678901212345678901234567890123456789012123456789012345678901234567890121234567890123456789012345678901212345678901234567890123456789012123456789
1234567890123456789012345678901212345678901234567890123456789012123456789012345678901234567890121234567890123456789012345678901212345678901234567890123456789012123456789
1234567890123456789012345678901212345678901234567890123456789012123456789012345678901234567890121234567890123456789012345678901212345678901234567890123456789012123456789
1234567890123456789012345678901212345678901234567890123456789012123456789012345678901234567890121234567890123456789012345678901212345678901234567890123456789012123456789
1234567890123456789012345678901212345678901234567890123456789012123456789012345678901234567890121234567890123456789012345678901212345678901234567890123456789012123456789
1234567890123456789012345678901212345678901234567890123456789012123456789012345678901234567890121234567890123456789012345678901212345678901234567890123456789012123456789
1234567890123456789012345678901212345678901234567890123456789012123456789012345678901234567890121234567890123456789012345678901212345678901234567890123456789012123456789
1234567890123456789012345678901212345678901234567890123456789012123456789012345678901234567890121234567890123456789012345678901212345678901234567890123456789012123456789
1234567890123456789012345678901212345678901234567890123456789012123456789012345678901234567890121234567890123456789012345678901212345678901234567890123456789012123456789
1234567890123456789012345678901212345678901234567890123456789012123456789012345678901234567890121234567890123456789012345678901212345678901234567890123456789012123456789
1234567890123456789012345678901212345678901234567890123456789012123456789012345678901234567890121234567890123456789012345678901212345678901234567890123456789012123456789
1234567890123456789012345678901212345678901234567890123456789012123456789012345678901234567890121234567890123456789012345678901212345678901234567890123456789012123456789
1. Introduction.
HVA/HVM Hot water automat
Congratulations on choosing an HVA/HVM hot water automat.
Read through the instructions before you use the machine.
- This manual contains important instructions for correct and safe usage of the hot water
automat.
- Always keep the manual in a handy place.
Coffee Queen AB is certified according to ISO 9001 and ISO 14001 standards
and therefore has a minimum impact on the environment.
HVA/HVM Hot water automat
- Digital display with temperature indication
- Electronic temperature control
- Manufactured in bright stainless sheet metal.
Facts
Height
Width
Depth
Tank capacity
Electrical connection
3-phase electrical connection
Cold water connection
Capacity:
Capacity: 3 phase
500 mm
225 mm
410 mm
7.5 litres
230 V / 2200 W
380 V / 8000 W
½” external thread
18 litres/hour
67 litres/hour
2.
2. Functional description.
Hot water tap
Display
Electronic temperature
control
Drip tray insert
Drip tray
ON/OFFswitch
Connection for
filling with water
Functional description
The hot water automat comprises a tank which holds 7.5 litres.
The water level is regulated by a level guard that switches and opens a solenoid
valve.
The water temperature is regulated by a thermostat and an element.
Hot water automat connected to the water supply.
3.
3. Installation and starting.
1.1. Place the machine on a level and watertight
surface.
1.2. Connect to the Cold water supply using the hose
provided. The most appropriate connection is to
a tap that can be turned off.
The pressure shall be 14.5 – 72.5 PSI
(1 – 5 bar) for the automat to function
properly
Refer to Programming on page 9 when filling
the water manually.
1.3. Insert the power plug in a separately-earthed wall
socket. 230 V, 10 A.
1.4. Switch on using the switch that is located at the
back of the machine.
Check that the light comes on.
4.
3. Installation and starting.
1.
The
hot water automat will now start to fill and heat the water.
1.1. The display will flash when the automat fills with water
1.2. While the machine is heating the water the display shows the actual
temperature until the pre-selected temperature is reached.
1.3. The display light stays on when the water has reached
the preset temperature of 90oC.
1.4. The hot water automat is now ready for use.
The operating temperature of the hot water automat is preset at the factory.
2.
Setting the water temperature.
2.1. Adjust the water temperature using the membrane
switch. Max temperature 96ºC.
2.2. Increase the temperature.
2.3. Reduce the temperature.
5.
4. IMPORTANT!
Important.
Do not do anything to the hot water automat. Incorrect action can lead to personal injury
and faults. The hot water automat should stand on a level surface to work satisfactorily.
The hot water automat must be placed on a waterproof surface so that any water leakage
is visible. Make sure that kinks are not formed in the connection hose when the hot water
automat is pushed into place.
The hot water automat’s supply and drain connection shall be checked regularly.
Check that no leakage has occurred in connection with installation.
The water connection always presents a risk of leakage irrespective of safety equipment.
Never leave the hot water automat unattended when it is in use. Turn the tap off when the
machine is not in use.
Switch off the supply before working on the hot water automat. This can be done by
removing the power supply plug from the wall socket.
All installation work must be done by a qualified person.
6.
5.Care.
.
NOTE Cleaning the outside of the machine
Never use aggressive cleaning agents when cleaning the hot water automat.
Use a soft cloth together with a
liquid cleaning agent that does
not scratch.
7.
6. Fault indications - SERVICE
Fault indications E1, E2, E3 and E4 are shown in the display.
NOTE Remove the power plug from the wall during any installation work.
LEVEL CONTROL
E1 shown on the display =
The level sensor’s short electrode is
earthed but not the long one.
Clean the level sensor.
Replace.
Cables connected incorrectly.
E4 shown on the display =
The automat fills slowly.
Poor water pressure.
Water tap not open
Restart the machine.
TEMPERATURE CONTROL
E2 shown on the display =
E3 shown on the display =
Temperature outside the
stated range
The temperature sensor is broken.
Cable loose.
Heating time too long.
Solid state broken.
Element broken.
Overheating guard tripped or broken.
5°C - 105°C.
Replace.
Restart the machine.
Replace.
Replace.
NOTE The installation work and all repairs shall be done by a competent
electrician.
8.
7. Programming.
1.
Programming automatic controls for manual water filling.
A
1.1.
Fill the water to A in the tank up to the long sensor pin.
See fig. 1. Approximately 4 litres.
1.2.
Keep button (B) pressed and switch on the machine
with the switch (D) at the same time.
fig.1.
B
C
D
fig.2.
E
1.3. The display shows T1
Change the type of machine with buttons B or C.
1.4. T1 = HVA automat
T2 = HVM manual
1.5. Confirm the choice by holding down the buttons (B) and (C) at the same time
for approximately 5 seconds.
NOTE Install the plug supplied in the inlet valve (E) to avoid possible leakage.
9.
HVA-HVM
Your retail dealer
...............................................................................
...............................................................................
...............................................................................
CREM International AB
Box 960, 671 29 ARVIKA, Sweden
Tel: +46 (0)570-477 00, Fax: +46 (0)570-47719
E-mail: [email protected] www.creminternational.com
Art. nr/Art. no.1730015


