1
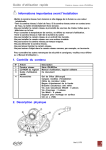
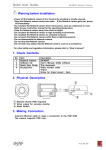
DMS64 User Manual Contents 1 2 Introduction ....................................................................................................................... 4 1.1 Summary ...................................................................................................................... 4 1.2 System Requirements .................................................................................................. 4 1.3 Installing Guide............................................................................................................. 5 1.4 Reinstalling Guide ........................................................................................................ 8 1.5 Device Register .......................................................................................................... 10 1.6 DMS64 Display Mode................................................................................................. 16 1.7 DMS64 Main Function ................................................................................................ 18 1.7.1 Live...................................................................................................................... 18 1.7.2 User Account ....................................................................................................... 19 1.7.3 Group .................................................................................................................. 20 1.7.4 Search................................................................................................................. 20 1.7.5 E Map.................................................................................................................. 21 1.7.6 Status .................................................................................................................. 21 1.7.7 Multi Theme......................................................................................................... 22 Registry Setup and Service ............................................................................................ 23 2.1 Live............................................................................................................................. 23 2.1.1 Summary ............................................................................................................. 23 2.1.2 Create a Live Screen........................................................................................... 23 2.1.3 Modify a Live Screen ........................................................................................... 24 2.1.4 Delete a Live Screen ........................................................................................... 27 2.1.5 Bind Device to Live Screen ................................................................................. 28 2.1.6 Setup Live Screen ............................................................................................... 29 2.1.7 Live Screen Switch Mode .................................................................................... 30 2.1.8 Live Screen Snap Shot........................................................................................ 30 2.1.9 Live Screen Archiving .......................................................................................... 31 2.1.10 Live Screen Lay Out ............................................................................................ 32 2.1.11 Live Screen Context Menu .................................................................................. 33 2.2 Search ........................................................................................................................ 34 2.2.1 Summary ............................................................................................................. 34 2.2.2 Search Button State ............................................................................................ 34 2.2.3 Playback (Forward, Backward)............................................................................ 35 2.2.4 Snapshot (BMP, JPG).......................................................................................... 36 -2- 2.2.5 Print..................................................................................................................... 37 2.2.6 Archive ................................................................................................................ 38 2.2.7 Log ...................................................................................................................... 39 2.3 EMAP ......................................................................................................................... 40 2.3.1 Summary ............................................................................................................. 40 2.3.2 Create a Emap Screen ........................................................................................ 40 2.3.3 Modify a Emap Screen ........................................................................................ 42 2.3.4 Delete a Emap Screen ........................................................................................ 43 2.3.5 Bind Device to Emap Screen............................................................................... 44 2.3.6 Emap Screen Event Color ................................................................................... 45 2.3.7 Emap Screen Event Action.................................................................................. 45 2.3.8 Emap Screen Popup (Manual/ Auto) ................................................................... 46 2.3.9 Emap Screen Switch(Manual/ Auto) .................................................................... 47 2.4 STATUS...................................................................................................................... 48 2.4.1 Summary ............................................................................................................. 48 2.4.2 Create a STATUS Screen.................................................................................... 48 2.4.3 Modify a STATUS Screen .................................................................................... 50 2.4.4 Delete a STATUS Screen .................................................................................... 51 2.4.5 Bind a STATUS Screen. ...................................................................................... 52 2.4.6 STATUS Screen Event Icon................................................................................. 53 2.4.7 STATUS Screen Popup ....................................................................................... 54 2.5 System ....................................................................................................................... 55 2.5.1 Summary ............................................................................................................. 55 2.5.2 System Button State............................................................................................ 55 2.5.3 Device (Register)................................................................................................. 56 2.5.4 User (Register) .................................................................................................... 57 2.5.5 NVR( Register ) ................................................................................................... 59 2.5.6 Snapshot (Archive) .............................................................................................. 61 2.5.7 Archiving (Archive) .............................................................................................. 62 2.5.8 Device (Log) -> DVR Log .................................................................................... 63 2.5.9 System (Log) -> DMS64 Log ............................................................................... 64 2.5.10 Remote Setup (Log) ............................................................................................ 65 2.5.11 Connect (Connect) .............................................................................................. 66 2.5.12 Disconnect (Connect) .......................................................................................... 66 -3- 1 Introduction 1.1 Summary DMS64 has been developed to control the DVR, various Network Camera’s image data and I/O Control efficiently. The DVR and IP CAMERA supplier focuses on how many number of screens could be shown on one screen and how it could be controlled. Thus, Live screen of 16, 32 64 multi screens could be seen. But we would require thinking about the bandwidth when multi channels are transmitted. Central Monitoring System (DMS64) could control the image and data by screen and it shows great countermeasures during emergency by getting screen and urgent data. Also, it has point of doing efficient control of other remote site’s DVR by central monitoring system. DMS64 is able to do the following functions to able to execute for constructing central monitoring system. Unlimited DVR register Monitoring 64 channels on one screen Live screen display for each screen type Surveillance functions for E-Map Device Event and information monitoring for Status Screen Remote recording and remote backup function PTZ Control Event view function for Alarm control (Motion, Sensor, Site Connection logs) DMS64 allows user to manage the setup of DVR (System setup / Recording Setup) and retrieve the recording data of DVR from remote site. Through E Map, users can notice Alarm, Events easily and allow control the alarm. 64 channels live monitoring feature provides more powerful centralized management ability to the observer 1.2 System Requirements -4- Items Minimum Requirements CPU Pentium 2.80 GHz or higher RAM 1GB MB or higher O/S Windows XP Professional or higher (32Bit) Acceleration DirectX® 8.0 or higher Resolution 1280 x 1024 as a minimum Video Card NVIDIA GeForce 8500 GT 256MB or higher Network Card 1000Base-TX (1Gbps) or higher operation; must match the network configuration Monitor 1EA NOTE: Recommended PC specifications for Central Management Software ( DMS64). 1.3 Installing Guide -5- Insert the Installation DMS64 disk on the CD/DVD Drive. The following screen as below would appear by Install Shield Wizard. Press [Next] button to proceed to next stage. NOTE: Double click the Setup file on the CD/DVD Drive to start the Install Shield Wizard if the Auto Run does not function. -6- The DMS64 could be installed as the following below. Click the [Close] button after installation is completed -7- 1.4 Reinstalling Guide If the DMS64 is re-installed on PC, the DMS64 could be installed as the following below. -8- When removing all installed features, press [Next] button to proceed to next stage. If you reinstall the DMS64 after remove, the DMS64 could be installed as the following below. Press [Repair] and [Next] button to proceed to next stage for Successful reinstallation. After Repairing Visual C++, you have to restart the computer for the changes to take effect. NOTE: When removing DMS64, it couldn’t remove Visual C++ at the same time . When removing DMS64, it couldn’t remove Visual C++ at the same time. . -9- 1.5 Device Register Input ID and PASSWORD (as Default ADMIN / 1234). Go to SYSTEM menu, Select Device Item. - 10 - Input Connection information of DVR. 1) The Company selection tab: DR_N group – DR4N, DR8N(2), DR16N(2), DR8NRT, DR16NRT, DR4N-LITE IP_CAM - PIXELPRO(VGA), PIXELPRO(720P), PIXELPRO(1080P) DR_H group – DR4H, DR8H, DR16H ` 2) Select model of DVR. 3) Create a group for DVR. 4) Input Device name and IP address of DVR. 5) Input Port number (DR_N: Client port, DR_H and IP CAM: web port number of system). 6) Input ID, Password of DVR then press ADD. - 11 - 7) Now finish registering the DVR on DMS64. 8) You have to check the “Auto connect” surely. Go to LIVE menu. Select NEW icon for create new Live screen. Input Name of screen mode. - 12 - Create a Group of Screen. Press Add Icon and close window. User will get below screen. Go to SYSTEM menu again and press Connect Icon. - 13 - Press LIVE tab on Left tree panel. Expand the item on the tree, then double click last item. User will get new window on right panel. - 14 - Now select DEVICE Tab on Left bottom Panel, and expand the tree. Drag the CAMERA Item to Right window Panel. - 15 - 1.6 DMS64 Display Mode NOTE: It is constructed to control the functions and buttons of each and every windows 1. Category Tab Button Use to select Screen menu of selected Category. 2. Frame Style Buttons Use to initialize / set layout of left Tree. - 16 - Use to change the Frame style. 3. LIVE Tree Use to see the information list of the registered LIVE Screen. 4. EMAP Tree Use to see the information list of the registered EMAP Screen. 5. STATUS Tree Use to see the information list of the registered STATUS Screen. 6. Device Tree Use to see the information list of the registered device. - 17 - 1.7 DMS64 Main Function 1.7.1 Live Live image of the registered device could be seen and the multiple screen could be seen until 64 multiple screens. Manage (increase/decrease, print, snapshot, previous image) each define image separately by displaying each panel’s image or multidisplay of camera image could be controlled by various screen mode and map image. Also, it supports real-time event monitoring for suitable event management and it could control each camera and show animation affect for login history and alarm of event viewer. - 18 - 1.7.2 User Account Function to register DMS64 user and Device. Give authority to the user, then the control for DMS64 could be done and supports backup functions for each user’s profile and data base. NOTE: UESR authority to Limit DMS64 function use. It couldn’t separately set & save per each UESR. - 19 - 1.7.3 Group Group function provide screen or map service registration and it could structure objects (camera, sensor, relay, mike, speaker and etc) on the monitoring screen structure and map image. More efficient control could be done by approaching the central monitoring system with the various service mode registered on each group. 1.7.4 Search It is function to see recorded image monitoring for saved event log history and backup the recorded image by AVI file. - 20 - 1.7.5 E Map It is function to support the Multi-Display of the screen mode on the map image and monitoring of the camera can be done on the E map itself. Provide control functions for each camera and when event happens on the specified camera, more efficient visual monitoring system, using animation effect and map link by map moving functions. 1.7.6 Status Show the event (video, audio, alarm) which performs in the facility linked with DMS64 by icon independent by channel for virtualization and at the same time to be able to monitor several facilities and all channels at real-time. - 21 - 1.7.7 Multi Theme It is a function to modify the window screen, according to the user’s taste and it supports 4 kinds of multi theme. - 22 - 2 Registry Setup and Service 2.1 Live 2.1.1 Summary Use to See Live image after selecting output Device on DMS64. It is supported to Split Mode, Full Screen Mode and Switch Mode except on basic live image output, then use the Snapshot, it is a function to Archiving functions of live image. Level of authority for each user’s DMS64 Control could be managed by registering profile for each authority. 2.1.2 Create a Live Screen Click [LIVE] -> [NEW] on the DMS64 menu and the following Live Screen could be seen on the DMS64 menu. Click [+] button as below and Group registration screen could be seen as below. Use to input Group Name and register group as below. - 23 - After Group Register, input Live Screen name and save. It could see Live Screen image as below. 2.1.3 - 24 - Modify a Live Screen Click the [LIVE] -> [MODIFY] as selecting Live Screen on DMS64, then it could see Live Screen Modify image as below. - 25 - Input the Live Screen name or select Live Screen Group, then press the Save button. - 26 - It could check Modified LIVE SCREEN as below. 2.1.4 Delete a Live Screen Click the [LIVE] -> [DELETE] as selecting LIVE SCREEN TAB on DMS64 menu, then It could delete the LIVE SCREEN. - 27 - 2.1.5 Bind Device to Live Screen Now select DEVICE TAB on LEFT bottom Panel, then expand the tree Drag & Drop the CAMERA ITEM to Right window Panel, It could blind Device to Live Screen. - 28 - NOTE: Live Screen mapping is saved to first drag & drop Action.(Device -> Screen) It couldn’t save Screen Moving within the Screen 2.1.6 Setup Live Screen Now select DEVICE TAB on LEFT bottom Panel, then expand the tree Drag & Drop the CAMERA ITEM to Right window Panel, It could blind Device to Live Screen. Setup OSD Set the OSD on Screen. Set the Color on each OSD. Event Filter Set the Event on using Live. Ignore the unselected Event on Live. Event Action Select Action form on each Event. Sound File Set the Action time of Event Action. Ignore another Event on time. - 29 - 2.1.7 Live Screen Switch Mode It could search remained Live Channel with (<), (>) buttons on [LIVE] -> [Option]. It could be automatically searched with pressing START button, after Auto (sec) setup. NOTE: Designated Screens are progressed on Switch Mode, step by step. If you want to change Switch Mode Sequence, change the Screen Sequence. 2.1.8 - 30 - Live Screen Snap Shot Screen Live image could be saved to image file on press [LIVE] -> [Snap Shot] button. 2.1.9 Live Screen Archiving Screen Live image could be saved to video (AVI) file on press [LIVE] -> [Archiving] button. - 31 - 2.1.10 Live Screen Lay Out The Screen division provided by DMS64 are 14 types which are [1, 4, 6, 7, 8, 9, 10, 12, 13, 16, 21, 29, 36, 64]. - 32 - 2.1.11 Live Screen Context Menu Close Channel – Close the selected live channel. Close All Channels – Close all selected live channels. PTZ On/Off – Can use the PTZ supporting Device by Remote Control as below. OSD ON – Can use on/off OSD with showing on the screen. Full Screen – Can see Full Screen with showing on the screen. Docking & Original State – Can Return to the Normal mode on Full Screen. Snap Shot – Can save the present image with showing on the screen. - 33 - AVI Backup - Can save the present the video (AVI) file with showing on the screen. ZOOM – Can see ZOOM mode with showing on the screen. Print – Can Printout with showing on the screen. Split – Can change the Split mode on selecting as below. Instant Playback – Can use Instant Play function with showing on the screen. 2.2 Search 2.2.1 Summary Stand alone DVR can Playback DVR recording Data on PC. IP Camera can see recording Data on PC. Drag & Drop Device list of Device tree to Search UI for Search. It could not use any button before connection. 2.2.2 Search Button State New Generate as deleting the Search UI. Don’t generate more than 1 Interface. Delete : Button for closing the Search UI. Float : Use to Float Search UI to another monitor. Search Forward : It could search Forward. Search Backward : It could search Backward. Search Stop : It could stop search. - 34 - Display with 1/4/9/16 split. print button snap shot button archive button Open the recording Data folder on archive. Search DVR Log on connection. Provide right position Timeline. Change the Panorama mode. Change the Search mode. Draw per minute Time Line on time. Draw per second Time Line on time. Draw per day Time Line on Date. Play the 1,2,4,8,16,32,64 times. Play the sound. 2.2.3 Playback (Forward, Backward) The timeline display also changes to show recorded footage on that day. Press Play button to choose the day and move to the timeline. During times playback, press the times playback and play. - 35 - NOTE: Support Panorama Search Function. Split Screen -> CH Selection -> Click Panorama 2.2.4 Button Snapshot (BMP, JPG) It is It could output recording Path and File Name, then open the recording folder. Click the Capture Screen, then it could see highly. - 36 - snapshot Screen. 2.2.5 Print Function to print the selected image from the camera. Install the Driver from Print Corporation. NOTE: Print -> Screen Split Screen is printed. Selected Ch is not printed - 37 - 2.2.6 Archive It is Video and audio for any channel can be selected for the Archive. Once all the desired archive setups have been selected, and press OK button. The DVR displays a list showing the exact information to be archived. If the Auto Close is selected on option, close the screen automatically after archive. It could open and see recording Save Folder - 38 - Archive Screen. 2.2.7 Log It could search Log of connecting DVR. Once all the desired time and filter have been selected, and press Search button. If Search logs are more than 100, it could research Prev, Next button. Search log could be printed or recorded on txt file. . - 39 - 2.3 EMAP 2.3.1 Summary It is a function for efficient central monitoring system by allocating the cameras of the registered device on the map. 2.3.2 Create a Emap Screen Click [EMAP] -> [NEW] to see the Emap registration window on the DMS64 menu. Click the [+] button as below to see Emap Group registration screen. Input the Group name and Click the Add as below. - 40 - Enter the Screen name at Name as below and click the […] button to register the Map Group on the “Group tree” window. - 41 - The initial Emap Screen after Save. 2.3.3 Modify a Emap Screen Click [EMAP] -> [MODIFY] on selected EMAP Screen, then it could see EMAP Screen Modify screen. - 42 - 2.3.4 Delete a Emap Screen If you click the [EMAP] -> [DELETE] on selected EMAP Screen, delete EMAP Screen. - 43 - 2.3.5 Bind Device to Emap Screen Now select DEVICE TAB on LEFT bottom Panel, then expand the tree Drag & Drop the CAMERA ITEM to Right window Panel, It could blind Device to Live Screen. - 44 - 2.3.6 Emap Screen Event Color Click the [EMAP] -> [Color] menu on selected EMAP Screen and output Next screen, then it could select wanted Event Action Color. 2.3.7 Emap Screen Event Action Click the [EMAP] -> [Action] menu on selected EMAP Screen and output Next screen, then it could select wanted Event Action UI. - 45 - 2.3.8 Emap Screen Popup (Manual/ Auto) Click the [EMAP] -> [Popup] menu on selected EMAP Screen, then, Mini Live Screen could be pop-up as double-clicking icon as below. NOTE: It could coincide 8 Emap Event Popup Screens. 8 Popup Screens from the first detected Sensor -> The next event Popup after 10 second. - 46 - 2.3.9 Emap Screen Switch(Manual/ Auto) Now select DEVICE TAB on LEFT bottom Panel, then expand the tree Drag & Drop Screen from Emap Screen tree on selected EMAP Screen, then generate Yellow Link shape Icon. Move Emap Screen as double-click When clicking the [EMAP] -> [Switch] menu, move automatically. When registering screen of Link icon happens to event, move automatically. - 47 - 2.4 STATUS 2.4.1 Summary Show the event (video, audio, alarm) which performs in the facility linked with DMS64 by icon independent by channel for virtualization and at the same time to be able to monitor several facilities and all channels at real-time. 2.4.2 Create a STATUS Screen Click [EMAP] -> [NEW] to see the Status registration window on the DMS64 menu. Click the [+] button as below to see Emap Group registration screen Click the [+] button as below to see Status Group registration screen. - 48 - Click the ADD after input Group name as below. Click the Save after input Screen name as below. - 49 - Generate Empty STATUS Screen as below. 2.4.3 Modify a STATUS Screen Click [STATUS] -> [MODIFY] on selected Status Screen, then it could see Modify screen of Status Screen as below. - 50 - On Screen, after changing the Screen name of Name, changing content could be applied to save on DMS64. 2.4.4 Delete a STATUS Screen If you click the [STATUS] -> [DELETE] on selected Status Screen, delete Status Screen. - 51 - 2.4.5 Bind a STATUS Screen. Now select DEVICE TAB on LEFT bottom Panel. Drag & Drop the Device ITEM to Right window Panel, It could blind Device to Live Screen - 52 - (Group Drag &Drop) 2.4.6 STATUS Screen Event Icon It could check per CH Event information after Device Registration as below. (Motion, Video Loss, Alarm, Audio Event) - 53 - 2.4.7 STATUS Screen Popup Click the Channel of registered Device on Status Screen, then, it could see Live Video of selected channel as below. - 54 - 2.5 System 2.5.1 Summary It could generally work with Register/Setup/Search on DMS64. 2.5.2 System Button State Register Device : Register Device for connection. User : Register User for working DMS64. IP Camera : Register Local Record as IP Camera. Archive Snapshot : Set to work Snapshot. Archiving : Set to work Archiving. Log Device : Search DVR Log. System : Search DMS64 Log. Setup : Set DVR setup by remote. Connect Connect : Try to connect registered DVR information. Disconnect : Try to disconnect registered DVR information. . - 55 - 2.5.3 Device (Register) Register the Device. Add : Register after putting in setup content. Modify : Modify selected List from registered. Delete : Delete selected List from registered. The Company selection tab. DR_N group – DR4N, DR8N(2), DR16N(2), DR8NRT, DR16NRT, DR4N-LITE IP_CAM - PIXELPRO(VGA), PIXELPRO(720P), PIXELPRO(1080P) DR_H group – DR4H, DR8H, DR16H - 56 - 2.5.4 User (Register) Register DMS64 User. Level of authority for each user’s DMS64 Control could be managed by registering profile for each authority. By default, the DMS64 is configured with a user ID of ADMIN, belonging to the ADMIN group and with a password of 1234. - 57 - Make Username, Password, Confirm, Authority, Memo with Add button. Modify Selected List Content with Modify button. Delete Selected List Content with Delete button. - 58 - 2.5.5 NVR( Register ) Set to Local Record of IP Camera in case of connecting IP Camera/ ANF Type devices. Device : Display the Device to be registered IP Camera. Folder Set up Folder on recording video data. It should have kept at least more than 1GB. HDD Size : Set up the recording space. (Max 1TB) File Name : Select the recording file name. (input except extension) Do Record : Select whether start the recording. Show the progress situation with progress bar for making the recording space of setting content, after finishing the set up and saving with Save. - 59 - Display completed setting content on the left List. Screen on setting up Screen to be completed set up. Record the video data to setting up capacity on Overwrite mode in real time, before the end of the DMS64. - 60 - It could see Search on recording data. 2.5.6 Snapshot (Archive) Set for Snapshot. Path : File Path for Save. File Type : Select BMP, JPG type. Auto : According to select Device Name and Camera Channel, Selected file is recorded to file name. - 61 - Manual : Input the file name, as working Snapshot function, then record. 2.5.7 Archiving (Archive) Set for Archiving. Path : File Path for Save File Size Set the Maximum Recording Size per file. As exceeding the setting file size, it could be divided to record as much as setting size. Auto : According to select Device Name and Camera Channel, Selected file is recorded to file name. - 62 - Manual : Input the file name, as working Archiving function, then record. 2.5.8 Device (Log) -> DVR Log Function to search the Log of the event as a list from the registered Device Don’t Float More than 1 Screen. Time : Set the Time. Device : Select Device for Search. Option : Check the Filter for Search. Print : Can Print in case of Search content. Save to File Can Save File, if there is Search content. Recording Folder is same to Setup Path of [Archive]Æ[Archiving]. - 63 - 2.5.9 System (Log) -> DMS64 Log Function to search the Log as a list from the DMS64 Don’t Float More than 1 Screen. Time : Select the Search Time. Option : Check the divided Option for main function Print : Can Print in case of Search content. Save to File Can Save File, if there is Search content. Recording Folder is same to Setup Path of [Archive]Æ[Archiving]. - 64 - 2.5.10 Remote Setup (Log) Run the Connecting Remote Setup of Connecting Device. It couldn’t run several setting at the same time. Press the Select button after selecting Device. - 65 - 2.5.11 Connect (Connect) Connect Registered Device. 2.5.12 Disconnect (Connect) - 66 - Disconnect Registered Device.