1
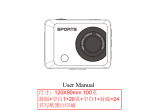
Mini Video Speaker
Model: FHC51
User’s Manual
Thank you for purchasing the FHC51 mini video speaker!
This product comes with a vague, small appearance, yet offers simple operation and
includes many practical functions, such as an MP3 / MP4 player, video recording, playback,
infrared night-vision, loop recording, photo capture, webcam, FM radio, and other
functions. It does NOT include audio recording. It can be used for personal
entertainment, home security, office, store and hospital bed monitoring, etc. The FHC51 is
the perfect combination of an entertainment product and a security monitor.
1. Appearance
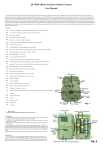
Camera
Button details:
"VOL-/|<<": Volume decrease / Previous / Fast backward
"VOL+/>>|": Volume increase / Next / Fast forward
"MENU": Menu / Mute
"MODE": Mode switch
"OK": Confirm
"ESC": Go back / Hold to turn off the display
**Pressing "VOL-/|<<" and "VOL+/>>|" together can open hidden function menus
such as video recording, etc.**
2. Features
2.1 Inconspicuous, portable, compact, and supports a Micro SD card
2.2 Rich entertainment functions:
* Music player, video player, FM radio, picture browser etc.
2.3 Powerful security monitoring functions:
* Infrared night vision, video recording
* High quality video compression, ability to store video for long durations
* External power supply for continuous recording (in case you don’t want to use the
battery)
* Loop records automatically without stopping
* Automatic/manual recording modes
* Hidden high level camera, hidden menu, humanized design
* Built-in LCD screen, can play video content without connecting to the computer
* Webcam functions
3. Functions
3.1 Entertainment function
Once turned on, the main interface is shown first. This gives you access to playing music
and videos, viewing pictures, listening to the radio and supports an aux line in.
3.2 Security function
All functions related to security are hidden. This includes video recording, photographs,
webcam, corresponded file playback, etc.
Press and hold the "VOL-/|<<" and "VOL+/>>|" buttons together for more than 3 seconds to
access the security interface. To switch back to the entertainment interface, repeat the
process.
3.3 Automatic recording
To use this function please set manual or automatic mode in the setting menu.
Automatic recording means that if you play MP3/MP4 (and video playback) by pressing
buttons while recording video, the video recording pauses until the MP3 / MP4 is over, then
the video recording will resume automatically. In comparison, manual recording means
that the recording will not resume after the completion of an MP3 / MP4.
3.4 Night-vision recording
The night vision function works with infrared enhancing when the amount of light is dim.
This is set in the security interface, “Monitor Settings”, “DV”, “DV IR LED” option.
3.5 Loop recording
Video files are saved and divided into sections automatically. When the Micro-SD card is
full, the oldest file or several older files are automatically deleted to make space for
continuous video recording. At the same time, it will automatically allocate the available
space and the effective space on the flash card. If the available space or the effective space
is too small, then the video recording will stop.
For the convenience of retrieving files, the file name contains recording information based
on time. The format is as follows: VidYYMMDD_hhmmss.mp4
3.6 Continuous video recording
With an external power supply, this product can continuously record video without the
limitation of any type of battery.
3.7 Hidden recording
This function must be set from the “Monitor Settings” in the security interface.
Hidden camera means that after 10-seconds of video recording, it automatically switches
the screen into a clock display. Recording doesn't stop, and it is indicated by a “blue dot”
that comes up on the top right corner of the screen. Hidden recording is default.
3.8 File directory structure
\\VIDEO
---------------------------Video directory
\\MUSIC
---------------------------Music directory
\\PICTURE
---------------------------Image directory
\\REC\VIDEO
---------------------------Video record directory
\\REC\PICTURE
---------------------------Photo record directory
The files should be put in their specific directory. For example, MP3 music files must be
placed in the \\MUSIC directory. Otherwise, they won’t be able to be played.
The video recording function needs more than a 512MB Micro-SD card and enough
effective memory space (the sum of the available space and the space of all the existing
video file), otherwise, it cannot record video and a message will display on the screen.
4. Operations
Routine operation: according to the screen display, press "VOL-/|<<", "VOL+/>>|" buttons
to select a function, "OK" button to confirm and "ESC” button to go back. Most of the
machine functions can be done through routine operations of these buttons.
4.1 Enter security interface
In the main interface, press and hold the "VOL-/|<<" and "VOL+/>>|" key at the same time
for more than 3 seconds to enter the security interface. Return to the main interface with the
same procedure.
In the interface of file listings for video, music and pictures, press "VOL-/|<<" and
"VOL+/>>|" key at the same time for more than 3 seconds to enter the hidden file list
interface, which includes file lists of camera and pictures. Press the “ESC” key to exit and
go back to the common file list interface.
4.2 Operation of file list
Entering into the music, video, picture browsing function from the main interface, we first
see the related file list, in file list interface. Press the "MENU" button to popup the menu.
4.3 Music/ Video play
Press the "MODE" button, the indicator on the volume bar will turn blue, it is now in the
second function mode. Press "MODE" again to go back to normal mode.
Normal mode:
* Briefly press "VOL-/|<<", "VOL+/>>|" buttons to choose the previous or next song.
* Hold the "VOL-/|<<", "VOL+/>>|" buttons to go backward or forward quickly (music
player has 4 speeds that can be played, holding the button longer will change the speed).
Second function mode:
* Briefly press "VOL-/|<<" or "VOL+/>>|" keys to adjust volume.
* Hold the "VOL-/ | < <" key to choose the play mode.
* Hold the "/ > > | VOL +" key to choose the EQ mode. General operation:
* Briefly press OK to play/pause
* Briefly press ESC to exit playing and go back to previous interface.
* Briefly press MENU to mute.
4.4 Radio operation
To start the radio, insert earphones or insert an audio jack into the “LINE IN” port.
Press the "MODE" button, the indicator on the volume bar will turn blue, and it is now in
second function mode. Press "MODE" again to go back to normal mode.
Normal mode:
* Briefly press “MENU” to enter into FM mode options, including the channel search,
automatic search and manual search.
* In channel search mode, we can choose a radio station. Briefly press the "VOL-/|<<",
"VOL+/>>|" key to choose a radio station, press "OK" to save the current radio station.
* In automatic search mode, press "OK" to search a radio station automatically, when
searching, all buttons are not active.
* In manual search mode, we can set a frequency manually. Press "VOL-/|<<", "VOL+/>>|"
to decrease or add frequency, press "OK" to save the current radio frequency setting.
Second function mode:
* Press "VOL-/|<<", "VOL+/>>|" buttons to adjust the volume.
* Press “OK” to mute.
General operation:
* Press "ESC" to exit the radio function and go back to the main interface.
4.5 Audio input
Insert a jack into the “LINE-IN” port, can be used as an external speaker.
* Press "VOL-/|<<", "VOL+/>>|" to adjust the volume.
* Press “OK” to mute.
* Press "ESC" to exit the line-in function and go back to the main interface.
4.6 Video recording
After entering the recording mode, press “OK”, a message box will appear on the screen to
ask whether or not to stop recording.
After choosing the recording mode, press “ESC”, then enter the clock display interface, the
recording will not stop.
In the clock display interface, press “VOL-/|<<” and “VOL+/>>|” for 3 seconds, then return
to the video recording interface. The recording will not stop.
In the clock display interface, press “ESC” button, save the recording, then exit to the main
interface. The recording will stop.
When the automatic record mode is set, the system will enter the clock display interface and
then start recording automatically if there is no operation in the main interface. When the
hidden record mode is set, the clock will appear automatically after starting video recording
for 10 seconds, when there is a “dot” display on the upper right corner of the screen, it
means that video recording is currently on. The “blue dot” indicates video recording, “||”
indicates that the recording stopped. To return to the security interface press and hold
“VOL-/|<<” and “VOL+/>>|” for 3 seconds.
4.7 Webcam operation
The webcam driver should be installed in the PC, and then the webcam function activated
on the camera. When connecting it to the computer with a USB cable, it will start the
webcam function. It will return to the main interface when the USB cable is disconnected.
4.8 Operation of Connect Computer
In the main interface, connect the product to a computer with a USB cable, and it will go
into MSDC mode (USB Mode) automatically. Pressing “ESC” twice rapidly will exit this
mode but remain charging the camera.
4.9 Charge
This product can be charged through a USB port, when the charger is connected through
USB cable, it will recharge automatically.
4.10 Clock display
How to enter clock display interface:
* In the main interface and security interface, the clock display mode will appear
automatically if there is no operation for a long time.
* After video recording starts, press the “ESC” button.
* When the hidden video recording mode is set, there shouldn’t be any operation until video
recording starts in 10 seconds.
How to exit time show mode
* When video recording is on, press “VOL-/|<<” and “VOL+/>>|” beyond 3 seconds, it will
return to video recording interface.
* When video recording is on, press “ESC” button, it will return to main interface.
* When video recording is off, press any button, it will return to main interface.
4.11 Clock setting the time and date
To set the time and date, enter the “Sys. Setup” menu from the main interface and select
“Time Set”. The yellow arrow denotes which field is being edited.
Button functions:
* Press “MODE” to access the next field.
* Press “MENU” to access the previous field.
* Press “VOL+/>>|” to increase/change the current value.
* Press “VOL+/>>|” to decrease/change the current value.
* Press “OK” to save current values and exit.
* Press “ESC” to exit and revert to previous values.
4.12 Turn off Screen Display
Press “ESC” button for 3 seconds. The LCD display will be turned off. Pressing any key
again will turn on the screen display.
5. Parameters
Video decode
Audio decode
Video encode
Video resolution
Video frame rate
Audio encode
Image format
Image resolution
Speaker power
LED resolution
Storage capacity
Interface type
IR LED wavelength
Battery
Charging voltage
Working temperature
Operating humidity
Storage temperature
MP4/3GP/AVI/ASF
MP3/WMA/WAV/AAC
MPEG4
320*240/640*480
30fps
AAC
JPG
Up to 2M Pixel
3W
320*240, QVGA
Micro-SD card Support Up to 32GB
MINI 5 pins USB, USB 1.1/2.0
940nM
1000mAH, Compatible with Nokia Li Battery
BL-5C
DC-5V
-10℃-60℃
20-80%RH
-10℃-70℃
6. Accessories
Battery charger
1 Piece
USB cable
Audio cable
Battery
Earphone
User’s manual
Portable sack
Standby Battery
1 Piece
1 Piece
1 Piece
1 Piece
1 Piece
1 Piece
1 Piece(option)
7. Troubleshooting
Phenomenon
System halted
Analysis
* Power is not stable or
unexpected interference
* Micro-SD card has a
problem
Cannot play / cannot
Micro-SD card has a
record / stopped
problem
recording automatically
Overlap display when
record or playback
Solutions
* Reinstall battery (The
power switch is not active
when system halted).
* Format or change the SD
card
Format card or change the
SD card
This is the LCD screen Connect to PC to watch the
characteristics, the video video
file has no problem
8. Precautions
* Use limits: Please strictly observe the relevant national laws. This product can’t be used
for any illegal purpose, or you are responsible for the consequences.
* About the battery: The working time of the battery will become shorter, with the growing
use of time, if not used for a long time, please recharge it before use.
* It is normal that the Micro-SD card’s real capacity is slightly less than the advertised
value. If the capacity of usage of the card is abnormal, please format the card and then test
again.
* Documents security: This product is a non-professional storage device; we do not
guarantee the security and integrity of the internal files. Please backup your important files
on computer or other storage device.
* Working temperature: -10 ℃ to 60 ℃.
* Working humidity: 20% - 80%, please do not put the product in damp environment. This
product is not waterproof product.
* Other Notices: Please do not subject the product to strong shocks and continuous
vibration. Please do not use it under strong magnetic and electric fields.
* Deal with the disposal: Please pay attention to the environmental protection. Don’t
discard this product freely. Throwing this product in fire is prohibited in order to avoid an
explosion.