1
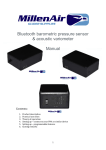
The LAVATM -‐ Light Airsports Variometer Bluetooth barometric pressure sensor & acoustic variometer Manual V2.10 Contents: 1. Product description 2. Practical use notes 3. Principles of operation 4. Setting up – connect to your PNA or similar device 5. Setting up – programmable features 6. Pushbutton functions 7. Closing remarks 1. Product description Barometric pressure altitude data is much more reliable than GPS altitude. For example when flying in the vicinity of restricted airspace the GPS altitude can show that you are still outside of the airspace, but in fact you already have infringed the airspace by 100 meters! So we introduce: the LAVATM -‐ Light Airsports Variometer, a Bluetooth barometric pressure sensor with integrated acoustic variometer! The LAVA has an internal Lithium battery for long fully stand-‐alone operation. It will power it for approx. 8 hours when using Bluetooth and acoustic variometer, and up to 18 hours when using only the acoustic variometer! Charging of the battery is done via a mini USB plug (also possible during normal operation). The sensor is extremely accurate; up to 1Pa accuracy, that's only 8cm resolution! The unit will work with any navigation software because it transmits both LK8EX1 as LXWP0 sentences. Integrated acoustic variometer The Bluetooth barometric pressure sensor also calculates and sends the variometer data to the navigation software for navigation purposes. This module also has an optional acoustic variometer! The vario is extremely accurate. Sensitivity, sound volume and variometer integration time are configurable via Bluetooth. An easy terminal-‐controlled setup process enables you to select your own preferences. This can be done through Bluetooth or via a mini-‐USB cable on the computer. Highly recommended for paragliders and hang glider pilots for use with the Vertica V2! Summary: • Integrated variometer data for navigation. • Acoustic variometer option! (See demo video) • Internal Lithium battery powers the unit for a full day of flying. Fully stand-‐ alone! • Very small: only 64 x 43 x 25 mm and low weight (ca 51 grams)! Easy to carry in your pocket. • Mini USB connector for charging of the battery, with status LED for charging. • Status LED for Bluetooth. • Bluetooth can be switched on and off to save power. • Acoustic variometer can be easily switched on and off by holding the Bluetooth function button for 1 second. • Battery life up to 18 hours, or 8 hours with Bluetooth on. 2 • Vario can be programmed via Bluetooth or via a mini-‐USB cable. • Variometer time constant adjustable via an easy Terminal setup program, default 2.5 seconds (choose between 1, 1.5, 2, 2.5, 3, 4, 5, 6, 7 or 8 seconds integration time). • Variometer tone volume adjustable via an easy Terminal setup program. • Variometer tone sensitivity adjustable via an easy Terminal setup program. • Variometer dead-‐band adjustable via an easy Terminal setup program. • Variometer beeper can be switched on/off using a control button. • Works on any navigation software, NMEA sentences $LK8EX1 and $LXWP0 (LK8000, SeeYou Mobile, XCsoar, etc...). • Bluetooth baudrate: 38400 bps. • Bluetooth password: 0000. • Bluetooth name: MillenAirBTvario[xxx] (xxx = serial number). 2. Practical use notes This device can be used in a range of applications that are quite diverse in flight characteristics: Paragliders, with their slow speeds and agility in manoeuvring in 3-‐D space. Hang gliders, with intermediate speeds and large ranges in glide angle. Gliders, with higher speeds and excellent glide angle. (Of course its use in a glider is limited as the unit is uncompensated.) 3 To optimally use this device in the conditions that you will expose it to it is important that you understand some of its operation principles, see next chapter. Please note that the default settings as delivered are intended to allow using it in flight. For instance the sensitivity is not set at its highest level, which would result in a positive response when demonstrating the device on the ground, but would be of no use when in flying. It is advised to use the device for the first time(s) with the default settings to get a feel for what you would like to change. It is quite likely that you will feel the need to modify the acoustic variometer to sound just like you would prefer. In that case, do you want it to respond faster or slower, be less or more sensitive? The LAVA remembers its settings: turning it on will restore the last used settings. 3. Principles of operation Integration time The readout of barometric pressure is generally affected by turbulence and needs to be stabilised. Likewise the variometer readings must undergo a small amount of averaging – integration, in order to keep the indications from changing too rapidly. This device has a built-‐in integrator with a range of integrating times that can be selected through the setup procedure. The integration time for the variometer is a matter of personal preference. Should not be taken too long or otherwise the region of climb may be passed through before the climb is detected, and not so short that the indication varies too nervously. This device provides integration times from 1.0 to 8.0 seconds. A useful default of 2.5 seconds has been pre-‐programmed, but can be changed through the configuration menu. Vario beep sensitivity The rate of climb or sink is calculated from repeated readings of the barometric pressure, and integrated (averaged) over the period set by the integration time specification. Both altitude and variometer data are transferred to the PNA in NMEA sentences. The acoustic variometer output is directly fed to the pilot via the tone that is being generated inside the unit. Internally the tone frequency is calculated from the difference in running averages over two integration times: the one specified via the configuration and a faster, fixed integrator. This is a very versatile method, with the advantage of offering flexibility in specifying the response of the beeper, but with the disadvantages of needing a range of vario beep sensitivities that depend on the integration time chosen, and hence the added complexity for the user. This unit however offers the possibility to choose automatic beep sensitivity where the unit uses a sensitivity that is matched to the integration time selected. Alternatively, one may deviate from this and choose another, manual, sensitivity setting, but only for those willing to spend time and effort to tune the response as desired. 4 Note that the codes used for the sensitivity are in steps of √2. In the automatic mode one still has the possibility to change the sensitivity for all integration times at the same time, via the Vario beep sensitivity multiplier setting, see next. Vario beep sensitivity multiplier In addition to the functionality of the vario beep sensitivity described above there is an overriding beep sensitivity setting: the multiplier. The multiplier that is specified here is applied to all beep sensitivity settings, including the automatic mode. It can range from 1/3rd to 4 times the tone sensitivity, adjustable in steps of 31/4. Default is 1x. The combination of these possibilities makes the acoustic vario very versatile, yet easy to adjust, especially for the case of automatic sensitivity mode. Vario beep dead zones The dead-‐zone is a region in measured rate of climb or sink where the beeper is quiet. Usually there is not much information in stationary beep tones around zero climb or sink, so there is an option to shut up the beeper in that zone. The codes available for this have the functionality as drawn below: Code%0%%%%%%%%%%1%%%%%%%2%%%%%%%%3%%%%%%%%%4%%%%%%%%%%%%%%%%%5%%%%%%%6%%%%%%%%7%%%%%%%%%%%%%%%%%8%%%%%%%%9% +0.2% % 20.2% 20.5% % 21.0% % % % % % 22.5% % % % % % % % % 25.0% 0% For code 0 the dead-‐zone is off, in other words the beeper is always on. Codes 1 to 4 are to be used where positive climb enables the beeper, with an increasing degree of sink before the beeper starts making sound. The same for codes 5 to 7, but here starting from zero vario. Codes 8 and 9 are used for situations where more rapid rate of sink (~0.5m/s) is standard. 5 4. Setting up – Connect to your PNA Your device will come with a pre-‐defined Bluetooth name and passcode. On request you can specify these at a small incremental cost, see the website. What you need to do to connect to your LAVA to a Bluetooth enabled Windows Mobile PNA device is as follows: First connection via Bluetooth. 1. Turn on the Bluetooth function: Press the blue button for approx. 4 seconds. A high-‐pitch beep and a fast-‐blinking (2 Hz) blue LED will confirm Bluetooth is enabled and is waiting for pairing. (See also section 6 in this manual). 2. In Windows Mobile, go to Settings -‐> Connections -‐> Bluetooth. 3. Devices -‐> add new device. Connect to your module, named 'MillenAirBTvarioxxx' using the standard passcode: 0000. (In case you ordered your LAVA with custom name and password, use those.) 4. Now the module is paired with your PNA. 5. Set up an outgoing COM port: COM Ports -‐> New Outgoing Port. 6. Select your module from the list and press next. 7. Select COM9*. Secure connection is not required. Press finish. Now the module is set up for an automatic connection on COM9. The Bluetooth connection will be established automatically when an application uses the COM9* port. When connected the blue led will be double-‐blinking at a 1 Hz rate to show that the unit is successfully paired and connected. *Note: Vertica V2: COM 5, 6 and 9 are available for Bluetooth connections. COM 7 and 8 are reserved for the wired LVTTL ports on the 10-‐pin mini USB connector. COM 4 is reserved for the internal GPS. Any other PNA: Consult the user manual of your device to see which COM port is available for Bluetooth connections. Configuring LK8000. 1. In LK8000 go to Config 2/3-‐> LK8000 Setup -‐> Device Setup. 2. Set up the connections using the following parameters: Device A: Generic, COM4, 19200 (internal GPS) Device B: LK8EX1, COM9*, 38400 (Bluetooth connection) 3. Message from LK8000: “COM ports restarting” and “Using Baro Altitude”. Now the connections are fully set up. You can modify the programmable features using the following steps. Fully switch off your PNA before removing the micro SD card. 6 Using a Terminal program to configure the module from the PNA. 1. Using your computer, download and unzip this file (3,8MB): http://www.millenair.nl/shop/download/apps/terminal.zip 2. Copy the 'terminal' folder to your micro SD card. 3. In Windows Mobile, create a new icon and set it up to launch 'Terminal.exe', and for the icon image use ‘Terminal-‐icon.gif’. Run the Terminal application. 4. Menu -‐> File -‐> Open -‐> Port COM 9*, Baud Rate 38400, (8, None, 1, Off) -‐> 5. Open. NMEA data should now be 'flowing'. 6. Bring up the on-‐screen keyboard and press the character 'c' or 'C'. Remove the on-‐screen keyboard and press send. You will now enter configuration mode. Proceed with the configuration using the instructions in the next chapter. Please note; the configuration mode will automatically ‘time out’ after 30 seconds of inactivity. 7. After finishing the configuration, close the COM port (Menu -‐> File -‐> Close) and exit the application. Failure to close the COM port while the Terminal application remains active, may cause LK8000 to be unable to access this COM port. 8. Run your navigation software and enjoy flying. Connecting to a computer via USB. The method for connecting the LAVA to your Bluetooth enabled PNA is usually all you would need in the field, but the LAVA can also be accessed via USB. Just connect to your Windows or Apple computer. The appropriate USB driver must be installed on your computer first. For this go to the site of FTDI: http://www.ftdichip.com/Drivers/VCP.htm and download and install the driver. Besides using this connection method to get data into your navigation program you can use a standard terminal program for PC/Mac to receive the NMEA data, and can access the programmable features as well. See section 5 for suggested terminal programs. In normal operation the USB interface will be in low power mode; it will only be used for charging the battery. In order to start the communication function, first turn on the LAVA device and next connect the USB cable to the computer. This will activate the USB communication electronics. Obviously the Bluetooth function can be off at this time, but there is no need to turn it off first. Note that the same information and the same control sequences can be exchanged as in the Bluetooth communication mode. 5. Setting up – Programmable features As was explained above you will have to set up the LAVA for your intended type of flight characteristics and personal preference. This is mainly true for the acoustic variometer function as this is your direct feedback during flight. For the basic altimeter function and NMEA source the default setting is usually ready to go. 7 The method to set up the device is quite straightforward. The terminal interface menu that is used is simple and a minimum of interaction is required to modify settings. So it is possible to change settings during flight, but depending on your mode of flying, in practice this may or may not be so easy to do in a safe manner. Therefore a warning: During flight, concentrate on flying and stay fully aware of your surroundings. As described earlier, you will need a ‘Terminal’ program on your PNA and/or computer in order to see the information being sent from the device to your PNA. Suggestions for different operating systems are: Windows mobile: ‘Terminal’, http://www.millenair.nl/shop/download/apps/terminal.zip Android: ‘BlueTerm’, https://play.google.com/store/apps/details?id=es.pymasde.blueterm&hl=en Mac OSX, Windows, Linux: ‘CoolTerm’ by Roger Meier, Mac OSX: http://www.millenair.nl/shop/download/apps/CoolTermMac.zip Windows: http://www.millenair.nl/shop/download/apps/CoolTermWin.zip Linux: http://www.millenair.nl/shop/download/apps/CoolTermLinux.zip The baud rate via the Bluetooth interface, as standard delivered, is 38400 Baud and the terminal program must be configured to use this speed. As soon as you successfully connect to the device with the correct transmission speed, you will see the NMEA “sentences” that the device outputs, with a beat of one second. For example you will see: $LXWP0,N,,40.55,0.08,-0.02,0.04,0.21,0.04,-0.09,,,*47 $LK8EX1,100848.00,40.49,-6,24.95,999,*19 $LXWP0,N,,40.49,0.01,-0.06,-0.00,-0.08,-0.17,-0.08,,,*66 $LK8EX1,100843.00,40.47,-2,24.97,999,*1A $LXWP0,N,,40.47,0.02,0.00,-0.08,-0.00,0.05,-0.07,,,*61 …… Now, to enter the configuration-‐mode of the device, send a ‘c’ or ‘C’ by typing this into the terminal, followed by <Enter>. (Note that you will not see the character echoed on your terminal window.) You will then be presented with the configuration menu, looking like this: M i l l e n A i r - BT Altimeter/Vario Ver. 2.01 Current settings: integration time= 3 volume= 9, beep sensitivity= 0 sensit. multiplier= 4, dead zone= 6 Config menu, options: I - integration time V - vario volume B - vario beep sensitivity M - vario sensitivity multiplier D - vario beep dead zone P - program BT 8 Q - quit The current settings are listed first, followed by the menu. The interaction with the menu is through single character inputs, in either lower or upper case – it does not matter. Type the menu-‐code, followed by <Enter> and you enter the dialog where you specify the setting for that menu-‐option, again using a single code character. In all cases when you do not want to change a setting, you can escape using the character ‘q’ or ‘Q’, for Quit. If you don’t interact with the menu for more than 30 seconds, the configuration mode times out and returns to the normal mode of operation. The menu-‐options and their explanations follow: I: integration time Int. time: 0=1.0s, 1=1.5s, 2=2.0s, 3=2.5s, 4=3s, 5=4s, 6=5s, 7=6s, 8=7s, 9=8s (current setting: 3) The interpretation of the integration time codes is indicated on the prompt line. Use ‘q’ to exit without changes. V: vario beep volume Vario volume: 0= off, 1=low....9=high (current setting: 9) The interpretation of the volume codes is indicated on the prompt line. Use ‘q’ to exit without changes. B: vario beep sensitivity Vario beep sensitivity: 0=auto, 1=low....9=high (current setting: 0) This setting influences the variation in tone depending on the rate of climb or sink and integration time. As is explained in the chapter on the principles of operation, the response of the vario depends on the integration time chosen. With this setting it is possible to adjust that response according to your personal preferences. Because there is a lot of experimentation involved in getting this just right for your taste, there is an option to do this automatically, code 0 which is the default. It is strongly advised to use this automatic mode! The effect of using the automatic mode removes much of the dependency on integration time. The most straightforward method to adapt the beeper response to one’s preferences is by using the M (multiplier) menu option, described next. Use ‘q’ to exit without changes. M: vario beep sensitivity multiplier Vario beep sensitivity multiplier: 0=1/3x...4=1x...9=4x (current setting: 4) This is a menu option to adjust the response of the vario beeper to changes in rate of climb or sink, irrespective of integration time (see the B menu option 9 above). This is used mainly to set the device for use for the type of flying and/or to one’s own preferences. The range of multipliers is from 1/3rd (code 0), to 1 (code 4), to 4x (code 9). Use ‘q’ to exit without changes. D: vario beep dead zone Vario beep dead zone: 0...9 (current setting: 6) The tone of the vario beeper will get lower and will sound continuously while in sink. For positive rates of climb it will get progressively higher and be interrupted at increasingly shorter intervals as the rate gets higher. In this way the acoustic feedback allows distinguishing between positive and negative rates of climb and the strength of the thermal. This is the normal mode of operation for most acoustic variometers. When flying around a zero rate of climb one gets a tone indication with small variations around zero, which may be useful, but can get rather annoying. The dead-‐zone functionality as explained in the chapter on theory of operation allows suppressing the tone in various ways, especially for sink-‐rates. Use ‘q’ to exit without changes. P: program BT Turn BT mode off first! This function is only for debugging after certain Bluetooth problems. Please do not experiment with this. Also, this can only be done when connected via the mini-‐USB port. If problems occur, please contact us and we will help you. Use ‘q’ to exit without changes. The default settings are: 3 – Integration time 9 – Vario volume 0 – Sensitivity automatic mode 4 – Multiplier 1.0x 6 – Dead band from 0,0 m/s to –2,5 m/s 6. Pushbutton functions Bluetooth on/off Please note that Bluetooth function is turned-‐off by default on every start up. This is done to save battery life for those who do not need the Bluetooth functionality. To switch on Bluetooth, press and hold the blue Bluetooth pushbutton for approx. 4 seconds. A high-‐pitch beep will sound and a fast-‐blinking (2 Hz) blue 10 LED will indicate that the unit is ready to connect with a device. After connecting the LED will double-‐blink at a 1 Hz rate. To switch off Bluetooth press and hold the blue Bluetooth button for approx. 4 seconds. A low-‐pitch beep will sound and the blue LED will turn off. In this mode the vario will work for more than 18 hours on its internal battery. Beeper on/off We know that the sound of the beeper can be rather annoying when the LAVA is not in actual flying use. Since software version 2.10 the blue pushbutton can be used to temporarily switch off the beeper. Just press the button for no longer than 1 second to turn it off, and later to turn it back on. Don't keep the button pressed for much longer because that will then trigger the Bluetooth on/off function as described above. 7. Closing remarks – practical tips We aim to put the best and most versatile mini Bluetooth altimeter/acoustic variometer for multiple applications on the market. For this we welcome your suggestions for improvement and practical experiences. Home made pressure chamber You can place your module inside a plastic box to simulate pressure changes. While using the terminal application you can see the actual variometer values, hear the respective acoustic variometer sounds and see the different effects on integration time changes. This makes it a little easier to notice the changed settings, without requiring multiple flights to get the variometer set up to your preferences. Be careful with sudden pressure changes. The module is extremely sensitive. Damage can occur with extreme pressure changes. Contact – further questions For further questions you can contact us at [email protected]. More information and demo videos are also available at www.MillenAir.nl. 11