1
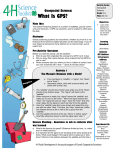
GPS Setup for Navigating an Ultralight
For Garmin 60, 76, 78, 96 series (others similar)
Note: This is particularly for competitions but applies generally, as well.
By Had Robinson
Copyright ©2014 Southwest Airsports, LLC
www.southwestairsports.com
1. Track Log – Go to “Menu” – “Tracks” and press enter.
a. Note: Track log should be “on” Note: It is very easy to turn it off,
FORGET that it is off, and then fly in a competition and then have
NO TRACKS! It is better to turn off the receiver in the GPS if you do
not want to clutter up your track log with track points while on the
ground. If you forget to turn on the receiver, you will know right
away that your GPS is not receiving a signal e.g. a blinking question
mark on top of your location ion. Check your doc on how to turn the
receiver on and off.
b. Clearing the Log - Highlight “Clear” and press enter. Be SURE you
CLEAR your track log BEFORE the comp begins. The scorekeepers
do not appreciate filtering through dozens of tracklogs in your GPS.
The ONLY data that should be in your GPS before a comp are the
waypoints and that day’s routes.
c. Track log setup – highlight “Setup” and press enter
i. Uncheck “Wrap when full”. If, for some reason, your track log
fills up, you will have the beginning of your track log and then
some rather than get a “zero” when scored by the comp
software.
ii. “Record Method” is “Time”. Pilots have chosen “Distance” or
“Automatic” and – sadly – had no record when they briefly
entered a proximity cylinder and left.
iii. “Interval” should be 3-5 sec. Less than this, the log may fill
quite fast. More than this – see “i.” above.
iv. “Data Card Setup” – Purchase a data card. In case you delete
your track log, a backup will be stored here. A 125 mb card will
store hundreds of hours of tracks. Scorekeepers for comps may
know how to retrieve your saved tracks in case you have a
disaster.
2. Routing – Go to Menu – Setup – Routing and press enter. You must
be intimately familiar with adding, deleting, and changing routes in
your GPS. Thoroughly practice this beforehand.
a. “Guidance Method” is “Off Road”. You may not want to follow roads
while flying….
b. Other options on the page do not matter.
3. Units – Go to “Menu” – “Setup” – “Units” and press enter.
a. “Position Format” is hddd.dddddº This is known as decimal
degrees”. It is far less confusing to enter degrees longitude and
latitude in this manner. Any other method increases your chances
of entering the wrong coordinates.
b. “Map Datum” should always be set to WGS 84
c. “Distance/Speed” is “Metric” as most comps are done in this
manner.
d. “Elevation” can be metric or feet – whatever the pilot prefers.
e. Other options do not matter
4. Time – Go to “Menu” – “Setup” – “Time” and press enter. Be sure to
set the correct time zone for the region you are flying in. All GPS units
use satellite time and record in GMT (Zulu) time so it will not affect
your scoring. However, if you have the wrong time zone set and use
your GPS as a clock, you could get confused as to when the meet
starts, closes, etc.
5. Map – Go to “Menu” – “Setup” – “Map” and press enter
a. “Orientation” should be “North Up”. If you have “Track Up” it may
be difficult to follow your route as the GPS will be re-drawing full
screens rather than just your moving icon. Most who have aviation
and marine pilot experience choose “North Up”. If you are
thermalling, for example, you will have no idea what your course
direction is. This is a personal preference. The author of this FAQ
thinks it is best to get used to “North Up” in the long run.
b. “Auto Zoom” is off.
c. “Detail” is least. When flying, do you want to see picnic areas
displayed on your GPS and other irrelevant detail? All you need to
see are your tracks, waypoints, route, and enough detail that is
viewable from the air such as major highways.
d. Map errors: If you fail to see your proximity circles or other aspects
of your map are incorrect, while in “Map”, press “Menu”, highlight
“Restore All Map Defaults” and press enter. This will fix most
problems.
e. Other options do not matter.
6. System – Go to “Menu” – “Setup” – “System” and press enter
a. “GPS” must be “Normal”. Do not use any other mode or you may
have problems with your tracking.
b. “WAAS / EGNOS” should be Enabled for the greatest accuracy.
c. “Proximity Alarms” must be ON if you want to be notified when you
touch a proximity radius. Do NOT forget to press “enter” to clear
the message. For additional and important info, see “7” below.
d. Other options do not matter.
7. Waypoints – Learn how to download them from a computer into your
GPS as this will save a great amount of time. Creating the waypoints
and setting the proximity radii is a tedious and time consuming task if
not done on a computer. BaseCamp (free) by Garmin is the
consummate software for both PC’s and MAC’s for doing this easily and
quickly. GPSDump can translate tracks for all different kinds of units. A
free download can be found here: http://fs.fai.org/ Get these tools and
learn how to use them.
a. To access/check your waypoints, press the “Find” button – highlight
“Waypoints” and press enter (to enter a waypoint) and then “quit”
to highlight and then access your existing waypoints. All of your
waypoints should be visible. If they are not, you do not have any.
b. It always best to upload your waypoints often as they can change
from day to day.
8. Proximity – to check/change press “Menu” twice – highlight
“Proximity” and press enter. You will see all of the waypoints that have
a proximity cylinder set. Proximity Alarms must also be set in
“Systmem” – see “5c” above. Highlight the actual value and change as
necessary. “Proximity Alarm Tones” must be checked (highlight this
and press enter to see options). The tones can all be off as you
cannot hear the tones when flying anyway. Note: The Proximity
firmware in the GPS may be somewhat buggy on some models. Be
sure to test your proximity settings with a practice waypoint before
flying. Note: Proximity Alarms must also be set in “System” – see “5c”
above.
9. Routes – Go to “Menu” – “Routes” and press enter. Do your
homework: You will have to go to the user manual for details on
setting up routes with waypoints and how to change, as needed. It is
not particularly difficult but should be practiced before you get to the
comp – you will have enough mental overload as it is. This is a task
that may be required to perform anytime. Please don’t waste other
pilots’ time learning stuff you should have acquired at home. However,
most will be happy to help if you can’t remember some detail.
a. “Off Road Transition” Note: This must be setup properly or the GPS
will not advance through the waypoints in a way suitable for pilots.
The purpose of proximity cylinders is so that you do not have to fly
to a settable (but – unfortunately – the same for all waypoints)
distance from every waypoint. This distance can vary widely! With
proximity cylinders you can fly close to a waypoint by a reasonable
amount (set for each waypoint by those in charge of the
competition). On the “Route” screen, press “Menu”. “Off Road
Transitions” is the default so press enter. Set this value to
“Manual”. This means that when on the “Active Route” screen (see
below), you will have to press the “Out” key to advance to the next
waypoint on the route. There is no method by which it will
automatically advance when you touch the edge of a proximity
cylinder. If you choose “Distance” and choose a distance from the
waypoint, you can have the GPS automatically advance to the next
waypoint but it is a set distance from ALL waypoints which may be
too much or too little, depending on how the proximity cylinders are
set for each waypoint by those in charge of the competition . It
would be really helpful to have a fourth option like “Proximity” with
a plus (outside cylinder) or a minus value (inside cylinder) for each
waypoint but nothing like this exists – yet.
b. “Route” screen – this is a useful screen but must be setup properly.
When a route is active this becomes the “Active Route” screen (see
“e” below) and tells the pilot which waypoint he is going to, how far
it is, and the relative direction towards it. Note: Some models and
versions do not have all of these features. To setup, highlight the
route and press enter. Press “Menu” and go to “Change Data
Fields”. Change the lower left screen to “Dist To Pt” and the lower
right screen to “Pointer”. You want to know how far it is to the next
waypoint in the route and what direction it is. To advance to the
next waypoint when navigating, press the “Out” button, to go back
to the previous, press the “In” button. Note: These buttons only
work if the GPS knows where you are and you have an active route.
There are other screens that will give this info but they will not let
you advance your route to the next waypoint. Remember that you
just set up your GPS to only advance to the next waypoint
manually.
c. To Navigate: Highlight the route you created and press enter. The
default is “Navigate” so press enter again. You don’t have to
navigate but having an active route will:
i. Highlight the route on the map.
ii. Help you know which waypoint is next.
iii. Tell you the direction you should go.
iv. Indicate how far the next waypoint is (if you setup the
appropriate data fields in the windows that are active while
navigating).
v. Note: Following the route only works if it is a relatively straight
course. If the route makes a sharp turn, then you want to
navigate to the edge of the relevant proximity cylinder and touch
d.
e.
f.
g.
it. This will give you the shortest distance to goal. You could
always add another waypoint just inside the proximity cylinder
and navigate to it.
“Map” Screen – when you start navigating, you will go the Map
screen. You must get a feel for where your screens are via the
“Page” and “Quit” keys as you may have to go back and forth
between the screens often.
“Active Route” screen – After you start navigating, press “Page”
one time and the “Active Route” screen will appear (most models).
The waypoint you should go to will be flashing, the distance to it
displayed in the lower left, and the direction towards it in the lower
right (if you set things up per “b” above). There are other screens
that will give this info but they will not let you advance your route
to the next waypoint. Read the appropriate sections in your
manual. To advance waypoints press the “Out” key. To go back for
some reason, press the “In” key.
“Compass” screen – If you use it, set the pointer to “Course”. See
your manual for more info on this feature.
Be sure to turn off your electronic compass if you have one as it
draws a considerable amount of power. To do this, press the “Page”
button twice. If nothing happens, you do not have an electronic
compass.
Notes: Some of the above options and configurations may not be available
on all models or there may be some differences in the access sequence. The
author has extensive marine experience with a GPS and its challenges of fog
and night travel. Always carry a compass for safety because it is essential if
you get caught in a cloud. A GPS can be disorienting as most cannot
accurately display a course or point north if the pilot/aircraft/ship is
changing direction rapidly. Ship pilots are particularly aware of this
shortcoming of all GPS units.
Fly safely!
Had
[email protected]