1
USER MANUAL
RA 18
CONTROL PANEL
Type 1601 - 18
OK
General:
- Control panel is intended to be installed next to the heater in the area outlined in the manual.
- The control panel is compatible with the following heater models:
- 1707 – … – 0405
( SKSG….DE )
- 1712 – … – 0405
( SKSM….DE )
- 1712 – … – 040520 ( SKSM….DEW )
- 1116 – … – 0405
( SKLR….DE )
- 1118 – … – 0405
( SKLT….DE )
- 1120 – … – 0405
( SKLW….DE )
- Maximum heating time 6 hours. Maximum preset time 23 hours.
- Adhere to given installation measurements.
- Heater and connection into the mains can only be carried out by an authorised person according to current
electricity regulations.
- NOTE! Prior to switching the heater on, ensure that the sauna room is ready for heating.
Persons with reduced physical and mental capacity, sensory handicap or little experience and knowledge about
how the device is operated (e.g. children) should only operate the device while supervised or according to
instructions given by the persons in charge of their safety.
Make sure that children are not playing with the sauna heater.
7014382
314 SYRA 23 D
1
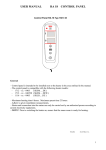
Control panel RA 18:
Sauna room light control (On / Off)
Temperature display
- Desired temperature (Setting mode)
- Actual temperature (Operating mode)
Time display
- Preset time (Setting mode)
- Desired bath time (Setting mode)
- Remaining bath time (Operating mode)
- Remaining preset time (Preset mode)
Increase setting
OK
Approve changes in settings / start heater
Decrease setting
Control panel activation / deactivation (On / Off – button)
On / Off – button:
Starts and stops functions.
When the equipment is active, pressing this button will stop all functions and display
will turn off.
When button is pressed when the equipment is in passive mode (display off), it will
activate the control.
OK
OK – button:
Approves changes in settings or moves to the next setting depending on function
mode.
Plus – button:
Increase setting
Minus – button:
Decrease setting
Activates a relay on the circuit board. Electrical connectors for lighting are
marked with a N and a light-symbol on the connector strip, voltage is 230 VAC,
max 100W. A led is activated next to the button on the control panel when lights are
activated.
Function times and settings:
- preset time
- function time
0 ... 23 hours
0 ... 6 hours
2
Control panel functions:
1. Press the On/Off button of the control panel. Both displays of the control
unit will turn on and the panel switches to setting mode. If you get no
response when pressing the On/Off button, please check the position of
the main switch in the sauna heater. The correct position is ( I ).
2. The upper display shows three bars ( - - - ) and the lower display (time
display) flashes digits 0.00, which indicates that the preset time can be
changed. The default value of the preset time is 0.00 (i.e. the sauna
heater turns on immediately after the bathing time and temperature have
been set).
If you want the heater to turn on after a certain period of time, you
must set the time (preset time) each time you turn the control panel on.
OK
3. The preset time is changed by pressing + or – buttons. If none of the buttons
is pressed in 5 seconds, the current time in the display will be saved in the
memory. You can also save the setting by pressing OK. NOTE: The control
panel remembers the preset time as long as the panel is in the active
mode.
4.
Once the preferred preset time has been set and accepted, the control panel
moves on to display the settings for bathing temperature and time. The upper
display starts flashing, which indicates that the bathing temperature can be
changed. The bathing temperature is changed by pressing + and – buttons
similarly to changing the preset time. Once the time is changed, save the
setting by pressing OK or by waiting for 5 seconds.
The setting for bathing temperature remains in the control panel memory
after switching it off.
5. Next the lower display starts flashing, which indicates that the bathing time
can be changed. The bathing time is changed by pressing + and – buttons
similarly to changing the bathing temperature. Once the time is changed,
save the setting by pressing OK or by waiting for 5 seconds.
The setting for bathing time remains in the control panel memory after
switching it off.
3
6. The control panel switches to active mode after the preset time, bathing temperature
and bathing time have been set. In the active mode, the sauna heater functions as follows:
•
If the preset time is default 0.00 (i.e. not changed in the setting mode), the sauna
heater will turn on immediately and the temperature display shows the current
temperature of the sauna room while the time display shows the remaining bathing
time.
•
If the preset time is not 0.00 (i.e. the default setting has been changed in the setting
mode), the control panel switches to the preset mode. In this mode, the upper display
shows three bars (- - -) and the lower display shows the remaining preset time. The
dot between hours and minutes in the time display flashes to indicate that the preset
mode is activated. Once the preset time has elapsed, the sauna heater will turn on and
start heating up.
Some useful tips:
•
•
•
The sauna heater / control panel can be switched off at any time by pressing the
On/Off button.
You can speed up the selection of setting values by keeping the button + or – pressed.
If the settings stored in the memory (bathing temperature and time) are applicable, you
can turn the sauna heater on simply by pressing the On/Off button of the control panel.
The control panel displays the settings and starts the sauna heater automatically, if no
buttons are pressed.
The control panel is able to display certain malfunctions:
The control panel is able to display certain malfunctions that may arise while using the sauna.
These are the corresponding error messages:
Err 1
Overheating protection activated
Err 2
Sensor malfunctioning
Err 3
Serial traffic between the sauna heater and the control
panel is not working
These malfunctions must be repaired by a qualified technician.
Please contact the nearest authorised repair shop.
4
Placement of the control panel with different heater types:
The control unit must be installed on the dashed area (1.)
(min and max measurements must be followed!)
Placement of the control panel in the sauna
room with sauna heater type:
1707 - ... - 0405
(SKSG - ... - DE)
1712 - ... - 0405
(SKSM - ... - DE)
1712 - ... - 040520 (SKSM - ... - DEW)
min 600 mm
min 600 mm
min 300 mm
min 300 mm
1.
Placement of the control panel in the sauna room with
sauna heater type: 1116-…-0405 (SKLR-…_DE)
max 750 mm
max 600 mm
max 600 mm
max 750 mm
OK
1.
Placement of the control panel in the sauna room with
sauna heater type: 1120-…-0405 (SKLW-…_DE)
min 600 mm
min 40 mm
min 300 mm
max 750 mm
1.
1.
max 750 mm
max 600 mm
OK
OK
Placement of the control panel in the sauna room with
sauna heater type: 1118-…-0405 (SKLT-…_DE)
min 600 mm
min 600 mm
OK
1.
max 750 mm
1.
max 750 mm
max 600 mm
OK
max 600 mm
min 300 mm
min 300 mm
5
Sensor OLET 19 placement with different heaters:
Sensor placement in the sauna room with
sauna heater type: 1707-…-0405 (SKSG-…-DE)
The sensor is fitted on the center line of the heater
40 mm from ceiling
Sensor OLET 19
min. mm
D
302
min. mm
A
A
min
30
min
30
min
20
H
C
143 145
min
20
284
K
J
F
40 mm *)
The specified clearances are minimum clearances except for *), which marks an absolute measurement. The sensor is fitted
on the center line of the heater.
Sensor placement in the sauna room with
sauna heater type: 1712-…-0405 (SKSM-…-DE)
1712-…-040520 (SKSM-…-DEW)
The sensor is fitted on the center line of the heater
40 mm from ceiling
Sensor OLET 19
(mm)
(mm)
40*)
F
*)Absolute
D
A
min 30
K
min 20
min 20
min 30
min 1900
A
6
Sensor placement in the sauna room with
sauna heater type: 1116-…-0405 (SKLR-…-DE)
*)Absolute measurement!
From the corner
40
135
Sensor
OLET 19
(x
mm
460
3
R 32
40
min 1900
min 900
Olet 19
Sensor placement in the sauna room with
sauna heater type: 1118-…-0405 (SKLT-…-DE)
min 10
max. 750
990
460
The sensor is fitted on the center line of the heater
40 mm from ceiling
Senosr OLET 19
(min.mm)
*) 40
(min.mm)
*)Absolute
1070
100
490
100
280
D
1900
830
max
450
10
10
max
450
7
Sensor placement in the sauna room with
sauna heater type: 1118-…-0405 (SKLT-…-DE)
The sensor is fitted on the center line of the heater
40 mm from ceiling
Measurement is minimum (mm)
if nothing else is stated.
Corner and wall installation:
OLET 19
40 *)
mm
OLET 19
A
D
60
60
60 *)
F
770
60
425 mm
mm
H
1900
1130 Rocher
1130
*) Absolute measurement! (must not be exceeded
or undershot)
800 Ring
*)
Safety clearances between the bottom of the sauna
heater and a wall.
Fixing the sauna heater
on the floor. NOTE
fixing of two (2) legs
Middle installation:
OLET 19
A
60
A
mm
F
770
Floor
fixing
screw
Adjustable
leg
Heaters
leg
Metal
fastener
60
H
1900
OLET 19
NOTE! If the sauna heater is installed further than 60mm off a wall or a corner, the installation
method is always middle installation. The thermostat must be installed in the ceiling,
as per instructions.
8
Sensor placement in the sauna room with
sauna heater type: 1120-…-0405 (SKLW-…-DE)
The sensor is fitted on the center line of the heater
40 mm from ceiling
Measurements are minimum (mm)
if nothing else is stated
Corner and wall installation:
OLET 19
40*)
mm
60
1900
60
1140
OLET 19
60
60*)
760
*) NOTE: Absolute
measurement
Fixing the sauna
heater to the floor.
NOTE! Fixing of
two (2) legs
Image 4
Sauna
heaters leg
Middle installation:
OLET 19
mm
1140
Metal
fastener
Adjustable
leg
60
The thermostat must be installed
within the dashed area to the ceiling
above the sauna heater.
1900
60
Floor
fixing
screw
Sensor
OLET 19
Sauna heater
NOTE! If the sauna heater is installed further than 60mm off a wall or a corner, the installation
method is always middle installation. The thermostat must be installed in the ceiling,
as per instructions.
9
Wiring diagrams
L1
L2 L3
J12
W
J11
V
J10
Control
N
A 12345 B12345
U
1234
3
2
1
1 2 34
L
1A
1A
1 2 3 4
Light
Fan
1
1 2 3 4
5.
5 6
N
N
2 3 4
N
6.
55
L1 L2 L3
1.
2.
3.
4.
1.
2.
3.
4.
Syöttö / Nätet / Stromnetz / Power input.
Saunavalo / Bastu belysning / Saunabeleuchtung / Sauna light. max 100W
Ei toimintoa / Ingen funktion / Keine funktion / No function
Sähkölämmityksen vuorottelu / El.förregling av annan el. förbrukare /
Signal kontakt / Signal contact
5. Ohjauskeskus / Styrpanel / Steuergerät / Control panel.
6. Tuntoelin / Sensor / Fühler / Sensor.
Connector strip
Heater
Sensor cable
4
3
2
1
1.
2.
3.
4.
Blue
White
Red
Yellow
1.
2.
3.
4.
Limiter
4
3
2
1
Blue
White
Red
Yellow
Heater PCB
OLEA 57
J11
J1
OK
J10
A 1 2 3 4 5 B 1 2 3 4 5
J2
Communication PCB
OLEA 83
1234
1.
2.
3.
4.
Brown
Black
Green
Yellow
10
Wiring diagrams
Sensor
Heater
N
L1 L2 L3
N
N
Sauna light
230V 100W
Input 400V 3N~
55
Signal contact
230V
No function
with the
RA 18 Midi
control panel
RA 18 – control panel
OK
11
RA 18 Control panel installation
1. First fasten the wooden base plate for control
panel to the wall with the provided screws. Make
sure the base plate is placed within the allowable
installation area (for detailed instructions please
refer to the sauna heater manual). Use a builder's
level to make sure the plate stays straight during
installing.
2. Place the control panel accurately on the wooden
base plate and drill a 2 – 3 mm hole through the
upper part of the casing. Depth of the hole is not critical,
because the purpose of the hole is to merely assist
driving the screw into the wooden base.
3. Subsequently, fasten the control panel onto the
wooden base plate with screws. Make sure the
control panel is straight in relation to the base plate,
drill a hole through the lower part of the casing and
fasten with screws.
12
4. Before driving the screws tightly, make sure the
cable is not pressed between the control panel and
the wooden base, but securely placed in the intended
groove.
5. Set the control panel frame in place by pressing with
your hands.
6. The frame is removed by pressing the four grooves
in the frame with a small rod or screw driver and
slightly twisting outwards.
13
Instrucciones de protección medioambiental
Instructions for environmental protection
Este producto no debe ser tratado como un residuo
doméstico normal al final de su vida útil, sino que debe
depositarse en el punto de recogida adecuado para el
reciclaje de equipos eléctricos y electrónicos.
This product must not be disposed with
normal household waste at the end of
its life cycle. Instead, it should be
delivered to a collecting place for the recycling
of electrical and electronic devices.
La presencia de este símbolo en el producto, en el manual de
instrucciones o en el paquete indica lo anteriormente
mencionado.
Los materiales pueden reciclarse según las marcas que
figuren en ellos. Mediante la reutilización o
aprovechamiento de estos materiales, o la reutilización de
equipos antiguos, se contribuye de manera importante a la
protección del medio ambiente. Nota: este producto debe
entregarse en el centro de reciclaje sin las piedras de sauna ni
la cubierta de esteatita.
The symbol on the product, the
instruction manual or the
package refers to this.
The materials can be recycled according to the
markings on them. By reusing, utilising the
materials or by otherwise reusing
old equipment, you make an important
contribution for the protection of our environment.
Please note that the product is returned to the recycling
centre without any sauna rocks and soapstone cover.
Please contact the municipal administration
with enquiries concerning the recycling place.
Instructies ter bescherming van het milieu
Instructions pour la protection de l’environnement
Dit product mag aan het einde van de levensduur niet
worden weggegooid via het normale huishoudafval. In plaats
daarvan moet het worden afgegeven bij een inzamelplaats
voor het recyclen van elektrische en elektronische apparaten.
Ce produit ne doit pas être mêlé aux ordures ménagères en
fin de vie. Il doit être déposé dans un centre de collecte pour
le recyclage des appareils électriques et électroniques.
Dit is waar het symbool op het product, de
gebruiksaanwijzing of de verpakking naar verwijst.
Le symbole apposé sur le produit,
la notice d’utilisation ou l’emballage
l’indique.
Het materiaal kan worden gerecycled op basis van de
aangebrachte markeringen. Door hergebruik van materialen
of oude apparaten levert u een belangrijke bijdrage aan de
bescherming van ons milieu. Lever het afgedankte product af
bij de inzamelplaats zonder saunastenen of het deksel van
speksteen.
Les matières peuvent être recyclées conformément à leur
marquage. En réutilisant, recyclant les matières ou en
utilisant différemment un vieil équipement, vous contribuez
considérablement à la protection de l’environnement.
Attention : ce produit doit être déposé au centre de recyclage
sans pierres et sans parement en stéatite.
Voor vragen over de inzamelplaats kunt u contact opnemen
met de gemeente.
Veuillez contacter votre Municipalité pour connaître le
centre de recyclage.
14