1
INSTRUCTIONS MANUAL
INTRODUCTION
Thank you for purchasing the R2 TRACER®, the world’s most advanced tracking system.
Please read this instruction manual carefully and place close attention to the quick-start guide and the
“tracking tips” section.
The R2 TRACER comes in two models:
1. A one-way receiver
2. A two-way receiver (which you can use to request the GPS position from the tag). This model is
easy to tell apart from the one-way model, because the gain button states the words “Call GPS”.
Depending on the type of tag you are tracking, the two-way receiver can also work in one-way
mode and receive long-distance GPS positions without need of a specific request (e.g., with the
HOUND TRACER tag).
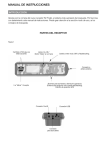
PARTS OF THE RECEIVER MENU ITEMS
Change the tag you
are tracking
On/off button / “Back”
menu button
Switch to go between GPS and radio-tracking mode
Connector for external
antennas
Go to “Menu” / OK
Buttons to increase and decrease the gain (i.e., the radiotracking signal receiving power) /
GPS position request (two-way model only)
Power jack
USB slot
Headphone jack
GPS MODE
“External antenna” indicates that you have selected the external
antenna option from the menu.
R2 TRACER RECEIVER battery
indicator
R2 TRACER GPS signal
quality (coverage quality)
Direction of tag
A communication icon in
the compass indicates
that a tag position is being received in real time
(one-way model only)
Distance to tag
If a time is shown, it is the time
since the last GPS position was
received.
Name of the tag stored in
memory
Tag battery indicator
Potential error in given
distance
RADIO-TRACKING MODE
Received signal strength
Maximum strength with
current gain
Current gain level
“GPS OK” means that you
can switch to GPS mode
and receive the tag’s position in real time (one-way
model only).
TINYLOC GPS SYSTEM
The Tinyloc GPS tracking system consists of a tag (HOUND TRACER, AVALON GPS, etc.) and the
R2 TRACER receiver. Every tag comes with a GPS antenna that can be used to determine its position. To
let you the location of the object, animal or person you are looking for, the tag sends its GPS to the
R2 TRACER over radio signals.
Once the R2 TRACER has locked in on both its own and the tag’s position, its built-in electronic compass
will tell you the direction and the exact distance between you and the tag.
Important! All communication between the tag and the R2 TRACER is carried out via radio waves and not via
GPS satellite. Satellites do not communicate between the R2 TRACER and the TAG. (See figure 1)
The R2 TRACER receives its current
location from the satellite.
The TAG receives its current location
from the satellite.
The tag sends its position by radio
waves to the R2 TRACER.
The GPS signal “travels” over the same radio waves used for the radio-tracking signal. Because it is much
more difficult to “transport” a GPS signal than a simple beep, the radio-tracking range is always 2-3 times
larger than the GPS range. This means you will find the tag faster in radio-tracking mode and will only have
the GPS signal in the last few kilometers.
OPERATING INSTRUCTIONS
STEP 1: STORE A TAG IN THE RECEIVER MEMORY:
Press the “OK” menu button. Use the “up” and “down” arrows to browse through the menu until
you reach “tags” and press “OK”. Then select “add” followed by “automatic”. (If you have the
tag’s TIN, you can also store the tag via the option “add TIN”).
The message “turn on the tag and place it above the receiver (<10 cm)” will appear on the
screen. Turn on the tag and place it above the receiver. (Turn on the tag by holding the magnet
over the STAND-BY symbol.) Then, follow the on-screen instructions to enter the tag’s name.
STEP 2: TRACK IN RADIO-TRACKING MODE:
With the radio-tracking system, you can track over long distances without depending on the
GPS signal (e.g., on raining days, hidden or lying animals, objects or people, when there is no
direct visibility between the tag and the sky, etc.).
The radio-tracking system compares the strength of the incoming signals to determine the direction of the TAG.
How to track:
1. Use the up/down buttons to select the TAG you would like to find.
2. Make a 360º turn to compare the strength of the incoming signals. The tag will be located
in the direction of the strongest signal (i.e., the highest number). You must make a full 360º
turn without adjusting the sensibility (do not touch the gain buttons on the side of the device).
If you do not hear a signal, use the buttons on the side of the receiver to increase the gain.
N.B.: When the signal reaches 99, the R2 TRACER is saturated, and you will no longer be able to
compare the signals (i.e., it will show 99 in more than one direction). If this happens, use the buttons
on the side of the receiver to reduce the gain and try again.
STEP 3: GPS TRACKING.
There are three different operating modes depending on your receiver and TAG.
UNIDIRECTIONAL MODE
When you are in radio-tracking mode and the words “GPS OK” appear on the screen (one-way
model), both the R2 TRACER and the tag have received a GPS signal and the tag is close
enough to send the signal to the R2 TRACER.
Press the “GPS/RT” button on the side of the design to switch to the GPS tracking screen.
N.B.: The first time you track in GPS mode, you will have to calibrate the compass (menu>r2
options>calibrate compass).
The screen will show the distance and direction of the dog. For maximum compass precision,
hold the R2 TRACER as level as you can on the palm of your hand.
When the message “xx minutes” appears on the screen under the compass, the receiver does
not have the tag’s current position. The position on the screen is the last received position (and
how long ago it was received).
If the message “R2 w/o GPS. Search out satellite visibility in clear area” appears on the screen,
this means that the R2 TRACER does not have GPS satellite visibility (e.g., you are inside a car
or in a covered area). The compass will reappear as soon as you find a place where the
R2 TRACER has a direct view of the sky.
BIDIRECTIONAL MODE
Radio tracking in two-way mode is the same as in one-way mode.
Unlike the previous model, this model does not issue a “GPS OK” message telling you went to
switch modes. Instead, request the GPS position when the radio-tracking signal is abundantly
clear.
The procedure is simple:
Push the button on the left to switch the screen. Push the buttons on the right side to request
the position (call GPS button).
A white compass with the word “wait” will appear on the screen. When this message is on the
screen, the receiver is sending a request to the transmitter. If the transmitter is within GPS range,
the receiver will beep to let you know that you are receiving a GPS position. In a few seconds,
the compass will turn black and will display the direction of and distance to the tag’s current
location.
If the TAG is out of GPS range or does not have GPS coverage, you will receive an error message. Keep tracking in radio-tracking mode and try again later.
After three minutes, regardless of whether you receive a GPS position or an error message, the
compass will turn white again (to indicate that there is no current position). If you have picked up
a previous position, the receiver will display how much time has passed since you received it.
If you would like to return to the radio-tracking screen, press the left button.
MIXED MODE
In some tag models (e.g., some HOUND TRACER models), the receiver can combine the two
previous modes. For the first 11-15 hours, it will operate in one-way mode, and then, after
11-15 hours, it will operate upon request (two-way mode).
Therefore, it is important to read the instruction manual that came with the transmitter.
BIDIRECTIONAL TAG MODELS WITH A TREED SENSOR
Some tags have an option that allows them to detect specific movements. In the case of the
treed sensor, this option detects inclination. If you have a tag model that includes this feature,
the GPS screen will display the word “treed” (only when you have a GPS signal). This means that
the tag is in an incline position.
OPERATION WHEN THE BATTERY IS LOW
The exact behavior of the R2 TRACER when the batteries are low depends on the model of the receiver
and the tag in use. Some tags, such as the HOUND TRACER models, will stop sending the GPS signal,
space the beeps farther out and send a double beep every five beeps. Most HOUND TRACER models will
stop transmitting a continuous signal and will instead send a signal every 5 seconds. Also, they will only
send the GPS position upon request. Please double check the user manual that came with your tag for
more information.
TRACKING TIPS:
TRACKING TIPS
IMPORTANT: Keep your receiver away from magnets at all times. However, if the compass locks up for some
reason and cannot be reset with the “calibrate compass” option, swipe the magnet around and above the compass in order to lock it up completely. (It should be COMPLETELY immobile and should keep showing the same
direction, even if you turn the R2 TRACER.) Once you have done this, use the receiver’s “calibrate compass”
option. If the antennas are put away, another quick way to reset the compass is to swipe the magnet across the
antennas. Then, pull them out and calibrate the compass.
If you try to enter a tag and the receiver tells you that the
channel is already being used by another tag, you can
change the channel for one of the tags at “menu>name of
tag>configure tag”. If you have no more free channels, you
can listen to the radio-tracking signals for two tags at the
same time (however, any GPS signals received will only be
for the tag currently being tracked).
If you would like, you can turn off radio tracking for any
tag using the option “menu>tags>name of collar>radio
tracking>off”. Once you have done so, you will receive either
a confirmation or an error message. (In the case of an error,
try again when you are closer to the tag.)
Figure 3
Keep in mind that as soon as the collar stops emitting the
radio-tracking signal, you will lose the extra range that radio
tracking offers.
Always hold the receiver level in the palm of your hand
and try not to touch the antennas. It is important for the R2
TRACER to be totally flat on the palm of your hand, otherwise
the direction shown on the compass will not be exact.
To get a GPS signal, you will often have to stay still for 30
seconds in the position that the beeps from the radio-tracking signal come in the clearest.
Figure 4
The R2 TRACER is designed to have the hunter’s body
behind it as a sort of shield. (Otherwise, the radio-tracking
mode would not be able to distinguish between incoming
signals from the front and the back.) (See figure 3)
The range of the receiver is much greater if you track from
hills or other elevated areas. Even something as simple as
lifting it above your head may be enough to add several
kilometers to its range. (See figure 4)
Figure 5
To receive the strongest signal, hold the R2 TRACER horizontally or vertically, depending on the position of
the tag. (See figure 5)
When in GPS mode, it is often useful to take a position from a high place or by lifting up your arm, so that
you can follow the “last position” shown on the screen (even if you will no longer receive positions in real
time when you go down the hill).
Before you set out on a day of hunting, it is a good idea to make sure that the tags receive a GPS signal
when you turn them on. It is a good idea to set the tags on the floor or on top of the car with the tags facing
upwards until they have received a GPS signal.
Once they have received a signal, you can put them on whatever targets you will like to track.
Once you have located a tag and would like to search for another, it is a good idea to turn the first tag off,
so that it does not interfere with the search for the second tag.
When searching, keep in mind that there are three distinct areas:
•
RADIO-TRACKING AREA: Only a radio-tracking signal
•
UNIDIRECTIONAL AREA: Tags like the HOUND TRACER receive a GPS signal either every
12 seconds (two-way model) or every 30 seconds (one-way model). Other tags, such as the
AVALON GPS, do not have this area.
•
BIDIRECTIONAL AREA: Receives the GPS position whenever a request is sent using the
“CALL GPS” buttons on the R2 TRACER.
Zone 1:
Radio-tracking area
Zone 2:
Radiotracking + GPS Unidirectionnelle
Zone 3:
Radiotracking + GPS Bidirectionnelle
MENU
1. TAGS
Here, you can do every related to tags (store them in the receiver’s memory, change their names, change
the channel, etc.)
ADD: Add tags to the memory of the R2 Tracer receiver.
• AUTOMATIC: This option is used to store tags automatically. A message will appear on the screen
asking you to hold the TAG above your R2 TRACER receiver. Then, press OK and the pairing process will begin automatically. When paired, the receiver will ask you to name the tag.
N.B.: Do not move the tag during the automatic pairing process. It is a good idea to make
sure there are no other tags on nearby, since they could cause interference.
• ADD TIN: Add tags using their TIN code. With this option, you can add a tag to the R2 TRACER
even if it is not nearby. The TIN contains all the information the R2 TRACER needs to find the tag.
Using this option, you can locate the tags of a companion who is not currently with you (e.g., if your
companion tells you the TIN code over the telephone).
N.B.: To find a tag’s TIN code, use the R2 TRACER receiver in which it is stored and go to
“menu>tags>configure tag>info”.
• ADD FREQUENCY: This function is used to memorize radio-tracking tags. Enter the tag’s frequency
number and give it a name. The R2 TRACER will then calibrate the exact frequency of the tag. Hold
the tag above your R2 TRACER and follow the instructions on the screen.
N.B.: Do not move the tag during the automatic calibration process.
“NAME OF TAG” (depending on the name you gave the tag when storing it in memory).
• TRACK: Takes you to the search screen in radio-tracking mode.
• On/off: Turns the tag on/off. (N.B.: Only over short distances.)
NORMAL MODE: Puts the tag in normal mode.
DOG STAT MODE: Activates the tag’s data log. The tag will store all of its positions as long as it
is turned on. In order to examine these positions and analyze them on your PC, you will need the
DOG STAT software and cable connection (not available on AVALON GPS).
• CONFIGURE TAG: Takes you to the tag’s configuration menu (name, channel, PIN, etc.) (< 2 meters
or 6.5 feet)
CHANGE CHANNEL: If you have two HOUND TRACER tags with the same channel, you can
use this option to change one of them.
CHANGE NAME
PIN: You can use this option to activate or deactivate (default) the PIN or change a previously
assigned PIN.
• TAG INFO: Here, you can find the tag’s serial number, current channel and TIN (i.e., the number you
will need to find track this tag from another R2 TRACER).
• TAG GPS INFO: Here, you can see the latitude and longitude of the tag’s last position as well as the
height and speed at which it is moving.
• CALIBRATE: Use this option for the R2 TRACER to calibrate the exact radio-tracking frequency of
the tags.
N.B.: Temperature changes may affect the frequency of the tags. You may want to check the calibration
of your tags periodically (every 1-2) months to ensure maximum reach.
• RADIOTRACKING ON/OFF: Turns off radio tracking for this tag. Radio tracking will start again automatically the next time you turn on the tag.
• AVALON LIGHT (super-light): Makes the LED on the AVALON GPS shine brighter light to help
facilitate nighttime searching.
• DELETE TAG: Deletes the tag from the memory of the R2 TRACER.
2. INTERNAL/EXTERNAL ANTENNA: Use this option to indicate whether you would like to track using
the internal antenna (default) or add an external or car antenna (not included with the R2 TRACER).
N.B.: If you choose “external antenna” but do not attach an antenna to the R2 TRACER, the range will be
reduced by approximately 90%. Do not forget to switch back to “internal antenna” if you want to track with just
the R2 TRACER.
3. POINTS OF INTEREST: With this option, you can save the R2 TRACER’s current location in memory
(GPS position required). Enter a name for the place you would like to save (e.g., car, piece 1, stand 1,
mushrooms, etc.)
The other option in this menu is “saved points”. Use this option to find or delete previously saved points of
interest.
4. R2 OPTIONS:
From this submenu, you can calibrate the compass, turn GPS on/off (to save energy) and check the
receiver’s serial number.
1. Calibrate compass: The R2 TRACER contains an electronic compass. You will need to calibrate this
compass the first time you use the R2 TRACER and every time you go anywhere that is significantly
different from your previous location (e.g., if you go from the country to the city, if you are near an
office building, if you are near a power tower, etc.)
To calibrate the compass, hold the R2 TRACER flat in the palm of your hand and slowly turn to the right.
Keep turning until you receive a message stating that the compass has been calibrated properly. Ideally,
you should complete two full turns in a span of 20 seconds.
2. Turn GPS on/off: Use this option to preserve the battery if you only plan to do radio tracking.
3. Info: The serial number, memory in use and the version of the software in your R2 TRACER receiver.
4. GPS info: The receiver’s current GPS coordinates, the satellites it is connected to, the height and
the satellite time.
5. Map mode: Activates tag positioning on map software on a computer connected by USB.
(See www.tinyloc.com/support)
INSERTING THE BATTERIES AND POWER SOURCE
The R2 TRACER is powered by 4 AA (LR6) 1.5 V batteries.
Makes sure you respect the polarity shown in the diagram on the bottom of the battery compartment.
We recommend changing the batteries in your R2 TRACER as soon as the low-battery indicator appears
on the screen. Starting then, you will begin to lose reception power (although the receiver will still operate
for quite a few more hours).
Power source
Receiver sensitivity
Frequency range
Operating temperature
Storage temperature
Index of protection
Weight
Dimensions (antenna not extended)
5 volts (4x LR6 “AA”). Do not use rechargeable batteries.
-146 dBm
Nordic countries (155,4 MHz to 155,525), US (MURS)
-15º to 50º C (5º to 122º F)
-20º to 70º C (-4º to 158º F)
IP 20
520 g with batteries
245x66.5x40 mm
GENERAL CONDITIONS OF SALE AND WARRANTY
See our Declaration of Conformity at: http://www.tinyloc.com/declarationofconformity