1
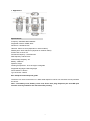
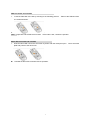
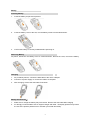
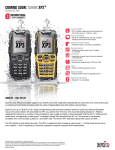
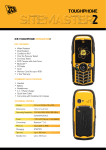
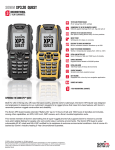
TP851 User manual Thank you for purchasing JCB ToughPhone TP851 PRO TALK mobile phone i Brief Introduction Thank you for choosing the JCB TP851 GSM cellular phone. You‘ll find details of the great features of the phone in this manual. The TP851 is waterproof and dustproof to IP67, The phone is rugged enough to withstand a drop of 1.5m onto a hard surface. The PTT function provides a free short-distance walkie talkie feature. High quality voice call in very noisy environment is now possible with the latest technology of dual MIC Noise Elimination applied in this phone. It also supports GPS, Bluetooth, Micro-SD card supported, TP touch screen, MP3, Sound recorder, 2 Mega-pixels camera, MPEG4 supported, 3GP video file supported, Torch, Phone lock, Keypad lock, Dual MIC voice elimination, Hands free, Games and JAVA. Please ensure you read the Important Product Information Guide at the end of this user manual prior to using the product ii Table of contents 1. Appearance ............................................................ Specifications……………………………………………… Key functions ........................................................ Display Icons………………………………………… SIM card install and uninstall ................................ Micro-SD card install and uninstall…………………… Battery ................................................................ 2. Basic functions ................................................... Power on/off.......................................................... Touch screen calibration……………………………….. Making a call ....................................................... Answering a call ................................................... Missed call ............................................................ Call rejection and call back ................................... Change ringtone………………………………………….. Quick operation of Walkie-talkie USB cable usage .................................................. 3. Basic Functions ................................................ 1. Phonebook ................................................... 1.1 Quick search ................................................. 1.2 Search contact .............................................. 1.3 Add New contact ........................................... … 1.4 Search company……………………… 1.5 Search Email………………………………… 1.6 Copy All ........................................................ 1.7 Delete ........................................................... 1.8 Caller groups………………………………… 1.9 Extra numbers............................................ 2.0 Import And Export ......................................... 2.1 Phonebook settings ................................... 2.2 Caller picture .............................................. 2.3 Caller ringtone ............................................ 2. Call center......................................................... 2.1 Call history .................................................... 2.2 Call settings .................................................. 3. Settings ............................................................. 3.1 User Profiles ................................................. 3.1 Dual SIM settings………………………..……… 3.3 Pen calibration ........................................... 3.4 Phone setup ................................................. 3.5 Network setup ............................................... 3.6 Security setup ............................................... iii 3.7 Restore factory settings ................................ 4) Business zone ............................................... 4.1 Games……………………………………… 4.2JAVA……………………………………………. 4.3JAVA settings…………………………………….. 4.4JAVA default security .......................... ……… 5).Messages ....................................................... 5.1 Text messages .............................................. 5.2 MMS ............................................................. 5.3 Chat .............................................................. 5.4Voice mail server………………………………… 5.5 Broadcast message…………………………… 6).Multimedia ...................................................... 6.1 Camera ......................................................... 6.2 Image viewer ................................................ 6.3 Video recorder .............................................. 6.4 Video player .................................................. 6.5 Audio player .................................................. 6.6 Sound recorder ............................................. 6.7 FM radio ....................................................... 8)PTT. ............................................................... 7.1 Interface…………………………… 7.2 ………… Usage ......................................................... 8)Services.......................................................... 8.1 STK service .................................................. 8.2 WAP .............................................................. 8.3 Data account………………………………….. 8.4 Connection management ........................... 9)Organizer ........................................................ 9.1 File manager…………………………………. 9.2 Extra ……………………………………… 9.3 GPS………… ……….. ………………… 9.4Hand up masage when reject………………… 9.5 Head lamp .................................................... 9.6 Lamp setting…………………………………… 9.7Eliminate background noise………………… 9.8 Calendar ....................................................... 9.9 Tasks............................................................. 9.10 Alarm........................................................... 9.11. World clock ................................................ 9.12 Shortcuts……………………………………… 4. Input Methods………………………………………… Troubleshootings ....................................................... Important Product Information Guide iv 1. Appearance Specifications Frequency: 850/900/1800/1900MHz Supported network: GPRS, WAP Dimension: 126x60x22 mm Talk time: About 10 hours (depends on network status) Standby time: About 280 hours (depends on network status) Screen Size: 2.2inch TFT Phonebook Capacity: 1,000 Records SMS Capacity: 200 Records Flash Storage Capacity: 2G Battery: 1800mAh Speaker: Single Working Temperature: -20 to 55 degree centigrade Supported languages: Multi-languages Phone Antenna : Built-in Type of Sensor: CMOS IP67 dustproof and waterproof grade: The device can survive immersion in 1 Meter water depth for half an hour and dust will not penetrate the device. Note : The Battery cover, Battery cover lock, Screw hole plug, Earphone port and USB port must be correctly sealed for the dust and water proofing. v Display Icons: SIM1 or SIM2 showing signal strength Battery capacity Alarm clock on. If off, no icon displays keypad locked or unlocked. SIM1 or SIM2 unread SMS SIM1 or SIM2 unread MMS SIM1 or SIM2 missed call SMS sending Ringtone Vibration Vibration and ring Ring after vibration Headset Bluetooth GPRS flow prompt PTT is working Transfer all voice calls vi SIM card install and uninstall 1. Insert the SIM card to the slot by referring to the following pictures. Take out the SIM card from the reverse direction. 。 2. Note: Input PIN code if SIM card is locked. If PIN code is lost, contact the operator Micro-SD card install and uninstall 1. Insert the Micro-SD card to the slot shown by below with the metal part open. plate and push it to the left to lock. Uninstall the Micro-SD card with reverse operation. 1 Cover the metal Battery Installing Battery 1. Insert the battery as per below pictures. 2. Insert the battery cover to the slot, turn the battery screw to horizontal direction. 3. Confirm the battery is correctly installed before powering on. Removing Battery As picture, below turn the battery screw to vertical direction, take off the cover, remove the battery. Charging 1. As per below pictures, connect the data cable to the micro USB port. 2. Connect to a power supply or connect the USB to a computer. 3. After charging, remove the data cable. See below: Battery maintenance: 1. Make sure to charge the battery fully for first time. Remove the data cable after charging 2. It‘s strongly recommended to use an original charger and cable.. Third party products may reduce the use of the product performance or threaten your health and safety. 2 3. Talking and standby time will depend on different conditions when using the device, like Signal intensity, working profiles, environment temperature etc. 4. Do not throw the battery into fire or any severe environment with high temperatures. 2. Basic Function Power on/off 1. 2. With a charged battery power, press for 2-3seconds to power on or off. If unlock password is required, enter the digits of 0000. Touch screen calibration 1. When you use the phone for the first time, please click the center of arrowhead to calibration. Dialing a Call A.Input the phone number 1. In standby mode, input the phone number directly or touch this icon screen type the number choose 2).Hangup, press and dial through on the bottom of the (you can choose from Sim1 or Sim , to go back to Standby interface. 2. You can choose a phone number from the phonebook or call record list to dial. Please refer to the phonebook and call record menu. B. Making an international call Press * twice, and the―+‖symptom appears, enter the country and area code and phone number, press for dialing Remark: international dialing code in some networks is not symbol ―+‖ C.Making an emergency call Input emergency number: 911, 999,110 etc . Answering a Call 1. When you receive a call press to answer. A: Volume During a call, press side key to adjust volume. B: Call option During a call, press left key→choose “ hold single call, end single call”etc. When Bluetooth is activated, you can talk through the Bluetooth earphone.( details please refer to 9.2.4) C:Hands Free Press right key→choose ―hands free‖ to switch between normal or loudspeaker. 3 Missed call dialing Press to check the details on missed calls. Reject a call when there‘s an incoming call, press PTT operation For details, please reference to 7.2 The use of data cable to reject a call. 1. Connect data cable with PC USB port. 2. Attach the data cable to the phone connector; during power on, the screen will display : Mass storage:choose it, in the PC, it will appear as a removable disk, you can check your saved files, remove or copy the files between the phone and computer, for example: copy MP3 to Music document, MP4 and AVI into Video document, put audio file into Audio document, pictures go into Images document, photos go into Photos document. 3. Basic Functions 1. Phonebook 1.1 Quick search 1, Phonebook→choose―quick search‖ 2, enter through right softkey → input the name‘s first letter→ press down key to searching the contact person→press the left soft key→choose ―call, send message‖ etc, the Print option means with activated Bluetooth and paired printer, you can print the contact information. 1.2 Search Contact Phonebook→search contact→Input name→ search (input methods as hereinafter) 1.3 Add new contact 1, Phonebook=>add new contact=>choose storage to SIM1 or SIM2 or to phone. 2, If you store to the phone, you can input home number,company name, email address etc. 1.4 Search company Search company name→Input company name→search 1.5 Search Email Search Email→input the Email address→search 1.6 Copy All Copy All→choose from phone to SIM or from SIM to phone→ Copying→copied 1.7 Delete Delete→ from SIM1 or from SIM2 or from Phone (input code 0000) or delete one by one. 1.8 Caller groups Phone book→Caller groups ―group name‖:you can edit a new group name; ―caller ringtone‖:use the left and right navigation key to choose the ringtone. ―caller picture‖: use the left and right navigation key to choose a pictures or a file. *the number you set must be the same from phone, or it will be invalid. 4 *this function will only work for the numbers from phone. 1.9 Extra numbers Owner number:SIM1/SIM2 owner number, you can edit and remove the name and phone number, if you edit the name and number, then it will display your name when the phone is in standby, if you only edit the phone number, it will only display your number under standby. SIM1 SOS number and SIM2 SOS number.It based on the operator setting. 2.0 Import and Export 1. Export:Press OK→ choose the number→ choose save number to Phone or Memory card, the backup file name is PhbPack.csv 2. Import:import number from Phone or Memory card→choose PhbPack.csv→ Choose import to SIM1,SIM2 or to Phone. Notes: 1. the phonebook backup name in Micro-SD card must be:Phback-.csv. 2. when you modify the contacts in the computer, you can‘t change the file name or you will unable to import. 3. when you modify or increase the number of contacts, you can‘t change the file format. 2.1 Phonebook settings You can check the memory status, preferred storage etc. 2.2 Caller picture Caller picture→enter into phone/ Memory card→Images→ choose the picutures→to new contact, to selected contact or to caller group as the caller picture. Note: the size should be limited to 10KB-20KB. 2.3 Caller Ringtone Caller Ringtone→choose one ring→choose to new contact, to selected contact or to caller group as the coming call ringtone Or through Caller Ringtone→Empty→Replace new music→through phone or Memory card→choose musicthrough My Music document. 二)、Call center 2.1 Call history 2.1.1 SIM1 Call history SIM1 Missed calls SIM1 missed calls→choose the missed number→ check the detailed information→ you can delete and call this number etc. You can choose call through SIM1 or SIM2, also can dial directly through dial key. SIM1 Dialed calls Same operation as Missed calls. SIM1 Received calls Same operation as Missed calls. Delete SIM1 calls logs You can delete one by one or delete all. SIM1 call timers You can check the call time of last call, dialed call and received calls. You can reset all. SIM1 call cost 5 * This function needs the support from operator network. SIM1 text message counter You can check how many messages you sent and received. SIM1 GPRS counter You can look through GPRS flow you sent and received Reset counter, you can delete all the GPRS flow logs. 2.1.2 SIM2 call history Same as SIM1. 2.2 Call settings A:SIM1 call settings Caller ID Please choose ―set by network, hide ID, send ID‖, the local is set by network. If you choose ―hide ID‖, then SIM1 only could receive the call, could not dial. Call waiting If there is another incoming call when you are talking on the phone, you will hear an audible tone from the earpiece. Activating this feature enables you to specify whether to answer the second incoming call or not. Deactivating this feature, you are not informed of a second incoming call by an audible tone in the earpiece, and the caller will hear a busy tone (If the divert feature is activated, the second incoming call is automatically diverted to another phone). Call divert 1. Divert all voice alls Press ―OK‖ to activate or deactivate this function, ―Query status‖, it will show the setting status of call divert. 2. Divert if unreachable When activated, calls will be diverted if you are out of coverage, other function introduction is the same as above. 3. Divert if no answer Press OK and go to activate this function→ Divert to new number→ press the number to be diverted to→ confirm sending, calls will be diverted the new number if you do not answer your phone. 4. Divert if busy When activated, calls will be diverted when you are already in a call. Same operation as point 1. 5. Divert all data calls When activated, all of your incoming calls will be diverted when the phone is busy ( need the support from network operator). 6. Cancel all diverts Press OK to enter the settings for this feature→Deactivate, all of call diverts of SIM 1 will be cancelled. Call barring The call barring network service allows you to restrict your calls, this feature needs call barring password supplied by your network service provider. This feature including outgoing calls, incoming calls, activate all, cancel all , change barring password. Line switching This feature is used to setting card 1 switching. Press switch to choose line 1 or line 2. ( needs local network support, suggest you choose line 1). 6 B.SIM 2 call setting Same as SIM 1, you also could choose line 1 when SIM 2 is open. C. Advance settings 1. Black list Press OK to enter into this feature→ black list→ reject from list: On/Off→ black list numbers→ add the phone number to the list ( 20 contacts at most)→ OK to save to finish, those numbers in the list will be blocked. 2. Auto redial The phone automatically redials the number if no answer or call barring when you activate this function. 3. Speed dial Open speed dial status→ choose the contacts from contacts list to the speed dial list→ finish→ press the right number to return to the standby interface for about 3 seconds, then you can start to use speed dial. 4. Call time display It will show the call time when this function is turned on, it will not show the call time when it is off. 5. Call time reminder You can set call time reminder, ―off‖ is not to remind you the call time, ―single‖ is to remind you one time only, ―Periodic‖ is to remind you every the seconds you set. 6. Auto quick end You can set the status to be on or off, and the time 1-9999 seconds, for example, if the time is 5 minutes, it will hang up automatically after calling for 5 minutes. 3, Settings 3.1 User profiles Use this menu to customize all various tones for incoming calls. Select profiles and press left key to access, including general, meeting, outdoor, indoor, headset, Bluetooth mode. Factory default mode is general. Activate. Press up/down key to choose different modes and press OK to activate. Customize Press left key to go to the options and choose ―customize‖. Note: 1. Select the different profiles or ring tone volume, the standby screen will display different icons accordingly; 2. When standby, long press ―#‖ to switch between general and meeting mode. 3.2 Dual SIM setting Dual SIM Open Both SIM 1 and SIM 2 will be open. Only SIM 1 open Only open SIM 1, SIM 2 will be closed, some of the SIM 2 features will be hidden. Only SIM 2 open 7 Only SIM 2 will be open, SIM1 will be closed; Some of the SIM 1 function will be hidden. Flight mode Please choose Flight mode when you are on plane, calling and message service will do not work. 3.3 Pen calibration According to the instruction shown on the screen, click the arrow center, calibrate the touch screen so that the touching can be more effectively. 3.4 Phone setup Time and date You can set up home city, time and date, display forma with date separator schedule power on/off: Set the power on/off time. Language: Set the language for using. Input methods: Choose the inputting methods. Display characteristics You can set up wallpaper, screen saver, power on/off display, show date and time, show owner number, clock type, green text, dedicated key, auto update of date and time. Adjust time automatically: this is a service from operator, after you setting up a correct time, every time you power on, the time will connect to service center automatically and adjust the time related. Backlight settings 1. LCD backlight, set up LCD backlight brightness and time 2. Auto-adjust backlight on/off, open this function to adjust brightness, according to environmental brightness to adjust backlight. 3. Auto update time: service supplied by the operator, every time power on it will check the time with the operator after you set the time. 4. Handwriting: in handwriting situation, set the handwriting speed and the color. 5. Background setting 3.5 Network setup SIM 1 network setup (1) Network selection: you can set to use SIM 1 to select network automatic or manually (suggest to choose automatic), if automatic, the mobile phone will select priority according to the SIM card service provider. If manually, need to choose the same network service provider of SIM card. (2) Preferences: select the priority network service provider, it will show network service providers‘ list. SIM 2 network setup Same as SIM 1 network setup Security setup A. SIM 1 security setup SIM 1 lock Input SIM 1 PIN number, setup SIM 1 lock or unlock, default, SIM card lock will display off. When lock the SIM card, need to input the SIM card password when power on the mobile phone, in another word, PIN number. PIN supplied by network service supplier, input wrong for three times contiguously, it will need to input PUK number, PUK number is used to unlock the lock PIN number. If loss the PUK number, please contact the network service provider. 8 Fixed dial Fixed dial is used to dial emergency number. Setup this function need to input the PIN number. Change password Change PIN 1 and PIN 2 password→ input old SIM card password→ input new SIM card password→ input again to confirm the new password B. SIM 2 security setup The operation is as same as SIM 1. C. Phone lock Open phone lock function, it will need to input phone password when power on the mobile phone, default password is 0000. D. Auto keypad lock It allows you to set keypad lock way, you can select 5s, 30s, 1min, 5min, the keypad will lock automatic when achieve the time, you need to press left soft key, then ―*‖ to unlock. E. change password Change the mobile phone password→ input old password→ input new password→ input again to confirm the new password Restore factory settings In this menu, enter your phone password ( the initial password is 0000), and press OK to reset your phone to its default settings. The Fourth. Business Zone 4.1 Games 4.1.1. Games The mobile phone supply Russia square, Magic Sushi, VSMJ three games. In the game menu, there is new games, games level, best grades and help some operations. Games settings Could setup BGM, sound effect, vibration and volume. 4.2 Java Support JAVA, the end user could install and download the JAVA from the internet. The mobile phone support Java function, the end user could install Java procedure by themselves. Now the mobile phone supply some Java internet applications and games, you could download the software and the games you like from the internet and install, copy the Java applications and install documents to the mobile phone or the micro SD card. In file management menu, press the document in .jar format to install Java applications, after installation, the application will be listed in the Java menu. 4.3 Java setting You can set up java audio, java vibration, select SIM, java SIM 1/2 profile, heap size by up/down navigation key for item selection and left/right navigation key for setting selection. 4.4 Java default security Go to the items of third party and untrusted domain, set the Network Access, Auto Invocation, Messaging, Multimedia, Read User Data, Write User Data, Local Connectivity to be Prompt at first by left/right navigation key. 9 5. Messages 5.1 Text message Click the icon to enter into the message menu; Click top left corner or press # to switch the typewriting; Type the message, choose the related phrase by up and down negotiation. Choose SIM1/SIM2 to finish the message sending. Write message Choose Write message and Press OK → input the character to write message→ choose SIM 1/2 done. You can choose ―send only‖, ―save and send‖, ―save‖, ―send to many‖ and ―send by group operations‖. ―Send to many‖ means you can send the message to 10 contacts at most. ―Send by group‖ means you can send to the all the contacts of this group which you choose. Use templates: Press up/down navigation key to select the template message.. Insert object: you can insert picture, my picture, predefined animation, my animation, melody, my melody, predefined sound into the message. Text format: including Text size (Text font size), Text style (Bold / Italics / Underline / Strikethrough), Alignment (Automatic / Left / Center / Right), New paragraph (Automatic / Left / Center / Right). Insert number: Press OK to choose the contact number you want send the message to. Insert name: Press OK to insert the contacts name in the message. Insert bookmark: Press OK to insert the URL address from bookmarks listed in the Bookmarks of WAP of Services which will be introduced in Chapter 8. Input method: including different input methods for choice. Note: some cities or areas message center can not support the characters more than 70 or English letters more than 160. Only the mobile phone compatible to EMS (Enhanced SMS) can receive and send static pictures, animation icons and music information.. Inbox Enter into inbox, press up/down navigation keys to check the received messages of SIM 1/2. If the inbox is not empty, press Options to reply, delete, forward, copy to phone, move to phone, delete all, copy all, move all, use number, use URL, use USSD operations. Outbox Choose the message from SIM 1/2 and press Options to edit, delete, copy to phone, move to phone, delete all, copy all, move all, use number, use URL, use USSD operations, Templates 10 short messages everyday use are preset in this phone. Press Options or OK to edit, remove and write message. SMS settings You can finish the following message settings of SIM 1/2 before using SMS, including profile settings, common settings, memory status and preferred storage. 5.2 MMS MMS is Multi-media Message Service, its main feature is it supports Multi Media functions, you can transmit different kinds of multi-media information, like text, picture and audio etc. MMS needs the 10 support from the network service provider, please check if your SIM card support this service or contact the Operator before using this service. Write message Press OK to go to ―write message‖ menu, you will see following subtitles: To, Cc, Bcc, Subject, Edit Content. When you want to input the recipient‘s phone numbers or emails, press the above subtitles and then choose ―Add number‖ or ―Add email‖, you can directly input the recipient‘s phone numbers or email address, or search the numbers from the phonebook. After inputting the phone numbers or email address, press OK to return to Recipient list. If you want to send the MMS to other recipients together, then press Options to continue to add numbers, or E-mails, or edit the numbers / emails you input or delete them. The subject of the MMS could be blank, if it is blank, it will be shown as No Topic. When you want to edit the content, choose ―Edit content‖ subtitle and press ―Edit. After inputting the content, press Options to add picture, audio or video, etc.; Choose ―Done‖ to finish edit and return to previous menu. If the recipient‘s number is not blank, press ―Done‖ and choose ―Send only‖, ―Save and Send‖, ―Save to Draft‖, ―Save as Template‖, ―Send Options‖, or ―Exit‖. Inbox Received MMS will be shown in the Inbox, users can check, read, or reply. If there is no MMS or the MMS service is not activated, screen will say ―Empty‖ when you want to read the message, When there is a new MMS in the Inbox, the phone will mention ―New MMS (SIM 1/2)‖, press to read the MMS. If the MMS was sent to your Email box, you have to log in your webmail box to check it. Outbox After being sent, the MMS will go to the Outbox, you can read, forward, etc. Draft Box The MMS edited can be saved into the Drafts box, press Options to view, send, etc. Template It includes two types: User Defined and Default. Any message in Inbox, Outbox, Draft Box can be saved as ―User Defined‖ template. ―Default‖ templates are the system MMS templates. PressOK and you will see the default MMS templates‘ list Choose the template and press Options, you will see ―View‖, ―Write Message‖, and―Properties‖. MMS Settings It includes following settings: ―Compose‖, ―Send‖, ―Retrieve‖, ―Filter‖, etc. ―Server profile‖ is used to select the MMS network provider for SIM 1 or SIM 2. Memory Status (Inside Storage Space): check the ―usage‖ of MMS, ―Used space‖, ―Free Space‖, etc. a) Voicemail Server 6. Chatting 7. Set the name and the phone number, reserve the setting, choose SIM1 or SIM2, start chatting. 8. Voice mailbox 9. Supplied by operator, press number 1 to enter into voice mailbox, 10. FM radio Voicemail box is provided by Network Operator, long press Numeric key 1 to visit voice mail when standby if you have set the voicemail number and name. 11 6)Multi-Media 6.1 Camera Menu→Multimedia→Camera, go into cyber shot screen, see the touch screen and numeric operations as below: Press ―Options‖ or touch to start following settings: Photos: view the photos Camera Settings: it is used to switch on/off the LED Highlight, set Shutter Sound, Explosion Value, Contrast, Anti-flicker, Delay timer and Continuous Shot. Image Setting: set the size of the photo (320x240/640x480/800x600/1600x1200) and quality. White Balance:Set the white balance of the camera. Screen Mode:Choose automatic or night shot mode Effects Settings: you can set a variety of effects, such as Normal, Grayscale, Sepia, etc. Set Frame: Set the frame for photos, only the frame with size 240x320 can be used. Storage: store the photos in the phone memory or extended memory card. Restore default: Restore the camera settings to factory defaults. 6.2 Image Viewer Press OK to enter. Choose one photo, press ―Options‖ to view, print, rename, delete etc. All the photos are stored in the―Images Folder‖of File Management. 6.3 Video Recorder Press OK → Video Recorder, press OK/Touch icon 12 and then it will start to record videos. Press "Options" and start following settings,including Camcorder settings, Video settings, Effect settings, Storage,Restore default. 6.4 Video Player Choose Video Player and press OK to enter. Press ―Options‖ to choose the ―Storage‖: Phone or Memory Card. This phone will add the files to the play list of ―Video‖ folder of the File Manager automatically. Choose one Video and press ―Options‖, then choose to Play, Send, Rename, Delete, etc. Remark:It support the 3GP/MP4 files in proper resolution/Decoding rate / frame speed; Decoding rate is suggested not to be less than 512 kbps; Frame speed is suggested to be around 10 frames per second. 6.5 Audio Player Choose Audio Player, press OK to go to player screen: Press "List", go to MP3 play list. Choose one audio file and press ―Options‖, you can choose to Play, view details, Add to ringtones, etc. Followings are the Audio Player settings: Preferred List: Audio files from Phone or Memory card. List Auto Generation: When it is switched on, all the MP3 files in the Music folder will be added automatically to this list; If it is switched off, users have to add the MP3 files by manual. Repeat:Repeat playing the files. Shuffle: Shuffle play the files. Backgroud play:exit MP3 player, songs are still playing in standby screen. Bluetooth Stereo output: allow transmit the MP3 files through Bluetooth or not. Bluetooth Stereo Earphone: switch on Bluetooth stereo output and find the Bluetooth stereo earphone, then it will transmit the MP3 sound to Bluetooth earphone(need Bluetooth earphone support stereo output). 13 Lyric list:switch on to display the lyric when playing,the .lrc format files must be stored in―My Music‖folder with the same name of the songs. 6.6 Sound Recorder Go to Recorder screen, press ―Options‖ → Press ―Record‖ →Stop and Save the audio, you will see the recorded file named by the recorded date and time. Press Options, you can choose to record, play, append, rename, delete, etc. 6.7 FM Radio Before using the FM radio, please insert the earphone first. Press OK to start recording what is broadcasting on the selected channel. Choose ―Options‖ and start the following settings: Channel List: you can save 9 channels, input the channel name and frequency, and choose to save.Choose the channel saved, and press ―Options‖ to choose ―Play‖, ―Delete‖ or ―Edit‖. Manual Input: you can input the channel you want to receive, valid frequency is from 87.5 to 108.0 MHz,input the numbers directly, including the decimal point.Press # to input the decimal point. Preset Auto Searching: choose auto searching to find the FM signal, it will save it into the channel list. Setting: choose to turn on/off ―Background play‖, or ―Loud Speaker‖, ―Record format‖, ―Audio quality‖ and ―Record storage‖. Recording: Record the FM radio of the broadcasting channel. Append: Choose the recorded file and continue to record. File List:List all the recorded files. 14 7. PTT 7.1 Main Screen Choose PTT, press OK or touch the icon to enter the following screen, details please refer to real screen: PTT Setting:Touch ④ or press OK to enter PTT settings. Backgroud Run:If switching on this function, you can send signals by pressing left side PTT button or receive the signals under the same frequency even if you are not under PTT screen. And you can see the PTT icon on the standby screen;If it is switched off, you can not receive or send any signals under background. Max TX time: you can set Max transmitting time to be 30s, 60s, 120s. After the time period you set, the transmitting will be interrupted. When transmitting, ② is red; When receiving, it is green. Frequency Step:Use left or right navigation key to set the step value to be 5K, 6.25K, 10K, 12.5K, 25K or touch the area ⑦ to choose different value. Press the icon or , or choose ―scan‖ to adjust the frequency. A yellow arrow will point out the Frequency Step value like below: Band selection:Touch ① or use left / right navigation key to choose wide or narrow band (Default band is wide band.) Squelch Threshold:Touch ③ or use left / right key to set the squelch level,and different levels are shown by different bars at the left bottom of the PTT screen. Press the Down Navigation Key to keep monitoring the signals;If the level is low, the weak signals that can be received. If the level is high, only good signals can be received. In short distance, set high level to avoid disturbing from other weak signals. Volume Adjust:Touch ⑤ or press the right side button to adjust the volume. 7.2 User Guide Step 1. According to the request, set the wide/narrow band, Volume, Frequency step (5K/10K/6.25 K/12.5 K/25K) and Max TX Time(30s/60s/120s), SQ Level, etc.. For frequency,you can directly input the 6 numbers through numeric keypad, the system will correct the last numbers according to the frequency step you set automatically. Valid frequency value is from 400.000 to 480.000MHz. Step 2 15 Transmitting:choose ,set the frequency as introduced to be same, touch → switch on―background run‖ and press OK. Press the left side button or up navigation key, indication light turns red., start to talk through the bottom microphone hole. The distance between the mouth and the microphone hole should be kept as 2.5-5cms; Not press the side button, it will go to receiving mode. Receiving Mode:Under the same frequency, indication light will turn green if it got the signals. When signals are strong, you do not need to press the Down navigation key to receive but you will hear the sound. If the signals are weak, press the key to better receive the information. When running Java application, the PTT will be turned off. 8)Services 8.1 STK Service This function needs the support from SIM card‘s network operator, different operators provide different services. 8.2 WAP Based on WAP function, this phone can be used to get information from the internet wirelessly. Press ―WAP‖, choose ―Homepage‖ and press OK to open, use up / down navigation keys to choose the link, the press left key to open the link; After the page is open, press left key to set the Homepage, Bookmark, Recent Pages, offline pages, Input address, Service inbox. 8.3 Data Account The account information has been pre-set. 8.4 Connection Management Modify the internet connection settings. 9)Tools 9.1 File Management This phone has Phone memory and support extended memory card. Choose Phone memory or memory card if being inserted a memory card, Press ―Options‖ and you will see followings: Open: Open the phone memory or memory card you chose. New Folder: Create a new folder in the memory. Format: Format the memory. Remove: Remove the memory. Rename: change the name of the memory. Details: Check the Memory Name, Total Size and Free Size. Press ―Open‖, you will see the folder list in the memory. Choose a folder and press ―Options‖, you will see ‖Open‖, ―New Folder‖, ―Rename‖, ―Delete‖, etc. Choose a file from the folder, you can choose to view / print it out if it is from the Images Folder: You can choose to play it if it is from My Music Folder or Audio Folder. All the files can be sent to other devices through MMS or Bluetooth. Note:The pictures or audio files must match the format that the receiving devices can support if you want to send them to. Otherwise, it can‘t be sent out. 9.2 Extra 9.2.1 Calculator 16 Input the numbers (Press―#‖ to input decimal point); Navigation keys respectively represent―+ - x ÷ M+ M- MR and MC‖ functions, press the navigation keys or touch the calculation symbols to start calculation. It gives out the result after you press OK key. Press the right key to clear the error number or symbol. Note: The precision is limited to round-off error. 9.2.2 Stopwatch You can choose typical stopwatch or nWay stopwatch by pressing the up/down key. Typical stopwatch: Split timing, Lap timing, View records. nWay stopwatch: press up/down/left/right key to start, press OK key to pause/continue, reset by pressing right soft key. 9.2.3 E-book reader It supports .txt format files, after entering the ebook reader, you will see: Open ebook, Global settings, Book info, Delete, Delete all files, Sort by, Apply global settings, and Help. Note: When reading,the numbers at the bottom of the screen represent different reading functions, the .txt format files must be stored in E-book Folder of the file management. 9.2.4 Bluetooth Bluetooth wireless communication function is built-in, users can connect the phone to other devices through Bluetooth, such as a Bluetooth handle-free device, other phones or PC which support the Bluetooth wireless technology. The Bluetooth can be applied to transmit images, video clip, text, electric card, etc., you also can talk through the Bluetooth handle-free device. 4.4.1 Activating Bluetooth You can activate / deactivate the Bluetooth according to the request. If you want to use the functions relevant to Bluetooth function, like sending a file through Bluetooth, you are required to turn on the Bluetooth first. 4.4.2 Inquiry audio device Search the Bluetooth devices and list the devices found in the screen, choose one device and pair with the pairing password. After successfully paired, the device will be added to Paired Device list. 4.4.3 My device It will appear ‗searching Bluetooth device‘ if the mobile phone is not connected with the Bluetooth device. Press OK key to search the Bluetooth devices around you, you can choose one from the device list found. 4.4.4 Connecting devices The devices in connecting are shown in the list. You can select the devices from the list and break the link. 4.4.5 Settings You can set the visibility of the mobile phone, change the device name, and set audio path. 4.4.6 My Bluetooth It will display the information of the device name, the device address, supporting services, etc. 9.3 GPS It searches and will show the longitude and latitude of your location as well as the altitude Note: Please put the phone outside the room. GPS Tracking: 17 9.3.1 Location Service: Input following contents and send to the phone number which you want to track: Format: W+Password+, +000 ( Default Password : 000000) For Example: W000000,000 The number being tracked will response with a SMS, including the location information: Location Data Format: Longitude = xxx degree - xx cent - xx second Latitude = xxx degree - xx cent - xx second 9.3.2 Time tracking function You can set the time tracking function on or off according to your needs. The phone will send a location message time interval that you set in advance, that is to say the phone will automatically send a message at this time, keep reporting its location till it gets the stop order. Step 1: Editing the message as below and send it to the number of the mobile phone W+Password+002,+XXX ( Remark: XXX means the minutes from, if XXX=000 then it means stop sending location message) For example: W000000,002,005 ( It means the phone will send a location message every 5 minutes) Step 2: The mobile phone will reply a message – (The appointed time that you set in advance) OK In this example, the content of the replied-message is: Set Time (005Min) OK. This message means you have set successfully that it will reply tracking location message every 5 minutes. The message is sent by every 5 minutes and the other phone will be received the location data message every 5 minutes a time. Remark: If the content of the message is : Longitude = 000 degree - 00 cent - 00 second Latitude = 000 degree - 00 cent - 00 second, it means the GPS signal does not catch the location. 9.3.3 Stop tracking function Editing the following message and sent to the number of the phone Format: W+password,+002,+000 18 For example: W000000,002,000 The phone will reply a message – Stop Timer OK This means the function of tracking location is off. 9.4 Hand up message when reject 9.4.1 If this function is switched on, it will auto-reply a message to the rejected numbers when it calls in. 9.4.2 Templates message SMS It has 10 messages templates, you can edit or delete them. (Remark: the auto-reply message is a normal short message sent through the network, please check with your SIM card‘s operator about the cost of one SMS.) If turning this off, it will not send out this kind of message. Head lamp Switch on this function, the bedside lamp will be turned on; Or press the side lamp button to turn on/off the lamp. 9.6 Lamp setting After switching on the head lamp functions, choose one from following settings: 1. Switch on/off by short press: short press the left-side key to switch on/ off the head lamp. 2. Switch on/off by long press: long press the left-side key around 2 seconds to switch on / off the head lamp. 3. Switch on by press and switch off by release: keep pressing the left-side key to keep the lamp on, the lamp is turned off after release the button. 9.7 Background noise Elimination When you start this function, you can eliminate the background noise that around you, if you keep this function off, then it will not eliminate the background noise. 9.8 Calendar You can use the handwriting pen to choose the date, or view the date by pressing the navigation keys (up / down / left / right keys) directly, the date on the screen will be changed accordingly. 9.9 Task Press OK to start this function, it will list the total quantity of the memo, you can choose the memo with navigation keys and press OK to review or add task. 9.10 Alarm Press the alarm function key to enter the function (set 5 alarm clocks at most), choose alarm by up/down key, you can edit the different settings such as on/ off, time, alarm tone,, Snooze(min), alert type, etc. 9.11 World clock Check the current time for other major cities in the world, and you can select ‗Daylight saving time for foreign city‘ according to requirement. 9.12 Shortcuts You can set shortcuts for main functions. 19 4. Input method Keypad definition OK key: It is used to confirm the information you input, or choose Options, send messages and save information, etc. Left key: it usually represents the function displayed at the left bottom corner of the screen. Right key: it is used to return, cancel or clear the information you input. Navigation keys: it includes up/down/left/right navigation keys, these four keys are used to move the cursor. * key: It is used to show symbols when you edit your text. Digital key (2-9): It stands for different letters on each key in the input mode of English or smart English. # key: it is used for switching among different input methods Input method 1. English input method Each key is used for inputting different letters. Repeat and press the key quickly to switch among the letters you need. Press * key or numeric ‖1‖ key to enter a special symbol, or go to options--- method input---choose input method by up/down key, or choose to insert symbols. Switch input method by # key. Press 0 key to input a Space. Clear input error by right key, or press the right key till all the contents are cleared. 2. Smart English input Type English letters: press 2-9 numeric keys to input English letters, the mobile phone selects all possible word combinations according to the input letters, for example, if press 2 key four times, multiple options are ‗cabb‘, ‗babb‘, etc. and press left or right key to select the word. 3. Hand-writing input 1. Click the icon of input method on the editing interface to decide the type of characters that you will put. 2. The place where the cursor stays is the inputting area, use the pen to write in the writing area, the LCD will indicate the automatic result once you pause a moment, and the candidate will also be displayed in the waiting area. click or show or hide the soft keyboard Click Click to show or hide the soft symbol keyboard to enter a space. Click Click to clear the letters move the cursor to the next line. Trouble Shooting 20 If your mobile has problems when using, please try to check the following ‗trouble shooting‘ first; If the problem is not solved, please contact us. Troubles Cause Solutions Power on key is Press power on key not pressed for for more than three enough time. seconds or longer Battery is low Charge the battery Can‘t Battery bad Assemble the battery power-on connection. again or clean the contact points of the battery SIM card failure Check or replace SIM card Battery Replace battery performance Insufficient goes bad. standby time Long time Reduce the time of playing games, playing games or or music, etc. music Poor contact Check contact conditions, replace socket or plug Input voltage is charge for about half too low an hour first, and then remove the plug and Charge charge the batter failure again Battery failure Replace battery Charger type Change suitable error charger Charger failure Change / repair the charger SIM card failure Conversation failure Check or replace SIM card Dialing error Redial Reach fee Contact with the restriction operator Incorrect phone Check phone number Part of calls numbers failure Setting problems Check ‗call barring‘ 21 Can‘t send out SMS This service is Contact the Operator not activated or and get the Message no Message Center Number. Center Numbers PIN code error Auto-lock Input code error Contact with the for three times operator Input wrong code Please contact with (forget the code) the appointed code error after-sales service center. Battery low Please charge the battery Mobile phone Setting problem auto Check if Auto power-off is switched power-off on. Accident Restart. Disturbing No incoming The volume was call warning set mute Set the volume again tone 22 Important Product Information Guide This Important Product Information Guide contains safety and handling for JCB Toughphone. Look for recycling, disposal, and other environmental information in the JCB Toughphone User Guide at: http://www.jcbphone.co.uk/ To avoid injury, read all operating instructions and the following safety information before using JCB Toughphone. For detailed operating instructions, read the JCB Toughphone User Guide on your JCB Toughphone by visiting http://www.jcbphone.co.uk/ Important Safety and Handling Information WARNING: Failure to follow these safety instructions could result in fire, electric shock, or other injury or damage to JCB Toughphone or other property. General Useage : JCB Toughphone has been designed to be significantly more rugged than a normal mobile phone, however it is NOT indestructible. Carrying and Handling JCB Toughphone : JCB Toughphone contains sensitive components Do not drop, disassemble, open, crush, bend, deform, puncture, shred, microwave, incinerate, paint, or insert foreign objects into JCB Toughphone. Do not use JCB Toughphone if it has been damaged—for example, if JCB Toughphone is cracked, punctured, or damaged by water. The screens of JCB Toughphone are made of glass. This glass could break if JCB Toughphone is dropped on a hard surface or receives a substantial impact or is crushed, bent, or deformed. If the glass chips or cracks, do not touch or attempt to remove the broken glass. Stop using JCB Toughphone until the glass is replaced by a JCB Toughphone Authorized Service Provider. Glass cracked due to misuse or abuse is not covered under the warranty. Keeping the Outside of JCB Toughphone Clean Clean JCB Toughphone immediately if it comes into contact with any contaminants that may cause stains, such as ink, dyes, makeup, dirt, food, oils, and lotions. To clean JCB Toughphone, unplug all cables and turn off JCB Toughphone. Then use a soft, slightly damp, lint-free cloth. Avoid getting moisture in openings. Don‘t use window cleaners, household cleaners, aerosol sprays, solvents, alcohol, ammonia, or abrasives to clean JCB Toughphone. The front screen surfaces have an oleophobic coating. To remove fingerprints, simply wipe these surfaces with a soft, lint-free cloth. The ability of this coating to repel oil will diminish over time with normal usage, and rubbing the screen with an abrasive material will further diminish its effect and may scratch the glass. Dust and Water The JCB Toughphone in fully tested to meet either IP54 or IP67 specifications (depending on the model). It is very important to note that all of the Toughphone connectors, covers and battery compartment must be correctly fastened and have the correct 0-rings fitted to meet the 23 waterproof and dust specifications Failure to ensure all connector, covers, battery compartment and O rings are correctly fitted will invalidate the warranty. In case JCB Toughphone gets wet turn off JCB Toughphone before cleaning, and allow it to dry thoroughly before turning it on again. Do not attempt to dry JCB Toughphone with an external heat source, such as a microwave oven or hair dryer. Repairing or Modifying JCB Toughphone Never attempt to repair or modify JCB Toughphone yourself. JCB Toughphone does not contain any user-serviceable parts, except for the SIM card , Battery and Battery Compartment. Disassembling JCB Toughphone, including the removal of external screws and back cover, may cause damage that is not covered under the warranty. Service should only be provided by a JCB Authorized Service Provider. If you have questions, a JCB Toughphone Authorized Service Provider. Charging JCB Toughphone To charge JCB Toughphone, only use the JCB Toughphone Connector to USB Cable or a high-power USB port on another device that is compliant with the USB 2.0 or 1.1 standard, or another JCB Toughphone -branded product or accessory designed to work with JCB Toughphone, or a third-party accessory certified to use with JCB Toughphone. Read all safety instructions for any products and accessories before using with JCB Toughphone. JCB Toughphone is not responsible for the operation of, or any damage caused by, third-party accessories or their compliance with safety and regulatory standards. When you use the JCB Toughphone USB Power Adapter to charge JCB Toughphone, make sure that the power adapter is fully assembled before you plug it into a power outlet. Then insert the JCB Toughphone USB Power Adapter firmly into the power outlet. Do not connect or disconnect the JCB Toughphone USB Power Adapter with wet hands. The JCB Toughphone USB Power Adapter may become warm during normal use. Always allow adequate ventilation around the JCB Toughphone USB Power Adapter and use care when handling. Unplug the JCB Toughphone USB Power Adapter if any of the following conditions exist: The power cord or plug has become frayed or damaged. The adapter is exposed to rain, liquid, or excessive moisture. The adapter case has become damaged. You suspect the adapter needs service or repair. You want to clean the adapter. Avoiding Hearing Damage Permanent hearing loss may occur if the receiver, earbuds, headphones, speakerphone, or earpieces are used at high volume. Set the volume to a safe level. You can adapt over time to a higher volume of sound that may sound normal but can be damaging to your hearing. If you experience ringing in your ears or muffled speech, stop listening and have your hearing checked. The louder the volume, the less time is required before your hearing could be affected. Hearing experts suggest that to protect your hearing: Limit the amount of time you use the receiver, earbuds, headphones, speakerphone, or earpieces at high volume. 24 Avoid turning up the volume to block out noisy surroundings. Turn the volume down if you can‘t hear people speaking near you. For information about how to set a maximum volume limit on JCB Toughphone, see the JCB Toughphone User Guide. Emergency Calls You should not rely on wireless devices for essential communications, such as medical emergencies. Use of JCB Toughphone to call emergency services may not work in all locations or all operating conditions. Emergency numbers and services vary by region, and sometimes an emergency call cannot be placed due to network availability or environmental interference. Some cellular networks may not accept an emergency call from JCB Toughphone if it does not have a SIM, if the SIM is PIN-locked, or if you have not activated your JCB Toughphone. Driving and Riding Safely Use of JCB Toughphone alone or with headphones (even if used only in one ear) while driving a vehicle or riding a bicycle is not recommended and is illegal in some areas. Check and obey the laws and regulations on the use of mobile devices like JCB Toughphone in the areas where you drive or ride. Be careful and attentive while driving or riding a bicycle. If you decide to use JCB Toughphone while driving, keep in mind the following guidelines: Give full attention to driving or riding and to the road. Using a mobile device while driving or riding may be distracting. If you find it disruptive or distracting while operating any type of vehicle, riding a bicycle, or performing any activity that requires your full attention, pull off the road and park before making or answering a call. Get to know JCB Toughphone and its features such as Voice Control, Favourites, Recent, and Speaker. These features help you to place your call without taking your attention off the road. See the JCB Toughphone User Guide for more information. Use a hands-free device. Take advantage of one of the many compatible hands-free accessories available for use with JCB Toughphone. Use of a hands-free device may be required in some areas. Position JCB Toughphone within easy reach. Keep your eyes on the road. If you get an incoming call at an inconvenient time, let your voicemail answer it for you. Try to plan calls when your car will be stationary. Assess the traffic before dialing, or place calls when you are not moving or before pulling into traffic. Let the person you are speaking with know you are driving. If necessary, suspend the call in heavy traffic or hazardous weather conditions. Driving in rain, sleet, snow, ice, fog, and even heavy traffic can be hazardous. Do not text, email, take notes, look up phone numbers, or perform any other activities that require your attention while driving. Composing or reading texts and emails, jotting down a to-do list, or flipping through your address book takes attention away from your primary responsibility, driving safely. Do not engage in stressful or emotional conversations that may be distracting. Make people you are talking with aware you are driving and suspend conversations that have the potential to divert your attention from the road. 25 Navigating Safely Do not rely on JCB Toughphone applications that provide maps, digital compass headings, orientation information, directions, or location-based navigation to determine precise locations, proximity, orientation, distance, or direction. These applications should only be used for basic navigation assistance. Maps, directions, and location-based applications depend on data services. These data services are subject to change and may not be available in all geographic areas, resulting in maps, digital compass headings, directions or location-based information that may be unavailable, inaccurate, or incomplete Do not use location-based applications while performing activities that require your full attention. For important information about driving safety, see the ―Driving and Riding Safely‖ section. Always comply with posted signs and the laws and regulations in the areas where you are using JCB Toughphone. For Vehicles Equipped with an Air Bag An air bag inflates with great force. Do not store JCB Toughphone or any of its accessories in the area over the air bag or in the air bag deployment area. Seizures, Blackouts, and Eyestrain A small percentage of people may be susceptible to blackouts or seizures (even if they have never had one before) when exposed to flashing lights or light patterns such as when playing games or watching video. If you have experienced seizures or blackouts or have a family history of such occurrences, you should consult a physician before playing games (if available) or watching videos on your JCB Toughphone. Discontinue use of JCB Toughphone and consult a physician if you experience headaches, blackouts, seizures, convulsion, eye or muscle twitching, loss of awareness, involuntary movement, or disorientation. To reduce risk of headaches, blackouts, seizures, and eyestrain, avoid prolonged use, hold JCB Toughphone some distance from your eyes, use JCB Toughphone in a well-lit room, and take frequent breaks. Choking Hazards JCB Toughphone contains small parts, which may present a choking hazard to small children. Keep JCB Toughphone and its accessories away from small children. Repetitive Motion When you perform repetitive activities such as typing or playing games on JCB Toughphone, you may experience occasional discomfort in your hands, arms, shoulders, neck, or other parts of your body. Take frequent breaks and if you have discomfort during or after such use, stop use and see a physician. Potentially Explosive Atmospheres Turn off JCB Toughphone when in any area with a potentially explosive atmosphere. Do not charge JCB Toughphone, and obey all signs and instructions. Sparks in such areas could cause an explosion or fire, resulting in serious injury or even death. Areas with a potentially explosive atmosphere are often, but not always, marked clearly. Potential areas may include: fueling areas (such as gas stations); below deck on boats; fuel or chemical transfer or storage facilities; vehicles using liquefied petroleum gas (such as propane or butane); areas where the air contains chemicals or particles (such as grain, dust, or metal powders); and any other area where you would normally be advised to turn off your vehicle engine. 26 Using Connectors and Ports Never force a connector into a port. Check for obstructions on the port. If the connector and port don‘t join with reasonable ease, they probably don‘t match. Make sure that the connector matches the port and that you have positioned the connector correctly in relation to the port. Accessories and Wireless Performance Turning on Airplane Mode on JCB Toughphone may eliminate audio interference between JCB Toughphone and an accessory. While Airplane mode is on, you cannot make or receive calls or use features that require wireless communication. Under some conditions, certain accessories may affect JCB Toughphone wireless performance. Reorienting or relocating JCB Toughphone and the connected accessory may improve wireless performance. Keeping JCB Toughphone Within Acceptable Temperatures JCB Toughphone is designed to be operated in temperatures between 0º and 35º C (32º to 95º F) and stored in temperatures between -20º and 45º C (-4º to 113º F). Low- or high-temperature conditions might temporarily shorten battery life or cause JCB Toughphone to temporarily stop working properly. Leaving JCB Toughphone in a parked vehicle or in direct sunlight can cause JCB Toughphone to exceed these storage or operating temperature ranges. Avoid dramatic changes in temperature or humidity when using JCB Toughphone as condensation may form on or within JCB Toughphone. When you‘re using JCB Toughphone or charging the battery, it is normal for JCB Toughphone to get warm. The exterior of JCB Toughphone functions as a cooling surface that transfers heat from inside the unit to the cooler air outside. Exposure to Radio Frequency Energy JCB Toughphone contains radio transmitters and receivers. When on, JCB Toughphone receives and sends out radio frequency (RF) energy through its antennas. The JCB Toughphone cellular antenna is located at the bottom edge of JCB Toughphone, to the left of the Home button. The Wi-Fi and Bluetooth® antenna is located at the top edge of JCB Toughphone, to the right of the headset jack. For optimal mobile device performance and to be sure that human exposure to RF energy does not exceed the FCC, IC, and European Union guidelines, always follow these instructions and precautions: When on a call using the built-in audio receiver in JCB Toughphone, hold JCB Toughphone with the dock connector pointed down toward your shoulder to increase separation from the antenna. When using JCB Toughphone near your body for voice calls or for wireless data transmission over a cellular network, keep JCB Toughphone at least 15 mm (5/8 inch) away from the body, and only use carrying cases, belt clips, or holders that do not have metal parts and that maintain at least 15 mm (5/8 inch) separation between JCB Toughphone and the body. JCB Toughphone is designed and manufactured to comply with the limits for exposure to RF energy set by the Federal Communications Commission (FCC) of the United States, Industry Canada (IC) of Canada, and regulating entities of Japan, the European Union, and other countries. The exposure standard employs a unit of measurement known as the specific absorption rate, or SAR. The SAR limit applicable to JCB Toughphone set by the FCC is 1.6 watts per kilogram (W/kg), 1.6 W/kg by Industry Canada, and 2.0 W/kg by the Council of the European Union. Tests for SAR are conducted using standard operating positions (i.e., at the ear and worn on the body) specified by these agencies, with JCB Toughphone transmitting at its highest certified power level in all tested frequency bands. Although SAR is determined at the highest certified power level in each frequency band, the actual 27 SAR level of JCB Toughphone while in operation can be well below the maximum value because JCB Toughphone adjusts its cellular transmitting power based in part on proximity to the wireless network. In general, the closer you are to a cellular base station, the lower the cellular transmitting power level. JCB Toughphone has been tested and meets the FCC, IC, and European Union RF exposure guidelines for cellular, Wi-Fi, and Bluetooth operation JCB Toughphone‘s SAR measurement may exceed the FCC exposure guidelines for body-worn operation if positioned less than 15 mm (5/8 inch) from the body (e.g., when carrying JCB Toughphone in your pocket). If you are still concerned about exposure to RF energy, you can further limit your exposure by limiting the amount of time using JCB Toughphone, since time is a factor in how much exposure a person receives, and by using a hands-free device and placing more distance between your body and JCB Toughphone, since exposure level drops off dramatically with distance. Additional Information For more information from the FCC about exposure to RF energy, see: www.fcc.gov/oet/rfsafety The FCC and the U.S. Food and Drug Administration (FDA) also maintain a consumer website at www.fda.gov/Radiation-EmittingProducts/RadiationEmittingProductsandProcedures/HomeBusinessa ndEntertainment/CellPhones/default.htm to address inquiries about the safety of mobile phones. Please check the website periodically for updates. For information about the scientific research related to RF energy exposure, see the EMF Research Database maintained by the World Health Organization at: www.who.int/peh-emf/research/database Radio Frequency Interference Radio-frequency emissions from electronic equipment can negatively affect the operation of other electronic equipment causing them to malfunction. Although JCB Toughphone is designed, tested, and manufactured to comply with regulations governing radio frequency emission in countries such as the United States, Canada, the European Union, and Japan, the wireless transmitters and electrical circuits in JCB Toughphone may cause interference in other electronic equipment. Therefore, please take the following precautions: Aircraft Use of JCB Toughphone may be prohibited while traveling in aircraft. For more information about using Airplane Mode to turn off the JCB Toughphone wireless transmitters, see the JCB Toughphone User Guide. Vehicles Radio frequency emissions from JCB Toughphone may affect electronic systems in motor vehicles. Check with the manufacturer or its representative regarding your vehicle. Pacemakers The Health Industry Manufacturers Association recommends that a minimum separation of 15 cm (6 inches) be maintained between a handheld wireless phone and a pacemaker to avoid potential interference with the pacemaker. Persons with pacemakers: Should always keep JCB Toughphone more than 15 cm (6 inches) from the pacemaker when the phone is turned on 28 Should not carry JCB Toughphone in a breast pocket ÂÂ Should use the ear opposite the pacemaker to minimize the potential for interference If you have any reason to suspect that interference is taking place, turn JCB Toughphone off immediately. (Press and hold the Sleep/Wake button until the red slider appears, then drag the slider.) Hearing Aids JCB Toughphone may interfere with hearing aids. If it does, consult the hearing aid manufacturer or your physician for alternatives or remedies. Other Medical Devices If you use any other personal medical device, consult the device manufacturer or your physician to determine if it is adequately shielded from radio frequency emissions from JCB Toughphone. Health Care Facilities Hospitals and health care facilities may use equipment that is particularly sensitive to external radio frequency emissions. Turn JCB Toughphone off when staff or posted signs instruct you to do so. Blasting Areas and Posted Facilities To avoid interfering with blasting operations, turn off JCB Toughphone when in a ―blasting area‖ or in areas posted ―Turn off two-way radio.‖ Obey all signs and instructions. 29