1
Setup
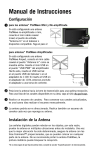
1 for Non-amplified Rayzar® Antennas*
If setting up a non-amplified
Rayzar antenna, connect
the mini coaxial (coax)
cable to the “Antenna
In” coax port on the TV
or compatible device.
Continue with step 2.
+
for Amplified Rayzar Antennas*
If setting up an amplified Rayzar
antenna, connect the mini coax
cable to the “Antenna In” port
as shown above. Plug the mini
USB into the “USB PWR” port
of the amplifier. Then, plug the
regular USB into the USB port
of the TV, 12V adapter, or 110V
adapter. If plugging the USB into
the 12V adapter, then plug the
12V adapter into a 12V outlet. If
plugging the USB into the 110V
adapter, then plug the 110V
adapter into a 110V outlet.
2 Position the antenna toward the broadcast tower for optimal
reception. For a listing of likely channels available in your area, go
online to dtv.gov/maps.
3 Run a channel scan. To keep your channel line-up up-to-date, run a
channel scan anytime you change locations.
4 The antenna may need to be repositioned. If so, run a channel scan
every time you reposition the antenna.
WARNING: While the Rayzar antenna has been designed with quality
and durability in mind, the antenna is not weatherproof and should
not be installed outside in rain, snow, excessive wind, etc.
WARNING: Do not paint the antenna. This could block signal and void
your warranty.
*If unsure of your antenna type, refer to the “Specifications” section of this document.