1
Instruction Manual 403-17CCA/CTA
A/C Robotic 55 Deg. Curved Gun
Revised 06/2014
D/F MACHINE SPECIALTIES, INC.
MIG & TIG Welding Products, Consumables & Accessories
1750 Howard Drive, North Mankato, MN 56003
Phone: (507) 625-6200 Fax: (507) 625-6203
Email: [email protected]
www.dfmachinespecialties.com
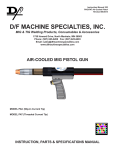
AIR-COOLED CURVED GUN
55° Robotic Curved Torch - Series 400
Model CCA (Slip-in Current Tip)
Model CTA (Threaded Current Tip)
INSTRUCTION, PARTS & SPECIFICATIONS MANUAL
D/F MACHINE SPECIALTIES is a world leader in the design, development, and manufacture of “MIG” (GMAW) & “TIG” (GTAW) welding products, consumables and accessories. D/F offers several types of manual Air or Water-Cooled “MIG” welding tools, and with the
increased use of automated and robotic welding systems, a demand has been created for welding tools of the highest quality, durability
and interchangeability. For over forty years, D/F welding products have been used extensively on “MIG” and “TIG” welding applications.
This experience, coupled with patented design features, unavailable on any other competitive equipment, has made D/F welding tools
the most advanced “MIG” and “TIG” welding guns and barrels for semi-automatic, automatic or robotic welding applications.
This Catalog is a guide to helping you select the proper tool for a given semi-automatic, automatic or robotic welding application. The following is only a partial listing of available semi-automatic, automatic and robotic guns. For further information on special “MIG” and “TIG”
requirements, please consult the factory.
Customer satisfaction and customer benefits are the center
points of all strategic contents
The spirit of the D/F Machine Specialties personnel is to listen to
and to integrate the customer throughout the process, to develop
and design marketable products, to present prototypes, to carry
out pilot tests and to prepare for and be open to new technology
and tasks. We attract and carefully select talented individuals
who share our values. Together we will nurture and sustain a
work environment with two-way communication, training, mentoring, and rewarding career opportunities.
Innovation and quality
Innovation and quality come from being receptive and willing to
learn from others. We encourage our people to be creative and
take risks in the pursuit of excellence. Innovative practices are
deeply rooted in every one of our employees, a philosophy that
leads to continuous product development and industry firsts.
Progress
By remaining confident, focused, and persistent in challenging
times, we will discover opportunity. Commitment to quality and
the pursuit on innovation ensure that D/F Machine Specialties
will remain an industry leader for years to come.
Commitment to excellence
At D/F Machine Specialties we commit to design, build and deliver premium products and superior customer support to quality
driven welding professionals. Customers still to this day choose
D/F over competitors because of our responsiveness and flexibility. Customers will continue to choose D/F tomorrow for our
superior hand-made products and service. To ensure this, we
need creative and competent personnel in all business divisions,
an intensive exchange of thoughts and ideas with all users, participation in working and study groups within the field of welding
technology and intensive cooperation with institutes and universities.
Teamwork
Striving for excellence is a commitment that is an integral component of the D/F Culture. Our team of skilled and dedicated
employees takes pride in the excellence products they produce.
Each of us willingly accepts personal responsibility for meeting
our commitments and we hold each other to a high standard of
accountability.
Responsibility
We will continually strive to be environmentally responsible and
to support the health and safety of our employees, customers,
and neighbors. We continue to support the communities in which
we operate and the industries in which we participate.
Thank You for Choosing D/F Machine Specialties
TABLE OF CONTENTS
Safety.............................................................................................................................4
Introduction, (Table 1) Ordering Info, (Table 2) Model Specifications.............................5
Disassembly, Assembly..................................................................................................6
Air-Cooled Curved 55° Guns - Parts..............................................................................7
(Table 3) Gas Nozzles, (Table 4) Current Tips...............................................................8
(Table 5) Liners, (Table 6) Casings, (Table 7) Recommended Spare Parts...................9
Body Liners, Fitting Replaceable Liners.......................................................................10
Utility Station................................................................................................................ 11
Wire Feeder Adapters & Inlets.....................................................................................12
Troubleshooting.......................................................................................................13-16
SAFETY MEASURES - **PLEASE READ!**
Welding is not particularly hazardous when certain safety practices are followed. Anyone using this equipment should be thoroughly
trained in safe welding practices. Failure to observe safe practices may cause serious injury. Handling welding torches presents no danger if the appropriate safety regulations are strictly adhered to. For example:
• Starting-up procedures must be reserved for those fully conversant with processes relating to arc welding equipment.
• Arc welding can prove damaging to eyes, skin, and hearing! It is therefore imperative that the Accident Prevention Regulations UVV 26.0 and VGB 15 are
fully observed and that all protective clothing, eye and ear protectors specified are worn.
• The load data given are maximum limit figures. Overloading will inevitably damage the torch!
• Before changing wear parts, disconnect for the power supply.
• The operating instructions for the individual welding components - e.g. power source, wire feed and cooling unit must be followed.
• Never pull the cable assembly across sharp edges or set down close to weld spatter or on a hot workpiece.
• Those not involved in the welding process should be protected by curtains or partitions from radiation and the danger of being dazzled.
• When handling gas cylinders, consult the instructions issued by the manufacturers and the suppliers of the pressurized gas.
• Workpieces which have been degreased using chlorinated solvents must be sprayed down with clean water before welding starts to avoid the risk of
phosgene forming. For the same reason, no degreasing baths containing chlorine must be placed close to the welding point.
• All vapors given off by metals can cause harm and a special warning is attached to lead, cadmium, copper, zinc, and beryllium. If necessary, take appropriate precautions (by providing adequate ventilation or an extraction system) to ensure that the legal maximum levels of toxic concentrations are not
exceeded.
For more information, refer to the following standards in their latest revisions and comply as applicable.
• ANSI Standard Z49.1, SAFETY IN WELDING AND CUTTING obtainable from the American Welding Society, 2501 N.W. 7th St., Miami, FL 33125.
• ANSI Standard Z41.1, STANDARD FOR MEN’S SAFETY - TOE FOOTWEAR obtainable from the American National Standards Institute, 1430 Broadway,
New York, NY 10018.
• ANSI Standard Z49.2, FIRE PREVENTION IN THE USE OF CUTTING AND WELDING PROCESSES obtainable from the American National Standards
Institute, 1430 Broadway, New York, NY 10018.
• OSHA, SAFETY AND HEALTH STANDARDS, 29CRF 1910, obtainable from the U.S. Government Printing Office, Washington, D.C. 20402.
• AWS Standard A6.0, WELDING AND CUTTING CONTAINERS WHICH HAVE HELD COMBUSTABLES obtainable from the American Welding Society,
2501 N.W. 7th St., Miami, FL 33125.
• NFPA Standard 70-1978, NATIONAL ELECTRICAL CODE obtainable from the National Fire Protection Association, 470 Atlantic Avenue, Boston, MA
02210.
• ANSI Standard Z88.2, “Practice for Respiratory Protection” obtainable from the American National Standards Institute, 1430 Broadway, New York, NY
10018.
• ANSI Standard Z87.1, SAFE PRACTICES FOR OCCUPATION AND EDUCATIONAL EYE AND FACE PROTECTION obtainable from the American
National Standards Institute, 1430 Broadway, New York, NY, 10018.
• NIOSH, SAFETY AND HEALTH IN ARC WELDING AND GAS WELDING AND CUTTING obtainable from the Superintendent of Documents, U.S. Printing
Office, Washington, D.C. 20402.
• American Welding Society Standard AWSF4.1 “Recommended Safe Practices for the Preparation for Welding and Cutting of Containers and Piping That
Have Held Hazardous Substances”, obtainable from the American Welding Society, 2501 N.W. 7th St., Miami, FL 33125.
INTRODUCTION
The CCA/CTA series of air-cooled curved gun configurations come pre-assembled and ready to install. These MIG welding
guns can be converted to different configurations to suit many robotic welding applications by utilizing the various nozzle
bodies and gas nozzles available. Consult the factory for special nozzle requirements other than those listed on page 8. All
models have the feature of individual replaceable service connections. When desirable, a cable/hose sheath is available to
further add to the durability and long life of these gun assemblies.
All joints on these guns are low temperature brazed for strength and integrity of the design. Longevity of the gun performance
in provided by the well-designed switch and cable assembly. Each gun assembly comes with a tip and nozzle applied.
In order to make the installation complete, the series and gun model along with wire size, wire feeder make & model, and
inlet as needed must be specified when ordering.
For further information or help with D/F Machine Specialties products, please visit our web site at
www.dfmachinespecialties.com, or consult the factory at 1-507-625-6200.
TABLE 1 - ORDERING INFORMATION
CODE NO.
DESCRIPTION
4 Ft.
5 Ft.
7 Ft.
8 Ft.
Model CCA/CTA (Specify Nozzle Body)
Model CCA (Nozzle Body 13197)
15524
15530
11547
Model CCA (Nozzle Body 13198)
15525
15531
11557
Model CCA (Nozzle Body 16384)
15526
15532
11567
Model CTA (Nozzle Body 13197)
15527
15533
11548
Model CTA (Nozzle Body 13198)
15528
15534
11558
Model CTA (Nozzle Body 16384)
15529
15535
11568
10 Ft.
12 Ft.
15 Ft.
11689
11690
11691
When ordering, specify the Model and Code No. from this table.
Also advise of wire diameter and feeder manufacturer to be used.
TABLE 2 - MODEL SPECIFICATIONS
MODEL
CURRENT
CAPACITY
LENGTH
BODY
DIAMETER
WEIGHT
(approx.)
RECOMMENDED WIRE
DIAMETER RANGE
CCA 55°/
CTA 55°
400 amps CO2
260 amps Argon
13.125”
1.450”
1.8 lbs.
.030”-.062” Hard
3/64”-1/16” Cored
5
DISASSEMBLY
1. When repairs are made on the production line make certain the power source and wire feeder are disconnected from
primary power.
2. Remove forward gas nozzle. If threads are damaged or clogged up with spatter, use (14610) nozzle thread chaser tap
to recondition the front of nozzle bodies (16384 & 13197).
3. Remove current tip. A wrench is provided for the collet holding the slip-in tip on the CA-C Series. See page 8 for replacement of tips and nozzles.
4. If the 1/4” and 5/16” collet adapters (13205 & 13209) or 7/16” threaded tip adapter (12019) is to be replaced, proceed
as follows:
a. Unscrew the nozzle body. If the insulator threads off with the nozzle body, it may be necessary to grip the edge of the
insulator (13163) and turn it out. Do not apply excessive pressure to the insulator.
b. The nozzle body insulator (16605) can be removed by sliding it to the rear. NOTE: Nozzle body (13197, 13198, &
16384) rear insulator threads can be reconditioned and re-chased with 14612 rear thread chaser.
5. Remove the adapter by using two 5/8” wrenches - one to hold the jam nut (16202) and the other to unscrew the adapter.
6. NOTE: Optional “Body Bushing” is provided to center up the liner located at the forward end of the inner body on guns
not utilizing the inner body liner and single piece casing.
7. Insulator on body tube should be inspected and replaced if worn or cut at this time.
8. Remove flat head screw (12610) and insulator from the body tube.
9. Release pressure on switch housing clamp.
10. Grasp electrical cable and at the same time pull body tube off the curved inner body. A slight twisting motion will aid in
sliding the tube back.
11. The casing set screw (14712) can now be released and the casing/liner assembly withdrawn out of the inner body.
NOTE: Swivel socket set is captivated by the body tube.
12. Insert and replace inner body liner. See page 8 for replacement.
13. If the trigger switch is to be removed:
a. Release socket set screw holding the switch in position.
b. Drift out the roll pin holding the lever in the switch housing.
c. Carefully pull button switch from housing - inspect and replace as required.
ASSEMBLY
1. Care must be exercised in connecting fittings to allow sliding of the handle over the hoses when reassembling. Keep the
hose/services as straight as possible, avoiding twisting of service lines.
2. If new power cable is required:
a. Trim off approximately 1” off cable covering.
b. Carefully wrap copper strands with copper sheet.
c. Slip wrapped copper cable end with locking clip (16196) provided into the rear of the inner body assembly.
3. Securely tighten socket set on the power cable assembly.
4. If possible, check for gas flow through gun body after applying the gas hose assembly.
5. By following the procedures listed in Disassembly in reverse, the gun cable can now be re-assembled.
6. Check to make sure that your gun assembly has the right size current tip and liners for wire to be used.
7. Be sure replacement lines/composite body liner is cut off a the proper length. For adjustment of current tip stick-out,
see page 10.
8. When trimming liner, important! Remove any sharp edges outside or inside and file if necessary.
9. When installing a new collet (11950 & 18262) be careful not to over-tighten with the collet wrench. Excessive pressure
is not required due to good gripping action of the collet.
10. Current tips and nozzles should be cleaned as frequently as required. A clogged nozzle will restrict the flow of shielding
gas.
11. Check regularly the condition of service hose and control wire connections leading from the feeder and power source.
6
AIR-COOLED CURVED 55° REMOTE MOUNT TORCH
SERIES 400 CA-C (Slip-In Tip) & CA-T (Threaded Tip)
6
10
12
1
11
36
17
2
9
14
15
13
25
17
20
35
33
19
22
5
29
17
18
4
8 7
31
32
3
30
16
34
23
21
24
26
Ref.
Code No.
Description
Ref.
Code No.
1
2
3
4
5
12878
16595
14085
14803
14808
14809
14810
14811
14812
14712
14713
12610
12880
11045
16234
Body Tube
Sleeve
Mounting Bracket
Clamp
Cable/Hose Protector 3Ft.
Cable/Hose Protector 4Ft.
Cable/Hose Protector 5Ft.
Cable/Hose Protector 6Ft.
Cable/Hose Protector 7Ft.
Socket Set Screw
Socket Set Screw
Flat Head Screw
Washer
Inner Body 55° - 1/0 Cable
Insulation Tube
Body Liner (see page 10)
Adapter - Threaded Tip 7/16”
Adapter - Slip-In Tip 1/4”
Adapter - Slip-In Tip 5/16”
Collet Nut - 1/4”
Collet Nut - 5/16”
Current Tip - Threaded (see Table 4)
Insulator
Nozzle Body (Less Insulator)
Nozzle Body (With Insulator)
Gas Nozzle (see Table 3)
Gas Nozzle (see Table 3)
Nozzle Body Thread Chaser (Rear)
Current Tip - Slip-In (see Table 4)
Wrench
24
25
14610
13177
13198
18073
18074
18075
18076
18077
18078
6
7
8
9
10
11
12
13
14
15
16
17
18
19
20
21
22
23
12019
13205
13209
11950
18262
13163
13197
13176
14612
12111
26
27
28
29
30
31
32
33
34
35
36
7
14501
14502
14503
14504
14100
16830
16426
16202
16605
16383
16384
16379
16380
16196
16089
27
28
Description
Nozzle Thread Chaser Tap (Front)
Nozzle Body (With Insulator)
Nozzle Body (Less Insulator)
Power Cable 1/0 - 3 Ft.
Power Cable 1/0 - 4 Ft.
Power Cable 1/0 - 5Ft.
Power Cable 1/0 - 6 Ft.
Power Cable 1/0 - 7 Ft.
Power Cable 1/0 - 8 Ft.
Casing (see Table 7)
Gas Hose Assembly - 3 Ft.
Gas Hose Assembly - 4 Ft.
Gas Hose Assembly - 5 Ft.
Gas Hose Assembly - 6 Ft.
Gas Hose Assembly - 7 Ft.
Gas Hose Assembly - 8 Ft.
Liners - See Table 6
Insulator
Adapter Jam Nut
Insulator
Nozzle Body (With Insulator)
Nozzle Body (Less Insulator)
Gas Nozzle .546” ID
Gas Nozzle .626” ID
Cable Clamp Kit
Bushing .030”-3/32”
TABLE 3 - GAS NOZZLES
GUN MODEL
NC/HT
REF.
1
2
3
4
5
1
NOZZLE TYPE
Copper Tapered
Copper Straight
Copper Full Taper
Copper Straight
Chrome (use with Nozzle Body 13198)
2
O.D.
63/64”
1”
63/64”
5/8”
1-1/16”
3
I.D.
5/8”
3/4”
5/8”
7/16”
3/4”
CODE NO.
10362
10340
10359
10374
10379
5
4
TABLE 4 - CURRENT TIPS
CURRENT TIPS - 2-1/2” SLIP-IN - 1/4” DIAMETER
Gun/Barrel Model
All NC, NCC, NCM
(Tip provides 1/8” set back)
All NC, NCC, NCM
(Tip provides 1/8” set back)
Wire Size
.030”
.035”
.045”
.052”
1/16”
3/64”
1/16”
Wire Type
Hard
Hard
Hard
Hard
Hard
Aluminum
Aluminum
Code No.
10794
10795
10796
10840
10797
10785
10786
CURRENT TIPS - 7/16” DIAMETER THREADED
CURRENT TIPS - 2-1/2” SLIP-IN - 5/16” DIAMETER
Gun/Barrel Model
All NC, NCC, NCM
(Tip provides 1/8” set back)
All NC, NCC, NCM
(Tip provides 3/8” set back)
All NC, NCC, NCM
(Tip provides 1/8” set back)
Wire Size
.030”
.035”
.045”
.052”
1/16”
5/64”
3/32”
7/64”
1/8”
.035”
.045”
.052”
1/16”
5/64”
3/32”
7/64”
1/8”
3/64”
1/16”
5/64”
3/32”
Wire Type
Hard
Hard
Hard
Hard
Hard
Hard
Hard
Hard
Hard
Cored
Cored
Cored
Cored
Cored
Cored
Cored
Cored
Aluminum
Aluminum
Aluminum
Aluminum
Code No.
19390
19391
19392
19393
19394
19711
19726
19396
19727
19400
19401
19402
19403
19404
19405
19406
19720
19407
19408
19728
19409
Gun/Barrel Model
All HT, HTC, HTM, CTW, CW-T,
MTW
(Tip provides 1/8” set back)
All HT, HTC, HTM, CTW, CW-T,
MTW
(Tip provides 3/8” set back)
All HT, HTC, HTM, CTW, CW-T,
MTW
(Tip provides 1/8” set back)
8
Wire Size
.035”
.045”
.052”
1/16”
5/64”
3/32”
7/64”
1/8”
.035”
.045”
.052”
1/16”
5/64”
3/32”
7/64”
1/8”
3/64”
1/16”
5/64”
3/32”
1/8”
Wire Type
Hard
Hard
Hard
Hard
Hard
Hard
Hard
Hard
Cored
Cored
Cored
Cored
Cored
Cored
Cored
Cored
Aluminum
Aluminum
Aluminum
Aluminum
Aluminum
Code No.
15116
15117
15121
15118
15119
15120
15122
15105
15101
15106
15112
15107
15108
15109
15110
15111
15126
15125
15087
15148
15123
TABLE 5 - LINERS
Description
Hard
Hard/Cored
Hard/Cored
Stainless
Stainless
Aluminum
Aluminum
Aluminum
Wire Size
.030”
.035”-.045” **
.045”-1/16” **
.035”-.045” **
.045”-1/16” **
3/64” **
1/16” **
3/32” **
2 Ft.
16443
16147
16154
16501
16833
16834
16835
3 Ft.
14130
16444
16148
16155
16502
14146
14152
14158
4 Ft.
14131
16445
16149
16156
16503
14148
14154
14160
5 Ft.
14132
16446
16150
16157
16504
14150
14156
14162
6 Ft.
16818
16447
16151
16158
16505
16618
14164
14165
7 Ft.
16819
16448
16152
16159
16506
16619
16620
16769
8 Ft.
16820
16449
16153
16160
16507
12410
12401
16602
10 Ft.
12320
16407
16119
12336
16508
12411
12402
16602
12 Ft.
12321
16408
16120
12337
16509
12412
12416
12417
15 Ft.
12322
16409
16121
12338
16510
12413
12404
12426
** Liners to be used with double asterisk casing
TABLE 6 - CASINGS
Description
Casing Assembly (Flexible)
Select Liner
Select Liner
Casing Assembly (Reinforced)
Single Piece
Single Piece
Single Piece
Single Piece
Wire Size
2 Ft.
3 Ft.
4 Ft.
5 Ft.
6 Ft.
7 Ft.
8 Ft.
10 Ft.
12 Ft.
15 Ft.
.030”
.035”-1/16” **
14440
14444
14441
14445
14442
14446
14443
14447
12291
16173
12292
16561
12285
13565
12286
13751
12287
13757
12290
13752
.035”-.045”
.045”-1/16”
5/64”-3/32”
7/64”-1/8”
16735
15750
15729
15740
16736
15751
15730
15741
16737
15752
15731
15742
16738
15753
15732
15743
16739
15754
15733
15744
16740
15755
15734
15745
16512
16513
15735
16515
15988
12380
12441
12445
15991
12383
12449
12448
16055
12386
12443
12446
** Liners to be used with double asterisk casing
TABLE 7 - RECOMMENDED SPARE PARTS
ITEM
Gas Nozzle
Current Tip
Collet Nut
Body Liner
Insulation Tube
Insulator
CODE NO.
To Be Selected
To Be Selected
To Be Selected
To Be Selected
To Be Selected
13163
MIN QTY.
2
25
1
2
1
1
9
COMPOSITE BODY LINERS
Required with Single Piece Casing or Casings that Use Replaceable Liners
Model CCA - Pre-Fit Body Liner Used with Slip-In Tip
CODE NO.
16385
16295
16296
DESCRIPTION
Composite Body Liner
Composite Body Liner
Composite Body Liner
SIZE WIRE
.030”-.035”
.035”-.045”
.045”-.052”-1/16”
TYPE WIRE
Hard
Hard
Hard
Model CTA - Pre-Fit Body Liner Used with Threaded Tip
CODE NO.
16746
16747
16748
DESCRIPTION
Composite Body Liner
Composite Body Liner
Composite Body Liner
SIZE WIRE
.030”-.035”
.035”-.045”
.045”-.052”-1/16”
TYPE WIRE
Hard
Hard
Hard
1
FITTING REPLACEABLE LINERS TO CASING ASSEMBLIES
The recommended method of cutting liners to size is as follows:
1. All repairs and adjustments to gun assemblies are made with the power source and feeder turned off.
2. Place gun and casing assembly as flat as possible on workbench (floor) keeping service lines straight.
3. Remove inlet or adapter depending on the feeder make. Remove the inner body fastening screw. The body housing
may now be pulled back to expose the inner body. The set screw fastening the casing may bow be released and the
casing may be taken out of the inner body. NOTE: Use a short piece of liner material for pushing the used liners back.
4. Now carefully push new liner in at adapter end.
5. Cut liner off even at gun and casing fitting.
6. Liner is now cut to size and gun may be reassembled.
10
UTILITY STATION 45184 - AIR-COOLED BARRELS
DIMENSION SPECIFICATIONS
ORDERING INFORMATION
Description
Utility Station - Air-Cooled Barrels
Code No.
45184
Base Length
Overall Length
Base Width
Overall Width
Overall Height
Mounting Hole Center Distance
Overall Weight
3.75”
5.75”
2.25”
2.5”
3.125”
2.75”
3.5 lbs.
UTILITY STATION SIDE VIEW WITH COVER
D/F TORCH CONNECTION
Gas
Hose
5.75”
1/0 or 2/0
Power Cable
3.125”
3.75”
2.5”
FROM LEFT: D/F TORCH CONNECTION
FROM RIGHT: CUSTOMER UTILITIES CONNECTION
CUSTOMER UTILITIES CONNECTION
Shielding Gas
(3/16” Hose Shank)
1/0 or 2/0
Power Cable
Shielding Gas
(3/16” Hose Shank)
Gas Hose
1/0 or 2/0
Power Cable
1/0 or 2/0
Power Cable
1.125”
2.75”
2 ea.
1/4”-20 Screws,
Lock Washers,
Nuts
11
WIRE FEEDER ADAPTERS & INLETS
Remote Mount Adapter
Manufacturer
ESAB®
Models
D20 (20mm)
Wire Diameter
.030”-3/32” H/C/AL
5/64”-1/8” H/C
Hard
or AL
13098
Cored
13099
Direct Mount
Adapter
Stub*
Liner
Hard
or AL
*
*
13096
Cored
13097
ESAB®
18246
18247
18248
18249
EURO
18493
18493
18540
18540
Hobart®
All
Models
.030”-3/32” H/C/AL
5/64”-1/8” H/C
13067
Lincoln®
LN-7, LN-8,
NA5-R
.030”-3/32” H/C/AL
5/64”-1/8” H/C
13110
LN-9
.030”-3/32” H/C/AL
5/64”-1/8” H/C
16581
NA3, NA5
.030”-3/32” H/C/AL
5/64”-1/8” H/C
16879
“BIG MIG”
NA3, NA5
.030”-3/32” H/C/AL
5/64”-1/8” H/C
16879
Lincoln®
Power-Feed
10, LF-72,
LF-74
.030”-3/32” H/C/AL
5/64”-1/8” H/C
13479
Linde®
SWM31
SWM34
SWM37
SWM38
EH8
Casing to Feeder
(Accepts Linde®
Outlet Guide)
13046
13046
13047
13048
13047
13048
Mavrix
®
13050
EH10
.030”-3/32” H/C/AL
5/64”-1/8” H/C
13043
PA-10
.030”-3/32” H/C/AL
5/64”-1/8” H/C
16556
.030”-3/32” H/C/AL
5/64”-1/8” H/C
16557
.030”-1/8”
.030”-1/8”
18268
Miller®
(50 Series)
OTC®
D/F Insert
.035”-.045” Hard
.045”-1/16” Hard
5/64”-3/32” Cored
3/64”-1/16” AL
Requires
Insert
CMRE-741
*
*
13068
13112
*
*
13113
16582
*
*
16528
16878
*
*
16880
16878
*
*
16888
13469
*
*
13480
13049
13050
13052
*
*
13080
16568
Requires
Inlet
16559
*
*
16558
*
*
PME-12X
YW50AKW1
.030”-1/16”
.030”-1/16”
13090
13466
TWECO®
#4
.030”-3/32” H/C/AL
5/64”-1/8” H/C
13479
.030”-3/32” H/C/AL
5/64”-1/8” H/C
16225
13116
16529
16881
16888
13468
13049
13079
16560
18282
Requires Inlet
13469
*
*
13480
Requires Liner
Requires Inlet
13486
*Stub liners only required in feeder adapter when single-piece casing is used.
12
FEEDER ADAPTER INLETS
Wire Size
.030”
.035”
.045”
.052”
1/16”
5/64”
3/32”
7/64”
1/8”
3/64” AL
1/16” AL
3/32” AL
Steel
Code No.
Brass
Code No.
13801
13803
13806
13844
13809
13812
13814
13816
13842
16417
16418
16419
16420
16421
16422
16422
Nylon
Code No.
13807
13810
13815
Esab®, Hobart®, Lincoln®, Linde®, Miller®, OTC®, Panasonic® ABB®, Fanuc®, Kuka®, Mavrix®, Motoman®, Thermal Arc®, TWECO®, & Welding Alloys® are registered
trademarks of their respective companies. Names are
mentioned for reference only. D/F Machine Specialties is
in no way affiliated with these companies.
18275
18282
Panasonic®
Welding
Alloys®
16087
ORDERING INFORMATION
Each D/F gun is fully assembled and ready to install. In order to make the installation complete,
the code number, wire size & type, make/model
of wire feeder, and inlet as needed must be specified when ordering. If special welding tools or accessories other than those listed previously are
required, please consult with the factory.
13468
13486
TROUBLESHOOTING: POROSITY (SUMMARY)
NOTE: Most POROSITY is caused by gas problems, followed by base metal contamination.
Causes of Porosity
Possible Solutions
BASE METAL CONTAMINATION
Impurities on base metal
a. Remove contamination; clean surfaces
b. Use of specific wire/gas mix for specific types of impurities
FILLER METAL CONTAMINATION
Impurities on filler metal (wire)
a. Replace wire
b. Install wire-cleaning system
c. Prevent industrial dust/dirt/grit from contaminating wire during storage or use
d. Prevent build-up of aluminum oxide on exposed aluminum
wire surface by using up quickly
e. Remove wire from wire drive unit and store in a sealed plastic bag when not in use for long periods
ATMOSPHERIC CONTAMINATION
Drafts, wind, fans, etc.
a. Protect weld from drafts (curtains/screens)
b. Use tapered or bottleneck gas nozzles when drafts cannot
be avoided
GAS MIXING APPARATUS
1. Too high a gas flow, causing turbulence, and/or sucking air
at hose connections; creating the venturi effect at end of gas
nozzle
2. Too low a gas flow, causing insufficient gas coverage
3. Damaged or kinked gas lines
4. Too high an oxygen content
5. Leaks in gas distribution system
6. Other impurities in gas - moisture, etc.
7. Inconsistent gas flow (cfh) at the torch connection
1a. Reduce gas flow
1b. Tighten all hose connection points
2. Increase gas flow
3. Repair or replace
4. Adjust mixer
5. Repair leaks
6. Overhaul system; fit filters and/or dryers
7. Regulate pressure into flow meter for consistent cfh delivery
of gas
GAS TURBULENCE
1. Excessive spatter build-up in gas nozzle and on current tip
2. Nozzle damage, causing uneven gas coverage
3. Torch gas ports clogged or deformed
4. Super-heated nozzle, causing shielding gas to expand rapidly and create return effect at end of nozzle
5.Gas diffuser/nozzle insulator missing
6. Too high a gas flow causing the venturi effect
1. Clean nozzle and tip regularly; spray with anti-spatter fluid
2. Replace nozzle
3. Clean or replace
4. Check duty cycle rating of torch
5. Replace
6. Reduce gas flow
WELDING PARAMETERS, ETC.
1. Too long a wire stick-out; gas nozzle too far from weld
puddle
2. Bad torch position - too sharp a torch incline causing the
venturi effect at the end of the nozzle leading to atmospheric
contamination
3. Excessively wide weld pool for nozzle I.D.
1. Use longer nozzle or adjust stick-out (3/8” minimum or 15
times wire diameter)
2. Correct torch angle
3. Width of the weld pool should be 1.3 times the nozzle I.D.;
use suitable wider gas nozzle
4. Reduce voltage
5. Reduce speed
4. Arc voltage too high
5. Too high a travel speed
13
TROUBLESHOOTING: SPATTER
Possible Solutions
Problems/Causes
SPATTER
Too fast or too slow wire feed for the arc voltage
Set the wire feed rate and voltage in accordance with good welding practices as recommended by a qualified welding engineer.
Too long an arc
Adjust the wire feed and voltage so that the arc is in accordance
with good welding practice for the joint to be welded. The distance from the current tip to the workpiece should be 15 times
the welding wire diameter. If the arc is too long there will be spatter, usually in the direction of the weld.
Damaged current tip
If the current tip becomes worn the welding wire will not be in
constant contact with the tip and the arc will become unstable.
A current tip contaminated with spatter will cause uneven wire
feed resulting in further spatter.
Inclination of welding gun too great
The angle of the gas nozzle relative to the workpiece should be
between 45 and 90 degrees. If the angle is too small, the wire
runs parallel to the weld pool, resulting in spatter in the direction
of the welding.
Faulty power source
Have the power source checked for faulty conditions such as
broken wires and faulty contacts.
Incorrect start
A great deal of spatter occurs if the stick-out is too great and if
the welding gun is held too far from the workpiece when striking
the arc. Try to start with as short a stick-out as possible and with
the welding gun as close to the starting point as possible. If a
large ball end is formed on the end of the welding wire, remove
it by cutting the wire with sharp wire cutters. It is helpful if the
wire is cut to a point. Always remove the ball end before striking
an aluminum arc. Check the welding ground connection.
Incorrect pulse parameters
Check the user manual for your power supply or consult a qualified welding engineer.
Uneven wire feed
Uneven wire feed gives rise to heavy spatter. Find the cause of
the disturbance and correct the condition before proceeding.
Impurities on the base metal
Paint, mill scale, rust and other contamination on the base metal
form an insulating layer causing an unstable arc that results in
heavy spatter. Clean the surfaces to be welded.
Poor ground contact
Inspect ground cable for loose connections, fraying and cuts.
Correct any problem areas found and attach the ground cable
directly to the workpiece after having cleaned the contact surface first. POOR GROUND CONTACT IS THE MOST COMMON CAUSE OF UNSTABLE MIG WELDING CONDITIONS.
Too long stick-out (short-arc welding)
The stick-out should be 15 times the diameter of the wire electrode being used. With increasing stick-out, the current is reduced and the arc voltage rises, giving a longer unstable arc
and increased spatter.
Incorrect polarity
Check for correct polarity. Follow the electrode manufacturer’s
recommendations.
14
TROUBLESHOOTING: GENERAL GUIDE
Problems/Causes
ERRATIC WIRE FEED
Slipping feed rolls
Possible Solutions
Check that the feed roll size is correct for the wire size being used. Increase the
drive roll pressure until the wire feed is even. Do not apply excessive pressure as
this can damage the wire surface, causing copper coating to loosen from steel
wires or metal shavings to be formed from soft wires like aluminum. These metal
fragments or shavings can be drawn into the wire feed conduit and will rapidly
clog the liner. When welding with flux-cored wires, excessive drive roll pressure
may open the wire seam and allow flux or metal powders to escape.
Clogged or worn gun liner
a. Dust, particles of copper, drawing lubricants, metal or flux and other forms of
contamination can all clog the liner so that the wire feed is slowed or impeded. A
liner that has been in use for an extended period of time becomes worn and filled
with dirt and must be replaced.
b. When changing the welding wire, remove the tip from the front end of the
gun and blow out the body liner with clean, dry compressed air from the back of
the gun. Repeat with the casing and liner assembly. Note: Wear safety goggles
when using compressed air to clean the liners. Make sure proper safety procedures are followed in order to avoid possible serious eye injury.
Liners too long or too short
Check the lengths of the liners and trim or replace if too long or too short. The
efficient feeding of the welding wire is dependent on the liners fitting correctly.
Spatter on the wire
Coil brake incorrectly adjusted
UNSTABLE ARC
Incorrect setting of voltage and/or current
Problems in wire feeding: worn current tip
Impurities on the base metal
Poor contact between ground cable and workpiece or loose power connection
Stick-out too long
An unprotected coil of wire quickly collects dust and other airborne contamination. If grinding is being performed in the vicinity, particles can become attached
to the wire, severely interfering with the wire feed. Replace with clean wire and
keep it protected with a cover. Make sure spare wire rolls are stored in a clean,
dry place.
Set the brake so that the coil immediately stops rotating as soon as welding is
interrupted. If the brake is applied too hard it will cause the feed rolls to slip,
resulting in uneven wire feed. If it is too loose, overrun of the wire will occur,
causing wire tangles, inconsistent tension on the feed mechanism and irregular
arc characteristics.
Set the wire feed in relation to the arc voltage in such a way that the arc is stable
and burns evenly. In spray arc welding, set the wire feed so that there are no
short circuits and the filler metal is transferred in a spray across the arc. Find the
cause of the interference and correct it. (See ERRATIC WIRE FEED above)
When the internal diameter of the current tip becomes worn from the passage
of wire through it, the wire may no longer stay in continuous electrical contact
with the tip. This results in an unstable arc and an increase in spatter. Paint, mill
scale, silicon scale, rust or flux deposits from previous weld runs may form an
insulating layer causing an unstable arc. Clean the surfaces to be welded.
Securely attach the ground cable as close to the point of welding as possible on
the workpiece. Clean the surfaces thoroughly to ensure good contact.
Check to insure the welding power connection on the power source is tight, the
and workpiece. Connection on the wire feeder is tight, the connection to the
adaptor block is tight, Loose power connection and the connection of the gun to
the adaptor block is tight.
Adjust the current tip to work distance to a minimum of 3/8” for short arc welding.
A more precise distance is 15 times the wire diameter.
15
TROUBLESHOOTING: GENERAL GUIDE
Problems/Causes
AIR-COOLED GUN RUNNING TOO HOT
Poor ground
Possible Solutions
Inspect ground cable for loose connections, fraying and cuts. Correct any problem areas found. Clean clamping area to insure good contact. Securely attach
the ground cable to the workpiece, as close as possible to the point of welding.
Make sure there is a good connection to the welding power source.
Loose power connection
Check to make sure the power connection on the power source is tight, the connection on the wire feeder is tight, the connection to the adaptor block is tight,
and the connection of the gun to the adaptor block is tight.
Consumable items loose or worn
Remove nozzle from gun and inspect current tip, collet nut (tip holder) and spatter disc (gas diffuser) for wear and tightness; replace or tighten as necessary.
Capacity of gun being exceeded
Note complete weld parameters, including welding current (Amps), welding voltage, wire feed speed, type and size of wire, type of gas and flow rate of gas and
consult your local Authorized D/F Machine Specialties Distributor or contact the
factory.
Dirty connection
Remove torch and inspect parts for dirt build-up. Periodic cleaning is necessary.
16
D/F MACHINE SPECIALTIES, INC.
MIG & TIG Welding Products, Consumables & Accessories
WARRANTY
This Equipment is sold by D/F MACHINE SPECIALTIES, Incorporated, under the warranty set forth in
the following paragraph. Such warranty is extended only to the buyer who purchases the equipment
directly from D/F or its authorized distributor as new merchandise.
The barrel and cable assemblies are warranted by D/F to be free from manufacturing defects for 90
days after delivery by D/F, provided that the equipment is properly operated under conditions of normal
use and that regular periodic maintenance and service is performed. Expendable parts are not warranted for any specific time. Expendable parts referred to herein would be the nozzles, current tips,
spatter discs, insulators, casing liners, and wire inlets. D/F’s sole obligation under this warranty is limited to making replacement at its manufacturing facility for barrel assemblies which are returned to it
with transportation charges prepaid, and upon D/F’s examination have been found to be so defective.
Genuine D/F MACHINE SPECIALTIES, Inc. Parts, Accessories, and Consumables must be used for
safety and performance reasons. The use of anything other than genuine D/F MACHINE SPECIALTIES, Inc. Parts, Accessories, or Consumables will void this Warranty. All units returned for warranty
repair are subject to Warranty Inspection. Warranty and repair work shall not apply to goods that have
been altered or repaired, have been subject to misuse or used while any parts are loose, broken, or
damaged, or used with other than original D/F® parts, consumables, or accessories which may affect
performance and safety.
D/F MACHINE SPECIALTIES, INC.
Rev. 140612-1
1750 Howard Drive
North Mankato, MN 56003
Phone: (507) 625-6200
Fax: (507) 625-6203
www.dfmachinespecialties.com