1
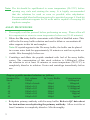
Protocol for FEK-022-06 β-Endorphin (Mouse, Camel, Bovine, Ovine) FLUORESCENT ENZYME IMMUNOASSAY KIT (range: 0-10,000 pg/ml) INTRODUCTION This Enzyme Immunoassay kit is designed to detect a specific peptide and its related peptides based on the principle of “competitive” enzyme immunoassay. PRINCIPLE OF ENZYME IMMUNOASSAY WITH THIS KIT The immunoplate in this kit is pre-coated with secondary antibody and the nonspecific binding sites are blocked. The secondary antibody can bind to the Fc fragment of the primary antibody (peptide antibody) whose Fab fragment will be competitively bound by both biotinylated peptide and peptide standard or targeted peptide in samples. The biotinylated peptide interacts with streptavidin-horseradish peroxidase (SA-HRP) which catalyzes the substrate solution. The fluorescence intensity is directly proportional to the amount of biotinylated peptide-SA-HRP complex but inversely proportional to the amount of the peptide in standard solutions or samples. This is due to the competitive binding of the biotinylated peptide with the standard peptide or samples to the peptide antibody (primary antibody). A standard curve of known concentration can be established accordingly. The unknown concentration in samples can be determined by extrapolation to this standard curve. Secondary AnƟbody Coated Plate Primary AnƟbody PepƟde (in standard soluƟons or samples) SA-HRP BioƟnylated PepƟde Substrate Fluorescence Intensity CAUTION: INVESTIGATIONAL DEVICE. LIMITED BY LAW TO INVESTIGATIONAL USE. FOR RESEARCH USE ONLY. NOT FOR USE IN DIAGNOSTIC PROCEDURES. 1 KIT MATERIALS 1. 2. 3. 4. 5. 6. 7. 20x assay buffer concentrate (50ml) .......................... Catalog no. EK-BUF 96 well immunoplate (1 plate) ............................Catalog no. FEK-PLATE Acetate plate sealer (APS), (3 pieces) .........................Catalog no. EK-APS Primary antibody (rabbit anti-peptide IgG) (1 vial). Standard peptide (1 vial). Biotinylated peptide (1 vial). Streptavidin-horseradish peroxidase (SA-HRP) (30μl) ..................................................Catalog no. EK-SA-HRP 8. Substrate solution (12ml).................................Catalog no. FEK-Substrate 9. Positive control (1 vial). 10. Stable peroxide solution (1.5ml)...........................Catalog no. FEK-Stable 11. Stop solution (12ml).................................................Catalog no. FEK- Stop 12. Assay diagram (1 sheet). 13. Protocol for FEK-022-06 (1 book). Note: Phoenix Pharmaceuticals, Inc. guarantees that its products conform to the information contained in this publication. The purchaser must determine the suitability of the product for their particular needs and establish optimum sample concentrations. MATERIALS REQUIRED BUT NOT SUPPLIED 1. 2. 3. 4. 5. 6. 7. Fluorescence microplate reader (325nm to 420nm) Orbital plate shaker capable of 300-400rpm (recommended) Microtiter plate washer (recommended) Multi-channel pipette capable of dispensing 50-100μl (recommended) Solution reservoir (recommended) Absorbent material for blotting. EDTA Lavender Vacutainer blood collection tubes (optional) .....................................................................Catalog no. VT-6450 8. Aprotinin (0.6TIU/ml of blood) (optional) .............Catalog no. RK-APRO 9. Buffer A (optional) .................................................... Catalog no. RK-BA-1 10. Buffer B (optional) .................................................... Catalog no. RK-BB-1 11. C18 SEP-COLUMN (optional) .......................Catalog no. RK-SEPCOL-1 2 Note: The kit should be equilibrated to room temperature (20-23ºC) before opening any vials and starting the assay. It is highly recommended that the solutions be used as soon as possible after rehydration. Recommended blood collection protocol is provided on page 9. Each kit contains sufficient reagents for 96 wells and is capable of assaying 40 duplicate samples. ASSAY PROCEDURE 1. Thoroughly read this protocol before performing an assay. Please allow all kit components to return to room temperature before use (25-45 minutes). 2. Dilute the 20x assay buffer concentrate with 950ml of distilled water. This will be the 1x assay buffer solution and used to dilute or reconstitute all other reagents in this kit and samples. Note: If crystals appear in the 20x assay buffer, the buffer can be placed in a warm water bath for approximately 30 minutes or until no crystals are visible. Mix thoroughly before use. 3. Centrifuge and dilute the peptide standard with 1ml of 1x assay buffer, vortex. The concentration of this stock solution is 1,000ng/ml. Allow the solution to sit at least 10 minutes at room temperature (20-23°C) to completely dissolve in solution. Vortex and centrifuge immediately before use. Prepare peptide standard solutions as follows: Standard No. Stock #1 #2 #3 #4 #5 #6 Std. volume 1000μl 100μl of stock 100μl of #1 100μl of #2 100μl of #3 100μl of #4 100μl of #5 1x Assay Buffer ---900μl 900μl 900μl 900μl 900μl 900μl Concentrations 1,000ng/ml 100ng/ml 10,000pg/ml 1,000pg/ml 100pg/ml 10pg/ml 1pg/ml 4. Rehydrate primary antibody with 1x assay buffer. Refer to QC data sheet for instructions on rehydrating the primary antibody. Allow to sit for at least 5 minutes to completely dissolve. Mix thoroughly. 3 100μl Blank B B Total binding T T 1 pg/ml 6 6 10 pg/ml 5 5 100 pg/ml 4 4 3 1,000 pg/ml 3 10,000 pg/ml 2 2 Positive Control PC PC 100μl 900 μl 100μl 900 μl 100μl 900 μl 100μl 900 μl 100μl 900 μl 1000 μl stock 1 2 3 4 5 6 1000 ng/ml 100 ng/ml 10,000 pg/ml 1000 pg/ml 100 pg/ml 10 pg/ml 1 pg/ml 5. Centrifuge and rehydrate the positive control with 1x assay buffer. Refer to QC data sheet for instructions on rehydrating the positive control. Allow it to sit at least 5 minutes to completely dissolve. Mix thoroughly. 6. Leave wells A-1 and A-2 empty as Blank. 7. Add 50μl of 1x assay buffer into wells B-1 and B-2 as Total Binding. 8. Add 50μl of prepared peptide standards from #6 to #2 (in reverse order of serial dilution) into wells from C-1 and C-2 to G-1 and G-2 respectively. Note: Peptide standards should be assayed in duplicate. 9. Add 50μl of rehydrated positive control into wells H-1 and H-2. Note: Positive controls should be assayed in duplicate. 10. Add 50μl of prepared samples into their designated wells in duplicate. 11. Add 25μl of rehydrated primary antibody into each well except the Blank well. Note: A multi-channel pipette is NOT recommended to load the primary antibody because variations in results may occur. 12. Seal the immunoplate with acetate plate sealer (APS). Incubate the immunoplate overnight (approximately 16-24 hours) at 4°C. 13. The next day, rehydrate the biotinylated peptide with 1x assay buffer. Refer to QC data sheet for instructions on rehydrating the biotinylated peptide. Allow to sit for at least 5 minutes to completely dissolve. Mix thoroughly. Remove APS from immunoplate. DO NOT WASH THE IMMUNOPLATE. Add 25μl of rehydrated biotinylated peptide into each well except the Blank well. 4 Note: A multi-channel pipette is NOT recommended to load the biotinylated peptide because variations in results may occur. 14. Seal the immunoplate with acetate plate sealer (APS). Incubate the immunoplate for 1.5 hours at room temperature (20-23°C). Orbital shaking at 300-400 rpm is recommended for the duration of the incubation. 15. Centrifuge the SA-HRP vial provided in this kit (3,000-5,000 rpm, 5 seconds) and pipette 12μl of SA-HRP into 12ml of 1x assay buffer to make SA-HRP solution, vortex thoroughly. 16. Remove APS from the immunoplate. Discard contents of the wells. 17. Wash each well with 350μl of 1x assay buffer, discard the buffer, invert and blot dry plate. Repeat 4 times. 18. Add 100μl of SA-HRP solution into each well. 19. Reseal the immunoplate with APS. Incubate for 1 hour at room temperature (20-23°C). Orbital shaking at 300-400 rpm is recommended for the duration of the incubation. 20. Mix 9 parts of Sustrate Solution to 1 part of Stable Peroxide Solution. This working solution is stable for 24 hours at room temperature (20-23°C) and no protection from light is required. To reduce variability, equilibrate the working solution to room temperature(20-23°C) before adding to the wells. 21. Remove APS from immunoplate. 22. Wash and blot dry the immunoplate 4 times with 1x assay buffer as described above in step 17. 23. Add 100μl of prepared Substrate Solution into each well. Gently tap the immunoplate to ensure thorough mixing. 24. Reseal the immunoplate with APS. Incubate for 15-20 minutes at room temperature (20-23°C). Orbital shaking at 300-400 rpm is recommended for the duration of the incubation. 25. Remove APS from the immunoplate. Add 100μl of stop solution into each well to stop the reaction. Gently tap the plate to ensure thorough mixing. Proceed to the next step within 20 minutes. 25. Load the immunoplate onto a fluorescence microplate reader, and measure relative fluorescence units (RFU) of each well. The excitation and emission maxima for the Substrate Solution are 325 and 420 nm, respectively. Wavelengths between 315 and 340nm for excitation and 370 and 470 nm for emission also can be used for detection. 5 Additional Recommended Procedural Notes: • Reagents of different lot numbers should not be mixed. • Recheck the reagent labels when loading the plate to ensure that everything is added correctly. • Unused microplate strips should be placed back in the foil pouch with a desiccant and stored at 4ºC. Do not allow moisture to enter the wells. • When handling the plate, avoid touching the bottom. • Manual washing may cause high duplicate coefficient variations. To reduce this factor, liquid from the plate should be removed by inverting and blotting the plate on an absorbent material. • If the room temperature is not within the suggested range (20-23°C), variations in results may occur. • The same reservoir for the reagents may be reused if the reservoir is washed well with distilled water before each use. • Each laboratory must determine the appropriate dilution factors for the samples to be measured to ensure that the samples are within the dynamic range of the standard curve. • High levels of interfering proteins may cause variations within sample results; therefore, it is imperative to select the appropriate sample preparation procedure to obtain optimal results. • Each time a new tip is used, make sure the tip is secure and free of air bubbles. For better intra-assay variation, aspirate and expel a reagent or sample back into the container a few times prior to loading. • Avoid submerging the whole tip into reagents because droplets can accumulate at the end of the tip causing an excess of reagent to be loaded into the well. This can lead to poor results. • For optimal results, an orbital plate shaker capable of 300-400 rpm is recommended for all incubations. • Modification of the existing protocol (i.e. standard dilutions, pipetting or washing technique, incubation time or temperature, storage conditions, and kit expiration) may affect the sensitivity and specificity of the test. • Plate must be read from the top. Fluorometric units are typically defined as relative fluorescence units (RFU) because the integrated signal is dependent on instrument settings. Consult the fluorometer’s user manual for specific instrument capabilities and settings. 6 Calculation of results Plot the standard curve on semi-log graph paper. Construct a standard curve by plotting the known concentrations of standard peptide on the log scale (X-axis), and its corresponding fluorescence intensity reading on the linear scale (Y-axis). It is strongly recommended to use curve-fitting software capable of 4 parameter logistics or log-logit to quantify the concentration of standard peptide. The standard curve shows an inverse relationship between peptide concentrations and the corresponding fluorescence intensity. As the standard concentration increases, the fluorescence intensity decreases. The concentration of peptide in a sample is determined by locating the sample’s RFU on the Y-axis, then drawing a horizontal line to intersect with the standard curve. A vertical line drawn from this point will intersect the X-axis at a coordinate corresponding to the peptide concentration in the sample. If samples have been diluted prior to the assay, the measured concentration must be multiplied by their respective dilution factors. The standard curve will be a reverse sigmoidal shape. Refer to QC Data Sheet for acceptable values of the positive controls. STORAGE 1. Store the kit at 4°C upon receipt. 2. It is highly recommended that solutions be used as soon as possible after rehydration. 3. Store 1x assay buffer at 4°C. 4. Remove any unneeded strips from antibody-coated plate, reseal them in ziplock foil and keep at 4°C. 5. Keep rehydrated solution of Standard, Biotinylated peptide, Antibody and SA-HRP at 4°C. 7 SUMMARY OF ASSAY PROTOCOL $GGȝOZHOORIVWDQGDUGVDPSOHRUSRVLWLYHFRQWURODQGȝO SULPDUy DQWLERG\ IQFXbDWH RYHUQLJKWDSSUR[LPDWHO\KRXUVDW& Add ȝOZHOORIELRWLQ\ODWHGSHSWLGH IQFXbDWH DW URRP WHPSHUDWXUH 3& IRU KRXUV :DVKLPPXQRSODWHWLPHVZLWK350ȝOZHOORI[DVVD\EXIIHU Add 0ȝOZHOORI6$+53VROXWLRQ IQFXbDWH DW URRP WHPSHUDWXUH 3& IRU KRXU WDVK LPPXQRSODWH WLPHV ZLWK 350ȝOZHOORI[DVVD\EXIIHU Add 0ȝOZHOO RI SUHSDUHGVXEVWUDWHVROXWLRQ IQFXbDWH DW URRP WHPSHUDWXUH 3& IRU PLQXWHV THUPLQDWH UHDFWLRQ ZLWK 0ȝOZHOORIVWRSVROXWLRQ 0HDVXUHUHODWLYHIOXRUHVFHQFHLQWHQVLW\RIHDFKZHOOFDOFXODWHUHVXOWV 8 SUGGESTED METHOD FOR THE EXTRACTION OF PEPTIDES FROM PLASMA Blood Withdrawal: Collect blood samples into the Lavender Vacutainer tubes (#VT-6450) which contain EDTA and can collect up to 7ml of blood. Gently rock the Lavender Vacutainer tubes several times immediately after collection of blood for anticoagulation. Transfer the blood from the Lavender Vacutainer tubes to the centrifuge tubes containing aprotinin (0.6TIU/ml of blood) and gently rock for several times to inhibit the activity of proteinases. Centrifuge the blood at 1,600 x g for 15 minutes at 4°C and collect the plasma. Plasma kept at -70°C may be stable for one month. If Lavender Vacutainer tubes are centrifuge-safe, the aprotinin may be added into the initial collection step. Extraction of Peptides from Plasma: 1. Acidify the plasma with an equal amount of buffer A (Cat. No. RK-BA-1). For example, if you are using 1ml of plasma, add 1ml of buffer A. Mix and centrifuge at 6,000 to 17,000 x g for 20 minutes at 4°C. 2. Equilibrate a SEP-COLUMN containing 200mg of C18 (Cat. No. RKSEPCOL-1) by washing with buffer B (Cat. No. RK-BB-1) (1ml, once) followed by buffer A (3ml, 3 times). Note: From steps 3-5, no pressure should be applied to the column. 3. Load the acidified plasma solution onto the pre-equilibrated C-18 SEPColumn. 4. Slowly wash the column with buffer A (3ml, twice) and discard the wash. 5. Elute the peptide slowly with buffer B (3ml, once) and collect the eluant into a polystyrene tube. 6. Evaporate eluant to dryness in a centrifugal concentrator or by a suitable substitute method. 9 7. Keep the dried extract at -20°C and perform the assay as soon as possible. Use 1x assay buffer to reconstitute the dried extract. If the peptide value does not fall within the range of detection, dilute or concentrate the sample accordingly. Tips for extraction of plasma: When using a C-18 SEP-COLUMN for the first time, use a bulb (not supplied) to apply pressure to the column after the addition of 1ml of buffer B to facilitate the flow through the column. From steps 3-5, no pressure should be applied. Ensure there is a constant flow for all solutions during the extraction procedure. Do not allow air bubbles to enter the C-18 matrix for optimal sample processing and recovery. Drying Sample After Extraction: A combination of a centrifugal concentrator (i.e. Speedvac) and a lyophilizer (freeze-dryer) produces the best results for drying the sample after extraction. First, use a Speedvac to dry sample for approximately 15 minutes to remove the organic layer. Then snap-freeze the remaining sample, and freeze-dry overnight using a lyophilizer. This two-step procedure produces a more consistent fluffy powder that is easier to rehydrate than a sample dried only with a centrifugal concentrator. However, if a centrifugal concentrator is not accessible, freezedrying overnight using a lyophilizer will be sufficient. REFERENCES 1. Porstmann, T. and Kiessig, S.T., Enzyme Immunoassay Techniques, An Overview, Journal of Immunological Methods, 150: 5-21 (1992). 2. Avrameas, S., Amplification Systems in Immunoenzymatic Techniques, Journal of Immunological Methods, 150: 23-32 (1992). 10 ASSAY DIAGRAM A B C D E F G H 1 2 3 4 5 6 7 8 9 10 11 12 USA Phoenix Pharmaceuticals, Inc. Europe Phoenix Europe GmbH 330 Beach Rd. Burlingame, California 94010 Tel: 650-558-8898, 800-988-1205 Fax: 650-558-1686 [email protected] www.PhoenixPeptide.com Viktoriastrasse 3-5 D-76133 Karlsruhe Germany Tel: +49 (721) 12 08 150 Fax: +49 (721) 12 08 15 15 [email protected]