1
❑ An NI motion controller
❑ A computer with an available PXI or PCI slot or IEEE 1394
NI-Motion Software Installation
Install the NI-Motion software before installing a motion controller for the
first time. If you are upgrading from a previous version of the NI-Motion
software, it is not necessary to remove your controller before installing the
upgrade. The upgrade does not affect your existing Windows
configuration.
Complete the following steps to install your NI-Motion software.
1.
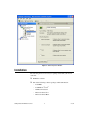
Insert the NI-Motion CD into your CD-ROM drive to display the
NI-Motion installation screen.
2.
Click Install NI-Motion.
3.
Follow the installer prompts through the rest of the installation.
4.
Refer to the NI-Motion ReadMe.htm file after the installation is
complete for last-minute information not contained in this document or
the NI-Motion online help.
Your NI-Motion software is installed. You can install the included
NI Motion Assistant demo after your NI-Motion installation is complete.
Motion Controller Installation
The following section explains how to install your PCI, PXI, and FW
controllers.
When adding or removing a controller from a Windows 2000/NT/XP system, you
must be logged on with administrator-level access. After you have restarted your system,
you may need to refresh MAX to view your new controller.
Note
PCI Controllers
1.
Power off and unplug your computer.
Caution To protect yourself and the computer from electrical hazards, the computer
should remain unplugged until the installation is complete.
2.
Remove the cover to expose access to the PCI expansion slots.
3.
Choose an unused 5 V PCI slot, and remove the corresponding
expansion slot cover on the back panel of the computer.
© National Instruments Corporation
3
Getting Started with NI Motion Control