1
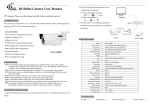
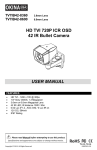
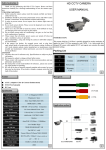
Quick Start Guide Item Number: IV-BV7660IR-AHDM Thank you for purchasing our products. Please read the cut-sheet carefully before operating. Safety Precaution Warning * To prevent fire or shock hazard, please do not immerse the unit into the water for a long period of time. * Please make sure the adapter used is consistent with product specifications, Otherwise, it might cause fire, electric shock or damage. * Pay attention to polarity of the adapter, it might cause some accidents like fires, and will burn out the camera. * Please don’t connect multiple cameras with the same adapter at the same time; overloading of adapter capacity may cause fires. * Power supply must be firmly fixed so as not to cause fires. * If the device gets abnormal smell or smoke, please stop it immediately and contact our customer service center. * If the camera doesn’t work, please do not dismantle it by yourself. Please contact our local distributor or our maintenance office to trouble shoot, Otherwise, the warranty is voided. * Please do not splash water on the product components when cleaning. Technical Specifications Item Number: IV-BV77660IR-AHDM Signal System: NTSC Sensor CCD: 1/3” Progressive Sensor Resolution: 720P Lens: Vari-focal 6-60mm OSD: YES Minimum Illumination: 0 LUX (IR ON) S/N Ratio: More than 52 dB Distance: 150ft LED: 12 PCS High Density IR LED Video Output: 1Vp-p 75Ω . AHDM / CVBS switch Connector video: BNC Operation Temperature: -4°F to +122°F Supplied Power: 24VAC, 12VDC(+/-10%); Installation 1. Connect the terminated power wire of the cable directly to the AC or DC power source. 2. Connect the BNC output of the Camera to an extension cable, or directly to a DVR / Observation System or to a TV/Monitor. 3. Fix up the pedestal on the ceiling, fix up the screw of pedestal. 4. Aim and adjust the “Field of View” as desired, then fix up the screw of horizontal angle. 5. Next, choose a satisfactory angle at which to aim the camera then connect the screw of declining angle. Push the Joystick up / down to select among menu items. Push the Joystick left / right to adjust the level of the selected item. Press the Joystick to enter the submenu or exit the OSD Setup Menu. Note: The function button is not only for direction control, also for switching video format and video output. Please follow the detailed instruction as below: Push the joystick "DOWN" button key over 5 seconds to switch video format from PAL to NTSC. Push the joystick "LEFT" button key over 5 seconds to switch video output from 720p to 960H (CVBS is the default). Push the joystick "RIGHT" button key over 5s to switch video output from 960H to 720p. 6. Tear apart the outer packing (figure 1) to take out the Desiccant Bag (figure 2), then put it into the camera housing (figure 3) Figure 1 Figure 2 Figure 3 Note: It’s recommended to close the cover cap immediately in case of reducing the absorption capacity of the desiccant bag inside the camera. Troubleshooting 1. No picture or unstable - Check the connection for video cable and/or power cable. 2. The image is so blurred 1) Check if there is some dirt on the lens, then use customized lens paper or cotton with alcohol to clean. 3. The image is so dim - Adjust the CNT of monitor and iris 4. Screen color cast in the special environment - Adjust direction 5. The screen glittering - The camera might face to the sun, TV set or computer. 6. The camera works abnormal; the surface over-heat; has peculiar smell, smoke etc. - Please cut off the power supply immediately. Secondly, check the connection to the power supply. If the camera is deemed faulty, send it back to your vendor or authorized reseller for repair. Accessory List No. Name Quantity 1 CCTV Camera 1 2 User Manual 1 3 Screw 1 Remark * If the camera doesn’t work, please do not dismantle it by yourself. Please contact our local distributor or our maintenance office to trouble shoot, Otherwise, the warranty is voided. * Please do not splash water on the product components when cleaning. Configuration in the OSD Menu You can use the Joystick on the rear panel of the camera to configure camera settings in the OSD menu. For details on the OSD menu structure as below: No. Main Sub Menu Sub Menu / Function Indoor NTSC: 1/30* Min Shu. PAL: 1/25* NTSC: 1/60,FLK,1/240, 1/480,1/1000, Mode DC* 1 1/2000,1/5000*, Outdoor* Lens Max. Shu. 1/10000, 1/50000 PAL: 1/50,FLK,1/200, 1/400,1/1000, 1/2000,1/5000*, 1/10000, 1/50000 Iris Speed 0 – 15(0*) Manual NTSC: 1/30, 1/60, FLK, 1/240, 1/480, 1/1000, 1/2000, 1/5000, 1/10000, 1/50000, X2, X4, X6, X8, X10, X15, X20, X25, X30, Auto* Shutter PAL: 1/25, 1/50, FLK, 1/200, 1/400, 1/1000, 1/2000, 1/5000, 1/10000, 1/50000, X2, X4, X6, X8, X10, X15, X20, X25, X30, Auto* AGC 2 0 – 15(15*) Off* Exposure Sens-up Auto Brightness Sens-up X2, X4*, X6, X8, X10, X15, X20, X25, X30 1-100(40*) Off* D-WDR On Level 0-8(8*) Auto Off* Pos/Size Position, Size,↑,↓,→,← Gradation 0-2(0*) Defog Auto Default Off* BLC Level Middle*, High, Low Area Position, Size,↑,↓,→,← Default Select 3 Area1*, Area2, Area3, Area4 Off Backlight Display On* HSBLC Black Mask On*/Off Level 0-100(20*) Position, Size,↑,↓,→,← All Day* Model Night Default ATW* AWC→SET Indoor 4 White Balance Outdoor Blue 1-500(50*) Red 0-100(50*) D→N(Delay) 0-60(1*) N→D(Delay) 0-60(1*) D→N(AGC) 1-255(240*) D→N(Delay) 0-60(1*) N→D(AGC) 1-255(50*) N→D(Delay) 0-60(5*) Burst Off*/On Manual AWB Ext* 5 Day & Night Auto Color B/W AGC Level 0-255(48*) Off Level IR Smart On* 0-15(4*) Position, Size,↑,↓,→, Area ← Off IR PWM 0-100(100*) 6 2DNR Middle*/Low/Off/High 3DNR Middle*/Low/Off/High NR Off* 7 Special Cam Title On D-effect 0123456789ABCDEFGHIJKLMNOPQRSTUVWXYZ▶ →←↑↓()ˉ-_▊/=&:~,. Freeze Off*/On Mirror Off*, Mirror, V-flip, Rotate Neg. Image Off*/On Off* Select Area1*,Area2,Area3,Area4 Position, Size,↑, On* ↓,→,← Display Off Sensitivit y Color Motion On Trans 0-100(64*) Green*, Blue, White, Red 1.00*,0.75,0.50, 0.25 View Type Alarm Off, Block, Outline, All* OSD View On*/Off Alarm Out On*/Off Alarm Sig High*, Low Time 1-15(3*) Default Off Privacy Select Area1*,Area2,Area3,Area4 Display Off On Color* Mosaic Inv Color Trans Position, Size,↑, ↓,→,← Position, Size,↑, ↓,→,← Position, Size,↑, ↓,→,← White*, Black, Red, Blue, CYAN, Yellow, Green 1.00*,0.75,0.50, 0.25 Default Language ENG*/CHN1/CHN2/GER/FRA/ITA/SPA/POL/RUS/POR/NED/TUR Off Defect Live DPC AGC level 0-255(65*) Level 0-100(100*) On* Off Pos/Size Start White DPC On* Position, Size,↑, ↓,→,← Close the iris then press DPC View Off*/On Level 0-60(5*) AGC 0-14(14*) Sens-up x2*, x4, x6, x8,x10, x15, x20, x25, x30 Off* Pos/Siz Black DPC On RS485 8 Adjust Sharpness ↓,→,← Start Press Enter DPC View Off*/On Level 0-255(255*) CAM ID 0-255(1*) ID Display Off*/On Baud Rate 2400,4800,9600,19200 ,38400 Off Position, Size,↑, Auto* CRT Level 0-10(6*) Start AGC 0-255(50*) End AGC 0-255(200*) Black Level 0-60(0*) Blue Gain 0-100(50*) Red Gain 0-255(50*) User*,0.45,0.50,0.55,0.60,0.65,0. CRT/LCD Gamma 0.95,1.00 LCD* 9 Exit LSC Off*/On Video. Out PAL/NTSC 70,0.75,0.80,0.85,0.90, Blue Gain 0-100(50*) Red Gain 0-100(50*) Save& END /Reset/Not Saved