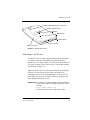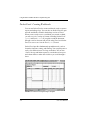
1
C-1050 Series User Manual Notice The information in this manual is subject to change without notice. VADEM SHALL NOT BE LIABLE FOR TECHNICAL OR EDITORIAL ERRORS OR OMMISSIONS CONTAINED HEREIN; NOR FOR INCIDENTAL OR CONSEQUENTIAL DAMAGES RESULTING FROM THE FURNISHING, PERFOMANCE OR USE OF THIS MATERIAL. This manual contains information protected by copyright. No part of this manual may be photocopied or reproduced in any form without prior written consent from Vadem. © 1999 Vadem. Vadem, Vadem ViewFinder, CalliGrapher® and ClioTM are trademarks of Vadem. Microsoft®, MS, MSN, PowerPoint®, ActiveX, ActiveSync, Outlook, InkWriter, Windows, Windows NT, Visual Basic, Visual C++, and the Windows logo are registered trademarks or trademarks of Microsoft Corporation in the United States and/or other countries. Microsoft products are licensed to OEMs by Microsoft Licensing, Inc., a wholly owned subsidiary of Microsoft Corporation. Product names mentioned herein may be trademarks and/or registered trademarks of their respective companies. Clio C-1050 User Manual Second Edition (September 1999) Part Number DA-00183 FOR YOUR RECORDS For your assistance in reporting this product in case of loss or theft, please record the model number and serial number (located on the bottom of the device) below. Please retain this information. Model Number ______________________________________ Serial Number _______________________________________ Date of Purchase _____________________________________ Place of Purchase_____________________________________ Contents About this Manual x Important Safety Instructions xii Operating Precautions xiii Where to Find Information xiv Conventions 1 xvi Getting Acquainted with Clio 1-1 Attaching to AC Power 1-3 Calibrating and Personalizing the Device Managing Power 1-5 Cycling Power 1-6 Notification LED/Switch 1-4 1-7 Power Manager Control Panel 1-7 Battery Status Tab 1-8 Suspend Options Tab 1-10 Backlight Tab 1-11 Managing Battery Pack Life 1-12 Recharging the Main Batteries 1-12 Using Batteries Efficiently 1-13 Using Display Modes 1-14 Using Clio in Keyboard Mode 1-14 Using Clio in Tablet Mode 1-15 Adjusting Contrast/Brightness 1-15 Using the Stylus 1-16 Exploring the Desktop 1-17 My Handheld PC 1-17 Taskbar 1-18 Start Menu 1-18 Online Help 1-18 Using Windows and Internet Explorer Clio User Manual 1-19 iii Windows Explorer 1-19 Internet Explorer 1-19 Communications and Connectivity Connecting to the Modem Using Infrared 1-21 1-20 1-20 Removing or Replacing the Battery Pack 1-22 Removing the Battery 1-23 Replacing the Battery 1-24 Memory 1-26 Using Optional Flash Cards 1-26 Installing a Compact Flash Card 1-28 Installing ROM 1-30 Resetting Clio 1-32 Clearing Memory 1-33 2 Setting up a Partnership with a Desktop PC 2-1 Connecting with the Travel Dock 2-2 Setting up Communications 2-4 Customizing Synchronization 2-7 Synchronizing Files and File Conversion 2-9 Drag and Drop 2-10 Synchronized Files 2-10 Backup and Restore 2-11 Remote Synchronization 2-11 3 Setting Up Remote Networking 3-1 Connecting to an ISP 3-2 Connecting to a Network 3-3 Creating a Dial-up Connection to a Network 3-4 Creating a Network (Ethernet) Connection 3-5 Synchronizing with a Desktop Computer 3-6 Creating a Dial-up Connection to a Modem 3-9 iv Clio User Manual Inbox: Sending and Receiving E-mail Messages 3-10 Setting up Inbox for Connecting to a Mail Server 3-10 Connecting to a Mail Server 3-13 Downloading Messages from a Mail Server 3-13 Disconnecting From a Mail Server 3-14 Managing Messages and Folders on a Mail Server 3-14 Synchronizing E-mail Using ActiveSync 3-15 Creating an Email Message 3-18 Getting Help on Connectivity 3-18 4 A Tour of Windows CE 4-1 Programs 4-2 Using the Start Menu and Taskbar 4-4 Using the Command Bar 4-5 Finding Files and Exploring the Web 4-5 Printing 4-6 Customizing Clio 4-7 Communications 4-7 Dialing 4-7 Display 4-8 Keyboard 4-8 Network 4-8 Owner 4-8 Password 4-9 Power Manager 4-9 Regional Settings 4-9 Remove Programs 4-10 Stylus 4-10 System 4-10 Tablet Mode AutoStart 4-10 Volume and Sounds 4-11 World Clock 4-11 Clio User Manual v 5 Using the Microsoft Office and Other Companion Programs 5-1 Pocket Word: Creating Documents 5-2 Pocket Excel: Creating Workbooks 5-4 Pocket Access: Viewing and Creating Data 5-6 Pocket PowerPoint: Showing Presentations 5-8 Voice Recorder and InkWriter 5-10 Voice Recorder: Capturing Ideas and Thoughts 5-10 InkWriter: Creating Notes and Drawings 5-12 Microsoft Pocket Outlook 5-14 Calendar: Scheduling Meetings and Appointments 5-15 Contacts: Tracking Friends and Colleagues 5-18 Tasks: Keeping a To Do List 5-19 6 Using the Bundled Programs Vadem ViewFinder™ 6-1 6-2 Viewing, Finding and Editing Your Personal Information Archiving and Restoring Notes 6-4 CalliGrapher® 5.3 6-3 6-6 Starting CalliGrapher 6-6 Recognition Mode 6-7 ScreenDraw mode 6-9 BSQUARE® bFAX® Pro 6-10 Sending a Fax via the Built-In Modem Receiving a Fax 6-11 6-11 BSQUARE bUSEFULTM Backup Plus 6-12 Starting a bUSEFUL Backup 6-12 Some Helpful Tips and Tricks about bUSEFUL BSQUARE Publisher and Viewer 6-12 6-15 Starting and running BSQUARE bREADY Publisher 6-15 Starting and Running the BSQUARE bREADY Viewer on your Clio 6-16 vi Clio User Manual A Clio Troubleshooting Guide and Tips A-1 What should I do if… A-1 …the power button won’t turn the device on? A-1 …my screen is dark? A-2 ...Clio’s Notify button is not working? A-2 …the system is not responding properly to the stylus taps? A-2 …my Clio will not respond to screen taps or keystrokes? A-3 ... my battery is not holding a charge? A-3 ...I can’t install the battery? A-4 ...my Clio doesn’t open and close properly? A-4 ...my Clio’s AC adapter is not charging the unit? A-4 ...my Clio is not receiving audio? A-4 ...I can’t insert a PC card into the card slot? A-5 …I forget my power-on protection password? A-5 ....the LCD on my Clio is flickering? A-5 ...my Clio’s battery LED is not working? A-6 ...my Clio’s serial port is not working? A-6 How do I… A-6 …minimize an application or window? A-6 …quickly access the desktop? A-6 …create a shortcut to my favorite application or file on the desktop? A-6 …end an application that is not responding? A-7 …tell if the Caps Lock is active? A-7 …access the context menus (right mouse click in Windows 95)? A-7 …check battery levels? A-7 …find out how much memory I have left for storage and applications? A-7 …maximize my battery life? A-8 Clio User Manual vii B Hardware Specifications C Regulatory Information for the C-1050 Series C-1 D Supported PC Cards E Limited Warranty F Vadem Software License Agreement G BSQUARE® EULA G-1 H Software Programs H-1 Glossary B-1 D-1 E-1 F-1 Glossary-1 Index viii Clio User Manual Preface Congratulations on purchasing Clio, the ideal PC Companion powered by the Microsoft® Windows® CE operating system. The size and capabilities of this device let you keep your most important business and personal information up-to-date and close at hand. Windows ActiveSync® with CE Services increases the power of Clio by letting you synchronize the information on your desktop or laptop computer with this device. Picture yourself in the following situations: • You’re on a business trip, getting important customer feedback that you want to discuss with your colleagues back in the office. Using Calendar, Contacts, and Inbox, you schedule a meeting and send it to your colleagues while still on the road. • You are on the road taking customer orders. Using Pocket Access, you create records for each customer with their order information. At night, you connect to your network and update the global database with your new orders. You also download updates to the product information database you use when making sales. • You glance at the time and realize that you are going to be late for the bus. You grab Clio and catch the bus just in time. Because ActiveSync keeps the information on your device always up-to-date, while on the bus, you leisurely read and respond to the e-mail messages you did not have a chance to get to during the day. Once at home, you use your device to dial into the network at your company and send your replies. Clio User Manual ix • During a few spare minutes in the airport, you check your email and send a note to your daughter wishing her luck at the gymnastics meet. About this Manual Table P-1 provides a description of each section in this manual. TABLE P-1 Contents of this Manual Section Chapter 1: Getting Acquainted with Clio Chapter 2: Setting up a Partnership with a Desktop PC Chapter 3: Setting Up Remote Networking Chapter 4: A Tour of Windows CE Chapter 5: Using Microsoft Office and Other Companion Programs Chapter 6: Using the Bundled Programs x Content Essential information about Clio, including its hardware, software applications, supported PC cards, and essential set-up tasks you should perform. Instructions for setting up a partnership and synchronizing Clio with a desktop PC. Instructions for configuring and using dialup and network connections.Instructions for sending and receiving email messages with the Inbox program. Description of the features of the Windows CE desktop environment. Information about using the Microsoft applications bundled with Clio. Information about using the Vadem applications bundled with Clio: ViewFinder, CalliGrapher, BSQUARE bFAX Pro, bUSEFUL BACKUP Plus and bREADY Publisher and Viewer. Clio User Manual About this Manual TABLE P-1 Contents of this Manual Section (Continued) Content Appendix A: Clio Troubleshooting Guide and Tips Symptom, Cause, and Solution information for commonly encountered difficulties Appendix B: Hardware Specifications System specifications for Clio Appendix C: Regulatory Information for the C-1050 Series Appendix D: Supported PC Cards Appendix E: Vadem Limited Warranty Appendix F: Vadem Software License Agreement Regulatory information regarding Clio Listing of PC Cards supported by Windows CE Complete text of Vadem limited warranty Complete text of software license agreement Appendix G: BSQUARE® End-User License Agreement (EULA) Appendix H: Software Programs Glossary Clio User Manual BSQUARE® bFAX® Pro, BSQUARE® bUSEFULTMBACKUP Plus, bREADYTM Publisher and Viewer EULA Complete listing of software programs included with C-1050 Series Translations of commonly used terms xi Important Safety Instructions Follow basic safety precautions to reduce the risk of fire, electric shock, or personal injury: 1. 2. 3. 4. 5. 6. 7. 8. 9. 10. 11. xii Read and understand all instructions. Follow all warnings and instructions marked on the product. Never install telephone wiring during a lightning storm. Never install telephone jacks in wet locations unless the jack is specifically designed for wet locations. Never touch uninsulated telephone wires or terminals unless the telephone line has been disconnected at the network interface. Use caution when installing or modifying telephone wires. Avoid using a telephone (other than a cordless type) or modem during an electrical storm. There may be a remote risk of electric shock from lightning. Use only the power adapter supplied with Clio. If you need to replace the supplied power adapter, go to the Vadem web site, http://www.vadem.com, for information on how to order a replacement. Do not overload wall outlets and extension cords as this can result in the risk of fire or electric shock. Never spill liquid of any kind on the product. To reduce the risk of electric shock, do not disassemble the product. Instead, take it to qualified service personnel when service or repair work is required. Opening or removing covers may expose you to dangerous voltage or other risks. Incorrect reassembly can cause electric shock when the product is next used. Clio User Manual Operating Precautions Operating Precautions Clio is a precision digital instrument. Be sure to observe the following important precautions in order to prevent malfunction that can result in improper operation or corruption of data in memory. • Never continue to use the device when battery power is low. Low battery power can cause corruption or loss of data stored in memory. Recharge batteries as soon as possible after low power is indicated. Charge whenever possible. • Avoid using the device in areas subjected to the conditions listed below. Such conditions can create the danger of fire or personal injury, as well as damage to and malfunction of the device. • Electrostatic charge • Extreme heat • Very high humidity • Sudden temperature change • Large amounts of dust Also note the following important precautions. Failure to do so can create the danger of fire, personal injury, as well as damage to and malfunction of the device. • Never drop the device, allow it to be hit by other objects or otherwise subject it to strong impact. • Never place heavy objects on top of the device. • Never disassemble the device. • Never insert foreign objects into the connectors or slots of the device. • Never allow water or other liquids to come into direct contact with the device. Clio User Manual xiii • Always use the stylus that comes with the device when operating its touch screen, and only use the shiny end of the stylus. • Never use paint thinner, benzene, or other volatile agents to clean the device or its display panel. Instead, use a soft cloth moistened with water. Wring out all excess liquid from the cloth before wiping the device or display panel. Where to Find Information This manual describes your Clio hardware, provides an overview of the programs included, and describes how to set up communications between your device and your desktop computer. Table P-2 is a guide to the different types of information available to help you use your device. Note that although this book introduces the programs on your Clio, it does not describe them completely. For more information, see the comprehensive online Help for each program. TABLE P-2 xiv Clio Information Information Source Program Documentation This User’s Manual -orOnline Help on your device. Select Start > Help. Synchronizing and exchanging files with a desktop computer This User’s Manual. -orOnline Help on your device. Select Start > Help. -orMicrosoft ActiveSync online Help on your desktop computer. In the ActiveSync window, click Help > Windows CE Services Help Topics. Clio User Manual Where to Find Information TABLE P-2 Clio Information (Continued) Information Source Toolbar buttons Tap and hold on a toolbar button to see its name. Drag off the toolbar button before lifting to avoid activating the button. Troubleshooting information on connections The Communications Troubleshooter on your desktop computer. In the ActiveSync window, click Help > Communications Troubleshooting. Up-to-date information on Windows CE-based devices The Microsoft Windows CE Home Page: http://www.microsoft.com/windowsce Information on this release of Windows CE Readme.doc file (located in the Microsoft ActiveSync folder on your desktop computer). Extensive online support for Clio specific tips, troubleshooting and FAQs (Frequently Asked Questions) The Vadem Home Page: http://www.vadem.com Information about accessories, software and upgrades for Clio The Vadem Home Page: http://www.vadem.com Vadem Technical Support Email to: [email protected] Vadem Technical Support, Service and Repair 1-888-GO-VADEM Clio User Manual xv Conventions This manual uses several conventions to present information of special importance. Warning: Warnings are cautions and alerts of things that can interfere with or damage the function of this device. Note: Notes highlight helpful and important things to keep in mind when using this mobile device. These include things like tips and tricks, shortcuts, and hints. Lists of items, points to consider, or procedures that do not need to be performed in a specific order appear in bullet format: • Item 1 • Item 2 Procedures that must be followed in a specific order appear in numbered steps: 1. 2. Perform this step first Perform this step second NOTE: The notation [tap] or [double-tap] may appear in this document. It signifies a stylus or finger tapping the touch screen. xvi Clio User Manual Where to Find Information The following general text conventions are used to denote special circumstances. [ENTER] Specific keyboard keys are shown in square brackets and are capitalized. [ALT]+[F4] Keys with a plus sign (+) between them must be pressed simultaneously {POWER} Buttons and knobs are depicted in round brackets and are capitalized and italicized. \\HKEY\CURRENT_USER Path names to PC or Windows CE resources are shown in Courier font. Start>Settings>Control Panel Clio paths to resources are shown usually in bold font cd \letters\business\legal [ENTER] PC keyboard entries or URLs you are expected to enter exactly as shown are indicated in Courier font. http://www.Vadem.com Clio User Manual xvii xviii Clio User Manual 1 Getting Acquainted with Clio Before you start using Clio, you will need to charge the unit until the orange indicator light on the front turns to green, indicating a fully charged battery. This chapter will show you how to: 1. Attach to AC power and charge the batteries. When attached to AC power, the battery pack and backup battery charge automatically, even when Clio is in use. Refer to “Attaching to AC Power” on page 1-3. Important: The first time you charge Clio, be sure that your device remains connected to AC power for twelve hours to fully charge both batteries. You may use Clio during this time, but do not remove it from the AC connection. This is only required the first time you charge Clio. 2. Calibrate and personalize Clio. Refer to “Calibrating and Personalizing the Device” on page 1-4. Clio User Manual 1-1 Getting Acquainted with Clio The names and locations of key components on your Clio are shown below. Figure 1-1 shows a top view of Clio in Keyboard Mode, and Figure 1-2 shows a bottom view of Clio. Display Power Button Microphone Birghtness control keys Screen contrast control keys External Power Port Notification LED/Switch Serial/ Docking Port IR Port Modem Jack Stylus FIGURE 1-1 Top view of Clio in Keyboard Mode Warning: Be careful when opening Clio. The hinge arm may pinch skin or clothing that is in contact with the back of the device when it is opened. Always rest Clio on a flat surface before opening. 1-2 Clio User Manual Attaching to AC Power Compact Flash Slot (internal, not shown) Memory Module Cover Speaker Reset button PC Card ejector PC card slot Battery Pack door FIGURE 1-2 Bottom View of Clio Attaching to AC Power To attach Clio to AC power, plug the mini-connector end of the AC adaptor cable into Clio and the two-pronged end into a standard 110V AC power outlet. You can also attach the device to AC power using the Travel Dock (refer to “Connecting with the Travel Dock” on page 2-2). When you attach Clio to AC power, the batteries automatically recharge. You can use the device while your batteries are recharging. In fact, it is recommended that you always use AC power when you are near an outlet to insure your batteries stay fully charged for when you travel. Important: Use only the AC power adapter supplied with Clio. If you need to replace the adapter, go to the Vadem web site, http://www.vadem.com, for information on how to order replacement. Clio User Manual 1-3 Getting Acquainted with Clio Calibrating and Personalizing the Device The first time you power on, the “Welcome to Windows CE for the Handheld PC” wizard appears on your screen. Just follow the instructions as they appear. 1. Note: Always use the Clio stylus to touch the Clio screen. Do not use any stylus or pen other than the Clio stylus. Using a different pen or stylus may damage your screen. Do not rest the heel of your hand on the screen, as it is quite sensitive to contact and will not work accurately when there is more than one point of contact. 2. 3. 1-4 Calibrate the screen: a. Remove the stylus from its holder. b. At the center of each cross or target (+) that appears on the display, tap using the stylus. c. Press the ENTER key when you are done. Set the world clock. When the World Clock dialog appears: a. In the Home tab, select a city in your time zone. b. Optionally, in the Visiting tab, select another city for which you would like to track local time, then tap OK. c. In the Date and Time tab, select the date and specify the time in your Home and Visiting cities. d. Tap OK in the upper right of the dialog. Enter your personal information. When the Owner Properties dialog appears, enter your personal information, then tap Done in the lower right corner of the dialog. Clio User Manual Managing Power Managing Power Clio uses two types of batteries and will maintain memory for at least two weeks when the device is turned off: • The rechargeable main battery pack, which comes packaged with the device. It provides approximately 12 hours of power under normal use. • A built-in, rechargeable backup battery. This battery pack recharges whenever you recharge the device. Its purpose is as an emergency power source to maintain memory when the main battery pack is removed for short periods. Note: The device cannot be turned on using only the backup battery. Warning: All data will be lost if the main battery is drained or removed and the backup battery is also drained. Replace the main battery as soon as possible after removing it. Always charge Clio whenever possible to protect your data. Clio User Manual 1-5 Getting Acquainted with Clio Cycling Power Clio is ready to use as soon as you power on. Unlike a PC, Clio does not need to boot up or shut down. There are three ways to power on and off: • Power Button. To power on, press the Power Button (large button recessed into the frame to the right of the display). To power off, press this same button. • Opening and Closing Clio. This is an optional feature you can set using the Power Manager Control Panel. When this feature is enabled and you close Clio with the screen facing down, it powers off. When you open Clio, it powers on. • Docking with the PC. When you dock Clio to your PC using the Travel Dock or Serial Cable, your Clio will automatically power on as part of establishing a partnership with your PC (refer to Chapter 2, “Setting up a Partnership with a Desktop PC”). Note: 1-6 If the screen does not appear to be on after you power on the device, you may need to adjust the screen brightness and contrast (refer to “Adjusting Contrast/Brightness” on page 115). The Clio screen takes a few seconds to reach full brightness after you turn on the device. Clio User Manual Power Manager Control Panel Notification LED/Switch Clio features a Notification LED/switch on its lower front edge. To interpret signals from the LED, refer to Table 1-1. TABLE 1-1 Notification LED/switch Indicator Meaning Steady green light Clio is attached to AC power and the battery pack is fully charged. Steady orange light Clio is attached to AC power and the battery pack is charging. Red blinking light An alarm or reminder of an important event or appointment that occurs while Clio is turned off. Press the LED/switch to turn on Clio and to turn off the alarm/reminder after it lights up. Power Manager Control Panel If you select the Power Manager icon in the Control Panel, a dialog box will be displayed that contains information about the Power status of the device. It contains three tabs that allow you to check your battery level and customize options to improve battery life. Clio User Manual 1-7 Getting Acquainted with Clio Battery Status Tab Figure 1-3 shows the Power Properties dialog box with the Battery Status tab displayed. FIGURE 1-3 Battery Status Tab in the Power Properties Dialog Box The Battery Status tab displays the battery level as a meter with green (good), yellow (low) and red (very low) zones. You can quickly determine whether your battery is empty or full by looking at the meter. The status of the internal, rechargeable backup battery is also shown. An estimated battery life is displayed for the Main Battery is also shown. The estimated battery life is a continuous calculation based on current use. It may fluctuate based on various factors including the brightness setting of the display, whether or not the modem is being used or even if the user is actively typing or letting the device sit idle. In some cases you may see “Unknown Time Remaining” for a short time before the device has time to calculate estimated battery life. The value should be taken as only an estimate of remaining battery life, not an exact time. 1-8 Clio User Manual Power Manager Control Panel Note: To preserve your data stored in RAM memory, Clio will automatically power off after the battery level enters into the red zone. If you attempt to turn the device on again, it may turn on briefly, then turn off again to protect memory. Use the AC Adapter as soon as possible to recharge the device. In order to protect your data, you should never leave the device for long periods of time without recharging the battery. When power becomes low on the device, dialog boxes appear to alert you of the problem. When AC Power is applied, the Main Battery icon changes to the External Power icon (Figure 1-4), to indicate that the device is running on AC and the Main Battery is recharging. FIGURE 1-4 External Power Icon Clio User Manual 1-9 Getting Acquainted with Clio Suspend Options Tab The Suspend Options tab (Figure 1-5) allows you to set options for automatically powering the device on or off. You can choose to have Clio turn on and off automatically whenever you open or close the case. In addition, you can set a timeout to automatically power off the device after an idle period to preserve battery power. FIGURE 1-5 Suspend Options Tab in the Power Properties Dialog Box 1-10 Clio User Manual Power Manager Control Panel Backlight Tab The Backlight tab (Figure 1-6) allows you to set a timeout to automatically dim the backlight after an idle period. Enabling this feature will maximize the battery life of your device under normal operating conditions. Touching the screen or any key on the keyboard will automatically brighten the backlight back to its original setting. FIGURE 1-6 Backlight Tab in the Power Properties Dialog Box Clio User Manual 1-11 Getting Acquainted with Clio Managing Battery Pack Life When fully charged, the main battery pack supports up to 12 hours of use. The backup battery provides an emergency power source to protect your memory contents if the main battery pack is removed for short periods of time. When attached to AC power, both batteries charge automatically, even when Clio is in use. Recharging the Main Batteries Warning: Never continue to use Clio when the battery pack is low. Complete loss of battery pack power will destroy your data. Recharge the batteries as soon as low power is indicated. To recharge the main battery pack and built-in rechargeable backup battery: • If you have a travel dock that is plugged into a wall outlet, attach Clio to the travel dock. • Otherwise, attach the AC Adapter directly to Clio. Note: The Notification LED/Switch turns orange whenever AC is applied and the battery is charging. Be sure to check the LED when you plug Clio into the AC Adapter or dock. The LED turns green when the battery is fully charged. The backup battery is provided for use by the system on an emergency basis, where the main battery pack cannot be recharged as necessary or when the main battery pack must be removed. Be sure to replace the main battery pack without delay. 1-12 Clio User Manual Managing Battery Pack Life Using Batteries Efficiently Here is a list of things you can do to maximize your battery pack’s life and charge: • Charge the battery pack as soon as the first low battery pack warning appears. Keep the battery fully charged whenever possible. • Use AC power as much as possible, especially when you are using PC cards. These cards consume a lot of power. • If you are low on power, turn off sounds on the device using the Volume and Sound Control Panel. These sounds consume a lot of power. • If possible, use AC power when using the Clio built-in modem as it requires more power. • Turn on the dim backlight feature, described above, to maximize battery life when the device is idle. • Choose a lower brightness setting if possible. The backlight consumes a lot of power. Clio User Manual 1-13 Getting Acquainted with Clio Using Display Modes The display screen is designed to make Clio as easy to use, under as many conditions, as possible. Using Clio in Keyboard Mode To open the screen in keyboard mode: 1. 2. 3. Place Clio face up on a flat surface with the Notification LED/switch facing you. Lift up on the screen and push the top of it away from you, keeping the screen inline with the screen arms. Pivot the screen to optimize its readability under different lighting conditions. Refer to Figure 1-7. Step 2. Lift the top away from you Step 3. Pivot the bottom toward you FIGURE 1-7 Opening the Display in Keyboard Mode 1-14 Clio User Manual Using Display Modes To close Clio: 1. 2. Align the screen with the screen arms. Close the screen by pushing it down to meet the body of Clio. Using Clio in Tablet Mode Once the screen is open, you can convert it to tablet mode: 1. 2. Pivot the screen so that it is facing away from the keyboard and is aligned with the screen arms. Push the screen down to meet the body of Clio (but with the display facing up), as shown in Figure 1-8. FIGURE 1-8 Display in Tablet Mode Adjusting Contrast/Brightness To adjust display contrast, press ALT+LESSTHAN(<) to decrease or ALT+GREATERTHAN (>) to increase contrast. To adjust display Clio User Manual 1-15 Getting Acquainted with Clio brightness, press ALT+PLUS (+) to increase or ALT+ MINUS (-) to reduce brightness. Using the Stylus Clio comes with a stylus, a pencil-shaped device for tapping or dragging to select or to move displayed items. To reduce the risk of scratching the Touch Screen, use the grey end of the stylus. You can use the stylus much as you would a mouse. For example: • Tap icons on your screen to select them. • Double-tapping works like double-clicking a mouse. • Press ALT and tap to access context-sensitive menus (equivalent to right-button click on a mouse). • To move something on the display, or to draw lines or curves, press continuously and drag. • If the CalliGrapher program is active (refer to “CalliGrapher® 5.3” on page 6-6), you can write on the screen in block or cursive styles and the system will capture your input, as if you had used the keyboard. Note: 1-16 You may use your finger instead of the stylus, but do not use any other stylus or pen. Using a different pen or stylus may damage your screen. Also, do not rest the heel of your hand on the screen, as it is quite sensitive to contact and will not work accurately when there is more than one point of contact. Clio User Manual Exploring the Desktop Exploring the Desktop The Clio Windows CE desktop contains shortcuts to programs and features the standard “My Handheld PC” icon, Start menu and taskbar. The following section briefly describes Clio’s desktop features. For more in-depth information on Windows CE applications, see Chapter 4, “A Tour of Windows CE”. My Handheld PC The “My Handheld PC” folder contains standard Windows folders, such as the Control Panel, Databases, My Documents, Program Files, and Windows. Use these resources to create new folders, create shortcuts to the desktop, navigate files, add files to the Favorites list (on Start menu), view files as icons or list, transfer files using infrared, and switch to the internet. For more specific information on the folders contained within the “My Handheld PC’ folder, see the Clio online help. Clio User Manual 1-17 Getting Acquainted with Clio Taskbar The taskbar is displayed along the lower edge of the desktop. It displays the programs you are currently running, the Desktop icon, and status tray. When selected, the Desktop icon minimizes all opened programs to display the desktop. The taskbar icons display the following information from left to right: • your battery status, including whether you are using AC current or battery. • your network connection status • access to Calligrapher resources (For more information on Calligrapher see “CalliGrapher® 5.3” on page 6-6). • contrast, brightness, volume and video screen settings, as well as battery charge information. • the current time Start Menu The Start menu is found on the left-most end of the taskbar. Tapping the Start icon opens the menu, where you will find directories containing all software application programs, your favorite documents, recently used documents, and Clio settings. The Run facility lets you set up and run software. The Suspend function lets you save your session settings to return to your current settings when disconnected. Online Help Clio contains an online help system that you can access from many ways. From the Start Menu, choose the Help icon. From applications, choose the question mark [?] icon. 1-18 Clio User Manual Using Windows and Internet Explorer The online help system contains the most up-to-date information about Clio’s features and functions. Using Windows and Internet Explorer Clio uses its own version of Windows Explorer and Internet Explorer. Windows Explorer The Windows Explorer program is useful for viewing, transferring and organizing files. It is also accessed from the “My Handheld PC” icon. To open this program, tap Start > Programs > Windows Explorer. Internet Explorer Internet Explorer lets you view HTML files and acts as your Internet browser. To open this program, tap Start > Programs > Internet Explorer. To view an HTML file residing on your Clio, select File > Open, then choose the file. To connect to the Internet and use Internet Explorer as your browser, see Connecting to an ISP on page 3-2. Clio User Manual 1-19 Getting Acquainted with Clio Communications and Connectivity Clio provides a modem jack, an IR (infrared) port, a serial/ docking port, a PC Card slot, and a Compact Flash slot. This section describes the use of each of these features. Connecting to the Modem To use the internal modem, plug any analog phone line into the standard RJ11 jack on the side of Clio (Figure 1-9). Warning: Only use an analog phone line with the built-in modem on Clio. Digital phone lines may damage the built-in modem. Digital phone lines can sometimes be found in hotels or corporate buildings using PBX systems. Check before using an unknown phone line. FIGURE 1-9 Plugging in the Modem Cable 1-20 Clio User Manual Communications and Connectivity To use the built-in modem, choose “Built-in modem on COM5:” as the modem type. Refer to Chapter 3, “Setting Up Remote Networking” for information on creating dial-up connections. Using Infrared You can establish an IR (infrared) connection between Clio and another device that runs Windows CE using the infrared port. To create an IR connection: 1. 2. Power on both devices. Place Clio and the other Windows CE device so that their IR ports are directly facing each other (refer to Figure 110). FIGURE 1-10 Infrared Connection To send a file, highlight the file then select File > Send To > Infrared Recipient in the Windows Explorer menu. To receive a file, select File > Receive in the Windows Explorer menu. Other programs may support infrared. Check the documentation for other programs for details. Clio User Manual 1-21 Getting Acquainted with Clio Note: The IR port and the serial port cannot work simultaneously. Removing or Replacing the Battery Pack For certain operations, such as installing more memory or installing certain types of PC cards, you will need to remove the battery pack. Also, if the battery becomes defective, you’ll need to replace it. Follow the steps in this section to safely handle the battery pack. Warning: Never open the battery pack door or remove the battery pack without FIRST shutting off the device. REMOVING THE BATTERY WHILE THE DEVICE IS ON MAY CAUSE YOU TO LOSE ALL OF YOUR DATA. 1. 2. 1-22 Remove the battery pack door. With Clio face down on a flat surface and the back of the device facing you, grasp the tabs on the back of the battery pack door and lift away from you (Figure 1-11). Clio User Manual Removing or Replacing the Battery Pack Back of the device facing you Device face down on a flat surface Lift the Battery Pack door up and away from you FIGURE 1-11 Removing the Battery Pack Door Removing the Battery 3. Rotate the tab of the battery pack away from the battery contacts and lift the battery pack out of the device. Refer to Figure 1-12. . FIGURE 1-12 Rotating the Battery Pack away from the Battery Contacts Warning: Never operate Clio with the Battery Pack removed. When removing the battery pack, replace it as quickly as possible and be careful not to leave it out of the system for an extended period of time. Clio User Manual 1-23 Getting Acquainted with Clio Replacing the Battery 1. 2. Open the battery compartment as described in steps 1-3 above. Insert the battery pack. Orient the battery pack so the tab is on the side matching the three battery contacts on Clio (and so that the tab is facing away from Clio). Insert the battery pack into Clio. Make sure both ends snap in securely. (Figure 1-13). . Tab Battery Contacts FIGURE 1-13 Inserting the Battery Pack 3. Rotate the battery pack so that its tab makes a connection with the three Battery Contacts on Clio. Refer to Figure 1-14. . FIGURE 1-14 Rotating the Battery Pack toward the Battery Contacts 1-24 Clio User Manual Removing or Replacing the Battery Pack 4. Replace the battery pack cover. Insert the tabs on the curved side of the door into the body of Clio (Figure 1-15), then press down on the straight side and snap into place (Figure 1-16). Note: If the battery pack door does not close completely, the device will not power on. . FIGURE 1-15 Inserting Door . FIGURE 1-16 Closing Door Clio User Manual 1-25 Getting Acquainted with Clio Memory Clio uses three types of memory: • Optional Flash Cards, which can be used to store files. • ROM, which contains the operating system and built-in programs. • RAM, which contains additional programs and data. This section describes installation and use of each type of memory. Using Optional Flash Cards You can use many kinds of Type I or Type II PC cards with Clio. Flash memory PC Cards can be used to store files. Modem and ethernet PC Cards can be used for communications. VGA PC Cards can be used to give presentations. Windows CE supports many such cards with its built-in drivers. Other cards come with their own drivers. A list of supported PC Cards is provided in Appendix D, “Supported PC Cards.” Installing a PC Card: 1. Insert your PC card into the PC card slot. If you have not used a PC card with the device before, you need to remove the protection card that is in the slot. To do this, grasp the tab on the end of the card and pull it out. Insert the PC card connector end first until it is snug and the eject button pops out. Do not force the card, it will still stick out slightly from the slot when fully inserted. Refer to Figure 1-17. Note: If the card stops and the Eject button has not popped out, you may have inserted the PC Card upside down. 1-26 Clio User Manual Memory Remove the PC Card, flip it over and try again. After removing the protection card, insert the PC card until snug. Do not force the card, as it will not fit all the way into Clio. FIGURE 1-17 Inserting a PC Card 2. If this is the first time you have inserted this PC Card, you may be prompted by the device to identify or format the card. Follow the instructions on the display. Flash memory PC Cards will appear as the Storage Card folder inside the My Handheld PC folder. Clio User Manual 1-27 Getting Acquainted with Clio Removing a PC Card Note: Carefully follow these steps when removing a PC Card. Otherwise, you may lose your data. To remove a PC card from Clio: 1. 2. 3. 4. Exit all programs that are using files that reside on your PC card. Power off Clio. Eject the card. Press the button beside the PC card slot. Replace the protection card. This prevents dust from entering the slot. Installing a Compact Flash Card You can use a compact flash card to store files as you would a PC card. Note: The Compact Flash slot is an internal slot. If swapping a compact flash card back and forth from a digital camera, you may wish to use a PC card adapter in the external slot. To insert or change a compact flash card: 1. 2. 1-28 Follow the steps to remove the battery pack (see “Removing or Replacing the Battery Pack” on page 1-22). Insert the compact flash card in the available slot. If there is a compact flash card currently in the slot, remove it first. Refer to Figure 1-18. Clio User Manual Memory Remove the battery pack Insert compact flash card into available slot, label side up. FIGURE 1-18 Inserting a Compact Flash Card 3. Replace the battery pack. Warning: When removing the battery pack, please replace it as quickly as possible and be careful not to leave it out of the system for an extended period of time. The backup battery provides an emergency power source for up to two hours, BUT IF IT DRAINS YOU WILL LOSE ALL OF YOUR DATA. 4. Replace the battery pack cover and snap into place. Insert the tabs on the curved side of the door into the body of Clio, then press down on the flat side and snap into place. If the battery pack door is not completely closed, the device will not power on. Compact flash cards will appear as the Storage Card 1 folder inside the My Handheld PC folder. Clio User Manual 1-29 Getting Acquainted with Clio Installing ROM Warning: Never open the battery pack door or remove the battery pack without FIRST shutting off the device. REMOVING THE BATTERY WHILE THE DEVICE IS ON MAY CAUSE YOU TO LOSE ALL OF YOUR DATA. You can upgrade the ROM module in Clio: • A new ROM module may be necessary to upgrade to a new release of the operating system. To replace the ROM: 1. 2. 3. 4. 5. 1-30 Synchronize information to your desktop PC. Backup any files or programs you need. Refer to “Synchronizing Files and File Conversion” on page 2-9. Disconnect any AC power connection, including the travel dock. Open the battery pack door and rotate the battery pack away from contacts. Remove the memory module cover, using a phillips screwdriver. Remove the ROM module currently in the device. Under the memory module cover are two modules. With Clio face down and its Notification LED/switch light facing you, the ROM module is on the right and the RAM on the left. Put your fingers around the ROM module and lift it out. Refer to Figure 1-19. Clio User Manual Memory RAM ROM FIGURE 1-19 Inserting a ROM Module 6. 7. 8. 9. 10. 11. Install the new ROM module. The ROM and RAM modules have unique connectors that will not accept the wrong module. Align the connectors on the module with the connectors in the Clio. Then firmly and evenly snap into place. Make sure the module is firmly seated in place. Do not force it. Replace the memory module cover. Be sure the cover is firmly in place. Clio will not power on if the cover is not in place. Replace the screw and carefully tighten. Do not overtighten the screw. Replace the battery pack (see “Removing or Replacing the Battery Pack” on page 1-22 for instruction). Optionally, reconnect AC power. Power on the device. Synchronize with your desktop PC to restore your data. Clio User Manual 1-31 Getting Acquainted with Clio Note: Always read and follow the specific instructions that came with your ROM module. There may be important updated information. Resetting Clio If the device does not turn on after you install the battery pack and attach the device to AC power, first check if the contrast and brightness are set correctly (see “Adjusting Contrast/Brightness” on page 1-15). If the device still does not turn on or appears frozen, you may need to reset the device. Warning: You will lose any unsaved changes in files or programs when you reset Clio. All running applications will exit upon reset. To reset the device, use the Clio stylus to push the reset switch. This switch is recessed on the bottom of the device (Figure 1-20), recessed behind a hole to protect it from accidental triggering. It is labeled RESET. 1-32 Clio User Manual Clearing Memory FIGURE 1-20 Resetting Clio Clearing Memory Warning: Clearing memory will completely erase all data on the system. This should only be done as an emergency procedure or when you wish to completely erase all data; for example, when assigning your device to a new owner. To clear memory: 1. 2. 3. Synchronize information to your desktop PC. Backup any files or programs you need. Refer to “Synchronizing Files and File Conversion” on page 2-9. Remove the memory module cover. Press the silver and black Memory Erase button (under the memory module cover), and simultaneously press the RESET switch with the stylus. Clio User Manual 1-33 Getting Acquainted with Clio 4. 5. 6. 1-34 With Clio face down and its Notification LED/switch facing you, the Memory Erase button can be found adjacent to the RAM module. Replace the memory module cover. Be sure the cover is firmly in place. Power on the device. Synchronize with your desktop PC to restore your data. Clio User Manual 2 Setting up a Partnership with a Desktop PC Microsoft ActiveSync® with Windows CE Services enables you to synchronize the information on your desktop computer with the information on Clio. Synchronization compares the data on Clio and your desktop computer, then updates both with the most recent information. For example: • Keep Pocket Outlook data up-to-date by synchronizing your mobile device with your choice of Microsoft Outlook (Inbox synchronization with Outlook Express is not currently supported), Microsoft Schedule+, or Microsoft Exchange. • Synchronize Word and Excel documents, Access and other ODBC databases and tables, as well as InkWriter files between Clio and desktop computer. Your files are automatically converted to the correct format. With ActiveSync, you can also: • Back up and restore Clio data. • Add and remove programs on Clio. • Copy (rather than synchronize) files between Clio and your desktop computer. Clio User Manual 2-1 Setting up a Partnership with a Desktop PC Synchronizing or exchanging files with your PC requires: • A physical connection with Clio via a Travel Dock or network connection. Refer to “Connecting with the Travel Dock” on page 2-2. • Installation of ActiveSync with Windows CE Services and setting up a “partnership” between Clio and your Desktop PC. Refer to “Setting up Communications” on page 2-4. The travel dock connects Clio to AC power and the serial port of the PC in one step, helping you to keep your device synchronized and your battery pack fully charged. Connecting with the Travel Dock You can connect the device to your PC with the Travel Dock, included with Clio. To connect Clio and a PC and/or recharge the device with the travel dock: 1. 2. 2-2 Connect the travel dock to a free serial port on your PC using the included null modem cable (DB9F-to-DB9F). Connect the mini-plug on the supplied AC Adapter to the travel dock. Connect the two-prong end of the AC adapter to a standard wall outlet. Clio User Manual Connecting with the Travel Dock 3. 4. Insert the travel dock into the serial/docking port. AC power is supplied to Clio through the serial/docking port when using the Travel Dock. Refer to Figure 2-1. Verify that AC power is correctly supplied to Clio by checking the Notification LED/switch on the front of the device. The LED should be orange when the batteries are charging and green when fully charged. To AC To PC FIGURE 2-1 Travel Dock Connector Note: After setting up the travel dock, leave it connected to your PC and plugged in with the AC adapter, so you can conveniently charge and synchronize Clio in one step. Clio User Manual 2-3 Setting up a Partnership with a Desktop PC Setting up Communications After you have calibrated and personalized Clio (refer to “Calibrating and Personalizing the Device” on page 1-4), you can install ActiveSync with Windows CE Services and set up a partnership between Clio and your computer. To install ActiveSync and set up a partnership with a desktop PC: 1. 2. 3. Optionally, upgrade to Microsoft Outlook 98, Microsoft Outlook 2000, or Schedule Plus 7.0A before installing ActiveSync. The installation tailors the partnership to the existing system configuration; therefore, the PIM software you will use should be installed on your PC before installing ActiveSync. Connect Clio to your desktop computer. Refer to “Connecting with the Travel Dock” on page 2-2. Launch the ActiveSync setup wizard. Insert the Desktop Software for Microsoft ActiveSync with Windows CE Services compact disc into your CD-ROM drive on your desktop PC. The Setup Wizard (Figure 2-2) starts automatically and finds the port with the Clio attached. FIGURE 2-2 Windows ActiveSync Setup Wizard 2-4 Clio User Manual Setting up Communications Note: If the wizard does not launch automatically, type d:\setup, where d is your CD-ROM drive. 4. 5. The Setup Program automatically searches your PCs COM ports for a device. If it reports no device found, check your serial cable connection, make sure your Clio is turned on, and repeat. Follow the directions as they appear on your screen. For most users, the Typical installation works best. Set up a partnership with your desktop PC. The wizard guides you through installing ActiveSync, setting up a partnership (Figure 2-3) and performing your first synchronization. FIGURE 2-3 Setting up a Parnership • Frequency. You can synchronize Manually only when you tap Synchronize Now, On Connection whenever Clio and the PC are connected, or Continuously, as information is updated. Clio User Manual 2-5 Setting up a Partnership with a Desktop PC 6. 2-6 • File Type. You can have synchronization apply to appointments, channel items, contacts, files, messages, tables, and/or tasks. When you are finalized, your device will synchronize for the first time. If you chose manual synchronization during setup, you will need to choose Synchronize Now in the Tools menu of the Mobile Devices folder. Clio User Manual Customizing Synchronization Customizing Synchronization 1. The default frequency and file types work well for most users. To change either setting after you’ve completed the wizard: Select your device icon in the Mobile Devices folder and then tap Tools > Synchronization Options. You can tap Tools > Synchronization Options to make new choices about the synchronization of the partnership (Figure 2-4). FIGURE 2-4 Mobile Devices ActiveSync Options As follows: • Appointments. All appointments in Outlook or Schedule Plus (or another calendaring program if you have thirdparty software that supports ActiveSync ). • Channel Items. Advanced users may require this new technology. Clio User Manual 2-7 Setting up a Partnership with a Desktop PC 2. • Contacts. All address book or contact information in Outlook or Schedule Plus (or another contacts program if you have third-party software that supports ActiveSync). • Files. Allows synchronization of desktop and Clio files. If you do not select this, you can still drag and drop files between systems. • Messages. Refers to email in your Inbox. • Tables. Refers to Access database tables. • Tasks. All “to do” items in Outlook or Schedule Plus (or another tasks program if you have third-party software that supports ActiveSync). Optionally, check synchronization status. When the Mobile Devices window appears at the end of the installation, you can tap Tools > Synchronization Status to display status information about the synchronization of the partnership (Figure 2-5). FIGURE 2-5 Mobile Devices ActiveSync Status 2-8 Clio User Manual Synchronizing Files and File Conversion Synchronizing Files and File Conversion When you transfer a file from your desktop computer to your device, the file is converted to a format that the device can read. During file conversion, some of the file’s attributes may be changed or removed, and the file extension is changed. For example, when you transfer a Microsoft Word file to your device, some of the file’s formatting may be removed or changed, and the file extension is changed to .pwd (Pocket Word). When this file is transferred back to the desktop computer, the file extension is converted back to .doc, but any changed or removed formatting will still be lost. Therefore, if you are using the Synchronized Files folder to transfer files and you want to preserve all formatting in the original document, keep a copy of the original file in another folder. See ActiveSync Help for specific information on how file attributes are affected during conversion. Note: If you have password protection on an Excel or Word file on your device, you must first turn off the password protection before the file is synchronized with the desktop computer. To do so, open the file, select File> Password, and clear the Password field. Clio User Manual 2-9 Setting up a Partnership with a Desktop PC Drag and Drop Files can be dragged and dropped from Clio to the PC workstation and vice-versa. To do this, connect Clio and desktop computer, double-tap the desktop computer’s device icon (in the Mobile Devices folder), and drag the files between the PC and the Mobile Devices folder. The files will be converted and copied onto Clio. Synchronized Files Where updates occur frequently on both Clio and desktop computer, you can synchronize the two instances of a file so that you always have an up-to-date copy on both computers. To do this, store such files in the Synchronized Files folder on both systems. During synchronization, files are updated in both locations. Note: 2-10 On the device, the Synchronized Files folder is in the My Documents folder. On the desktop computer, the Synchronized Files folder is called device Synchronized Files, where device is the name of your device. If you are using Windows 95 or Windows 98, the folder is located in the My Documents folder (c:\My Documents\device Synchronized Files). If you are using Windows NT, the folder is located in the Personal folder (c:\Winnt\Profiles\your username\Personal\device Synchronized Files. Clio User Manual Backup and Restore Backup and Restore Regularly back up your device data on your desktop computer using ActiveSync, or use BSQUARE bUSEFUL BACKUP Plus (see page 6-12), to prevent losing information if your device is ever corrupted or lost. To do this, connect your systems, then tap Tools > Backup/Restore in the Microsoft ActiveSync folder on your desktop computer. Your first backup may take some time, depending on how much information you have on your device. Subsequent backups will be faster if you select Incremental instead of Full. Note: Check the Automatic backup option to perform incremental backups each time your Clio is connected to your desktop PC. The automatic backup minimizes the possibility of data loss. Remote Synchronization You can synchronize with your desktop computer while away from the office by connecting to your network or directly to your computer via a modem attached to your computer. For more information, refer to “Synchronizing with a Desktop Computer” on page 3-6. Clio User Manual 2-11 Setting up a Partnership with a Desktop PC 2-12 Clio User Manual 3 Setting Up Remote Networking With a dialup connection, you can connect to your desktop computer, a network, or the Internet while away from your office. This is called remote networking and Clio provides the following remote networking options: • Use the Internet Connection Wizard to connect. • Connecting to an ISP (Internet Service Provider). Once connected, you can send and receive e-mail messages and view Web pages. If this is the method you want to use, refer to “Connecting to an ISP” on page 3-2. • Connecting to a Network. Once connected, you can send and receive e-mail messages, view intranet Web pages, and access files on the network. If this is the method you want to use, refer to “Connecting to a Network” on page 3-3. • Synchronizing with a Desktop Computer. Once connected, you can synchronize information such as your Pocket Outlook data. If this is the method you want to use, refer to “Synchronizing with a Desktop Computer” on page 3-6. Clio User Manual 3-1 Setting Up Remote Networking Connecting to an ISP You can connect to your ISP via a dial-up connection. Once connected, you can send and receive e-mail messages and view Web pages. To create a dial-up connection to an ISP: 1. 2. 3. 4. 5. 6. 7. 8. 3-2 Obtain the following information from your ISP: • ISP dial-up phone number • POP3 or IMAP4 server name • SMTP host name • User name • Password • Domain name (for network connections only) If you use a PCMCIA card, insert it into Clio. Select Start > Programs > Communications, then Remote Networking. Double-tap the Make New Connection icon. Enter a connection name (e.g., “ISP Dial-Up”), select DialUp Connection, then select Next. Select your modem type. To use the built-in modem on Clio, select “Built-in modem on COM 5:” Optionally, select configuration and TCP/IP settings. You should not need to change any settings in the Configuration or TCP/IP Settings dialog boxes. Most ISPs now use server-assigned addresses. If the ISP you are connecting to does not use server-assigned addresses, enter the addresses in the TCP/IP Settings dialog box. When finished, tap Next. Enter your access phone number and tap Finish. Once created, the dial-up connection is available anytime. To use it, double-tap its icon, enter your user name and password, Clio User Manual Connecting to a Network then tap Connect. Once connected, you can use Pocket Internet Explorer to visit Web pages or Inbox to send and receive email. Note: Before you can use Inbox, you need to provide the information it needs to communicate with the mail server. For specific instructions, refer to “Inbox: Sending and Receiving E-mail Messages” on page 3-10. Connecting to a Network If you have access to a network, you can send e-mail, access file servers, view intranet pages, and possibly access the Internet. You can connect to your network in one of two ways: • Create a dial-up connection using a RAS (Remote Access Service) account. Before you can create this dial-up connection, your network administrator will need to create a RAS account for you on the network. If this is the method you want to use, refer to “Creating a Dialup Connection to a Network” on page 3-4. • Connect to the network using an Ethernet PC Card. If this is the method you want to use, refer to “Creating a Network (Ethernet) Connection” on page 3-5. Clio User Manual 3-3 Setting Up Remote Networking Creating a Dial-up Connection to a Network To create a dial-up connection to a network: 1. 2. 3. 4. 5. 6. Obtain the following information from your network administrator: • Corporate dial-up access telephone number • User name and Password • Domain name If you use a PCMCIA modem card, insert the card into Clio. Tap Start > Programs > Communications, then Remote Networking. Double-tap the Make New Connection icon. Enter a connection name (e.g., “Corporate Dial-Up”), select Dial-Up Connection, then tap Next. Select the Dial-Up Connection. • Dial-Up Connection: is used for softmodem, wireless modem, or PCMCIA modem card to send and receive email or to access the Internet (or shared resource). • Direct Connection: is used for infrared port, serial cable, or Ethernet card. The infrared port and serial cable are used to transfer files (.doc, .pxl, etc.) from Clio to the PC or vice versa. The Ethernet card is used to network Clio to another mobile device or to the PC Internet connection. Note: The serial cable connection provides the same data transfer rate as the SIR infrared connection. On the other hand, the infrared connection saves you the hassle of using a wire to connect the devices. An Ethernet card can connect Clio to the Internet at extremely fast speeds. It can also network other 3-4 Clio User Manual Connecting to a Network devices/PCs to Clio. 7. 8. Optionally, select configuration and TCP/IP settings, then tap Next. You should not need to change any settings in the Configuration or TCP/IP Settings dialog boxes. Enter your access phone number and tap Finish. Once created, the dial-up connection is available anytime. To use it, double-tap its icon, enter your user name and password, then tap Connect. Once connected, you can use Pocket Internet Explorer to visit Web pages or Inbox to send and receive email. Creating a Network (Ethernet) Connection You do not need to create a new connection in Remote Networking on your device for a network connection. Instead, you must install and configure an Ethernet card. The drivers for the card may already exist on your device. To create a network (Ethernet) connection: 1. Insert the Ethernet card into your device and connect it to your network cable. Note: For a list of supported cards, refer to Appendix D, “Supported PC Cards.” 2. 3. If you have an A/C Adapter, plug it into your device. Ethernet PC Cards consume a significant amount of power. In the Settings dialog box, enter the information for your server. Tap Start > Settings > Control Panel, then double-tap Network: Clio User Manual 3-5 Setting Up Remote Networking Select your Ethernet driver, then tap Properties. Most networks use DHCP, so you should not have to change these settings. b. In the Identification tab, enter your name, password, and domain. See your network administrator if you need assistance. Once connected, you can use Pocket Internet Explorer to visit intranet Web pages and Inbox to send and receive e-mail. a. Note: Before using Inbox, you need to provide the information it needs to communicate with the mail server. For instructions, see “Inbox: Sending and Receiving Email Messages” on page 3-10. Synchronizing with a Desktop Computer To synchronize remotely, the following conditions must be met: • You must first establish a partnership between your device and desktop computer while at your desktop computer. The partnership cannot be established remotely. Refer to “Setting up Communications” on page 2-4. • The desktop computer must be powered on and you must be logged in. Schedule+, Exchange, or Outlook must be running with your user profile. • In the lower-right corner of the ActiveSync window, the connection status must display “Waiting for mobile device to connect.” • Synchronization must be enabled or set to “Automatically synchronize if data is out-of-date.” To verify this, check the ActiveSync Options dialog box. • Auto Connect must be set to “At all times” in ActiveSync. 3-6 Clio User Manual Synchronizing with a Desktop Computer • If you are communicating with the desktop computer through a dial-up or network connection, you must be logged on to the network on the desktop computer. Select “Enable a network connection” in the ActiveSync Properties dialog box. Note: If your computer must be turned off while you are away from your office, you cannot synchronize remotely. However, since your email resides on the network’s mail server, you can still receive messages by dialing in directly to your network. Refer to “Connecting to a Network” on page 3-3. If the above conditions are met, you can synchronize with your desktop computer while away from the office in one of three ways: • Create a dial-up connection using a RAS (Remote Access Service) account. If this is the method you want to use, refer to “Creating a Dialup Connection to a Network” on page 3-4. Once the connection has been created and you are connected, select Start > Programs > Communications > ActiveSync in the Clio Start menu. In the ActiveSync dialog box, select a dial-up connection and the name of a computer with which to connect. Once connected to the network, your device will find your desktop computer and initiate synchronization. • Use an Ethernet card to connect to the network. If this is the method you want to use, refer to “Creating a Network (Ethernet) Connection” on page 3-5. Once the connection has been created and you are connected, select Start > Programs > Communications > ActiveSync. Clio User Manual 3-7 Setting Up Remote Networking In the ActiveSync dialog box, select Network Connection as the method to connect and the name of the computer with which to connect. Once connected to the network, your device will find your desktop computer and initiate synchronization. • Create a dial-up connection to a modem connected directly to your computer. The modem must be set up to answer incoming calls. If this is the method you want to use, refer to “Creating a Dialup Connection to a Modem” on page 3-9. Once the connection has been created and you are connected, select Start > Programs > Communications > ActiveSync. In the ActiveSync dialog box, select a dial-up connection the name of a computer from the Connect to list. 3-8 Clio User Manual Creating a Dial-up Connection to a Modem Creating a Dial-up Connection to a Modem To create a dial-up connection to a modem attached to a desktop computer: 1. 2. 3. 4. 5. 6. 7. 8. Perform any relevant prerequisite steps: a. If you are a Windows 95 user, install the Dial-Up Networking Upgrade 1.2. b. If User Level Access is enabled in Dial-Up Networking, create a user account. c. If you are a Windows 98 user, you will need to add a second dial-up adapter. For more information about any of these prerequisites, see ActiveSync Help. Follow the modem manufacturer's directions to install a modem on your desktop computer. Note the telephone number for your desktop computer modem. On your desktop computer, open the Mobile Device folder. Tap File > Communications. Under “Device Connections via Serial Port”, tap your modem in the Ports list. Tap “Enable mobile device connection.” Tap “Enabled” in both “Device Connections via Serial Port” and “Device Connections via Network.” To create the connection, refer to “Connecting to an ISP” on page 3-2. Substitute the phone number you noted in step 3 for the ISP dial-in number. Clio User Manual 3-9 Setting Up Remote Networking Inbox: Sending and Receiving E-mail Messages Use Inbox to send and receive e-mail messages. You can access your e-mail by connecting to a mail server through an Internet or network account or by synchronizing with your desktop computer. This section shows you how to: 1. 1. 2. Set up your mailbox to use a mail server Clio connects and synchronizes with third party electronic mail servers that use the POP and IMAP protocol. Synchronize email with the server Once connections are set up, follow these procedures to synchronize transmission of messages between your PC, or your email server. Send a message Take a few minutes to familiarize yourself with Clio’s messaging facility. Setting up Inbox for Connecting to a Mail Server Note: Inbox does not currently support connecting with proprietary mail protocols such as AOL and MSN. However, you can still gain access to the Internet through these services. There may be third-party programs available that would enable you to send and receive mail through proprietary protocols. 1. 3-10 Obtain the following information from your ISP or network administrator: • POP3 or IMAP4 server name • SMTP host name Clio User Manual Inbox: Sending and Receiving E-mail Messages 2. 3. 4. 5. 6. 7. 8. 9. • User name • Password • Domain name (for network connections only). Select Start > Programs > Pocket Outlook > Inbox. Select Services > Options. On the Services tab, tap Add. Choose “IMAP4 Mail” or “POP3 Mail”, enter a name for the connection, and then tap OK. In the Mail Service Definition dialog box, enter the information from step 1. In Connection, choose the remote connection you want to use. For example, if you are receiving e-mail through a network connection, select “Network Connection.” If you have not created a connection, select “Create new connection”, double-tap the Make New Connection icon, then follow the instructions in the wizard. When finished, tap Inbox in the taskbar and continue. In the Mail General Preferences dialog box, select desired options. In the Mail Inbox Preferences dialog box, select desired options: • In When Getting Messages, choose how you want messages downloaded by default: • “Get full copy of messages” will take up more storage space on your device. • “Only synchronize Inbox folder hierarchy” (IMAP4 only) will speed up the time it takes to download your messages. Clio User Manual 3-11 Setting Up Remote Networking • In When Getting Full Copy, choose whether you want to download file attachments and meeting requests with messages. This setting applies whether you have chosen to download full copies of messages by default, or to selectively download full copies of messages (by opening the message and selecting the Get Full Copy button). Note: If you want to receive meeting requests, your Exchange Server administrator must enable support for Rich Text Format for your account. Ask your administrator if this feature is enabled for you. 10. Tap Finish. The service connection appears on the Installed services box in the Options dialog box. Creating Another Connection You can create other mail connection configurations just as you created your initial ISP or Network Connection. 1. 3-12 Tap Start > Programs > Pocket Outlook > Inbox. a. Tap Services > Options. • From the Connection menu in the POP3 Service Definition Window, select "Create new connection." • Double-tap the Make New Connection icon, then follow the instructions from the Wizard. • When finished, tap Inbox in the taskbar and continue to fill in your POP or IMAP information and other options you prefer. Clio User Manual Inbox: Sending and Receiving E-mail Messages Connecting to a Mail Server You can send and receive messages by connecting directly to your mail server. To do this, either: • Connect to your Internet service provider (ISP) via modem. • Connect to the local area network that includes your mail server, via modem or Ethernet PC card. Downloading Messages from a Mail Server To send and receive e-mail: 1. 2. Verify that the service you want is selected. Tap the Services menu and make sure that the service you want to use has a bullet next to it. Tap Connect. When you connect to the mail server, the messages on your device and mail server are synchronized: • New messages are downloaded to the device Inbox folder • Messages in the Clio Outbox folder are sent • Messages that have been deleted on the server are removed from the Clio Inbox. These folders are stored under the service you created when setting up Inbox. Double-tap a message in the message list to open it. If you read a message and decide that you need the full copy, tap Get Full Copy. Clio User Manual 3-13 Setting Up Remote Networking Disconnecting From a Mail Server To disconnect Inbox from a mail server, tap Services/Disconnect. You must also disconnect your dial-up connection by doubletapping the icon in the status bar and selecting Disconnect. Managing Messages and Folders on a Mail Server By default, messages are displayed in one of four folders in the service you created: Inbox, Deleted (local), Outbox, and Sent. The Deleted (local) folder contains messages that have been deleted on the device. If you are using IMAP4, you may see a Deleted Items folder. This folder is for deleted messages on the server. The behavior of the Deleted and Sent folders depends on the Inbox options you have chosen. To organize messages into additional folders: 1. 2. 3. 3-14 Select File > Folder, then New Folder. Name the new folder. Drag messages into the folder you created. The behavior of the folders you create depends on whether you are using POP3 or IMAP4. Differences in behavior are described below. • If you are using POP3, when you drag messages to a folder you created, the link is broken between the messages and their copies on the mail server. The next time you connect, the mail server will see that the messages are missing from the device Inbox and delete them from the server. This prevents you from having duplicate copies of a message, but it also means that you will no longer have access to the messages you move to the folders you create (from anywhere except the device). • If you are using IMAP4, the folders you create and the messages you move are mirrored on the server. For Clio User Manual Inbox: Sending and Receiving E-mail Messages example, if you move two messages from the Inbox folder to a folder called Family, the server will create a copy of the Family folder and copy the messages into that folder. Therefore, messages are available to you anytime you connect to your mail server, whether it is from your device, laptop computer, or desktop computer. This synchronization of folders occurs when you create a new folder, move messages into a folder, exit the Inbox program, or select Services > Synchronize Folders. If you want to view the messages in a folder while disconnected from your mail server, select the folder and then Services > Offline Folder. Synchronizing E-mail Using ActiveSync Another way to access your e-mail is by synchronizing your device and desktop computer. Using ActiveSync on your desktop computer, you can send and receive e-mail messages by exchanging information between Inbox on your device and Inbox in either Outlook or Exchange on your desktop computer. Clio User Manual 3-15 Setting Up Remote Networking When you synchronize, any changes made on either computer are transferred to the other: • If you have received new messages in Inbox on your desktop computer, the messages are copied to your device. • If you delete a message on the device, it is deleted from the desktop the next time you synchronize. • If you compose and send new e-mail messages on your device, the messages are moved to the desktop computer and sent the next time you synchronize. In addition, changes you’ve made to Calendar, Contacts, and Tasks are updated. If you are receiving e-mail by synchronizing with your desktop computer, the device Inbox is set up by default. However, because e-mail messages are not synchronized by default, you will need to set up ActiveSync Services on your desktop computer to include e-mail messages when synchronizing. To do so, select your device icon in the ActiveSync folder on the desktop and then tap Tools > ActiveSync Options. Tap Options to set options such as how much of a message to download and whether you want attachments included. You will not be able to change these settings from the device. Downloading Messages Using ActiveSync To send and receive e-mail, connect to your desktop computer and initiate synchronization. The way you initiate synchronization depends on how you are connected to your desktop computer and the settings you have chosen in ActiveSync. When you synchronize, the first 100 lines of new messages in Inbox on the desktop computer are copied to the Inbox folder on your device, and messages in the device Outbox folder are sent. Double-tap a message in the message list to open it. 3-16 Clio User Manual Inbox: Sending and Receiving E-mail Messages Managing Messages and Folders Using ActiveSync Messages are stored in one of four folders in the ActiveSync service: Inbox, Deleted (local), Outbox, and Sent. The behavior of the Deleted and Sent folders depends on the Inbox options you have chosen. If you want to store messages in a folder other than Inbox, select File > Folder > New Folder. Create the folder and then drag messages into it. Doing so breaks the link between these messages and their copies on the desktop computer. When you synchronize next, the messages in the folder you created will not be synchronized. In addition, the desktop computer will see that the messages are missing from the device Inbox folder and delete them from the Inbox folder on the desktop so that both Inbox folders match. This prevents you from getting duplicate copies of a message, but it also means that you will no longer have access to the messages you move out of Inbox except from the device. Clio User Manual 3-17 Setting Up Remote Networking Creating an Email Message To create a message: 1. 2. 3. 4. 5. 6. Tap Compose > New Message. In the To field, enter the address of one or more recipients. You can also tap Address Book to select addresses from the Contacts list or an address service. In the Subject field, enter a title for the message. Select the message body and type your message. To attach a file, tap Add Attachment. Tap Send. If you are not connected to your mail server, the message is moved to the Outbox folder and will be sent the next time you connect or synchronize. Getting Help on Connectivity More information on the procedures described here, as well as information on additional procedures, can be found in the following locations: • Online Help on the device. Select Start > Help, then Inbox, Remote Connections, or Synchronization. • Microsoft ActiveSync online Help on the desktop computer. Open the Microsoft ActiveSync icon, then tap Help Topics on the Help menu. Troubleshooting information is also contained there. 3-18 Clio User Manual 4 A Tour of Windows CE Your device comes with a keyboard, touch screen, and stylus. You use the keyboard just as you do on your desktop computer. The stylus and touch screen replace the pointing device; you select and move objects on the screen by tapping and dragging them with the stylus. The stylus also allows you to write on the screen just as you do with a pen and paper. Note: If you have difficulty accurately selecting objects with your stylus, press CTRL+ALT+PLUS (+) to calibrate the screen. Clio User Manual 4-1 A Tour of Windows CE Programs The Windows CE programs that come with your device are stored in ROM (read-only memory) and cannot be removed or lost. You can install additional programs that will be placed in RAM (random access memory). Table 4-1 provides a listing of programs and descriptions. TABLE 4-1 4-2 Programs Bundled with Clio Program Description Calendar Keep track of your appointments and create meeting requests. Contacts Keep track of your friends and colleagues. Inbox Send and receive e-mail. Tasks Keep track of your tasks. Microsoft Pocket Access View ODBC databases and create Access information. Microsoft Pocket Excel View and create Excel documents. Microsoft Pocket PowerPoint Present PowerPoint presentations. Microsoft Pocket Word View and create Word documents. ActiveSync Initiate synchronization with your desktop computer from your device. PC Link Initiate a connection with your desktop computer. Remote Networking Set up connections with other computers or the Internet. Terminal View and download files from a bulletin board or send and receive e-mail. Microsoft Voice Recorder Record your spoken ideas. Microsoft InkWriter Create handwritten or typed notes and drawings. Clio User Manual Programs TABLE 4-1 Note: Programs Bundled with Clio Program Description World Clock Set the date, time, and alarm for your home city or the city you are visiting. Calculator Perform calculations. Solitaire Entertain yourself while on the road. There are many Windows CE programs available, including freeware and shareware. Visit http://www.microsoft.com/windowsce/ or try searching the Web on the keyword “Windows CE” to find additional programs for your device. Clio User Manual 4-3 A Tour of Windows CE Using the Start Menu and Taskbar Use the Start menu to open programs, settings, Help, and recently used documents. Just select Start, and then select the program or item you want to open. In addition to the Start menu, the taskbar contains buttons for the programs you have running, a status area, and a desktop icon (Figure 4-1). FIGURE 4-1 Start Menu and Taskbar 4-4 Clio User Manual Using the Command Bar Using the Command Bar Each program has a command bar located at the top of the program window (Figure 4-2). The command bar displays both menu names and toolbar buttons. Select the slider to switch between displaying toolbar buttons only or menu names and toolbar buttons. You can drag the slider to display the buttons and menu names you want. You can also drag the slider down to move the toolbar buttons under the menus. FIGURE 4-2 Command Bar Finding Files and Exploring the Web To find files on your device, select Start > Programs > Windows Explorer. When you create and save a file on your device, it is stored in a folder called My Documents unless you select another location. You can copy or move a file from one location to another by selecting the file and then using the Copy or Cut and Paste commands on the Edit menu. To view Web pages, select Start > Programs >Internet Explorer: • For pages that are stored on your device, select, File > Open, then tap Browse and locate the file. • For pages on the Internet or an intranet, type a URL in the Address box. Clio User Manual 4-5 A Tour of Windows CE To access Internet or intranet Web pages, you must first set up a connection between your device and the Internet or an intranet. Note: To view the HTML source code of a Web page on your device, tap File > Save As to save the page on your device. Then, in Pocket Word, tap File > Open, select “All Documents” from the Type list, then select the page you saved. Printing Microsoft Pocket Word, Microsoft Pocket Excel, Microsoft InkWriter and Pocket Outlook support printing. In order to print, you will need to connect to a PCL 3 printer. Clio can print directly to IrDA (infrared) capable PCL printers. Choose Print under the File menu within these programs. Select PCL Laser or PCL Inkjet, depending on the type of printer. Choose IRDA as the Port. To print to a serial printer, use the travel dock and connect the printer to the DB9 connector on travel dock. You will need appropriate printer driver support for Windows CE. Contact your printer manufacturer for printer driver support for Windows CE. In addition, you can transfer files to your desktop PC and print them from your desktop. 4-6 Clio User Manual Customizing Clio Customizing Clio Clio uses the standard Microsoft CE Control panel. You can customize and adjust settings on Clio by using the Control Panel. To open the Control Panel, tap Start > Settings > Control Panel. Double tap any icon to bring up properties for that item. A list of icons and their functions follows. For detailed information about the properties of any Control Panel item, tap the “?” in the upper right corner of the dialog box for online Help. Communications Assigns a name to Clio for use in communicating with other computers. You can also specify whether to allow a connection with a desktop computer and the port specifications for that connection. Dialing Specifies dialing settings, including area code, country code, dial type, and the code to disable call waiting. You can store multiple dialing patterns (e.g., “Work”, “Home”, etc.). Clio User Manual 4-7 A Tour of Windows CE Display Changes the background (wallpaper) and appearance (window color scheme) on the Windows CE desktop. You can add a bitmap by copying a .bmp file to your the Windows directory on Clio. Then select this .bmp file in the Appearance tab. Keyboard Toggles character repeat on and off, and specifies delay and rate for repeated characters. Network Selects the network adapter and provides identification of the device to the network. Owner Provides fields in which owner information can be entered. A notes tab also allows other information to be entered and to be displayed when powering on, for example, “Reward for return of this device.” 4-8 Clio User Manual Customizing Clio Password Allows you to set a password to restrict access when Clio emerges from suspend mode. Once set, password access cannot be circumvented: Clio must be reset. Thus, if you set a password, write it down in a retrievable place. Password mode can be toggled on and off. Power Manager Displays battery pack status and provides power management option selections. Alternatively, battery status can be viewed from the status bar. Regional Settings Allows you to customize Clio to display text in a local language, as well as format numbers, currency, time and date for regional preference. Clio User Manual 4-9 A Tour of Windows CE Remove Programs Lists programs that can be removed. Tap to select a program from the list, then tap Remove. Stylus Adjusts how Windows CE recognizes your double taps (as slow or rapid successive taps). You can also recalibrate your screen. System Displays system and memory properties. You can allocate memory between storage memory and program memory. Tablet Mode AutoStart Runs programs automatically when Tablet mode is enabled. By default, CalliGrapher is selected to run when Clio is opened in Tablet Mode. 4-10 Clio User Manual Customizing Clio Volume and Sounds Lets you adjust volume and select sounds to accompany programs, notices, and events. Toggles sound on or off, enables audible clicks and taps (for keys and screen taps). You can also add a sound by copying a .wav file to the Windows directory on Clio. To play the sound, select the .wav file in the Sound tab. World Clock Allows you to specify a Home time zone and Visiting city (from a list that you can customize), local time for each, and the date. You can also set alarms to alert you. Clio User Manual 4-11 A Tour of Windows CE 4-12 Clio User Manual 5 Using the Microsoft Office and Other Companion Programs The Microsoft Office companion programs consist of Microsoft Pocket Word, Microsoft Pocket Excel, Microsoft Pocket Access, and Microsoft Pocket PowerPoint. You can access the Office companion programs by tapping Start > Programs > Office, and then the program you want to open. Other Microsoft companion programs include Voice Recorder and InkWriter. You can access these companion programs by tapping Start > Programs > Accessories, and then the program you want to open. To access Microsoft Pocket Outlook, tap Start > Programs > Pocket Outlook, and then the component program that you want to open. Note: More information on the procedures described in this chapter can be found in online Help on Clio. Tap Start > Help, then the program name. Because programs work in similar ways to their counterparts on the desktop computer, online Help covers basic procedures and the differences between the companion programs and desktop programs. If you need more information on using a companion program, refer to the documentation that came with the desktop version of the program. Clio User Manual 5-1 Using the Microsoft Office and Other Companion Programs Pocket Word: Creating Documents You can use Pocket Word to create documents, such as letters, meeting minutes, and trip reports. You can also use Pocket Word to open and edit documents created in the desktop version of Word. When you are ready to save a document you created or edited, you can save it in a variety of formats, including Pocket Word (.pwd) and Word (.doc). If you plan to send the document through e-mail to someone who will be using Word, not Pocket Word, be sure to save it in the Word (.doc) format. To type text in Pocket Word, tap or tap the screen to place the insertion point and start typing. Use the spelling checker to verify accuracy. You can quickly format the text, using buttons and menu commands. You can format as you go or apply formatting later. You can type text in either Outline view or Normal view, and you can easily switch from one view to the other, using the View menu. Work in Outline view when taking notes in meetings. As shown in Figure 5-1, use the formatting of the templates to highlight main points and provide formatting for detail text. 5-2 Clio User Manual Pocket Word: Creating Documents FIGURE 5-1 Pocket Word: Meeting Minutes Template To take meeting minutes using Pocket Word: 1. 2. 3. 4. 5. Note: Tap File > New > Document from Template. In the Template dialog box, tap Meeting Notes, then OK. Tap File > Save. Enter a name, choose a storage location, then tap OK. Overtype the text in the template with your agenda items and notes. To see more of your document, tap View > Full Screen. Clio User Manual 5-3 Using the Microsoft Office and Other Companion Programs Pocket Excel: Creating Workbooks You can use Pocket Excel to create workbooks, such as expense reports and mileage logs. You can also use Pocket Excel to open and edit workbooks created in the desktop version of Excel. When you are ready to save a workbook you created or edited, you can save it in a variety of formats, including Pocket Excel (.pxl) and Excel (.xls). If you plan to send the document through e-mail to someone who will be using Excel, not Pocket Excel, be sure to save it in the Excel (.xls) format. Pocket Excel provides fundamental spreadsheet tools, such as formulas, functions, sorting, and filtering. You can split panes to easily view different areas of a large worksheet. You can also “freeze” the top and leftmost panes in a worksheet to keep row and column labels or other data visible as you scroll through a sheet. FIGURE 5-2 Pocket Excel: Expense Report Template 5-4 Clio User Manual Pocket Excel: Creating Workbooks To log travel expenses using Pocket Excel: 1. 2. 3. 4. 5. Note: Tap File > New > Workbook from Template. In the Template dialog box, tap Expense Report, then OK. Tap File > Save. Enter a name, choose a storage location, and then select OK. Overtype the text in the template. If your workbook contains sensitive information, you can protect it with a password. To do so, open the workbook, tap File > Password. Every time you open the workbook, you will need to enter the password, so pick one that is easy for you to remember but hard for others to guess. Workbooks with password protection cannot be synchronized. Clio User Manual 5-5 Using the Microsoft Office and Other Companion Programs Pocket Access: Viewing and Creating Data Use Pocket Access to view and update data from Microsoft Access, Microsoft SQL Server, and other ODBC databases on your desktop computer. Simply create the database on your desktop computer and then transfer the data to your device. You can also use Pocket Access to create new databases, tables, and SQL procedures directly on your device. Note: Programmers can use Microsoft ActiveX Data Objects for Windows CE (ADOCE) and Microsoft Visual Basic or Microsoft Visual C++ to develop custom database solutions. For more information, see http://www.microsoft.com/windowsce/. FIGURE 5-3 Pocket Access: Database Table 5-6 Clio User Manual Pocket Access: Viewing and Creating Data To create a new database and table on Clio: 1. 2. 3. 4. 5. 6. Tap Start > Programs > Office > Microsoft Pocket Access. When Pocket Access appears, with the cursor in the Name field, enter a name for the database and tap OK. Double-tap the Create a new table icon. In the Field Name box, enter a name. Under Data Type column head, tap to display a drop-down menu and select a data type: • Text boxes have a size limit of 255 characters. To enter longer notes, select the Memo data type. • To enter numbers with decimal points, select the Float data type. • To enter numbers between -32,768 and +32,767, select the Integer data type. • For smaller numbers, use Small Integer. To limit the size of a field, enter an amount in the Field Size column. Note: Data Type and Field Size cannot be changed after the table is saved. 7. 8. Note: To index the field, tap Yes under the Indexed column head. When all the fields you want for your table have been entered, tap File > Save Table. For tables that do not need to be updated on Clio, mark them as read-only when transferring from the desktop. Clio User Manual 5-7 Using the Microsoft Office and Other Companion Programs Pocket PowerPoint: Showing Presentations Use Pocket PowerPoint to quickly and easily deliver a professional presentation on your device (for one-on-one presentations) or connect your device to a VGA monitor (using a VGA PC Card) and show the presentation to a larger group. Simply create the presentation in Microsoft PowerPoint on your desktop computer and then transfer the presentation to your device. Your Pocket PowerPoint file will include the text, pictures, notes, and layout position of the original Microsoft PowerPoint presentation, but will not include animations or slide transitions. FIGURE 5-4 Pocket Powerpoint: Giving Presentations 5-8 Clio User Manual Pocket PowerPoint: Showing Presentations To show a Powerpoint presentation: 1. 2. 3. 4. 5. Note: Using ActiveSync, copy the presentation from your desktop computer to your device. Tap Start > Programs > Office > Microsoft Pocket PowerPoint. In the Open Presentation dialog box, select the presentation you want to show, and then OK. To change the presentation display and slide advance options, select Tools > Set Up Show. To start the show, tap View > View Show. If you chose Manual in step 4, use the Previous and Next buttons to control the slides. You can tailor a presentation while on the road by adding a new title slide to your presentation. To do so, select Tools > Title Slide. Clio User Manual 5-9 Using the Microsoft Office and Other Companion Programs Voice Recorder and InkWriter Voice Recorder and InkWriter are programs for quickly capturing your ideas, notes, and thoughts. With Voice Recorder, you can record reminders and ideas. With InkWriter, you can take handwritten and typed notes and create drawings. Voice Recorder: Capturing Ideas and Thoughts Quickly capture thoughts, reminders, ideas, and phone numbers with Voice Recorder. FIGURE 5-5 Voice Recorder Window, displaying Recordings 5-10 Clio User Manual Voice Recorder and InkWriter To record and play a recording: 1. 2. 3. 4. 5. Note: Select Start > Programs > Accessories > Microsoft Voice Recorder. Hold your mobile device’s microphone near your mouth or other source of sound. Tap Record (stop sign button). You’ll hear a beep when recording begins. To stop recording, tap Stop (square button). The new recording appears in the recording list. To play a recording, double-tap it in the recording list. To pause playback, tap the Play/Pause button. Tap Play/ Pause again to resume playback. You can play all of your recordings, one after another. Select the recording you want to play first, then tap Control > Play Sequential. The selected recording and following recordings will be played. A short beep will sound between recordings. Clio User Manual 5-11 Using the Microsoft Office and Other Companion Programs InkWriter: Creating Notes and Drawings InkWriter, a text, graphics, and ink processor with Rich Ink technology, makes it easy to write and draw the way you do on paper, but with the benefit of being able to edit and format what you've written and drawn. With InkWriter, you can enter information in the way that's easiest for you. You can type using the keyboard, or you can write and draw directly on the screen using your stylus or pointing device, as shown in Figure 5-6. FIGURE 5-6 Sample InkWriter Document 5-12 Clio User Manual Voice Recorder and InkWriter To create an InkWriter document: 1. 2. 3. Select Start > Programs > Accessories > InkWriter. Create your document: • To write, select View > Writing, then use the stylus like a pen. • To type, select View > Typing, then use the keyboard. • To draw, select View > Drawing, then use the stylus like a pen. You can also create a drawing in Writing view by crossing three of the ruled lines on the first stroke of the drawing. When finished, select File > Save. Note: InkWriter can help you draw perfect circles, rectangles, triangles, and lines. In Drawing view, draw the shape you want and use the Select tool to select it. Then, tap Format > Shapes, and select the shape you want. Clio User Manual 5-13 Using the Microsoft Office and Other Companion Programs Microsoft Pocket Outlook The Microsoft Pocket Outlook program includes Calendar, Contacts, Tasks, and Inbox. Using ActiveSync, you can synchronize information in Microsoft Outlook , Microsoft Schedule+, or Microsoft Exchange on your desktop computer with your device. Each time you synchronize, ActiveSync compares the changes you made on your device and desktop computer and updates both computers. Calendar, Contacts, and Tasks each consists of a card view and list view: • The card view is where you enter or view the details for each entry. • The list view is where you view all entries. With Inbox, you can send and receive e-mail messages, either through synchronization with Outlook or Exchange on your desktop computer or by connecting directly to your mail server through an Internet or network account. Refer to “Inbox: Sending and Receiving E-mail Messages” on page 3-10. You can access Pocket Outlook by tapping Start > Programs > Pocket Outlook, and then an Outlook program. 5-14 Clio User Manual Microsoft Pocket Outlook Calendar: Scheduling Meetings and Appointments Use Calendar to schedule appointments, meetings, and other events (Figure 5-7). You can check your appointments in one of several views (Day, Week, Month, Year, and Agenda) and easily switch among the views by selecting the corresponding toolbar button. FIGURE 5-7 Microsoft Outlook Calendar Clio User Manual 5-15 Using the Microsoft Office and Other Companion Programs To create a new appointment: 1. From any view, tap New Appointment. The Appointment dialog box appears (Figure 5-8). FIGURE 5-8 New Appointment dialog box 2. 3. 4. 5. 6. Note: Enter a description and a location. Select the time and date. To add notes, tap Notes, then select the notes area and enter your notes. To assign the appointment to a category, tap Categories and select a category from the list. Select other desired options, then tap OK when finished. More information on the procedures described in this chapter can be found in online Help on Clio. Tap Start > Help, then the program name. If you need to schedule a meeting with people who use Outlook, Pocket Outlook, or Schedule+, you can use Calendar to schedule the meeting. When attendees receive a meeting request, they can choose to accept or decline the meeting. If they accept, the 5-16 Clio User Manual Microsoft Pocket Outlook meeting is automatically added to their schedule. In addition, their response is automatically sent back to you, and your calendar is updated. Before you can send a meeting request, enter e-mail addresses in Contacts and set up Inbox to send and receive messages. Refer to “Contacts: Tracking Friends and Colleagues” on page 5-18 and “Setting up Inbox for Connecting to a Mail Server” on page 3-10. To create a meeting request: 1. 2. 3. 4. 5. Tap Tools > Options, then choose a mail transport. If you send and receive messages using synchronization, select ActiveSync. If you connect to an ISP or network, select the service you set up in Inbox. Tap File > Make Meeting. Enter meeting information. Select the contacts you want to invite. Select other desired options, then tap OK. Inbox automatically creates a meeting request and sends it to the attendees the next time you connect to your mail server or synchronize with your desktop computer. Note: Your device will remind you about appointments and meetings with an alarm. To change how you are notified, select Tools > Options. Tap Alarm, then Reminder Options. Clio User Manual 5-17 Using the Microsoft Office and Other Companion Programs Contacts: Tracking Friends and Colleagues Contacts maintains a list of your friends and colleagues so that you can easily find the information about them (Figure 5-9). Using the Clio IR port, you can also quickly share Contacts information with other Windows CE-based mobile device users. FIGURE 5-9 Contacts Window To create a new contact: 1. Tap New Contact. The New Contact dialog box appears (Figure 5-10). FIGURE 5-10 New Contact Dialog Box 2. 3. 5-18 Enter a name. Tap Business or Personal and enter information in the appropriate fields. Clio User Manual Microsoft Pocket Outlook 4. Note: Supply an e-mail address if you want to send meeting requests and e-mail messages to this contact. To add a note or assign the contact to a category, tap Notes/Categories, then select the notes area and enter your notes, or select a category from the list. You can send up to 25 contact cards at a time to another Windows CE-based device. Line up the IR ports on the two devices so that they are within three feet (one meter) of one another. In the Contacts list, select the item(s) you want to send, then File, and then Send. If you are receiving items(s), select File and then Receive. Tasks: Keeping a To Do List Use Tasks to keep track of what you have to do. Overdue tasks are displayed in bold (and in red on color devices). FIGURE 5-11 Tasks Window Clio User Manual 5-19 Using the Microsoft Office and Other Companion Programs To create a new task: 1. 2. Tap New Task. The Task dialog box appears (Figure 5-12). FIGURE 5-12 Task Dialog Box 3. 4. 5. 6. 7. Note: 5-20 Enter a description. Select start date, due date, and other information. To add notes, tap Notes, then the notes area. Enter your notes. To assign the task to a category, tap Categories, then select a category from the list. Select other desired options, then tap OK. To mark a task as complete, tap its check box in the Status column. To delete all completed tasks, tap Edit > Delete Completed Tasks. Clio User Manual 6 Using the Bundled Programs In addition to the Microsoft Office companion programs discussed in the previous chapter, Vadem has included several programs specifically designed for Clio. You can access these programs by tapping Start > Programs > Vadem. The bundled programs discussed in this chapter are: • • • • • “Vadem ViewFinder™” on page 6-2. “CalliGrapher® 5.3” on page 6-6. “BSQUARE® bFAX® Pro” on page 6-10. “BSQUARE bUSEFULTM Backup Plus” on page 6-12. “BSQUARE Publisher and Viewer” on page 6-15 Clio User Manual 6-1 Using the Bundled Programs Vadem ViewFinder™ ViewFinder is a program designed to let you quickly view and find your personal information, including contacts, calendar, tasks and notes. You can see what your day looks like in one screen, and you can also globally search across all of your personal information. The contacts, calendar and tasks information in ViewFinder is shared with the Microsoft Pocket Outlook programs so you can enter and view information in either ViewFinder or Pocket Outlook interchangeably. ActiveSync works the same whether you change information in ViewFinder or Pocket Outlook. The personal notes in ViewFinder are stored separately and can be archived and restored to memory or your desktop PC. FIGURE 6-1 ViewFinder Window 6-2 Clio User Manual Vadem ViewFinder™ Viewing, Finding and Editing Your Personal Information To look at your day: 1. 2. 3. Select Start > Programs > Vadem > ViewFinder to launch ViewFinder. Tap Go To Today to see the current day’s calendar and tasks, as well as all your contacts and notes. Tap on the Monthly, Daily or Agenda tabs to change the Calendar view. The Agenda tab shows all future events. To edit information: 1. 2. 3. 4. Double-tap an appointment, task, contact or note to view and edit detailed information. Tap the New button in the Contacts, Calendar, Notes or Tasks window to create a new contact, appointment, note or task, respectively. Create or edit the item in the dialog box that appears. Tap OK after creating or editing a new item. Tap X to close the dialog box without saving changes. To find information: 1. 2. 3. 4. Type the word or text you want to find in the Find window. You may need to tap the Clear Search button if you had searched before. Tap the Begin Search button. ViewFinder displays a filtered view showing all contacts, appointments, tasks and notes containing the search word(s). Tap the Clear Search button when you are done Clio User Manual 6-3 Using the Bundled Programs 5. Select Tools > Options and tap the Find tab to change the find options. The default is to search for all words, ignoring case. Archiving and Restoring Notes To archive your notes: 1. 2. 3. 4. 5. Tap the Clear Search button in the Find window if a search filter is active. Notes cannot be archived or restored if a filter is active. Tap the Note icon to the left of the Notes title in the window. Select Archive… Tap the Change… button if you want to change the default location of the archive. You can archive to RAM memory or to a PC Card or Compact Flash card for persistent storage of notes. Tap the Begin button to create the archive. To restore your notes: 1. 2. 3. 4. 5. 6-4 Tap the Clear Search button in the Find window if a search filter is active. Notes cannot be archived or restored if a filter is active. Tap the Note icon to the left of the Notes title in the window. Select Restore… Tap the Change… button if you want to change the default location of the archive. Tap the Begin button to restore from the archive. Clio User Manual Vadem ViewFinder™ To archive your notes to your PC: 1. 2. 3. First, archive your note to a file in RAM or Flash on Clio, as described above. Establish a partnership with your PC and use ActiveSync to transfer the archive file to your PC. As an alternative, you can email the archive file as an attachment. Use Inbox to send a message to your PC email account, attaching the file, if you are traveling. Additional online help can be viewed by tapping the “?” icon at the top of the ViewFinder screen. Clio User Manual 6-5 Using the Bundled Programs CalliGrapher® 5.3 CalliGrapher is an electronic inking and handwriting recognition program that allows you to write or draw on the Clio screen, then store your writing as ink, or have your writing converted to text. The Recognition mode of CalliGrapher converts your writing – cursive, print or mixed mode – to text for input into any program. The ScreenDraw mode of CalliGrapher captures your writing and drawing as an ink overlay on the Clio screen. You can then save your ink to a file. Starting CalliGrapher You can start CalliGrapher in three ways: • Select the Calligrapher desktop icon. • Select Start > Programs > Vadem > CalliGrapher. • By default, CalliGrapher will start when you put Clio into tablet position. Note: You can change this default setting from the Clio control panel. Open the control panel by selecting Start > Settings > Control Panel, then select Tablet Mode Autostart. When CalliGrapher is running, two icons are displayed in the taskbar (lower right of the screen, as in Figure 6-2): the Recognition mode icon and the ScreenDraw mode icon. The highlight shows which mode is on. 6-6 Clio User Manual CalliGrapher® 5.3 Recognition mode ScreenDraw mode FIGURE 6-2 Recognition mode and ScreenDraw mode Tap the icons to switch between modes or tap the icon that is highlighted to turn its mode off. Press and hold on the icons to open the CalliGrapher pop-up menu. Note: CalliGrapher remembers your preferred settings in Clio’s tablet mode and in Clio’s keyboard mode and switches between them automatically. Recognition Mode In Recognition mode, you can write anywhere on the screen and your handwriting is converted to text (Figure 6-3). The text is then sent to the application which is currently active. Clio User Manual 6-7 Using the Bundled Programs FIGURE 6-3 Recognition mode Here are some tips for using CalliGrapher Recognition mode most effectively: 1. 2. 3. 4. 5. Use the entire screen as your writing surface. You don’t need to limit yourself to the location of the cursor. Characters about ½” - 1” tall are recognized most accurately. You’ll quickly see how to adjust your handwriting for easy translation. Write straight across the screen. Do not write diagonally or let your writing drift. Try not to rest your palm on the screen. The Clio screen is touch sensitive and will interpret your palm as input. You can write several lines of text at a time. Do try to put enough space between words to make them easily separated. You don’t need to pause between words. See Clio’s online Help for a complete list of editing, spellchecking, and text selection tips available in this mode. 6-8 Clio User Manual CalliGrapher® 5.3 ScreenDraw mode In ScreenDraw mode, you may use Clio as a writing tablet or as a drawing surface. Use the stylus to draw lines and free-hand shapes, or make notes in your own handwriting. Your drawing is displayed as the original ink, writing or scribbling without interpretation by the handwriting recognition program. If you make a mistake, draw a line crossing the lines that you wish to erase, and then pause with your stylus resting on the screen. Drawings can be saved in their original state for later use. You may also convert drawings to bitmap (.bmp) or .gif files using the optional Calligrapher ToolKit. Screendraw Menu Options The following application features are found under the Calligrapher menu. Access the menu by pressing and holding, or doubletapping, the CalliGrapher ScreenDraw icon. • To add interest and variation to your InkNote drawings, you can change the Ink Width and Ink Color applied to your drawing. Choose from 9 ink colors, and a variety of ink widths. Ink options are found by double-tapping the Calligrapher ScreenDraw icon to bring up the Calligrapher menu. From the menu, choose Options/Ink. • To erase a drawing, select Clear Ink from the menu. • To save an ink note, select Save InkNote. Save the ink note using any name you choose, but preserve the .ink extension. • To convert ink to text, select Recognize Ink. (The conversion process may not work effectively with freehand drawings.) Clio User Manual 6-9 Using the Bundled Programs BSQUARE® bFAX® Pro BSQUARE’s bFAX Pro lets you send and receive faxes. It works with both the built-in Clio modem and PC Card modems. bFAX Pro is fully integrated with the Contacts database to make sending to recipients easy and quick. You can fax documents created in Pocket Word, Pocket Excel, Contacts, or any other Windows CE application that supports printing. You can customize the cover page with your company logo and information. You can also bundle fax jobs for sending later in a single, money-saving connection. Refer to Figure 6-4. FIGURE 6-4 bFAX Window 6-10 Clio User Manual BSQUARE® bFAX® Pro Sending a Fax via the Built-In Modem 1. 2. 3. 4. 5. 6. 7. 8. 9. 10. Attach an analog phone line to the modem jack. Select Start > Programs > Vadem > BSQUARE bFAX Pro. Select Options > Communications… Choose Built-in Modem on COM5: in the “Modem To Use” field. This option will be remembered the next time you fax. Select Edit > Add Recipient… A dialog box appears in which you can add recipients. Tap the Contacts button to see a list of fax numbers from your Contacts database. Check off the recipients you want to add and tap OK. Double-tap the Default Cover Page in the Document window to edit it in Pocket Word. Select Edit > Add Document… to add other documents to the fax. Select Fax > Send Fax… Choose your dialing location and set the other dialing options. Tap the Dial button to begin. Receiving a Fax 1. 2. 3. 4. 5. Attach an analog phone line to the modem jack. Select Start > Programs > Vadem > BSQUARE bFAX Pro. Select Fax > Receive Fax… Choose a file name and location to save the fax. It will be stored in tif format. Tap OK. bFax will wait for a call and receive the fax. Clio User Manual 6-11 Using the Bundled Programs BSQUARE bUSEFUL Backup Plus TM Avoid data loss on your Clio. The bUSEFULTM Backup gives you peace of mind by backing up your device. Starting a bUSEFUL Backup Tap Start > Programs > bSQUARE > bUSEFUL Backup Plus. 1. 2. 3. Select the bUSEFUL wizard to back up your device. Tap Next. Select Back Up the Entire Device (the default) or select the items to back up. Tap Finish. Specify the location to store your backup. a. Tap the Browse button. b. Locate the directory or storage device you wish to use. c. Name the backup file. d. Tap OK. e. Choose a password if you need greater security. Warning: If you lose your password, your file may not be recoverable. 4. Tap OK to begin the backup process. Some Helpful Tips and Tricks about bUSEFUL Backing Up and Restoring When backing up and restoring, do not attempt to complete other tasks on your Clio. This includes synchronizing with the desktop, using other files, or shutting down the device while the backup or restore operation is in progress. Completing other tasks may cause unexpected results. 6-12 Clio User Manual BSQUARE bUSEFULTM Backup Plus Deleting Old Backups Because old backup files can take up a large amount of space, it’s important to delete backups you won’t need. Be sure to check all associated folders: files could be located in the directory where you installed bUSEFUL Backup Plus, or in the My Documents folder. Setting Up a Size Limit for a Backup File Under the Tools/Options-Backup tab, note the option to adjust the size limit per backup file. The default selection is No Size Limit. If you choose to limit the size per backup file, an original .buf (backup file) file will be created along with additional files until the backup is complete. For example, if you choose the limit of 720 KB per backup file, a large backup may have 4 files. The first has the original icon for the .buf file, the second has an extension of.001, then .002, etc. Files other than the original have a “System” icon. If you move the original .buf file to a new location, you must also move the additional backup files to that location or they will not be restored. When backing up large amounts of data, you may receive the message, “There is not enough space available to perform the backup. Do you wish to continue? Yes/No.” If you choose Yes, your backup may not be complete with all data. See Start/ Settings/Control Panel/System - Memory tab to view and adjust the Storage Memory. Not Enough Space to Back Up If you receive the message “There is not enough space to perform the backup”, it’s advisable to copy old backup files to a Compact Clio User Manual 6-13 Using the Bundled Programs Flashcard or to your desktop PC, and reset your device. The results of having low memory may be unpredictable. Restoring Compressed Files If the number of bytes being restored is larger than the total number of bytes, this is due to a backup being compressed more than once. This is typical when using any compression-type application. If you go to the Tools/Option-Backup tab, and disable the Use Compression When Backing Up option, you will notice the numbers will equal when you restore again. Restoring from a Flash Card If you use a flashcard for your backup, and you choose to remove bUSEFUL Backup Plus from your device, you will need to copy the following files to your flashcard in order to restore your backup file: • • • • bUSEFUL Backup Plus.exe Bsqcore.dll Bsqcompress.dll Bsqwizard.dll Note: To see .dll files, go to the Windows folder. Choose View > Options from the menu, then enable Show All Files. Uncheck the Hide file extensions check box. When restoring these files from the flashcard back to your Clio, make sure the files are restored to the Windows folder before launching the application. 6-14 Clio User Manual BSQUARE Publisher and Viewer BSQUARE Publisher and Viewer BSQUARE Publisher and Viewer lets you collect and organize data from your desktop or network into electronic "books" with "chapters" on a desktop machine, and then download the information to your Clio for easy reference while mobile. As an electronic book publisher, bREADY is the easiest, most convenient way to publish and/or read electronic books. bREADY Viewer enables you to view any HTML, text or PocketWord file. Starting and running BSQUARE bREADY Publisher On your Desktop PC computer: 1. 2. 3. 4. 5. 6. 7. 8. Double click the bREADY Publisher Icon. Automatically a new book appears. Go to the File menu and select Book Properties. Enter the book title and author. Single click OK. Go to the Insert menu and select a book component. For example, select Chapter. Create a title for your Chapter. Click OK or Enter. Under Chapter 1, go to the Insert menu and select a characteristic. Go to the Tools menu and select Publish Book. Publish to Device converts the file to a document format readable on your Clio. Click Publish. You can now view the document on your Clio. Now let's use bREADY Viewer on your Clio. Clio User Manual 6-15 Using the Bundled Programs Starting and Running the BSQUARE bREADY Viewer on your Clio The BSQUARE bREADY Viewer displays files in book format on your Clio. You can annotate, bookmark and search a book any book you open in the bREADY Viewer. From the Start menu, select Programs>bSquare>bVIEWER. 2. Tap Book>Open. 3. Select the book you want to read. 4. Tap OK. See the bREADY Viewer online Help for more information about bViewer features. 1. 6-16 Clio User Manual Appendix A Clio Troubleshooting Guide and Tips This section contains useful tips and troubleshooting information for Clio. Be sure to visit the Vadem Home Page, http://www.vadem.com, for a complete list of tips, troubleshooting information and answers to Frequently Asked Questions (FAQs). What should I do if… …the power button won’t turn the device on? • The main battery may not have enough charge to power the device. Plug in the AC adapter, wait a few seconds, and then try pressing the power button again. • DO NOT remove the main battery if the device will not turn on, as you may lose important data. Always try applying AC power using the AC Adapter first. • Typing on the keyboard WILL NOT power on the device if it is off, as with some notebook PCs. You must use the power button located to the right of the display. • Make sure to depress the power button all the way until it clicks, then release the button. • Adjust the contrast—ALT+LESSTHAN (<) or ALT+GREATERTHAN (>), and the brightness —ALT+MINUS () or ALT+PLUS (+). The screen may have been darkened to the point where it appears to be off. Clio User Manual A-1 • After trying the above, make sure the main battery is installed and the battery door is correctly seated and closed securely. There is a safety switch that will not allow the device to operate if the battery door is not correctly snapped into place. • Make sure the memory module cover is seated and screwed down correctly. There is a safety switch that will not allow the device to operate if the memory module cover is not on properly. • If none of the above turns the device on, use the stylus to press the reset button located on the underside of the device, then try to power the device on again. …my screen is dark? • Prolonged exposure to sunlight may cause your Clio’s screen to temporarily darken. This is normal for LCD screens and is not permanent. • Adjust the contrast—ALT+LESSTHAN (<) or ALT+GREATERTHAN (>), and the brightness —ALT+MINUS () or ALT+PLUS (+). The screen may have been darkened to the point where it appears to be off. ...Clio’s Notify button is not working? Make sure you have the correct date and time information in Clio’s World Clock window, and also confirm that you have selected the audio and video alarm options you expect. If these measures don’t work, call Vadem Service at 1-888-GO VADEM. …the system is not responding properly to the stylus taps? • You may need to recalibrate the stylus settings. To do this, tap on Start > Settings > Control Panel, then double-tap on the Stylus icon. A-2 Clio User Manual What should I do if… • Alternatively, you may use the keyboard to access the calibration screen by pressing the CTRL, ALT, and “=” keys simultaneously. • If the CalliGrapher application is active (you can verify this by looking at the taskbar, near the time display, for a pen icon with a blue background), you may need to hold the stylus down until you hear a beep (approximately 1/2 second) before dragging the stylus to move or select an object or text. • Alternatively, you may deactivate the CalliGrapher application by tapping on the pen icon in the taskbar once, making the blue background disappear. To re-enable CalliGrapher, simply tap the icon again, and the blue background will reappear. …my Clio will not respond to screen taps or keystrokes? • Trying powering the device on and off again using the power button. It may have turned off automatically after an idle period. Typing on the keyboard WILL NOT power on the device if it is off, as with some notebook PCs. You must use the power button located to the right of the display. • You may need to reset your device, using the recessed “reset” button located on the bottom of your device. This should only be done when all other attempts to remedy the situation have failed. ... my battery is not holding a charge? Plug the AC adapter into the unit and allow the unit to charge for 8 hours and verify the battery pack charge. If the battery still does not hold the charge, re-seat the battery pack and connect the AC adapter to the unit. Clio User Manual A-3 If the battery still doesn’t charge, you may need to replace the AC adapter or the battery. Call Vadem Service at 1-888-GO VADEM. ...I can’t install the battery? Check for visibly damaged external parts, including battery contact. Review battery installation instructions in the manual ...my Clio doesn’t open and close properly? Check and make sure the battery pack cover is properly placed on the unit. See “Removing or Replacing the Battery Pack” on page 1-22. ...my Clio’s AC adapter is not charging the unit? If you have verified that the AC current is not recharging Clio’s battery, (see “Power Manager Control Panel” on page 1-7) you may need to replace the AC adapter. Contact Vadem Service at 1-888-GO VADEM for a replacement. ...my Clio is not receiving audio? First, go to the Volume& Sound properties in the Control Panel. In the Volume window, make sure the Volume slider is at least a mid-range level of loudness. Verify that Sounds and Clicks are enabled. If you are having trouble receiving sounds from your Microsoft CE applications, select the Sounds window. You’ll note that to enable individual events, you can select sounds and events to alert you. From the Scheme drop-down window, verify that All Sounds, or Windows CE Default is selected. A-4 Clio User Manual What should I do if… ...I can’t insert a PC card into the card slot? First, check to make sure the protective slot card has been removed. If the slot is empty, make sure the PC card is inserted properly (right-side up, contacts facing the unit). Finally, check for damage in the external area by the PC card slot. Call Vadem Service at 1-888-GO VADEM. …I forget my power-on protection password? If you forget your password, you must clear the memory of your Clio to reset the password. Unfortunately, clearing memory will cause ALL data, files, user information, and other settings TO BE LOST. To perform this operation, refer to “Clearing Memory” on page 1-33. TIP: When you synchronize your password protected device to your PC, you will be prompted for the device password during synchronization. If you choose the “save password” option, you will not need to enter your password when connecting your device to the PC. This will allow you to access your device via the PC later even if you forget your password, to retrieve files and synchronize. However, you will still need to clear memory if you forget your password. ....the LCD on my Clio is flickering? First, try adjusting the brightness and contrast. If this does not clear the problem, with Clio’s power on, flex both hinges. Tap and vibrate Clio and the screen. If this does not work, with Clio in open mode, feel for heat just above the right hinge. If Clio feels warm or hot, IMMEDIATELY shut off the unit and call Vadem Service at 1-888-GO VADEM. Clio User Manual A-5 ...my Clio’s battery LED is not working? If Clio’s battery is fully charged, or you are connected to AC power via the AC power adapter, call Vadem Service at 1-888-GO VADEM. ...my Clio’s serial port is not working? Sometimes you’ll need to reset the connection, by resetting your Clio, disconnecting and replacing the serial port cable, or, if connected to your PC, rebooting your machine to recognize Clio. How do I… …minimize an application or window? Tap on the application box on the taskbar. To maximize it, tap on the application box again. …quickly access the desktop? In the lower right corner, there is a small, square desktop icon that looks like a desk pad, paper, and pencil. Tap the icon to access the desktop, and tap it again to return to the last active application window. …create a shortcut to my favorite application or file on the desktop? From the desktop, double-tap on the My Handheld PC icon, and browse to the correct file. Once you find the desired file, tap on it to highlight it, then press Ctrl + C (to copy). Go back to the desktop, and hold down the Alt key while tapping on the screen. This will bring up a small menu. Tap Paste Shortcut. A-6 Clio User Manual How do I… …end an application that is not responding? Press Ctrl + Alt + Del at the same time. The Task Manager box will appear, then you can highlight the non-responsive task, and press End Task. …tell if the Caps Lock is active? Clio displays a blue capital A in a white box inside the taskbar at the bottom of the screen when Caps Lock is active. …access the context menus (right mouse click in Windows 95)? • Simply hold down the ALT key while tapping on the screen. …check battery levels? Go to Start > Settings > Control Panel and double-tap the Power Manager icon. You will see a bar graph that shows capacity, remaining amount, and estimated time remaining as well. Alternatively, you can tap Clio’s Multimedia icon in the taskbar tray. The Power Manager bar graph displays. …find out how much memory I have left for storage and applications? Go to Start > Settings > Control Panel and double-tap the System icon. You will see allocated and in use numbers for both storage and program memory. Clio User Manual A-7 …maximize my battery life? • Use the external AC power adapter whenever possible. This is especially important during high battery drain events, such as when a PCMCIA or Compact Flash card is being used, when the modem is in use, and when connecting and/or synchronizing with your desktop computer. Also, keeping the AC Power plugged in whenever possible ensures your Clio is fully charged and ready to go whenever you are. • Do not let the LED indicator flash for long periods of time. This is a small drain on the battery, but it all adds up! • Do not use the brightest backlight setting, if possible. The backlight consumes the most power. • Shorten the auto-suspend time. Go to Start > Settings > Control Panel and double-tap the Power Manager icon. Once the Power Manager applet is open, change to the Suspend Options tab. You can lower the “Suspend on battery power” setting to as little as 1 minute, and you can also “Suspend while on external power” which will allow the battery to charge faster. • Shorten the time until the backlight dims. Go to Start > Settings > Control Panel and double-tap the Power Manager icon. Once the Power Manager applet is open, change to the Backlight tab. You can lower the dimming setting to as little as 15 seconds. This setting is only in effect while on battery power only. • Turn off sounds you don’t need by going to Start > Settings > Control Panel > Volume & Sounds. Click on the Sounds tab, and all the events that have a sound will be listed in the left hand pane with a speaker icon next to them. Highlight one you won’t need, then change the Event Sound listing to (None). A-8 Clio User Manual Appendix B Hardware Specifications This appendix contains hardware specifications for Clio, including: • • • • • TABLE B-1, “Physical Description of C-1050 Series” TABLE B-2, “Power” TABLE B-3, “Processor and Input/Output” TABLE B-4, “Communications” TABLE B-5, “Expansion” Clio User Manual B-1 TABLE B-1 Physical Description of C-1050 Series Attribute Value Dimensions 8.7 in. x11.25 in.x1 inch (288mm x 222mm x 24.5mm) Weight 3.2 pounds, with main battery pack TABLE B-2 Power Attribute Value Main Battery Pack Lithium Ion Rechargeable Battery Pack, Part Number CA-LI Backup Battery Rechargeable Lithium Coin Cell, built-in DC Jack DC9V @ 1.1A TABLE B-3 Processor and Input/Output Attribute Value CPU NEC MIPS VR4121 RISC processor Keyboard 63-Key QWERTY layout, 16.5mm center-to-center Display CCFT Backlit, 65,000 Color DSTN, 640x480 pixels, .30 dot pitch Memory 32MB SDRAM 24MB ROM Serial Port RS-232 serial port via serial/docking connector Supports data transfer rate up to 115 Kpbps Infrared Transceiver B-2 FIR, SIR IrDA compliant Clio User Manual TABLE B-3 Processor and Input/Output Attribute Value Indicator Lights Green : Fully Charged Battery and AC Power Applied Orange : Battery Charging and AC Power Applied Red : Alarm/Appointment Notification Audio In Omnidirectional microphone (voice quality) Audio Out 1.5” or Speaker that can play standard .wav files Clio User Manual B-3 TABLE B-4 Communications Attribute Value Modem Built-in 56Kbps V.90 data/fax modem and RJ11 connector Compatible with ITU-T Standards Data Modes: V.21 0-300bps, Bell 103 V.22, V.22bis - automode 1200bps, 2400bps V.32 - adaptive rate 4800 - 9.6kbps V.32bis - adaptive rate 4800 - 14.4kbps V.32terbo - adaptive rate 4800 - 19.2kbps V.34 2400-28.8kbps V.90+ adaptive rate 2400bps to 33.6kbps plus 200 bps aux. channel ADSI 2.0 (1200bps) send/receive modulation V.23 - 1200bps/75bps (Minitel) V.8bis negotiation Fax Modes: V.29 9600bps V.29 7200bps V.27ter 4800bps V.27ter 2400bps V.17 14.4kbps with short-train Data Link Layers: Async and HDLC framers V.42, MNP 1-4 error correction V.42bis and MNP compression B-4 Clio User Manual TABLE B-5 Expansion Attribute Value PC Card Type II PC Card slot Compact Flash Type II Compact Flash slot (internal) Serial/Docking RS-232 serial port and DC power port for docking connections Clio User Manual B-5 B-6 Clio User Manual Appendix C Regulatory Information for the C-1050 Series FCC Registration This device complies with Part 15 of the FCC rules. Operation is subject to the following two conditions: (1) this device may not cause harmful interference, and (2) this device must accept any interference received, including interference that may cause undesired operation. Telephone Consumer Protection Act of 1991 The Telephone Consumer Protection Act of 1991 makes it unlawful for any person to use a computer or other electronic device to send any message via a telephone facsimile machine unless such message clearly contains, in a margin at the top or bottom of each transmitted page or on the first page of the transmission, the date and time it is sent and an identification of the business, other entity, or individual sending the message and the telephone number of the sending machine or such business, other entity, or individual. FCC Part 68 Requirements The Federal Communications Commission (FCC) has established Rules which permit this device to be directly connected to the telephone network. Standardized jacks are used for these connections. This equipment should not be used on party lines or coin phones. This equipment complies with Part 68 of the FCC Rules. On the back of the computer is a label that contains, among other information, the FCC registration number and ringer equivalence number (REN) for this equipment. If requested, this information must be provided to the telephone company. This equipment uses the following USOC jacks: RJ11C Clio User Manual C-1 The REN is used to determine the quantity of devices which may be connected to the telephone line. Excessive REN’s on the telephone line may result in the device not ringing in response to an incoming call. In most, but not all areas, the sum of the REN’s should not exceed five (5.0). To be certain of the number of devices that may be connected to the line, as determined by the total REN’s contact the telephone company to determine the maximum REN’s for the calling area. If this equipment causes harm to the telephone network, the telephone company will notify you in advance that temporary discontinuance of service may be required. If advance notice isn’t practical, the telephone company will notify the customer as soon as possible. Also, you will be advised of your right to file a compliant with the FCC if you believe it is necessary. The telephone company may make changes in its facilities, equipment, operations, or procedures that could affect the operation of the equipment. If this happens, the telephone company will provide advance notice in order for you to make the necessary modifications in order to maintain uninterrupted service. If trouble is experienced with this equipment, please contact Vadem for repair and (or) warranty information. If the trouble is causing harm to the telephone network, the telephone company may request you remove the equipment from the network until the problem is resolved. This equipment is designed to be connected to the telephone network or premises wiring using a compatible modular jack which is FCC Part 68 compliant. IC (Industry Canada) This device does not exceed Class B limits for radio noise emissions from digital apparatus set out in the radio interference regulations of Industry Canada. Le present appareil numerique n’emet pas de bruits radioelectriques depassant les limites applicables aux appareils numberiques de la classe B prescrites dans le Reglement sur le brouillage radioelectrique edicte par le ministere des Communications du Canada. UL/CUL Listing This information technology equipment is UL- and CUL-listed for the uses described in this manual. Radio and Television Interference This equipment generates and uses radio frequency energy, and, if not installed and used properly in strict accordance with the manufacturer’s instructions, may cause interference to radio and television reception. This device has been tested and found to comply with the limits for a Class B digital device in accordance C-2 Clio User Manual with the specifications of Part 15 of FCC rules, which are designed to provide reasonable protection against such interference in a residential installation. However, there is no guarantee that interference will not occur in a particular installation. If this device does cause interferences to radio or television reception, which you can determine by monitoring reception when the device is on and off, try to correct the problem with one or more of the following measures. Reorient the receiving antenna. Relocate the device with respect to the receiver. Relocate the device and / or the receiver so that they are on separate branch circuits. If necessary, consult your dealer or and experienced radio / television technician for additional suggestions. You may find the following booklet, prepared by the Federal Communications Commission, helpful: How to Identify and Resolve Radio-TV Interference Problems, Stock No. 004-000-0345-4, U.S. Government Printing Office, Washington, DC 20402. In accordance with Part 15 of the FCC rules, the user is cautioned that any changes or modifications to the equipment described in this manual that are not expressly approved by Vadem, could void the user’s authority to operate the equipment. For Canadian Users NOTICE: The Industry Canada (IC) label identifies certified equipment. This certification means the equipment meets certain telecommunications network protective, operational, and safety requirements. The IC does not guarantee the equipment will operate to the user’s satisfaction. Before installing this equipment, the user should ensure that it is permissible to be connected to the facilities of the local telecommunications company. The equipment must also be installed using an acceptable method of connection. In some cases, the user may extend the company’s inside wiring for single-line, individual service by means of a certified connector assembly (telephone extension cord). The customer should be aware that compliance with the above conditions may no prevent degradation of service in some situations. Currently, telecommunications companies do no allow users to connect their equipment to jacks except in precise situations that are spelled out in tariffing arrangements with those companies. Clio User Manual C-3 Repairs to certified equipment should be made by an authorized Canadian maintenance facility designated by the supplier. Any repairs or alterations made by the user to this equipment, or equipment malfunctions, may give the telecommunications company cause to request the user to disconnect the equipment. Users should ensure for their own protection that the electrical ground connections of the power utility, telephone lines, and internal metallic water pipe system, if present, are connected together. This precaution may be particularly important in rural areas. CAUTION: Users should not attempt to make such connection themselves, but should contact the appropriate electric inspection authority, or electrician, as appropriate. Ringer Equivalence The Ringer Equivalence Number (REN) of this device is 0.4B. Notice: The Ringer Equivalence Number (REN) assigned to each terminal device provides an indication of the maximum number of terminals allowed to be connected to a telephone interface. The termination on an interface may consist of any combination of devices subject only to the requirement that the sum of the Ringer Equivalence Numbers of all the devices does not exceed 5. The equipment uses a CA11A jack. AVIS: L’étiquette d’Industrie Canada identifie le matériel homologué. Cette étiquette certifie que le matériel est conforme à certaines normes de protection, d’exploitation et de sécurité des réseaux de télécommunications. Toutefois, le Ministère n’assure pas que le matériel fonctionnera à la satisfaction de l’utilisateur. Avant d’intaller ce matériel, l’utilisateur doit assurer qu’il soit permis de le raccorder aux installations de l’entreprise locale de télécommunications materiel. Le matériel doit également être installé en suivant une méthode de raccordement acceptée. Dans certains cas, les fils intérieurs de l’entreprise utilisés pour un service individuel à ligne unique peuvent être prolongés au moyen d’un dispositif de raccordement homologué (cordon rallonge téléphonique interne). L’abonné ne doit pas oublier qu’il est possible que la conformité aux conditions énoncées ci-dessus n’empêchent pas la dégradation du service dans certaines situations. Actuellement, les entreprises de télécommunication ne permettent pas que l’on raccorde leur matériel à des jacks d’abonné, sauf dans les cas précis prévus par les tarrifs particuliers de ces entreprises. Les réparations de matériel homologué doivent être effectuées par un centre d’entretien candadien autorisé désigné par le fournesseur. La compagnie de télécommunications peut demander à l’utilisateur de débrancher un appareil à la C-4 Clio User Manual suite de réparations ou de modifications effectuées par l’utilisateur, ou à cause de mauvais fonctionnement. Pour sa propre protection, l’utilisateur doit assurer que tous les fils de mise à la terre de la source d’énergie électrique, des lignes téléphoniques et des canalisations d’eau métalliques, s’il y en a, soient raccordés ensemble. Cette précaution pêut être particulièrement importante dans les régions rurales. AVERTISSEMENT: L’utilisateur ne doit pas tenter de faire ces raccordements luimême; il doit avoir recours a un service d’inspection des installations électriques, ou a électricien, selon lecas. Clio User Manual C-5 C-6 Clio User Manual Appendix D Supported PC Cards TABLE D-1 lists PC Card (PCMCIA) peripherals that have been tested for use with Windows® CE™. For the most up to date information on compatible PC Cards, go to http://www.microsoft.com/windowsce. TABLE D-1 Supported PC Cards Hardware Category Company Name Product Name Miscellaneous Socket Communications Page Card Miscellaneous Socket Communications Serial I/O Modem/Analog Apex Data Mobile Plus V.34.33.6Kbps modem Modem/Analog Compaq 288 Fax Modem Modem/Analog Compaq Speedpaq 288 Telephony Modem Modem/Analog EXP DataFax 1414 Modem/Analog EXP ThinFax 1414LXM Modem/Analog Hayes Microcomputer Optima 14.4 + FAX for PCMCIA Modem/Analog Hayes Microcomputer Optima 28.8 + FAX for PCMCIA Modem/Analog Microcom TravelCard 28.8P Modem/Analog Microcom TravelCard FAST 28.8P Modem/Analog Motorola Montana 33.6 Modem/Analog Practical Peripherals ProClass (PC144T2) Clio User Manual D-1 TABLE D-1 Supported PC Cards (Continued) Hardware Category Company Name Product Name Modem/Analog Practical Peripherals ProClass (PC288T2) Modem/Analog Simple Technology 33.6 Communicator Modem/Analog Motorola SecurID V.34 Modem/Analog U.S. Robotics/Megahertz PC Card Modem (XJ1144) Modem/Analog U.S. Robotics/Megahertz PC Card Modem (XJ2288) Modem/Analog U.S. Robotics/Megahertz SP1336 Modem/Analog U.S. Robotics/Megahertz Sportster 14.4 PC Card FaxModem Modem/Analog U.S. Robotics/Megahertz Sportster 28.8 V.34 PC Card FaxModem Modem/Analog U.S. Robotics/Megahertz XJ/CC1336 Modem/Analog Xircom CreditCard Modem 28.8 Modem/Analog Xircom CreditCard Modem 33.6 Secondary Storage /Memory IBM Calluna Microdrive PC Card Type II Hard Disk Drive Storage/Flash Memory MagicRam Turbo Flash Memory Storage/Flash Memory PNY Electronics VersaCard P-CF004-PA Storage/Flash Memory PNY Electronics VersaCard P-CF008-PA Storage/Flash Memory PNY Electronics VersaCard P-CF015-PA Storage/Flash Memory SanDisk 10 MB FlashDisk Storage/Flash Memory SanDisk 2 MB FlashDisk Storage/Flash Memory SanDisk CompactFlash 2MB Storage/Flash Memory SanDisk CompactFlash 4MB Storage/Flash Memory SanDisk CompactFlash 6MB Storage/Flash Memory SanDisk CompactFlash 8MB Storage/Flash Memory SanDisk CompactFlash 10MB Storage/Flash Memory SanDisk CompactFlash 15MB Storage/Flash Memory Simple Technology PCMCIA ATA Flash 12MB Storage/Flash Memory Simple Technology PCMCIA ATA Flash 4MB D-2 Clio User Manual TABLE D-1 Supported PC Cards (Continued) Hardware Category Company Name Product Name Storage/Flash Memory Simple Technology PCMCIA ATA Flash 8MB Storage/Flash Memory Verbatim 20 MB Clio User Manual D-3 D-4 Clio User Manual Appendix E Limited Warranty HARDWARE: Vadem ("Vadem") warrants to the original purchaser ("Customer”) that this product will be free from defects in workmanship and materials, under normal use, for one year from the date of original purchase from Vadem or its authorized retailer. If this product does not operate as warranted above during the applicable warranty period, Vadem may, at its option and expense, replace the defective product or part with a comparable product or part, repair the defective product or part, or, if neither replacement nor repair is reasonably available, refund to Customer the purchase price for the defective product or part. Proof of date of original purchase will be required. Replacement products or parts may be new or reconditioned. Vadem will warrant replaced or repaired products or parts 'and hardware upgrades to which Customer is entitled by agreement between Customer and Vadem for a period of ninety (90) days from shipment of such product, part or upgrade, or through the end of the original warranty, whichever is longer. All products or parts that are replaced become the property of Vadem. Accessory products, if any, are not covered under this Limited Warranty. Vadem shall not be responsible for Customer's software, firmware, or other information, contained in, stored on, or integrated with any products returned to Vadem for repair, whether under warranty or not. SOFTWARE: Vadem warrants to Customer that the software programs licensed from it will perform in substantial conformance to the program specifications therefor for a period of ninety (90) days from the date of original purchase from Vadem or its authorized retailer. Vadem warrants the media containing software against failure during the warranty period. Proof of date of purchase will be required. No updates are provided. The sole obligation of Vadem with respect to this express warranty shall be (at the discretion of Vadem) to refund the purchase price paid by Customer for any defective software products, or to replace any defective media with software which substantially conforms to applicable Vadem published specifications. Vadem makes no warranty or representation that its software products will meet your requirements or will work in combination with any hardware or applications software products provided by third parties, that the operation of the software products will be uninterrupted or error free, or that all defects in the software products will be corrected. Clio User Manual E-1 OBTAINING WARRANTY SERVICE: Customer must contact Vadem’s Technical Support or Customer Service facilities within the applicable warranty period to obtain warranty service authorization. Dated proof of original purchase will be required. Vadem is not responsible for Customer products or parts received without warranty service authorization. Repaired or replacement products serviced under warranty will be shipped to Customer at Vadem's expense. The repair and replacement process for products or parts in locations outside of the United States will vary dependent on Customer's location. Products or parts shipped by Customer must be sent prepaid and packaged appropriately for safe shipment; obtaining insurance for packages is advisable. In the United States, if such products or parts are not shipped by Customer to arrive at Vadem within thirty (30) days from the date warranty service authorization is provided, Customer will pay Vadem the price of such product or part at the product’s then current price. WARRANTIES EXCLUSIVE: IF THIS PRODUCT DOES NOT OPERATE AS WARRANTED ABOVE, CUSTOMER'S SOLE REMEDY FOR BREACH OF THAT WARRANTY SHALL BE REPLACEMENT OR REPAIR OF THE PRODUCT OR PART OR REFUND OF THE PURCHASE PRICE PAID, AT THE OPTION OF VADEM AND DEPENDENT UPON PRIOR AUTHORIZATION. TO THE FULL EXTENT ALLOWED BY LAW, THE FOREGOING WARRANTIES AND REMEDIES ARE EXCLUSIVE AND ARE IN LIEU OF ALL OTHER WARRANTIES, TERMS, OR CONDITIONS, EXPRESS OR IMPLIED, EITHER IN FACT OR BY OPERATION OF LAW, STATUTORY OR OTHERWISE, INCLUDING WARRANTIES, TERMS, OR CONDITIONS OF MERCHANTABILITY, FITNESS FOR A PARTICULAR PURPOSE, AND SATISFACTORY QUALITY. VADEM NEITHER ASSUMES NOR AUTHORIZES ANY OTHER PERSON TO ASSUME FOR IT ANY OTHER LIABILITY IN CONNECTION WITH THE SALE, INSTALLATION, MAINTENANCE OR USE OF ITS PRODUCTS. Vadem shall not be liable under this warranty if its testing and examination disclose that the alleged defect in the product does not exist or was caused by Customer's or any third person's misuse, neglect, improper installation or testing, unauthorized attempts to repair or modify, or any other cause beyond the range of the intended use, or by accident, fire, lightning, or other hazards or acts of God. This warranty does not cover physical damage to the surface of the product, including cracks or scratches on the LCD. This warranty does not apply when the malfunction results from the use of this product in conjunction with accessories, other products, or ancillary or peripheral equipment and Vadem determines that there is no fault with the product itself. This warranty does not apply to the failure of the product or part due primarily to any communication service Customer may subscribe to or use with the product. E-2 Clio User Manual LIMITATION OF LIABILI'IY: TO THE FULL EXTENT ALLOWED BY LAW VADEM ALSO EXCLUDES FOR ITSELF AND ITS SUPPLIERS ANY LIABILITY, WHETHER BASED IN CONTRACT OR TORT (INCLUDING NEGLIGENCE), FOR INCIDENTAL, CONSEQUENTIAL, INDIRECT, SPECIAL, OR PUNITIVE DAMAGES OF ANY KIND, OR FOR LOSS OF REVENUE OR PROFITS, LOSS OF BUSINESS, LOSS OF INFORMATION OR DATA, OR OTHER FINANCIAL LOSS ARISING OUT OF OR IN CONNECTION WITH THE SALE, INSTALLATION, MAINTENANCE, USE, PERFORMANCE, FAILURE, OR INTERRUPTION OF THIS PRODUCT, EVEN IF VADEM OR ITS AUTHORIZED RESELLER HAS BEEN ADVISED OF THE POSSIBILITY OF SUCH DAMAGES, AND LIMITS ITS LIABILITY TO REPLACEMENT OR REPAIR OF THE PRODUCT OR PART, OR REFUND OFTHE PURCHASE PRICE PAID, AT THE OPTION OF VADEM. THIS DISCLAIMER OF LIABILITY FOR DAMAGES WILL NOT BE AFFECTED IF ANY REMEDY PROVIDED HEREIN SHALL FAIL OF ITS ESSENTIAL PURPOSE. UNITED STATES GOVERNMENT LEGEND: The software provided with the product is commercial in nature and developed solely at private expense. The software is delivered as “Commercial Computer Software" as defined in DFARS 252.227-7014 (June 1995) or as a commercial item as defined in FAR 2.101(a) and as such is provided with only such rights as are provided in the license agreement, which is Vadem’s standard commercial license for the Software. Technical data is provided with limited rights only as provided in DFAR 252.227-7015 (Nov. 1995) or FAR 52.227-14 (June 1987), whichever is applicable. GOVERNING LAW: This Limited Warranty shall be governed by the laws of the State of California, U.S,A. Some countries, states, or provinces do not allow the exclusion or limitation of implied warranties or the limitation of incidental or consequential damages for certain products supplied to consumers or the limitation of liability for personal injury, so the above limitations and exclusions may be limited in their application to you. When the implied warranties are not allowed to be excluded in their entirety, they will be limited to the duration of the applicable written warranty. This warranty gives you specific legal rights which may vary depending on local law. Vadem 1960 Zanker Road San Jose, CA 95112 (408) 467-2100 Clio User Manual E-3 E-4 Clio User Manual Appendix F Vadem Software License Agreement Vadem™ Software License Agreement CalliGrapher® 5.3, developed by ParaGraph®, a Division of Vadem Vadem ViewFinder™ 1.1, developed by Vadem. Vadem Internet Connection Wizard, developed by Vadem. System software, developed by Vadem. 1960 Zanker Road, San Jose, CA 95112 Copyright © 1997, 1998, 1999 Vadem. All Rights Reserved. VADEM AND PARAGRAPH®, A DIVISION OF VADEM (hereafter collectively known as "Vadem") IS WILLING TO LICENSE THE USE OF THE SOFTWARE PRODUCTS DESCRIBED HEREIN ONLY UPON THE ACCEPTANCE BY LICENSEE (“you” or “your”) OF ALL OF THE TERMS CONTAINED IN THIS LICENSE AGREEMENT ("Agreement"). READ THE TERMS AND CONDITIONS OF THIS LICENSE CAREFULLY. YOUR USE OF THE LICENSED SOFTWARE INDICATES YOUR CONSENT AND AGREEMENT TO ALL OF THE LICENSE TERMS SET FORTH BELOW. IF YOU DO NOT CONSENT AND AGREE TO BE BOUND BY THE TERMS OF THIS AGREEMENT, RETURN THE UNUSED SOFTWARE PRODUCT WITHIN 30 DAYS OF THE DATE OF PURCHASE TO THE PLACE OF PURCHASE FOR A FULL REFUND. 1. Definitions. The CalliGrapher software, Vadem ViewFinder software, Vadem Internet Connection Wizard, and the system software (e.g., drivers, firmware) in binary form (hereafter "Software") licensed pursuant to this Agreement is provided to you for use subject to Vadem's copyright and other intellectual property rights. Clio User Manual F-1 2. License Grant and Notices. Vadem and its licensors (if any) at all times shall retain exclusive ownership of the Software. Vadem hereby grants to you a personal, non-exclusive license to use the Software on a single System, and to make a single copy of the Software for archive purposes. No license is granted to you for any other purpose. The above license is subject to the following limitations, breach of which shall terminate this Agreement: (i) you agree not to reverse engineer, disassemble or modify the Software; (ii) you agree not to remove, alter or obscure proprietary notices of Vadem or its suppliers; (iii) you agree not to use Vadem's or Vadem's suppliers' name, logos or trademarks except as necessary to affix the appropriate copyright notices required in this Agreement. 3. Transfer Restrictions. You may permanently transfer the right to use any licensed copy of the Software and all licenses and rights in that copy of the Software granted to you under this Agreement to a third party provided that: (i) such transferee agrees to accept the terms and conditions of this Agreement, and (ii) you transfer all Software to such transferee and retain no copies. Except as provided in this Section, you may not transfer or assign this Agreement or any of your rights or obligations under this Agreement, in whole or in part. 4. Export Restrictions. You may not export or reexport any Software except in full compliance with all United States laws and regulations, executive orders and the like, including in particular Parts 740, 742 and 744 of the Export Administration Regulations of the U.S. Department of Commerce. No Software may be exported or reexported into (or to a national or resident of) any country to which the U.S. embargoes goods, or to anyone on the U.S. Treasury Department's list of Specially Designated Nationals or the U.S. Commerce Department's Table of Denial Orders. 5. Enforcement Of Terms; Termination. If you fail to comply at all times with the terms of Agreement, Vadem and/or its licensors may pursue all available legal remedies to enforce this Agreement, and Vadem may, at any time after your default under the terms of this Agreement, terminate this Agreement and all licenses and rights granted to you hereunder. You agree that Vadem's licensors referenced in the Software are third-party beneficiaries of this Agreement, and may enforce this Agreement as it relates to their intellectual property. You further agree that, if Vadem terminates this Agreement for your default, you will, within thirty (30) days after any such termination, deliver to Vadem or render unusable all Software originally provided to you hereunder and any copies thereof embodied in any medium. 6. Governing Law. This Agreement shall be governed by and interpreted in accordance with the laws of the State of California, excluding its choice of law rules. F-2 Clio User Manual 7. Restricted Rights, U.S. Government End Users. The Software is a "commercial item", as that term is defined at 48 C.F.R. 2.101 (Oct. 1995), consisting of "commercial computer software" and "commercial computer software documentation," as such terms are used in 48 C.F.R. 12.212 (Sept. 1995). Consistent with 48 C.F.R. 12.212 and 48 C.F.R. 227.7202-1 through 227.7202-4 (June 1995), all U.S. Government End Users acquire the Software with only those rights set forth herein. 8. Limited Warranty. Vadem warrants that the media containing the Software, if provided by Vadem, is free from defects in material and workmanship and will so remain for ninety (90) days from the date you acquired the Software. Your sole remedy, for any breach of this warranty shall be, in Vadem's sole discretion: (i) to replace your defective media; or (ii) if the above remedy is impracticable, to refund the license fee you paid for the Software. Replaced Software shall be covered by this limited warranty for the period remaining under the warranty that covered the original Software, or if longer, for thirty (30) days after the date of shipment to you of the replaced Software. You must inform Vadem of a defect in media during the applicable warranty period and provide evidence of the date you acquired the Software for this warranty to be effective. APART FROM THE FOREGOING, VADEM MAKES NO OTHER WARRANTY, EXPRESS OR IMPLIED, AND EXPRESSLY DISCLAIMS THE IMPLIED WARRANTIES OF MERCHANTABILITY, FITNESS FOR A PARTICULAR PURPOSE, AND NONINFRINGEMENT OF THIRD PARTY RIGHTS. 9. Limitation Of Liability. IN NO EVENT SHALL VADEM OR IT LICENSORS BE LIABLE TO YOU FOR ANY SPECIAL, CONSEQUENTIAL, INCIDENTAL OR INDIRECT DAMAGES OF ANY KIND (INCLUDING WITHOUT LIMITATION THE COST OF COVER, DAMAGES ARISING FROM LOSS OF DATA, USE, PROFITS OR GOODWILL), WHETHER OR NOT VADEM HAS BEEN ADVISED OF THE POSSIBILITY OF SUCH LOSS, HOWEVER CAUSED AND ON ANY THEORY OF LIABILITY ARISING OUT OF THIS AGREEMENT. THESE LIMITATIONS SHALL APPLY NOTWITHSTANDING THE FAILURE OF ESSENTIAL PURPOSE OF ANY LIMITED REMEDY. VADEM'S LIABILITY ARISING OUT OF THIS AGREEMENT AND/OR YOUR USE OR POSSESSION OF THE SOFTWARE, INCLUDING WITHOUT LIMITATION ANY AND ALL CLAIMS COMBINED, WILL NOT EXCEED THE AMOUNT OF THE LICENSE FEE FOR THE SOFTWARE PROVIDED UNDER THIS AGREEMENT. This provision shall survive the expiration or termination of this Agreement. Clio User Manual F-3 10. Laws Governing Warranties And Liability. The law(s) of a jurisdiction may define the scope of warranty to be provided for products or the manner in which a supplier's liability may be limited, and such law(s) shall govern this Agreement only to the extent a party protected by such law(s) cannot waive the protection thereof by contract. 11. Complete Agreement. This Agreement supersedes all proposals, oral or written, all negotiations, conversations, discussions and all past course of dealing between you and Vadem relating to the Software or the terms of its license to you, and may only be modified by written amendment signed by you and an authorized representative of Vadem. 12. Copyright. Some portions of system software are Copyright (c) 1995 - 1998 Microsoft Corporation. All rights reserved. Copyright (c) 1995 - 1997 NEC Corporation. All rights reserved. Copyright (c) 1997 - 1999 Vadem. All rights reserved. Copyright (c) 1997 - 1999 Seiko Epson Corp. All rights reserved. F-4 Clio User Manual Appendix G BSQUARE® EULA BSQUARE® bFAX® Pro and BSQUARE ® bUSEFULTMBackup Plus and bREADYTM EULA IMPORTANT-READ CAREFULLY: This End User License Agreement ("EULA") is a legal agreement between you (either an individual or a single entity) and BSQUARE Corporation ("Manufacturer") the manufacturer of bFax Pro, bUSEFULTM Backup Plus and bREADYTM (“SOFTWARE”). The SOFTWARE includes computer software, the associated media, any printed materials, and any "online" or electronic documentation. By installing, copying or otherwise using the SOFTWARE, you agree to be bound by the terms of this EULA. If you do not agree to the terms of this EULA, the Manufacturer is unwilling to license the SOFTWARE to you. In such event, you may not use or copy the SOFTWARE and you should contact the Manufacturer. SOFTWARE LICENSE. The SOFTWARE is protected by copyright laws and international copyright treaties, as well as other intellectual property laws and treaties. The SOFTWARE is licensed, not sold. GRANT OF LICENSE. This EULA grants you the following rights: • Software. You may use the SOFTWARE on a single System. • Back-up Copy. You may make a single copy of the SOFTWARE for use solely for archival purposes with the System. DESCRIPTION OF OTHER RIGHTS AND LIMITATIONS. • Limitations on Reverse Engineering, Decompilation and Disassembly. You may not reverse engineer, decompile, or disassemble the SOFTWARE, except and only to the extent that such activity is expressly permitted by applicable law notwithstanding this limitation. • Single System. The SOFTWARE is licensed for a single System. • Rental. You may not rent or lease the SOFTWARE. • Software Transfer. You may permanently transfer all of your rights under this EULA only as part of a sale or transfer provided you retain no copies, Clio User Manual G-1 • you transfer all of the SOFTWARE (including all component parts, the media, any upgrades or backup copies, and this EULA), and the recipient agrees to the terms of this EULA. If the SOFTWARE is an upgrade, any transfer must include all prior versions of the SOFTWARE. Termination. Without prejudice to any other rights, Manufacturer may terminate this EULA if you fail to comply with the terms and conditions of this EULA. In such event, you must destroy all copies of the SOFTWARE and all of its component parts. COPYRIGHT. All title and copyrights in and to the SOFTWARE (including but not limited to any images, photographs, animations, video, audio, music, text and "applets," incorporated into the SOFTWARE), the accompanying printed materials, and any copies of the SOFTWARE, are owned by BSQUARE Corporation or its suppliers. You may not copy the printed materials accompanying the SOFTWARE. All rights not specifically granted under this EULA are reserved by BSQUARE Corporation. LIMITED WARRANTY. • Limited Warranty. Manufacturer warrants that the SOFTWARE will perform substantially in accordance with the accompanying written materials for a period of ninety days from the date of receipt. Any implied warranties on the SOFTWARE are limited to ninety days. Some states/jurisdictions do not allow limitations on duration of an implied warranty, so the above limitation may not apply to you. • Customer Remedies. Manufacturer's and its suppliers' entire liability and your exclusive remedy shall be, at Manufacturer's option, either (a) return of the price paid, or (b) repair or replacement of the SOFTWARE that does not meet the above Limited Warranty and which is returned to Manufacturer with a copy of your receipt. This Limited Warranty is void if failure of the SOFTWARE has resulted from accident, abuse, or misapplication. Any replacement SOFTWARE will be warranted for the remainder of the original warranty period or thirty days, whichever is longer. • No Other Warranties. EXCEPT AS EXPRESSLY PROVIDED IN THE LIMITED WARRANTY SECTION ABOVE, THE SOFTWARE IS PROVIDED TO THE END USER “AS IS" WITHOUT WARRANTY OF ANY KIND, EITHER EXPRESSED OR IMPLIED, INCLUDING, BUT NOT LIMITED TO, WARRANTIES OF NON-INFRINGEMENT, MERCHANTABILITY, AND/OR FITNESS FOR A PARTICULAR PURPOSE. THE ENTIRE RISK OF THE QUALITY AND PERFORMANCE OF THE SOFTWARE IS WITH YOU. • No Liability for Consequential Damages. NEITHER MANUFACTURER NOR MANUFACTURER'S SUPPLIERS SHALL BE HELD TO ANY LIABILITY FOR ANY DAMAGES SUFFERED OR INCURRED BY G-2 Clio User Manual • THE END USER (INCLUDING, BUT NOT LIMITED TO, GENERAL, SPECIAL, CONSEQUENTIAL OR INCIDENTAL DAMAGES INCLUDING DAMAGES FOR LOSS OF BUSINESS PROFITS, BUSINESS INTERRUPTION, LOSS OF BUSINESS INFORMATION AND THE LIKE), ARISING FROM OR IN CONNECTION WITH THE DELIVERY, USE OR PERFORMANCE OF THE SOFTWARE. Attorney's Fees. IN THE EVENT ANY PARTY TO THIS EULA SEEKS ASSISTANCE OF LEGAL COUNSEL TO ENFORCE THIS EULA OR TO MAINTAIN OR DEFEND ANY CAUSE OF ACTION ARISING OUT OF OR RELATED TO THIS EULA, THEN THE PREVAILING PARTY IN ANY SUCH ACTION, DEMAND, ARBITRATION OR DEFENSE SHALL BE ENTITLED TO RECOVER FROM THE OTHER SAID PREVAILING PARTY'S REASONABLE ATTORNEY'S FEES INCURRED, TOGETHER WITH COSTS AND EXPENSES. U.S. GOVERNMENT RESTRICTED RIGHTS. The SOFTWARE and documentation are provided with RESTRICTED RIGHTS. Use, duplication, or disclosure by the Government is subject to restrictions as set forth in subparagraph (c)(1)(ii) of the Rights in Technical Data and Computer Software clause at DFARS 252.227-7013 or subparagraphs (c)(1) and (2) of the Commercial Computer Software-Restricted Rights at 48 CFR 52.227-19, as applicable. Manufacturer is BSQUARE Corporation /3633 - 136th Place SE, Suite 100/Bellevue WA 98006. This EULA is governed by the laws of the State of Washington, United States of America. Should you have any questions concerning this EULA, please contact the Manufacturer. Clio User Manual G-3 G-4 Clio User Manual Appendix H Software Programs Clio contains a variety of specially-developed applications. These software programs, developed by Vadem and its partners, are shown in the table below. TABLE H-1 Vadem Bundled Programs Program Description Vadem ViewFinder View and find contacts, calendar, tasks and notes in one screen ParaGraph® Calligrapher ® Natural hand recognition software that can store handwriting as ink or convert it to typed text. Citrix ICA Thin Client Run full featured programs from a Citrix server using thin client Internet communications setup wizard Setup wizard for remote mail servicce or ISP Contrast and brightness icon Enables screen brightness and contrast adjustment in tablet mode. WesttekTM JetCetTM Print standard edition Complete printing solution necessary to support the travelling professional Westtek PowerPointTM Companion Converts Microsoft Pocket Word documents to Microsoft Pocket PowerPoint BSQUARE® bUSEFUL Backup Plus Avoid potential data loss by backing up all data or portions of data on a device in under a minute. BSQUARE® bFAX Pro Sends and receives fax through builtin modem or PC card modem TM Clio User Manual TM H-1 The following table lists the Microsoft CE programs installed on Clio. These programs are stored in ROM and cannot be erased. TABLE H-2Microsoft CE Programs Program Description Calendar Keep track of your appointments and create meeting requests. Contacts Keep track of your friends and colleagues. Inbox Send and receive email. Tasks Keep track of your tasks. Microsoft Pocket Access View ODBC databases and create Access information. Microsoft Pocket Excel View and create Excel documents. Microsoft Pocket PowerPoint Present PowerPoint presentations. Microsoft Pocket Word View and create Word documents. ActiveSync Initiate synchronization with your desktop computer from your device. PC Link Initiate a connection with your desktop computer. Remote Networking Set up connections with other computers or the Internet. Terminal View and download files from a bulletin board or send and receive email. Microsoft Voice Recorder Record your spoken ideas. InkWriter Create handwritten or typed notes and drawings. World Clock Set the date, time, and alarm for the home city and the city you are visiting. Calculator Perform calculations. Solitaire Entertain yourself while on the road. For information on available Windows CE programs, including freeware and shareware, visit http://www.microsoft.com/ windowsce/ or search the Web on keyword “Windows CE.” H-2 Clio User Manual Glossary AC adapter A connector that provides external power (not battery power) to your device. See “Attaching to AC Power” on page 1-3 for information about installation and use. ActiveSync (formerly known as Windows CE Services) The desktop computer program used to synchronize, transfer, and manage data and files between your device and desktop computer. appointment An entry in Calendar. attachment An item included with an e-mail message. backup file A duplicate copy of the program data on your device. This file does not include settings and information stored in ROM, such as factory-installed software. Use your backup file to return your device to its previous state if your device data is damaged or destroyed, or if you have performed a full reset. baud rate The speed at which a modem transmits data. This is set at 19200 by default on your device. calibrate The process that determines how the stylus and touch screen interact. You can calibrate both the screen alignment and the stylus double-tap settings. COM port See communications port. command bar The combination toolbar and menu bar used in Windows CE. communications port A serial communications port used to connect equipment, such as mobile devices, modems, and printers. compact flash card A modem, network, or storage card that you plug into your device. connection The ability to interact with another device, computer, or the Internet by means of a serial, IR, Ethernet, or dial-up connection. Clio User Manual Glossary-1 data Information that is stored in any of your Windows CE program files. desktop computer A computer running Microsoft Windows 95/98 or Windows NT to which you connect your device. dial-up connection A connection between your device and a remote computer by means of a modem. You can connect to an ISP, a network, or a modem attached to a PC. direct connection A connection between your device and another computer by means of a serial cable or IR ports. download The process of transferring data from your desktop computer to your device. e-mail Messages and other items that you send and receive with Inbox. Explorer window The window that appears when you double-click a device icon in the Mobile Devices window. In the Explorer window, which is part of Microsoft ActiveSync, you can view and copy files between your device and your desktop computer. file conversion The process of converting Windows-compatible files on your desktop computer to Windows CE-compatible files on your device, and vice versa. full reset See reset. IMAP4 (Internet Message Access Protocol) An e-mail protocol supported by some mail servers. When using IMAP4, the folders you create on your desktop computer or device are mirrored on the mail server so that the contents of the folders are available from any computer with access to your mail server. Inbox synchronization A feature in Microsoft ActiveSync that enables you to synchronize mail between your device and desktop computer. Your computer must be on and running Microsoft Exchange 5.5 or Outlook 97/98. Inbox Transfer A feature in Microsoft Outlook and Microsoft Exchange that enables you to transfer specific e-mail messages between your device and desktop computer. Internet connection A communications method used to establish a link between your device and a server that provides access to the Internet, typically, an Internet service provider. Internet service provider (ISP) A company that provides access to the Internet. Glossary-2 Clio User Manual intranet A network designed for information sharing within a company or organization. IR (infrared) connection A connection between your device and another computer or device (such as a printer) by means of the IR port on each device. local folder A folder that is available only from the location in which it was created. In POP3, any folder you create on the device is a local folder, and any messages it contains can only be viewed from the device. message header A line of summary information, such as sender and subject, for an e-mail message. mobile device A computer that runs Microsoft Windows CE. Microsoft ActiveSync The shortcut on the desktop computer that contains ActiveSync and the Windows CE Services components. modem card See compact flash card and PC Card. My Documents folder The folder that stores files you create on your device. You can view the contents of this folder in the Explorer window in ActiveSync. network connection A connection between your device and a network by means of an Ethernet card inserted into your device. offline folder When using IMAP4, a folder that contains messages that are available when working online or offline. partnership The process of establishing a connection between your desktop computer and your device for the purpose of synchronizing and transferring data. Your device can have partnerships with up to two desktop computers. PC Card A removable card, such as modem, Ethernet, or storage card, that conforms to the PCMCIA specification. PC Link The program on your device that you use to connect and synchronize with your desktop computer when using a serial cable or IR. POP3 (Post Office Protocol) An e-mail protocol supported by most mail servers. port settings The settings used to configure a communications port on a computer. PPP (Point-to-Point Protocol) The protocol that your device uses to communicate with your Internet service provider’s network server. Clio User Manual Glossary-3 RAS (Remote Access Service) account A network account that enables your device to remotely access your corporate network. remote connection A connection between your device and a remote computer. You make a remote connection by using a modem or an Ethernet card. Remote Networking The Windows CE folder where you establish a dial-up connection between a mobile device and a remote computer. reset Depending on the state of your device, a process that either causes the device to reboot or erases all data stored in RAM. For more information, see “Resetting Clio” on page 1-32 of this manual. restore To return your device to the state it was in when it was backed up. This involves copying your backup data to your device. serial cable A cable provided by your manufacturer to connect your device to your desktop computer. serial connection A connection between your device and a desktop computer or external modem by means of a serial cable. slider The vertical double bar on the command bar used to switch between displaying toolbar buttons and menu names. stylus A pointing device, similar to a pen, used to make selections (tap) and enter information on the touch screen. synchronization The process of comparing the data on your device with the corresponding data on your desktop computer and updating either computer with the most up-to-date data. synchronization service A service in ActiveSync that allows for synchronization of specific items between the device and desktop computer. You can synchronize appointments, contacts, tasks, e-mail messages, and files. TCP/IP (Transmission Control Protocol/Internet Protocol) The protocol that your device uses to communicate remotely. toolbar A bar at the top of the screen that contains buttons that perform specific tasks. touch screen A touch-sensitive screen on your Clio device that can recognize the location of a touch on its surface (typically done by using a stylus) and translate that touch into a desired action (such as making a selection or moving the cursor). Glossary-4 Clio User Manual Index Symbols “Built-in modem on COM 5” 1-21 A AC power 1-3 adjusting contrast/brightness 1-15 agreement, end user license G-3 agreement, software license F-1 AutoStart icon 4-10 B backlight 1-11 backlight control keys 1-2 backup 2-11 entire device 6-12 partial 6-12 backup battery 1-12 backup using bFAX 6-10 battery pack efficient use 1-13 installing 1-22–1-25 removing 1-22 battery pack door 1-3 bFAX Pro 6-10 brightness adjustment 1-15 BSQUARE bFAX Pro end user license agreement G-3 BSQUARE Publisher and Viewer 6-15– 6-16 BSQUARE Viewer 6-16 bundled programs 6-1–6-16 bFAX Pro 6-10 BSQUARE Publisher and Viewer 6-15 Calligrapher 6-6 Vadem ViewFinder 6-2 bUSEFUL Backup Plus 6-12–6-14 Clio User Manual deleting old 6-13 restoring compressed files 6-12 size limit 6-14 tips and tricks 6-12 using flashcard 6-12 using password with 6-12 C calibrating the stylus 1-4 Calligrapher 6-6 Ink options 6-9 ink to text conversion 6-9 menu options 6-9 recognition mode 6-6 Screendraw mode 6-6 CalliGrapher software license agreement F-1 clearing memory 1-33 Clio calibrating 1-4 control panel 4-7–4-11 personalizing 1-4 setting up 1-1–1-33 specifications B-1 command bar 4-5 communications 1-20–1-28 modem 1-20 PC cards 1-26–1-28 setup 2-4–2-6 specifications B-4 communications icon 4-7 compact flash cards 1-28–1-29 components backlight control keys 1-2 battery pack door 1-3 display 1-2 external power port 1-2 Index-1 IR port 1-2 memory erase button 1-33 memory module cover 1-3 modem jack 1-2 Notification LED/switch 1-2 notification LED/switch 1-7 PC card ejector 1-3 PC card slot 1-3 power button 1-6 reset button 1-3 screen contrast control keys 1-2 serial/docking port 1-2 speaker 1-3 stylus 1-2, 1-16 configuring Clio 1-1–1-33 connecting dialup connection to a network 3-4 ethernet connection to a network 3-5 ISP 3-2–3-3 network 3-3–3-9 travel dock 2-2–2-3 connectivity, see “communications” contrast adjustment 1-15 control panel 4-7–4-11 AutoStart 4-10 communications 4-7 dialing 4-7 display 4-8 keyboard 4-8 network 4-8 owner 4-8 password 4-9 power 4-9 regional settings 4-9 remove programs 4-10 stylus 4-10 system 4-10 volume and sounds 4-11 world clock 4-11 customizing synchronization 2-7–2-8 cycling power 1-6 D desktop PC, synchronization with 3-6–38 Index-2 dialing icon 4-7 dialup connection to a modem 3-9 display 1-2–1-15 adjusting 1-15 backlight 1-11 keyboard mode 1-14–1-15 tablet mode 1-15 display icon 4-8 downloading messages using ActiveSync 3-16 dragging with stylus 1-16 E email synchronizing using ActiveSync 3-15– 3-16 email, creating 3-18 email, sending and receiving 3-10–3-17 end user license agreement G-3 expansion specifications B-5 external power icon 1-9 external power port 1-2 F FAX (via bFAX) receive 6-11 send 6-11 finding information xiv–xv I inbox 3-10–3-17 connecting to a mail server 3-10–3-12 information, finding xiv–xv InkWriter 5-8, 5-12 input/output specifications B-2 installing PC cards 1-26 installing the battery pack 1-22–1-25 Internet Explorer 4-5 IR port 1-2 ISP, connecting to 3-2–3-3 K keyboard icon 4-8 keyboard mode 1-14–1-15 Clio User Manual L LED signals 1-7 license agreement F-1 end user G-3 limited warranty E-1 M mail creating connection 3-12 disconnecting 3-12 downloading 3-12 managing files 3-12 mail server connecting 3-13 creating connection 3-12 disconnecting 3-14 downloading messages 3-13 managing messages and folders 3-14 setting up inbox 3-10–3-12 main battery pack main v. backup battery managing messages and folders using ActiveSync 3-17 managing power (see “power management”) memory 1-26–1-34 clearing 1-33 compact flash cards 1-28–1-29 RAM 1-30–1-32 resetting 1-32–1-33 ROM 1-30–1-32 memory erase button 1-33 memory module cover 1-3 microphone 1-2 Microsoft Calendar Tasks 5-19 Microsoft Companion Programs InkWriter 5-8, 5-12 VoiceRecorder 5-8, 5-10 Microsoft Office Pocket Access 5-6 Pocket Excel 5-4 Pocket PowerPoint 5-8 Pocket Word 5-2 Microsoft Office programs 5-1–5-20 Clio User Manual Microsoft Outlook Calendar 5-15 Contacts 5-18 Microsoft Pocket Outlook 5-14 modem 1-20 “Built-in modem on COM 5” 1-21 analog phone line only 1-20 modem jack 1-2 N network icon 4-8 network, connecting by dialup 3-4 network, connecting by ethernet 3-5 network, connecting to 3-3–3-9 notification LED switch 1-2 Notification LED/switch 1-2 notification LED/switch 1-7 O on switch 1-2 operating precautions xiii–xiv owner icon 4-8 P partnerships 2-1–2-11 password icon 4-9 PC card 1-26–1-28 ejector 1-3 installing 1-26 list D-1 removing 1-28 slot 1-3 PCMCIA cards list D-1 personalizing Clio 1-4 physical description B-2 Pocket Access 5-6 Pocket Excel 5-4 Pocket Outlook 5-14 Pocket PowerPoint 5-8 Pocket Word 5-2 power attaching to AC power 1-3 power button 1-2, 1-6 power icon 4-9 Index-3 power management 1-5–1-7 cycling power 1-6 external power icon 1-9 main v. backup battery power manager control panel (see “power manager control panel”) power manager control panel 1-7–1-11 backlight tab 1-11 battery status tab 1-8–1-9 suspend options tab 1-10 power on/off 1-6 power specifications B-2 precautions xiii–xiv printing 4-6 processor specifications B-2 R RAM 1-30–1-32 recognition mode, CalliGrapher 6-7 regional settings icon 4-9 regulatory information C-1 remote networking 3-1–3-18 connecting to a network 3-3–3-9 connecting to an ISP 3-2–3-3 dialup connection to a network 3-4 ethernet connection to a network 3-5 remote synchronization 2-11 remove programs icon 4-10 removing a PC card 1-28 removing the battery pack 1-22 reset button 1-3 resetting memory 1-32–1-33 restore 2-11 ROM 1-30–1-32 S safety instructions xii Screen contrast control key 1-2 screen contrast control keys 1-2 ScreenDraw mode, CalliGrapher 6-9 serial docking port 1-2 serial/docking port 1-2 setting up Clio 1-1–1-33 software license agreement F-1 speaker 1-3 Index-4 specifications B-1 communications B-4 expansion B-5 input/output B-2 physical description B-2 power B-2 processor B-2 start menu 4-4 stylus 1-2, 1-16 dragging 1-16 tapping 1-16 writing with Calligrapher 1-16 stylus icon 4-10 synchronization backup and restore 2-11 downloading email, using ActiveSync 3-16 email, using ActiveSync 3-15–3-16 file conversions 2-9–2-10 files 2-9–2-10 managing messages and folders, using ActiveSync 3-17 remote 2-11 with a desktop computer 3-5 with a desktop PC 3-6–3-8 synchronization options 2-7 synchronization, customizing 2-7–2-8 synchronizing with a desktop PC 2-1–211 system icon 4-10 T tablet mode 1-15 tapping with stylus 1-16 taskbar 4-4 To 1-14 travel dock 1-12, 2-2–2-3 troubleshooting A-1 V Vadem ViewFinder 6-2 Vadem ViewFinder software license agreement F-1 ViewFinder 6-2 VoiceRecorder 5-8, 5-10 Clio User Manual volume and sounds icon 4-11 W warranty, limited E-1 Windows CE 4-1–4-11 command bar 4-5 Internet Explorer 4-5 printing 4-6 start menu 4-4 taskbar 4-4 world clock 1-4 world clock icon 4-11 writing with Calligrapher 1-16 Clio User Manual Index-5 Index-6 Clio User Manual VADEM 1960 Zanker Road San Jose, CA 95112 408-467-2100 Technical Support: web: http://www.vadem.com email: [email protected] phone: 1-888-GO-VADEM