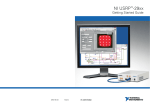
1
ONTARIO CHIROPRACTIC ASSOCIATION PATIENT MANAGEMENT PROGRAM PUTTING EXPERIENCE INTO PRACTICE PMP Manitoba Manual December 2010 1 PATIENT MANAGEMENT PROGRAM 2 PATIENT MANAGEMENT PROGRAM Contents Additional Help........................................................................................................................................5 Getting Into PMP.....................................................................................................................................5 Main Appointment Screen Description ............................................................................... 6 Moving Around the Appointment Book....................................................................................................9 Hotkeys from the Appointment Book.......................................................................................................9 Function Keys .........................................................................................................................................9 Customizing PMP for Your Office...................................................................................... 10 Creating Letterhead ..............................................................................................................................10 Doctor Defaults .....................................................................................................................................12 Computer Defaults ................................................................................................................................13 Other Setup Menu Options ...................................................................................................................13 Appointments ...................................................................................................................... 22 Book an Appointment by Clicking into a Timeslot .................................................................................22 F2 Appointment Grid............................................................................................................................23 Appointment Booking after Posting Activity ..........................................................................................24 F3 Show Our Day .................................................................................................................................24 F5 Show My Week................................................................................................................................25 Appointment Status...............................................................................................................................25 Changing the Appointment Status ........................................................................................................26 Rescheduling Appointments .................................................................................................................26 Hide Invalid Appointment ......................................................................................................................27 Multiple Appointment Booking...............................................................................................................28 Posting Activity ................................................................................................................... 32 Accessing Patient Activity .....................................................................................................................32 Posting Patient Transactions ................................................................................................................33 Posting Payments Only.........................................................................................................................35 Patients Who Do Not Have Appointments (Walk-Ins) ...........................................................................35 Discount ................................................................................................................................................36 Refund ..................................................................................................................................................36 Inventory Refund...................................................................................................................................37 Activity Date ..........................................................................................................................................38 Editing and Deleting Transactions ........................................................................................................39 Transfer Credits / Balances between Patients ......................................................................................40 Transfer Credits / Balances between Practitioners ...............................................................................40 Returned Cheques................................................................................................................................42 Gift Certificate .......................................................................................................................................42 Write Offs ..............................................................................................................................................44 Payment Distribution Screen.................................................................................................................45 Add a New Patient & Patient Information.......................................................................... 47 Accessing the New Patient File.............................................................................................................47 The Personal tab...................................................................................................................................47 The Comments tab ...............................................................................................................................48 The Pop Ups tab ...................................................................................................................................48 The Manitoba tab ..................................................................................................................................48 The Bill To / Employers tab ...................................................................................................................49 The EHC tab .........................................................................................................................................49 The Appointments tab...........................................................................................................................49 The Account / Activity tab......................................................................................................................49 The Lower Taskbar ...............................................................................................................................49 Advanced Features within the Patient File ....................................................................... 50 Default Activity ......................................................................................................................................50 Envelopes / Labels................................................................................................................................51 Related Patients....................................................................................................................................52 Pop Ups ................................................................................................................................................53 Edit Comments .....................................................................................................................................54 Active Email ..........................................................................................................................................55 Edit Activity Comments .........................................................................................................................55 Manitoba Health Services Commission ............................................................................ 56 Manitoba Health Billing .........................................................................................................................57 3 PATIENT MANAGEMENT PROGRAM Processing Manitoba Health Reconciliations ........................................................................................58 Handling On Screen Rejections during Reconciliation..........................................................................58 Dealing with No Payment Recorded .....................................................................................................59 Manitoba Public Insurance ................................................................................................. 60 Set Up an MPI Patient ..........................................................................................................................60 Posting Transactions for MPI Patients ..................................................................................................60 Manitoba Public Insurance Forms.........................................................................................................61 Posting Manitoba Public Insurance Activity...........................................................................................65 Billing Manitoba Public Insurance .........................................................................................................65 Manitoba Public Insurance Reconciliation ............................................................................................66 MPI Write Offs.......................................................................................................................................66 Worker’s Compensation Board.......................................................................................... 67 Set Up a WCB Patient ..........................................................................................................................67 Posting Transactions for WCB Patients ................................................................................................67 Worker’s Compensation Board Forms ..................................................................................................68 Worker’s Compensation Board Billing...................................................................................................71 Worker’s Compensation Board Reconciliation ......................................................................................72 WCB Write Offs.....................................................................................................................................72 Reports ................................................................................................................................. 73 Summary Sheets ..................................................................................................................................73 Statements............................................................................................................................................75 Appointment Book.................................................................................................................................77 Reminder List........................................................................................................................................78 Past Due Recall List..............................................................................................................................79 The Long Term Recall List ....................................................................................................................79 Accounts Receivable ............................................................................................................................80 Patient Query by Doctor or Office .........................................................................................................80 Query Customization ............................................................................................................................81 Labels ...................................................................................................................................................82 Fee History Report................................................................................................................................82 Patient Referral Activity Report .............................................................................................................83 Exporting Documents............................................................................................................................83 Create E-mail Distribution List from PMP..............................................................................................85 Merge Letters........................................................................................................................................85 Security................................................................................................................................. 89 Login .....................................................................................................................................................90 Creating or Changing Passwords .........................................................................................................91 Edit Date ...............................................................................................................................................91 Account Edit Journal .............................................................................................................................92 Backup, Utilities and Housecleaning ................................................................................ 93 Backup ..................................................................................................................................................93 Test Restore .........................................................................................................................................94 Restore .................................................................................................................................................95 Utilities ..................................................................................................................................................95 Error Checking ......................................................................................................................................96 Defragment ...........................................................................................................................................96 Deleting Patients...................................................................................................................................97 Accounts Receivable ............................................................................................................................97 Documents for Printing .........................................................................................................................98 PMP Word Pad .....................................................................................................................................98 APPENDIX ............................................................................................................................ 99 Manitoba Health Diagnostic Codes.......................................................................................................99 Manitoba Health Disposal Codes........................................................................................................100 Workers Compensation Board Fees ...................................................................................................101 Workers Compensation Chiropractic X-ray Fees ................................................................................102 Manitoba Public Insurance Fee Schedule...........................................................................................103 X-Ray Fee Schedule...........................................................................................................................105 Manitoba Health Electronic Billing Instructions ...................................................................................106 Download the Reconciliation...............................................................................................................111 Renaming Your Manitoba Remit File ..................................................................................................112 4 PATIENT MANAGEMENT PROGRAM PMP Support Support Line E-mail Fax 416-860-7199 / 1-800-561-7361 [email protected] 416-860-0857 Address 20 Victoria St, Suite 200 Toronto, Ontario M5C 2N8 Website www.chiropractic.on.ca Additional Help Each PMP CD includes a full program, the latest update, and a network version of the PMP. Also included are a copy of this Manual, the OCF Handbook and PMP tutorials. We have included newsletters, training information, various programs and many other pieces of information that you may find helpful. Keep your CD in a safe place at the office – replacements are $25. Getting Into PMP Open PMP by clicking the PMP SQL icon on the desktop. The SQL Launch screen will appear. Click the Start PMPw SQL in [#] seconds button before the countdown if you wish. The Stop button is for network use and allows for troubleshooting A PMPW Login Form will appear requiring a Login Id and Password. This screen is controlled by Security and should be setup so that each user enters with their personal ID and password. Setup instructions can be found on page 89. If security has not been setup on your PMP type ‘RS’ into the Login Id field. Click into the Password field or press the Tab key. Type ‘RS’. The password will appear as asterisks. Click OK or press Enter. 5 PATIENT MANAGEMENT PROGRAM Main Appointment Screen Description Main Screen Appointment Book All patient activity can be done from the appointment book. Our easy to use appointment book allows you to add a new patient, make single or multiple appointments, and add, update and change patient information. The Patient Management Program will accommodate up to 27 practitioners. You may wish to list your practitioners in a specific order or it may be that not all practitioners are in the office everyday. The features Appointment Book and Appointment Book Sets will allow you to customize the appearance of your PMP. Title Bar The title bar lists current information. The date on the left is the date of the appointment book displayed. The date in brackets is today’s date. This information comes from your computer. Pull Down Menus Access the program through easy to use menus. Menu items with an arrow ‘‘ have a secondary menu. Practitioner Tabs Each practitioner has their own tab. Move through practitioner tabs by clicking onto their name on the tab or type the corresponding underlined number to view the appointment book for that practitioner. 6 PATIENT MANAGEMENT PROGRAM Named Columns Practitioners can create, assign, and share columns. Sharing columns will allow other practitioners to see when rooms are in use and eliminates overbooking. Time Slots Time slots are defaulted to 15 minute increments and the colour coding signifies valid appointment slots as set up in Doctor Hours. Time intervals of 5, 10, and 20 minutes are available and this option is chosen in Doctor Defaults. The number of columns is customizable by practitioner to represent the number of appointments the practitioner can book in each time interval. Hidden Appointments Time slots with a red underline indicate an invalid appointment. Clicking on the timeslot will provide details about the hidden appointment. Days of the Week Clicking on one of these buttons will cause PMP to change the Appointment Book to that day. The button will stay indented to show you the day of the week. These buttons are related to the week you are viewing on the appointment book. Vertical Appointments Appointments can be booked either vertically or horizontally. Named columns book vertical appointments only. Horizontal Appointments A horizontal appointment will book to the right and may or may not scroll to additional timeslots depending upon your doctor default settings. 7 PATIENT MANAGEMENT PROGRAM Shared Room Appointments Named columns can be shared by practitioners. This allows practitioners using the same treatment rooms to check for availability and easily see when the room is in use by another practitioner. The patient name is visible on the appointment book of the treating practitioner. Other practitioners sharing the room will see a visual reference that the room is booked. This is indicted by the grey shaded area where you see Dr.CW on the screen shot. Suns The four suns correspond with: Morning Midday Afternoon Evening - 9 AM or your first appointment. - 11 AM - 2 PM - 5 PM. Clicking on any of the Suns will change the time to that part of the day. The ‘Blinking’ Light Colours are used to indicate overall appointment status of all patients for all practitioners. Green means that there are no late appointments. Yellow means at least one appointment is five minutes late. Blinking Red means that at least one appointment is 15 minutes late Click on the light to manage late appointments or to turn the Blinking Light off. Current Date / Appointment Book Date Selector This shows the date that the Appointment Book is displaying. Click on the down arrow to select another date. Click onto the back or forward arrow once for every month you wish to move backward or forward. You can also click onto the month or year to produce a list of months or years. Click onto the day on the calendar to select that day for viewing on the screen. Plus and Minus Buttons Each click moves the date of the Appointment Book forward or backward by one week. Post It Note The Post It Note, once set up, will allow you to communicate with other staff members or leave yourself reminders. You can also set it up so that today’s note appears when PMP is opened if a note has been created. This is set up in Setup, Computer Defaults. Note: Notes are only visible when they have been created in the Setup menu. Today Button Clicking the Today button will bring the Appointment book back to today's date. 8 PATIENT MANAGEMENT PROGRAM Moving Around the Appointment Book Arrow Keys on the Keyboard The arrow keys will move the cell pointer in the direction of the arrows. Holding an arrow key will cause the Appointment Book to scroll in that direction. Page Up, Page Down on the Keyboard These keys will cause the time to advance three hours forward or backward. It will not allow you to travel beyond the doctor's hours. Wheel / Scroll Mouse If you have a wheel mouse you can use the wheel to scroll up or down. Hotkeys from the Appointment Book The following keys affect the appointment within the cell pointer: C will mark an appointment Confirmed A will mark an appointment Arrived M will mark an appointment Missed P will mark an appointment Postponed F10 will process activity for the selected appointment The following keys are not dependent on a specific appointment: F will start the function search for a patient by First name L will start the function search for a patient by Last name N will start the function search for a patient by Number 1, 2, 3, etc will move through the different tabs on the Appointment Book Function Keys F1 F2 F3 F4 F5 F6 F7 F8 F9 F10 F11 F12 Help Add an Appointment Show our Day Daily Summary Sheet for the displayed Doctor and Date Show my Week Edit Patient Information Screen Saver will be activated if set up in the Control Panel Login Form Write Off from within Patient Activity Process Activity for the selected Appointment Default Activity from within Patient Activity Process Activity by selecting a patient See page 22 See page 24 See page 73 See page 25 See page 47 See page 90 See page 44 See page 32 See page 50 See page 35 Right Click Menu Right clicking the mouse on the appointment book brings up a menu with common functions. 9 PATIENT MANAGEMENT PROGRAM Customizing PMP for Your Office Creating Letterhead Letterhead is created by each office or practitioner to be printed at the top of statements. It should show your clinic and practitioner names as well as practitioner registration numbers. Address, telephone and fax numbers, Email and website address should also be detailed. Click the File menu, WordProcessor. Change the justification to centre using the centre justification icon. Type the Clinic or Doctor’s Name on the top line, Address, City, Postal Code, Phone, and Fax numbers on subsequent lines. See example below. Dr. DD Palmer Spinal Health Clinic 5160 Explorer Drive, Suite 30, Winnipeg MB R2W 4T7 Phone: 204 629-8211 Fax: 204 629-8214 [email protected] When the letterhead is complete click the File menu, Save As. Double click the Template folder. Click into the Filename: field and type the word Letterhead with the Doctor’s initials, ie. LetterheadDD. Click Save. Your letterhead is now saved in the template directory. You may create as many letterheads as you choose. Letterheads must be named Letterhead[something]. Choose your letterhead as the Default Letterhead in Doctor Defaults. Click the Setup menu, Doctor Defaults. Choose a practitioner and click Edit this Doctor’s Defaults. Click Select a File to use to the right of Default Letterhead. Click the appropriate letterhead and click Open. Click Accept. The chosen letterhead will automatically be selected for this practitioner when printing statements. Hint: If the letterhead you created is not available, check the WordProcessor to be sure it was saved as letterhead[something] in the Template folder. The following items are found under the Setup menu. Clinic Defaults The Clinic Default screen contains the name of your clinic or office and complete address. The default city and area code will populate new patient files reducing the amount of input required. Partnership is for legal business partnerships only. In most cases you should not have a checkmark. If in doubt contact the support line. Use Login is required for security in PMP. Total Payments on Statements groups together payments on statements even when it is distributed to multiple practitioners in the patient record. Stop Reports from auto closing will allow report choice to remain open to allow for multipractitioner printing of reports.. 10 PATIENT MANAGEMENT PROGRAM Show Unit buttons on editing Appointments will allow vertical and horizontal unit buttons to appear saving time when scheduling appointments. Show Initials on Horizontal Appointments will allow patient initials to populate all cells for multiple unit appointments so that it is more noticeable that an appointment is scheduled into a time slot. Default “From” date on Statements will start printed statements from the date selected. Popup comments to pop automatically on indicate where pop ups are designed to appear. Patient pop ups are information boxes that appear on a patient file where and when you choose, stating information you have input and may require about this patient or appointment. Patient pop ups are created in Patient Information on the Pop Ups tab. Locations where pop ups designed to appear are chosen here. Choose which actions will cause pop ups to appear by check marking items. Edit Appointment Information. This screen appears after you click on a booked appointment on the appointment book. Arrived. The popup will also appear when you arrive a patient on the Appointment Book using the hotkey of A. Make an Appointment in this Time Slot. This screen is available when clicking onto an empty time slot from the appointment book screen. F2 Add an Appointment. Whenever accessing the F2 Add an Appointment grid. 11 PATIENT MANAGEMENT PROGRAM Patient Activity. Before processing activity. Doctor Defaults The Doctor Defaults screen allows you to personalize the PMP for each Practitioner. Click into each box to add or edit information. Some fields cannot be edited due to security. The edit doctor default allows you to choose the doctor's name on the appointment book tab and whether the AR totals appear on the Summary Sheets. Determine whether you would like the birthday song to play and choose the default appointment type for each practitioner. Appointments that exceed the time slot offers options as to how to display the appointments within the columns. Will stay fixed will display extra columns warning you when appointments booked in that time slot exceed the number of units available for the current practitioner. There is a maximum of 9 columns. If the number of units exceeds 9 a sad face icon appears as a warning. Clicking the sad face icon shows the list of hidden appointments. Will wrap allows appointments that exceed the timeslot to move to the next time interval. Will wrap and hide will wrap as the choice above but it also hides all appointments that are missed, rescheduled, cancelled, and postponed. Note: Named columns will automatically hide invalid appointments. Appointment Book Configuration will allow practitioners to specify personalized settings. Time Slot Interval offers 5, 10, 15, and 20 minute intervals. Columns Across offers 1 – 9 columns. Available Columns are the named columns available for use. These are created under the Setup menu, Named Columns. Your Named Columns are the columns that you would like to appear on this practitioner’s appointment book. Named columns accept vertical appointment booking only and can be shared by practitioners. This allows practitioners sharing treatment rooms to check availability and see when the room is in use by others. 12 PATIENT MANAGEMENT PROGRAM Computer Defaults This area is utilized if the user would like different information on this computer than may be available at another networked computer. You can change the screen size and print receipts with an alternate address rather than the Clinic Default address. Cell shading is defined and you can also choose a different Appointment Book Set. The options on the Computer Default screen are used for this computer only. If you are running PMP networked each computer can assign different options. Screen Size The PMP screen resolution can be changed so that you decide how PMP will appear on your desktop. Networked offices will choose screen resolution for each computer running PMP. Choose the screen resolution by clicking the radio button beside your choice under Screen Size. The screen will change each time you click a different radio button allowing you to choose the screen size you prefer. Note that grayed out screen sizes are not available for this monitor although you may be able to increase these options by changing your screen settings in Display Properties. To temporarily change the screen size from the main appointment book: Press the Ctrl and up arrow keys together when on the main appointment book to enlarge Press the Ctrl and down arrow keys together when on the main appointment book to shrink. This temporary feature is also available on the right click menu. Appointment Shading Appointment cells can be shaded to various degrees of grey to signify their meaning on the schedule. Appointment Cell shade refers to booked appointments. This makes viewing horizontal appointments that wrap easier to distinguish. Adjust the lever to the desired setting. Unavailable Shared Column Cell shade refers to shared columns where another practitioner has a patient booked and a timeslot is not available. This cell is also populated with the doctor code of the practitioner who is using this room. Adjust the lever to the desired setting. Extra Column Cell shade refers to temporary columns that are added to accommodate appointments that exceed the timeslot when wrapping is not turned on. This differentiates these columns so that overbooking does not occur by inadvertently booking into the Extra column. Other Setup Menu Options Appointment Books The Patient Management Program will accommodate up to 27 practitioners. You may wish to list your practitioners in a specific order or it may be that not all practitioners are in the office everyday. The features Appointment Book and Appointment Book Sets will allow you to customize the appearance of your PMP. When creating an Appointment Book, choose the practitioners to be included by clicking the box to the left of the 13 PATIENT MANAGEMENT PROGRAM practitioners’ name in the right hand column. The names will appear in the middle column in the field below New Appointment Book. You can change the order of the practitioners by clicking the red arrows. Type a name for the Appointment Book and click Save. The named Appointment Book will appear in the field below Appointment Books on File. Click OK. Appointment Book Sets This feature is used to group together Appointment Books that you have created. For instance you may have an Appointment Book Set titled Practitioners which contains the separate appointment books of Chiropractors, Massage Therapists and Other Practitioners. Another option for an appointment book set could be the days of the week. Appointment Book Sets are also useful if you have more than one location using the same PMP. Pressing the space bar when on the main appointment book screen moves you between the different appointment books in the set. The Appointment Book Sets area functions similarly to the Appointment Books area. To create a set click the box to the left of each of the available Appointment Books on the right. The books will appear in the center of the screen in the field below New Appointment Book Set. You can change the order of the set by clicking the up or down red arrows. Name the Appointment Book. Once all the information is correct click Save this Appointment Book Set. The named Set will appear in the field below Appointment Book Sets on File. Click OK. Loading Appointment Book Sets There are two ways to load Appointment Book Sets: For Today Only. A specific Appointment Book Set will need to be loaded each time you open PMP. Click Set Up, Appointment Book Sets, Load an Appointment Book Set. A pop up window will appear entitled Load an Appointment Book Set. Click the appropriate book. Click OK. Every Time. The chosen set will appear every time you open PMP. Click Setup, Computer Defaults. Click the down arrow to the right of Default Appointment Book Set. Select the appropriate set for this computer. Note: Close and reopen PMP to view this change. 14 PATIENT MANAGEMENT PROGRAM Appointment Colours This area is linked to the appointment book and defines which colour represents which type of appointment. The colours chosen appear in the bottom left hand corner of booked appointments on the appointment book. PMP offers eight colours. Determine which appointment colour is to be associated with which Appointment Type. Define the Screen Text which is a short form of the appointment name. It is used on reports regarding appointment colours. Appointment Comments Appointment Comments are used to create a pick list of standardized comments for use when setting up patient appointments. Rooms can be booked on a regular basis for particular patients and notes such as Room 1 or 2 only will assist in increasing patient satisfaction. These comments may also be used for messages between staff. For example, if a patient says he or she will pay next visit, when booking the next appointment the staff member adds the word ‘Collect’ to the comment area. Appointment Types This area is linked to the patient information and appointment book windows and allows you to preset standard appointment types and assign a fixed number of time units to each type. The descriptor used for each appointment type may be a maximum of 15 characters. Bill/To Employers The Bill/To Employers table enables you to build a database of employers and insurance companies. The form records the company code which you assign, company name, contact name, phone, and fax numbers, e-mail address, address, city, province/state, country, postal code and, where applicable, account number. 15 PATIENT MANAGEMENT PROGRAM City Codes The City Codes form is linked to patient information and allows you to add the names of cities in your surrounding area where your patients live and work. This helps to speed up the input of information into patient records and provides uniform phrasing and spelling. Doctors Hours This area allows you to set office hours for each doctor or practitioner. Choose the practitioner and click Edit this Doctors hours. Position your mouse over a time slot and hold down the left mouse button. Drag your mouse to the ending time slot and release the button. Click either Set to the Doctor is In or Set to the Doctor is Out. Click Accept when complete. Fee Classes Fee Classes are used to determine which fees are treated as initial visits, re-exams, x-rays, and subsequent visits on summary sheets. Fee classes are linked to the treatment part of fee schedule. All New Patient activity should be copied into the initial visit code area of Fee Classes in order to appear correctly on summary sheets. These items will appear as new patient visits on the last page of your daily summary sheet if the patient does not have any previous transactions on their Account Activity screen. Previous activity in the patient file would mark the patient as a re-exam on the daily summary sheet. When fee schedule items are selected as Initial Visits the MH code becomes V103 which the PMP program recognizes as a new patient visit, for this reason items that have a Manitoba Health fee code of 8506 attached will lose the ability to bill MH for this visit. MH pays for chiropractic adjustments only and therefore if you wish to bill MH for a new patient adjustment you will need to bill this activity separately as the 8506 MH code will not be present on new patient visits selected in fee classes. MPI and WCB initial visit and x-ray codes must also be selected in fee classes to ensure proper placement on billing invoices. 16 PATIENT MANAGEMENT PROGRAM Fee Schedule The fee schedule is broken up into three parts; Treatment: Fees for services rendered are stored here. Other: All other items such as Gift Certificates, Transfers, Refunds, etc. Inventory: All tangible items that are sold. Note: Fee Schedule codes must be unique. You cannot use the same code for more than one item. Treatment The Fee Schedule for Treatment allows you to create and edit treatment fees for your office regarding billings to the patient and WCB. To add a treatment click Add, then Form. Type a code to denote the treatment you are inputting. Press the Tab key. Type a description of the treatment. Press Tab and type the amount you wish to charge for this billing for each patient category. Next to the MH, MPI, and WCB Codes and MH, MPI, and WCB Fees type the corresponding codes and fees. To edit a treatment click the treatment in the list and click Edit. Make edits by clicking into the appropriate box and making the changes. Click OK. Other The table includes the Code, Description, and Selling Price. items that are not a treatment or Inventory item should be placed here. For details on processing various kinds of activity such as Discounts, Gift Certificates, Refunds and Transfers See pages 36. Inventory The fee schedule for inventory allows you to track products you sell or hold in inventory. The form records the product code, description, quantity in stock, minimum stock quantity, cost price, selling price, supplier, and applicable taxes. Note: Taxes are input as the percentage amount applicable. Remember to increase the quantity in stock when you receive a supply order. Note: Fee Schedule codes must be unique. You cannot use the same code for more than one item. 17 PATIENT MANAGEMENT PROGRAM Flags Flags will allow you to identify particular patients based on criteria that you determine. It is a way of grouping patients. You may create up to 36 flags that are distinctive to your office. An example would be a 1 to identify the primary contact member of the family for a mailing list. Named Columns Named columns allows practitioners to define treatment rooms or treatment types. You can name as many columns as you choose but a maximum of 9 columns can be assigned per practitioner. Named columns accept vertical appointment booking only. Notes Notes are a way to provide reminders and inter-office communication. You can remind yourself or others to order inventory items, recall patients, provide reports to bookkeeper etc. Other Comments The purpose of the Other Comments form is to provide a pick list of standardized comments for use when printing a patient appointment calendar. Comments such as ‘24 hour notice required for all rescheduled appointments’ or ‘Reminder - your progress evaluation is a 30 minute appointment, so please plan accordingly’, may be used. 18 PATIENT MANAGEMENT PROGRAM Patient Categories Your office may have different fees for adults, seniors and students. Assigning Patient Categories will allow you to bill different fees to different patients automatically. To create new categories click Setup, Patient Categories and click onto an unused category. Click Edit, type the appropriate change and click Save. To update your changes in the category area you must close and reopen the program. A maximum of 18 categories can be created. Hint: Once complete, do not delete or change the order of the categories. They are assigned to your patients based on the order in the list and deleting or changing the order of the categories will change your patients’ personal information. Patient Comments The Patient Comments form is an area that provides a pick list of standardized comments for use within the patient file. Comments may include account details, special patient instructions or other personal information. You may add individual comments within the patient files that are unique to that patient if the pick list comments do not provide enough information. Payment Types Payment Types lists all types of payments accepted in your office. It is used for selecting the payment type while posting activity. Payment type can also be set up as a default in the Patient Information Personal tab. Phone Number Types This area is linked to the patient information window and allows you to set a number of telephone fields so that you may capture several telephone numbers from each patient. Telephone numbers may include work, home, pager, cellular phone, cottage, and fax. 19 PATIENT MANAGEMENT PROGRAM Province/State Codes The Province Codes Form is linked to patient information and allows you to add the names of provinces or states in your surrounding area, where your patients live and work. This helps to speed up the input of information into patient records and provides for uniform phrasing and spelling. Referrals If your office tracks referrals, this form will be very useful to you as it will capture referral information from industry as well as individuals. The Edit Referrals form records the code assigned, the referral name, and contact details. Note: This field in patient information is case and punctuation sensitive. It is important that you set-up the pick list for referrals if you wish to be able to accurately produce the referral activity report. Statement Comments The purpose of Statement Comments is to provide additional information, reminders or personalized notes on patient account statements. Comments may wish them ‘Happy Holidays’, remind them about ‘Spinal Health Week’, promote new products, or inform of current interest rate charges on accounts past due. Suppliers The Suppliers form enables you to build a database of your suppliers. The Edit Suppliers table records the company code which you assign, company name, contact name, phone and fax numbers, e-mail address, address, city, province/state, country, postal code and account number. Some offices use this as a phone directory of frequently called numbers. 20 PATIENT MANAGEMENT PROGRAM Vacation/Holiday/Time Off These areas allow you to set the vacation and time off schedules for each individual practitioner and holidays for the entire office/clinic. Office holidays should be set up first, then vacations. To create Vacation and Holidays click the specified date or click and drag a range of dates to highlight. Click the Declare Holiday or Declare Vacation button. Holidays will require you to type in a name to activate the function for the holiday. Vacations will appear on the appointment book as green times. Holidays will appear on the appointment book as blue times. Edit Doctors Time Off for other appointments and half days. Access to this function is located in the Setup menu, Vacation / Holiday/ Time Off and on the right click menu. Time off will book 15 minute increments only. Practitioners with time intervals set for 10 or 20 minute increments will have time off start 5 minutes later. Creating time off is easy, click onto a ‘Start’ time on the grid. Click on an ‘End’ time on the grid. Click Book From-To off to book off the times in between. Add a Comment. Click OK. Once you have setup up Doctors Time Off it will be indicated on the Appointment Book, F2 – Add an Appt, Edit Appointment, and Multiple Appointment Detail screens as a red strike through on the time(s). 21 PATIENT MANAGEMENT PROGRAM Appointments Appointment types are created under the Setup menu. Each Appointment Type, when set up correctly with an assigned number of units, will book the required amount of time on your appointment book. Up to eight appointment types can have a related colour signifying the appointment type at a glance. Colours are assigned under the Setup menu, Appointment Colours. See page 12. Book an Appointment by Clicking into a Timeslot When you click on the appointment book a screen appears that allows you to book an appointment into the selected time slot. Choose your search criteria and click onto a button under Select a Patient By. The Other button offers alternate ways of searching such as postal code or phone number. You can also add an appointment for a new patient by clicking onto the Add New Patient button and adding a new patient. Select the patient by clicking onto the Last name, Number, or First name button and typing the name / number of the patient. Double click or press Enter on the highlighted patient. Change the type of appointment by clicking the down arrow under Type of Appointment and choosing another appointment type from the list. Units are the number of columns this appointment will fill. Numbered buttons above and beside the units will book the unit number you click on, either horizontally or vertically. Alternately you can type in the unit number and select Horizontal or Vertical. Click Finished. Note: The Unit buttons across the top and down the side is an option that is selected under the Setup menu, Clinic Defaults. 22 PATIENT MANAGEMENT PROGRAM F2 Appointment Grid This method of adding an appointment does not use the appointment book directly, therefore you must supply all the information about the appointment. You can also book multiple appointments and this is the fastest way to add several appointments. The F2 screen is broken up into the following sections: Current Appointment shows the details for the appointment we are booking. The Time Grid shows an overview of the day’s schedule. Numbers that appear in the grid boxes represent the number of columns already in use for the specified time interval. List of Appointments and Doctor tabs at the bottom show the appointments currently being scheduled and an appointment book mini view. Scroll the appointment book screen to move to times and click onto the screen to book appointments. Patient Information on the right is a summary of information that may be required for scheduling purposes. To create one appointment only click the appropriate date on the calendar. Choose the Type of Appointment and the units for the appointment with horizontal or vertical unit buttons. The unit buttons across and down is an option that is selected under the Setup menu, Clinic Defaults. Pick the Room if appropriate. Remember that rooms will only book vertical appointments. Note: Practitioners utilizing 5 minute interval times should schedule F2 appointments using the mini view at the bottom as 5 minute slots are not visible on the grid. To book the time of the appointment choose to either book by clicking onto a time in the Time Grid area or by clicking onto the mini appointment view. Alter any other areas that are required such as Doctor for this Appointment, Status, Comment. Click Finish. To create multiple appointments follow the above instructions but do not click Finish. Click Add Another Appointment after you have successfully entered the details for the first appointment. The date automatically advances to the next day. Click the next appointment date on the calendar and then the appropriate time. Continue this process until you have booked all required appointments. You may print an appointment List or Calendar from this screen if you wish. Click Finish when you have completed all appointments. 23 PATIENT MANAGEMENT PROGRAM Appointment Booking after Posting Activity When a patient does not have another appointment booked and you have completed posting their activity from the appointment screen, you will be taken to their Appointment tab in Patient Information. You can click onto the buttons Add an app, same time next Week or Same time next Month (28 days) to book for that time range. If the appointment does not meet booking criteria you will see a mini view of the appointment book alerting you to the fact that there is a scheduling problem. Clicking onto a valid timeslot allows you to book the required appointment. The Add an appointment button will take you into the F2 Appointment Grid. If you choose to click Continue from the appointment tab you will be returned to the appointment book screen where you can use the Make an appointment in this Time Slot screen to book another appointment. The patient last posted will be selected as the patient to book for the next appointment. F3 Show Our Day Pressing F3 will show the full daily schedule for all practitioners listed on the appointment book for whichever day you are viewing. This is helpful when looking for an available timeslot or trying to co-ordinate appointments. Coloured boxes show times where scheduled appointments are booked. Clicking onto a specified cell will open the mini appointment book view. Here you can book, edit, or view appointments. 24 PATIENT MANAGEMENT PROGRAM Note: If any of your Practitioners are utilizing 5 minute intervals the screen view will show 9:00 am – 5:00 pm only due to space requirements. Other timeslots can be viewed by scrolling in the mini view screen by clicking onto a timeslot. All other intervals will show all office hours. F5 Show My Week The F5 function will show the week at a glance for one practitioner for the week your calendar is on when pressing F5. This is helpful when looking for an available timeslot. Coloured boxes show times and columns in use. Clicking onto a specified cell will invoke a ‘slice’ of the appointment book to open at the specified timeslot. Here you can book, edit, or view appointments in a similar manner to that in F3. Appointment Status The appointment status will let you know if a patient is expected, arrived, completed, rescheduled or has cancelled their appointment based upon the colour and font of the patient name on the appointment book. Some hotkeys are offered to change the status of appointments. To use hotkeys position the cell pointer (black box) on the patient that you wish to change the status of by using the arrow keys on your keyboard. Arrived An ‘Arrived’ appointment is blue. To 'Arrive' a patient simply press the A key. Missed ‘Missed’ appointments are red. When a patient has missed an appointment, press the M key. Unconfirmed An ‘Unconfirmed’ appointment is italicized. It does not have a hotkey. Unconfirmed appointments require reminder calls. Confirmed ‘Confirmed’ appointments are black. Change the status of an ‘Unconfirmed’ appointment to ‘Confirmed’ by pressing the C key. 25 PATIENT MANAGEMENT PROGRAM Rescheduled A 'Rescheduled' appointment has a red underline. It has no hotkey. Postponed ‘Postponed’ appointments are italics with a black strikeout. The hotkey is the P key. Postponing an appointment will add the patient to the Past Due Recall list. Cancelled A ‘Cancelled’ appointment are italics with a red strikeout. There is no hotkey. ’Cancelled’ will add the patient to the Long Term Recall List. Done When you have finished processing a patient the appointment status automatically changes to ‘Done’. At any time throughout the day you can see exactly what the status is for each and every patient on your appointment book. Note: Names within a yellow cell indicate patients who are at least 5 minutes late. Changing the Appointment Status To change the appointment status on the appointment book, use the hotkeys where applicable by positioning the cell pointer on the patient name and typing the hotkey associated with the correct status. The cell pointer has a black border. Move the cell pointer by using the arrow keys on the keyboard. To change a status that does not have an associated hotkey click onto the patient name from the appointment book screen and choose the status of choice from the Edit Appointment Information screen. Click Finish. Rescheduling Appointments Within the same day. Appointments that are being rescheduled within the same day can be ‘dragged’ to alternate times. Position your mouse over the patient being rescheduled. Press and hold the left button and drag the mouse to the new time slot. When you are positioned over the new slot, release the mouse button. You can also use the scroll button on your mouse to drag appointments to time slots not visible on the screen. To another date. Rescheduling an appointment requires that another appointment be made before the ‘reschedule’ process is complete. For this reason you will see a capital R attached to your mouse after choosing Reschedule from the Edit Appointment Information screen. Click onto another time slot where you can use the Make an appointment in this Time Slot screen to book another appointment. The pre-selected name will be the patient you are rescheduling. 26 PATIENT MANAGEMENT PROGRAM Hide Invalid Appointment This option offers you the ability to ‘hide’ invalid appointments (Rescheduled, Cancelled, Postponed, and Missed) so that the timeslot is available for additional valid appointments. When the option is turned on (details below) and an invalid appointment exists in a timeslot the time will be seen with a red underline. Click the timeslot to see the list of hidden appointments. At this point you can Delete, Edit, access Patient Information or Post an Activity for the highlighted patient. Click Accept to return to the appointment book. To turn on the Hide feature go to the Setup menu, Doctor Defaults. Choose ‘will wrap and hide invalid appts. (resched…). Invalid appointments will automatically hide when a practitioner has a named columns assigned to their appointment book. This option is chosen by practitioner and therefore the default will need to be set for each person. Note: Invalid appointments do not appear in the F2 - Add an Appt screen. Only Confirmed and Unconfirmed appointments are included in the visible timeslot number. 27 PATIENT MANAGEMENT PROGRAM Multiple Appointment Booking Multiple appointments will not book into Named Columns. They are scheduled by 15 minute intervals only. Practitioners utilizing 10 or 20 minute intervals will have appointments appear in the earlier timeslot that is closest to the 15 minute time chosen. The ability to create multiple appointments is available from within Patient Information on the Appointments tab. Click Book Multiple Appointments. Choose the doctor that you wish the appointments to be booked with. The Doctor of Record will be the default. Click Book Multiples using this Doctor. The subsequent screen allows you the option to create or choose a multiple. Click onto a number under each row to create a schedule. Your choice appears on the blue line listing the number of appointments and units for a number of weeks or months. Once you are satisfied that the blue line, represents the schedule you wish to add click Add the current line, . Your selection will move up to the Current Multiple box where you can continue to add more appointments by following the same procedure. Saving The Multiple. You can save this multiple for use when booking multiple appointments for other patients, thereby saving time. Click Save this Multiple. Type a name that describes the multiple. Click OK. Select A Multiple. Click Select a Multiple from the previous screen; double click the multiple of choice. 28 PATIENT MANAGEMENT PROGRAM Click Continue. A pop up will appear offering you the option of a starting date other than today. This option is available if you do not want the plan to start immediately. Click Yes. Choose the starting date for the plan by clicking onto the calendar. Click OK. The Multiple Appointment Calendar screen is where the appointment times are booked and conflicts resolved. Office holidays and vacations will be shown on the calendar. This screen can be broken into three sections: Make Appointments for the current line of the ‘Multiple’. This section is where you input the times for each day that the patient should be booked. Type in as many times as you need for the current line. The number of appointments is listed above the days of the week. 29 PATIENT MANAGEMENT PROGRAM The ‘named’ area to the right lists the schedule. Checkmarks indicate booked appointments. You will need to have checkmarks beside every item in order to complete. The calendar area shows booked appointments. It indicates conflicts where edits or cancellations will need to be completed. These appointments are signified by colour coding. The legend is detailed at the bottom of the screen. After completing the first line of scheduled appointments you will need to delete one of the times in order to be able to move to next line of scheduled appointments. Click into the field below one of the days of the week and then click the Delete this Time button. Click goto Next Line. The second set of scheduled appointments below the ‘Named’ area will now be processed and show any conflicting appointments that need to be edited or cancelled before continuing. Handling Conflicts And Changing Variables You can edit all appointments that appear as conflicts (red on yellow). Click onto the conflict or appointment that you wish to correct. A new screen appears asking you to Select another time for this appointment. Notice the ‘3 *’ (asterisk) in the time slot that we had selected. The ‘*’ indicates the time chosen. The ‘3' indicates the number of units (columns) already booked at this time. This practitioner has three columns available on his appointment book and therefore the reason the appointment failed is the time slot is already full. 30 PATIENT MANAGEMENT PROGRAM At this point you can change the appointment: to another time by clicking into another time slot to another day by clicking onto a time slot on a different day to another doctor You can also change: the type of appointment the units of time the appointment comments If you have edited the appointment to eliminate the conflict click Book Appointment. If you wish to cancel the appointment click Cancel Appointment. Once all the appointments are complete click Accept. Click Yes when asked if you would like to book the appointments. Click Print Calendar. If you choose you can add comments to the bottom of the patient calendar by typing into the large white area or choose a pre-existing comment by double clicking an item from the Select a Comment box. Note: Comments are created under the Setup menu, Other Comments. The calendar can be printed out for different periods of time. Click on the radio button to the left of the appropriate time. Click Print the Calendar. The appointment calendar now appears on screen. Each page contains two months of appointments. Letterhead information will be pulled from Clinic Defaults. 31 PATIENT MANAGEMENT PROGRAM Posting Activity Accessing Patient Activity There are five ways to access Record Activity and Payments. 1. 2. 3. 4. 5. From the Patient Menu Clicking on a Patient appointment on the Appointment Book Pressing F10 on a Patient appointment on the Appointment Book (shortcut) Pressing F12 on the Appointment Book (shortcut) From within Patient Information on the Account/Activity tab From the Patient Menu Go to the Patient menu and choose Record Activity and Payment. Click onto or type the underlined letter on the button you wish to use for your search criteria. Select the patient by double clicking on them or highlight and press Enter Clicking on a Patient appointment on the Appointment Book Click onto the patient on the appointment book and press the F10 key or click the Activity (F10) button Pressing F10 on a Patient appointment on the Appointment Book Move the cell pointer over the appropriate patient on the appointment book. Press F10 Pressing F12 on the Appointment Book Press F12 on the appointment book and click onto or type the underlined letter on the button you wish to use for your search criteria. Select the patient by double clicking on them or highlight and press Enter. This is a shortcut for walk-in patients and for those offices not using the PMP appointment book schedule for patient appointments. From within Patient Information on the Account/Activity tab In the Patient Information screen press F10 from any tab or click the Account/Activity tab and click the Activity button. 32 PATIENT MANAGEMENT PROGRAM Posting Patient Transactions The Patient Activity screen begins with Treating Doctor. The listed practitioner will be either the practitioner with whom the patient was booked or the Doctor of Record if you entered using the F12 key. Change the Treating Doctor if necessary. Click into the field below the word Code to bring up a list of your Fee Schedule. Scroll through the list or type the first few letters of the code for the item you are searching for. For instance, if you type the letter ‘C’, the Fee Schedule opens and takes you to the beginning of the fees that have a code starting with ‘C’. Locate and double click the item you are searching for or highlight and press Enter. The amount listed under the Patient column is editable. To change this amount, click into the field, edit the amount and press the Tab or Enter key when you have finished. You can select more than one activity or inventory item by clicking into the code field below the previous activity or typing a new code letter. A Default Activity (F11) button is located above the Payment Amount. This is used for selecting the typical treatment that the patient receives. You can either click this button or press F11 to select the default activity instead of locating the treatment yourself. Default Activity is set up in Patient Information on the Personal tab. Posting the Payment Once you have selected all activity click the appropriate Payment Amount from the list. Amount allows you to type a payment amount in the field to the right None means no payment was made 33 PATIENT MANAGEMENT PROGRAM Today’s Fees will pay the amount listed to the right which is the total of today’s billings for the treating practitioner Account Balance will pay the total to the right which is the entire balance owed to all practitioners for this patient Related Balance pays the total to the right which is the entire balance for this patient and all patients they are ‘linked’ to in Related Patients on the Personal tab of Patient Information Preset Payment will pay the total to the right which is the preset amount listed on the Account Activity tab of Patient Information Dr. No. _ will pay the amount listed to the right which is the total owed to the treating doctor only Click the down arrow under Payment Type and choose the correct payment type. Note: A payment type can be set up in the Patient Information on the Personal tab under the field Payment Type that will be the default when posting payments. Printing Receipts and/or Statements You can choose to print a receipt or statement at the time of posting. A receipt is a list of today’s transactions and payments only. A statement is a list of transactions between specified dates. When you choose the statement option you are prompted to specify the statement date range. The default start date will be next day after the last statement end date. If there is no previous statement date the start date will default to the date set up in Clinic Defaults. The end date will default to today’s date. These dates can be edited by clicking the down arrow and choosing another date on the calendar. Change the month and/or year by clicking onto the month or year at the top of the calendar and choosing another date from the list. You can type the dates into the Date From and Date To fields as dd/mm/yy. The last statement date field in Patient Information on the Account Activity tab will be updated after Posting. Posting the Activity Click Post. The transaction is now complete. The summary sheet will be updated to reflect this activity, related patient balances will be paid automatically and added to summary sheets, receipts and/or statements will be printed. How you accessed the patient activity and whether the patient has another appointment booked will determine what appears on screen next: 34 PATIENT MANAGEMENT PROGRAM If you entered the patient activity screen from an on-screen appointment and the patient you are processing has another appointment booked you will see a pop up entitled ‘Yes, or No’ confirming the patients next appointment. Click Yes to confirm and you will taken back to the appointment screen. If you choose No you will be taken to the Appointment tab in Patient Information to delete or edit the appointment. If you entered the patient activity screen from an on-screen appointment and the patient you are processing does not have another appointment you will be taken to the Appointment tab of Patient Information to allow you to book the next appointment. If you entered the activity screen from the patient menu or F12 you will return to the appointment book screen without future appointment details or prompting for additional booking. If you entered the activity screen from the Activity button located in the Patient Information screen you will be returned to the same screen. Posting Payments Only Access the Patient Activity screen as seen in previous instructions. Instead of choosing a code for activity, press F10. A payment line will be created. The cursor is now activated under Payment Amount at the Amount field. Type the amount of the payment or click the radio button to left of the relevant payment option. Determine the Payment Type by clicking the down arrow and selecting the appropriate type. Click Post. Patients Who Do Not Have Appointments (Walk-Ins) Press F12 while on the appointment book and select your patient by the method of your choice. Double click or press Enter on the appropriate patient. Once in the patient activity follow through with Posting Patient Transactions. These patients will appear as DONE appointments on the appointment book. They will not have an appointment type and the words ‘WALK-IN’ will appear in comments and on the Appointment tab in Patient Information. 35 PATIENT MANAGEMENT PROGRAM Discount PMP handles discounts to allow you to decrease patient cost for specified items. To Post a Discount press F12 on the appointment book and select your patient or get into the Patient Activity screen in your usual manner. Enter your transaction in your usual manner. Press Enter or the Tab key to create a second line. Type DI or click into the Code field and select Discount. The curser is now activated in the patient fee area. Type the discount amount with a minus sign, ie. -20.00. Press Tab. The discount line now shows the fee reduction in red and the total fee for today includes the discount. Click Post. Note: Summary sheet shows a total of the discounts if you use the code “DI”. This total can be given to your accountant to provide information for your records of the amount of reduced or complimentary services your office provides. Refund There are two types of patient refunds. The first is a refund that is required due to an overpayment. To Post a Refund press F12 on the appointment book and select your patient or get into the Patient Activity screen in your usual manner. Type REF or click into the Code field and select Refund. Leave the patient fee at 0.00. Press Enter. Press Enter or the Tab key to create a second line. To create the refund amount either click the radio button to the left of Amount and type in the amount of the refund with a minus sign, i.e. -50.00 or click the radio button to the left of Account Balance if the amount is correct 36 PATIENT MANAGEMENT PROGRAM Select the method of the refund i.e. Cash, Cheque, etc. under Payment Type. Click Post. Note: Your end of day receipts will not match your summary sheets if you write a Cheque to your patient for the amount of the refund. If you refund by cash, debit or credit card, your day end receipts will be accurate. In the Patient Information Account Activity screen add a comment to the refund by clicking onto the refund line and clicking the Edit Comment button. Type an explanation for the transaction. Type your initials. Click Save. Inventory Refund The second type of refund is because of a fee reduction of inventory return. This is a two step process: 1. Return the inventory 2. Process the refund 1. Return the inventory item. Press F12 on the appointment book and select your patient or get into the Patient Activity screen in your usual manner. Locate and select the original inventory item. Click into the column under Patient. Type in the cost of the item with a minus sign, i.e. -50.00 and press Enter or the Tab key. Click the radio button to the left of None in the payment amount area. Click Post. 2. Process the refund. Get back into Patient Activity. Type REF or click into the Code field and select Refund. Leave the patient amount at 0.00. Press Enter. Press Enter or the Tab key to create a second line. 37 PATIENT MANAGEMENT PROGRAM To create the refund amount either click the radio button to the left of Amount and type in the amount of the refund with a minus sign, i.e. -50.00 or click the radio button to the left of Account Balance if the amount is correct. Select the method of the refund i.e. Cash, Cheque, etc. under Payment Type. Click Post. Note: Your end of day receipts will not match your summary sheets if you write a Cheque to your patient for the amount of the refund. If you refund by cash, debit or credit card, your day end receipts will be accurate. In the Patient Information Account Activity screen add a comment to the refund by clicking onto the refund line and clicking the Edit Comment button. Type an explanation. Type your initials. Click Save. Note: If the returned inventory item can be sold again, you will want to increase your Amount in Stock for this item in Fee Schedule, Inventory. Activity Date The Activity Date function allows you to change the date for processing transactions that occurred on a previous day. Go to the Utilities menu, then Activity Date. To set the date back, click onto the appropriate day on the calendar. For a previous month click the back arrow once for every month you wish to move back. You can also click onto the month or year to produce a list of months / years. Click Accept Changes. Once you have returned to the main appointment screen you will see a red border around the screen. This indicates that activity posting will be on a date prior to today. Process the necessary transactions. Print the summary sheet and attach it to the original summary sheet for that date to explain any changes in accounts receivable. To return to today go to the Utilities menu, Activity Date. Click Reset to System Date, then Accept Changes. 38 PATIENT MANAGEMENT PROGRAM Editing and Deleting Transactions There are times after processing patient activity that you have to edit or delete a transaction. For example the patient could have paid you after the visit had been posted or you posted an incorrect patient. Get into the Patient Information Account Activity tab. To Edit a Transaction click the item to be edited and click Edit. A pop up window will appear entitled Edit a Transaction. The area on the left is the activity before the edit. Modifications take place on the right side of the screen. When attempting to alter a date please note that you can only move the date forward. Click in to the field that you wish to change. Once the change is complete, click Accept Modified Record. If no changes are made click Cancel. A message box will appear noting You’ve edited a transaction…. Type an explanation for the edit and add your name or initials. Click OK. Changes will be recorded in the Account Edit Journal along with the comment. To Delete a Transaction click the item to be deleted. Click the Delete button. A pop up window will appear asking if you would like to delete the payment as well. Answer Yes or No. Another window will appear asking you to confirm the deletion. Click OK. A message box will appear noting You’ve deleted a transaction…. Type an explanation for the deletion and add your name or initials. Click OK. Changes will be recorded in the Account Edit Journal along with the comment. Hint: All PMP users in your office should be instructed to detail the reason for the edit or deletion and note their name upon seeing the comment box. 39 PATIENT MANAGEMENT PROGRAM Transfer Credits / Balances between Patients To transfer credits from one patient to another: Add Transfer to your Fee Schedule if necessary. Click the Setup menu, Fee Schedule, Other. Click Add. Type TRAN into the code field and Transfer into the description field. Leave the amount at 0.00. Click Save. Add Transfer to your Payment Types if necessary. Click the Setup menu, Payment Types. Click Add. Type Transfer into the Description field and TRAN into the Short description field. Transfer the Amount from the Patient with the Credit. Get into Patient Information on the Account Activity tab for the patient that has the credit. Press F10. Select Transfer from the activity list. Press the Tab key. Below Payment Amount click Amount and type the total to transfer with a minus sign before the amount, i.e. -100.00. Change the Payment Type to Transfer. Click Post. Transfer the Amount to the Patient with the Balance. Get into Patient Information on the Account Activity tab for the patient that has the balance owing. Press F10. Select Transfer from the activity list. Press the Tab key. Below Payment Amount click Amount and type the total of the transfer, i.e. 100.00. Change the Payment Type to Transfer. Click Post. These transactions will now appear in succession on the summary sheet. There should be no change in the monies for the day as this is a direct transfer. Transfer Credits / Balances between Practitioners You may wish to transfer a balance /credit from one practitioner to another. For instance you may want to transfer the $30.00 owed to DD to LH. Add Transfer to your Fee Schedule if necessary. Click the Setup menu, Fee Schedule, Other. Click Add. Type TRAN into the code field, Transfer into the description field, and leave the amount at 0.00. Click Save. Add Transfer to your Payment Types if necessary. Click the Setup menu, Payment Types. Click Add. Type Transfer into the Description field and TRAN into the Short description field. 40 PATIENT MANAGEMENT PROGRAM Transfer the Amount from the Practitioner with the Balance / Credit.. Get into Patient Information on the Account Activity tab for the patient that has the balance / credit. Press F10. Change the Treating Doctor field to the practitioner with the amount to be transferred. Select Transfer from the activity list. Press the Tab key. Click Amount and type the amount to transfer, i.e. 30.00 or -30.00. If your patient owes this practitioner money, the transfer amount is positive. If there is a credit balance, the transfer amount is negative. Change the Payment Type to Transfer. Click Post. Transfer the Amount to the Other Practitioner. Press F10 again. Change the Treating Doctor field to the practitioner to who is receiving the transferred balance. Select Transfer from the activity list. Press the Tab key. Click Amount and type the amount to be transferred, i.e. -30.00 (the opposite of the amount transferred above). Change the Payment Type to Transfer. Click Post. The balance is now owed to LH. 41 PATIENT MANAGEMENT PROGRAM Returned Cheques To record a returned cheque in PMP complete the following steps: Add Returned Cheque to your Fee Schedule if necessary. Also add Returned Cheque Charge if it is your office policy to charge your patient when the bank returns a cheque. Click the Setup menu, Fee Schedule, Other. Click Add. Double click into the code field and type RC into the code field. Type Returned Cheque into the description field. Leave the amount at 0.00. Click Save. Click Add. Double click into the code field and type RCC into the code field and Returned Cheque Charge into the description field. The amount should be the fee you charge for a returned cheque. Click Save. Posting the Returned Cheque: Get into Patient Information on the Account Activity tab for the patient whose cheque was returned. Press F10. Select RC – Returned Cheque from the activity list. Press Enter. The patient amount should be left at zero. Select RCC – Returned Cheque Charge from the activity list. Press the Tab key. Below Payment Amount click the radio button beside amount and type the total of the returned cheque with a minus sign before the amount, i.e. -100.00. Change the Payment Type to Cheque. Click Post. These transactions will now appear on the summary sheet and in the patient file. There will be a reduction in the receipts on your daily summary and the total will not match the total of the cheques in your cash drawer. Gift Certificate Add gift certificate to your Fee Schedule if necessary. Click the Setup menu, Fee Schedule, Other. Click Add. Double click into the code field and type GC. Type Gift Certificate into the description field. Make the Selling Amount $0.00. Gift Certificates (GC) can be used in two ways depending upon the set up of your office: A gift certificate will be used by one practitioner only A gift certificate can be used by more than one practitioner. 1. Gift certificate is used for one practitioner only. Sale of GC. Get into the Patient Activity screen in your normal manner. Locate and select the Gift Certificate from the list. Press Enter or Tab to create a second line. The selling amount should be 42 PATIENT MANAGEMENT PROGRAM $0.00. The Payment amount will reflect the cost of the GC. Click onto the radio button to the left of Amount and type the amount of the payment. Choose the Payment Type from the list, click Post. This will have the effect of recording the money received and creating a credit on the patient file. There is no change in revenue; no service has been given. Redemption of CG. Get into the Patient Activity screen in your normal manner. Locate and select the treatment that the patient had from the list. Click onto the radio button to the left of None. Change the Payment Type to Gift Certificate. Click Post. 2. Gift certificate can be used by more than one practitioner. Create a new patient file named Gift Certificate by pressing F6 from the appointment book. Type the first name as ‘Gift‘ and the last name as ‘Certificate’. Make the Doctor of Record the first DC in your office. Click Save. Create a payment type named Gift Certificate. Go to the Setup menu, Payment Type. Click Add. Type ‘Gift Certificate’; press the Tab key type ‘GC’. Click Save. Sale of GC. Get into the Patient Activity for the patient Gift Certificate. Leave the Treating Doctor as the first DC. Locate and select the Gift Certificate from the list. Press Enter or Tab to create a second line. The selling amount should be $0.00. The Payment amount will reflect the cost of the GC. Click onto the radio button to the left of Amount and type the amount of the payment. Choose the Payment Type from the list, click Post. This will have the effect of recording the money received and creating a credit on the account for the patient file Gift Certificate. There is no change in revenue; no service has been given. Post to the first DC because that is the bank account that should get the money. Redemption of CG. Get into the Patient Activity screen for the patient in your normal manner. Make sure the Treating Doctor is the practitioner who performed the treatment. Locate and select the treatment that the patient had from the list. Click onto the radio button to the left of Amount and type the amount of the GC. Change the Payment Type to Gift Certificate. Click Post. The revenue or fee will show on the day summary sheet for the treating practitioner and the receipts will balance because you received the gift certificate as payment. To balance the actual cash get into the Patient Activity screen for the Gift Certificate patient file. Type ‘TRAN’ or click into the Code field and select Transfer. Press Enter. Press Enter or the Tab key to create a second line. Click the radio button to the left of Amount and type in the amount of the GC with a minus sign, i.e. -50.00. Change the Payment Type to Gift Certificate. Click Post. This transaction will reduce the credit balance on the Gift Certificate patient and has no impact on total revenue. Suggestions Some offices number their gift certificates. You can record this information in the patient comment area for the Gift Certificate patient e.g. “Oct1-08 sold GC#0052 - redeemed Feb14-09”. If a gift certificate expires you need to reflect an increase in income because you received money but did not render a service. Create a fee schedule item called “expired gift certificate” with a ‘zero’ fee and post this transaction anytime you need to eliminate a credit on account because of an unused or expired gift certificate. The fee will equal the price of the certificate purchased and would be entered when you post the transaction. 43 PATIENT MANAGEMENT PROGRAM Write Offs Patient Write Off Get into the Patient Activity screen or press F12 from the appointment book and locate the patient. Press F9. A write off information line will appear. The cursor is now activated in the Amount field. Type the amount of the write off or click the Account Balance radio button if the amount is correct. Click Post. Reversing a Write Off You may on occasion be required to reverse a write off. There are two steps involved in this procedure: 1. Get into Patient Information on the Account Activity screen, press F10. Press F9. A write off information line will appear. The cursor is now activated in the Amount field. Type the amount of the write off to be reversed. Click Post. The amount is shown as a credit in the patient balance at this point. 2. Click onto the write off (WO) line, click Edit. Click into the Patient Amount box on the right and highlight only the minus sign (-). Press delete. Click Accept Modified Record. Type the reason for the reversal into the comment field. Click OK. Below is how the account would look after reversing a write off. Credit Write Offs There are 2 steps involved in writing off a credit. Please note writing off a credit should only be done after continued attempts to refund the patient have failed. Please check with your bookkeeper or accountant for more details. 1. Get into Patient Information on the Account Activity screen, press F10. Press F9. A write off information line will appear. The cursor is now activated in the Amount field. Type the amount of the credit as a positive number. Click Post. The amount of the credit has now doubled. 2. Click onto the write off (WO) line, click Edit. Click into the Patient Amount box on the right and highlight only the minus sign (-). Press delete. Click Accept Modified Record. Type the reason for the write off into the comment field. Click OK. 44 PATIENT MANAGEMENT PROGRAM Below is how the account would look after writing off a credit. WCB Write Offs To write off stale dated WCB claims click the Manitoba menu, Record Manual Payments, WCB. Choose the practitioner; click Prepare the report for this Doctor. Locate the patient by clicking Number, Surname, or First and typing the search information into the Search field. Click the first visit you wish to write off under Activity. Click into the Current Line amount box after selecting the date and type 0.00 into the amount field. Click Accept Changes. Click 2. TTP & WO. Click Finish when all claims to be written off have been handled. Print the WCB Payment Journal. Payment Distribution Screen (Multi Practitioner Offices Only) A Payment Distribution screen will appear after processing a payment for a patient when more than one practitioner is owed money and the payment amount is not equal to the total owed. The lower half of the screen is named ‘Payment Worksheet’. All the practitioners on your PMP will be listed here with account balances. Put a checkmark beside Balance Due only if you wish to pay the entire balance for that practitioner. If you wish to pay an amount different from the Balance Due type that amount into the field under Payment. Each payment made in the worksheet will reduce the Amount to Allocate balance until the total is 0.00. The Accept button is only enabled when the amount to allocate reaches 0.00. Click Accept. 45 PATIENT MANAGEMENT PROGRAM View All Doctor Balances On occasion you may require the ability to edit the balance owing for a specific patient / doctor. This is not a procedure that is recommended unless it is done to correct a balance owing that was not created by a listed activity or to correct a balance transferred from another software conversion. In the Patient Information screen on the Account / Activity tab click View All Doctor Balances. A pop up window will appear entitled Edit Balances. Practitioners appear in the order they are listed on the Appointment Book. The practitioners that are on the current Appointment Book appear in white at the top of the window. The other practitioners that are listed on this program but not loaded on the Appointment Book are in grey and can still be edited. To alter a balance press the Alt & E keys at the same time. A New Balance column will become visible. Make the required changes. Click OK. An edit box will appear where you are expected to type an explanation for the edit. Initial your explanation. Changes made in this area will be reflected in the Accounts Receivable and the Account Edit Journal. 46 PATIENT MANAGEMENT PROGRAM Add a New Patient & Patient Information Accessing the New Patient File There are four ways to access the new patient file. From the Patient menu Add New Patient Right click on the appointment book, choose Add New Patient Click on an empty time slot on the appointment book, click Add New Patient Press the F6 key when on the appointment book, click New Patient Each of the four ways to add a new patient takes you to a new window with a blank patient record file. Across the top of this window you will see the heading ‘Patient Information Adding a NEW Patient (Patient Number not yet assigned)’. The Personal tab The Personal tab contains basic information about the patient. You must enter the First and Last name of the patient to save the file. The patient number is automatically assigned upon saving using the Next Available Patient Number found under the Setup menu, Doctor Defaults. If the patient to be added is related to a patient already in your database and they have the same address you can use the Copy From Existing button to copy basic demographic information into the new file. Fill in the required information. Phone Numbers The phone number area will hold up to four phone numbers. Choose the type of phone number you are adding by clicking the down arrow and selecting the type from the list. 47 PATIENT MANAGEMENT PROGRAM Email The email button above the Email Address will open your electronic messaging program and address an email to the listed address. Related Patients Related Patients will allow you to link family members or multiple files for the same patient so that payments can be made for all outstanding accounts. Double click on each patient you wish to relate. Click Continue. Do not add the patient whose file you are in to the related selection. Payment Type A default payment type can be set up that will be used whenever you post activity. Default Code You can create a default activity for each patient that will post the activity with a single keystroke. Click the down arrow beside Default Code and choose the activity most often posted for this patient. Flags Flags are single digits or letters used to indicate something meaningful to you about the patient. You may have up to eight flags per patient. Flags are created in the Setup menu, Flags. The Flag option can be chosen to select a particular group of patients for some reports, e.g. Queries. The Comments tab Enter relevant information into this tab that isn't stored elsewhere. There are no restrictions as to how much information can be stored. You may predefine frequently used comments in the Setup menu, Patient Comments. Double clicking on the predefined comment under Select a Comment will enter it automatically into the body of the comments. The Pop Ups tab Pop Ups are information boxes that will appear on a patient file where and when you choose, giving information you have input and may require about this patient or their appointment. Locations where pop ups are designed to pop are chosen in the Setup menu, Clinic Defaults. See page 10 and 48. The Manitoba tab The Manitoba tab includes tabs for Manitoba Health, Manitoba Public insurance, and Workers Compensation Board. The Manitoba Health tab contains: - The patients MH Number - Visits Left. This field automatically decreases when treatments are posted. On or your next business day after January 1st you will receive a pop up upon opening your PMP that asks you if you would like to reset the Manitoba health visits. If you have completed posted treatments from the previous year you can choose Yes. Choose No to continue inputting visits from the previous year. The pop up will appear every time you open PMP until you select Yes. Once you have selected to 48 PATIENT MANAGEMENT PROGRAM renew the MH visit every patient will default to having 12 visits left. This field is editable should the amount be incorrect at any time. - The Diagnostic Code which is chosen from a pick list. - Diagnostic Comments for C99 is a field where you type in any comments related to the Diagnostic Code of C99 Other Conditions - Fee after Manitoba Health expiry. In this field choose the fee to bill the patient once their MH visits are exhausted. The Full Fee adds the MH fee to the patient fee and bills that amount. Patient Fee continues to charge the patient what they were charged will MH visits remaining. Post Expiry Fee will charge the patient the amount typed into the field box. The MPI tab contains specified fields to input relevant information that will populate reports and invoices. This tab also allows you to create New Initial chiropractic, New Track I, and New Track II reports. The WCB tab contains specified fields to input relevant information that will populate reports and invoices. This tab also allows you to create New Chiropractor’s First and Progress Reports. The Bill To / Employers tab The Bill To / Employers tab houses information regarding the person or company that is responsible for the account if not the patient themselves or Workers Compensation. The EHC tab Input any relevant Extended Health Care information on this tab. Note these totals do not automatically count. To save the new patient file click Save. Once saved two new tabs will appear: The Appointments tab The appointments tab houses all past and future appointments. It offers the option to Add an appointment (using the F2 Appointment Grid), Book Multiple Appointments, and after posting activity it offers Add an appointment, Same time next week, and Same time next Month (28 days). You also have the option to Print Calendar and Delete all Pending Appointments. The Account / Activity tab The Account / Activity tab is where all financial transactions are stored. You can print receipts and statements from here, add comments to activity to explain their nature, and also edit and delete transactions. The Lower Taskbar The bottom portion of the Patient Information screen is a static screen. It is available on all tabs within the patient information screen. The Next and Previous buttons give you the choice of moving forward or backward one patient at a time, searching by either name or number depending upon the previous search criteria. An envelope button is located in the middle of the screen which will print the name and address on an envelope or label for the patient currently being viewed. See page 51. The buttons on the right offer you the ability to locate other patients by Last name, Number, First name, and Other. 49 PATIENT MANAGEMENT PROGRAM The Other button offers various options for locating patients. The bottom taskbar shows hints regarding accessing the F2 - to add an appointment and F10 - to process an activity. Click Continue to save changes and exit the patient information screen. Advanced Features within the Patient File Default Activity You can create a default activity for each patient that will post the activity with a single keystroke. The setup for this is in Patient Information Personal tab. Click the down arrow beside Default Code. Choose the activity most often posted for this patient. Processing Patient Activity using Default Activity When in the patient activity click F11 or press the Default Code button to use the default activity. 50 PATIENT MANAGEMENT PROGRAM Envelopes / Labels Envelopes and labels are located in three areas in the PMP: Right clicking on a booked appointment brings up the addressed envelope for that patient. An unused appointment slot brings up a blank envelope where you can type an address. In Patient information there is a button located on the bottom of the screen. This will bring up an addressed envelope for that patient on all tabs. In Bill / To, EHC, and MVA there is a button with a ? on it. Click on it to bring up information for the company or person. An envelope button is located on the bottom right. Click the envelope icon. For Envelopes select the following: 1. The size of the envelope; 6-3/4, 9, 10, 11, 12, 14 2. Feed type depending on your printer; Left, Right Vertical Middle, and 3. Check Print Return Address to add your information to the upper left corner. This information is pulled from Clinic Defaults 4. Edit the name and address 5. Font attributes 6. Patient name and address are editable 7. Any changes in Printer setup To utilize labels you will need to purchase and install a Dymo LabelWriter 400 Turbo. Please note that other label equipment cannot be guaranteed to work from within PMP. Once installed, checkmark the Dymo option located in Computer Defaults under the Setup menu. All information in the Address to Print box can be edited, Patient number, x-ray information, date, etc. can be added to the label. Click the LabelMaker icon to produce a label. 51 PATIENT MANAGEMENT PROGRAM Related Patients Related Patients will allow you to link family members or multiple files for the same patient so that payments can be made for all outstanding accounts. This is set up in Patient Information Personal tab. Double click on each patient you wish to relate. Click Continue. Once Related Patients have been set up you will see a pop up during activity posting that details outstanding accounts. Pay related patient balances including today’s billings by clicking the radio button next to Related Balance. Do not use the related balance function if anyone in the group has a credit balance. When choosing to print statements for related balances the statements will print for all related patients receiving part of the payment. 52 PATIENT MANAGEMENT PROGRAM Pop Ups Pop Ups are information boxes that will appear on a patient file where and when you choose, stating information you have input and may require about this patient or their appointment. Patient pop ups are created in the Patient Information Pop Ups tab. The option of when and where pop ups appear is selected in the Setup menu, Clinic Defaults. See page 10. To Add Pop Ups get into the Patient Information file and click the Pop Ups tab. Click Add. To choose when you would like the Pop Up to appear, click the button number of your choice. You will need to edit the date for items 2, 3, and 4, and add in a number for items 5 and 6. Pop Up When Options: 1. Will pop every time until deleted. 2. Will pop only on the chosen date. If the patient file is not accessed that day the Pop will be deleted. 3. Will pop only once, the first time the patient is accessed on or after the date chosen. 4. Will pop only that week for as many times as the patient is accessed. 5. This pop up pops only after X number of visits have been posted. Note: Items from the Fee Schedule listed under Inventory or Other are not considered visits. 6. This pop up will appear every time after the date chosen until the new month starts and reoccurs every subsequent month until it is deleted. Once you have selected the appropriate choice click OK. Click into the Pop Up Comment box and the type the comment you would like to appear. You may type up to 5 lines of text for each pop up. To choose a default pop up comment click onto the comment of choice from the list on the right and click Copy Selected. The default comment will copy into the Pop Up Comment box. Click Save. 53 PATIENT MANAGEMENT PROGRAM Edit Comments Comments in Patient Information can be edited, highlighted, and formatted for more visibility when processing. You can also print the patient comment. Once you have created the comment click Edit. An edit screen will appear. Determine the area you wish to highlight by click and drag. Click the highlighter icon. Click the X to close. You will be asked if you wish to save your changes, click Yes. The highlighted and / or edited portions will appear on the Patient Summary Information screen. 54 PATIENT MANAGEMENT PROGRAM Active Email PMP will open your messaging program and address emails to your patients if you have internet capability on your computer. Enter the patient email address and click the Email button in Patient Information / Personal to activate this feature. Edit Activity Comments When you post or edit an activity that requires an explanation, you can add a comment to the transaction. On the Patient Information / Account Activity tab click the activity where you would like to add a comment. Click Edit Comment. A comment screen will appear allowing you to type a comment. Type a comment that describes the activity process. Click Save. Once an activity comments has been added to an activity a checkmark will appear in the second column. 55 PATIENT MANAGEMENT PROGRAM Manitoba Health Services Commission It is important to understand how Manitoba Health (MH) works in the province of Manitoba. The following is a summary of the components of MH structure. The Manitoba Government utilizes a method of billing fees for chiropractic services called TWO-TIER BILLING. This means that in Manitoba, the Province will pay a PORTION of the fee for chiropractic services. The REMAINDER of the fee is the direct responsibility of the patient. The government agency under which fees are paid is the Manitoba Health Services Commission (MH). For residents of Manitoba the rules are as follows: Each patient is entitled to charge fees for chiropractic care to MH for up to 12 visits per year. The billable amount is $10.75 per visit. The fiscal year runs from January to December. Once the patient has reached the allowable amount, they are personally responsible for fees for services, until the commencement of the new MH fiscal year. MH will not pay for a claim if submitted more than 6 months after the treatment date. If a claim is rejected by WCB or MPI you have 6 months from the service date to submit to MH. General Information MH has set down rules that apply to codes and fees for services rendered in a chiropractic office. All treatments including examination are billed to MH with the code 8506 and fee of $10.75. When entering patient data into PMP it is important to consider: Correct fees are entered into the fee schedule in the program and are kept current with any changes. MH fees are correctly entered in the program, and updated when necessary. The Patient is listed as the correct type in the program. (ie. MH, MPI, WCB) The Manitoba Health Number (6 digits) is correctly recorded in the patient file. (Make sure you look at the card yourself when a new patient arrives. This procedure alone will help keep your accounts receivable to a minimum.) Surname & given name in the program are exactly the same as it appears on the Manitoba Health Card. Specific data is required for claims submission to MH. Missing data will result in a claim being rejected. This may cause a delay in payment. The data required to submit a MH claim is as follows: - Health number Service code for each visit Fee submitted for each visit Service date MH Diagnostic code MH billing may be submitted daily, weekly or bi-weekly. The deadline date for submission varies each month. All cut-off dates are posted on the EPiCS message board and are also issued at the beginning of each calendar year. If you are unsure please check with your MH office. Understanding the process of billing and reconciliation will help you monitor your accounts accurately. Follow through with the step by step billing, handling rejections and reconciliation procedure to minimize your accounts receivable and maintain MH account control. 56 PATIENT MANAGEMENT PROGRAM Manitoba Health Billing Once activity has been processed in patient files where MH fees are applicable you will want to create a billing to Manitoba Health. Go to the Manitoba menu, Prepare MH Billing Exchange. Click the radio button next to the type of billing you wish to produce. All Pending Claims will pull all MH claims that have not been previously billed or that have been marked back to pending for resubmission. Pending Claims by Period will pull all MH claims that have not been previously billed or that have been marked back to pending for resubmission between specified dates. Rebill Claims by Period will pick up all claims whether pending or billed between specified dates. Click Run. The next screen contains information and reports regarding your submission. The View Draft Rejection Journal button, if enabled, will generate a draft report on your screen of all claims that are missing information and therefore will not be submitted. If the button is not enabled there are no rejected claims at this time. The rejection journal will show a box around a field to indicate the problem is with that field. When the patient number has a box around it then it means the patient demographics are incorrect or missing. For example the address is missing or Rural Route is spelled R R. The address field requires a minimum of three characters. The View Draft Claim Journal button will generate a draft report on your screen of all claims being submitted. Click any of these buttons to produce the report for viewing or printing. Click Cancel to cancel this submission if you want to fix rejected claims or delay this billing. To continue click Save and create Submission file. An information box will appear noting the name and location of the submission. Make note of this filename, you will it need when sending claims through the EPiCS system. Click OK. The View Rejection Journal button will be enabled if there are rejections. Click this button to print the report. The View Claim Journal button will allow you to generate the billings report. These reports will be stored in Documents for Printing under the Report menu and can be viewed or printed at a later time. The Rejection Journal appears like this: The Claim Journal appears like this: 57 PATIENT MANAGEMENT PROGRAM Processing Manitoba Health Reconciliations Manitoba Health sends you a payment file each month through the EPiCS program. Download the file and run it in PMP to pay individual claims and update your Accounts Receivable. After you have downloaded the payment file from MH go to the Manitoba menu, Reconcile MH Remittance File. Click Choose a Returns File. Locate and select the Remittance file by clicking the down arrow beside Look in. Click Open. Click View Returns File to view the reconciliation. Click Process File to apply the reconciliation. Click OK after the payment has been applied. Click View MH Payment Journal to print the payment journal. Click View MH Rejection Journal to print the rejection journal. These reports will be stored in Documents for Printing under the Report menu and can be viewed or printed at a later time. The Payment Journal is named ‘MH_ PJ’ followed by the creation date. Click Continue. Handling On Screen Rejections during Reconciliation If MH has rejected any claims a screen will appear entitled 'Handle Rejections'. Decisions will be required regarding each rejection. The rejection code you choose will determine the action that is taken. Three options are available to deal with the rejections: 1. Transfer to Patient 2. Transfer to Patient & Write Off 3. Rebill the Claim You may either press the numbers 1, 2, 3 on your keyboard or click the box below the title selections on the top right of the screen. For example: if the code is 01 - MH Number not valid, you will choose. # 3. Rebill if you are able to correct the claim. Hint: When in doubt choose Rebill. You can always re-submit or pay the claim once you understand the reason for the rejection. A complete list of Manitoba Health Disposal Codes is available in the Appendix at the back of this workbook. 58 PATIENT MANAGEMENT PROGRAM A check mark will appear in the box where you have clicked or pressed. When all rejections have been handled, click Finish. Click View MH Payment Rejection Journal to print the report. This report will be stored in Documents for Printing under the Report menu and can be viewed or printed at a later time. The Payment Rejection Journal is named ‘MH_ PRJ’ followed by the creation date. Click Continue. Dealing with No Payment Recorded After processing the payment file you may notice the words No Payment Recorded (NPR) listed in the midst of patients name on the MH Payment Journal. What this means is that PMP was unable to locate the claim listed above the NPR to mark the payment. There are a few different reasons that this may happen. 1. The claim was deleted after it was submitted to MH. This type of claim will be displayed on the Payment Journal exactly the same as the one above and will have fee submitted 10.50 and fee paid 10.50. You will need to notify MH that a wrong claim was paid and follow their direction. You may also need to manually pay the correct claim. 2. The claim was previously paid. On the Payment Journal it will appear without a fee submitted and will not have a patient name listed above. The disposal code is 03 – Duplicate Account – claim previously processed. To find the patient this claim belongs to you will need to locate the Manitoba Health Claim Journal that contains the submission. Follow the column ‘Claim Number’ to locate the claim, in this case claim number 1200. This type of NPR would signify that the claim was listed as a No Payment Recorded on a previous Payment Journal. The claim will need to be paid manually if found on a previous claim journal as paid. See below. 59 PATIENT MANAGEMENT PROGRAM Manitoba Public Insurance “Manitoba Public Insurance is a nonprofit Crown Corporation that has provided basic automobile coverage since 1971. Services are available through 22 claim centers, two Customer Service centers in 13 locations across Manitoba, and ten Driver and Vehicle Licensing (DVL) outlets. DVL services are also available through 147 agents in 123 communities, including 100 photo licensing agencies, and mobile testing units that service 69 communities. A staff complement of more than 1,600 strong makes MPI one of the largest employers in the province.” This information was taken from the Manitoba Public Insurance website at www.mpi.mb.ca/. Set Up an MPI Patient In Patient Information: on the Personal tab Patient Type Patient Category Default Code A/R Type Send Statements To MPI as appropriate Adjustment EHC EHC on the EHC tab: input all information of the Insurer on the Manitoba / MPI tab: input Claim #, Accident Date, Adjuster, and Diagnosis Posting Transactions for MPI Patients When posting activity for the MPI patient you can select the same activity as you would for a regular patient if your fee schedule is set up correctly. All transactions for treatments should have MPI codes and fees attached and will show $0.00 under the Patient column. Reports and inventory items billable to MPI should be added to Fee Schedule Inventory. Report fees can be billed at completion of Form creation (see next section) or billed separately. When you choose to bill reports separately you are prompted to choose the form you are billing for from a list of forms created for this patient. This procedure will apply the form number to the invoice billing. 60 PATIENT MANAGEMENT PROGRAM If you do not have any forms created within PMP type the number located at the top right of the form you are filling out into the field to the left of the OK button. This number is editable at a later time by clicking the + sign on the account activity line. Inventory items offer you the option of billing the patient or MPI during posting if both patient and MPI fees are set up for the item in the fee schedule. Manitoba Public Insurance Forms When you have a patient in your office where Manitoba Public Insurance (MPI) will be the payor you are required to complete an ‘Initial Health Care Report’ and later a ‘Health Care Provider Progress Report’. PMP makes completing these reports quick and easy. To create the reports you will need to get into Patient Information on the Manitoba tab and go to the MPI section. 61 PATIENT MANAGEMENT PROGRAM The MPI screen contains some basic fields that will be ‘pulled’ into the reports you create. There are buttons for the 3 types of reports available for MPI patients; New Initial Chiropractic Report, New Track I Report, and New Track II Report. Below the report buttons is a list of ‘Finalized’ and ‘Draft’ forms. As each report is created it will be listed in this area along with any comments you wish to add to the report. The Edit Comment button will allow you to add comments to a form after The Edit Form button allows a ‘Draft’ form to be edited. ‘Finalized’ forms cannot be edited. View / Print will open the Ace Viewer and display your form in the required format. The Delete ‘Draft’ Form button allows you to delete ‘Drafts’. ‘Finalized’ forms can not be edited or deleted. Creating a Form Check that the Patient Information - Personal area has been completed first as this information will be ‘pulled’ into the form. Input the Claim Number, Accident Date, Adjuster if known, Area X-Rayed, and Diagnosis. This information will also be pulled into the form. Click New Initial Chiropractic Report. There are three parts to this form. Each part is separated in the tabs across the top. They will all need to be completed to ‘finalize’ the form. Along the bottom of the form are buttons for Test Form, Cancel, Save as Draft, and Save as Finalized (unalterable). Test Form when pressed will highlight required fields in yellow and marks a red ‘X’ on incomplete parts of the form Cancel closes the form without saving and brings the user back to the MPI screen Save as Draft will save all information input so far allowing you to edit or complete the form at a later time Save as Finalized (unalterable) saves the form in an unchangeable format. Use this button only when you are sure all the information is complete and correct. 62 PATIENT MANAGEMENT PROGRAM Click into empty fields to input required data. Click onto each part along the top to continue filling out the form. Click Test Form. Areas of the form requiring data before completion will be marked with a red ‘X’ at the top and the fields required will be highlighted in yellow. If you are unable to complete the form at this time due to lack of time or information click Save as Draft. The form will now be saved as a ‘Draft (can edit)’ on the main MPI screen in Patient Information. Click Edit Comments. Type a comment. Click OK. The comment will now be added to the form. Editing a Form Once you are ready to complete the report click the required form, Edit Form. The report will open allowing you to complete the form. Fill in missing information. Click Save as Draft. Click the required form, View / Print. Print the report and double check or have your doctor check for accuracy. Finalizing a Form When you are satisfied that the form is complete click the required form and Edit Form. The report will open allowing you complete the form. Click Save as Finalized (unalterable). 63 PATIENT MANAGEMENT PROGRAM Automatic Form Billing in PMP Upon ‘Finalizing’ a form you will be asked whether you would like to create an activity to bill for the form. If you choose to add the report charge, a transaction will appear on the Account/Activity tab in Patient Information. Note: Track I and Track II forms include a ‘Yellow Flags’ field on Part 3. When checked, PMP will add a billing of 5.00 to the activity if you choose to add the report charge at ‘Finalization’ Here is a completed form. 64 PATIENT MANAGEMENT PROGRAM Posting Manitoba Public Insurance Activity Fee Schedule items, when set up correctly, will appear with MPI billings and show up accurately on MPI invoices. When adding or setting up MPI billings in your fee schedule make sure to have the appropriate code and fee filled in. For items that are required to be listed under the heading Description add them to your Inventory in Fee Schedule. Note that Initial Visits and X-rays appear in Description when added to Fee Classes. Billing Manitoba Public Insurance Go to the Manitoba menu, Prepare Manitoba Public Insurance (MPI) Billing. Click the radio button next to the type of billing you wish to produce. All Pending Claims will pull all MH claims that have not been previously billed or that have been marked back to pending for resubmission. Pending Claims by Period will pull all MH claims that have not been previously billed or that have been marked back to pending for resubmission between specified dates. Rebill Claims by Period will pick up all claims whether pending or billed between specified dates. Click Run. The next screen contains information and reports regarding your claims. The View Draft Report button will generate a draft report on your screen of all claims being submitted with this billing. The View Draft Invoices button will generate the draft invoices that are to be submitted to MPI. Click these buttons to produce the report for viewing or printing. To proceed with the billing click Save and Print INVOICES. The View Report button will now be enabled. Click this button to print the report. These reports will be stored in Documents for Printing under the Report menu and can be viewed or printed at a later time. The MPI Claim Journal is named MPI_CJ followed by the creation date. The Invoices are named MPI_Inv followed by the creation date. 65 PATIENT MANAGEMENT PROGRAM Manitoba Public Insurance Reconciliation Go to the Manitoba menu, Record Manual Payments. Click MPI, Choose a doctor and click Prepare the Report for this Doctor. Select a patient by clicking onto the Number, Surname, or First button and typing information into the Search field. Click the patient name. A list of claims will appear on the right side of the screen. Click the first claim to pay. Click Pay <-> UnPay and Accept Changes. The status of the claim will change to paid. Continue with each claim to pay. Locate the next patient to pay claims for in the same manner. Click Finish when you have paid all claims. A report will appear on screen detailing the payments. Print the report at this time or you may print it later. It will be stored in Documents for Printing under the Report Menu. The Payment Journal is named ‘MPI’ followed by the doctor code and creation date. Click Close. MPI Write Offs To write off stale dated MPI claims click the Manitoba menu, Record Manual Payments, MPI. Choose the practitioner; click Prepare the report for this Doctor. Locate the patient by clicking Number, Surname, or First and typing the search information into the Search field. Click the first visit you wish to write off under Activity. Click into the Current Line amount box after selecting the date and type 0.00 into the amount field. Click Accept Changes. Click 2. TTP & WO. Click Finish when all claims to be written off have been handled. Print the Payment Journal. 66 PATIENT MANAGEMENT PROGRAM Worker’s Compensation Board General Information The Worker’s Compensation Board (WCB) has a fax-based reporting and billing process for healthcare providers. Instead of mailing reports, healthcare providers can fill out the form on paper or online and send them to the WCB by fax. Fax in Winnipeg: 954-4999 Fax outside of Winnipeg: 1-877-872-3804 When a claim is rejected by WCB you have 6 months from the service date to bill Manitoba Health for the claim. You will need to edit the claims. Set Up a WCB Patient In Patient Information: on the Personal tab Patient Type Patient Category Default Code A/R Type Send Statements To WCB as appropriate Adjustment Bill To Bill To on the Bill To / Employers tab: input all information of the Insurer on the Manitoba / WCB tab: input Claim #, Accident Date, Adjuster, and Diagnosis Posting Transactions for WCB Patients When posting activity for the WCB patient you can select the same activity as you would for a regular patient if your fee schedule is set up correctly. All transactions for treatments should have WCB codes and fees attached and will $0.00 under the Patient column. Reports and inventory items billable to WCB should be added to Fee Schedule Inventory. Inventory items offer you the option of billing the patient or WCB during posting if both patient and WCB fees are set up for the item in the fee schedule. 67 PATIENT MANAGEMENT PROGRAM Worker’s Compensation Board Forms If you have a patient in your office where Worker’s Compensation Board (WCB) will be the payor you will be required to complete a ‘Chiropractor’s First Report’ and later a ‘Chiropractor’s Progress Report’. PMP makes completing these reports quick and easy. To create the reports, you will need to get into Patient Information on the Manitoba tab and go to the WCB tab. The WCB screen contains some basic fields that will be ‘pulled’ into the reports you create. There are 2 types of reports available for WCB patients; New Chiropractor’s First Report, and New Chiropractor’s Progress Report. Below the report buttons is a list of ‘Finalized’ and ‘Draft’ forms. As each report is created it will be listed in this area along with any comments you wish to add to the report. The Edit Comment button will allow you to add comments to a form after The Edit Form button allows a ‘Draft’ form to be edited. ‘Finalized’ forms cannot be edited. View / Print will open the Ace Viewer and display your form in the required format. The Delete ‘Draft’ Form button allows you to delete ‘Drafts’. ‘Finalized’ forms can not be edited or deleted. Creating a Form Check that the Patient Information - Personal area has been completed first as this information will be ‘pulled’ into the form. Input the Claim Number, Accident Date, Adjuster if known, Area X-Rayed, and Diagnosis. This information will also be pulled into the form. 68 PATIENT MANAGEMENT PROGRAM Click New Chiropractor’s First Report. There are three parts to this form. Each part is separated in the tabs across the top. They will all need to be completed to ‘finalize’ the form. Along the bottom of the form are buttons for Test Form, Cancel, Save as Draft, and Save as Finalized (unalterable). Test Form when pressed will highlight required fields in yellow and marks a red ‘X’ on incomplete parts of the form Cancel closes the form without saving and brings the user back to the MPI screen Save as Draft will save all information input so far allowing you to edit or complete the form at a later time Save as Finalized (unalterable) saves the form in an unchangeable format. Use this button only when you are sure all the information is complete and correct. Click into empty fields to input required data. Click onto each part along the top to continue filling out the form. Click Test Form. 69 PATIENT MANAGEMENT PROGRAM Parts of the form that are not completed will be marked with a red ‘X’ and the fields required will be highlighted in yellow. If you are unable to complete the form at this time due to lack of time or information click Save as Draft. The form will now be saved as a ‘Draft (can edit)’ on the main WCB screen in Patient Information. Click Edit Comments. Type a comment. Click OK. The comment will now be added to the form. Editing a Form Once you have the missing information and / or time to complete the report click the required form and Edit Form. The report will open allowing you to complete the form. When all fields have been finished click Save as Draft. Click the required form and View / Print. Print the report, double check and/or have your doctor check for accuracy. Finalizing a Form When you are satisfied that the form is complete click the required form and Edit Form. The report will open. Click Save as Finalized (unalterable). Click the required form and View / Print. Print the report. You may wish to add a comment at this time regarding the completion or mailing date. Click Edit Comments. Type a comment and click OK. The comment will now be added to the form. 70 PATIENT MANAGEMENT PROGRAM Below is a completed form. Worker’s Compensation Board Billing Go to the Manitoba menu, Prepare Worker’s Compensation Board of Manitoba (WCB) Billing. Click the radio button next to the type of billing you wish to produce. All Pending Claims will pull all MH claims that have not been previously billed or that have been marked back to pending for resubmission. Pending Claims by Period will pull all MH claims that have not been previously billed or that have been marked back to pending for resubmission between specified dates. Rebill Claims by Period will pick up all claims whether pending or billed between specified dates. Click Run. The next screen contains information and reports regarding your claims. The View Draft Report button will generate a draft report on your screen of all claims being submitted with this billing. The View Draft Invoices button will generate draft invoices that are to be submitted to MPI. Click these buttons to produce the report for viewing or printing. To proceed with the billing click Save and Print INVOICES. The View Report button will now be enabled. Click this button to print the report. These reports will be stored in Documents for Printing under the Report menu and can be viewed or printed at a later time. The WCB Claim Journal is named WCB_CJ followed by the creation date. The Invoices are named WCB_Inv followed by the creation date. Click Finished. 71 PATIENT MANAGEMENT PROGRAM Worker’s Compensation Board Reconciliation Go to the Manitoba menu, Record Manual Payments. Click WCB, Choose a doctor and click Prepare the Report for this Doctor. Select a patient by clicking onto the Number, Surname, or First button and typing information into the Search field. Click the patient name. A list of claims will appear on the right side of the screen. Click the first claim to pay. Click Pay <-> UnPay and Accept Changes. The status of the claim will change to paid. Continue with each claim to pay. Locate the next patient to pay claims for in the same manner. Click Finish when you have paid all claims. A report will appear on screen detailing the payments. Print the report at this time or you may print it later. It will be stored in Documents for Printing under the Report Menu. The Payment Journal is named ‘WMP’ followed by the doctor code and creation date. Click Close. WCB Write Offs To write off stale dated WCB claims click the Manitoba menu, Record Manual Payments, WCB. Choose the practitioner; click Prepare the report for this Doctor. Locate the patient by clicking Number, Surname, or First and typing the search information into the Search field. Click the first visit you wish to write off under Activity. Click into the Current Line amount box after selecting the date and type 0.00 into the amount field. Click Accept Changes. Click 2. TTP & WO. Click Finish when all claims to be written off have been handled. Print the WCB Payment Journal. 72 PATIENT MANAGEMENT PROGRAM Reports Summary Sheets PMP Summary sheets are easy to read and include detailed information regarding the period you request. Pressing F4 while on a particular Appointment Book will activate a Daily Summary Sheet for that practitioner for the date on the appointment book. Summary sheets can also be accessed from the Report Menu and offer choices of Daily, Weekly, Monthly, Quarterly, and Yearly. Reports can be produced for individual practitioners, grouped by the entire clinic, or grouped by the practitioners listed on the appointment book currently in use. Daily summary sheets can be sorted by patient name, patient number, the order patients were posted in, or the activity code. Choose the order under Reports, Summary Sheet, and Daily. Click Run the Report to make the selected option the default. Reading the Daily Summary Sheet The first part of the Daily Summary Sheet details individual patient information regarding all financial transactions as well as next appointment information. Dr.R indicates the doctor of record for this patient. Dr.T indicates the practitioner who treated the patient. Loc. Indicates the office location. (Note this field may not be active) Code is the Fee Schedule code given for this item The columns Patient, MH, and WCB indicate the billing amount to that payor. The last page of the daily summary sheet is the same as all of the other summary sheets including the monthly, weekly, quarterly and yearly. For further details see below. Reading the Last Page of PMP Summary Sheets All PMP Summary Sheets offer the same information on the last page. The only difference is in the totals due to the reporting period you choose. Understanding the details, totals, and how PMP gets those totals will help you make decisions and complete statistical reports. Look at the last page of your summary sheet: 73 PATIENT MANAGEMENT PROGRAM If you are trying to balance your receipts with your summary sheet look for the field Total Patient Payments. Also shown in the first column is Doctor of Record. This indicates the breakdown of fees generated by practitioners treating other doctor's patients. Total Patients Seen refers to the number of individual patients who have been treated during the reporting period. For instance, on your yearly summary sheet a patient who is adjusted once a month will count as 1 Total Patients Seen and 12 Subsequent Visits. Subsequent Visit Claims refers to the total number of transactions posted from your treatment fee schedule. By dividing the Total Visit Claims by Total Patients Seen you are now able to calculate the average number of patient visits. This is a statistic that many management consultants utilize. New Patient Claims is an important statistic and accuracy depends on two factors: The transaction posted to the new patient must be from your Fee Classes listed as an Initial Visit Code. The date that this transaction is posted must be the patient’s first visit date. Confirm the date by referring to the field First Visit Date on the Appointments tab in Patient Information. If the transaction does not meet both the above criteria, a new patient will not be recorded. Re-examination Claims are counted when a transaction is posted from your Fee Schedule, Treatment, has a WSIB Code of V103, and the transaction date is NOT the same as the patient’s First Visit Date. Total Fees Charged represents the total billings for the practitioner(s) on the summary sheet. It is the total revenue for the practitioner(s) who gave the treatment. Offices with multiple practitioners who 74 PATIENT MANAGEMENT PROGRAM treat each other’s patients are able to break this total down to show whose patients were treated by using the Doctor of Record amounts. Doctor of Record. The Doctor of Record breakdown represents the revenue earned by treating patients belonging to various practitioners. The total fees under Doctor of Record amounts will always equal the Total Fees Charged. In looking at the screen shot, note that: Dr. D.D. Palmer treated patients for a Total Fees Charged amount of $189.26 The Doctor of Record amount for Dr. D.D. Palmer is $70.00 The Doctor of Record amount for Dr. B. Pierce is $119.26 That means that Dr. D.D. Palmer earned $70.00 from treating his own patients and he earned $119.26 from treating Dr. Pierce’s patients. These amounts can be useful when practitioners pay a percentage or amount when treating other practitioner’s patients. This breakdown is not available for offices that have multiple patient files for the same patient. Note: Accounts Receivable is an option on summary sheets. Turning AR on or off is chosen under the Setup menu, Doctor Defaults. Statements Statements can be pulled: 1) individually from within the Patient Information Account Activity screen 2) individually while posting activity 3) grouped for related patients while posting activity 4) individually or grouped from the Report menu. 1) From within the Patient Information Account Activity screen click the Statement button. Determine the start and end dates by clicking the down arrow under Date From and Date To. The Date from is defaulted from the date selected under the Setup menu, Clinic Defaults. Print transactions for specific practitioners only by check marking Include activity ONLY from these Doctors and then checking the appropriate practitioners. Use the default letterhead determined in Use Blank Paper or select another by clicking Choose. The option Use Letterhead will print onto custom made pre-printed letterhead. Choose to add a comment by typing directly into the Comments to print on statements field or select one by double clicking onto the appropriate comment under Select a Comment. The comments are created under the Setup menu, Statement Comments. 75 PATIENT MANAGEMENT PROGRAM The Report Destination will send the statement: to the Screen, this option will update the Last Statement Date. Uncheck the field Update Last Statements Date if you do not want the date updated. to the Printer, this option will update the Last Statement Date Export to RTF will create the report as a ‘rich text format’ available for opening in word processors Save to File will save the report ready for exporting 2) Individually while posting activity. To print a statement during posting check mark the Print Statement box before clicking Post. The default start date will be next day after the last statement end date. If there is no previous statement date the start date will default to the date set up in Clinic Defaults. The end date will default to today’s date. These dates can be edited by clicking the down arrow and choosing another date on the calendar. Change the month and/or year by clicking onto the month or year on at the top of the calendar and choosing another date from the list. You can also type the dates into the Date From and Date To fields as dd/mm/yy. The statement date field in Patient Information on the Account/Activity tab will be updated after Posting. 76 PATIENT MANAGEMENT PROGRAM 3) Grouped for related patients while posting activity. This option is similar to above except statements will be printed for all ‘related patients’ paid when the Related Balance option is selected under Payment Amount. 4) Individually or grouped from the Report menu. Choose the Report menu, Statements, List of Patients. Select the practitioner and click Prepare the report for this Doctor. Click on Number, Surname or First to search for patients by that field. Click into the Search box after choosing the search type and type the name or number. Double clicking or pressing Enter after the patient is highlighted or clicking Add Selected will copy that patient into the Selected Patients box. By choosing Fill the List using Patient Query you can choose patients by other criteria. Click Continue. In the Prepare Statements for screen select options in the same manner as for item #1 from within the Patient Information Account Activity screen. Appointment Book The Appointment Book printout gives a printed version of the day’s appointments. It is convenient for practitioners who want to have a copy of their day. Print the appointment book by clicking the Report menu, Reminders / Recalls, Appointment Book. 77 PATIENT MANAGEMENT PROGRAM Choose the date and times. Clicking Partial Day will allow you the option to input a time range. Appointment Type Colours will include the appointment colours associated with each appointment. Choose Colour Options if you have a colour printer. Click Print the Appointment Book. Note: This report will print with invalid appointments ‘hidden’ if you have selected this option in Doctor Defaults or if you have named columns. Reminder List The reminder list provides a list of appointments that may require reminders or other types of calls. This report is a good tool for reminding patients of future appointments. Choose the Report menu, Reminder / Recalls, Reminder List. The date defaults to today, edit it to reflect tomorrow or the next business day. Click the radio button next to Unconfirmed Appointments. Click Run the Report. Hint: This report is also a good report to take home when you are expecting inclement weather. Print All Appointments for this procedure. 78 PATIENT MANAGEMENT PROGRAM Recall Lists PMP offers Past Due and Long Term Recall Lists. The Past Due Recall List is a record of all incomplete appointments such as missed and postponed appointments. The Long Term Recall List is a record of patients that have no future appointments scheduled. Cancelled appointments go to the Long Term Recall List. Past Due Recall List The past due recall list is a list of all incomplete appointments. Used in conjunction with the long term recall list, they provide an accurate catalogue of patients. Utilizing the Past Due Recall list on a daily basis can assist you in ensuring your patients do not ‘fall through the cracks’. You can also use the list to move patients onto the Long Term Recall List. Access the Past Due Recall List by clicking the Patient menu, View Past Due Recall List. Choose the practitioner and click View Past Due Recall List for this Doctor. Double click the patient’s name; you will be taken into the patient’s appointment file. Add a new appointment by clicking Add an Appointment. Move a patient to the Long Term Recall List by clicking Clear Date Click Continue. You will be taken back to the Past Due Recall List. The patient whose appointment was booked or moved is no longer on the Past Due Recall list. To print a paper version of the Past Due Recall list click the Report menu, Reminders /Recalls, Past Due Recall List. Select the correct practitioner and click Print Past Due Recall List for this Doctor. Click Run the Report. The Long Term Recall List Access the Long Term Recall List by clicking the Report menu, Reminders /Recalls, Long Term Recall List. Select the correct practitioner and click Print Long Term Recall List for this Doctor. Input the dates you want for this report, click Run the Report. 79 PATIENT MANAGEMENT PROGRAM Accounts Receivable Accounts Receivable reports can be produced for Patients Bill To EHC WCB MPI MH Hint: To have patients appear on the correct Accounts Receivable Report enter the correct AR Type in Patient Information, Personal Tab. If this field is not entered correctly the patient may appear on an incorrect Accounts Receivable report. To print Accounts Receivable for Patients click the Reports menu, Accounts Receivable, Patient. Select the appropriate practitioner, Prepare Accounts Receivable for this Doctor. Click the down arrow under Period Ending and click onto the back or forward arrow once for every month you wish to move back or forward. You can also click onto the month or year to produce a list of months or years. Click onto the day on the calendar. Choose where to send the report by clicking the radio button under Report Destination. Click Run the Report Patient Query by Doctor or Office Various types of information may be derived from selecting items in this report, such as New Patient Lists, Birthday Lists, etc. These reports can be sorted by Number, Surname or Birthday and contain your choice of customized information from the patient file. Boxes must be checked to the left of the criteria options and to the left of the selected alphabetical fields in order to produce the required report. 80 PATIENT MANAGEMENT PROGRAM Query Customization The criteria fields you select will determine which patients are included on the report; for example your new patients, birthday patients etc. Once you have selected the criteria for your query click Customize. Now you are able to select what information about these patients to include on the report by check marking the boxes in the right hand column. These items will appear in the middle column entitled MY Fields (Ordered). Change the order of the fields by clicking the red arrows to the right of the items. Once all items are selected and ordered you can choose to save this query for future use. For example, if you do a monthly New Patient report with referrals you can set the fields up once, save them, then retrieve them whenever necessary. Click Save Field List. Type the name of the file in the box to the right of File Name, click Save. Your file is now saved in the Report Directory. You may retrieve it for future query customization by clicking the Load File List button. Click Run the Report MY way. 81 PATIENT MANAGEMENT PROGRAM Labels You may print Mailing Labels from within the PMP. Click the Report menu, Mailing Labels. Choose Select Patients Individually. Choose a practitioner and click Run the Report for this Doctor. There are two ways to select patients individually: 1. Number, Surname, or First 2. Fill the List Using Patient Query a. Number, Surname, or First Click the button of choice for how to search for your patients. The selection will turn yellow. Click into the Search field. Start typing the first few letters or numbers. Double click or press Enter on the appropriate patients. Selected patients will appear on the right. b. Fill the List Using Patient Query The query area can now be utilized to pull patients that meet the criteria you select for labels. Once all required fields are checked click Accept. You will be returned to the Select a list of Patients’ screen. Click Continue, and then OK. Hint: If your labels are not positioned correctly on the sheet of labels you can increase or decrease the top margin. This is done under the Setup menu, Clinic Defaults, Mailing Labels. Increase the number to start the labels further down on the paper. Fee History Report The Fee History Report will generate a sales report of any item in your Fee Schedule: Treatment, Other or Inventory, e.g. a list of all patients who received Orthotics in a given period. The report may be pulled in either of the following ways: By Date By Patient Click the Report menu, Fee History Report. Select By Date or By Patient. Choose the practitioner; click Run Report for this Doctor. Click the down arrow to the right of each field; select the dates and fee schedule item. Click Run the Report. 82 PATIENT MANAGEMENT PROGRAM Patient Referral Activity Report The PMP will generate a report based on the referral source of your patients. The report shows the revenue generated from the referral source and it is subtotalled by patient. Click the Report menu, Patient Referral Activity. Choose a practitioner; click Prepare the Report for this Doctor. Select the appropriate fields by clicking the down arrow to the right, then click Run the Report. Exporting Documents All reports that can be bought to the screen in PMP can be exported to other programs. This includes exporting to Adobe, Excel, Word Processors, and also formats of HTML and JPEG, to name a few. The uses of this feature are numerous; you can email statements and appointment calendars / lists to your patients, export financial reports to your accountant, and edit documents. Create the Report To export a report start by creating the report in the normal manner. When you see the Report Destination option, click Save to File. A Save As window will appear asking you for a name and location for the document. Type a name for the report. Click Save, click Run the Report. Note: If your report does not offer the option of Save to File bring your report/document to the screen. Once the report is visible on screen click the File menu followed by Save. Save the file to C:\PMPw\Data\Report. Type a name, click Save. Close the Ace Viewer and return to the Appointment Book. 83 PATIENT MANAGEMENT PROGRAM Export the Report Click Reports, Documents for Printing. Locate and right click the newly created file. Click the option Export the Report. Choose a location for the file in the Save in: field and type a name in the File name: field. Choose the format by clicking the down arrow beside Save as type:. Click Save. Make any changes and edits in the formatting screen and click OK. Your document will open in the associated program for the specified file type. Export Formats Adobe PDF Files (*.pdf) These will open on most computers in an unchangeable format. Good for emailing statements and appointment calendars / lists. Rich Text Format (*rtf) RTF's open in most word processors allowing you to edit documents. Hyper Text Markup Language (*.htm) Extended Hyper Text Markup Language (*.htm) Both are used for web pages. Microsoft Excel Workbook (*.xls) Quattro Pro for Windows (*.wb1) Lotus 1-2-3 (*.wk2) These are spreadsheet documents. Good for pulling accounts receivable and summary sheets into accounting software. Windows Bitmap (*.bmp) JPEG File (*.jpg) Enhanced Metafiles (*.emf) Windows Metafiles (*.wmf) These are all picture type formats. 84 PATIENT MANAGEMENT PROGRAM Create E-mail Distribution List from PMP Follow these instructions to create a distribution list pulled from PMP for use with your messaging program. Go to the Utilities menu, Patient Export. Click Choose Criteria Using Query. Checkmark Has Email at the bottom on the right (you will have to scroll to locate this option). Click Accept. Choose Select Fields. Checkmark Email address, uncheck Patient Number. Click Accept. Choose Export to Comma Delimited. Choose a location for the file in the Save in: field and type a name in the File name: field. Click Save. On your desktop click Start, Programs, Accessories, Notepad. Click File, Open. Locate the file and click Open. Go to the Edit menu and choose Replace. Insert " (quotation mark) into the field Find what and leave the Replace with field blank. This will delete all the quotation marks. Click the Edit menu and choose Select All. Click the File menu then Copy. Now you can Paste the email addresses into a group (distribution) email. We are not able to detail these instructions as there are many messaging programs but using Contacts or Addresses should help. Merge Letters Click File, WordProcessor. Select a Letterhead to use by clicking Open, Template, the appropriate letterhead. When the letterhead is open click File, Save As, and type the name of the merge letter. Click Save. Change the justification using the Left justification icon. Move your cursor to the desired location on your letter. Click Merge, Patient Merge Fields, OK. This is where the merge fields are located. Click appropriate fields under the down arrow such as Fl, Add, City, etc. Remember to leave spaces between fields. Hint: A list of merge codes is detailed on the following pages. Continue preparing your letter, adding appropriate merge fields. To delete fields highlight the merge code and press the Backspace or Delete key on the keyboard. Save the completed letter. When you are ready to merge click Merge, Merge Patients Individually or Merge By Patient Query. 85 PATIENT MANAGEMENT PROGRAM If you choose Merge by Patient Query select the appropriate criteria in the Query by check marking the boxes to the left of your choices. Once your selections are complete click Continue. Click OK. Your letters will generate on screen. Close, Print and Printer Setup icon are in the top left of the screen. Page number and Next / Previous page icons are in the bottom right. Utilizing the Merge Feature The following are some ideas for using the merge function in the PMP WordPad. Change of Office Hours Notice of Fee Increase Thank you for referrals Notification of Missed Appointments Spinal Checks for Children Upcoming Information Sessions Congratulation letters Welcome letters Notice of new promotions Spinal Care Class Reminders 86 Off Work letter Thank you Grams Recalls Collection letters Treatment Plans Christmas letter Orthotic letter Insurance letters Lawyer letters Discharge PATIENT MANAGEMENT PROGRAM Merge Codes Action Accident Date from WCB Patient Active Check marked Address Total Balance Date Of Birth Bill To: Claim # Bill To: Code # Bill To: Contact From Patient Bill To: File # Bill To: Phone From Pat. Info Bill To: Policy # Health Card Expires on Health Card Number City WCB Claim # Country Diagnostic Code Diagnostic Details Doctor of Record EHC Code EHC Contact EHC Max $ EHC Phone Extension EHC File # EHC First Day Coverage EHC Fiscal Year EHC # of visits to date EHC max # of visits payable EHC Phone EHC Policy # EHC Amount Remaining EHC Yearly Start Date EHC Max $ Per Visit Patient Email Patient First Name Patient First and Last Names Patient Flags First Visit Date Patient Middle Name Last name followed by First Last Payment Amount Merge Code %[acc_date] %[Active] %[Add] %[Bal_due] %[Birth] %[BT_ClaimNo] %[BT_Code] %[BT_Contact] %[BT_FileNo] %[BT_Phone] %[BT_PolicyNo] %[Card_date] %[Card_no] %[City] %[Claim_No] %[Country] %[Diag_code] %[Diag_rem] %[Doctor] %[EHC1_Code] %[EHC1_Contact] %EHC1_DolMax] %EHC1_Ext] %[EHC1_FileNo] %[EHC1_First Day] %EHC1_FiscalDate] %EHC1_NoVisits] %EHC1_NoVisitsMax] %[EHC1_Phone] %[EHC1_PolicyNo] %[EHC1_Remaining] %[EHC1_StartDate] %[EHC1_Visit] %[Email} %[First] %[Fl] %[Flag] %[Fv_date] %[Init] %[Lf] %[Lp_amt] 87 PATIENT MANAGEMENT PROGRAM Action Last Payment Date Last Statement Date Last Visit Date Maiden Name Birth Month and Day MVA Accident date MVA Claim Number MVA Company Code MVA Contact MVA Phone Extention MVA File/Policy Number MVA Allowable amount of visits MVA Phone number MVA 1st Treatment Date Number of Visits Next Visit Date & Time Next Visit Appt Status Patient A/R type Patient Category Patient Number Patient Type Payment Type Patient 2nd listed Phone # Patient 2nd listed Extension # Name of 2nd listed Phone # Patient 3rd listed Phone # Patient 3rd listed Extension Name of 3rd listed Phone # Patient 4th listed Phone # Patient 4th listed Extension Name of 3rd listed Phone # Patient Home Phone # Patient Postal Code Preset billing amount Province Referred By Referral Method Send Statements To: Social Insurance # Auto Statement Y/N Patient Surname WCB 1st Treatment Date X-Ray Remaining Merge Code %[L-_date] %[Ls_date] %[Lv_date] %[Maiden_Name] %[Mmdd] %MVA_AccDate] %[MVA_ClaimNo] %[MVA_Code] %[MVA_Contact] %[MVA_Ext] %[MVA_FileNo] %[MVA_NoVisits] %[MVA_Phone] %[MVA_TreatDate] %[No_visit] %[Nv_datetime] %Nv_status] %[OnAR] %[Pat_cat] %[Pat_no] %[Patient_type] %[Pay_type] %[Phone_2] %[Phone_2ext] %[Phone_2lab] %[Phone_3] %[Phone_3ext] %[Phone_3lab] %[Phone_4] %[Phone_4ext] %[Phone_4lab] %[Phone_home] %[Post] %[Preset] %[Province] %[Ref_by] %[Ref_method] %[SendTo] %[Sin_no] %[Statement] %[Surname] %[Tr_date] %[Xray] 88 PATIENT MANAGEMENT PROGRAM Security Information The PMP offers a security feature that allows or restricts access to menu items. PMP records edits, deletions, and balance changes that occur within the patient file. The security area records the user who performed the change. The security feature is located under the File menu, Security. It contains Login, Profiles, Users, and Change Passwords. A profile named ‘Rick’ was included with your initial PMP. This profile allows access to all PMP features. You can continue to use this profile to signify ‘full access’ or delete it once a replacement has been made. Note: You must do a PMP backup before continuing with this process. Profile The profile is how you permit or restrict access to menu items in the program. Create profiles for all PMP users to limit their access to certain PMP menu items. Click the Expand Treeview icon to show the detailed PMP menus. To create a new profile simply click on a menu item that you wish to control access to and choose Not Allowed on the right. Continue to control access for other items using the same procedure. Once you have completed selecting menu items for this profile type a name into the New Security Profile field. The name should be logical based on the level of security and not the user name, i.e., Part time staff or Office manager. Click the Save Security Profile icon. 89 PATIENT MANAGEMENT PROGRAM You will see a screen notifying you that changes have occurred. Click Yes. You may be required to click Yes repeatedly until all individual items have been changed. Click OK once you see the congratulations message. Your profile has now been saved. To edit or view existing profiles click the down arrow under Security Profile. Click the profile you wish to edit or view. Hint: When limiting access for user profiles you should restrict access to the menu items of Users, Profiles, and Clinic Defaults. These areas allow users to alter their profiles. Only the ‘Rick’ or ‘full access’ profile should have these areas allowed. Users The Users screen is where you will find a list of individuals currently utilizing your PMP and where you add new users and assign profiles. To add a new user click Add. Type the new users initials, first, and last name into the fields provided. Click the down arrow under Profile. Choose the profile appropriate for this user. Note: The field User allowed access to these Doctors has been disabled and is not required. Click Save. To Edit a User click the users name and the Edit button. Make your changes and click Save. To Delete a User click the users name and the Delete button. Click OK. This user will no longer have access to PMP. Note: When there is a change in office staff you should add and delete users as appropriate. Login The login screen allows you to switch users. The shortcut function key F8 will open the login screen from the main appointment book. 90 PATIENT MANAGEMENT PROGRAM To logoff as a user but allow other users access to PMP, open the login screen. This permits the next user to login. If they click Cancel or close the login screen PMP will automatically close and must be reopened. Note: This feature protects all users from accessing menu items and modifying activity using another PMP User Id. Creating or Changing Passwords The Change Password area allows you to create a new password or change an existing password. To assign or change your password you must first be logged in as the user. Click File, Security, Change Password. When you open the Change Password screen the users initials are already visible in the Login Id field. Type a password into the Password field. Repeat the password in the Confirm Password field. Click OK. The password for this login ID has now been changed. Note: Passwords are case sensitive. Edit Date One of the functions that PMP contains is the ability to restrict edits and deletions from happening in the patient account activity screen. The restrictions are limited by date. When activated, users will not be able to edit or delete transactions in patient files if the transaction date of the activity is before the date specified in ‘Edit Date’. The Edit Date aids in more accurate bookkeeping procedures and stops changes from happening within previous months without approval. Security should be setup to disable access to this area. To setup the Edit Date go to the Utilities menu, Edit Date. Select the appropriate date on the calendar. Click Accept Changes. 91 PATIENT MANAGEMENT PROGRAM Account Edit Journal The Account Edit Journal records any edits, deletions and balance changes that are made in the patient Account Activity screen. It offers the choice of viewing the report by Service Date or Edit Date. Service Date will show the edits and deletions by the date of service. Edit Date shows the edits and deletions by the date the service was edited. Balance changes are added to the list treating the editing date as the service date. Click the Reports menu, Account Edit Journal, by Patient, by Login ID, or by Date. by Patient will produce the account edits and deletions for a specific patient by Login ID will produce the account edits and deletions created by a specific user by Date will produce the account edits and deletions done during a specified date range Note: All users should be setup with individual logins in order for the Account Edit Journal to accurately reflect the user who performed the action. This account edit journal was produced by Date, Editing Date. The first line shows the date and time that the change took place followed by the user that completed this transaction and the type of change. If a comment was added at the time of change it will appear following the transaction type. The next two lines of an Edit explain how the transaction looked at posting, and how it looked after the edit. Areas that were altered are shown within boxes. The second line of a Delete shows the entire transaction that was deleted. A Balance Edit details any balance changes. 92 PATIENT MANAGEMENT PROGRAM Backup, Utilities and Housecleaning Backup Backup is one of the major problems users encounter. Faulty or non existent backups can have devastating results. Hard drive crash, theft, fire and flood are just a few of the many reasons you may require your PMP backup to retrieve your patient and clinic history. Backup Procedures No matter what media type you are using for backups, floppy disk, CD, USB drive, etc, you should have more than one set. If you use the same object for every backup and that media fails or is lost you will not have any good, retrievable backups. For this reason we suggest you have at least two sets of backup media: 2 USB memory drives 2 CD’s 2 week supply of floppy disks (floppies are erased with every backup therefore 1 set per day for a two week period). While you are using ‘backup set # 1’, ‘backup set # 2’ should be stored off site. Note: We recommend you perform the PMP Daily Backup even if other programs are being utilized. If there is a problem with your program the PMP Support Staff can usually get you up and running in minimal time if you are utilizing the PMP Backup. The OCA is not responsible for any other backup program. Accessing and Using Backup Exit PMP on all computers. Double click the Backup SQL icon on the desktop. Click either Daily Backup or Monthly Backup. Daily Backup contains your patient data and generated report data. Monthly Backup contains your patient data, generated report data, and the Report and Letter directories. PMP allows backups to be created to any specified media. Click the radio button beside Drive A: to send the backup to floppy diskette. Click the radio button beside Other to select another media. 93 PATIENT MANAGEMENT PROGRAM Click the button with the 3 dots to choose the drive. Locate the drive for the media of choice. Click OK. Click Start Daily or Monthly Backup. PMP creates two backups; the first backup goes to the hard drive of your computer and the second goes to the specified drive. Monthly backups should be created: on a monthly basis when making a last backup before moving PMP to a new / different computer before deleting patient data or reports. before installing updates or adding practitioners to PMP. Test Restore After 6 backups have been performed you will see the message 'You have performed 6 backups without doing a test restore’. If you choose not to perform the test restore at this time the message will appear upon completion of each subsequent backup until the test restore is performed. To perform the test restore leave the media that you just used for the backup in the drive, click the Restore tab, # 7 or # 8. Click Test Only and click Start Restore. 94 PATIENT MANAGEMENT PROGRAM You are asked if you wish to restore using the file BD091118.zip or BM091118.zip. The file name is created as follows: BD stands for Backup Daily, BM stands for Backup Monthly. 091118 stands for year 2009, month 11, day 18. Make sure this is the correct date when doing a test restore. The test restore does a file comparison to make sure the data is good and that it will restore if required. When the test restore is complete a pop-up window will appear entitled Finished. Click Yes to erase the test data. Restore There are times when you have to restore a backup. This could be due to a power failure, power surge, the computer may have been turned off incorrectly or the computer froze. Double click the PMP Daily Backup icon on the desktop. Click the Restore tab, click on the backup that you wish to restore from the list on the left. Choosing to restore a backup from the # 8 Other option will require you to locate the backup. Choose the directory where your backup was stored by double clicking on it. Locate and double click the backup that you want to restore. Click Live Database, Start Restore. You will be asked to confirm the date of the backup. Click OK. Utilities PMP has a desktop icon named PMPs Utilities. The area is for use if you have internet capabilities at your PMP location. Upload PMP SQL Database is an option whereby you can send your program to an FTP site where our programmer can access it for repair. This feature can only be used when PMP support staff has arranged it. Please contact support before attempting to use this feature as you will not have access to your data once it has been sent. Note: Restoring your last backup would allow you back into PMP. Download PMP SQL Database is how you retrieve your data once it has been repaired. Download Program Update. On occasion updates are available for download. You will be notified when they are posted by whichever method you have chosen for OCA communication. 95 PATIENT MANAGEMENT PROGRAM Computer Maintenance Error Checking Error Checking is a program in your Windows Operating System that will check the files on the hard drive to make sure there are no problems. If problems are found it will attempt to fix them. To prevent problems from occurring in your computer, you should run Error Checking on a weekly basis or when you have had to shut down the computer in an improper manner. To access Error Checking double click the My Computer icon, right click C:\, and left click Properties. Select the Tools tab. Click Check Now…. Checkmark both options on the next screen and click Start. You will see a screen offering to schedule the check on the next restart. Click Yes. Error checking may take up to one hour. Restart your computer. Defragment Defragmentation is a program provided by your Windows Operating System that analyzes local volumes and consolidates fragmented files and folders so that each occupies a single, contiguous space on the volume. As a result, your system can access files and folders and save new ones more efficiently. By consolidating your files and folders, Disk Defragmenter also consolidates a volume's free space, making it less likely that new files will be fragmented. To access Defrag double click the My Computer icon, right click C:\, and left click Properties. Select the Tools tab. Click Defragment Now…. Click Defragment. Defragment may take up to two hours. Hint: If it appears that Defragment restarts part way through the process and does not complete or gives a message about restarting, turn off your screen saver, temporarily disable your virus protection, and/or close your messaging program. 96 PATIENT MANAGEMENT PROGRAM Cleaning Up Your PMP Deleting Patients On occasion you may wish to delete patients from your PMP. PMP will not allow you to delete a patient if there is any activity within the last year. Do a backup and label with the date prior to deleting any patients. Pull a list of patients that have not been to your clinic for a number of years through query. Determine which patients you would like to delete from the program. Print a Patient History and Profile for each patient. Delete patients individually as per the instructions below. Click Patient, Delete a Patient. Select the patient. The patient information screen will appear to allow you to confirm that you would like to delete this patient. Once you are sure click Continue. A confirmation screen will appear. Click Yes. Accounts Receivable Keep your accounts receivable up to date. There is no sense in having the same balances on your A/R from year to year. Print Accounts Receivable Determine patients: - to be called - to be mailed a letter - to be sent to a collection agency - to be written off To Access the Patient Accounts Receivable, click the Report menu, Accounts Receivable, Patient. Select the appropriate doctor, Prepare Accounts Receivable for this Doctor. Choose the correct ending date by clicking the down arrow. Click Run the Report. Print 3rd Party and WCB Accounts Receivables. 97 PATIENT MANAGEMENT PROGRAM Documents for Printing An area of PMP that needs to be cleaned out regularly is Documents for Printing. This is a region where files of different types are stored in PMP. The number of documents contained in Documents for Printing is directly related to the amount of space required for your monthly backups. After about 3 months documents can be deleted as they are saved on monthly backups. Keep the number of reports to a minimum for optimum usage of your computer and PMP. To access this area click Reports, Documents for Printing. Reports and documents that may be stored in Documents for Printing include: MH Claim Journals, Payment Journals, Rejection Journals, WCB and MPI Claim Journals, Payment Journals, Documents saved for Exporting. To delete documents for printing right click the appropriate file and choose delete from the list. To delete multiple documents close PMP. Double click on the My Computer icon. Double click your C:\ drive. Locate and double click PMP, Data, Report. Click the View menu, Details. Click the column header Date Modified. This will sort the reports by creation date. Make sure the arrow beside date modified is pointing up so that the oldest reports will be at the top of the screen. You can now click on the first report to be deleted. Press and hold down the Shift key and click onto the last report to be deleted. All reports in between will be highlighted. Once the chosen reports have been highlighted press the Delete key on your keyboard. Click Yes when prompted to confirm sending the items to the recycle bin. PMP Word Pad The number of letters contained in the word pad also affects the amount of space required for your monthly backups. After a while letters can be deleted as they are saved on monthly backups. Keep the number of letters to a minimum for optimum usage of your computer and PMP. To delete letters or letterheads from the PMP click File, WordProcessor, File, Open. Determine the files to be deleted. Right click on the appropriate letter to be deleted and choose Delete from the menu. To delete multiple documents close PMP. Double click on the My Computer icon. Double click your C:\ drive. Locate and double click PMP, Data, Letters. You can now click on the first letter to be deleted. Press and hold down the Shift key and click onto the last letter to be deleted. All letters in between will be highlighted. Once the list is highlighted, press the Delete key on your keyboard. Click Yes when prompted to confirm sending the items to the recycle bin. 98 PATIENT MANAGEMENT PROGRAM APPENDIX Manitoba Health Diagnostic Codes 99 PATIENT MANAGEMENT PROGRAM Manitoba Health Disposal Codes 100 PATIENT MANAGEMENT PROGRAM Workers Compensation Board Fees Schedule “A” Item Effective October 2007 Initial History & Examination $43.64 Treatment Fee Adjustment/Adjunctive Therapy $29.64 Emergency/House Call $26.27 Regular Reporting $33.76 Narrative Report or Referral $112.55 WCB Consultant Phone Calls* $202.59/hour ** * Initiated by a WCB Chiropractic Consultant to an external chiropractor ** Per hour, calculated on the basis of twelve (12) five minute increments. 101 PATIENT MANAGEMENT PROGRAM Workers Compensation Chiropractic X-ray Fees Effective September 1, 2003 Tariff View Tech Prof Total 7024 Chest Single PA * 18.00 8.00 26.00 7025 Chest PA & Lateral * 21.70 9.00 31.70 7031 Ribs One Side 24.40 6.00 30.40 7331 Ribs Both Sides 24.75 9.80 34.55 7036 CS Routine Views * 30.20 12.00 42.20 7038 CS Added Views 35.70 10.80 46.50 7194 Thoracic Spine 30.35 7.00 42.05 7193 L.S. Routine * 29.50 11.70 42.05 7054 L.S. Added Views 35.70 10.80 46.50 7035 Spine Complete 64.35 17.40 81.75 7037 Spine Two Views 47.00 19.00 66.00 7039 Pelvis AP Views * 20.30 9.00 29.30 7339 Pelvis Lat/Hip 29.00 12.60 41.60 7041 S.I. Joints 19.60 6.00 25.60 7034 Sacrum/Coccyx 27.95 7.45 35.40 7402 Special views 28.55 7.00 35.55 7046 Claviale/Scapula 17.40 6.00 23.40 7047 Humerus 21.10 4.80 25.90 7048 Elbow 23.00 8.00 31.00 7049 Forearm 22.10 4.80 26.90 7050 Wrist * 17.70 8.00 25.70 7052 Fingers * 14.00 8.00 22.00 7093 AC Joints 20.85 7.50 28.25 7044 Shoulder * 22.10 9.90 32.00 7403 Added Views 7.50 4.00 11.50 7053 Hip * 26.10 9.80 35.90 7055 Femur 23.00 4.80 27.80 7056 Knee * 18.30 8.30 26.60 7058 Tibula/Fibula 23.00 4.80 27.80 7059 Ankle * 17.80 8.00 25.80 7060 Foot 16.50 8.00 24.50 7062 Toes 8.70 2.95 11.65 7404 Added Views 8 4.00 12.00 102 PATIENT MANAGEMENT PROGRAM Manitoba Public Insurance Fee Schedule Chiropractic Services Schedule “A” 1. Initial Assessment (Complete History, Physical Examination, Diagnosis, Treatment and Adjunctive Therapy) EFFECTIVE DATE FEE January 1, 2010 $78.23 2. Subsequent Visit Fees: (One Fee per Visit) a) Subsequent Treatment EFFECTIVE DATE January 1, 2010 FEE $33.26 b) Supervisory Visit EFFECTIVE DATE January 1, 2010 FEE $33.26 c) Acupuncture Treatment EFFECTIVE DATE FEE January 1, 2010 $50.12 Up to 10 acupuncture treatment visits will be covered per claim. No extensions shall be permitted. d) Active Release Treatment (A.R.T.) EFFECTIVE DATE FEE January 1, 2010 $50.12 Up to 10 active release treatments will be covered per claim. No extensions shall be permitted. 3. Emergency Calls: Travel Only a) Emergency Calls: Travel Only (50 kilometers or less) EFFECTIVE DATE FEE January 1, 2010 $41.87 b) Travel Beyond 50 Kilometers – Per Each Additional 16 Kilometers EFFECTIVE DATE FEE January 1, 2010 $9.48 4. Consultation Fee for Review of Manitoba Public Insurance Cases: Includes Meeting in Person or Consultation by Phone 103 PATIENT MANAGEMENT PROGRAM EFFECTIVE DATE January 1, 2010 5. FEE $198.47/per hour Narrative Report Where a narrative report is requested by Manitoba Public Insurance, it will be billed per page, to a maximum of 5 billable pages per report. Half pages will be charged at a rate of one half of the full page fee. All chiropractors shall use 1” margins, single spaced and 12 Font in order to be eligible for payment. EFFECTIVE DATE FEE January 1, 2010 $99.68 per page 6. Form Reports Initial Chiropractic Report Chiropractic Track I Report Chiropractic Track II Report All 3 reports will attract the following fees: EFFECTIVE DATE FEE January 1, 2010 $47.27 7. Referral letter or report of findings letter to another Health Care discipline outside your clinic. The discipline must be one recognized by Manitoba Public Insurance. EFFECTIVE DATE January 1, 2010 FEE $99.68 8. Supports that are medically required are to be billed at manufactured suggested list with exception of the cervical pillow where the maximum fee is: FFECTIVE DATE January 1, 2010 9. FEE $62.00 plus PST The “Yellow Flags” Questionnaire shall be compensated at the rate of $5.57 each. 104 he PATIENT MANAGEMENT PROGRAM X-Ray Fee Schedule 1. 2. 3. 4. 5. 6. 7. 8. 9. 10. 11. 11. 12. 13. 14. 15. 16. 17. 18. 19. 20. 21. 22. 23. APL C-Spine (3 views) APLC Flexion and Extension (5 views) Pillar Views (2 - 8/10) Davis Series APL C-Spine (AP - 7/17) APL Dorsal APL Lumbar APL Lumbosacral APLLS and Both Obliques Shoulder Series Full Spine APL (14/36) (a) Full Series - APLC - APLT - APLLS APL C-Spine and Obliques (5 views) Extremities (2 views) Pelvis (1 - 14/17) Knee Ankle (3 views) Sinuses Ribs (2 - 14/17) Chest Written Reports for Films sent in (1 area) Written Reports for Films 14/36 (2 views) Additional Films (8/10) of any area Motion Study includes an A.P. and Lat Plain View - per area 105 TECH. PROF. $47.01 $60.15 $31.98 $94.02 $39.51 $47.01 $47.01 $47.01 $69.60 $31.98 $80.86 $94.02 $60.15 $31.98 $22.58 $31.98 $31.98 $63.93 $46.48 $46.48 N/A N/A $13.16 N/A $17.10 $17.10 $17.10 $17.10 $17.10 $17.10 $17.10 $17.10 $17.10 $17.10 $28.21 $28.21 $17.10 $17.10 $17.10 $17.10 $17.10 $17.10 $17.10 $17.10 $17.10 $27.27 $236.95 PATIENT MANAGEMENT PROGRAM Manitoba Health Electronic Billing Instructions You must register with Manitoba Health for the EPiCs program. Once your office has been set up as an electronic billing site (this may take three – four weeks) follow the billing instructions found on page 57 of this handbook. Once the billing file is created you may send the file to Manitoba Health electronically. Make sure PMP is closed. Double click the SIS icon. Type in the following information Username, Password, Domain and PASSCODE. The username and passcode will be included in the documentation you received with your initial package from Manitoba Health. The first password will be assigned by MH, which you will be able to change. The PASSCODE is a combination of a P.I.N. and the number on the RSA SecurID (which will change every 60 seconds). You will work with the SIS support team who will assign the password and P.I.N. Refer to the Secure Internet Solutions (SIS) Application Portal Installation Guide and User Manual for details. For details on setting a PIN and Password please refer to the Secure Internet Solutions (SIS) Application Portal Installation Guide and User Manual. Note: If you experience trouble contact the SIS Help Desk at (204)944-2802 or (800) 637-0551 Once you have entered the information click Log In. 106 PATIENT MANAGEMENT PROGRAM Click once on the Application Icon once and in 30 – 60 seconds the application will appear. Press the Spacebar, then Enter. Type your UserID, press Tab. Type your Password, press Enter. 107 PATIENT MANAGEMENT PROGRAM . Press F10. . A pop up window will appear entitled Action Code Menu. Press Enter to begin the session. 108 PATIENT MANAGEMENT PROGRAM The Manitoba Health Message screen will contain information about your last submission, about the last remittance file available, as well as information about submission cut off dates. These messages should be reviewed at sign-on as important information will communicated in this way. Press F8. 109 PATIENT MANAGEMENT PROGRAM The following is a description of each area on the Data Transfer Utility screen: U Upload Claims D Download Remittance P1 Print claim submission Audit Control Confirmation Report (Must be done after each submission to confirm receipt status. Without this confirmation claims as submitted will not be processed.) P2 Print Remittance Summary Report M Review Messages TR Download Tariff Rates TD Download Tariff Description HELP Online Quick Reference Help information END Terminate the Session A selection is made by typing the option to the right of COMMAND/OPTION line and pressing Enter. To upload the submission type U, press the Tab key. The cursor will move to the right of the Drive line near the bottom of the screen. Type C for the drive location, press the Tab key. Type PMPW\DATA\SUBMIT. Press the Tab key. Type SUBMIT, press the Tab key. Type the file name that you were given during the creation of the MH submission in PMP, i.e. No1. Press Enter. Press the Tab key. Note: You will only have to type the file extension (N01, 2, 3, etc) the first time you send a submission. All other information will be remembered. Press the F3 key. Once you have pressed Enter to release the upload, the screen will change. 110 PATIENT MANAGEMENT PROGRAM The screen will state that the file transfer was successful. If there is an error, re-enter the information and try again. Press F3 to return to the Data Transfer Utility screen. Press P1 to print claim submission Audit Control Confirmation Report. Download the Reconciliation Follow the instructions on page 106 to access the SIS Application Portal. Once in the Data Transfer Utility type P2 Print Remittance Summary Report. This report will automatically be sent to your printer. Printing this report will determine if the remittance is ready to be downloaded. If the report does not print, make another attempt later. Once the report prints type D to download the Remittance. Press the Enter or Tab key. The cursor will move to the drive, press Tab, Tab, Tab. Type the file extension. Press Enter. The file transfer will execute. A screen will appear stating the information is spooling. Once the transfer is complete the screen will change stating the number of records that have been successfully transferred. The file is now ready to be reconciled in PMP. Follow the instructions on page 58. 111 PATIENT MANAGEMENT PROGRAM Renaming Your Manitoba Remit File All Manitoba Health (MH) remit files are overwritten with subsequent remittances because they have the same name. If you rename the file after receiving it you can avoid issues that arise due to overwriting. After you have downloaded the Remit file from MH and are ready to run it go to the Manitoba menu, Reconcile Manitoba Health (MH) remittance file. Click Choose a Returns File. Right click your most recent remit file. Choose Rename from the list. Type Remit1.txt or RemitJune2006.txt. Hint: Remember to rename subsequent remit files sequentially and choose names that will allow you to identify the files. Continue with normal reconcile procedure. 112