1
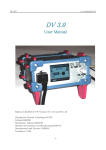
Firmware
UPGRADE
V1.0.0
PREFACE
These are manuals showing how to upgrade taping module with new firmware.
CONTACT INFORMATION
Machine was designed and produced in AMTEC.PRO d.o.o. For any additional information contact directly
to the manufacturer:
2/18
GENERAL PRECAUTIONS
Only qualified personal with the proper technical training with this equipment and awareness of the
possible hazard can perform upgrade on the equipment.
Before proceeding with work or upgrade read this manual very carefully.
User manual provides
des guidelines and education for of users how to upgrade the machine. It contains
important information to avoid potential hazards to the operator and equipment.
Attention
Electrical Hazard
Temperature Hazard
Mechanical Hazard
ve been placed on the machine to bring the attention of the operators and technicians to
Warning signs have
the potential hazard. It’s recommended not to remove safety parts on the machine.
SAFETY PRECAUTIONS
Warning: This manual contains important safety and operating information.
information. Please read and follow the
instructions in this manual. Failure to do so could result in personal injury or damage to your
device.
Warning: Please turn machine off and disconnect power cord before removing any panel.
Warning: Heaters can be hot several minutes after switch off. Before any maintenance, turn machine off,
disconnect the power cords and compressed air supply. Please allow heater to cool.
Warning: Be aware of the hazard to pinch fingers to the sprocket wheel while moving. Cover the sprocket
wheel after installing new tape.
3/18
INDEX
1
2
Basics
Installing software
2.1 Unpacking software
2.2 Installing drivers
2.2.1 Manual driver installation windows xp
2.2.2 Manual driver installation windows 7
2.3 Install LM flash programmer utility
3 Upgrading machine firmware
3.1 Setting up "LM Flash programmer"
3.2 Downloading old version of software
3.3 Upgrading machine with new firmware
5
6
6
7
7
8
11
14
14
15
17
4/18
1 BASICS
Upgrade of machine firmware is done when we'd like to increase machine functionality or to remove
software bugs from old versions of firmware.
Connection to machine can be made only with drivers installed on computer. Drivers can be installed to PC
running Windows XP SP3, Windows Vista SP1 or Windows 7 operating systems. Both 32-bit and 64-bit
versions are supported.
Upgrading of software is done with "LM Flash Programmer" utility. Install this utility to computer after
installing driver.
Copy "Stellaris" folder to C disk before performing an upgrade.
5/18
2 INSTALLING SOFTWARE
2.1 UNPACKING SOFTWARE
Unpack "Stellaris.zip" to folder C drive. Folder "c:\Stellaris" will be created with the following content:
Be careful not to create "C:\Stellaris\Stellaris " or to extract the content directly to C drive.
6/18
2.2 INSTALLING DRIVERS
Before starting an upgrade of machine firmware drivers must be installed to computer. First copy "Stellaris"
folder to C disk.
Connect machine to PC with USB cable. If necessary lose screws on machines front panel to connect it with
USB cable.
Windows will start searching drivers for the machine. In some cases the windows will find drivers by them
self. If not the drivers must be installed manually.
2.2.1 MANUAL DRIVER INSTALLATION WINDOWS XP
If Windows doesn't find drivers the following steps must be done:
1. Windows will ask for location of some files. Click OK button.
2. In new windows select source as "c:\Stellaris\FTDI\i386" and click OK button
Repeat step 1 and 2 until all devices are installed.
7/18
2.2.2 MANUAL DRIVER INSTALLATION WINDOWS 7
If Windows doesn't find drivers the following steps must be done.
1. Open Device manager on Control panel. You will find "Stellaris Evaluation Board" marked with
yellow "!" sign. Right click on it and choose properties.
2. In property window select "Driver" tab and click on Update driver
8/18
3. Find drivers manually
4. Select folder "c:\Stellaris\FTDI" for installing driver. Mark "Include subfolders".
9/18
5. The driver is installed. Click close to finish.
Repeat steps 1-5 for all Stellaris devices in "Device manager".
10/18
2.3 INSTALL LM FLASH PROGRAMMER UTILITY
After installing drivers install "LM flash programmer" utility.
1. In Windows explorer open folder " C:\Stellaris\LMFlashProgrammer". Click on
"LMFlashProgrammer.msi"
2. Click NEXT on first screen of installation wizard
11/18
3. Select "I agree" and NEXT
4. Select folder to install the software and click NEXT
12/18
5. Confirm to start the installation with pressing button NEXT
6. Wait installation to complete and click CLOSE button
13/18
3 UPGRADING MACHINE FIRMWARE
Before starting upgrade of machine firmware install drivers and "LM Flash programmer" utility to
computer.
To upgrade the machine firmware following steps must be done:
1. Set up "LM Flash programmer" utility
2. Download old version of firmware
3. Upgrade new version of firmware
3.1 SETTING UP "LM FLASH PROGRAMMER"
1. Connect machine and PC with USB cable. Lose screws on machine's front panel if USB connector is
not accessible.
2. Start "LM Flash programmer". Select "Configuration" tab and choose "LM3S6965 Ethernet
Evaluation Board" in "Quick Set".
Now right device is set for using "LM Flash programmer" utility.
14/18
3.2 DOWNLOADING OLD VERSION OF SOFTWARE
Before upgrading machine with new firmware it's recommended to create backup of old version of
firmware.
1. Select "Flash Utilities" tab in "LM Flash programmer".
2. Select upload destination and name of backup file. i.e
"c:\Stellaris\backup\tapingModule_sep11.bin" by pressing "Browse" button.
15/18
3. Select Entire Flash to be uploaded
4. Click Upload button to start upload procedure
Old firmware is now uploaded and stored on computer.
16/18
3.3 UPGRADING MACHINE WITH NEW FIRMWARE
1. Open "LM Flash programmer" utility and select "Program" tab
2. Set up programming options to:
- "Erase Necessary Pages – (slower)
- Verify After Program
- Reset MCU After Program
- Program Address Offset: 0x 1000
17/18
3. Select file for upgrade by pressing "Browse" button. Go to "c:\Stellaris\Firmware" and select
"IMS001_V1.26.bin"
4. Click "Program" button to start upgrade
Wait a few seconds that upgrade completes.
18/18