1
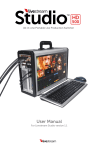
Livestream Studio
Surface Go
User Manual
For use with Livestream Studio version 3.0
Published on May 27, 2015
The Livestream Studio Surface Go
is a compact hardware accessory
that gives you external control of
the fundamental features in
Livestream Studio software.
2
Start by connecting the USB
cable to the Surface Go and
plugging it into a USB 2.0 port on
your Livestream Studio system.
3
Launch Livestream Studio and
go into the settings menu by
clicking the gearwheel in the
upper right corner.
4
Under the ‘Studio Surface’ tab, click
‘Download Drivers.’ Open the file
that downloads and run the installer.
Note: You must have Studio version 3.0 or above to
support the Surface Go. This option will not appear on
earlier versions.
5
Restart your system and launch
Livestream Studio. Some of the
buttons on the Surface Go will light
up slightly when the software has
finished launching.
6
In Livestream Studio settings,
navigate to the ‘Inputs’ menu.
Under the ‘Surface’ column, you
will assign five inputs to the five
tracks on your Surface Go.
7
After saving your settings, the Surface Go
will indicate which of your assigned sources
are in Preview and Program. The track with
the lit green ‘PRV’ button is in Preview. The
track that has the lit red ‘PGM’ button is in
Program.
8
If you want to put one of your
assigned sources into Preview,
press the corresponding ‘PRV’
button.
9
Similarly, to put a source
directly into Program, press
the corresponding ‘PGM’
button.
10
The Surface Go also includes
‘Cut’ and ‘Auto’ transition
controls for switching sources
between Preview and Program.
11
The ‘Auto’ transition type and
speed is determined in
Livestream Studio under the
‘Transitions’ tab.
12
The Surface Go also includes
a mini T bar to execute a
manual transition, allowing
you to control the speed of a
dissolve or wipe.
13
The right side of the Surface
Go features the graphics
overlay controls for all three
graphics channels.
14
For any graphics overlay channel you
want to put into Preview, press the
corresponding green ‘PRV’ button. It
will light up, indicating your graphic is
now overlaying in Preview.
15
When you are ready to push
your graphics overlay into
Program, press the flashing
yellow ‘PUSH’ button.
16
The red ‘PULL’ button will light
up, indicating that the graphics
overlay is in Program. Press it to
remove the graphic from
Program.
17
Finally, the Surface Go includes
buttons that allow you to start
and stop your recordings and
streams.
18
When you first press either
button, they will light up red to
indicate that they are active.
Press the button again to stop
the recording or streaming.
19
Have feedback, questions, or
issues? Go to Livestream Studio
settings and click on the ‘Support’
tab for Livestream Support contact
information.
20
We encourage all Livestream Studio users to
join our Livestream Studio Customer Group on
Facebook to share tips, feature requests,
workflows, ideas, bugs, etc. Request to join at
www.facebook.com/groups/hd500.
21