1
ESPAÑOL
User manual
35
1. INTRODUCTION Thank you for purchasing this Portable Multimedia Energy ™ LED TV3010. First of
all, welcome to the Energy portable multimedia TVs world. The following sections
provide an overview of your new device and its basics features. Please read
everything carefully before start using the product.
2. ImpORTaNT SafeTy INSTRUCTIONS
Keep this information in a safe place for future reference.
This symbol indicates that this product incorporates double insulation
between hazardous mains voltage and user accessible parts.
WARNING: To reduce the risk of fire or electric shock, do not expose your TV3010
to rain or moisture.
Safety Considerations
≥ Do not use the device in humid or damp conditions.
≥ Do not allow the device to get wet.
≥ Do not expose the device to dripping or splashing.
≥ Do not place water filled objects on top of the device.
≥ Do not place naked flame sources, such as candles, on the top of the device.
37
ENGLISH
To ensure your safety and the safety of others, please ensure that you read all the
safety information before operating this product.
Ventilation
The slots and openings on the device are for ventilation. Do not cover or block them
as it may cause overheating.
NEVER let children push anything into the holes or slots on the case.
Battery Disposal
Please ensure batteries are disposed of safely.
Never dispose of batteries in a fire or with other household waste.
Check with your local authority for disposal regulations.
Cleaning
ALWAYS unplug the product before you clean it.
Do not use liquid or aerosol cleaners.
Clean the device with a soft, damp (not wet) cloth.
38
3. CONTROLS aND CONNeCTIONS
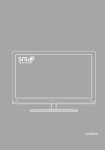
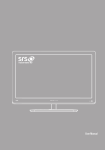
3.1. front view
1
2
3
4
5
6
7
8
9
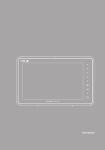
1. 10’’LED Screen.
2. CH+: Move up in the menus and change to the next channel in viewing mode.
3. CH-: Move down in the menus and change to the previous channel in viewing
mode.
4. VOL+: Move right/change settings in menus. Increase the volume level in
viewing mode.
5. VOL-: Move left/change settings in menus. Decrease the volume level in viewing
mode.
6. OK: To confirm a selection.
7. MENU: Press to open the menus /exit to go back to the topper menus.
8. Mode: Press this button to switch display mode:4:3LB, 4:3PS, 16:9.
9. LED indicator (*).
10. IR receiver.
(*) The LED states are shown as:
Blue – The battery has finished charging and is full.
Red – Device on and battery charging / Device off and battery charging
Null – Device on / Device off
Flashing -The device is in STANDBY mode.
39
ENGLISH
10
1
1
3.2. Top view
1. Stand.
2. Antenna.
2
2
5
5
3.3. Side view
1.
2.
3.
4.
5.
1
1
2
2
SD/SDHC/MMC Card Reader.
USB jack.
ON/OFF.
DC 9V Jack.
3.5 mm Earphone Jack.
3
3
4
4
3.4. Rear view
1. Hanging bracket to the wall.
2. Remote control jack.
3. Speakers
1
2
OPEN
REMOTE CONTROL
3
40
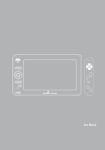
4. RemOTe CONTROL
4.1. Button Description
0-9: To change the channel and to select individual menu options.
ON/STANDBY: Press to turn on the device or to change to Standby mode.
MODE: Press this button to switch display mode: 4:3LB, 4:3PS,16:9.
PVR: Record programs of TV or Radio.
MUTE: Press once to turn the sound off/on (mute control).
FAV: To operate the favourite channels.
EPG: Press this button to display Electronic Program Guide.
SUB: Subtitle.
INFO/GOTO: Press to display the information of the current programs, or to go to a
specific instant of the video playback.
10. TTX: Press to enter Teletext (if available).
11. L/R: Press to change the sound of channel.
12. TV/Radio: TV/Radio switch.
13. Menu/Exit: Press to open the menus and
2
3
4
5
6
1
7
press again to exit.
14. ►►|: Play next file/chapter.
15. |◄◄: Play previous file/chapter.
16. ►►: Fast forward the video playing.
17. ◄◄: Fast rewind the video playing.
18. PLAY/PAUSE: Starts or pauses the current
20
9
19
11
18
13
playback.
17 16 15 14
19. ▲: Move up in the menus and change to the
next channel in viewing mode.
▼: Move down in the menus and change to the previous channel in viewing mode.
►: Move right/change settings in menus. Increase the volume level in viewing mode.
◄: Move left/change settings in menus. Decrease the volume level in viewing mode.
20. ENTER: To confirm a selection. Or to open the channel list Menu.
Note: SUB/TTX/EPG may not be available for all channels.
◄◄/►►/|◄◄/►►| will act as RED/GREEN/YELLOW/BLUE key depending on
context.
41
8
10
12
ENGLISH
1.
2.
3.
4.
5.
6.
7.
8.
9.
4.2. Installig the batteries
Pull the battery loader out and insert a CR2025 battery.
≥ Make sure to place the battery in the correct direction.
≥ When not using the remote control for a long period of time remove the battery.
≥ When operating range reduces replace the battery.
≥ Do not recharge, disassemble, or heat the battery. Misuse of the battery may
result in leakage that will damage the remote control.
4.3. Using the remote control
To use the remote control, point it towards to the IR receiver.
The remote control range is 4 metres or less within a ±30° angle from the remote
sensor. If the remote’s battery is low, the remote may not function properly, so
replacing the battery immediately is recommended.
The remote control will not work if the way to the receiver is blocked.
Sunlight or other very strong light will decrease the sensitivity of the remote control.
5. BUILT-IN ReCHaRGeaBLe BaTTeRy
This portable TV comes with a built-in rechargeable Lithium-Ion battery.
≥ Charge the battery fully before initial use for at least 8 hours. Charging time is
normally about 4hours. A fully charged battery delivers about 2.5 hours of use.
≥ When the battery is weak, an indication symbol will appear on the screen and the
unit will power off automatically after a few minutes.
6. INSTaLLaTION aND CONNeCTIONS
Caution: Make sure to check the voltage specification of the wall outlet is the same
rating with the receiver. To prevent the risk of electric shock, do not open the cover
or the back of the TV.
42
6.1. antenna
Please pull the Antenna just like the figure shows.
We recommend to use an external antenna instead of the portable antenna included when the signal isn’t good enough.
6.2. Connecting the earphones You can connect stereo earphones to the headphone jack for private listening.
When earphones are connected, the speakers will automatically turn off.
Caution: Loud volume can damage your hearing.
Decrease the volume before connecting earphones, and then raise the volume back to a
comfortable level.
43
ENGLISH
The TV unit is supplied with a telescoping antenna that will provide good reception
in most situations. Be sure to keep the TV stationary when trying to receive a
signal. Any movement of the TV can result in loss of the digital signal.
6.3. Installing stand
Insert the front end of the support to the slot on the back cover, and then rotate the
base as illustrated in bottom, until the support is locked properly.
In order to store the remote control, insert it to the slot on the back stand.
7. USeR INTefaCe
7.1. powering ON the system
1.
Power On: Switch ON/OFF button from OFF to ON.
The system will enter DVB mode as soon as the system is powered on.
44
System interface when there are
no TV/RADIO programs in the
database.
If the database has already got TV
or RADIO programs saved, the system will continue with the program
it was playing before it was powered off.
2. Press ▲▼ to switch to the previous or next program. And press ◄ ► to
adjust the sound volume.
You can open the main menu by
pressing Menu/Exit. You can press
▲▼ to select mode which you
want to enter.
7.2.1 Digital TV
In Main Menu, press ▲▼ to
choose Digital TV option and then
Press ENTER once to enter Digital
TV menu as shown in. Under the
Digital TV menu, there are six
different options.
45
ENGLISH
7.2. main menu 7.2.1.1 Channel manager
System offers an efficient function of channel management.
There are two independent pages for channel management, TV and RADIO.
Channel Organizer
Under the channel manager menu,
press ENTER to enter channel organizer menu. Channel organizer page
includes favourite channels, moving
and channel deleting.
Note: It will pop up and dialogue
box prompting that “Channel not
available” when there are no channels in database, and it will not enter into channel
organizer page.
Press ▲▼ to select channel. Press ◄► to choose the line where Favourite Channel, move and delete, and press ENTER to set and cancel Favourite Channel, move or
delete. After setting, corresponding figure will appear.
Note: After moving a channel, press yellow button to free the selection.
Channel sorting
Under the channel sorting, the
channels shall be listed according
to certain sequence so that the user
can easily find them.
Note: It will pop up and dialogue box
prompting that “Channel not available” when there are no programs in
database, and it will not enter into channel sorting page.
Press ▲▼ to choose Type. Press◄► to set Sorting Parameters.
46
Before sorting, the type of sorting shall be set, including the following items:
After sorting is set, to realize channel sorting, press ENTER. Then the
system will ask you if you really want
to save the channel sorting
edit Channels
Has different operations such as Add and Rename channels.
Note: It will pop up a dialogue box
prompting “No Carriers” when there
are no programs in database, and it
will not enter into ADD-Edit Channel
page.
47
ENGLISH
1. First Option: Choose the programs to be sorted via the selection area, such as:
England, Italy, France, etc;
2. Second Option: Press FTA (free of charge), Scramble (encrypted), ALL (Free and
Encrypted Channels);
3. Third Option: According to alphabetic order: All, A-Z, Z-A, LCN+, LCN-.
Add Channel menu
Under Add Channel menu, there are
6 parameters for adding a channel
as follows:
1. Area Name: For Area Name,
press ► in the remote controller
to enter the Area Name list on the
right, then press ▲▼ to choose
area name, press ENTER to confirm;
2. Carrier: Press ◄► to choose;
3. Channel Name: Press ◄► to enter Rename Channel page;
4. Audio PID, Video PID, PCR PID, Press 0-9 number key to revise values;
5. Press ENTER to confirm the adding, the system will hint with “Update succeeds”
and return to Edit Channel menu;
Delete all
If you do not like one or some channels, you can delete it/them in Channel Organizer
menu. But if you do not like all TV or Radio, you can enter “Delete All” menu to delete
all TV and Radio channels.
Under Channel Manager menu,
press▲▼ to choose “Delete All”
option and then press ENTER.
48
To delete all TV channels or all
radio channels, press ▲▼ to move
the cursor to All TV Channels option
or All Radio channels option, press
ENTER. Then the system will ask
you if you really want to delete all
channels.
7.2.1.2 Installation
ENGLISH
Under the installation menu, there
are two kinds of Installation modes:
Auto Search and Manual Search.
auto search
To enter into auto searching menu,
move the cursor to “Auto Search”
by using “▲▼”, and then press
“ENTER”.
After entering into auto search
page, system will scan all programs
one by one, under frequency points
of current countries or regions selected automatically. During scanning process,
press Menu/Exit to stop and exit scanning. If any program is detected and the scanning process is finished, system will exit the scanning page and save the program.
Then it will return to the installation menu and play it in a small window.
49
manual search
If you know the frequency of the program or if you want to scan the program at
any frequency required, you can select manual scanning. To enter into manual
searching menu, move the cursor to “Manual Search” by using “▲▼”, and then
press “ENTER”.
It will display the relevant parameters Freq (KHz) and Band Width.
Then press ENTER to start searching.
If any program is detected and
the scanning process is finished,
system will exit the scanning page
and save the program. Then it will return to the installation menu and play it in a
small window.
area Search Area search is a kind of intelligent and convenient mode of programs searching,
which covers programs of all frequency points of target countries or regions.
At present, this system covers many targets countries and regions including:
Germany/ England/ Italy/ France/
Spain, etc.
To enter into Area Search menu,
move the cursor to “Area Search”
by using “▲▼”, and then press
“ENTER”.
After entering into area search
page, system will scan all programs one by one under frequency points of current
countries or regions selected automatically. During scanning, press Menu/Exit to
50
stop and exit scanning. If any program is detected and the scanning
process is finished, system will exit
the scanning page and save the
program. Then it will return to the
installation menu and play it in a
small window.
Configuration provides individualized system setup function; you can
configure the system according to
your own hobby and demand.
OSD
You can set the user interface
display mode according to your own
demand.
When the cursor moves on the
option in OSD menu, the values
corresponding to this option appear
on the right of the menu. Press
“▲▼” to move upward and downward to choose the options in OSD menu.
51
ENGLISH
7.2.1.3 Configuration
The different options in OSD menu are:
1. OSD: sets system menu theme;
five different themes are available.
2. Time on OSD: sets whether to
display system time in full-screen
play channel or not. Press ◄► to
choose between ON and OFF.
3. OSD Timeout: sets some
information hint dialogue box and displays time length. Press ◄► to choose
among 1-6 seconds.
4. OSD Trans: sets menu transparency. Press ◄► to adjust value between %0-%60.
5. OSD Language: The system has the user interface supporting a couple of
languages; you can set language via OSD Language option. Press ◄► to enter
OSD Language List.
6. 1st audio and 2nd audio Language option: Press ◄► to enter the
currently supported Audio Language list; then press▲▼ to choose language, and
finally press ENTER to confirm.
TV
Through TV setup you can adjust image configuratuon.
All TV setup options are listed on
the left of the menu. The values
corresponding to this option can be
displayed on the right of the menu.
Move the cursor to the desired TV
option, and press ◄► to choose
among available options; the set
takes effect immediately.
52
The different options in TV menu are:
1. Aspect Ratio: 4:3PS/4:3LB/16:9.
2. Brightness: 0%~100%.
3. Contrast: 0%~100%.
4. HUE: -6,-5,-4,-3,-2,-1, 0, 1, 2, 3, 4, 5, 6.
5. Saturation; 0~12.
Press ▲▼to select the System
Setup option you want to change.
Press ◄► to enter into the list
on the right, and then use again
▲▼ to select the desired value.
Finally press ENTER to confirm the
selection.
The different options in System Setup menu are:
1. Surround: To set stage effect (OFF, Concert, Church, Passive, Live).
2. LCN: To set the LCN on or off. When you choose LCN ON, the front of the programs
will display the LCN number.
3. Area: To set scanning area. Choose an area to download preset channel settings.
Time
Use it to enter time set.
In Time menu, there are two time
modes (auto and manual). When
the cursor moves onto Timer Mode
option, press ◄► to choose time
mode.
a) Auto setting: revise via setting
GMT Offset, Summer Time options.
53
ENGLISH
System setup
The system settings are Auto as deffault.
1. GMT Offset: press ► to move the cursor into the Properties list on the right.
Press ▲▼ to move upward and downward the cursor and choose the relevant
GMT Offset. Finally press ENTER to confirm the choice.
2. Summer Time: move the cursor to Summer Time option, and use ◄► to set
Summer Time.
b) Manual setting: revise via
setting Date, Time options.
1. Date: press ◄► to enter date setting menu. Use ◄►to switch days,
use▲▼ to switch weeks, use ◄◄ / |◄◄to switch months and use ►► /
►►| to switch years.
2. Time: Press 0-9 number key to revise values.
After time is set, Press ENTER to
save the setting, the system will
hint with” Update succeeds”.
54
7.2.1.4 Software Upgrade:
If there is a software upgrade available, you can automatically update
the software of the device.
7.2.1.5 factory default
7.2.1.6 Version
Here you can find system software information, including H/W Version, S/W
Version, F/W version, Checksum, Build Date and Build Time.
Press Menu/Exit to return to previous menu.
7.2.1.7 Digital TV basic function menu
When playing a Digital TV channel,
you press OK from the front panel to
open the Digital TV basic function
menu.
55
ENGLISH
Use ◄► to select “YES” or “NO”. Select “YES” to come back to the factory default
settings.
faV program
If there are some favourite programs that have been set up, press
▲▼ to enter into the favourite
program list.
Press ▲▼ to select the favourite
program, and use ENTER to confirm
the choice, or else press Menu/Exit
to exit.
TV/Radio
Press TV/RADIO to switch between TV player and RADIO player, when the program
is in full screen.
epG (electronic programs guide)
Note: The program signal must
contain EPG date. In other case, it
may be not available.
Enter into the EPG page to know
more about the programs to be
played.
Subtitle
Note: The program signal must contain Subtitle date. In other case, it may be not
available.
Subtitle is defaulted to be off. To see the subtitle information, enter the Subtitle
menu of the current programs.
56
Use ◄► to choose whether
to open subtitle or not, and
press ▲▼ to move upward and
downward to choose language.
TTX (Teletext)
Note: The program signal must contain TTX date. In other case, it may be not
available.
If you want to watch teletext, please select “TTX” to enter into TTX page.
▲: go to the previous page
▼: go to the next page
◄: go back 100 pages,
►: advance 100 pages
TTX or Menu/Exit: exit.
multiaudio
Audio language switch and L/R channel switch.
Press ◄►to switch between
“Stereo” → “Left” (left channel)
→ “Right” (right channel). Then
use▲▼ to switch the language
of sound.
57
ENGLISH
Use the following keys:
program info
Show the information of current program when it is in normal playing state.
You can also press INFO to access
to Program info.
7.2.2 movie
Press ENTER key to enter to next
directory. Press Menu/Exit to return
to previous directory.
It displays only video files and folders.
Use ▲▼ to choose the video file,
and press ENTER to play selected
file.
While playing a video, press ENTER
to pause or play.
Press |◄◄ to play previous video, press ►►| to play next video.
58
Press ►►or ◄◄ to modify the playback speed.
Press Menu/Exit to exit play mode and return to file directory.
7.2.3 music
Press ▲▼ to choose Music option. Press ENTER to confirm and enter into the
main directory.
Press ENTER key to enter to next directory. Press Menu/Exit to return to previous
directory
Use▲▼ to choose audio files,
and press ENTER to play selected
music file.
Press |◄◄ to play previous audio file, press ►►| to play next audio file.
While playing music, press ENTER
to pause or play.
Press ►► or ◄◄ to modify the
playback speed.
Press Menu/Exit to exit music play
mode and return to file directory.
59
ENGLISH
It displays only audio files and folders.
7.2.4 photo
Press▲▼ to choose Photo option. Press ENTER to confirm and enter into the
main directory.
Press ENTER key to enter to next directory. Press Menu/Exit to return to previous
directory
It displays only photo files and folders.
Use ▲▼ to choose photo files,
and press ENTER to open selected
photo file.
Press |◄◄ to play previous photo,
press ►►| to play next photo.
Press Menu/Exit to exit play mode and return to file directory.
7.2.5 Disk manager
Press ▲▼ to choose Disk Manager option. Press ENTER to confirm.
Press Menu/Exit to exit from Disk
Manager.
60
8. pVR fUNCTION
9. TROUBLeSHOOTING If you experience problems with this receiver or its installation, in the first instance
please read carefully the relevant sections of this User Manual and this
Troubleshooting section.
Problem
The LED does not
light up / not lit
when the device is
connected to the
mains.
The remote control is
not working
Doesn’t display the
subtitle
Possible cause
Solution
Mains cable is not connected
Check that the mains cable is
plugged into the power socket
The battery isn’t installed or
needs to be recharged
Make sure the battery is installed
properly and charged
Battery exhausted
Charge battery
Remote control is incorrectly
aimed
Aim the remote control to the TV.
Check that nothing blocks the front
panel
The program signals no subtitle
date
Try pressing the SUB button to open
the subtitle
The subtitle doesn’t open or
signal is too weak
Make sure the signal is good
61
ENGLISH
1. In TV or Radio playing mode, press PVR to open REC selection window, and
select “YES” to begin recording.
While recording, press PVR to open REC selection window again, and select
“YES” to exit.
Note: REC files can only be saved in the memory of an external USB device
2. In desktop of Disk Manager, press ▲▼ to select a file in the list of files. Press
ENTER to play the selected file.
3. In desktop of Disk Manager, press the green button of the remote control to
switch between operations of PLAY/Delete One/Delete all. After pressing ENTER
to select one operation, a new dialog box appears. Select “YES” to confirm or
“NO” to cancel.
The programs recorded from TV can be played in Movie function. You will find
the file in PVR folder, which contains all the recordings done. The programs
recorded from Radio can be played in Music function.
The aerial is not properly
connected to the machine
When the device
tries to find and store
channels you get the
message “No signal”
Check the aerial installation,
including its connections
The aerial is not correctly direc- Check that the aerial is directed
ted towards the transmitter
towards the transmitter
OR
The aerial is not suitable for
When only very few of
digital channels
the expected number of
channels are found
Check that digital transmissions
are available in your area
There are no terrestrial digital transmissions in your area
Can’t play the music
file correctly
The file is damaged or the
code is wrong
Change the file
OR
Can’t play the video
The format of the video is not compatible, or file is damaged
Picture or video can
not be seen in full
screen
The resolution of the files not
suitable
62
Change the file
10. SpeCIfICaTIONS
Specificactions
Input Frequency
VHF: 177.5 - 226.5 MHz
UHF: 474 – 858 MHz
RF Input Level
-20 ~ -78 dBm
IF Bandwidth
7 MHz & 8 MHz
Modulation
QPSK, 16QAM, 64QAM
Decoder Format
MPEG2
Output Format
4:3 & 16:9
Audio
Decoder Format
MPEG-1 (layer 1 & 2)
WMA
USB 2.0 connector
Plays video (DivX, Xvid, AVI, MPG,) audio (MP3, WMA) and photos
(JPEG).
Tuner
Video
Conectors
Power
Screen
Dimensions (wxdxt)
RF in
IEC 169-2 female connector
Stereo headphones
3,5mm jack
USB
2.0 (sólo Host) max. USB
capacity 16 GB
Card Reader
MMC/SD/SDHC max. card capacity
16 GB
AC 100-240V 50/60 Hz, max.0.5A
Input
DC 9V, 2A
Consumption
18 W max
Type
Digital LCD with LED backlight
Size
10”
Resolution
1024 x 576
286mm x 178mm x 39,5mm
Specifications are subject to change without further notice.
63
ENGLISH
Ítem
11. WaRRaNTy
Energy Sistem Soyntec S.A. warrants its products to be free from defects in
materials and workmanship at the time of purchase.
The warranty period is 36 months from the date of purchase for your portable
multimedia TV.
12. WaRRaNTy pROCeDURe
1. Visit the Support section at http://support.energysistem.com and select your
product to view the FAQ (Frequently Asked Questions). The solution to your
problem is very likely to have been already published there. You will also be able
to download user manuals, user guides, drivers and updates.
2. If you cannot find an appropriate solution in the Support section, you may send
us your enquiry or warranty service request by email:
[email protected]
3. Alternatively, you may prefer to contact the distributor from which you
purchased the product, presenting the purchase receipt or invoice.
Specifications are subject to change without notice.
© 2011 by Energy Sistem®. All rights reserved.
Trademarks All company, brand and product names are trademarks or registered
trademarks of their respective companies.
64
13. DeCLaRaTION Of CONfORmITy
Manufacturer Name: Energy Sistem Soyntec S. A.
Address: Pol. Ind. Finestrat. C/ Calpe, no. 1, 03509 Finestrat, Alicante
Tel: 902 388 388
Fax: 902 119 034
We declare under our own exclusive responsibility that the product:
Energy Sistem® Portable Multimedia TV Energy™ LED TV3010 White
Is in compliance with the essential directives, norms and standards of the
European Union 89/336/EEC (EMC Directive).
Manufacturing country: China
This symbol on the product or the instructions means that your electrical
and electronic equipment should be disposed at the end of life separately
from your household waste. For more information, please contact the local
authority or dealer where you purchased the product.
65
ENGLISH
NIF: A53107488