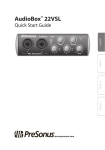
1
Chapters Surfscan® 6100/6200 Operations Manual Main Contents Copyright 1996, Tencor Instruments Version 3.2 1-Introduction 2-Basic Skills 3-Getting Started 4-Scanning 5-Recipes 6-Calibration 7-Setting Up the System 8-Working with the Database Index 9-Browser 10-Export and Import 11-ViewLog 12-Diagnostic Tools 13-X-Y Coordinates Option 14-SPC Option 15-Patlite Option Contents Click on a topic or chapter Surfscan® 6200 Wafer Surface Analysis System Operations Software Version 3.2 Online Manual: 2400 Charleston Road, Mountain View, CA 94043 Phone: (415) 969-6767 FAX: (415) 968-9482 #343153 Rev. B 5/97 COPYRIGHT NOTICE Copyright ©1996 by TENCOR INSTRUMENTS. All rights reserved worldwide. No part of this publication may be reproduced, transmitted, transcribed, stored in a retrieval system or translated into any human or computer language, in any form or by any means, electronic, mechanical, magnetic, chemical, manual, or otherwise, without the express written permission of TENCOR INSTRUMENTS, 2400 Charleston Road, Mountain View, California, 94043. WARRANTY Except as otherwise indicated, Tencor Instruments warrants to the Buyer that the items sold by it hereunder are free from defects in material and workmanship and meet applicable specifications. In discharge of this warranty, Tencor Instruments agrees either to repair or replace as it may elect, any part or parts which under proper and normal use proves defective in material or workmanship within twelve months after delivery to Buyer, except for optional printers. If it is recognized that some components and accessories fail to give reasonable service for a reasonable period of time, as determined solely by Tencor Instruments, Tencor Instruments will at its election replace or repair them. Tencor Instruments may at any time discharge its warranty as to any item by refunding the purchase price and taking back the item. Unless Buyer shall inspect all items and within thirty days of delivery notify Tencor Instruments of any apparent defects discovered and shall return the apparently defective item, transportation charges prepaid, to the Tencor Instruments factory or service office if so directed, Tencor Instruments shall have no liability hereunder. The foregoing warranty and remedy are exclusive and Tencor Instruments shall have no other liability under any other warranty express or implied either in fact or by operation of law, statutory or otherwise. Tencor Instruments shall have no liability for special or consequential damages of any kind and from any cause arising out of the installation or use of any item. TRADEMARKS Surfscan and the Tencor logo are a registered trademarks of Tencor Instruments. Hewlett Packard and PaintJet are registered trademarks of Hewlett-Packard Corporation. Windows™ is a trademark and Microsoft, MS-DOS, and Access are registered trademarks of Microsoft Corporation. DECnet™, PATHWORKS™, and VAX™ are trademarks and DEC is a registered trademark of Digital Equipment Corporation. NetWare and Novell are registered trademarks of Novell, Inc. U. S. PATENTS This instrument is protected under the following patents: 4601576, 4766324, 4641967, 4378157, and patents pending. #343153 Rev. B 5/97 v OPERATING SAFETY The Surfscan 6200 contains an Argon Ion laser rated for 30 mW with a maximum operating power of 0.5 W. A safety interlock is provided on the laser scan circuit that automatically turns off the laser if the scanning mirror fails to operate. Do not defeat the function of this safety feature. CAUTION: Use of controls or adjustments, or performance of procedures other than those specified herein might result in hazardous light exposure. Caution labels located on the front and back sides of the scan unit are reminders of the laser hazards. See label reproductions below: Pursuant to the Regulations for the Administration and Enforcement of the Radiation Control for Health and Safety Act of 1968 (pertinent to laser products), a document describing this product has been filed with the Consumer Industrial Products Branch (HFZ-312) of the Division of Radiological Products of the National Center for Devices and Radiological Health (CDRH). This product conforms to the requirements for a Class I Laser product. HIGH VOLTAGE This system contains components requiring high voltage (between 500 and 2500 VDC). #343153 Rev. B 5/97 vii REVISION LOG This manual describes the operation of the Surfscan 6100 and 6200 instruments with software version 3.2. This manual and the Surfscan 6100/6200 Wafer Surface Analysis System Reference Manual replace the single Surfscan 6100/6200 Wafer Surface Analysis System User Manual provided with software versions 3.1 and prior. Other than rearrangement of material into two volumes, the following changes have been made: • Chapter 6, “Calibration” This chapter was revised to include the new automatic calibration curve generation feature for oxides and nitrides. • Chapter 15, “Patlite Option” This is a new chapter describing the Patlite option. #343153 Rev. B 5/97 Table of Contents ix TABLE OF CONTENTS 1. Introduction 1.1 Before Starting 1.2 About the Instrument 1.3 About this Manual 1.3.1 Conventions 1.3.2 How Information is Organized 1.3.3 Related Manuals 2. Basic Skills 2.1 Operator Interface 2.1.1 Auxiliary Panel 2.1.2 Keypad 2.1.3 Mouse 2.1.4 Floppy Disk Drive 2.1.5 Working with Cassettes 2.2 Using the Instrument 2.3 Working with Application Windows 2.4 Working with Menus 2.5 Working with Dialog Boxes 2.5.1 Using the Selection Bar 2.5.2 Using Command Buttons 2.5.3 Using Check Boxes 2.5.4 Using Radio Buttons 2.5.5 Using List Boxes 2.5.6 Using Pull-Down Lists 2.5.7 Using Cycle Controls 2.5.8 Using Select Buttons 2.5.9 Using Data Entry Fields 2.5.10 Using Scroll Bars 2.6 Printing Screens 1-1 1-2 1-2 1-4 1-4 1-4 1-4 2-1 2-1 2-2 2-3 2-4 2-6 2-6 2-8 2-9 2-10 2-12 2-13 2-13 2-14 2-14 2-15 2-16 2-16 2-17 2-17 2-18 2-19 3. Getting Started 3.1 Setting Up for the First Time 3.2 Using the DOS Shell 3.3 Disk and Database Space 3-1 3-4 3-4 3-4 4. Scanning 4.1 Starting the Scan Application 4.2 Scanning Methods 4.2.1 About Scanning 4.2.2 Scanning All Substrates 4.2.3 Scanning Selected Substrates 4-1 4-2 4-4 4-6 4-6 4-6 #343153 Rev. B 5/97 x Surfscan 6200 Operations 4.3 4.4 4.5 4.6 4.7 4.8 4.9 4.10 4.11 4.2.4 Scanning One Substrate (Direct Access) 4.2.5 Lot Summary Using the Scan Window 4.3.1 Menus and Commands Quick Reference 4.4.1 General Procedures Using the Summary Box Using the Cassette Catalog Using the Histogram 4.7.1 Zooming the Histogram 4.7.2 Editing Bin Splits Using the Wafer Map Zooming the Map Examining a MicroView 4.10.1 Displaying a MicroView 4.10.2 Changing MicroView Display Options 4.10.3 Using the MicroView Cursor 4.10.4 Setting the MicroView Threshold 4.10.5 Manually Choosing a MicroView View 4.10.6 Using MicroViews for Defect Analysis Printing Summaries 4.11.1 Printing a Wafer Summary 4.11.2 Printing a Lot Summary 4.11.3 Choosing Automatic Printing Options 4.11.4 Setting Up Printers 5. Recipes 5.1 Recipe Menus 5.2 Using the Recipe Dialog Box 5.3 Recipe Parameters 5.3.1 Data Collection Parameters 5.3.2 Data Display Parameters 5.3.3 Configuration Parameters 5.3.4 Sort Parameters 5.3.5 Selecting Substrate Parameters 5.4 Setting the Data Collection Range 5.4.1 Selecting an LPD Range 5.4.2 Selecting a Haze Range 5.4.3 Selecting Throughput 5.5 Selecting Display Options 5.5.1 Selecting the Data Display 5.5.2 Displaying Defects 5.5.3 Displaying Haze 5.6 Selecting Automatic Operations 5.6.1 Automatic Sorting of Failed Wafers #343153 Rev. B 5/97 4-7 4-8 4-8 4-10 4-11 4-13 4-15 4-18 4-20 4-20 4-21 4-22 4-23 4-24 4-25 4-26 4-27 4-29 4-29 4-30 4-32 4-32 4-34 4-35 4-35 5-1 5-1 5-3 5-4 5-4 5-7 5-8 5-9 5-10 5-11 5-12 5-14 5-16 5-16 5-16 5-17 5-20 5-22 5-22 Table of Contents 5.7 5.8 5.6.2 Automatic Wafer Alignment 5.6.3 Automatic Printing 5.6.4 Automatic Saving Selecting Sort Options 5.7.1 Haze Deviation Sort Parameters Recipe Parameter Guidelines xi 5-22 5-23 5-24 5-25 5-26 5-27 6. Calibration 6.1 Using the Calibration Application 6.2 Calibrating PSL Spheres on a Substrate 6.2.1 Using Substrate and Thickness Records 6.2.2 Measuring PSL Spheres 6.2.3 Using the Substrate Calibration Curve 6.3 Calibrating the Tencor-Standard Curve 6.3.1 About Calibration Curves 6.4 Haze Calibration 6.4.1 Measuring Haze 6.4.2 Using the Haze Calibration Curve 6.4.3 Importing and Exporting the Haze Table 6.5 Cassette Calibration 6-1 6-1 6-3 6-4 6-9 6-13 6-17 6-19 6-20 6-20 6-24 6-26 6-27 7. Setting Up the System 7.1 User Configuration Dialog Box 7.2 Selecting Events for the System Log 7.3 Setting Wafer Orientation 7.4 Defining Exclusion Patterns 7.4.1 Exclusion Regions 7.5 Setting Data Colors 7.6 Setting Data Compression 7.7 Setting Up for TFF Files 7.7.1 Setting TFF Filenaming 7.7.2 Setting Database IDs 7.8 Managing User Accounts 7.8.1 Adding or Modifying User Accounts 7.8.2 Deleting a User Account 7.8.3 Testing a User Account 7.9 Managing Recipes 7.10 Setting System Configuration 7.11 Setting Printer Configuration 7.11.1 Selecting Text and Graphics Printers 7.11.2 Setting Up for Printing 132-Column Reports 7.11.3 Setting Up for Fast Printing of System Log Reports 7-1 7-2 7-5 7-6 7-7 7-7 7-10 7-11 7-12 7-12 7-14 7-15 7-15 7-18 7-18 7-19 7-19 7-22 7-22 7-24 7-26 #343153 Rev. B 5/97 xii Surfscan 6200 Operations 8. Working with the Database 8.1 About the Database System 8.1.1 Database Utilities 8.1.2 Avoiding Disk Full or Database Full Conditions 8.2 Managing the Disk and Database 8.2.1 Disk Full Messages 8.2.2 Checking Disk and Database Free Space 8.2.3 Recovering from a Disk Full Condition 8.2.4 Reducing the Size of the Database 8.2.5 Repairing The Database 8.3 Backing Up and Restoring the Database 8.3.1 Backing Up Data 8.3.2 Restoring Data 8.4 Reports 8.4.1 Viewing Reports 8.4.2 Printing Reports 8-1 8-1 8-1 8-1 8-3 8-4 8-5 8-6 8-7 8-7 8-9 8-10 8-12 8-15 8-16 8-18 9. Browser 9.1 Selecting Summaries and Maps 9.2 Reviewing Data 9.3 Using the Browser Window 9.4 Displaying Map-to-Map 9.5 Deleting Summaries and Maps 9-1 9-2 9-5 9-6 9-7 9-11 10. Export and Import 10.1 Export and Import Guidelines 10.2 Starting the Export/Import Utility 10.3 Viewing an Import List 10.4 Importing Data 10.5 Exporting Data 10.5.1 Selecting Data for Export–An Overview 10.5.2 Selecting Recipes 10.5.3 Selecting Summaries and Maps 10.5.4 Selecting PSL Spheres on Substrate Records 10.5.5 Selecting Exclusion Patterns 10.5.6 Selecting Access Codes 10.5.7 Selecting Calibration Tables 10.5.8 Selecting Configuration Tables 10-1 10-1 10-1 10-3 10-4 10-6 10-7 10-8 10-10 10-11 10-13 10-14 10-16 10-16 11. ViewLog 11-1 11.1 11.2 11-2 11-4 11-4 11-5 11-6 #343153 Rev. B 5/97 Viewing the System Log Viewing and Printing System Log Reports 11.2.1 Choosing a Printer 11.2.2 Viewing a Report 11.2.3 Printing a Report Table of Contents 11.3 xiii Selecting Entries Using Dialog Boxes 11.3.1 Selecting by Log Messages 11.3.2 Selecting by User 11.3.3 Selecting by Access Class 11.3.4 Selecting by Date System Log Entry Descriptions 11-8 11-8 11-9 11-10 11-11 11-13 12. Diagnostic Tools 12.1 Early Warning System 12.1.1 Function Controls 12.1.2 Viewing Data Values 12.1.3 Function Display 12.1.4 Collection Parameters 12.1.5 Panel Controls 12.1.6 EWS Controls 12.1.7 Alarms 12.1.8 Preferences 12.2 System Status 12.3 Scribe Mark Exclusion Zones 12.3.1 Configuring SMEZ 12.3.2 Applying SMEZ Definitions 12.3.3 Creating Scribe Mark Exclusion Zones 12-1 12-1 12-3 12-3 12-4 12-5 12-7 12-8 12-8 12-9 12-9 12-12 12-13 12-13 12-13 11.4 13. X-Y Coordinates Option 13.1 Rotating a Map 13.2 Translating X-Y Coordinates 14. Statistical Process Control Option 14.1 Editing SPC Data Files 14.2 Extracting Data for SPC 14.3 Displaying SPC Data 14.4 Printing SPC Data 14.5 SPC Tutorial 14.5.1 Introduction 14.5.2 Control Charts 14.5.3 Implementation Guidelines 15. Patlite Option 15.1 Introduction 15.1.1 System Configuration 15.1.2 Lighting Options 15.2 Status Information Available 15.2.1 Scan State 15.2.2 Cassette State 15.3 Configuring the Patlite 13-1 13-2 13-2 14-1 14-1 14-4 14-5 14-6 14-6 14-6 14-7 14-10 15-1 15-1 15-1 15-1 15-1 15-1 15-3 15-5 #343153 Rev. B 5/97 xiv Surfscan 6200 Operations 15.3.1 15.3.2 Glossary Index #343153 Rev. B 5/97 ASCII File Format An Example 15-5 15-7 Glossary-1 Index-1 List of Figures and Tables xv LIST OF FIGURES AND TABLES Figure 1-1 Figure 1-2 Surfscan 6100/6200 Surfscan 6000-Series MicroView Figure 2-1 Figure 2-2 Figure 2-3 Figure 2-4 Figure 2-5 Figure 2-6 Figure 2-7 Figure 2-8 Figure 2-9 Figure 2-10 Figure 2-11 Figure 2-12 Figure 2-13 Figure 2-14 Figure 2-15 Figure 2-16 Figure 2-17 Figure 2-18 Figure 2-19 Figure 2-20 Surfscan 6100/6200 Major Components Auxiliary Panel Keypad Mouse and Mouse Pad Floppy Disk Drive Aligning Wafers with a Mechanical Aligner Manually Aligning Wafers Seating the Cassette Surfscan 6000-Series Application Window Example of a System Menu Pull-Down Menu Control Menu Command Buttons Check Boxes Radio Buttons List Boxes Pull-Down Lists Cycle Controls Data Entry Field Scroll Bar Figure 3-1 Figure 3-2 Logon Dialog Box System Menu–Analysis Manager Access Figure 4-1 Figure 4-2 Figure 4-3 Figure 4-4 Figure 4-5 Figure 4-6 Figure 4-7 Figure 4-8 Figure 4-9 Figure 4-10 Figure 4-11 Figure 4-12 Figure 4-13 Figure 4-14 Figure 4-15 Figure 4-16 Scan Application Window Recipe Selection Dialog Box Lot ID Dialog Box Scan Window after a Scan Lot Summary Window Scan Window Parts Haze Results in Scan Window Scan Application Menus Database ID Definitions Dialog Box Lot ID Dialog Box Summary Box Wafer ID Dialog Box Comments Dialog Box Cassette Processing Commands and Indicators Histogram Histogram Markers 1-1 1-3 2-1 2-2 2-3 2-5 2-6 2-7 2-7 2-8 2-9 2-10 2-11 2-12 2-13 2-14 2-14 2-15 2-16 2-16 2-17 2-18 3-1 3-2 4-2 4-3 4-4 4-5 4-8 4-9 4-10 4-10 4-13 4-14 4-15 4-16 4-16 4-18 4-20 4-21 #343153 Rev. B 5/97 xvi Surfscan 6200 Operations Figure 4-17 Figure 4-18 Figure 4-19 Figure 4-20 Figure 4-21 Figure 4-22 Figure 4-23 Figure 4-24 Figure 4-25 Figure 4-26 Figure 4-27 Figure 4-28 Figure 4-29 Figure 4-30 Figure 4-31 Figure 4-32 Histogram Bin Splits Zoomed Wafer Map Locating Defects in the Zoomed Wafer Map MicroView Wireframe MicroView Format MicroView Cursor Moving the MicroView Cursor by Clicking and Double-Clicking MicroView Display Options Dialog Box Outline of MicroView Area Defect Shown in MicroView Scratch Shown in MicroView Area Shown in MicroView Example of a Short Wafer Summary Example of a Long Wafer Summary Example of an 80-Column Lot Summary Printer Selection Dialog Box 4-22 4-23 4-24 4-25 4-26 4-27 4-28 4-29 4-30 4-31 4-31 4-32 4-33 4-33 4-34 4-35 Figure 5-1 Figure 5-2 Figure 5-3 Figure 5-4 Figure 5-5 Figure 5-6 Figure 5-7 Figure 5-8 Figure 5-9 Figure 5-10 Figure 5-11 Figure 5-12 Figure 5-13 Figure 5-14 Figure 5-15 Figure 5-16 Recipe Menus Recipe Dialog Box Measurable Surface Area Recipe Film Calibration Curves Dialog Box LPD Ranges Area From Equals Max Size Area From Greater Than Max Size Gain versus Cross Section for the Surfscan 6200 Gain Versus Diameter Defect Histogram Bin Splits Dialog Box Areas as a Series of Chords Detailed Haze Bin Splits Detailed Print Configuration Dialog Box Detailed Save Configuration Dialog Box Defect Histogram Bin Splits Dialog Box Haze Deviation Sort Parameters Dialog Box 5-1 5-3 5-10 5-11 5-12 5-12 5-13 5-13 5-14 5-18 5-20 5-21 5-23 5-24 5-26 5-27 Figure 6-1 Figure 6-2 Figure 6-3 Figure 6-4 Figure 6-5 Figure 6-6 Figure 6-7 Figure 6-8 Figure 6-9 Figure 6-10 Figure 6-11 Calibration Window Select Cassette Slot Dialog Box Select Substrate Type and Thickness Dialog Box Adding a New Substrate Adding a New Substrate Calibration Tables Import/Export Dialog Box Select Cassette Dialog Box Specify Thickness Dialog Box PSL Sphere Diameter Dialog Box Calibration Error Calibration Results Window 6-1 6-3 6-4 6-5 6-6 6-8 6-9 6-9 6-10 6-12 6-12 #343153 Rev. B 5/97 List of Figures and Tables xvii Figure 6-12 Figure 6-13 Figure 6-14 Figure 6-15 Figure 6-16 Figure 6-17 Figure 6-18 Figure 6-19 Figure 6-20 Figure 6-21 Figure 6-22 Figure 6-23 Figure 6-24 Calibration Curve Adding a Point to the Calibration Curve Moving a Calibration Curve Point Specify Actual PSL Sphere Diameter Dialog Box Calibration Results Select Haze Calibration Value Dialog Box Scan Wafer Dialog Box Haze Calibration Results Haze Calibration Curve Calibration Tables Import/Export Functions Dialog Box Cassette Calibration Window Select Cassette Dialog Box Select Cassette Dialog Box 6-14 6-15 6-16 6-17 6-18 6-21 6-22 6-23 6-24 6-26 6-28 6-29 6-30 Figure 7-1 Figure 7-2 Figure 7-3 Figure 7-4 Figure 7-5 Figure 7-6 Figure 7-7 Figure 7-8 Figure 7-9 Figure 7-10 Figure 7-11 Figure 7-12 Figure 7-13 Figure 7-14 Figure 7-15 Figure 7-16 Setup Menus User Configuration Dialog Box Standard Wafer Orientation Dialog Box Exclusion Pattern Dialog Box New Exclusion Pattern Selection Dialog Box Particle Color Selection Dialog Box Compression Methods Dialog Box Tencor File Format Control Dialog Box Database ID Selection Dialog Box Add New User Dialog Box User Access Privileges Dialog Box Delete a User Dialog Box Recipe Menu System Configuration Dialog Box Printer Selection Dialog Box Screen Save Setup Dialog Box 7-1 7-2 7-6 7-8 7-8 7-10 7-11 7-12 7-14 7-16 7-17 7-18 7-19 7-20 7-22 7-23 Figure 8-1 Figure 8-2 Figure 8-3 Figure 8-4 Figure 8-5 Figure 8-6 Figure 8-7 Figure 8-8 Figure 8-9 Figure 8-10 Figure 8-11 Figure 8-12 Figure 8-13 Figure 8-14 Database Menu Hard Disk and Database Usage Statistics Dialog Box Repair Database Dialog Box Database Repair Backup Window Disk Access Message Box Backup Progress Window Backup Complete Message Box Exit Backup Message Box Restore Window Retrieve Catalog Dialog Box Insert Last Diskette Message Box Retrieve Complete Message Box Disk Access Message Box 8-2 8-5 8-8 8-8 8-9 8-10 8-11 8-11 8-11 8-12 8-13 8-13 8-13 8-14 #343153 Rev. B 5/97 xviii Surfscan 6200 Operations Figure 8-15 Figure 8-16 Figure 8-17 Figure 8-18 Figure 8-19 Figure 8-20 Figure 8-21 Figure 8-22 Restore Progress Window Restore Complete Message Box Exit Backup Message Box Reports Window Database Reports Window Recipe Report Print Setup Dialog Box Print Dialog Box 8-14 8-14 8-15 8-15 8-16 8-17 8-18 8-19 Figure 9-1 Figure 9-2 Figure 9-3 Figure 9-4 Figure 9-5 Figure 9-6 Figure 9-7 Figure 9-8 Figure 9-9 Figure 9-10 Figure 9-11 Figure 9-12 Browser Menus Printer Selection Dialog Box Desired IDs Dialog Box Data Selection Dialog Box Review Data Dialog Box Database Browser Window Map-to-Map Display Map-to-Map Menu Map-to-Map Preferences Removed Defects Map Added Defects Map Choosing the Second Map 9-1 9-2 9-3 9-3 9-5 9-6 9-8 9-8 9-9 9-9 9-10 9-10 Figure 10-1 Figure 10-2 Figure 10-3 Figure 10-4 Figure 10-5 Figure 10-6 Figure 10-7 Figure 10-8 Figure 10-9 Figure 10-10 Figure 10-11 Figure 10-12 Figure 10-13 Figure 10-14 Figure 10-15 Figure 10-16 Figure 10-17 Database Export/Import Utility Window Import From Dialog Box Import in Progress Message Box All Records Message Box Selected Import Dialog Box Confirm Write to Database Dialog Box Record Already Exists in Database Dialog Box Export To Dialog Box Export All Records Message Box Select Recipes to Export Dialog Box Data Selection Dialog Box Export All Film Records Message Box Selecting Films to Export Dialog Box Export All Exclusion Patterns Message Box Selecting Exclusion Patterns to Export Dialog Box Export All Access Codes Message Box Selecting Access Codes to Export Dialog Box Figure 11-1 Figure 11-2 Figure 11-3 Figure 11-4 Figure 11-5 System Log Window View By Order Dialog Box View By Columns Dialog Box Changing the Width of a Column Print Dialog Box #343153 Rev. B 5/97 10-2 10-3 10-3 10-4 10-5 10-5 10-6 10-7 10-8 10-9 10-10 10-11 10-12 10-13 10-13 10-14 10-15 11-1 11-2 11-3 11-3 11-4 List of Figures and Tables xix Figure 11-6 Figure 11-7 Figure 11-8 Figure 11-9 Figure 11-10 Figure 11-11 Figure 11-12 Figure 11-13 Figure 11-14 System Log Report System Log Page Buttons Print Dialog Box Save Export Text As Dialog Box View Selected Dialog Box Log Message Selection Dialog Box User Selection Dialog Box Access Class Selection Dialog Box User Selection Dialog Box 11-5 11-6 11-7 11-7 11-8 11-9 11-10 11-11 11-12 Figure 12-1 Figure 12-2 Figure 12-3 Figure 12-4 Figure 12-5 Figure 12-6 Figure 12-7 Figure 12-8 Figure 12-9 Figure 12-10 Figure 12-11 Figure 12-12 Figure 12-13 Early Warning System Window Data Dialog Box Display Dialog Box Data Collection Control Dialog Box Early Warning System Panel Dialog Box Alarms Dialog Box Preferences Dialog Box System Status System Versions Tiled Windows Cascaded Windows SMEZ Definition Example SMEZ Definition Example, Rotated +45 Degrees 12-2 12-3 12-4 12-6 12-7 12-8 12-9 12-10 12-10 12-11 12-12 12-15 12-15 Figure 13-1 Figure 13-2 Figure 13-3 Figure 13-4 Figure 13-5 Figure 14-1 Figure 14-2 Figure 14-3 Figure 14-4 Moving the Cursor to an LPD Reference Coordinate Dialog Box Defined X-Y Reference Point Reference Coordinates Dialog Box Applying User Coordinates to the Wafer Map SPC Editor Set SPC Limits Dialog Box Calculate SPC Limits Dialog Box SPC Display Window 13-3 13-3 13-4 13-5 13-5 14-2 14-2 14-3 14-5 TABLES Table 4-1 Slot Processing 4-6 Table 5-1 Table 5-2 Haze Range Throughput 5-15 5-16 Table 6-1 Table 6-2 Table 6-3 SEMI Substrate Thickness Calibration Curves used for Diameter and Cross Section Calibration Curves used in Defect Sizing 6-10 6-19 6-20 #343153 Rev. B 5/97 xx Surfscan 6200 Operations Table 7-1 Table 7-2 Table 7-3 TFF Format - Standard Precision TFF Format - Extra Precision Date/Time Encoded Filenaming 7-13 7-14 7-23 Table 10-1 Approximate Storage Space for Surfscan Data 10-8 Table 12-1 Default EWS Function Values 12-5 Table 15-1 Table 15-2 Table 15-3 Table 15-4 Table 15-5 Table 15-6 Table 15-7 Patlite Scan States Patlite Cassette States Patlite Cassette Done States Patlite Error Message States Patlite Error Message States Patlite GEM Link States Example Patlite ASCII FIle Entries 15-1 15-3 15-3 15-3 15-4 15-5 15-7 #343153 Rev. B 5/97 Introduction 1 1-1 INTRODUCTION This chapter provides a brief introduction to the Surfscan 6100 and Surfscan 6200 Wafer Surface Analysis Systems, lists key instrument features, and describes the conventions and organization of this manual. The Surfscan 6100 locates, sizes, and counts defects down to 0.157 µm at a 95% capture rate. The Surfscan 6200 locates, sizes, and counts defects down to 0.09 µm at an 80% capture rate. Surfscan 6100/6200 Wafer Surface Analysis System Figure 1-1 Surfscan 6100/6200 #343153 Rev. B 5/97 1-2 Surfscan 6200 Operations 1.1 BEFORE STARTING Before using the instrument, review Chapter 1, “Introduction,” Chapter 3, “Basic Skills,” and Chapter 4, “Getting Started.” Then, you can use Chapter 5, “Scan,” to start the Scan application and become familiar with basic scanning techniques. 1.2 ABOUT THE INSTRUMENT The instrument detects, counts, and sizes defects on semiconductor substrate materials. The instrument uses laser beam scanning for detecting defect contamination and displays scan results in color-coded wafer maps, histograms, and summaries. Wafer Map Wafer Summary Histogram Key features of the instrument are: • Software applications use Microsoft Windows, allowing data to be presented in easy-to-understand graphics. • The instrument uses a single-puck wafer transport mechanism that minimizes contamination from wafer handling. The standard cassette indexers can handle wafers from 100 mm to 200 mm. Optional 2-in. and 3-in. configurations are available. • Each user can have a unique user name and access code. The system manager can assign specific privileges to each user. • Wafer summaries and maps can be stored in the Surfscan 6X00 database. Data in the database can be reviewed, imported, exported, backed up, and restored. A query language provides selection of specific database records. #343153 Rev. B 5/97 Introduction 1-3 • The instrument can sort passed and failed wafers into separate cassettes. • The instrument can be calibrated for multiple substrate types. Defect and haze calibration curves can be easily customized. • The instrument can save data into Tencor File Format (TFF) files that can be used for further data analysis. • Tencor Instruments MicroView technology displays a three-dimensional view of a substrate’s surface: Figure 1-2 Surfscan 6000-Series MicroView MicroViews are useful for identifying defects, contaminants, and other wafer features from the characteristics of their scattered light. MicroViews can help you identify scratches, surface film, and other features. • Optional features include support for operation over a DECnet local area network, an X-Y coordinates function, a statistical process control (SPC) package, remote instrument control using Semiconductor Equipment Communications Standard II (SECS-II), desktop operation, and an expanded I/O option. #343153 Rev. B 5/97 1-4 Surfscan 6200 Operations 1.3 ABOUT THIS MANUAL This section provides information that will help you to understand the conventions and organization of this manual. 1.3.1 CONVENTIONS The following conventions are used in this manual: Convention Used to show: italic Information you type at the instrument keypad or using the alphanumeric keypad Bold Messages and examples SMALL CAPS Keys to press Initial Caps Parameter names NOTE: In this manual, 6XX0 refers to any Surfscan 6000-series instrument. 1.3.2 HOW INFORMATION IS ORGANIZED This manual provides instructions on using the instrument to take measurements. The chapters include basic operating instructions, getting started steps, scanning procedures, recipes, calibration, system administration topics, and so on. The manual includes a glossary and an index. 1.3.3 RELATED MANUALS Tencor Instruments also provides the Surfscan 6100/6200 Reference Manual and the Surfscan 6XX0 SECS Interface Manual. The Surfscan 6100/6200 Reference Manual is a reference guide covering installation, maintenance, theory of operations, the Desktop package, and network options. A list of error messages is included for reference during troubleshooting. The Surfscan 6XX0 SECS Interface Manual is a reference guide covering the implementation of the GEM/SECS Option. #343153 Rev. B 5/97 Basic Skills 2 2-1 BASIC SKILLS This chapter describes instrument controls, including keypad, mouse, floppy drive, and cassette indexer. This chapter also describes how to load a cassette and introduces you to basic program operation using the mouse or keypad. 2.1 OPERATOR INTERFACE The instrument is operated through the instrument’s video display, auxiliary panel, keypad, mouse, and the floppy disk drive. The video display provides system messages, application windows, and utility screens. The auxiliary panel provides power and reset buttons. The keypad provides data entry, cursor control, and command keys. The mouse can be used to perform most of the actions available through the keypad. The floppy disk drive can be used for installing software updates and for backing up data files. Auxiliary Panel Display Keypad Cassette Locator Mouse Floppy Disk Drive Figure 2-1 Surfscan 6100/6200 Major Components #343153 Rev. B 5/97 2-2 Surfscan 6200 Operations 2.1.1 AUXILIARY PANEL The Auxiliary Panel contains main instrument controls. Disk in-use Indicator Figure 2-2 Auxiliary Panel The controls available on the auxiliary panel are: Control Action Emergency Off Press to shut off instrument power. For emergency use only. Key switch Not implemented in the current version. Power On Press to turn on instrument control power and start the computer. Reset Press to restart the computer without turning off instrument power. The instrument’s software is automatically loaded when the instrument is reset. The disk in-use indicator lights when the system accesses the hard disk. (The indicator is not present on all instruments.) The instrument should be reset only when this indicator is off. Power Off Press to turn off instrument power and the computer system. CAUTION: #343153 Rev. B 5/97 Do not reset the instrument or turn power off when the disk in-use indicator is lit. Data loss can result. Basic Skills 2-3 2.1.2 KEYPAD The operator keypad is located on the top of the console just below the display monitor. Except where noted otherwise in this manual, you can use the keypad, mouse, or a combination of both input devices to enter data or issue instrument commands. Figure 2-3 Keypad The actions of the operator keypad are: Key Action 0–9 Numeric keypad for the entry of the numbers 0 through 9, the decimal sign, and the minus sign. Numbers are positive if not preceded by the minus sign. UNDO Cancels the previous action. Also used to move the text cursor backwards (backspace) to erase the text in fields. ID Displays the Wafer ID dialog box when using the Scan application. Also allows you to enter a wafer ID during a microscan. NO or CANCEL Cancels the current action. YES or ENTER Starts the current action. HELP Displays help information for the active application. MENU Selects the menu bar when an application window is displayed. The first option in the menu bar is highlighted. [↑] [↓] [←] [→] Moves the cursor or selection bar in the direction of the arrow. SEL Selects items, as indicated in this manual. RCP Displays the current recipe. ZOOM Magnifies the wafer map or histogram. MICROSCOPE Places the wafer on hold. After the current scan is completed, the wafer is retained in the instrument. Press MICROSCOPE a second time while the wafer map is zoomed to begin a microscan. #343153 Rev. B 5/97 2-4 Surfscan 6200 Operations Key Action NEXT Selects the next item or icon in a list or menu. SAVE In the Scan application, saves the wafer summary, wafer map, or both to the database. CASS In the Scan application, catalogs the cassette. If the cassette is already cataloged, changes the scan order. HOME In the Scan application, homes the cassette indexers to the load/unload positions. If the puck is not at the home position: 1) the wafer is unloaded into the first empty slot in the cassette, 2) the puck is moved to the home position, and, 3) the indexers are moved to the load/unload positions. If the puck is already in the home position, the indexers are moved to the load/unload positions. PRINT Prints the contents of the current screen. Press PRINT twice to select the area to print and to select normal or reverse printing. AUTO In the Scan application, sets automatic or manual scan sequencing. The current mode is shown in yellow in the Status window. When Auto is enabled, wafers are loaded from the source cassette in a continuous sequence until all the wafers in the cassette are scanned. STOP In the Scan application, stops the current scan. If a scan is not taking place, the wafer is returned to its original slot in the source cassette; all instrument motion then stops. If a scan is taking place, it is terminated before returning the wafer to the cassette. START In the Scan application, starts a wafer scan sequence or resumes a motion after pressing STOP. 2.1.3 MOUSE The mouse is a pointing device that can be used to start applications, select commands and options, enter data, and exit applications. As you move the mouse, the pointer on the screen moves. The pointer can change shape, depending upon its location in a window. For example, in the Scan window, the pointer changes to a particle cursor when over the wafer map and to a vertical cursor when over the histogram. When the system is busy performing an action, the pointer changes to an hourglass. Except where noted otherwise in this manual, you can use the keypad, mouse, or a combination of both input devices to enter data or issue instrument commands. #343153 Rev. B 5/97 Basic Skills 2-5 For best results, move the mouse only when it is on the mouse pad. Mouse Mouse Pad Figure 2-4 Mouse and Mouse Pad The mouse has three buttons. The left and right buttons are used to indicate an action, such as starting an application. The middle button is not used. Mouse Action Using the mouse: The action is used to: Click Without moving the mouse, press and release the left or right mouse button. Select an item or cancel an operation. Double-click Press and release the left or right mouse button twice in rapid succession. Select an item and starts the action associated with the item. Drag Press and hold the left or right Select an option from a menu, view mouse button, move the mouse, information not currently visible in a list box or window (scroll), change and then release the button. the width of a column. Actions performed by clicking, double-clicking, or dragging can be different when using the left button or right button. #343153 Rev. B 5/97 2-6 Surfscan 6200 Operations 2.1.4 FLOPPY DISK DRIVE The floppy disk drive allows you to install new software, upgrade existing software, back up and restore the system hard disk, and save (export) or insert (import) selected data. Floppy Disk Drive Eject Button In-Use Indicator Figure 2-5 Floppy Disk Drive To insert a diskette into the drive: Insert the disk label-side up into the drive. When the system reads from the disk or writes to the disk, the in-use indicator lights. To remove the disk from the drive: Press the eject button. (Be sure the in-use indicator is off before ejecting the disk.) 2.1.5 WORKING WITH CASSETTES The instrument scans wafers contained in a cassette. Cassettes can be loaded onto the left indexer, right indexer, or both indexers. When you change a cassette size, the cassette locator plate must be changed. When scanning, the following cassette configurations can be selected. See Chapter 5, “Recipes,” for details on casssette configurations. Cassette Configuration Shown in Recipe as Load/Unload Action Right only R:>< Wafers load from the right and unload to the right. Left only L:>< Wafers load from the left and unload to the left. Right-to-left L:<R:> Wafers load from the right and unload to the left. Left-to-right L:>R:< Wafers load from the left and unload to the right. Sort Wafers L:<R:>< Wafers load from the right cassette. Passed wafers unload to the left cassette. Failed wafers unload to the right cassette. When sorting is disabled, wafers load and unload using the right cassette only. #343153 Rev. B 5/97 Basic Skills 2-7 NOTE: When using two cassettes, the instrument’s wafer handling system can be configured for left-to-right or right-to-left handling, but not for both. To change the cassette wafer handling configuration, contact your Tencor Service representative. To load a cassette: 1. Orient the wafers in the cassette. When using a mechanical aligner, the flats should face the rear of the cassette. See Fig. 2-6. Using a mechanical aligner: Flats to the rear of the cassette Figure 2-6 Aligning Wafers with a Mechanical Aligner When manually aligning wafers, one of the flats of each wafer should face the front of the cassette. See Fig. 2-7. 2. Set the heel of the cassette into the carrier guide. 3. Set the front edge down on the locator plate. Manually aligning wafers: Flats to the front of the cassette Figure 2-7 Manually Aligning Wafers #343153 Rev. B 5/97 2-8 Surfscan 6200 Operations 4. Twist the cassette left to right, two to three times to seat firmly. Step 2 Figure 2-8 CAUTION: Step 3 Step 4 Seating the Cassette If wafers become scratched or otherwise damaged or are mishandled during wafer handling, immediately perform cassette calibration as described in Chapter 6, “Calibration.” 2.2 USING THE INSTRUMENT This section and the remaining sections in this chapter describe the basic techniques needed to operate the Surfscan 6000-series instrument. To power up the instrument: Press the Power On button on the auxiliary panel. Allow approximately 10 minutes for a full warm-up. To reset the instrument hardware and software without powering off: Press the Reset button on the auxiliary panel. Instrument electronics and mechanics are initialized and the software is reset. CAUTION: Whenever you power up or reset the instrument, allow the instrument to complete its power up or reset sequence before resetting or powering down the instrument. To power down the instrument: Press the Power Off button on the auxiliary panel. #343153 Rev. B 5/97 Basic Skills 2-9 2.3 WORKING WITH APPLICATION WINDOWS The instrument communicates with an operator using the Microsoft Windows environment. In this environment, windows display information, menus provide lists of commands, and dialog boxes request additional information about a command and display error messages. The instrument provides a set of applications (software programs). Each application has its own window and menus. When you want to scan wafers, for example, you must start the Scan application. When Scan starts, it displays its application window on the screen. Using this window, you can start a scan, catalog a cassette, change a recipe parameter, or choose other available actions. The blank areas of the Scan application window display the results of a wafer scan. Each application displays a separate application window. An application window has a title bar that contains the application name, a menu bar that contains menu titles (and in some applications commands), a control menu icon that contains window options, a communications mode indicator, and a work area. Menu Bar Control Menu Icon Communications mode appears here Title Bar Application Window Figure 2-9 Surfscan 6000-Series Application Window The window’s title bar can contain information related to the application, such as the current recipe name and cassette slot number. The communication indicator can be either Local, indicating instrument control through the keypad and mouse, or Remote, indicating instrument control from a host computer (requires remote communications option). #343153 Rev. B 5/97 2-10 Surfscan 6200 Operations To use an application, choose menus or commands displayed in the menu bar, or use keypad commands. When the application needs more information about an action, it displays a dialog box. An application also displays a dialog box to inform you of an error or to provide a help message. Section 2.4, “Working with Menus,” and Section 2.5, “Working with Dialog Boxes,” tell you how to use these items. 2.4 WORKING WITH MENUS Menus list actions you can select. The instrument uses two types of menus—icon menus and pull-down menus. The System Menu is an icon-based menu. Each icon represents an application or a system action. When you double-click on an application icon, the application starts and displays an application window or menu window. The number of icons displayed in your System Menu might be different than shown in the example. The selected icon is highlighted Figure 2-10 Example of a System Menu In an icon menu, the mouse pointer changes to the Tencor Instruments logo. To start an application: Double-click on the application icon. Or press NEXT repeatedly to select the desired icon and then press ENTER. You can also use the arrow keys to select an icon from an icon-based menu. #343153 Rev. B 5/97 Basic Skills 2-11 A pull-down menu is an object in a window that displays a list of choices. The window’s menu bar lists the titles of menus available by the application. When you choose the menu title, the menu opens. When you select a menu item, the program performs the action and closes the menu. Menus or menu items that are unavailable are dimmed. Pull-Down Menu Menu Item Figure 2-11 Pull-Down Menu NOTE: In the Scan window, the menu bar displays ID, CASS, AUTO, HOME, SAVE, and PRINT commands, which when clicked perform the same action as pressing those keys on the keypad. To open a menu from the menu bar: Move the mouse pointer over the menu title and click the left mouse button. Or press MENU to select the menu bar, press [←] or [→] to highlight the menu title you want, and then press [↓] to open the menu. To close a menu from the menu bar: Click on any blank screen area, or press MENU or CANCEL. To choose an item from an open menu: Click on the item you want to select. Or press [←] or [→] to highlight the choice you want. Then press ENTER. #343153 Rev. B 5/97 2-12 Surfscan 6200 Operations To choose an item from a closed menu (shortcut method): Move the mouse pointer over the menu. Press and hold the left mouse button. The menu opens. Move the mouse pointer over the choice you want. The item is highlighted. Release the mouse button. HINT: If a menu item has an underlined number, you can choose it by opening the menu and pressing the number. Each application has a special menu, called the Control menu, that can be opened by clicking on the Control menu icon or by pressing ALT + SPACEBAR. To open the Control menu for an application: Click the Control menu icon in the upper-left corner of the window. Be careful not to double-click the icon or you will close the window. Control Menu Icon Figure 2-12 Control Menu Restore returns the window to its previous size. Minimize shrinks the window to an icon. Close exits the application. Switch to... opens the Task Manager window. 2.5 WORKING WITH DIALOG BOXES The instrument uses dialog boxes to obtain additional information about an action you have selected. A dialog box can contain any of the items described in this section: check boxes, radio buttons, command buttons, data entry fields, list boxes, cycle controls, and scroll bars. The instrument also uses dialog boxes to display warnings, error messages, online help, and confirmation messages. #343153 Rev. B 5/97 Basic Skills 2-13 2.5.1 USING THE SELECTION BAR When working with a dialog box, you can use the mouse to directly select the items discussed in this section. If you use the keypad, you must move the selection bar to the item to select and choose an option. Key Action NEXT Moves the selection bar to the next item or group of items SEL Selects a check box or chooses a select button [↑] [↓] [←] [→] Moves the selection bar in the direction of the arrow ENTER Chooses the selected command button CANCEL Chooses the Cancel command button 2.5.2 USING COMMAND BUTTONS Command buttons perform the action described by the button’s title. Command buttons with ellipses (...) open another dialog box. Command buttons with greater-than symbols (>>) after the title expand the current dialog box. Buttons that are unavailable are dimmed. Command buttons Figure 2-13 Command Buttons In most dialog boxes, one button is the default button and can be chosen by pressing ENTER. The selected command button is highlighted with a dark border. Where a dialog box contains OK and Cancel buttons, the Cancel button cancels the action. Any changes made to dialog box options are ignored. The OK button keeps any selections and proceeds with the action. To select a command button: Click on the command button. Or press ENTER to choose OK, or press CANCEL to choose Cancel. #343153 Rev. B 5/97 2-14 Surfscan 6200 Operations 2.5.3 USING CHECK BOXES Check boxes indicate options that can be selected or deselected. When an option is selected, a small x appears in the check box. When the option is off, the check box is blank. A check box is dimmed when the option is unavailable. Selected check box Deselected check box Figure 2-14 Check Boxes To select or deselect a check box: Click on the check box. Or press NEXT to highlight the check box. Press SEL to select or deselect the check box. 2.5.4 USING RADIO BUTTONS Radio buttons are used to display a group of options where only one item in the group can be selected at a time. The selected radio button contains a black dot. Blank radio buttons are deselected. Gray-colored buttons are not available. Radio button group Selected radio button Figure 2-15 Radio Buttons #343153 Rev. B 5/97 Basic Skills 2-15 To select a radio button: Click on the radio button. Or press NEXT to select the desired group of options and then use the arrow keys to select the desired radio button. 2.5.5 USING LIST BOXES List boxes display lists of options. When a list is longer than the list box, scroll bars are provided so you can view the remainder of the list. Selection box List box Figure 2-16 List Boxes See Section 2.5.10, “Using Scroll Bars,” for details on scrolling. To select a list item: Click on the item to display the item in the selection box; then choose OK to begin the action associated with the list. Or use the arrow keys to move the selection bar up or down through the list and press ENTER to select the item displayed in the text box. To select a list item by typing the list item name: Click on the selection box and type the full or partial name of the item to be selected. If the full name is typed, choose OK to begin the action. If the partial name is typed, click on OK to display a list of items matching the item name typed. Use the mouse or the operator keypad to select the item as described above. #343153 Rev. B 5/97 2-16 Surfscan 6200 Operations 2.5.6 USING PULL-DOWN LISTS Pull-down lists display the current or default choice in the selection box. The arrow button to the right of the field opens a list of available choices. If the list contains more items than can be displayed in the list box, scroll bars are provided. Pull-down button Pull-down list Figure 2-17 Pull-Down Lists To choose pull-down list items: Click on the pull-down button to open the list. Click on the desired item. Scroll the list, if necessary, to find the desired item. Alternatively, type the first character of the desired item in the edit field to scroll to the item. 2.5.7 USING CYCLE CONTROLS Cycle controls allow you to select from a list of predefined values. Cycle control Select button Figure 2-18 Cycle Controls To select an item using a cycle control: Click on the cycle control with the left mouse button to cycle forward through the choices or with the right mouse button to cycle backward through the choices. Or press NEXT until the desired option group is highlighted. Press [↓] or [↑] to move to the desired option field. Press [←] or [→] to cycle through the choices. #343153 Rev. B 5/97 Basic Skills 2-17 2.5.8 USING SELECT BUTTONS Select (SEL) buttons indicate that the option can be defined through a dialog box. To display the dialog box: Click on the SEL button with the mouse. Or use NEXT, [↓], or [↑] to select the select button and press SEL on the keypad. 2.5.9 USING DATA ENTRY FIELDS A data entry field is an area for entering data. Most data entry fields are enclosed within rectangular boxes. When you select a data entry field, a flashing vertical bar called the text cursor appears. The text or values you type begin at the text cursor. As you type, the text cursor moves to mark the next location where a letter or value will appear. Text cursor Entry field Alphanumeric keypad Figure 2-19 Data Entry Field The instrument displays an alphanumeric keypad when alphabetic or numeric data can be entered with the mouse. To enter data with the mouse: Click on characters in the alphanumeric keyboard. If you make a mistake, choose Clear to start over again or press UNDO to delete the previous character(s). When all the characters are entered, click OK or press ENTER. To abandon an entry, click on the Cancel button or press CANCEL. To enter numeric values in a data entry field with the keypad: Type the numeric value by pressing keys on the operator keypad; then press ENTER to enter the value. If you make a mistake while entering values, choose Clear to start over again or press UNDO to delete the previous character(s). To abandon the entry, press CANCEL. #343153 Rev. B 5/97 2-18 Surfscan 6200 Operations 2.5.10 USING SCROLL BARS A window or dialog box uses scroll bars to display data that does not fit into the existing work space. For example, if a list of filenames is longer than will fit in a list box, vertical scroll bars are displayed to allow you to view the names not shown. Scroll arrow Scroll bar Scroll box Figure 2-20 Scroll Bar To scroll with the mouse, refer to the following table: To scroll... Do this One line Click a vertical scroll arrow. One window Click in the scroll bar, above or below the scroll box. Continuously Hold down the left mouse button while pointing to one of the scroll arrows. When the desired information appears, release the button. To any position Drag the scroll box along the scroll bar to the desired position. The length of the scroll bar indicates the amount of the information in the list, so moving the scroll box to the middle of the scroll bar displays information in the middle of the list or document. Indexing You can also scroll to a specific part of the file list using the indexing approach. Click on the field above the file list to display the text cursor; then type the first few letters of the filename and press ENTER. The list will scroll to the first filename having the unique combination of characters entered. To scroll with the operator keypad: Press [↑] or [↓] to move the selection bar vertically through the list. A list is automatically scrolled as necessary. Press HOME to display the top of the list. #343153 Rev. B 5/97 Basic Skills 2-19 2.6 PRINTING SCREENS The instrument provides a print screen feature that allows you to print either the full screen or the active window. To print the screen using the default print settings: Press PRINT. To change the default print screen setting: 1. Press PRINT twice. The Print Screen dialog box appears. 5. Choose the print setting to use: Print Screen Option Description Full Screen - Normal Print the screen using normal colors. Full Screen - Switch B/W Print the screen switching black and white. Active Window - Normal Print the active window using normal colors. Active Window - Switch B/W Print the active window switching black and white. To save the current settings, check the Save As Default check box. Choose OK to print the screen or window using the specified settings. NOTE: When you choose Switch B/W for a color printer, only black and white colors are switched. Yellow, for example, does not change. When you choose Switch B/W for a black and white printer, all colors are reversed. #343153 Rev. B 5/97 Getting Started 3 3-1 GETTING STARTED This chapter provides basic startup procedures for the instrument, including: • Powering up the instrument • Logging on to the instrument • Starting Scan • Quitting from an application • Logging off the system • Setting up the system for first use • Using the DOS shell (advanced use) • Monitoring disk and database space To perform wafer scans or other instrument functions, you must log on to the system and select the application you want to use. To power up the instrument: Press the Power On button on the instrument’s auxiliary panel. Allow 10 minutes for a full warm-up. The instrument displays status messages and the Log On dialog box appears when the system is initialized To log on to the instrument: Using the on-screen keypad, click on each character of your access code. For each character clicked, an asterisk appears in the access code text box. When you have entered all characters, click the Enter button. Use the on-screen keypad to enter your access code with the mouse Figure 3-1 NOTE: Logon Dialog Box If your access code is a number, you can use the instrument keypad to enter it. #343153 Rev. B 5/97 3-2 Surfscan 6200 Operations NOTE: The screen blanks out when there is no operator entry for over 1 minute. To display the Log On screen again, press any key on the keypad. You cannot use the mouse to redisplay the screen. If you enter a valid code, the system displays the System Menu. If you enter the wrong code, the system displays an error dialog box. Choose the OK button to re-enter your access code. The System Menu contains three or more icons, depending upon your user access level: Mouse pointer The selected icon is highlighted Menu Type Access Class User Name Figure 3-2 System Menu–Analysis Manager Access Figure 3-2 shows the System Menu for a user with Analysis Manager access. Note that the colors in this figure are different from the screen display colors. The System Menu displays application icons, the Log-Off icon that returns you to the Log On screen, and the Help icon that opens the Surfscan 6000-series Help System. Your access #343153 Rev. B 5/97 Getting Started 3-3 class determines the icons that will be displayed in the system menu. For example, a fab operator menu might have only three icons: Double-click the Scan icon to start the Scan application, where you can scan substrates. Double-click the Help icon to open the Surfscan 6000-series Help System. The Help System gives you instructions on using the instrument. Double-click the Log Off icon when you have finished using the instrument. To start Scan: Double-click on the Scan icon in the System Menu. Or select the Scan icon, if necessary, and press ENTER. To start any application: Double-click on the icon of the application you want to start. Or press NEXT one or more times to highlight the icon you want to choose and then press ENTER. You also can use the arrow keys to highlight an icon. To close an application: Click on the control button in the upper left corner of the application window to display the control menu. Then choose the Close option. Or double-click on the application’s control button. Or choose the Exit command from the first pull-down menu. To log off the system: 1. Exit the current application. The System Menu is displayed. 2. Choose Log Off. The Log On screen appears. #343153 Rev. B 5/97 3-4 Surfscan 6200 Operations To shut down the instrument: 1. Log off the system. 2. Press the auxiliary panel’s Power Off button. CAUTION: When you power up or reset the instrument, allow the instrument to complete its power up or reset sequence before resetting or powering down the instrument. If your instrument’s Reset button has a disk inuse indicator, wait for the indicator to go off before powering off or resetting the instrument. See Section 2.1.1, “Auxiliary Panel.” To obtain help: Double-click on the Help icon or press the HELP key. The Surfscan 6000-series Help System window appears. You can obtain information about each Surfscan 6000series application, procedures for scanning and using other features, and descriptions of the instrument. To obtain help from an application window, choose a topic from the application’s Help menu or press the HELP key. 3.1 SETTING UP FOR THE FIRST TIME For system managers or administrators: If you are setting up the instrument for the first time, see Chapter 7, “Setting Up the System,” for details on instrument configuration and user account management. You should also refer to Chapter 8, “Working with the Database,” for details on setting up and using the instrument database. 3.2 USING THE DOS SHELL For advanced users: When you switch to the DOS shell, close all other Surfscan 6000series applications and use the C:\ icon in the Surfscan 6000-series System Menu. CAUTION: Exiting to DOS by any other means except the C:\ icon can damage the instrument motion subsystem. When you are finished using the DOS shell, press the Reset button to reboot the computer. 3.3 DISK AND DATABASE SPACE The hard disk contains many types of data files, including the Surfscan 6000-series database file. It is important that free space be available on the hard disk at all times and that the database file be maintained on a regular basis. In general, you should consider the database full when it contains 10,000 or more wafer summaries or 300 or more wafer maps. You should consider the hard disk full when less than 15 MB are free. #343153 Rev. B 5/97 Getting Started 3-5 The Tencor Instruments banner at the top of the screen contains a disk status icon. Disk status icon When the disk status icon is green, disk and database space is available. When the disk status icon is yellow, free disk or database space is getting low and your system manager needs to increase free space. When the disk status icon is red, there is no free space and the database cannot be initialized. You must create free disk space before proceeding. See Section 8.2.3, “Recovering from a Disk Full Condition.” You can check the hard disk and database usage by double-clicking on the disk icon. The Hard Disk and Database Usage Statistics dialog box reports the used space and free space statistics for the hard disk and database file. For details on disk and database usage, see Section 8.2, “Managing the Disk and Database.” #343153 Rev. B 5/97 Scanning 4 4-1 SCANNING This chapter describes the operation of the Scan application. Using the Scan application you can scan wafers or other substrates, examine the results of scans using analysis tools, and save or print the results. To scan a substrate, you need to know how to start the Scan application, load a cassette, and select a recipe. You also might need to choose scanning options and select individual substrates to scan. The first part of this chapter describes these procedures. To analyze scan results, you can magnify (zoom) the LPD or haze map, zoom the histogram, and MicroView the substrate. Recipes contain preset data collection, data display, pass/fail sorting, automatic printing and saving options, cassette, and other options. See Chapter 5, “Recipes,” for details. This chapter contains the following sections: Title Description Section 4.1, “Starting the Scan Application.” Starting the Scan application and preparing for a scan. Section 4.2, “Scanning Methods.” The methods you can use to scan wafers. Section 4.3, “Using the Scan Window.” How to use Scan application window to scan wafers, print and save data, and analyze results. Section 4.4, “Quick Reference.” A brief description of important commands and functions. Section 4.5, “Using the Summary Box.” How to use the Summary box, where scan results are listed. Section 4.6, “Using the Cassette Catalog.” How to use the cassette catalog to choose slots, move wafers, and home the cassette. Section 4.7, “Using the Histogram.” How to zoom the histogram and change bin splits. Section 4.8, “Using the Wafer Map.” How to use a wafer map. Section 4.9, “Zooming the Map.” How to zoom the wafer map. Section 4.10, “Examining a MicroView.” How to MicroView an area of the wafer and use the MicroView cursor to determine approximate defect size. Section 4.11, “Printing Summaries.” Printer setup and how to print wafer and lot summaries. #343153 Rev. B 5/97 4-2 Surfscan 6200 Operations 4.1 STARTING THE SCAN APPLICATION To start the Scan application: At the System Menu, choose the Scan icon. A blank Scan window appears. The Scan window is divided into areas that display results of scans. Recipe This area displays a summary of the results of a scan. This area displays the defect or haze map. Scan Sequence Status Box Figure 4-1 This area displays the histogram. Scan Application Window The Scan window displays the recipe name in the title bar and the scan sequence in the status box. Scan sequence indicates the order in which slots are scanned: from top-to-bottom or bottom-to-top. Before scanning: 1. Choose the recipe to be used. 2. Load the cassette of substrates onto the right locator. 3. Choose scan options. Scan options allow you to change the scan sequence and to enable automatic scan operation. 4. Enter a Lot ID, if desired. #343153 Rev. B 5/97 Scanning 4-3 To choose a recipe: 1. If the recipe name shown in the title bar is not correct, choose Load from the Recipe menu to display the Load Recipe dialog box. Or press MENU, [↓], and then ENTER to display the Load Recipe dialog box. Figure 4-2 Recipe Selection Dialog Box 2. Click on the recipe name to load. Or press [↓] to select a recipe from the list. 3. Click OK or press ENTER on the keypad to load the recipe. To load a cassette: Place the cassette of substrates on the right locator. See Section 2.1.5, “Working with Cassettes,” for details on cassette loading. To change the scan sequence: Click CASS or press CASS on the keypad The status box displays the current scan sequence. To select automatic operation: Click AUTO or press AUTO on the keypad. When Auto is on, the status box displays Auto and all selected substrates are automatically processed when you start a scan. #343153 Rev. B 5/97 4-4 Surfscan 6200 Operations To enter a Lot ID: 1. Choose Lot ID from the Recipe menu to display the Lot ID dialog box. Figure 4-3 Lot ID Dialog Box 2. Choose a persistence setting–Next scan only, Until end of cassette, or All subsequent scans. 3. Enter the Lot ID and choose OK. 4.2 SCANNING METHODS This section describes scanning methods. The procedures below describe how to scan all substrates, selected substrates, or one substrate from a cassette. The table at the end of this section tells you where to go in this manual to use advanced scan features and options. The recipe sets the primary data of interest (defect or haze) and the initial data displays (map or histogram or both). For each scan, the instrument displays the primary data and lists the results of the scan in the summary. If the recipe specifies alternate data, the data can be manually chosen for display. The recipe also can specify automatic saving or printing of data. When the last substrate in the cassette is scanned or when you press HOME, the instrument homes the cassette and displays the Lot Summary window. (The Lot Summary screen does not appear if Suppress Lot Summary Display is enabled in the User Configuration dialog box.) The Cassette catalog lists the occupied slots of the cassette. The catalog can be numbered from bottom-to-top (the default) or top-to-bottom and the scanning sequence can be set to bottom-to-top or top-to-bottom. #343153 Rev. B 5/97 Scanning 4-5 To scan substrates from the cassette: Press START. The instrument scans the first substrate in the cassette. When a substrate is scanned, the instrument highlights its slot number in the Cassette catalog and displays the results in the scan summary. The map and histogram show data graphically. See Fig. 4-4. Map Scan Summary Cassette Catalog Histogram Figure 4-4 Scan Window after a Scan In manual operation, press START to scan the next substrate. In automatic operation, the instrument automatically scans the next substrate in sequence. #343153 Rev. B 5/97 4-6 Surfscan 6200 Operations 4.2.1 ABOUT SCANNING The instrument can scan all substrates in a cassette, selected substrates, or one substrate (called direct access). You can choose three scanning options: automatic or manual operation, scan sequence, and microscope hold for MicroViewing. Table 4-1 Slot Processing Slot Status (Auto Off) (Auto On) No slots selected. When you start a scan, the instrument scans the next substrate in the cassette. When you start a scan, the instrument scans all or all remaining substrates in the cassette. More than one slot selected, including up to all slots in the cassette. When you start a scan, the instrument scans the next selected substrate in the cassette. When you start a scan, the instrument scans all remaining selected substrates in the cassette. One slot selected. When you start a scan, the instrument scans the substrate again. Not applicable in single (direct access) scans. When all substrates in a cassette have been scanned, the instrument homes the cassette and displays the Lot Summary screen, where you can view a summary of scan results and enter IDs for each substrate scanned and a Lot ID, if not already entered. See Section 4.2.5, “Lot Summary.” To remove a cassette before all substrates have been scanned: Click Home or press the HOME key. (Auto must be off to home the cassette.) The instrument displays the Lot Summary. See Section 4.2.5, “Lot Summary.” For details on holding a substrate for a MicroView, see Section 4.8, “Using the Wafer Map.” 4.2.2 SCANNING ALL SUBSTRATES To scan all substrates: 1. Select automatic scanning by pressing the AUTO key or choosing Auto from the menu bar. AUTO appears in the Status box. 2. Press the START key or choose Start from the menu bar. The instrument scans all wafers in the cassette and displays the Lot Summary at the end of the scanning process. 4.2.3 SCANNING SELECTED SUBSTRATES The following procedure can be used to scan substrates selected in the Cassette catalog. All selected substrates in the cassette can be scanned in sequence. To scan only one substrate, see Section 4.2.4, “Scanning One Substrate (Direct Access).” #343153 Rev. B 5/97 Scanning 4-7 To select specific substrates to scan: 1. NOTE: 2. Press CASS to catalog the cassette. If pressing CASS does not catalog the cassette, lift the cassette off the indexer and then return it to the indexer. This resets the cassette status switch and all slot positions should show question marks (?). Press CASS to catalog the cassette. Click on the slots to process. Or press NEXT to highlight the Cassette catalog, use [↑] and [↓] to move to a slot, and press SEL. One or more slots can be selected using this method. 3. Press START to begin the scan. 4.2.4 SCANNING ONE SUBSTRATE (DIRECT ACCESS) The following procedure can be used to scan one substrate from the cassette. To scan one substrate (direct access): 1. Press CASS to catalog the cassette. 2. Click on the slot to process. (Double-click on the slot to select the slot and start the scan.) Or press NEXT to highlight the Cassette catalog, use [↑] and [↓] to move to the slot, and press SEL. 3. Press START. The instrument displays Direct Access in the status box and scans the selected substrate. To cancel one-substrate scanning: Click Home or press HOME. #343153 Rev. B 5/97 4-8 Surfscan 6200 Operations 4.2.5 LOT SUMMARY The instrument displays a Lot Summary when all substrates in a cassette have been scanned or when you home the cassette. Figure 4-5 Lot Summary Window The Lot Summary lists LPD counts, area counts, scratch counts, totals, and haze data for each substrate, and lists statistical data for the lot. You can enter a Lot ID and Wafer IDs as necessary. Click on the field or press NEXT to select the field to enter. NOTE: The Lot Summary does not appear when the Suppress Lot Summary Display option is set in the User Configuration dialog box. To exit the Lot Summary: Choose Print 80c to print using 80 columns or choose Print 132c to print using 132 columns. These commands close the Lot Summary window. Or choose OK or press ENTER to save the Wafer IDs and Lot ID and close the Lot Summary. Or choose Cancel to close the window without printing the Lot Summary. 4.3 USING THE SCAN WINDOW The Scan window is the control panel for scanning and analyzing substrates. You can use the menu bar or keypad to catalog and scan substrates in a cassette, and to print, save, and display the scan results. This section briefly describes the major parts of the Scan window, provides examples of defect and haze displays, lists the steps for entering User ID information, and summarizes the steps for using other scan functions. When you scan a substrate, the instrument displays the results in the scan summary. Depending upon recipe settings, the instrument also displays scan results in a map, histogram, or both. Data are color-coded as shown by the bin splits in the summary. The #343153 Rev. B 5/97 Scanning 4-9 Cassette catalog displays the contents of the cassette and can be used to select individual substrates for scanning. Slot # Scan Summary Box Map Cassette Catalog Status Box Histogram Figure 4-6 Scan Window Parts The Scan window contains the following areas: Window Area Description Summary box Displays the date, time, wafer comment, wafer ID, scan results, and recipe settings. See Section 4.5, “Using the Summary Box.” Wafer map Displays the color-coded defect map or haze map. See Section 4.8, “Using the Wafer Map.” Cassette Catalog Displays cassette contents. See Section 4.6, “Using the Cassette Catalog.” Histogram Displays a histogram of the displayed data. The histogram be used to change LPD bin splits. See Section 4.7, “Using the Histogram.” Status box Displays instrument status. #343153 Rev. B 5/97 4-10 Surfscan 6200 Operations When you display a haze map and histogram, the instrument displays haze data in the summary, a haze map, and the histogram displays the distribution of haze values. Haze Map Haze Bin Splits Haze Histogram Figure 4-7 Haze Results in Scan Window Note that the haze range bin splits are listed in the lower part of the summary. 4.3.1 MENUS AND COMMANDS In the Scan menu bar, choosing ID, Cass, Start, Auto, Home, or Save is the same as pressing the key of the same name on the instrument keypad. Recipe, XY, Print, and Display are pull-down menus. Figure 4-8 Scan Application Menus The Recipe menu allows you to load a new recipe, view and modify the current recipe, create a new recipe, save a recipe, set user IDs, delete a recipe, enter remote mode (SECS- #343153 Rev. B 5/97 Scanning 4-11 II Communications Option required), enter the Lot ID, extend the puck for inspection and cleaning, and exit the Scan application. For details on recipes, see Chapter 5, “Recipes.” The XY menu provides map rotation and reference point definition (X-Y Coordinates Option required) and allows you to save map data in Tencor File Format (TFF). Note that a TFF file contains the wafer data currently displayed in the map, including any changes made to bin splits, map orientation, and origin. TFF files can be automatically saved, if specified in the recipe’s Detailed Save Configuration. For details on setting up for TFF files, see Section 7.7, “Setting Up for TFF Files.” The Print menu allows you to print wafer summaries and lot summaries on the text printer. Summaries can be printed in 40, 80, or 132 column format. The Select Printers item allows you to select the text and graphics printers for the system. The Resume Printer item starts a suspended print job. See Section 4.11, “Printing Summaries,” for details on printing. The Display menu provides data display combinations: defect map only, defect histogram only, defect map plus histogram, haze map only, haze histogram only, or haze map plus histogram. The recipe specifies the initial data display. The Help menu provides help topics. Choose Using Scan to view the help topics related to the Scan application or choose Contents to open the help system. Choosing Using Help displays the Microsoft Windows Using Help topics. 4.4 QUICK REFERENCE The following table summarizes the actions available when using the Scan application. To: Do this: Change the scan order Press CASS. Change the data display Choose a display option from the Display menu. Or, press MENU, use arrow keys to highlight the Display title, and press arrow keys to open the Display menu. A check mark appears in front of the current display option. Use arrow keys to highlight the display you want, and press ENTER. Choose automatic scan Press AUTO. Enter the Lot ID Choose Lot ID from the Recipe menu. Enter the ID in the Lot ID dialog box and click OK. Or press MENU. Press arrow keys to highlight the Lot ID choice. Press ENTER. Type the Lot ID and press ENTER. Enter the wafer (substrate) ID Press ID or click ID in the menu bar. The instrument displays the Wafer ID dialog box. Type the ID for the substrate and press ENTER. #343153 Rev. B 5/97 4-12 Surfscan 6200 Operations To: Do this: Extend the puck for cleaning Choose Extend Puck from the Recipe menu after removing the cassette. You must be logged on as a User Manager. Home the cassette Press HOME. Load a new recipe Choose Load from the Recipe menu. Select the recipe and click OK. Or press MENU. Press arrow keys to highlight the Load choice. Press ENTER. Select the recipe name and press ENTER. Print a substrate or lot summary Choose an item from the Print menu. Or press MENU, use arrow keys to highlight the Print title, and press down arrow to open the menu. Use arrow keys to highlight the item to print, and press ENTER. Print the screen Press the PRINT key. (No mouse equivalent.) Save data (manually) Press SAVE. The instrument saves maps, summaries, and TFF files of the primary data and alternate data (if collected). Save a TFF file (manually) Choose Write to TFF from the XY menu. Or press arrow keys to select the XY menu and choose Write to TFF, and then press ENTER. MENU, use the Start a scan #343153 Rev. B 5/97 Press START. Scanning 4-13 4.4.1 GENERAL PROCEDURES General procedures when using the Scan application are listed in this section. To enter user ID information: 1. Choose Set IDs... from the Recipe menu. Scan displays the following dialog box: Figure 4-9 2. Database ID Definitions Dialog Box Enter the User ID information required. Use the pull-down lists to view or select previously entered data. Note: User IDs are customer-defined. Consult with your system manager for rules on using these fields. #343153 Rev. B 5/97 4-14 Surfscan 6200 Operations To enter the Lot ID: 1. Choose Lot ID from the Recipe menu. Scan displays the Lot ID dialog box. Figure 4-10 Lot ID Dialog Box 2. Enter the new Lot ID and choose OK. The Lot ID appears in Lot Summary reports and the Lot Summary screen and is required for saving Tencor File Format (TFF) files. Lot ID also can be entered at the Lot Summary screen. To save Tencor Format File (TFF) manually: 1. After scanning the substrate, choose Write to TFF from the XY menu. 2. If automatic filenaming has been selected, the instrument saves the file using a date/ time-based or Lot ID-based filename. If user selectable filenaming has been selected, the instrument asks for the TFF filename. The TFF file contains any changes to the map made by rotating the map, changing bin splits, or zooming the histogram. #343153 Rev. B 5/97 Scanning 4-15 4.5 USING THE SUMMARY BOX The summary displays the date and time of the scan, the results of the scan, bin splits, overlay controls, and a selection of recipe parameters. The bin splits are color-coded, as shown by the numbered buttons. You can enable or disable a bin from the map or histogram by selecting a bin split button. The summary updates when you enable or disable a bin split, edit a defect or haze bin, or magnify the map. Comment Bin Splits Area Control Haze Overlay Control Figure 4-11 Summary Box Buttons 1 through 8 control the bin splits for the primary data. Button 0 overlays the alternate data. Button 9 overlays area data. For example, all haze data can be overlayed onto a defect map by selecting button 0. The summary lists primary data and alternate data (if one is selected in the recipe). Data Description LPD Count The total of all light point defects and their total surface area. Bins 1–8 Bin splits intervals and the count of LPDs for each bin. Mean The mean of collected LPDs. Std Dev The standard deviation of collected LPDs. Area Count The count of all areas (areas and scratches) on the substrate and their total surface area. Scratch Cnt The total number of scratches and their total surface area. Sum of All Defects The sum of all LPDs and areas, including scratches. #343153 Rev. B 5/97 4-16 Surfscan 6200 Operations Data Description Haze Region The percentage of the measurable surface area containing haze. Haze Average The sum of all haze values divided by the number of haze values, including those that are over the Haze Range limit and under the Haze From limit. When the haze map is zoomed, only those haze values in the magnified map are included in the average, including values under or over the haze range limits. When the haze histogram is zoomed, only those haze values within in the zoomed histogram interval are included in the haze average. Values under or over the haze range limits are not included. Haze Peak The highest haze value. To enter a Wafer ID after scanning: 1. Choose ID from the menu bar or press the ID key to open the Wafer ID dialog box. Figure 4-12 Wafer ID Dialog Box 2. Enter the ID for the substrate and choose OK. The ID appears in the scan summary and in the Lot Summary. To enter a Wafer ID after scanning the lot: At the Lot Summary screen, enter IDs for substrates and the lot, as required. Choose OK to keep IDs and close the Lot Summary screen, or choose a print command. To enter a comment: 1. Choose the comment button (the minus button) in the Summary or press the minus key on the keypad. The Scan application displays the Comments dialog box. Figure 4-13 Comments Dialog Box 2. #343153 Rev. B 5/97 Enter comments of up to 40 characters and choose OK. The comment appears in the summary. Scanning 4-17 To enable or disable a bin: Click on the bin button. Or press NEXT repeatedly until the summary is selected. Press the number of the bin(s) to change. Buttons 1 through 8 represent bin splits for the primary data. Button 0 overlays the alternate data. Button 9 overlays area data. When a bin is disabled, the Scan application removes the color-coded bin data from the map and histogram when the window is refreshed. Also, its data values are dimmed and are not included in count totals. To refresh the map and histogram after selecting or changing bins: Click the left button in the map or histogram or press NEXT. To overlay the alternate data in the map: Choose button 0. To display area data: Choose button 9. To print the current summary: Choose Short Summary or Long Summary from the Print menu. #343153 Rev. B 5/97 4-18 Surfscan 6200 Operations 4.6 USING THE CASSETTE CATALOG The Scan application displays the Cassette catalog at the right of the screen. To display the contents of the cassette loaded on the indexer, press CASS. The instrument catalogs the cassette, displaying substrates by slot number: CASS changes the scan order HOME homes the indexer and clears the catalog Cassette catalog Occupied slots are numbered Scan Sequence Figure 4-14 Cassette Processing Commands and Indicators You can scan substrates in a cassette in sequence from bottom-to-top or top-to-bottom, or select two or more substrates from the catalog, or select a single substrate from the catalog. The status box displays the current scan sequence. The slot selector can be used to choose a substrate to scan. The Cassette catalog displays the cassette’s substrate status, as follows: • If the status of a slot cannot be determined, the slot contains a question mark (?). • A white slot number indicates that the substrate has not yet been scanned. • A green slot number indicates that the substrate has been scanned and has passed all pass/fail criteria. • A red slot number indicates that the substrate has been scanned and has failed one or more pass/fail criteria. • A yellow slot number indicates that the instrument is processing the substrate. #343153 Rev. B 5/97 Scanning 4-19 To select the scan sequence for a cassette: Press CASS. The status box displays the scan sequence. NOTE: To start slot numbering at the top of the cassette, see the Reverse Ladder Numbering option in Section 7.1, “User Configuration Dialog Box.” To select one substrate to scan: Double-click on the slot in the Cassette catalog. Or click on the slot of the substrate you want to scan. Note: If you select only one substrate to scan, the instrument enters Direct Access mode. Direct Access mode allows you to repeatedly scan the selected substrate by pressing START for each scan. Or press [↑] or [↓] to move the slot selector to the substrate you want to scan, press SEL and then press START. When you select only one substrate for processing, the instrument enters Direct Access mode. To select substrates to scan: Press CASS to catalog the cassette. Press [↑] or [↓] to move the slot selector to the substrate(s) to select. Press SEL at each slot. Selected slots are highlighted. To clear the Cassette catalog: Press HOME. The instrument homes the indexer, and if not in Direct Access mode, displays the Lot Summary for the substrate(s) scanned. To recatalog a cassette: 1. Press HOME. 2. Wait for indexer motion to stop and then lift the cassette off the indexer. 3. Replace the cassette on the indexer. 4. Press CASS. #343153 Rev. B 5/97 4-20 Surfscan 6200 Operations 4.7 USING THE HISTOGRAM The histogram displays the distribution of light point defects or haze values. The color coding corresponds to the bin splits shown in the summary. Using the histogram window, you can zoom the histogram and change bin splits. Defect Size at Cursor Histogram Cursor Total Area Figure 4-15 Histogram The Scan window can display a histogram in combination with the map, a histogram only (no map), or no histogram (the map is enlarged). The recipe sets the initial map/histogram display combination. The display can be changed through items in the Display menu. A LPD histogram plots the LPD count versus LPD diameter or cross-section as specified in the recipe. A haze histogram plots the number of defects versus haze values. Defect histograms display a red total area bar at the right. When you magnify the map, select or deselect a bin, zoom the histogram, or edit bin splits, the histogram changes as necessary. When you move the cursor into the histogram, the cursor changes to an I-beam. To change the histogram display: Choose a display type from the Display menu. Using the histogram window, you can zoom the histogram to narrow the data range and change bin splits. 4.7.1 ZOOMING THE HISTOGRAM The histogram can be zoomed, allowing you to narrow the range of interest for the primary data. To zoom the histogram: Using the mouse: 1. Double-click the left button in the histogram. Two markers appear. 2. To move the left marker to define the lower limit, press and hold the left mouse button, and move the mouse. (Drag with left button.) Release the mouse button. #343153 Rev. B 5/97 Scanning 4-21 3. To move the right marker to the upper limit, press and hold the right mouse button and move the mouse. (Drag with right button.) Release the mouse button. Repeat Steps 2 and 3 as necessary to define the range of interest. 4. Double-click the left mouse button to zoom the histogram to the range between the two markers. If desired, you can zoom again by repeating Steps 2, 3, and 4. 5. Press NEXT to move to the map, keeping the defined range intact. Using the keypad: 1. Press NEXT one or more times to select the histogram. 2. Press ZOOM. Two markers appear in the histogram. 3. Press SEL to select the marker(s) to move. Each time you press SEL, markers are chosen in the following order: left marker, right marker, both markers, no markers. The program highlights the selected marker(s). Use [←] and [→] to move the markers. Histogram markers Figure 4-16 Histogram Markers 4. Press ZOOM to zoom the histogram. Repeat Steps 3 and 4, as necessary, to narrow the range further. 4.7.2 EDITING BIN SPLITS The histogram can be used to change LPD bin splits. To edit bin splits: Double-click the right button in the histogram. (There is no keypad equivalent to this operation.) The instrument displays a bin split indicator at the top of the histogram and a bin change cursor. Using the mouse: 1. Move the cursor under the bin boundary to change. Click the left mouse button. 2. Drag the cursor using the left mouse button. The bin split indicator changes to reflect the new boundary. #343153 Rev. B 5/97 4-22 Surfscan 6200 Operations Using the keypad: 1. Press SEL to select the boundary to change. 2. Press [←] or [→] to change the boundary. The bin split indicator changes to reflect the new boundaries. 3. Press ENTER to apply the new bin splits to the map and histogram. Bin split cursor Current bin split value Bin split Indicator Figure 4-17 Histogram Bin Splits 4.8 USING THE WAFER MAP The Scan application can display a wafer map of LPDs or haze. The wafer map can be displayed in combination with a histogram. The recipe sets the initial substrate map/ histogram display combination and the combination can be changed for the current scan by using the Display menu. You can magnify (zoom) the wafer map, set and apply user-defined coordinates to the map (X-Y Coordinate Option required), and MicroView an area of the wafer. When you zoom the histogram window change bin split ranges through the histogram, the changes are applied to the wafer map the next time it is redrawn on the screen. To change the display combination: Choose a display type from the Display menu. To magnify (zoom) a map: Double-click the left button in the map. Or press NEXT repeatedly to select the map and then press ZOOM. For details on using a zoomed wafer map, see Section 4.9, “Zooming the Map.” To display a MicroView: Proceed to Section 4.10, “Examining a MicroView.” To refresh the map: Click the left button in the map or press NEXT. Any bin split changes will be made to the wafer map. #343153 Rev. B 5/97 Scanning 4-23 4.9 ZOOMING THE MAP The instrument provides a multilevel zoom feature. When you zoom the map, the instrument displays a panning window and magnifies the map. The menu bar lists the instrument keys that can be used when zooming. To magnify (zoom) a map: Double-click the left button in the map or press NEXT repeatedly to select the map and then press ZOOM. Panning cursor Panning window Magnified map X Coordinate at cursor Magnification scale Figure 4-18 Zoomed Wafer Map To change magnification levels: In the Panning window, press SEL to choose the next magnification level. The scale at the bottom of the map shows the current scale setting. To locate the area on the map to magnify: Move the panning cursor by moving the mouse or by using the arrow keys. Notice that the magnified map changes as you move the panning cursor. If the X-Y Coordinates Option is installed, you can press 1 or 2 to move to these reference points. To move from Panning window to magnified map: Click in the Panning window, or press ZOOM. The LPD Data box and cursor appear in the map. Click in the map or press CANCEL to move back to the Panning window. #343153 Rev. B 5/97 4-24 Surfscan 6200 Operations To identify an LPD: Move the cursor using the mouse or the keypad arrow keys. When you move the mouse, the cursor jumps to the nearest LPD. When you use the arrow keys, the cursor moves to the next LPD in the direction of the key. The LPD data box displays the X-Y coordinates and dimensions of the LPD at the cursor. Note that you cannot move the cursor outside the border of the magnified map, but you can magnify a different portion of the map by using the Panning window. The cursor is particularly useful for specifying X-Y reference points (requires X-Y Coordinates Option). To return to the Panning window, click the left or right mouse button or press CANCEL. LPD Data Figure 4-19 Locating Defects in the Zoomed Wafer Map To reduce (unzoom) a map: Click the right button in the Map or Panning windows or press UNDO. NOTE: For details on setting X-Y coordinates, rotating a map, and sending XY coordinates over the COM3 port, see Chapter 13, “X-Y Coordinates Option.” 4.10 EXAMINING A MICROVIEW The Surfscan 6000-series MicroView feature allows you to examine a three dimensional representation of the surface of the substrate. The amplitude axis (Z-axis) is evenly scaled from the smallest to largest amplitudes in the MicroView area. #343153 Rev. B 5/97 Scanning 4-25 You can view the MicroView area from different angles, display the MicroView in color or wireframe format, and use the MicroView cursor to obtain approximate defect amplitude or sizing. Also, you can change the threshold level. A MicroView removes the haze data and sizing information is given in approximate diameter or cross section units. 4.10.1 DISPLAYING A MICROVIEW A MicroView includes only defect data, the haze component of the data has been removed. To display a MicroView: 1. Press MICROSCOPE to keep the next scanned substrate on the puck. 2. Scan the substrate. 3. Double-click the left mouse button in the map or press NEXT repeatedly to select the map and then press ZOOM. The instrument displays the Panning window and magnifies the map. 4. Move the panning cursor to the area of interest by using the mouse or arrow keys. Then press MICROSCOPE. The instrument displays the MicroView area in the Panning window and displays the 3-D MicroView in the map. See Fig. 4-20. Panning cursor Panning window shows MicroView area In a particle MicroView, the legend shows defect size in diameter or cross-section units. MicroView rendering MicroView information Figure 4-20 MicroView #343153 Rev. B 5/97 4-26 Surfscan 6200 Operations 4.10.2 CHANGING MICROVIEW DISPLAY OPTIONS You can change the view and the display format, and you can set the view area to full screen or to within the wafer map section of the Scan window. To change the MicroView view: Press 1 through 7 to change the view, as described in the following table: View # Description 1 Front view, angled and elevated. This is the initial (default) view. 2 Left view, elevated. 3 Front view, elevated. 4 Right view, elevated. 5 Top view, looking down the Z-axis. 6 Left view, looking down the X-axis. 7 Front view, looking down the Y-axis. To change the MicroView display format: Press NEXT to change the MicroView format from color to wireframe or from wireframe to color. Wireframe rendering A wireframe displays more quickly on the screen. Figure 4-21 Wireframe MicroView Format #343153 Rev. B 5/97 Scanning 4-27 To view the MicroView in full-screen: Press ZOOM. To exit full-screen view, press ZOOM again or choose CANCEL to exit the MicroView. To exit from a MicroView: If the instrument is displaying a MicroView, click the right button or press CANCEL to exit the MicroView display. In the Panning window, click the right button or press CANCEL to exit zoom mode. To return the substrate to the cassette, press HOME. 4.10.3 USING THE MICROVIEW CURSOR Using the MicroView cursor, you can obtain the approximate size of defects displayed in the MicroView. The MicroView cursor is a vertical line having a small square at its base and a circle that that slides up and down the cursor to indicate the defect amplitude or approximate size. When the cursor is at the base of a defect, the circle moves to the top of the defect and the information box displays the approximate size and coordinates of the defect. Approximate defect coordinates Approximate defect size Top of defect Base of defect Figure 4-22 MicroView Cursor To display the MicroView cursor: In the Panning window, press MICROSCOPE. To move the cursor: Using the mouse: #343153 Rev. B 5/97 4-28 Surfscan 6200 Operations Move the mouse left or right to move the cursor along the MicroView X-axis. Move the mouse up and down to move the cursor along the MicroView Y-axis. Using the arrow keys: 1. Press [←] or [→] to move the cursor along the MicroView X-axis. 2. Press [↑] or [↓] to move the cursor along the MicroView Y-axis. NOTE: When displaying different views of the MicroView, remember that the cursor moves along the X- and Y-axis of the MicroView, not in the Xand Y-directions of the screen. In a left view, for example, [ ←] and [→] move the cursor along the MicroView X-axis which is top-to-bottom on the screen and [↑] and [↓] move the cursor along the MicroView Y-axis which is left-to-right across the screen. To move the cursor to the nearest defect within range: Click the mouse button. If there are no higher peaks within the range of the cursor, the cursor does not move. To move the cursor to the highest peak in the MicroView: Double-click the left mouse button. Highest peak in MicroView When you double-click the mouse, the cursor jumps to the highest peak within the MicroView area. Figure 4-23 Moving the MicroView Cursor by Clicking and Double-Clicking #343153 Rev. B 5/97 Scanning 4-29 To move the cursor along one or more adjacent defects (a scratch, for example): Drag the mouse along the Y-axis. (Press and hold the mouse button while moving the mouse up or down.) To return to the Panning window: Press MICROSCOPE, UNDO, CANCEL or the right mouse button. The MicroView cursor disappears. 4.10.4 SETTING THE MICROVIEW THRESHOLD You can set the threshold for MicroViews. For example, if the MicroView shows a haze component, you can set the threshold to a point above the main body of the haze to better view defects above the haze. The threshold remains in effect until you reset the threshold to a new value or you scan a new wafer. To set a new MicroView threshold: 1. Perform a MicroView by pressing MICROSCOPE. 2. Press RCP to display the MicroView Display Options dialog box. Figure 4-24 MicroView Display Options Dialog Box 3. Enter the MicroView threshold and choose OK, or choose Use Recipe Threshold to use the current recipe value and choose OK. 4.10.5 MANUALLY CHOOSING A MICROVIEW VIEW You can manually set the MicroView viewing angle by using the mouse in the Panning window. Note that manually setting the viewing angle requires patience to perform properly. You might have to try several times before you become comfortable with setting the viewing angle manually using the mouse. Manually setting the viewing angle is not available through the keypad. #343153 Rev. B 5/97 4-30 Surfscan 6200 Operations To choose a viewing angle: 1. In the Panning window, press the left mouse button without moving the mouse. A three dimensional outline of the MicroView area appears on the screen. Current view MicroView outline Bottom Figure 4-25 Outline of MicroView Area 2. If the outline does not appear, release the mouse button and return to Step 1. 3. Continue to hold down the mouse button. 4. Move the mouse up, down, left, or right. The outline rotates and tilts and the current viewing direction is indicated at the top-left of the MicroView window. 5. To see the MicroView at the new angle, release the mouse button. 6. You can return to a standard view by pressing 1 through 7. 4.10.6 USING MICROVIEWS FOR DEFECT ANALYSIS MicroViews can be useful for identifying and analyzing light point defects, areas, and scratches. The characteristic patterns of light point defects (LPD), scratches, and areas are shown in the MicroView examples below. LPDs appear as higher cross-section regions with #343153 Rev. B 5/97 Scanning 4-31 characteristic peaks. Scratches appear as an elongated strand of low cross-section defects rising above the sea of haze. Defects shown in MicroView Figure 4-26 Defect Shown in MicroView Example of a scratch shown in a MicroView. Figure 4-27 Scratch Shown in MicroView #343153 Rev. B 5/97 4-32 Surfscan 6200 Operations In MicroViews, areas are similar in appearance to LPDs but lack the characteristic peak. In areas, the peak is truncated at the Area From value, as defined in the recipe. Example of an area shown in a MicroView. Figure 4-28 Area Shown in MicroView 4.11 PRINTING SUMMARIES The Scan application Print menu provides options for printing wafer summaries, lot summaries, and a one-line summary. The Print menu also can be used to select text and graphic printers and to resume a printing operation. NOTE: When printing is in progress, a flashing Printing message appears at the top of the Scan window. When a print job encounters a problem such as the printer being out of paper or offline, the job is suspended. When the problem has been corrected, the print job can be continued by choosing Resume Printer from the Print menu. The printer is automatically resumed when after the next scan. 4.11.1 PRINTING A WAFER SUMMARY You can print a short (40-column) or long (80-column) wafer summary. To print a wafer summary: Choose Short Summary, 40 Col or Long Summary, 80 Col from the Print menu. See Figs. 4-29 and 4-30. #343153 Rev. B 5/97 Scanning 4-33 Tuesday, March 08, 1994 2:26:49 PM ID# *02 Comments: Sort: PASS LPD Count: 2410 LPD / cm2: 14.4 Bin1 2.00 2.37: 2410 Bin2 2.37 2.80: 2114 Bin3 2.80 3.32: 1847 Bin4 3.32 3.92: 1600 Bin5 3.92 4.64: 1360 Bin6 4.64 5.50: 1098 Bin7 5.50 6.51: 764 Bin8 6.51 7.70: 427 Mean( C ) : 4.54 Std Dev: 1.80 Area Count: 1613 Area Total: 37.0mm2 Scratch Count: 3 Scratch Total: 28.9mm Sum of All Defects: 4023 Haze Region: 0% Haze Average: 0ppm Haze Peak: 0ppm Laser:488nm Gain:3 Diameter: 150 mm Thresh: 2.00um Exclusion: 2mm Haze Rng: 1000ppm Thruput: Medium Recipe ID: DEMO Figure 4-29 Example of a Short Wafer Summary Tuesday, March 08, 1994 Time: 2:26:49 PM Recipe ID: DEMO Database ID: ID#1 ID#2 ID#3 ID#4 ID#5 ID#6 ID#7 Comments: ID# *02 LPD Count: 2410 LPD / cm2: 14.4 2.00 7.70: 2410 2.37 7.70: 2114 2.80 7.70: 1847 3.32 7.70: 1600 3.92 7.70: 1360 4.64 7.70: 1098 5.50 7.70: 764 6.51 7.70: 427 Mean( C ) : 4.54 Std Dev: 1.80 Area Count: 1613 Area Total: 37.0mm2 Scratch Count: 3 Scratch Total: 28.9mm Sum of All Defects: 4023 Laser: 488nm Gain: 3 Threshold: 2.00um Haze Range: 1000ppm Sort: Haze Region: Haze Average: Haze Peak: Below Haze 4.00 146 289 431 573 715 858 Above Haze Diameter: Exclusion: Thruput: Range 146: 289: 431: 573: 715: 858: 1000: Range PASS 0% 0ppm 0ppm 0% 0% 0% 0% 0% 0% 0% 0% 0% 150 mm 2mm Medium Figure 4-30 Example of a Long Wafer Summary #343153 Rev. B 5/97 4-34 Surfscan 6200 Operations NOTE: In wafer summaries, disabled bin values are listed in brackets [ ]. Disabled bins counts are not included in the total LPD count or Sum of All defects count. 4.11.2 PRINTING A LOT SUMMARY You can print 80-column or 132-column lot summaries. When printing 132-column summaries, the printer must be set up as described in Section 7.11.2, “Setting Up for Printing 132-Column Reports.” To print a lot summary: Choose Lot Summary, 80 Col or Lot Summary, 132 Col from the Print menu. For an example of an 80-column lot summary, see Figure 4-31. L O T S U M M A R Y Date: Tuesday, March 08, 1994 2:27:55 PM Recipe ID: DEMO; LotID: ID# LPD LPD <---Area--> <--Scratch-> Sum <---Haze--> Count /cm2 Count Total Count Total of Rgn Avg (mm2) (mm) Dfcts (%) (ppm) ---------------------- ----- ----- ----- ----- ----- ------ ----- ---- -----*01 2143 12.8 1613 37.0 3 28.9 3756 0 0 *02 2410 14.4 1613 37.0 3 28.9 4023 0 0 Group Statistics: Min: Max: Average: Std Dev: 2143 12.8 1613 2410 14.4 1613 2276.50 13.6 1613 188.80 1.13 0 37.0 37.0 37.0 0 3 3 3 0 28.9 3756 28.9 4023 28.9 3889.5 0 188.8 0 0 0 0 Figure 4-31 Example of an 80-Column Lot Summary NOTE: #343153 Rev. B 5/97 A lot summary also can be printed from the Lot Summary window that appears at the end of cassette processing. See Section 4.2.5, “Lot Summary.” 0 0 0 0 S R T P P Scanning 4-35 4.11.3 CHOOSING AUTOMATIC PRINTING OPTIONS Automatic printing options are specified in the recipe. The recipe can specify the type of summary to print—none, one-line, short, or long—and the screen print setting—off, normal, or swap black and white. For details, see Section 5.6.3, “Automatic Printing.” 4.11.4 SETTING UP PRINTERS To choose the text and graphics printers: 1. Choose Select Printers from the Print menu. Scan displays the Printer Selection dialog box. Figure 4-32 Printer Selection Dialog Box 2. Choose a text and graphics printer. The system uses the text printer to print summaries and reports and the graphics printer to print maps and screen printouts. One printer can be assigned as both the text and graphics printer. To print 132-column reports, set your Text printer to Generic/Text Only. The printer must be configured as described in Section 7.11.2, “Setting Up for Printing 132Column Reports.” To print to a video printer, set the Graphics Printer to VIDEO. To print maps and screens, the graphics printer must not be assigned to a text-only printer. To print screens to a Windows bitmap file, set the graphics printer to FILE and then choose the Setup button to set file path and filenaming conventions. 3. Choose OK. #343153 Rev. B 5/97 Recipes 5 5-1 RECIPES This chapter describes recipes. Recipes allow you to specify data collection, data display, configuration, pass/fail sort settings, and automatic saving and printing operations for a given wafer substrate size and type. To create a new recipe or modify an existing recipe, you must know how to use Recipe menus and the Recipe dialog box, and know how to set recipe parameters. Also, your user account must allow you to create, edit, and save recipes. The instrument stores recipes in the database by name. A recipe name can be up to 19 characters long and can contain any combination of alphabetic, numeric, or special characters. When you load a recipe from the database, the recipe becomes the current recipe, or the recipe used for scanning. Scan and Setup application windows display the current recipe name in parentheses in their title bars, and the Recipe dialog box displays the current recipe name as its title in parentheses. For step-by-step instructions on setting recipe parameters, see Section 5.3.5, “Selecting Substrate Parameters.” Recipe actions are available from the following applications: To: Use: Create, delete, load, save, or rename a recipe Scan or Setup applications Export or import recipes Database Export/Import utility Print a recipe listing Database Reports utility 5.1 RECIPE MENUS Recipe menus in the Scan and Setup applications provide recipe actions: Scan Application Recipe Actions Figure 5-1 Setup Application Recipe Actions Recipe Menus #343153 Rev. B 5/97 5-2 Surfscan 6200 Operations Menu items with the same titles in the Scan and Setup applications perform identical actions. Recipe actions are: Choose This: To Do This: Load... Open and load a selected recipe. Displays the recipe selection dialog box. View/Modify... View or change the current recipe. Displays the Recipe dialog box. New... Create a new recipe. Displays the New Name dialog box. Type the recipe name and choose OK. The instrument sets initial data collection, data display (except haze range and haze from), and configuration values to the previous recipe’s values. The instrument sets haze display and sort parameters to maximum values. Use View/Modify to change recipe settings. Save Save the recipe using the current recipe name. Save As... Save the current recipe using a new name. Displays the New Name dialog box. Delete... Delete a selected recipe. Displays the selection dialog box. #343153 Rev. B 5/97 Recipes 5-3 5.2 USING THE RECIPE DIALOG BOX A recipe can be created, modified, or viewed by opening the Recipe dialog box from the Scan or Setup applications. The dialog box contains four general parameter areas: data collection, data display, configuration, and sort. Current Recipe Substrate Name and Thickness Figure 5-2 Recipe Dialog Box To select recipe parameters, the dialog box provides cycle controls, select buttons, and data entry fields. These objects can be used as described in Chapter 3, “Basic Skills.” Choose OK to keep the settings as shown in the dialog box. The current settings apply to scans, but the settings are not saved in the database (permanently saved) until you choose Save from the Recipe menu. Choose Cancel to exit the Recipe dialog box without keeping any changes. In the Scan application, choose the Start button to start a scan using the current recipe settings. This button performs the same function as choosing OK in the Recipe dialog box and then pressing the START key or choosing START from the menu bar. To modify or view an existing recipe: 1. Open the Scan or Setup window. 2. If the recipe you want to work on is not the recipe shown in the window’s title bar, choose Load... from the Recipe menu and open the recipe. 3. Choose View/Modify... from the Recipe menu, or press RCP. The instrument displays the Recipe dialog box. #343153 Rev. B 5/97 5-4 Surfscan 6200 Operations To change recipe settings: 1. Open the Recipe dialog box. 2. Change recipe settings, as desired. 3. Click OK or press ENTER. The changes you made to the recipe parameters remain in effect. 4. To save the changes you made, choose Save from the Recipe menu to save changes to the current recipe or choose Save As... from the Recipe menu to save the recipe using a different recipe name. 5.3 RECIPE PARAMETERS This section describes the parameters listed in the Recipe dialog box. • Data collection parameters specify the substrate, data collection range, and instrument throughput. • Data display parameters specify primary and secondary data types, wafer map and histogram display options, the number of bin splits to be used, and haze display parameters. • Configuration parameters specify cassette usage, sorting option, automatic operations, and substrate type and thickness. • Sort parameters establish the pass/fail limits for wafers. If scan results exceed any of the enabled sort parameters in the recipe, the wafer fails, otherwise the wafer passes. Certain recipe parameters interact. When you change Gain, for example, Threshold, Area From, and Haze Range values automatically change to the default values for that gain. You can change the values for these parameters after setting the gain. 5.3.1 DATA COLLECTION PARAMETERS Data collection parameters are described in the table below. See Section 5.5, “Selecting Display Options,” for details on selecting parameter values for the range of interest. Data Collection Parameter Description Substrate diameter Substrate size: 2 in., 3 in., 82 mm, 100 mm, 125 mm, 150 mm, or 200 mm. Edge exclusion The distance from the edge of the wafer toward the center that is excluded from scan results. Minimum value is 1 mm. Maximum value is one-half wafer diameter. #343153 Rev. B 5/97 Recipes 5-5 Data Collection Parameter Description Flat/Notch exclusion The wafer exclusion pattern to apply. One or more exclusion regions can be defined by the exclusion patterns listed in this field. The areas of the wafer specified by exclusion regions are excluded from scan results. See Section 9.5, “Defining Exclusion Patterns,” for details. Haze Suppression Increases the Haze Range and Haze From by the value entered. (Requires analog board P/N 223670.) Gain/Max Size Instrument gain setting. Gain determines the range of data collected during a scan. Gain is a value from 1 to 7 for the Surfscan 6100, 1 to 8 for the Surfscan 6200. Max Size indicates the maximum LPD size for this gain. When you change Gain, the instrument automatically sets Area From to Max Size, and sets Threshold and Haze Range to their default values. Surfscan 6100/6200 Max Size and Threshold values are listed in the table that follows. Max Size (µm) Max Size (µm2) Gain 1 63 250 2 28 50 3 7.7 10 4 1.6 2.5 5 0.33 0.5 6 0.21 0.1 7 0.16 0.025 8 (6200 only) 0.12 0.005 #343153 Rev. B 5/97 5-6 Surfscan 6200 Operations Threshold Threshold specifies the smallest LPD size to be included in the scan result. Threshold defaults to the standard value for the current gain setting. If you set threshold to 0, the instrument automatically supplies the default value. If you set threshold to a value equal to or greater than Max Size, data will be collected for one size only. Gain Throughput #343153 Rev. B 5/97 Default Threshold (µm) Default Threshold (µm2) 1 1.4 2.13 2 0.32 0.427 3 0.21 0.086 4 0.16 0.022 5 0.13 0.0043 6 0.10 0.0008 7 0.08 0.0002 8 (6200 only) 0.07 0.0001 The speed at which the wafer is processed through the instrument: high, medium, normal, or low. Throughput sets wafer scan speed and relative scanning sensitivity and determines microscan viewing dimensions. Recipes 5-7 5.3.2 DATA DISPLAY PARAMETERS Data display parameters specify the primary and secondary data, type of display (map, histogram, or both), show size (diameter or cross section), bin splits, area boundary, and haze range. Data Display Parameter Description Display Option The data to collect, display, and save. Defect/Haze: the instrument collects defect and haze data and displays defect data when the scan completes. Haze data can be overlaid by selecting the summary table 0 button. Haze/Defect: the instrument collects defect and haze data and displays haze data when the scan completes. Defect data can be overlaid by selecting the summary table 0 button. Defects Only: the instrument collects, displays, and saves defect data only. Haze Only: the instrument collects, displays, and saves haze data only. Display Type The initial map and histogram display combination. (The display can be changed temporarily by selecting from the Scan application Display menu.) Map + Histogram: displays a wafer map and histogram. Map: displays map only. Histogram: displays histogram only. Show LPD size calculation and display parameter: diameter (µm) or cross section (µm2). Bin Split Bin split value indicates number of bins used. To set bin splits, choose the SEL button. The Bin Split dialog box allows you to edit LPD bin split ranges and to set the number of bins used. Area From This value determines the LPD size above which the instrument classifies LPDs as areas. Defaults to the current Max Size value. Maximum diameter is 9900 µm and maximum cross section is 99000 µm2. To set scratch parameters, click the Area From SEL button. See “Areas And Scratches” in Section 5.5.2, “Displaying Defects.” #343153 Rev. B 5/97 5-8 Surfscan 6200 Operations Data Display Parameter Description Haze Range Limited, full, extended or autorange. The haze value range, in parts-per-million, are determined by the current gain setting. In autorange, the instrument chooses the range that provides the best resolution. The instrument automatically zooms on the peak of the data, if any. Haze From The minimum haze value collected. Defaults to 1/250 of the Haze Range value. 5.3.3 CONFIGURATION PARAMETERS Configuration parameters provide cassette, sorting, automatic operation, and substrate selection. Configuration Parameter Description Cassette Cassette type and wafer handling configuration. Cassette types can be scrolled using the cycle control. You can select only a cassette type that has been calibrated for the current substrate diameter. See Chapter 7, “Calibration,” for details on creating cassette types. Cassette wafer handling can be: L: >< (left-only), R: >< (right-only), L:> R:< (left-to-right), L:< R:> (right-to-left), or L:< R:>< (sorted). Your instrument is configured for either right-to-left or left-to-right wafer handling. To switch to the other cassette configuration, contact your Tencor Service Representative. Sorting Off or On. When sorting is On and the cassette setting is L:< R:>< (sorted), failed wafers unload to the left cassette, passed wafers unload to the right cassette. This parameter has no effect for other cassette configurations. Auto Align (X-Y) On or Off. When On, the instrument automatically aligns the wafer map to the feature specified in the User Configuration dialog box. Auto Gain Setting Not implemented. Auto Print Automatic printing parameter. Set to On to allow automatic printing, Off to disable. To select detailed print options, choose the SEL button. #343153 Rev. B 5/97 Recipes 5-9 Configuration Parameter Description Auto Save Automatic save parameter. Set to On to allow automatic saves, Off to disable. To select detailed save options, choose the SEL button. substrate name Calibrated substrate type and thickness. To select a substrate type, choose the SEL button. The dialog box lists the substrate types and thicknesses currently available. Use the cycle control to select an available film thickness. (T) = Tencor-supplied calibration curve (C) = customer-supplied calibration curve 5.3.4 SORT PARAMETERS Sort parameters provide pass/fail limits. Sort Parameter Description LPD Count The maximum number of light particle defects (LPD) allowed: 0 to 99999. LPD/cm2 Number of light particle defects allowed per square centimeter. Defaults to measurable wafer surface area / total LPD. Bin limit Off or On. Set to On to use the bin limits specified in the Bin Limit dialog box. Bin limits set the number of LPDs allowed for each LPD bin. Area Count Total number of areas allowed (areas + scratches). Defaults to 9999. Area mm2 Total of all areas allowed in mm2, 0 to 9999. Scratch Count Number of scratches allowed, 0 to 9999. Defaults to 9999. Scratch mm Total of all scratches allowed in mm. Sum of All The total of LPD Count and Area Count allowed. Defaults to 9999. Haze Average The maximum allowable haze, when expressed as the average of haze (in ppm) over the measurable surface area. Haze Deviation The allowable amount of deviation of the haze level from the average, expressed in either absolute (PPM) or relative (percent) terms, over a user-selectable percentage of the wafer’s surface. See Section 5.7.1, “Haze Deviation Sort Parameters,” for details. #343153 Rev. B 5/97 5-10 Surfscan 6200 Operations Sort Parameter Description Haze Peak The maximum allowable haze value in parts-per-million. Haze Region The maximum allowable wafer area containing haze, expressed as a percentage of the measurable wafer surface area. 5.3.5 SELECTING SUBSTRATE PARAMETERS This section and succeeding sections provide a step-by-step discussion of setting recipe parameters, starting with substrate parameters. See Section 5.3, “Recipe Parameters,” for a summary of all recipe parameters and their values. A recipe specifies the diameter and edge exclusion for the substrate, and specifies which substrate/film thickness calibration curve to use for calculating LPD sizes. NOTE: If the Show parameter is set to Cross Section, the instrument calculates LPD size using measured scattering efficiency, normalized by the instrument’s standard response curve. Select the Substrate Diameter and Edge Exclusion for the substrate. Substrate diameter can be 2 in., 3 in., 82 mm, 100 mm, 125 mm, 150 mm, or 200 mm. The recommended edge exclusion value is 4 mm. Wafer Measurable Surface Area Edge Exclusion Figure 5-3 Measurable Surface Area The instrument collects data only from within the measurable surface area of a wafer. To select a different thickness using the currently selected substrate: Cycle through the thicknesses displayed to the right of the substrate name. #343153 Rev. B 5/97 Recipes 5-11 To select a new substrate and thickness: Choose the select button at the bottom-left of the Recipe dialog box. The instrument displays the following dialog box: Figure 5-4 Recipe Film Calibration Curves Dialog Box The dialog box lists all substrates and thicknesses currently calibrated for the instrument. If the substrate you want is not listed, you can calibrate the instrument for the new substrate. See Chapter 7, “Calibration.” Choose the Substrate Type and film thickness for the recipe and choose OK. The Recipe dialog box displays the substrate name and thickness. When a Tencor Instruments-supplied calibration curve is used, the substrate name is followed by (T) in the Recipe dialog box. When a customer-supplied calibration curve is used, the substrate name is followed by (C) in the Recipe dialog box. The (T) or (C) designation also is shown in the wafer summary in the Mean field. To use the recipe limits used when calibrating for the film and thickness specified, check the Recipe Limits from Calibration Curve check box. (Requires analog board P/N 223670.) 5.4 SETTING THE DATA COLLECTION RANGE This section tells you how to obtain the desired data collection range by selecting instrument gain, threshold, the defect-to-area boundary, and haze range for a recipe. The instrument collects defect and haze data from a wafer by illuminating the wafer surface with a laser beam, collecting the scattered light through an optics system, and amplifying the scattered light with a photomultiplier tube (PMT). The gain of the PMT determines the dynamic range for collecting data. #343153 Rev. B 5/97 5-12 Surfscan 6200 Operations 5.4.1 SELECTING AN LPD RANGE To specify the light point defect (LPD) range, use Gain, Threshold, and Area From parameters. The Gain setting determines the maximum LPD size of interest (the Max Size recipe parameter). Threshold determines the smallest LPD collected during a scan and can be adjusted as necessary to isolate a particular LPD range. User-selected Area From value Area Area From Max Size True Dynamic Range Threshold Figure 5-5 LPD Ranges The Area From parameter determines the LPD size at which the instrument classifies areas. The instrument classifies LPDs at or above the Area From value as an area. Area From defaults to Max Size (Fig. 5-6) but can be increased if necessary (Fig. 5-7). LPDs larger than Area From are classified as areas Area From = Max Size LPD collected Threshold Figure 5-6 #343153 Rev. B 5/97 LPDs below threshold are not counted Area From Equals Max Size Recipes 5-13 Area From > Max Size LPD below Area From is collected Max Size Figure 5-7 Area From Greater Than Max Size Using a combination of gain and threshold settings, you can scan for a broad or narrow band of LPDs, depending upon your requirements. Figure 5-8 shows choosing a gain and threshold to match the LPD range you want (expressed as LPD cross section in µm2). 1000 250 100 50 10 Cross Section LPD Size in µm2 10 2.5 1 2.13 0.5 0.1 0.427 0.1 0.025 0.086 0.01 0.005 0.022 0.0043 0.001 0.00086 0.00022 0.0001 0.00011 0.00001 Gain 1 2 3 4 5 6 7 8 Surfscan 6200 Figure 5-8 Gain versus Cross Section for the Surfscan 6200 #343153 Rev. B 5/97 5-14 Surfscan 6200 Operations The range of interest determines the Gain and Threshold combination to use. For example, if you want to collect data for LPDs in the 4 to 8 µm2 range (the shaded area in the table), you would set Gain to 3 and set Threshold to the smallest LPD size of interest. The instrument collects, displays, and records LPDs within the range set by the Threshold and Area From parameters (Area From defaults to 10 µm2 for Gain 3). If desired, bin splits can be used to display any segment of data within the Threshold to Area From range. 63 P.S.L. Diameter LPD Size in µm 100 28 7.7 10 1 1.6 1.40 0.33 0.32 0.21 0.21 0.1 0.16 0.13 0.10 4 5 6 0.16 0.12 0.08 0.07 7 8 0.01 Gain 1 Figure 5-9 2 3 Gain Versus Diameter If you want to collect LPDs in the range of 0.1µm to 0.15 µm, for example, you would set Gain to 7 and Threshold to 0.1. If the LPD range of interest exceeds the range of a single gain, you can scan wafers twice, changing Gain and Threshold values between each scan. To automate the process, different recipes can be used for each scan. If you set Threshold to 0 or Area From to less than Max Size, the instrument automatically enters the default value for the parameter. 5.4.2 SELECTING A HAZE RANGE The haze range collected during a scan is determined by the gain setting, Haze Range value, and Haze From value. Haze Range determines the maximum haze value collected during a scan. You can select from the three haze ranges for each gain setting, as listed in Table 5-1, or choose the Autorange setting. #343153 Rev. B 5/97 Recipes 5-15 Table 5-1 Haze Range Gain Limited Full Extended 1 49–12500 98–25000 200–50000 2 9.8–2500 20–5000 39.2–10000 3 2–500 3.92–1000 7.84–2000 4 0.49–125 .98–250 1.96–500 5 0.098–25 0.196–50 0.392–100 6 0.02–5 0.0392–10 0.0784–20 7 0.0049–1.25 0.0098–2.5 0.02–5.0 8 (6200 only) 0.001–0.25 0.002–0.5 0.00392–1.0 Haze From is the smallest haze value collected. Haze From defaults to 1/250 the current Haze Range setting but can be set to a different value, as needed. During a scan, the instrument collects haze data from the measurable wafer surface, separated into 832 x 860-µm segments called tiles. Haze maps display the average haze value per tile. Haze histograms display the distribution of haze values. Average haze for a wafer is calculated by averaging the haze values of all tiles on the wafer. When you choose Autorange, the instrument chooses the range that provides the best resolution. The collected data is automatically zoomed at the peak. You can narrow the range of data in the zoomed histogram by entering a percentage smaller than 100. For example, if you enter 90%, the lower and upper limits of the histogram are adjusted inward toward the peak by up to 10% of the haze pixels. When the autorange/autozoom feature is used • The zoomed histogram never excludes more pixels than specified in the recipe. • When autozoom completes, the haze bin splits are recomputed and evenly divided across the new, zoomed range. • If a haze map is displayed, it will be redisplayed after the autozoom has completed. If substrate sorting is dependant upon haze results, the sort decision is made after the haze bin splits are recomputed. • When autozoom is enabled, the results saved in the database reflect the zoom and the evenly distributed haze bin splits. • It is not possible to unzoom the results of an autozoom. The unit of measurement for haze data is parts-per-million (ppm) of the incident scan beam. NOTE: The instrument uses a haze calibration curve to determine haze values. This curve can be customized as required. See Chapter 7, “Calibration.” #343153 Rev. B 5/97 5-16 Surfscan 6200 Operations 5.4.3 SELECTING THROUGHPUT Throughput affects the wafer processing speed, relative instrument sensitivity, and microscan viewing area dimensions. Table 5-2 Throughput Throughput Wafer Velocity (Pitch) µm Relative Sensitivity (µm) Microscan Viewing Area (mm) Low 10 0.12 1.0 Normal 20 0.13 1.3 Medium 30 0.14 1.8 High 40 0.15 2.0 Low throughput results in highest instrument sensitivity but produces the lowest waferper-hour processing speed. In general, use the highest throughput that produces acceptable results. 5.5 SELECTING DISPLAY OPTIONS This section describes defect and haze display options. The recipe specifies which types of data will be collected during a scan, how to display data in the Scan window (wafer map, histogram, or both), the LPD size calculation method (LPD cross section in µm2 or LPD diameter in µm), defect bin splits, haze bin splits, and initial area and scratch display. 5.5.1 SELECTING THE DATA DISPLAY The Display Option parameter selects the primary and secondary data display. Option Description Defect/Haze The instrument collects all data and displays defect data in maps and histograms. Haze data can be displayed in the wafer map by using the 0 button in the summary table or haze data can be chosen for display through the Display menu. Haze/Defect The instrument collects all data and displays haze in maps and histograms. Defect data can be displayed in the wafer map by using the 0 button in the summary table or defect data can be chosen for display through the Display menu. Defect Only Displays defect data only. The instrument does not collect or save haze data. Haze Only Displays haze data only. The instrument does not collect or save defect data. #343153 Rev. B 5/97 Recipes 5-17 After each wafer scan, the instrument displays the primary data in the Scan window. The recipe’s Display Type parameter specifies the map and histogram display for the primary data: map only, histogram only, or map and histogram. The operator can override the current data display by choosing from the Scan application Display menu. 5.5.2 DISPLAYING DEFECTS When Display Option is set to Defect/Haze or Defect Only, the instrument automatically displays LPDs in the Scan window for each wafer scan. Area and scratch defects also can be displayed. LIGHT POINT DEFECTS (LPDS) The instrument color-codes LPD bin splits. You can set the number of LPD bin splits by setting the recipe Bin Split parameter. The following rules apply to setting bin splits: • The number of LPD bins can be from one to eight. • All bins must be within the data collection range displayed at the bottom of the dialog box. • Each bin represents a separate range of values. Bins cannot overlap. • The value of the lower boundary of a bin defaults to the value of the upper boundary of the previous bin. For example, if the upper boundary of bin #2 is set to 0.379, the lower boundary of bin #3 is automatically set to 0.379. The lower boundary of bins cannot be set directly. • The Area From value defaults to the Max Size value, but can be changed. When Area From exceeds Max Size, the LPD range is extended to the Area From value, and the ranges of LPD bins and bin split limits are adjusted, as necessary. To change bin ranges, use the histogram bin split editing technique as described in Section 5.5, “Using the Histogram,” or use the Detailed Bin-Split dialog box. To set LPD bin splits: 1. Open the recipe to edit and set Display Option to Defect/Haze or Defect Only to allow LPD bin split editing. 2. Choose the Bin Split select button to open the Detailed LPD Bin Split dialog box. Bin fields are color-coded. The color bar at the bottom of the dialog box indicates the LPD range specified by the current threshold and gain. The current bin boundaries are shown in the From and To data fields. #343153 Rev. B 5/97 5-18 Surfscan 6200 Operations 3. To change the number of bins, enter the number of bins to use in the Number of Bins box. The color bar and bin fields automatically change as necessary. Figure 5-10 Defect Histogram Bin Splits Dialog Box 4. Change bins splits, using any or all of the following methods: • To reset bins to default values, choose the Default Bin Splits button. All bins and limits are set to default values. • To enter values directly: Click on the To field of the bin to change. Enter a value. When entering values into the To fields, be sure to follow the rules for bin boundaries. Or double-click the left mouse button over the color bar at the bottom of the dialog box. The pointer changes shape when over a bin boundary. Move the pointer over the boundary you wish to change. Press and hold the left mouse button and move the boundary. Release the button when the boundary is set. Change boundaries for all bins you want to change. When complete, click the right mouse button. 5. Select the Count Range: Auto, Fixed 10, Fixed 30, Fixed 100, Fixed 300, Fixed 1000, Fixed 3000, or Fixed 10000. The Fixed count ranges set the histogram Yaxis to the fixed value. The Auto count range automatically scales the histogram Y-axis to the maximum count. 6. Select the bin split counting method: Sequential or Cumulative. In sequential counting, the LPDs for each bin are counted and displayed separately. In cumulative counting, the count for each bin is added to the counts of lower bins to give a running total. For example, the count for bin #4 is the sum of the counts for bins 1, 2, 3, and 4. 7. Choose OK to save the bin splits setup. #343153 Rev. B 5/97 Recipes 5-19 To specify the LPD size calculation method: Choose a Show option, as follows: Option Description Diameter The instrument calculates LPD size using the calibration curve for the selected substrate and thickness. See Section 6.3.5, “Selecting Substrate Parameters.” The instrument matches scattering efficiency measurements to the LPD diameters listed in the calibration curve. Cross Section The instrument calculates LPD size from scattering efficiency. Sizes are normalized based on the instrument’s standard response curve. Sort options can be set as described in Section 6.7, “Selecting Sort Options.” AREAS AND SCRATCHES The instrument classifies a defect larger than the recipe Area From value as an area or as a scratch. Areas are displayed as red regions on wafer maps. The total surface area occupied by areas is shown by a red vertical bar in histograms. The instrument estimates the size of an area by totaling the length of all chords recorded for the area. The instrument defines a scratch as an area that when an ellipse is drawn around the area • The length of the major axis of the ellipse is equal to or greater than the Scratch Minimum Length value specified in the User Configuration dialog box. • The ratio of the major axis of the ellipse to the estimated width must be equal to or greater than the Scratch Length To Width Ratio value specified in the Detailed Scratch Definition dialog box. The instrument estimates width by dividing the area by the length of the major axis of the ellipse. • The ratio of the major axis to the minor axis of the ellipse must be equal to or greater than three. The instrument reports scratch count and area total in the wafer summary table. #343153 Rev. B 5/97 5-20 Surfscan 6200 Operations When zooming a wafer map with areas displayed, areas appear as follows: Areas are shown as a series of chords Figure 5-11 Areas as a Series of Chords Sort options can be set for area count, scratch count, total area, and total scratch length. See Section 6.7, “Selecting Sort Options.” 5.5.3 DISPLAYING HAZE When the Display Option parameter is set to Haze/Defect or Haze Only, haze is the primary data. The instrument automatically displays haze data in the Scan window for each wafer scan. When Display Option is set to Defect/Haze, haze is the secondary data. The instrument collects haze data which can be displayed by choosing a haze display option from the Display menu. The instrument color-codes haze data. Each color identifies a separate range of data, called a bin split. Haze bin splits can be edited through the Detailed Haze Bin Split dialog box, described below, or through histogram editing. To edit haze bin splits: 1. Set Display Option to Haze/Defect or Haze Only to allow haze bin split editing. 2. Choose the Bin Split select button to open the Detailed Haze Bin Split dialog box. Bin fields are color-coded. From and To fields indicate the total haze range, as #343153 Rev. B 5/97 Recipes 5-21 specified by Haze From and Haze Range. The current bin boundaries are shown to the right of the bin column. Figure 5-12 Detailed Haze Bin Splits 3. Click on the boundary to change. The boundary cursor blinks. Carefully move the pointer over the blinking cursor and press and hold the left mouse button. Move the cursor to the new boundary location and release the button. Or press NEXT repeatedly until the boundary cursor blinks. Use [←] to move the cursor to the next lower boundary. Use [→] to move the cursor to the next higher boundary. When at the boundary to change, use [↑] to move the boundary up, [↓] to move the boundary down. 4. Choose OK to save the bin splits as shown. Choose Default to apply the default ratios to the bin splits. 5. If the primary recipe data is defects, set the Display Option to Defect/Haze. Sort options can be set for percentage of haze versus total measurable surface area, average haze, and peak haze. See Section 5.7, “Selecting Sort Options.” #343153 Rev. B 5/97 5-22 Surfscan 6200 Operations 5.6 SELECTING AUTOMATIC OPERATIONS This section describes the automatic operations available through a recipe, including • Automatic sorting of failed wafers to the left cassette • Automatic alignment of the wafer to a feature • Automatic printing of summaries or the screen • Automatic saving of summaries or wafer maps 5.6.1 AUTOMATIC SORTING OF FAILED WAFERS The instrument can automatically sort failed wafers to the left cassette and passed wafers to the right cassette. For a discussion of pass/fail sorting, see Section 6.7, “Selecting Sort Options.” To enable automatic sorting: 1. Set the recipe Cassette parameter to the sorting configuration (L:< R:><). 2. Set Sorting to On. 3. When scanning, the cassette of wafers must be loaded on the right indexer and an empty cassette on the left indexer. Passed wafers unload to the right cassette, failed wafers unload to the left cassette. 5.6.2 AUTOMATIC WAFER ALIGNMENT The instrument can automatically align a wafer map to a flat or notch, as specified in the Standard Orientation Selection dialog box. (Requires X-Y Coordinates Option. See Chapter 13, “X-Y Coordinates Option.”) When Auto Align (X-Y) is On, the instrument automatically aligns the wafer map after each scan. #343153 Rev. B 5/97 Recipes 5-23 5.6.3 AUTOMATIC PRINTING The instrument can automatically print the wafer summary or the entire screen. To open the Detailed Print Configuration dialog box, choose the Auto Print select button: Figure 5-13 Detailed Print Configuration Dialog Box The instrument can automatically print short, long, or one line summaries, and screens can be printed using normal colors or swapped black and white. Choose automatic printing options for all wafers, passed wafers, and failed wafers. Summary Option Description None Do not print a wafer summary. One Line Print a one-line summary. Your text printer must be set for 132-column printing. See Section 9.12.2, “Setting up for Printing 132-Column Reports.” Short Print a 40-column summary on the text printer. Long Print a long summary on the text printer. Print Screen Option Description Off Do not print the screen. Normal Print the screen on the graphics printer using the colors shown on the screen. Swap B/W On color graphics printers, swaps (inverts) black and white only. On black and white graphics printers (such as dot matrix printers), inverts all colors. #343153 Rev. B 5/97 5-24 Surfscan 6200 Operations NOTE: To print the screen manually press PRINT. To change screen print options, press PRINT twice in rapid succession. If the graphics printer is set to FILE, the instrument prints the wafer maps to a disk file. See Section 9.12, “Setting Printer Configuration.” 5.6.4 AUTOMATIC SAVING The instrument automatically saves wafer summaries, wafer maps, and Tencor File Format (TFF) files, as specified in the recipe’s Detailed Save Configuration dialog box. For more information on TFF files, see Section 9.7, “Setting up for TFF Files.” By choosing SAVE in the Scan window, you can save data not already saved. To set automatic save operations: 1. Open the recipe by choosing View/Modify from the Recipe menu. 2. Click the Auto Save select button to display the Detailed Save Configuration dialog box. Figure 5-14 Detailed Save Configuration Dialog Box 3. #343153 Rev. B 5/97 Choose automatic saving options for summaries, wafer maps, and Tencor File Format (TFF) files. Save Option Description All Wafers Save data for both passed and failed wafers. Failed Wafers Save data only if wafer fails. Passed Wafers Save data only if wafer passes. Recipes 5-25 Save Option Description None Do not save data. The instrument has the following disk and database limitations: • When you start the instrument you will be warned when available disk space is less than the disk space warning limit of 15 MB. • The database can store approximately 10,000 wafer summary records. • The exact storage requirements for wafer maps are directly related to the size of the wafer and number of data points collected for the wafer. • The system saves TFF data as DOS files. 5.7 SELECTING SORT OPTIONS Recipe sort parameters determine when a wafer passes or fails the scan. Limits can be set for total number of defects found, defects/cm2, LPDs per bin, area count, scratch count, area total, scratch length total, haze as a percentage of total measurable wafer area, average haze, and peak haze. A wafer passes when data does not exceed any limits that are On. Sort results are reported in the wafer summaries and in Lot Summary reports. When cassettes are configured for sorting (L: < R: ><), failed wafers unload to the right cassette, passed wafers to the left cassette. The Defect Histogram Bin Splits dialog box sets the bin split sort limits. For descriptions of other sort parameters, see Section 6.3, “Recipe Parameters.” #343153 Rev. B 5/97 5-26 Surfscan 6200 Operations To open the Defect Histogram Bin Splits dialog box, choose the Bin Limit select button: Figure 5-15 Defect Histogram Bin Splits Dialog Box To enable bin limits, set Bin Limit to On. To disable bin limits, set Bin Limit to Off. To set bin limits: 1. Choose the Bin Limit SEL button to open the Defect Histogram Bin Splits dialog box. 2. Enter bin limits: • Click on a bin limit box and enter a value. Or press NEXT repeatedly until the text cursor appears in the Limit text box at the top of the dialog box. • Enter the bin limit. To move to another limit box, use [↑] or [↓]. 3. Choose OK to save bin limits and close the dialog box. 5.7.1 HAZE DEVIATION SORT PARAMETERS By setting sort criteria for haze deviation, you can pass or fail a substrate depending on how much the haze level varies from the average haze. The variation can be absolute (expressed in PPM) or relative (expressed as a percentage). You can also define the percentage of the wafer surface that must fall within the deviation limits for the wafer to pass. #343153 Rev. B 5/97 Recipes 5-27 To set haze deviation sort parameters: 1. Choose the Haze Average SEL button to open the Haze Deviation Sort Parameters dialog box: Figure 5-16 Haze Deviation Sort Parameters Dialog Box 2. Select the Sort Mode (Absolute, Relative, or Disabled) using the cycle control. 3. Enter the desired Ceiling and Floor limits in the appropriate fields. 4. Enter the desired Region % (the percentage of the wafer surface that must fall within the deviation limits for the wafer to pass). 5. Click OK. 5.8 RECIPE PARAMETER GUIDELINES • Area Total should be less than 10 mm2 for a 150-mm wafer. Adjust range using Gain and Threshold parameters to reduce total area. • If the instrument displays Data Overload in the status box, instrument sensitivity is too high. Count accuracy and repeatability might not be reliable. Reduce sensitivity by raising threshold, reducing gain, or increasing throughput. • If the histogram shows an exponentially increasing distribution at the low end of the graph, the instrument might be collecting phantom defects or haze noise. Raise threshold and gain proportionately. #343153 Rev. B 5/97 Calibration 6 6-1 CALIBRATION This chapter describes Surfscan 6200 calibration procedures available through the Calibration application: polystyrene latex (PSL) spheres on a substrate, haze, and cassette calibration. PSL spheres on substrate calibration allows you to add calibration curves for new substrates and film thicknesses or edit existing curves. The instrument uses the calibration to calculate defect sizes. See Section 6.2, “Calibrating PSL Spheres on a Substrate.” The haze calibration procedure produces a haze calibration curve that can be modified as necessary. See Section 6.4, “Haze Calibration.” The cassette calibration procedure allows you to calibrate for one or more wafer cassettes and to save cassette calibrations. See Section 6.5, “Cassette Calibration.” 6.1 USING THE CALIBRATION APPLICATION The Calibration application provides PSL spheres, haze, and cassette calibration procedures, stores calibration results in the Surfscan 6200 database, and allows PSL sphere and haze calibration curves to be customized. To start the Calibration application: Choose the Calibration icon at the System Menu. The instrument displays the Calibration window. Figure 6-1 Calibration Window The Calibration menu bar lists the following menu titles: Procedure, Substrate, Size, Options, and Results. Clicking START in the menu bar is equivalent to pressing START on the keypad. #343153 Rev. B 5/97 6-2 Surfscan 6200 Operations The Procedure menu lists calibration procedures and other application commands: Procedure Menu Item Description Cassette Learn Starts the cassette calibration procedure. (Not available when indexer system configuration is set to None.) PSL Spheres on Substrate Starts the PSL on spheres calibration procedure. You must choose a substrate, substrate diameter size, cassette type, and PSL sphere size. See Section 6.2, “Calibrating PSL Spheres on a Substrate.” Haze Calibration Start the haze calibration procedure. You must choose a substrate size before viewing the current calibration data or making a haze calibration scan. See Section 6.4, “Haze Calibration.” Load Wafer From Loads a wafer from the left or right cassette. Use the submenu to indicate where the wafer is: Export/Import Displays the Export/Import dialog box that allows you to export or import the database record associated with the current (checked) calibration procedure. Extend Puck Extends the puck for inspection and cleaning. Exit Quits the Calibration application. The Substrate menu title displays the Substrate Name and Film Thickness selection dialog box, used for selecting, adding, changing, or deleting substrate calibration records. The Size menu displays substrate diameter choices. Size must be chosen for all calibration procedures. Results displays the most recent calibration results for the selected calibration. For example, if you have selected PSL Spheres on Substrate, silicon dioxide, 500Å film #343153 Rev. B 5/97 Calibration 6-3 thickness, and 150-mm substrate diameter, the instrument displays the associated calibration curve. Press START to begin the calibration procedure selected in the Procedure menu. To choose the slot to use for calibration scanning: 1. Choose Load Wafer From from the Procedure menu. When you choose Right Indexer or Left Indexer, the instrument displays the slot selection dialog box. Figure 6-2 Select Cassette Slot Dialog Box 2. Choose From Specified Slot to specify the slot number in the slot field or choose From Bottom Slot to use the bottom cassette slot. 3. Choose OK. 6.2 CALIBRATING PSL SPHERES ON A SUBSTRATE This section describes the Surfscan 6200 substrate calibration procedure. Using the Calibration application, you can: • View the current calibration curve for a substrate and film thickness. • Add, delete, or change substrate/thickness records. • Measure a selected PSL diameter using a sample wafer. The measured result can be displayed in the calibration curve window. • Customize the calibration curve of a selected substrate. Tencor Instruments supplies a bare silicon calibration curve that is the standard curve for the instrument and cannot be changed by the customer. Curves for other substrates and film thicknesses can be added to the instrument and customized as required. In calibration windows, standard curves are green and custom curves are red. Yellow points are measured (calibrated) points. Substrate calibration curves can be created and customized, as follows: • Data can be obtained from Tencor Instruments and imported into the Surfscan 6200 database. The data can be customized as needed in the Calibration Curve window. #343153 Rev. B 5/97 6-4 Surfscan 6200 Operations • Data can be generated automatically by curve fitting (for nitride and oxide films). • Data can be collected by the customer using calibration scans. Sample wafers can be scanned using the Calibration application to obtain scattering efficiency measurements. The calibration curve window displays the current calibration curve and any recorded measurement points. The curve can be customized as needed. • Data can be obtained by the customer by scanning calibration wafers using the Scan application. Points on the curve can be added, deleted, or changed using the calibration curve window. To create a substrate calibration curve, you must add the substrate name and film thickness to the database. Initial substrate calibration curves match the instrument standard curve for bare silicon. 6.2.1 USING SUBSTRATE AND THICKNESS RECORDS Use the Substrate Type and Film Thickness dialog box to create a new substrate calibration curve, review or edit an existing substrate calibration, delete a substrate, or measure a sample wafer for a given substrate and PSL diameter. To import or export substrate records use the Import/Export action in the Procedure menu. NOTE: Where possible, the Database Export-Import utility should be used to import and export substrate records. The Calibration Export-Import action uses a different format than the Database utility. To open the Substrate and Film Thickness dialog box: 1. Choose PSL Spheres on Substrate from the Procedures menu. 2. Choose Substrate from the menu bar. The application displays the Select Substrate Type and Thickness dialog box. Figure 6-3 Select Substrate Type and Thickness Dialog Box The Substrate Name box lists the current substrate names. The Thickness box lists the current thicknesses for each selected substrate. #343153 Rev. B 5/97 Calibration 6-5 To select a substrate and film thickness: 1. Choose a substrate name. Available values appear in the Thickness box to the right. 2. Choose a thickness. 3. Choose OK. To view the calibration curve for this substrate, choose Results from the menu bar. To add a new measured substrate calibration record: 1. Choose Substrate from the Calibration menu bar. The application displays the Select Substrate Type and Thickness dialog box. 2. Choose Select to expand the dialog box and select the Measured radio button if it is not already selected. Figure 6-4 Adding a New Substrate 3. Type the new substrate name and thickness. Choose the optical configuration. 4. Choose Add. The instrument adds the new substrate and thickness to the table. 5. Return to Step 2 to add more substrates and thicknesses or choose OK to close the dialog box. #343153 Rev. B 5/97 6-6 Surfscan 6200 Operations To add a new automatic substrate calibration record: NOTE: Only Nitride or Oxide calibration records can be generated automatically in version 3.2 of the Surfscan 6000-series software. 1. Choose Substrate from the Calibration menu bar. The application displays the Select Substrate Type and Thickness dialog box. 2. Choose Select to expand the dialog box, then select the Automatic radio button if it is not already selected. Figure 6-5 Adding a New Substrate 3. Select Nitride or Oxide from the Substrate pull-down list, enter the desired thickness, and choose the desired optical configuration. 4. Choose Create. 5. The instrument adds the new substrate and thickness to the table. The following message appears in the message area at the lower left corner of the Calibration window: Substrate type “@Nitride” (nnnn Å) has been added #343153 Rev. B 5/97 Calibration 6-7 Note that the prefix @ precedes the substrate name. This prefix identifies curves that you generate, distinguishing them from measured curves. 6. Return to Step 2 to add more substrates and thicknesses or choose OK to close the dialog box. To change a substrate record: 1. Choose Substrate from the Calibration menu bar. The program displays the Select Substrate Type and Thickness dialog box. 2. Choose Select to expand the dialog box. Select a substrate and thickness from the list boxes and choose the optical configuration. 3. Choose Change. The substrate and new thickness appears in the substrate lists. 4. Return to Step 2 to change other substrates and thicknesses or choose OK to close the dialog box. To delete a substrate record: 1. Choose Substrate from the Calibration menu bar. The program displays the Select Substrate Type and Thickness dialog box. 2. Choose Select to expand the dialog box. Select the substrate and thickness from the list boxes. 3. Choose Delete. The selected substrate and thickness are removed from the substrate lists and calibration data for this substrate/thickness is deleted from the database. Note: You cannot delete Bare Silicon. 4. Return to Step 2 to delete other substrates and thicknesses or choose OK to close the dialog box. HINT: If you have more than one change to make to the substrate table, you can save time by opening the Select Substrate Type and Thickness dialog box and making all additions, changes, and deletions before choosing the OK button. #343153 Rev. B 5/97 6-8 Surfscan 6200 Operations To import a substrate record: 1. Select a substrate record from the Select Substrate Type and Thickness dialog box. The selection only applies when exporting a record but must be made to enable the Import/Export menu item. 2. Choose Import/Export from the Procedure menu. The application displays the Calibration Tables Import/Export dialog box. Figure 6-6 Calibration Tables Import/Export Dialog Box 3. Type the name of the import file in the From File field, and choose Import. If the imported substrate record already exists in the database, the programs asks if you want to overwrite the current record. Choose OK to overwrite, or Cancel to cancel the import. 4. Repeat Step 3 to import more substrate records, or choose Exit to close the dialog box. To export a substrate record: 1. Select the substrate record to export from the Select Substrate Type and Thickness dialog box. 2. Choose Import/Export from the Procedure menu. The application displays the Calibration Tables Import/Export dialog box. The dialog box lists the selected substrate record at the bottom of the Export Calibration File field. If this is not the correct substrate record, choose Exit and return to Step 1. 3. Type the name of the export file in the To File field, and choose Export. If the file already exists, the programs asks if you want to overwrite it. Choose OK to overwrite or Cancel to cancel the export. 4. Choose Exit to close the dialog box. #343153 Rev. B 5/97 Calibration 6-9 6.2.2 MEASURING PSL SPHERES This section describes the process of measuring PSL spheres on a sample wafer. To measure PSL spheres on a substrate, you must scan a sample wafer. The PSL Sphere Diameter dialog box allows you to set scanning parameters and select the sphere diameter of interest. When the scan is complete, the Calibration application displays a wafer map of the scanned wafer, a histogram, and a summary of scan results. The measurement can be displayed on the substrate calibration curve. To select the substrate diameter and PSL diameter: 1. Choose the substrate size from the Size menu. The Calibration application displays Select Cassette dialog box. Figure 6-7 2. Select Cassette Dialog Box Choose the cassette type. The application uses the <default> cassette type unless more than one cassette type has been defined for the wafer size. Then, the application displays the Select Cassette dialog box. Select the cassette being used and choose OK The Specify Thickness of the Calibration Wafer dialog box appears. Figure 6-8 Specify Thickness Dialog Box #343153 Rev. B 5/97 6-10 Surfscan 6200 Operations 3. Enter the thickness of the substrate in µm or click Default to use the SEMI standard thickness for the substrate size. See Table 6-1. Click OK. Table 6-1 4. SEMI Substrate Thickness Substrate Size (mm) SEMI Thickness (µm) 100 575 125 625 150 675 200 725 The application displays the Choose PSL Sphere Diameter dialog box. See Fig. 69. Choose the PSL diameter supplied on the sample wafer. To define a diameter not listed, choose one of the radio buttons shown as unused. 5. If you are an analysis user, you can choose Select to show calibration recipe parameters. The dialog box expands to show data collection and data display parameters. Figure 6-9 #343153 Rev. B 5/97 PSL Sphere Diameter Dialog Box Calibration 6-11 If necessary, change the default parameters as described in the following table: Recipe Parameter Description Sphere Diameter (µm) The PSL sphere diameter. Use this field to enter a new diameter when unused is selected in the PSL diameter option group. If you enter a value other than the selected diameter, the program displays an error message. To delete the selected diameter, enter 0 and choose OK. The diameter is set to unused. Maximum CV (%) Maximum coefficient of variation (CV). This value is a product of variations of instrument sensitivity, geometric sampling errors, Poisson noise broadening, and the natural dispersion of PSL sphere sizes. If the CV calculated for the calibration scan exceeds the displayed value, the program alerts you and allows you to accept or cancel the calibration. CV can be from 1 to 30. Edge Exclusion (mm) The edge exclusion distance in mm. Edge exclusion can be from 2 to 30. PMT Gain Setting The gain/max size setting to be used for the calibration scan. See Chapter 5, “Recipes.” Threshold (µm2) The cross-section threshold used for data collection. Threshold is the smallest value collected and displayed. Lower Display Limit (µm2) The smallest cross-section defect size used in calculations. Upper Display Limit (µm2) The largest cross-section defect size used in calculations. 6. Choose OK to close the recipe parameters. Then, choose OK again to close the PSL Spheres Diameter dialog box. 7. To start the calibration scan, press START. The application displays the calibration results window and prompts you to insert the sample substrate. Insert the sample wafer in the bottom slot of the cassette (or the selected calibration slot) and choose Start Scan. The instrument scans the substrate. If the coefficient of variation calculated for the scan is larger than the maximum recipe setting, the Calib dialog box displays the calculated CV value and asks if you want to continue #343153 Rev. B 5/97 6-12 Surfscan 6200 Operations with the calibration: Figure 6-10 Calibration Error Choose OK to continue with the calibration or choose Cancel to end the calibration. The application displays a wafer map, scan summary, and histogram. See Fig. 6-11. Figure 6-11 Calibration Results Window The histogram displays the distribution of cross-section values. Dashed lines identify the mean and standard deviation. Ideally, the peak of the histogram and the mean cross-section value coincide. The summary lists the following data: #343153 Rev. B 5/97 Calibration 6-13 Summary Field Description (substrate) The substrate name and film thickness. PSL diameter The selected PSL diameter. Select The range of selected defects. Spheres The number of spheres collected out of the total found. Mean C-Section The mean cross-section value. Coefficient of Variation The calculated CV value. To display the calibration curve for the substrate, including the results just measured: Click Resume or press SEL. Proceed to Section 6.2.3, “Using the Substrate Calibration Curve.” To exit the calibration scan without saving calibration measurements: 1. Click Cancel or press CANCEL. The application displays a confirmation dialog box. 2. Choose OK to continue the calibration, or choose Cancel to end the calibration. 6.2.3 USING THE SUBSTRATE CALIBRATION CURVE A calibration curve normalizes the response of the Surfscan 6200 to a substrate/film thickness pair. When a substrate is added to the database and the first sample wafer scanned, the instrument displays the standard calibration curve in red and the measured diameter-to-cross section point in yellow. You can use the Substrate Calibration Curve window to view or edit a substrate and film thickness calibration curve. To display the calibration curve window, view the current calibration curve by selecting PSL Spheres on Substrate from the Procedure menu and choosing Results from the menu bar or accept the results of a calibration measurement, as described in Section 6.2.2, “Measuring PSL Spheres.” Using the results of calibration scans and other data, the analyst can create a customized, monotonic curve for a selected substrate. Using the mouse or keypad, you can change the location of points, and add or delete points as necessary. To view a substrate calibration curve: 1. Choose PSL Spheres on Substrates from the Procedure menu. 2. Choose Substrate from the menu bar. Select the substrate and thickness to view. Choose OK. 3. Choose Results from the menu bar. The application displays the calibration curve for the selected substrate and thickness. #343153 Rev. B 5/97 6-14 Surfscan 6200 Operations The calibration curve window displays editing commands in the menu bar, the substrate name, the current calibration curve, the edit cursor, cursor location box, and curve points. Figure 6-12 Calibration Curve Colors identify how the curve was created. Red identifies a custom curve that can be edited. Yellow identifies points measured by calibration scans. Measured points are shown for reference. Green identifies Tencor Instruments-supplied curves. Except for bare silicon, Tencor Instruments-supplied curves can be modified, and when modified change to red. You can add a point to the curve, delete a point, or change a point’s location by using the dotted line cursor. The custom diameter at the cursor appears at the top of the graph. The box at the lower-right of the graph shows the measured cross section and Tencor-standard cross section, if any. The points defining the curve are listed at the bottom of the window. The following keys can be used when editing a calibration curve: Key Function [←] [→] Moves the cursor in small steps in the direction of the arrow. [↑] [↓] Moves the cursor in large steps. [↑] moves the cursor to the right, [↓] moves the cursor to the left. ENTER Confirms a point add or point change. NEXT Moves the cursor in large steps to the right. CANCEL Cancels curve editing. #343153 Rev. B 5/97 Calibration 6-15 Key Function SEL Moves the cursor in large steps to the right, including moving it exactly over a point. UNDO Deletes a point. ZOOM When the cursor is exactly over a point, allows you to delete or change the location of the point. When the cursor is not exactly over a point, allows you to add a point. Displays a bounding box around the point to add, delete, or change. To move the calibration curve cursor: Move the mouse or press [←], [→], [↑], [↓], and SEL. To add a point to the calibration curve: 1. Move the cursor to the location on the curve to add the point. 2. Double-click the left button or press ZOOM to enter edit mode. The bounding box shows the limits for the point. Figure 6-13 Adding a Point to the Calibration Curve 3. Move the mouse or press [↑] or [↓] to move the point up or down within the bounding box. #343153 Rev. B 5/97 6-16 Surfscan 6200 Operations 4. Press ENTER to add a point at the cursor location. NOTE: The delete point and change point procedures require that you position the cursor exactly over the point to delete or change. To move the cursor exactly over a point, first move the cursor close to the point, then press [↑] to move the cursor to the right or [↓] to move the cursor to the left. If you double-click the left button or press ZOOM and the cursor is not exactly over a point, the application enters Add a Point mode. If you enter this mode by mistake, press CANCEL to exit and try again. To delete a point from the calibration curve: 1. Move the cursor exactly over the point to delete. 2. Double-click the left button or press ZOOM to enter edit mode. The bounding box shows the limits for the point. 3. Press UNDO to delete the point at the cursor. The curve re-fits. To change the location of a point on the calibration curve: 1. Move the cursor exactly over the point to delete. Use SEL, [↑], or [↓] to move the cursor directly over the point. 2. Press ZOOM to enter edit mode. The bounding box shows the limits for the point. Figure 6-14 Moving a Calibration Curve Point #343153 Rev. B 5/97 Calibration 6-17 3. Move the mouse or press [↑] or [↓] to move the point up or down within the bounding box. Enlarged portion of Substrate Calibration Curve The bounding box shows the limits for changing a point. Point to edit 4. Press ENTER to complete the point change and exit edit mode. To cancel curve editing or exit the curve results window: Click the right button or press CANCEL. 6.3 CALIBRATING THE TENCOR-STANDARD CURVE The instrument’s standard substrate calibration curve or other Tencor-supplied curve can be calibrated and the results applied to all the custom film curves. Tencor Instruments recommends calibrating the standard substrate curve at least once per month. To calibrate for bare silicon: 1. Start the Calibration application and choose PSL Spheres on Substrate from the Procedure menu. 2. Choose the Bare Silicon substrate. 3. Select the substrate size and one of the standard PSL sphere diameters. Note that you cannot select recipe parameters for standard calibrations. The Specify Actual PSL Sphere Diameter dialog box appears to allow you to calibrate using a different PSL sphere size. Figure 6-15 Specify Actual PSL Sphere Diameter Dialog Box 4. If the calibration wafer contains a PSL sphere size different than one of the standard sizes, enter the actual PSL sphere diameter in µm. The value must be within 10% of the sphere diameter specified in Step 3. #343153 Rev. B 5/97 6-18 Surfscan 6200 Operations 5. Prepare a bare silicon wafer for the calibration. Insert the sample wafer in slot 1 of the cassette, and place the cassette on the right locator. PSL spheres of the size selected in Step 3 must exist on the wafer. 6. Scan the wafer by choosing START. The Calibration application displays a histogram and wafer map of the scanned wafer. The histogram shows the mean cross-section for the PSL sphere and dashed vertical lines show the standard deviation. Figure 6-16 Calibration Results 7. The Summary at the bottom of the screen shows the PSL sphere calibration results: substrate, PSL sphere diameter, selected sensitivity range (peak width), the number of spheres found, mean cross section, and the coefficient of variation. The instrument adjusts the mean cross section to match the standard value for the selected sphere diameter. For example, when measuring 0.364 µm PSL spheres, the instrument automatically adjusts the mean cross section (scattering efficiency) to 0.667 µm2 for bare silicon. The ratio used to adjust the mean value can be applied to the substrate’s calibration curve, as described in Step 7. If you entered an actual PSL sphere diameter that is different than one of the standard diameters (see Step 4), the instrument adjusts the results accordingly. 8. Press SEL to apply the ratio described in Step 7 to the substrate’s calibration curve or press CANCEL to exit the calibration procedure. If you accept the calibration, the instrument adjusts the entire calibration curve for #343153 Rev. B 5/97 Calibration 6-19 bare silicon by the adjustment ratio. The ratio is displayed in the lower-right corner of the calibration screen. NOTE: The custom calibration ratio should be between 0.9 and 1.1. If the ratio is not within these limits, contact your Tencor Instruments service representative for a hardware adjustment. You can choose to use the custom curve shown in red or the Tencor-standard curve shown in green. To choose the curve to use, press 2. The >> >> symbols identify the selected curve. 6.3.1 ABOUT CALIBRATION CURVES The following notes apply to calibration curves: • The Tencor standard bare silicon (white) calibration curve cannot be customized. • The Tencor standard bare silicon (white) calibration curve for one instrument should not be used on another instrument as calibration data will not be accurate. • Film curves created on one instrument should not used on another instrument as LPD sizing will be inaccurate. • When you choose the Tencor Instruments-standard curve, (T) appears next to the substrate name in the recipe dialog box. (C) appears for custom curves. • Custom calibration curves do not apply when the recipe specifies Bare Silicon, diameter display, and either Tencor (T) or custom (C) curve. Table 6-2 Calibration Curves used for Diameter and Cross Section Calibration Curve Diameter Cross section Custom Standard Customizable Film Customizable Standard #343153 Rev. B 5/97 6-20 Surfscan 6200 Operations • The following tables summarizes the calibration curves used for recipe substrate and display type combinations. Table 6-3 Calibration Curves used in Defect Sizing Substrate Curve Type Recipe Show Type Calibration Curve(s) Used Bare Silicon (T) Diameter Diameter: Tencor standard, non-editable, white curve Bare Silicon (T) Cross-section Diameter: Tencor standard, non-editable white curve Cross-section: Tencor standard, editable green curve Bare Silicon (C) Diameter Diameter: Tencor standard, non-editable white curve Bare Silicon (C) Cross-section Diameter: Tencor non-editable white curve Cross-section: Custom red curve Film (T) Diameter Diameter: Tencor standard non-editable curve Cross-section: Tencor editable curve Diameter: Film curve Film (T) Cross-section Diameter: Tencor standard non-editable white curve Cross-section: Tencor standard editable green curve Film (C) Diameter Diameter: Tencor standard non-editable white curve Cross-section: Tencor standard editable green curve Diameter: Custom red calibration curve Film (C) Cross-section Diameter: Tencor standard non-editable white curve Cross-section: Tencor standard editable green curve 6.4 HAZE CALIBRATION This section describes the Surfscan 6200 haze calibration procedure. Using the Calibration application, you can view the current haze calibration curve, measure haze using sample wafers, and customize the haze calibration curve. To view the current haze calibration curve: 1. Choose Haze from the Procedure menu. 2. Choose a substrate diameter size from the Size menu. 3. Click on Results in the menu bar. Or press MENU. Press [→] to highlight Results, and then press ENTER. 6.4.1 MEASURING HAZE This section describes the process of measuring haze. To measure haze, you must scan a sample wafer. The Haze Value dialog box allows you to set scanning parameters and select the haze value of interest. When the scan is complete, the Calibration application displays a wafer map of the scanned wafer, a histogram of haze pixels, and a summary of haze results. The measured haze can be displayed on the haze calibration curve. #343153 Rev. B 5/97 Calibration 6-21 To measure a haze value: 1. Choose Haze from the Procedure menu. 2. Choose the substrate diameter size from the Size menu. 3. The application automatically uses the <default> cassette type unless more than one cassette type has been defined for the wafer size. Then, the application displays the Select Cassette dialog box. Select the cassette being used and choose OK. The application displays the Haze Calibration Value dialog box. 4. Choose the haze value of interest. If the value is not listed, choose an unused option to define a new value. 5. If you are an analysis user, choose the Select button to set haze scan recipe parameters: Figure 6-17 Select Haze Calibration Value Dialog Box 6. Verify recipe parameters and change as required. Recipe Parameter Description Haze Value (ppm) Selected haze value in parts-per-million. Use this field to enter a new value when unused is selected in the haze value option group. If you enter a value other than the selected haze value, the program displays an error message. To delete the selected haze value, enter 0 and choose OK. The selected diameter is set to unused. #343153 Rev. B 5/97 6-22 Surfscan 6200 Operations Recipe Parameter Description Maximum CV (%) Maximum coefficient of variation (CV). This value is a product of variations of instrument sensitivity, geometric sampling errors, Poisson noise broadening, and the natural dispersion of PSL sphere sizes. If the CV calculated for the calibration scan exceeds the displayed value, the program alerts you and allows you to accept or cancel the calibration. CV can be from 0 to 30. Edge Exclusion (mm) The edge exclusion distance in mm. Edge exclusion can be from 2 to 30. PMT Gain Setting The gain/max size setting to be used for the calibration scan. See Chapter 5, “Recipes.” for gain settings. Haze Range The maximum haze range. Lower Display Limit (ppm) The smallest haze value used in calculations. Upper Display Limit (ppm) The largest haze value used in calculations. 7. Choose OK to accept the recipe settings. 8. Click START in the menu bar or press START. The application displays the wafer map and histogram window, and the Scan Wafer dialog box instructs you to place the sample wafer in the bottom slot of the right cassette. Figure 6-18 Scan Wafer Dialog Box #343153 Rev. B 5/97 Calibration 6-23 9. Place the sample wafer in the bottom slot of the right cassette and choose Start Scan. The instrument scans the wafer and displays a map, histogram, and results summary: Figure 6-19 Haze Calibration Results The histogram displays the distribution of haze values. Dashed lines identify the mean and standard deviation. The summary at the bottom of the window lists the following data: Haze Field Description Haze Value The haze value selected for scanning Select The selected haze range Haze Pixels The number of haze pixels used out of the total found Mean Haze Value The mean haze value for the scan Coeff of Variation The calculated coefficient of variation 10. Click Resume in the menu bar or press SEL to accept the calibration results and display the measured value in the calibration curve. Click Cancel in the menu bar or press CANCEL to return to the Calibration window. When you accept the measured results, the application displays the calibration #343153 Rev. B 5/97 6-24 Surfscan 6200 Operations curve, which can be customized as necessary. 6.4.2 USING THE HAZE CALIBRATION CURVE You can use the Haze Calibration Curve window to view or edit the haze calibration curve. To display the Calibration Curve window, view the current calibration curve by selecting Haze from the Procedures menu and choosing Results or accept the results of a calibration measurement, as described in Section 6.4.1, “Measuring Haze.” Figure 6-20 Haze Calibration Curve You can add a point to the curve, delete a point, or change a point’s location by using the dotted line cursor. The custom haze value at the cursor appears at the top of the graph. The box at the lower-right of the graph shows the measured haze value and the custom value, if any. The points defining the curve are listed at the bottom of the window. The following keys can be used when editing a calibration curve: Key Function [←] [→] Moves the cursor in small steps in the direction of the arrow. [↑] [↓] Moves the cursor in large steps. [↑] moves the cursor to the right, [↓] moves the cursor to the left. ENTER Confirms a point add or point change. NEXT Moves the cursor in large steps to the right. CANCEL Cancels curve editing. #343153 Rev. B 5/97 Calibration 6-25 Key Function SEL Moves the cursor in large steps to the right, including moving it exactly over a point. UNDO Deletes a point. ZOOM When the cursor is exactly over a point, allows you to delete or change the location of the point. When the cursor is not exactly over a point, allows you to add a point. Displays a bounding box around the point to add, delete, or change. 1 2 Used to change between custom values and standard values, as shown in the message box in the lower-right of the Calibration Curve window. To move the calibration curve cursor: Move the mouse or press [←], [→], [↑], [↓], and SEL. To add a point to the calibration curve: 1. Move the cursor to the location on the curve to add the point. 2. Double-click the left button or press ZOOM to enter edit mode. The bounding box shows the limits for the point. 3. Move the mouse or press [↑] or [↓] to move the point up or down within the box. 4. Press ENTER to add a point at the cursor location. You can define up to 13 points for a curve. NOTE: The delete point and change point procedures require that you position the cursor exactly over the point to delete or change. To move the cursor exactly over a point, first move the cursor close to the point, then press [↑] to move the cursor to the right or [↓] to move the cursor to the left. If you double-click the left button or press ZOOM and the cursor is not exactly over a point, the application enters Add a Point mode. If you enter this mode by mistake, press CANCEL to exit and try again. To delete a point from the calibration curve: 1. Move the cursor exactly over the point to delete. 2. Double-click the left button or press ZOOM to enter edit mode. The bounding box shows the limits for the point. 3. Press UNDO to delete the point at the cursor. The curve re-fits. #343153 Rev. B 5/97 6-26 Surfscan 6200 Operations To change the location of a point on the calibration curve: 1. Move the cursor exactly over the point to delete. 2. Press ZOOM to enter edit mode. The bounding box shows the limits for the point. 3. Move the mouse or press [↑] or [↓] to move the point up or down within the box. 4. Press ENTER to complete the point change and exit edit mode. To cancel curve editing or exit the Curve Results window: Click the right button or press CANCEL. 6.4.3 IMPORTING AND EXPORTING THE HAZE TABLE You can import or export haze calibration data using the Import/Export action in the Procedure menu. To import the haze calibration table: 1. Select Haze from the Procedure menu. 2. Choose Import/Export from the Procedure menu. The application displays the Calibration Tables Import/Export dialog box. Figure 6-21 Calibration Tables Import/Export Functions Dialog Box 3. Type the name of the import file in the From File field and choose Import. 4. Choose Exit to close the dialog box. To export the haze table: 1. Select Haze from the Procedure menu. 2. Choose Import/Export from the Procedure menu. The application displays the Calibration Tables Import/Export dialog box. 3. Type the name of the export file in the To File field, and choose Export. 4. Choose Exit to close the dialog box. #343153 Rev. B 5/97 Calibration 6-27 6.5 CASSETTE CALIBRATION This section describes calibrating the instrument for the cassettes used by the instrument. The cassette calibration procedure allows you to calibrate for a cassette. During calibration, the instrument measures the movement required to load substrates from slots that are second from the top and second from the bottom. The instrument moves the puck toward the substrate in upper slot with vacuum on. The indexer then lowers the wafer toward the puck. When the instrument senses a reduction in vacuum pressure, indicating contact with the substrate, the instrument records the number of moves taken. The instrument moves the puck to the lower slot and repeats the test. If cassette calibration fails, check the following: • The locator is correctly installed. • The cassette is firmly seated on the locator. • The substrates do not touch the rails or back of the cassette. • In some cases, it might be necessary to move the substrates 2 to 3 mm (approximately 1/8 in.) toward the front of the cassette to insure that they lie flat. NOTE: Chapter 3, “Maintenance,” in the Surfscan 6100/6200 Reference Manual, describes Surfscan 6100/6200 maintenance procedures, including cleaning the puck. Since the distance between slots (slot pitch) and other dimensions of cassettes can vary, the Surfscan 6200 allows more than one cassette type to be calibrated and stored at one time. When different cassettes are used, the cassette type must be assigned to one of the standard cassette heights, set to one or more wafer sizes, and calibrated for each size. Cassette types can be deleted when no longer needed. The <default> cassette type is available for all size wafers, is set to Normal cassette height, and cannot be deleted. A cassette type must be selected in each recipe. When more than one cassette is defined, the cassette being used must be selected before calibrating PSL spheres on substrates or haze. To calibrate the instrument to a cassette: 1. Choose Cassette from the Calibration application Procedure menu. 2. Choose the substrate diameter size from the Size menu. The program displays the Select Cassette dialog box. 3. Select the cassette type to calibrate. 4. Choose START to begin the calibration routine. The application displays the Cassette Calibration window showing the right cas- #343153 Rev. B 5/97 6-28 Surfscan 6200 Operations sette: Figure 6-22 Cassette Calibration Window 5. As stated by the Place Cassette dialog box, make sure that wafers are loaded only into slots that are second from the top and second from the bottom of the cassette. The major flats of wafers must face toward the front of the cassette. Firmly seat the cassette on the locator plate. 6. Choose Start Calibration to calibrate. The instrument indexes the cassette and informs you if it does not find wafers in both slots. (If one or both wafers are not found, return to Step 4.) 7. The puck moves toward the wafer in the upper slot with vacuum turned on and pauses momentarily when a reduction in pressure is sensed. The puck then moves to the wafer in the lower slot and repeats the test. The instrument displays a summary of the calibration results. If the calibration was unsuccessful, start the calibration again. If the wafers are tilted toward the front or back as the puck finds the substrate, verify that #343153 Rev. B 5/97 • The cassette is firmly seated on the locator. • The locator is correctly installed. • The substrates do not touch the rails or back of the cassette. Calibration 6-29 • The flats of wafers face forward. Start the calibration again. If the substrates still tilt, move them 2 to 3 mm (approximately 1/8 in.) toward the front of the cassette. 8. Before using the new calibrated cassette for production, fill the cassette with dummy wafers and use the Move command to unload and load wafers for each slot. Watch for handling errors. If any occur, consider using different cassettes or contact your Tencor Service Representative for a system adjustment. To add a cassette type: 1. Choose Cassette from the Calibration application Procedure menu. 2. Choose the wafer diameter size from the Size menu. The program displays the Select Cassette dialog box. Figure 6-23 Select Cassette Dialog Box 3. Type the new cassette name in the text box. 4. Using the cycle control, select a cassette height. • Normal for most cassettes • Empac for Empac cassettes • Stretch for cassettes with greater than usual distance between slots (Fluoroware Teflon cassettes, for example) After being added, you cannot change the cassette height setting for a stored cassette type. To reset the cassette height parameter for a cassette type, you must delete the cassette type, add the cassette type back to the list, specify the new cassette height, and recalibrate the cassette. 5. Choose the Add button. #343153 Rev. B 5/97 6-30 Surfscan 6200 Operations 6. Choose the OK button to remove the Select Cassette dialog box. To delete a cassette type: 1. Choose Cassette from the Calibration application Procedure menu. 2. Choose the wafer diameter size from the Size menu. The program displays the Select Cassette dialog box. Figure 6-24 Select Cassette Dialog Box 3. Choose the cassette to delete from the list box. You cannot delete the <default> cassette type. 4. Choose the Delete button. You only can delete cassettes that are not used in any recipe. If the Delete button is gray, the cassette is being used in one or more recipes. 5. Choose the OK button to remove the Select Cassette dialog box. #343153 Rev. B 5/97 Setting Up the System 7 7-1 SETTING UP THE SYSTEM This chapter describes setting up the system using the Setup application and reviewing system status using the Status application. The Setup application provides general system setup functions. You can set: • Cassette slot numbering • Compression methods when saving data into the database • Login method • Message indicators • Printer configuration • Recipes • System log recording • Tencor File Format (TFF) options • User accounts • Wafer exclusion patterns • System configuration To start the Setup application: Choose the Setup icon from the System Menu. The Setup window appears. Setup menus provide general setup actions, user account actions, and recipe management actions. Figure 7-1 Setup Menus Config menu items provide system configuration, user configuration, data compression, and TFF database ID association. Access menu items provide user account management actions, as described in Section 7.8, “Managing User Accounts.” #343153 Rev. B 5/97 7-2 Surfscan 6200 Operations Recipe menu items provide recipe management actions, as described in Section 7.9, “Managing Recipes.” To exit the Setup application: Choose Exit from the Config menu. 7.1 USER CONFIGURATION DIALOG BOX Many configuration options are set through the Setup application’s User Configuration dialog box. To print a user configuration report, see Section 8.4, “Reports.” To open the User Configuration dialog box: 1. Choose User from the Config menu. Setup displays the User Configuration dialog box. Click the More button to open the second part of the dialog box. Figure 7-2 #343153 Rev. B 5/97 User Configuration Dialog Box Setting Up the System 7-3 The following configuration options can be set: Configuration Option Control Type Description Selects the type of instrument control: local or host. Local: Instrument is controlled locally using the operator keypad, mouse, and display. Host: A host computer controls the instrument. Login Method The logon access method. None: No password or key is required for instrument operation. Code: The user must enter a password code to access the system. Key: (Not implemented) Code and Key: (Not implemented) Access Time Out Time out value in minutes. (Not implemented) Messages Message alert notification. Messages are listed in order of severity, with errors being the most critical. Off: The system displays messages with no audible alert or flashing message border. Flash: The system displays messages with flashing borders. Sound: The system displays messages and beeps. Flash and Sound: The system displays the message using sound and flashing border. Show Sign-On Banner Enables the display of the instrument’s system banner at startup. This option is normally disabled. Simulated Data Normally disabled. Should only be used for diagnostic purposes or when using the Surfscan 6000-series Desktop option. Contact Tencor Instruments for further information. Reverse Ladder Numbering Sets slot 1 to the top of the cassette ladder, rather than the bottom (default). Reverse Cassette Processing Changes cassette processing to start at the slot at the top of the cassette rather than at the bottom. #343153 Rev. B 5/97 7-4 Surfscan 6200 Operations Configuration Option Description Destination Slot Numbering Specifies that the slot number displayed in wafer summaries, saved in the database, printed on reports, and saved in TFF files will be the destination slot number rather than the source slot number. If the instrument cannot determine the destination slot number, the slot number is set to 99 and remains set to 99 even when the wafer is moved to the destination slot. L:< (Failed Wafers) Changes the destination for failed wafers from the right cassette to the left cassette. Suppress Lot Summary Display Eliminates the Lot Summary screen that appears at the end of a cassette scan or when the HOME key is pressed. Reverse Destination Filling Enables reverse filling of the destination cassette (wafers are put in the destination cassette from the bottom up, using the first available empty slot). Default Cassette Slots The number of slots in your cassettes. The second part of the User Configuration dialog box provides the configuration buttons and log event options. For a description of the system events that can be recorded, see Section 7.2, “Selecting Events for the System Log.” CONFIGURATION BUTTONS Command buttons allow you to specify Tencor File Format filenaming, wafer orientation, wafer exclusion patterns, and bin colors: • TFF Control displays the Tencor File Format Control dialog box, allowing you to set the disk path, filenaming convention, and file extension for TFF files. See Section 7.7, “Setting Up for TFF Files.” • Wafer Orientation displays the Wafer Orientation dialog box, allowing you to set wafer map origin location and edge feature orientation. Wafer map rotation requires the X-Y Coordinates Option. See Section 7.3, “Setting Wafer Orientation.” • Exclusion Pattern displays the Exclusion Pattern dialog box, allowing you to define up to three exclusion areas for a single exclusion pattern. See Section 7.4, “Defining Exclusion Patterns.” • Particle Colors displays the Particle Colors dialog box, allowing you to change the colors used to display data in histograms and maps. See Section 7.5, “Setting Data Colors.” #343153 Rev. B 5/97 Setting Up the System 7-5 7.2 SELECTING EVENTS FOR THE SYSTEM LOG The User Configuration dialog box provides system log entry options. The system log can record any or all of the following events: Event Records a log entry when System Startup The instrument is started or restarted. User Logon A user logs on. User Logoff A user logs off. Mode Change The instrument mode changes (switching between Surfscan 6200 software applications). Recipe Change The operator changes the recipe. New Recipe The operator creates a new recipe. System Configuration Change The operator changes the system configuration. User Configuration Change The user changes the user configuration dialog box. Status A system status message appears. Warning A warning message appears. Caution A caution message appears. Error An error message appears. To have the system enter the name of the last user logged on as the startup user: Check the Last User Name for System Startup check box. #343153 Rev. B 5/97 7-6 Surfscan 6200 Operations 7.3 SETTING WAFER ORIENTATION Wafers can be oriented to a flat or notch and the origin position can be set using the Standard Orientation Selection dialog box. When a wafer is scanned, the wafer can be automatically oriented to the selected position by setting the Auto Align (XY) recipe parameter to On or by choosing Rotate to Edge Feature from the XY menu. Wafer rotation requires the X-Y Coordinates Option. See Chapter 13, “X-Y Coordinates Option.” NOTE: When using TFF files on a Tencor DataHub Data Analysis System, Surfscan SWIFT/Station, or Surfscan Revisit Station, set wafer origin position to Center of Wafer. To select wafer orientation: 1. Choose User from the Config menu. The Setup application displays the User Configuration dialog box. 2. Choose the More button to open the second part of the dialog box. 3. Choose Wafer Orientation. The Setup application displays the Standard Orientation Selection dialog box: Figure 7-3 Standard Wafer Orientation Dialog Box 4. Select the standard flat and notch orientations. 5. Select the origin position. Choose OK to set these positions. #343153 Rev. B 5/97 Setting Up the System 7-7 7.4 DEFINING EXCLUSION PATTERNS Regions of a wafer can be excluded from the result of a scan by defining an exclusion pattern. An exclusion pattern can contain up to three regions that are excluded from defect and haze counts. Each region can be defined using the Exclusion Pattern dialog box. For a wafer with a flat, one of the following exclusion regions can be defined (the flat is assumed to be at the bottom of the wafer): Bottom-left Top-right Bottom-middle Top-left Bottom-right Top-middle For wafers with a notch, one of the following exclusion patterns can be defined (the notch is at the bottom of the wafer): Bottom and left Top and left Bottom, top, and left Bottom and right Top and right Bottom, top, and right Bottom only Top only Bottom and top 7.4.1 EXCLUSION REGIONS Exclusion regions are always rectangles. An exclusion region is defined by specifying the location and dimensions of the region in millimeters. The Exclusion Pattern dialog box displays a list of defined exclusion patterns, a diagram of exclusion regions for the selected pattern, and region dimensions. To define an exclusion pattern: 1. Start the Setup application. 2. Choose User from the Config menu. The Setup application displays the User Configuration dialog box. 3. Choose the More button to open the second part of the User Configuration dialog box. #343153 Rev. B 5/97 7-8 Surfscan 6200 Operations 4. Click Exclusion Pattern. The Exclusion Pattern dialog box appears. The dialog box lists the current pattern names, a diagram of the exclusion regions for the selected pattern, and region parameters. Figure 7-4 5. Choose New to create a new exclusion pattern. The New Exclusion Pattern Selection dialog box appears: Figure 7-5 #343153 Rev. B 5/97 Exclusion Pattern Dialog Box New Exclusion Pattern Selection Dialog Box Setting Up the System 7-9 6. Enter a pattern name in the Exclusion Pattern Name field. 7. Choose the flat or notch pattern you want to use. 8. Choose OK to return to the Exclusion Pattern dialog box. 9. Define the dimensions and location of the exclusion region(s). Exclusion parameter values can be from -9.99 mm to +99.99 mm and cannot be greater than one-half the wafer diameter. The parameters for each region are diagrammed on the map. Two parameters for each region define the size of the region, one parameter defines the distance from the edge of the wafer, and one parameter defines the distance from the center line of the wafer (flats only). To ignore a region assigned to an exclusion pattern, set the location and dimension values for the region to 0. The size or location of an exclusion region can be changed at a later date. To save exclusion patterns: Choose the Save button from the Exclusion Pattern dialog box. To delete an exclusion pattern: At the Exclusion Pattern dialog box, select the pattern to delete and choose Delete. The <default> pattern cannot be deleted. To save an exclusion pattern under a new name: Choose the exclusion pattern name from the list and choose Save As. To use a pattern in a recipe: 1. Using the Scan or Setup applications, open the Recipe dialog box. 2. In the Data Collection group, cycle through Flat/Notch Exclusion options. Choose the pattern name to use for the recipe. 3. Choose OK to close the recipe dialog box. 4. Save the recipe. #343153 Rev. B 5/97 7-10 Surfscan 6200 Operations 7.5 SETTING DATA COLORS You can change the colors used to identify bins, areas, and haze. These changes effect wafer maps and histograms. To change colors: 1. Choose User from the Setup application’s Config menu. The User Configuration dialog box appears. 2. Click the More button. The dialog box expands. 3. Click the Particle Colors button. The Particle Color Selection dialog box appears. Figure 7-6 Particle Color Selection Dialog Box 4. Click on the data category you want to change in the Colors Selected list. 5. Click on an unused color from the Available Colors palette. (To assign a currently used color to a different data category, first unassign it from its current category and then reassign it to the new category.) 6. Repeat Steps 4 and 5 until all color changes have been made. If you want to return to the default colors at any time, click the Tencor Defaults button. 7. Click Ok when all changes have been made. #343153 Rev. B 5/97 Setting Up the System 7-11 7.6 SETTING DATA COMPRESSION When saving wafer maps and other data, you can conserve disk space by choosing a data compression method. The compression options available are: None, Light, Moderate, and Heavy. When compression is used, the instrument takes longer to save the data but uses less disk space. The Heavy compression method reduces data to a minimum amount of space and requires the most amount of time to save the data. The data compression setting does not affect the time required to read data from the database. The user manager should experiment with a variety of compression settings to determine the ideal combination for your system. Where high throughput is important, lower or no compression can be used and regular database maintenance used to archive important data records before deleting them. Where conservation of disk space is important, higher compression methods can be used. It is recommended that the Haze method be set to Light initially. To select data compression methods: 1. Choose Compression from the Config menu. Setup displays the Compression Methods dialog box. Figure 7-7 Compression Methods Dialog Box 2. Select compression methods for each item by cycling through the available parameters. 3. Choose OK when complete. #343153 Rev. B 5/97 7-12 Surfscan 6200 Operations 7.7 SETTING UP FOR TFF FILES Before saving Tencor File Format (TFF) files, first set up the filenaming convention and database IDs. The following notes apply to TFF files: • When using TFF files on a Tencor DataHub Data Analysis System, set wafer origin to Center of Wafer. • TFF files can be automatically saved at scan time by selecting an automatic save option in the recipe. Files can be manually saved by choosing Write to TFF from the XY menu in Scan or Browser applications. • A TFF file contains the data currently displayed on a wafer map, including changes to wafer orientation, wafer origin, and bin splits. • To view or create a text version of a TFF data file, use the TEXTOUT.EXE program. TEXTOUT.EXE is in the \SOVA\BIN directory. 7.7.1 SETTING TFF FILENAMING When saving Tencor File Format (TFF) files, the instrument uses the file path and file naming conventions specified in the Tencor File Format Control dialog box. To set TFF filenaming: 1. Choose User from the Config menu in the Setup application to open the User Configuration dialog box. 2. Choose the More button to open the second part of the dialog box. 3. Choose the TFF Control button to open the Tencor File Format Control dialog box. Figure 7-8 4. #343153 Rev. B 5/97 Tencor File Format Control Dialog Box In the Drive/Path field, enter the disk drive and directory path for TFF files. (It is good practice to save user created files such as TFF files and bitmaps into a separate directory.) Setting Up the System 5. 7-13 Choose a Filename method. When saving TFF files, the instrument will automatically supply the filename convention specified in this dialog box. Date/Time encoded naming: The instrument forms the TFF filename using the system date and time. See Section 7.11.1, “Selecting Text and Graphics Printers,” for details on date and time encoding. Serialized Lot ID naming: The instrument forms the filename from the Lot ID, recipe name, and a serializing digit: XLLLLRR.TFF where X = a serializing character from A–Z. LLLL = characters 3–7 from the current lot ID. Defaults to @ characters. RR = the last two characters in the current recipe name. Defaults to @@. TFF = the file extension. Defaults to TFF. User selectable: The instrument asks for the TFF filename for each file saved. 6. Choose the Event Size Format: Standard TFF or Extra Precision. If you want to review TFF files on the DataHub Data Analysis System, Surfscan Revisit Station, or Surfscan SWIFT/Station, save the files in the Standard TFF format. The Extra Precision format increases the resolution of the X and Y size of events and reports haze summary information. Event size values are stored either in 1/10 microns or nanometers.When the event value is greater than 32768 (0x8000), the event size is specified in 1/10th of microns.When the event value is greater than 32767, the event size is specified in nanometers and the high order bit is set to 1. To obtain the event size, subtract 32768 (0x8000) from the event value. NOTE: The TFF specification requires that X and Y event size values are stored as unsigned 16-bit integers Table 7-1 and Table 7-2 define the range of Particle and Area values in a TFF file. Note that TFF stored values are in Diameter Units. Also note that a 0 will be stored in the TFF file for any Particle or Area value exceeding the Measured Value range. Table 7-1 TFF Format - Standard Precision Field Type Range of Measured Values Range of Diameter Values Range of TFF Stored Values (10 x diameter) Particles >0 to 6553.5 µm >0 to 6553.5 µm >0 to 65535 Areas >0 to 33.73 mm2 >0 to 6553.5 µm >0 to 65535 Overflow Value 0 #343153 Rev. B 5/97 7-14 Surfscan 6200 Operations Table 7-2 TFF Format - Extra Precision Field Type Format Range of Measured Values Range of Diameter Values Range of TFF Stored Values Particles Std >32.767 to 3276.7 µm >32.767 to 3276.7 µm >327 to 32767 Particles Ext >0 to 32767 nm >0 to 32767 nm 32768 to 65535 Areas Std >843.26 µm2 to 8.432 mm2 >32.767 to 3276.7 µm >327 to 32767 Areas Ext >0 to 843.26 µm2 >0 to 32767 nm 32768 to 65535 Overflow Value 0 7. To use the TFF filename as the Wafer ID, check the Use TFF Filename as the Wafer ID check box. 8. Choose OK to close the Tencor File Format dialog box. 7.7.2 SETTING DATABASE IDS Tencor File Format (TFF) files require that product ID, process level ID, and processing equipment ID information be assigned to user ID fields. If a database ID field assigned to product, process, or equipment is blank, the default is used: product ID is set to the instrument model (6200, for example), process ID is set to the current recipe name, and equipment ID is set to SFS6x00 (where x is 1, 2, 3 or 4, depending upon the instrument model) or SFS6420. To assign database IDs to TFF file parameters: 1. Choose Database IDs... from the Config menu. The program displays the ID selection dialog box: Figure 7-9 Database ID Selection Dialog Box 2. Choose one ID for each TFF parameter. An ID can be assigned to only one parameter at a time. 3. Choose OK. #343153 Rev. B 5/97 Setting Up the System 7-15 7.8 MANAGING USER ACCOUNTS The Setup application Access menu allows you to add, modify, or delete user accounts. The user manager should assign user names and access privileges, update them as necessary, and delete accounts for users no longer needing access to the system. The instrument provides two menu types—Fab Line and Analysis—and two user levels (also called access classes)—user operator and user manager. The Fab Line menu provides access to the Scan and Calibration applications, the Windows Program Manager, and the DOS prompt. The Analysis menu provides access to the Scan, Calibration, Setup, Database, and Status applications, the Windows Program Manager, and DOS prompt. User levels provide a convenient method of broadly categorizing users within each menu type. The System Menu and Database Menu display the user name, user level, and menu type at the bottom of the screen. The access privileges assigned to a user account determine which functions or actions are available to each user and which icons are displayed in the System Menu. When a user logs on, the system determines the user’s access privileges from the entered access code. NOTE: A user with Add/Delete/Modify Users privileges can modify or delete any user account. User operators can create user operator accounts only. User managers can create all types of accounts. 7.8.1 ADDING OR MODIFYING USER ACCOUNTS Access to the instrument is controlled through user accounts. Each account consists of a user name, access code, user type, menu type, and access privileges. #343153 Rev. B 5/97 7-16 Surfscan 6200 Operations To add a new user: 1. Choose Add User from the Access menu to display the Add New User dialog box. Figure 7-10 Add New User Dialog Box 2. Enter the user’s name in the User Name field using the alphanumeric keypad. User names appear at the bottom of System and Database menus. 3. Enter the user’s password in the User Access Code field. This is the code that must be supplied by a user to log on to the instrument. NOTE: After being created, a password cannot be viewed or changed. If you are creating several user accounts, note the password assigned to each account. 4. Specify the user type, either user manager or user operator. Note that Tencor Engineer and Tencor Service options can be accessed by Tencor personnel only. 5. Choose the Menu Type: Analysis or Fab Line. The menu type setting determines the functions that can be displayed in the System Menu. The Analysis menu type provides access to all instrument functions. The Fab Line menu type provides access to Scan, Calibration, Windows Program Manager, DOS Prompt, and Log Off functions. The icons that appear in the user’s menu are specified at Step 6. #343153 Rev. B 5/97 Setting Up the System 6. 7-17 Choose OK. The program displays the User Account Record dialog box: Figure 7-11 User Access Privileges Dialog Box 7. NOTE: Select access privileges. The Setup application allows you to check any privilege listed in the dialog box. However, only those privileges allowed by the user’s user type and menu type will be enabled. See Steps 4 and 5. 8. Choose OK to add the new user. 9. To verify that you have set user privileges correctly, proceed to Section 7.8.3, “Testing a User Account.” To modify a user account: 1. Choose Modify User from the Access menu. Setup displays the User Account Record dialog box, as shown in the adding a user account procedure above. 2. Choose the user name to modify. 3. Change privileges, as required. 4. Choose OK. 5. To verify that you have set user privileges correctly, proceed to Section 7.8.3, “Testing a User Account.” #343153 Rev. B 5/97 7-18 Surfscan 6200 Operations 7.8.2 DELETING A USER ACCOUNT When a user account is no longer needed, it should be deleted from the database. The user name and access code can no longer be used for log on. To delete a user: 1. Choose Delete User from the Access menu. Setup displays the Delete A User dialog box: Figure 7-12 Delete a User Dialog Box 2. Click on the User Name cycle control to cycle through the user name list. 3. Choose OK to delete the selected user name, or choose Cancel to abandon the action. A message will appear asking you to confirm a delete. Choose Yes to confirm the delete or No to cancel. 7.8.3 TESTING A USER ACCOUNT After creating or modifying a user account, you can verify that the correct password and access was selected by temporarily logging on as the user, accessing Surfscan 6200 software functions, and logging off as the user. To test a user account: 1. Choose Login from the Access menu. Setup displays the Surfscan 6000-series Login dialog box. Enter the password of the user account you want to test and press ENTER. 2. Minimize the Setup window by clicking the Minimize icon at the upper right of the screen. 3. If the System Menu is not on the screen, double-click on the SFS 6200 icon. 4. Verify that menus and other accessible actions are correct. 5. To exit this user account and return to your original user account, minimize the current application window. Choose Windows Program Manager from the System Menu and choose Setup or double-click on the Setup icon shown at the bottom of the screen. Choose Revert from the Setup Access menu to return to your account. #343153 Rev. B 5/97 Setting Up the System 7-19 7.9 MANAGING RECIPES Using the Setup application, you can create, edit, delete, or rename recipes. The Recipe menu provides the following choices: Figure 7-13 Recipe Menu For details on creating recipes, see Chapter 6, “Recipes.” The Send to Host and Receive from Host choices are active when the SECS option is installed and SECS is enabled. These choices allow you to send or receive a recipe from a host computer. See Chapter 21, “SECS Option,” for details. 7.10 SETTING SYSTEM CONFIGURATION System configuration can be set through the Setup application’s System Configuration dialog box. To print a system configuration report, see Section 8.4, “Reports.” #343153 Rev. B 5/97 7-20 Surfscan 6200 Operations To view the instrument’s system configuration: Choose System from the Config menu. Setup displays the System Configuration dialog box. Figure 7-14 System Configuration Dialog Box Select the Printer button to configure printers. See Section 7.11, “Setting Printer Configuration.” System configuration options are factory-set at Tencor Instruments and should not be changed unless instrument hardware is upgraded. These options include: Factory-Set Options Description Processor Type Computer system microprocessor type. Model Number Surfscan model: SFS6100 or SFS6200. Machine Type Options are: Blind, Instrument, or Desktop. Laser Type Laser used by instrument: Argon Ion (Surfscan 6200) or HeNe (Surfscan 6100) Sampling Rate Sampling rate of instrument: Single #343153 Rev. B 5/97 Setting Up the System 7-21 Factory-Set Options Description Analog Board Type The analog board type used by the instrument: Unknown: desktop system. P/N 175325: old analog board. P/N 223670: newer analog board. Wafer Handling Determines wafer handling method: Standard, SMIF, Robotic, or Alt Robotic. Indexer Configuration Cassette indexer configuration: None, Left, Right, or Left + Right. Maximum Haze at Gain 1 Chooses the maximum haze range for Gain 1: 50000 ppm or 100000 ppm GEM Version Selects the GEM version: GEM 92 or GEM 93. Not present if SECS Option is not installed. See Chapter 10, “SECS Option,” in the Surfscan 6100/6200 Reference Manual, and the Surfscan 6XX0 SECS Interface Manual for details. The Options group provides additional configuration settings, as listed below: Option Description Juggler Enables the software Juggler utility. (Not implemented) SECS Enables the optional Semiconductor Equipment Communications Standard (SECS) interface. Not present if SECS Option is not installed. See Chapter 10, “SECS Option,” in the Surfscan 6100/6200 Reference Manual, and the Surfscan 6XX0 SECS Interface manual for details. Removable Disk Enables the optional removable disk accessory. (Not implemented) Streaming Tape Enables the optional streaming tape accessory for backing up and restoring data. Not implemented in the current release. Debug The default is Off. The Debug option is used by Tencor Instruments field service personnel. When Debug is On, the instrument displays debug messages when errors occur. #343153 Rev. B 5/97 7-22 Surfscan 6200 Operations 7.11 SETTING PRINTER CONFIGURATION Instrument printer configuration consists of setting the printer(s) to use when printing text and graphics and for setting up your system for printing 132-column reports. In addition to selecting printer devices, you can choose to print screens to a disk file using the device independent bitmap (BMP) format or you can choose to print to a video printer. For fast printing of system log reports, the Windows default printer should be used. See Section 7.11.3, “Setting Up for Fast Printing of System Log Reports.” 7.11.1 SELECTING TEXT AND GRAPHICS PRINTERS The Printer Selection dialog box allows you to select a graphics and text printer. The system prints wafer maps and screens on the graphics printer and prints summaries and reports on the text printer. Where only one printer is available, you can assign the same printer for text and graphics. If a text-only printer is selected for graphics, wafer maps and screen printouts will not be printed. When printing graphics, the screen can be printed to disk as a bitmap (BMP, TIF, or PCT file). To set the default text and graphics printers: 1. Open the System Configuration dialog box and choose the Printer... button. Setup displays the Printer Selection dialog box: Figure 7-15 Printer Selection Dialog Box 2. 3. #343153 Rev. B 5/97 Choose the default text printer from the Text list and the default graphics printer from the Graphics list. Choose the printer you are using or • Choose FILE for the default graphics printer to print screens to a disk file. • Choose Video for the default graphics printer to print screens to a video printer. The printer should be configured for VGA, 800x600. To change printer setup, choose Setup. Setting Up the System 4. 7-23 If you have chosen to print to disk, choose Setup to specify the file information. Figure 7-16 Screen Save Setup Dialog Box • Enter the path for screen saves in the Drive/Path field. (It is good practice to create a directory for storing user-created files, such as bitmaps or TFF files.) • Select a filenaming convention: Date/Time encoded naming: The instrument forms the filename based upon the system date and time. Decimal date and time values are converted to binary-coded-decimal. The hexadecimal result of the date and time values produces the filename. Table 7-3 Date/Time Encoded Filenaming Time/Date Bits Seconds/2 0–4 Minutes Hexadecimal Values (LSB) 0000 = 0 1000 = 8 5 – 10 0001 = 1 1001 = 9 Hours 11 – 15 0010 = 2 1010 = A Day of month 16 – 20 0011 = 3 1011 = B Month of year 21 – 24 0100 = 4 1100 = C Year - 1980 25 – 31 (MSB) 0101 = 5 1101 = D 0110 = 6 1110 = E 0111 = 7 1111 = F For example, a file created on September 8, 1992 at 15:30:55 would be named 19287BDB: Year - 1980 Month Day Hour Minute Sec/2 12 9 8 15 30 27 0 0 0 1 1 0 0 1 0 0 1 0 1 0 0 0 0 1 1 1 1 0 1 1 1 1 0 1 1 0 1 1 1 9 2 8 7 B D B #343153 Rev. B 5/97 7-24 Surfscan 6200 Operations Serialized Lot ID naming: The instrument forms the filename from the Lot ID, recipe name, and a serializing digit: XLLLLRR.BMP Where: X = a serializing character from A–Z LLLL = characters 3–7 from the current Lot ID (defaults to @@@@) RR = the last two characters in the current recipe name (defaults to @@) BMP = the file extension (defaults to the file extension assigned to the selected file type) User selectable: The instrument asks for the filename for each file saved. • Select a File Type using the cycle control. The available formats are Device-independent bitmap (BMP) Tag-based file format (TIF) Macintosh PICT (PCT) 5. Choose OK to close the Setup dialog box and choose OK again to close the Printers dialog box. 7.11.2 SETTING UP FOR PRINTING 132-COLUMN REPORTS The instrument can print 132-column wafer summaries and lot summaries. Your printer can be set to print 132-column reports by using one of the following procedures: • If you have a wide carriage printer, set the Windows Generic/Text Only printer driver for wide carriage printing. • If your printer supports compressed printing, you can automatically enable compressed mode when printing by using the Windows Control Panel. • You can manually set your printer to a compressed printing mode. Refer to your printer manual for details on manually configuring your printer. NOTE: For more information about using the Windows Control Panel, refer to the Microsoft Windows documentation. To set the Generic/Text Only printer to wide carriage: 1. At the System Menu, choose the Windows Program Manager icon. The Surfscan 6200 System Menu reduces to an icon. 2. Open the Windows Control Panel accessory. 3. Open the Control Panel Printers utility. 4. Choose the Generic/Text printer from the list of printers. 5. Choose the Setup button to display the Generic/Text Only setup dialog box. 6. Select the Wide Carriage check box. An X appears. #343153 Rev. B 5/97 Setting Up the System 7-25 7. Close the Control Panel dialog boxes by choosing OK at each box. 8. To return to the System Menu, double-click on the Surfscan 6200 icon at the bottom of the screen. Be sure your Text printer is set to Generic/Text Only. To configure your printer for 132-column (compressed mode) printing: 1. Open the Microsoft Windows Program Manager window. 2. Open the Control Panel and then open the Printers utility. The Printer utility displays the Printers dialog box. 3. Choose the Generic/Text Only printer. 4. Choose the Setup button to display the Generic/Text Only dialog box. 5. Choose the Add button to display the Add dialog box. 6. Enter the name for your 132-column printer in the New Printer Name text box. Using a computer keyboard, type the control code for setting 132-column mode in the 17 c.p.i. (characters-per-inch) field. Check your printer manual for the control codes for compressed printing. Printer type Control Code ASCII Code (Use with ALT key) Dot matrix 9- and 24-pin printers Ctrl+O 015 HP PaintJet Esc&k2S 027, 038, 107, 050, 083 For example, to set an HP PaintJet for 132-column mode, press ESC (the 17 c.p.i. field shows <ESC>) and then type &k2S. (The k must be lowercase and the S must be uppercase.) You can also use decimal codes by pressing and holding the ALT key and then typing the three digit decimal codes on the numeric keypad. For example, you can type ALT + 027, ALT + 038, ALT + 107, ALT + 050, and ALT + 083. 7. Click OK to close the Add dialog box. 8. Check the Wide Carriage and No Page Break options in the Generic/Text Only dialog box and choose OK. 9. Choose Close to close the Printers dialog box. 10. Close the Control Panel accessory. 11. Open the Surfscan 6000-series application by double-clicking on theSurfscan 6200 icon. 12. Open the Setup application and choose System from the Config menu. 13. Choose the Printers button and choose the Generic/Text Only printer for your Text Printer. #343153 Rev. B 5/97 7-26 Surfscan 6200 Operations 7.11.3 SETTING UP FOR FAST PRINTING OF SYSTEM LOG REPORTS When printing system log reports, faster printing can be achieved if the Windows default printer is used for printing the report and the default printer is set to one of the following: • HP LaserJet • HP DeskJet or DeskJet Plus • HP PaintJet or PaintJet XL • Generic/Text Only Best results are obtained by using a fast, continuous form feed printer supporting 66 linesper-page. If this printer type is available, set the default Windows printer to Generic/Text Only and set up the printer as follows in the Windows Printer utility: Parameter Setting Printer: Text Only Paper Size: Letter Paper Feed: Continuous No Page Break: Disabled Printer Codes: (All Blank) #343153 Rev. B 5/97 Working with the Database 8 8-1 WORKING WITH THE DATABASE This chapter describes the database system and provides instructions for • Managing disk space and the database so out of space errors do not occur • Backing up and restoring the database • Printing recipe settings, user configuration, and system configuration • Using database queries You must have Analysis Manager access to use database utilities. 8.1 ABOUT THE DATABASE SYSTEM The database is stored on the hard disk and contains the results of scans, recipe definitions, system and user configuration tables, user account records, system log entries, and calibration tables. 8.1.1 DATABASE UTILITIES Using database utilities, you can • Back up data to floppy disks, the hard disk, or a network disk • Print recipe, system configuration, and user configuration reports • Export and import data to floppy disks, the hard disk, or network disk • View maps and summaries stored in the database and delete them • View system log entries and delete them • Extract data and analyze it using statistical process control For a discussion of database concepts and detailed descriptions of searching the database using data selection and database query functions, see the Microsoft Access User’s Guide. 8.1.2 AVOIDING DISK FULL OR DATABASE FULL CONDITIONS If the disk or database becomes full, you can no longer save data to the database. To avoid this condition, the database and the hard disk should be managed as follows: • The database should be regularly monitored, backed up, and purged of unnecessary data. • The hard disk should be regularly monitored and purged of unnecessary files. Using data compression, you can reduce the amount of space required for saving data. See Section 7.6, “Setting Data Compression,” for details. For details on managing the disk and database, see See Section 8.2, “Managing the Disk and Database.” #343153 Rev. B 5/97 8-2 Surfscan 6200 Operations To open the Database Menu: Choose the Database icon at the System Menu. The Database Menu displays utility icons: Figure 8-1 Database Menu The following database utilities can be selected: Database Icon Allows you to: Browser Review wafer records, set X-Y coordinates, produce map-to-map comparisons, and delete wafer records. Extract records for statistical process control. See Chapter 9, “Browser.” Export/ Import Export or import recipes, wafer maps and summaries, substrate records, system or user configuration, access codes, and instrument calibration tables. See Chapter 10, “Export and Import.” Backup/ Restore Back up the database to floppy disk or hard disk or restore the database. See Section 8.3, “Backing Up and Restoring the Database.” Report Print recipes, system configuration, or user configuration. See Section 8.4, “Reports.” ViewLog View, print, or delete system log events. See Chapter 11, “ViewLog.” #343153 Rev. B 5/97 Working with the Database 8-3 Database Icon Allows you to: SPC Display Display statistical process control data. (Requires SPC option to use.) SPC Editor Create or edit SPC data files. (Requires SPC option to use.) Help Start the Surfscan 6220 help system. Exit Quit the Database Menu. To start a database utility: Double-click on the icon or press NEXT to highlight the icon and then press ENTER. 8.2 MANAGING THE DISK AND DATABASE It is important to regularly manage the disk and database and to avoid disk or database full conditions. The following information will help you to understand how to manage the disk and database. • The database contains wafer maps, wafer summaries, system log entries, system calibration tables, user account information, and recipes. Wafer maps, summaries, and system log entries take the majority of database space. • The database size is in part limited by the size of the hard disk. • As new maps, summaries, or log entries are saved into the database, the database file automatically expands, as necessary, using available free disk space. If you save data to the database but do not remove old data from the database, the database grows and can eventually consume all available free disk space. • You should periodically export old maps, summaries, and log entries to floppy disks and then delete them from the database to make more space. Note, however, that by deleting maps, summaries, or log events from the database, you make database space available, but you do not make disk space available. In other words, the database file does not reduce in size when you delete entries for it. • Access to a large, unmaintained database is slower than for a well-maintained database. • It is good practice to back up your database when it is small and contains essential recipes, user accounts, system calibration tables, system configuration, and user configuration data. This small database can be used to reduce the size of your database at a future time, if required. • If the disk becomes full, additional data cannot be saved into the database since it can no longer expand. If this happens, you can free database space by deleting data and you might have to reduce the size of the database by restoring a previously backed up, smaller one. • You should regularly remove unneeded files, such as user document files, bitmap files, TFF files, and others, from the hard disk. #343153 Rev. B 5/97 8-4 Surfscan 6200 Operations • When moving data from the instrument to a Surfscan 6000-series Desktop, use the Backup and Restore utility to move large amounts of data and the Export/Import utility to move small amounts of data. Large amounts of data would be 1000 or more wafer summaries or 25 or more wafer maps. Small amounts of data would be less than 200 wafer summaries and less than 10 wafer maps. • The system provides warning messages when disk or database warning limits are exceeded. When these messages appear, you should delete entries from the database, remove nonessential files from the hard disk, or do both before attempting to save additional data. The warning messages are: Disk space is getting low, <number> bytes remain free! When the instrument is reset, the system warns you when free disk space falls below 15 MB. Excessive number of summaries <number> in database! When you attempt to save a wafer summary, the system alerts you when the database already contains more than 9,999 summaries. Excessive number of maps <number> in database! When you attempt to save a wafer map, the system alerts you when the database already contains more than 299 maps. Some database error messages might indicate a disk full condition, as described in Section 8.2.1, “Disk Full Messages.” • When the disk is full, you can create free disk space by deleting nonessential files. See Section 8.2.3, “Recovering from a Disk Full Condition.” 8.2.1 DISK FULL MESSAGES The following database error message can indicate that the error is from a disk full condition: In the Scan application: (34-1070) Inserting summary data into database: database has been shut down (please disconnect) (34-1070) Inserting map into database: database has been shut down (please disconnect) (34-1001) Disconnecting from database: database has been shut down (5-65) Database access failure During instrument initialization: (34-1000) Connecting to database: read or write failure (34-1050) Reading blobs from database: Invalid cursor number #343153 Rev. B 5/97 Working with the Database 8-5 See Section 8.2.2, “Checking Disk and Database Free Space,” for displaying disk and database statistics. See Section 8.2.3, “Recovering from a Disk Full Condition,” for the steps to take to free disk space. 8.2.2 CHECKING DISK AND DATABASE FREE SPACE The status of free disk and database space is indicated by the disk status icon at the top of the screen: The disk icon changes colors to alert you to current disk and database free space conditions: • When the disk icon is green, disk and database free space are within acceptable limits. • When the disk icon is yellow, the disk or database is nearly full. You should free up disk space or database space as soon as possible. • When the disk icon is red, the disk or database is full. You should immediately free up disk or database space. You must not continue saving data until more free space is made available. To view disk and database statistics: Double-click on the disk icon to open the Hard Disk and Database Usage Statistics dialog box. Figure 8-2 Hard Disk and Database Usage Statistics Dialog Box #343153 Rev. B 5/97 8-6 Surfscan 6200 Operations The Hard Disk and Database Usage Statistics dialog box shows the amount of disk space used and free, the amount of database space used and free, and the number of maps and summaries used. Choose the Help button to view on-screen information about disk and database space. 8.2.3 RECOVERING FROM A DISK FULL CONDITION If the hard disk becomes full, you must delete enough non-essential files from the disk to free 3 MB or more of disk space. To recover from a disk full condition: 1. Connect an AT keyboard to the instrument. 2. Start the Windows File Manager application, as follows: At the System Menu, click on the Program Manager icon. Then, click on the File Manager icon in the Main group. If you cannot access the Surfscan 6220 System Menu: • Restart the computer. • When the Microsoft Mouse message appears, press CTRL+ BREAK (the BREAK key is at the upper right on the AT keyboard). • Press the BREAK key several more times until the Terminate batch (Y/N)? message appears. Type y and press ENTER. • At the DOS prompt, type win and press ENTER. Microsoft Windows starts. • Double-click on the File Manager icon in the Main group. 3. The amount of free disk space is listed at the bottom of the File Manager window. You must increase free disk space to at least 3 MB. 4. Use the File Manager Search feature or disk tree to locate the files to delete. For example, to search for all bitmap files with the BMP file extension, choose Search from the File menu. Type *.bmp in the Search For text box. Type c: in the Start From text box. Check the Search All check box. Click OK to view all bitmap files on drive C. Before deleting, check each file to ensure that it is not needed. CAUTION: 5. #343153 Rev. B 5/97 Do not delete any files from your hard disk that you are not sure about. Be especially careful when deleting files from the following directories: \WINDOWS and its subdirectories, \SOVA and its subdirectories, \SQL and its subdirectories, \SQLBASE and its subdirectories, \UTILS, and \DOS. When at least 3 MB of free space is shown at the bottom of the File Manager window, close the File Manager and reset the instrument. When the instrument initializes, delete data from the database (first exporting any you wish to save) and delete any additional files from the hard disk that are not essential. Working with the Database 8-7 8.2.4 REDUCING THE SIZE OF THE DATABASE If you want to reduce the size of the database, you can replace the current database with a smaller, previously backed up one. Deleting data from the database does not reduce the size of the database file. CAUTION: The procedure described in this section removes all data from the current database and replaces it with the data from a previously restored database. Before restoring the smaller database, export any system calibration, user account, system log entries, maps, or summaries you want to save. To reduce the size of the database: 1. Export all calibration tables, user configuration, system configuration, user accounts, and essential recipes and summaries. See Chapter 10, “Export and Import.” NOTE: Using the C:\TEMP directory or a network drive for the export destination can save time. (Export to the C:\TEMP directory only if sufficient hard disk space is available.) 2. Restore a previously backed up database that is smaller than the current one. See Section 8.3.2, “Restoring Data.” If you do not have a database containing the essential data, contact your Tencor Service Representative. 3. Import the data saved at Step 1. See Chapter 10, “Export and Import.” CAUTION: The calibration verification procedure should be performed after restoring the database. 8.2.5 REPAIRING THE DATABASE Under certain conditions the Surfscan database might become corrupt. This can happen if there is a power loss or the instrument is reset while accessing the database. Depending on the type and amount of damage to the database, it might be possible to repair it. As always, this should not be considered a substitute for regular backups, as there are conditions where the database cannot be repaired. See Section 8.3, “Backing Up and Restoring the Database,”for backup procedures. To repair the database: 1. Exit the Surfscan application. The database cannot be repaired if the Surfscan application is running. Microsoft Access must have exclusive access to the database. 2. Double-click on the Microsoft Office group icon in the Program Manager. 3. Double-click on the Microsoft Access icon in the Microsoft Office group. #343153 Rev. B 5/97 8-8 Surfscan 6200 Operations 4. Select the Repair... from the File menu. The Repair Database dialog box is displayed. Figure 8-3 Repair Database Dialog Box 5. The default database locations are C:\DATABASE\LOCAL.MDB and C:\DATABASE\REMOTE.MDB. Choose the local database and select OK. 6. A progress bar indicates the repair has begun. When done, the following dialog box should be displayed. Figure 8-4 Database Repair 7. If any other result is displayed, contact Tencor Service. 8. Select Repair... from the File menu again. 9. Choose the remote database and select OK. Because this database can become quite large (possibly hundreds of megabytes), repairing might take a while (tens of minutes). 10. Again, if any result other than success is displayed, contact Tencor Service. 11. Select the Exit from the File menu. 12. Double click on the Surfscan Application icon in Program Manager, to restart the Surfscan application. If you have any doubt regarding the success of the repair, contact Tencor Service. #343153 Rev. B 5/97 Working with the Database 8-9 8.3 BACKING UP AND RESTORING THE DATABASE The database Backup and Restore operations make use of the Microsoft Backup for Windows utility. MS-Backup allows full, incremental, and differential backups of any files on your system. It uses setup files to save lists of files selected for backing up as well as settings and options. This section describes how to use MS-Backup to back up the Surfscan database. For more information on backup strategies, setup files, backup catalogs, and so on, see the MS-DOS User’s Guide. To start the Backup/Restore utility: Choose the Backup/Restore icon from the Database Menu. The Microsoft Backup window appears: Figure 8-5 NOTE: Backup Window When backing up to floppy diskettes, be sure to label each backup diskette with the date and a sequential disk number. Each 3.25-in. disk stores up to 1.4 MB of data. #343153 Rev. B 5/97 8-10 Surfscan 6200 Operations 8.3.1 BACKING UP DATA You can back up the database to floppy disks or to a network drive, if available. To back up the database: 1. In the Backup window, click on Backup in the button bar below the menu bar. 2. Click on the Backup To pull-down button and select the appropriate destination drive for your backup as follows: • If the destination is a floppy drive, choose A: 1.44 MB 3.5-in. • If the destination is a network drive, choose MS-DOS Path, then type the full path of the network destination into the second text field below. 3. Select Open Setup from the file menu and select the file SOVABK.SET in the C:\SOVA\DATABASE directory. Click OK, or press ENTER. The main Backup window reappears, with updated information to the right of the Select Files button. This information includes an estimate of how many floppy diskettes you will need and how long the backup will take. 4. Select Full from the Backup Type pull-down list under the Select Files button. 5. If backing up to floppy diskettes, insert the first diskette into the floppy drive. 6. Click on the Start Backup button. If backing up to floppy diskettes, the following message box appears: Figure 8-6 Disk Access Message Box Click OK to proceed with the backup. #343153 Rev. B 5/97 Working with the Database 7. 8-11 The following window appears, showing the progress of the backup: Figure 8-7 Backup Progress Window When prompted, remove the first diskette, insert the next, and click OK or press ENTER. (If backing up to a network, there are no disks to add, and no prompt appears.) 8. When the backup is completed, the following message box appears: Figure 8-8 Backup Complete Message Box Click OK or press ENTER to return to the main Backup window. 9. Click on Quit in the button bar. The following message box appears: Figure 8-9 Exit Backup Message Box Click OK. #343153 Rev. B 5/97 8-12 Surfscan 6200 Operations 8.3.2 RESTORING DATA The procedure that follows describes restoring the database. When restoring from floppy diskette, each backup disk must be supplied in the order the floppies were used for backup. If necessary, the volume label of a backup disk can be examined to determine the sequence of disks by their date and time of backup. CAUTION: When you restore the database, all data in the current database will be removed. Essential data such as system calibration tables, recipes, and user accounts should be saved before restoring. Any wafer maps, summaries, and system log entries you want to keep should be saved also. You can save data by backing up the entire database or exporting selected database entries. After restoring the database, you should verify instrument calibration. To restore the database: 1. If floppy diskettes were used for the backup, insert the first diskette from the backup set. 2. In the Backup window, click on Restore in the button bar below the menu bar. Figure 8-10 Restore Window 3. #343153 Rev. B 5/97 Choose the source drive containing the backup from the Restore From pull-down list. Working with the Database 4. 8-13 Choose Retrieve... from the Catalog menu. The following dialog box appears: Figure 8-11 Retrieve Catalog Dialog Box Choose the appropriate drive from the pull-down list. (If restoring from a network drive, select MS-DOS Path and type in the correct path.) 5. If restoring from diskettes, the following message box appears: Figure 8-12 Insert Last Diskette Message Box Insert the last diskette from the backup set as prompted and click OK. (The backup catalog file is always written to the last diskette in a backup set.) The catalog file is copied onto the hard drive and the following message appears: Figure 8-13 Retrieve Complete Message Box Click OK. 6. Double-click on the Restore Files drive (usually drive C) to restore all files on the backup diskettes, or click on the Select Files button to select specific files for restoring. #343153 Rev. B 5/97 8-14 Surfscan 6200 Operations 7. Click on the Start Restore button. The following dialog box appears: Figure 8-14 Disk Access Message Box Click OK to proceed with the restore. 8. The following window appears, showing the progress of the restore: Figure 8-15 Restore Progress Window When prompted, remove the first diskette, insert the next, and click OK or press ENTER. (If restoring from a network, there are no disks to add, and no prompt appears.) 9. When the restore is completed, the following message box appears: Figure 8-16 Restore Complete Message Box Click OK or press ENTER to return to the main Backup window. #343153 Rev. B 5/97 Working with the Database 8-15 10. Click on Quit in the button bar. The following message box appears: Figure 8-17 Exit Backup Message Box Click OK. 8.4 REPORTS This section provides instructions for viewing and printing recipes, the system configuration table, the user configuration table, and exclusion patterns using the database Report utility. To print the system log, see Chapter 11, “ViewLog.” To print data summaries and maps stored in the database, see Chapter 9, “Browser.” To start the database Report utility: Select Report from the Database menu. The database system displays the Reports window: Figure 8-18 Reports Window #343153 Rev. B 5/97 8-16 Surfscan 6200 Operations 8.4.1 VIEWING REPORTS To select and view a Recipe report: 1. From the Select menu, choose Recipes. 2. The following dialog box appears: Figure 8-19 Database Reports Window The Available Recipes list box displays the recipes currently available. The Selected Recipes list box displays the recipes you have selected for the Recipe report. The move buttons allow you to move recipe/substrate size items to or from the Selected Recipes list, as described below: Button Description > Adds the selected recipe to the Selected Recipes list < Removes the selected recipe from the Selected Recipes list >> Adds all recipes to the Selected Recipes list << Removes all recipes from the Selected Recipes list Select the recipe(s) to add to the export list, using the Move buttons. Use the horizontal scroll bars at the bottom of each list to see additional data. 3. #343153 Rev. B 5/97 Click OK to display the selected Recipe report. Working with the Database 4. 8-17 The selected report is displayed in the Report window: Go to last page Go to next page Go to previous page Go to first page Figure 8-20 Recipe Report • By default, the first page of the Recipe report occupies the entire Report window. Each individual recipe in the report is displayed in a single page. To view other pages, use the page control arrows (Fig. 8-20). • If another Recipe report is open before selecting another, it is cleared and replaced by the new Recipe report. Any other reports (System Configuration, User Configuration, or Exclusion Pattern) previously selected are still open, even though they are currently not visible. Any selected reports are listed in the Window menu below the standard menu selections (1–4), allowing you to switch between reports. You can also use CTRL + F6 or CTRL + TAB to switch between reports. • To display two or more reports at the same time, select Tile Horizontally, Tile Vertically, or Cascade from the Window menu. • To close a report window without leaving the Report application, click on Close in the tool bar at the bottom of the Report window (Fig. 8-20). #343153 Rev. B 5/97 8-18 Surfscan 6200 Operations To select and view System Config., User Config., or Exclusion Pattern reports: 1. From the Select menu, choose System Configuration, User Configuration, or Exclusion Patterns. 2. The selected report is displayed in the Report window. • By default, the latest report occupies the entire Report window. If another report of the same type is open before selecting another, it is cleared and replaced by the new report. Any other reports previously selected are still open, even though they are currently not visible. Any selected reports are listed in the Window menu below the standard menu selections (1–4), allowing you to switch between reports. You can also use CTRL + F6 or CTRL + TAB to switch between reports. • To display two or more reports at the same time, select Tile Horizontally, Tile Vertically, or Cascade from the Window menu. • To close a report window without leaving the Report application, click on Close in the tool bar at the bottom of the Report window. 8.4.2 PRINTING REPORTS Reports from the Report application are printed to the current default printer unless another printer is selected from the Print Setup dialog box. NOTE: To print a report, a printer that supports graphics mode must be selected. To select a printer: 1. Choose Print Setup from the Print menu. The following dialog box opens: Figure 8-21 Print Setup Dialog Box 2. Click on the pull-down list under Specific printer. Select one of the following: • HP LaserJet • HP DeskJet and DeskJet Plus • HP PaintJet and PaintJet XL #343153 Rev. B 5/97 Working with the Database 8-19 • Generic/Text Only Best print spooling speed can be achieved when the default printer is a fast, continuous tractor feed printer capable of 66 lines per page. If available, set the default printer to Generic/Text Only. Click the Setup button to verify that printer settings are as follows. Printer: Text Only Paper Size: Letter Paper Feed: Continuous No Page Break: Disabled Printer Codes: (all blank) To print a report: 1. Click on the printer icon in the tool bar at the bottom of the report window (Fig. 820). The following dialog box appears: Figure 8-22 Print Dialog Box 2. Select the desired print options (range of pages, number of copies, and so on). Then click OK to print the report. To fast print to the default printer: 1. Choose Print All from the Report menu. 2. Choose Long Report or Short Report from the submenu. The selected report is sent immediately to the default printer. To print all selected reports: Choose Print all selected from the Print menu. All selected reports are sent immediately to the default printer. A recipe report includes all recipe settings, including the settings of each detailed configuration (scratch, print, save, defect bin splits, and haze bin splits). To exit the Report utility: Choose Exit from the Instrument menu. #343153 Rev. B 5/97 Browser 9 9-1 BROWSER This chapter describes the Browser database utility. Using Browser, you can display wafer summaries and maps stored in the database, display map-to-map, delete wafer records from the database, and perform X-Y coordinate functions. This chapter describes • Starting the Browser utility • Reviewing wafer records • Displaying map-to-map (X-Y option required) • Deleting Summaries and Maps • Extracting wafer records for statistical process control See Chapter 8, “Working with the Database,” for a discussion of database concepts. To start the Browser utility: Choose the Browser icon from the Database Menu. The Browser window appears. The Database menu provides data selection, User ID selection, and wafer record review options. Section 9.2, “Reviewing Data.” Figure 9-1 Browser Menus Other menu titles appear in the menu bar after wafers have been selected or displayed: • The XY menu provides wafer orientation, reference point definition, and Tencor File Format (TFF) file output options. See Chapter 13, “X-Y Coordinates Option,” for details on the X-Y Coordinates Option. • The Print menu provides short and long wafer summary printouts and allows you to choose the text and graphics printers. The Lot Summary choice is not available. • The Display menu provides map and histogram display options. #343153 Rev. B 5/97 9-2 Surfscan 6200 Operations To choose the text and graphics printers: 1. Choose Select Printers from the Print menu. Browser displays the Printer Selection dialog box. Figure 9-2 2. Printer Selection Dialog Box Choose a text and graphics printer from the lists. The system uses the text printer to print summaries and reports and the graphics printer to print wafer maps and screen printouts. One printer can be assigned as both the text and graphics printer. To print wafer maps and screens, the graphics printer must not be assigned to a text-only printer. 3. Choose OK. 9.1 SELECTING SUMMARIES AND MAPS This section describes the steps to take to select wafer summaries and maps stored in the database. The selected records can be viewed, extracted for statistical process control (requires SPC option when records were saved), or deleted. To select wafer records, you choose field values that will be matched against each wafer record in the database. A record must match all entered values to be selected. For quickest results, you should use the fewest values necessary to identify the data to review. HINT: #343153 Rev. B 5/97 Database access time improves when less than 100 records have been selected for review. In general, you can limit the data selection to a smaller number of records by using a narrow date or time range, or by using other key fields that more closely identify the wafer records you want to select. Browser 9-3 To select wafer records: 1. Choose the Database icon from the System menu. Then choose the Browser icon on the Database Menu to start the Browser utility. 2. Choose Set IDs from the Database menu to display the Desired IDs dialog box. Figure 9-3 Desired IDs Dialog Box 3. Select the IDs you wish to use for data selection and choose OK. Only the IDs fields checked can be used for record selection at Step 4. 4. Choose Select from the Database menu to display the Select dialog box: Figure 9-4 5. Data Selection Dialog Box Choose values for one or more selection fields. Only those records matching all the values entered in this dialog box are selected. A blank selection field is a wildcard that matches all field values. If you do not enter any selection values in this dialog box (and Has Map field is Yes/No, Wafer Size is All Sizes, and the Slot Number is Any), Browser selects all wafer records in the database. #343153 Rev. B 5/97 9-4 Surfscan 6200 Operations Data can be selected using the fields described in the following table. Field Name Description Recipe Name of a recipe. The pull-down list gives current recipe names. ID The substrate ID. ID#1 - ID#7 User ID fields. Pull-down lists give current field values. Has Map Indicates whether the record must have a map: Yes, No, or Yes/ No. Yes/No matches data that is with or without a map. Substrate The substrate size. All Sizes matches all wafer sizes. Slot Number Slot number. Any matches any slot number. Defect Range The defect range of interest. Enter the starting defect total in the From box and the ending defect total in the To box. Date Range The creation date range. Enter the starting date in the From field and the ending date in the To field. The following keys can be used within the Date field: . (period) fills in the current date. UNDO erases the date field. SEL displays the calendar dialog box: Use arrow keys or mouse to select a date. Use the scroll arrows to view a different month. Choose OK to use the selected date. Time Range The creation time range. Enter the starting time in the From field and the ending time in the To field. 6. Check the Show box of a value to display the field in the Review window. 7. To view wafers, proceed to Section 9.2, “Reviewing Data.” To delete wafer records, proceed to Section 9.5, “Deleting Summaries and Maps.” #343153 Rev. B 5/97 Browser 9-5 9.2 REVIEWING DATA You can display a summary and map (if any) from the database. 1. Select the data to review as described in Section 9.1, “Selecting Summaries and Maps.” Choose Select to start the database query. When the search completes, Browser displays the Review window if matching records were found: Figure 9-5 Review Data Dialog Box The Review window lists the data that match your selection criteria. Only the fields with their Show check box marked are listed. If Browser finds no matching data, it displays a dialog message. 2. Choose Display to remove the Review window and display the selected data. CAUTION: The Delete and Delete All commands in the Review window permanently delete data from the database. See Section 9.5, “Deleting Summaries and Maps,” for details on deleting data from the database. Proceed to Section 9.3, “Using the Browser Window,” for details on viewing summaries and maps. #343153 Rev. B 5/97 9-6 Surfscan 6200 Operations 9.3 USING THE BROWSER WINDOW When you display data from the database, the Browser window shows the summary, map (if any), and histogram: Figure 9-6 Database Browser Window Viewing and analysis functions are available. See Chapter 4, “Scanning,” for details on these functions. A summary of available functions are listed below. To zoom the map: Double-click the left button or press ZOOM. To print the summary: Choose the type of summary from the Print menu. To change the graphics display: Choose an option from the Display menu. To add or remove haze, defect, or area data: Choose a bin split or overlay control button in the Summary box. #343153 Rev. B 5/97 Browser 9-7 To display the data currently selected from the database: Choose Review from the Database menu. Browser displays the Review window. To zoom the histogram: Double-click the left button in the histogram, or press NEXT repeatedly to select the histogram, and then press ZOOM. To change bin splits: Double-click the right button in the histogram. To view or set X-Y coordinates: See Chapter 13, “X-Y Coordinates Option.” To extract data for use in statistical process control (SPC) (requires the Statistical Process Control Option.): Choose Extract for SPC from the menu bar. Browser reports the number of records that will be extracted. Choose OK to continue or Cancel to select a different set of records. You must associate the data with an existing SPC data file. Select the file from the File Selector dialog box and choose OK. The SPC Display utility automatically runs, showing the default data display. See Chapter 14, “Statistical Process Control Option,” for details on SPC. 9.4 DISPLAYING MAP-TO-MAP The map-to-map feature can be used to display comparisons between two wafers. You can view a difference (common) map, added defects map, removed defects map, before map, and after map. (Map-to-map requires that maps were saved with the X-Y Coordinates Option enabled.) To display map-to-map: 1. Select data with maps from the database using options from the Select menu. 2. Select one map from the Review window. #343153 Rev. B 5/97 9-8 Surfscan 6200 Operations 3. Return to the Review window and select the other map. Choose Map-to-Map. Browser displays the map-to-map window and enables the Map-to-Map menu: Figure 9-7 Map-to-Map Display The wafer window displays the difference map. Before map, after map, and defect total information is listed at the left of the window. You can select a map option from the summary area or display a map by choosing an option from the Map-to-Map menu: Figure 9-8 NOTE: #343153 Rev. B 5/97 Map-to-Map Menu When saving a TFF file using map-to-map, the file contains only the data displayed in the added, removed, or difference map. Browser 9-9 To set the common particle radius: 1. Choose Preferences from the Map-to-Map menu. Browser displays the Map to Map Preferences dialog box: Figure 9-9 2. Map-to-Map Preferences Enter the radius value and choose OK. When particles on both maps that are within this distance of each other, Browser reports them as being common. If the radius value is 0, no common particles will be found. When you choose OK, Browser recalculates the difference map. To view a map of removed defects: Choose Removed Defects Map from the Map-to-Map menu: Figure 9-10 Removed Defects Map #343153 Rev. B 5/97 9-10 Surfscan 6200 Operations To view a map of added defects: Choose Added Defects Map from the Map-to-Map menu: Figure 9-11 Added Defects Map If Browser is already displaying wafers map-to-map, you can return to the Review window and select another map for comparison. Browser displays a selection dialog box, listing the current wafers by date, time and ID: Figure 9-12 Choosing the Second Map Choose one of the current maps to compare to the map selected in the Review window. #343153 Rev. B 5/97 Browser 9-11 9.5 DELETING SUMMARIES AND MAPS You can delete summaries and maps from the database by using the Select dialog box or Review window. Before deleting wafers from the database, export any wafers that you might need in the future. See Chapter 8, “Working with the Database,” for details on backing up the database. See Chapter 10, “Export and Import,” for details on exporting wafers. You can delete selected wafer records by choosing the wafers to delete at the Select dialog box and then • Using the Select dialog box Delete button • Using the Select dialog box Select button to open the Review window and then using the Delete or Delete All buttons. You can delete all wafer records in the database by choosing Delete ALL Summaries and Maps from the Select dialog box. CAUTION: Before deleting Summaries and Maps, be sure that any records you wish to save have been exported or backed up. To delete all wafer records from the database: 1. Choose Select from the Database menu. The Select dialog box appears. 2. Choose Delete ALL Summaries and Maps. A confirmation dialog box appears. Click OK to delete all wafer summaries and maps from the database or choose Cancel to return to the Select dialog without deleting. To review records before deleting: 1. Select wafer records as described in Section 9.1, “Selecting Summaries and Maps.” 2. Choose Select from the Select dialog box to display the Review window. 3. Select the records you want to delete and choose Delete, or choose Delete All to delete all records listed in the window. Browser asks you to confirm the delete operation. 4. Choose OK to confirm the delete records operation or choose Cancel to abort the operation. #343153 Rev. B 5/97 Export and Import 10-1 10 EXPORT AND IMPORT This chapter describes exporting data from the instrument’s database to a floppy disk, to the hard disk, or to a network disk drive (if available). This chapter also describes importing data into the database from an export data file. To export or import data, you must start the Export-Import database utility. To export data, you must select the records to export, specify the export filename, and choose the Export action. To import data, you must specify the import filename and choose the Import action. To view the contents of an import file, you must specify the filename of the import file and choose the Get Import Listing action. 10.1 EXPORT AND IMPORT GUIDELINES Keep the following guidelines in mind when exporting and importing data: • Exporting more than 500 summaries in one export operation can require a long period of time. If you need to export a large number of summaries, divide them into small groups by selecting by date and time ranges. • If you need to move a large number of summaries (over 1000 summaries or 25 maps) from an instrument to a Surfscan 6000-series Desktop computer, use the Backup and Restore utility. Use Backup to make a complete copy of the database, then use Restore to restore the data to the desktop database. • When the database contains a large number (thousands) of summaries and a large number (hundreds) of maps, the Export and Import utility is more effective to move 200 or less summaries or 10 or less maps. 10.2 STARTING THE EXPORT/IMPORT UTILITY To start the Export/Import utility: Choose the Export/Import icon from the Database menu. The utility displays the Database Export-Import window. #343153 Rev. B 5/97 10-2 Surfscan 6200 Operations Title Bar Selection List Selection Buttons Record Count Column Menu Bar Filename Entry Box Status List Box Figure 10-1 Database Export/Import Utility Window The menu bar provides command actions. The filename box is used to enter the export or import filename. The Status box lists the status of an export or import in progress (and lists the contents of an import file when Get Import Listing is used). The selection list shows selected data with check boxes. The selection buttons allow selection of particular items of the each record type (except Calibration Tables, System Config, and User Config). The Count column reports the number of records exported or imported. #343153 Rev. B 5/97 Export and Import 10-3 10.3 VIEWING AN IMPORT LIST To view an import list: 1. Select Import From... from the File menu. The following dialog box appears: Figure 10-2 Import From Dialog Box 2. Choose the destination drive for the export file from the Drives pull-down list. This can be a network drive if you have the DECnet Option or Windows for Workgroups Option. 3. Select the desired import file and click OK. Note: If the file does not have an SFS extension, select All Files (*.*) from the List Files of Type pull-down list. (If you know the path and filename, you can enter the path and filename of the import file directly into the Device\Path\Filename field of the Import/Export window.) 4. Choose Get Import Listing from the menu bar. The following message box appears: Figure 10-3 Import in Progress Message Box As each record in the import listing is read from the import file, it appears in the Status box. Each item in the Status box is prefixed with a blank space to indicate that this record is in the import file but has not yet been imported into the database. You can abort the import listing before it is finished by clicking on the Abort Import button. When the import listing is finished, the Import in Progress dialog box closes. 5. You can scroll the Status box, if necessary, to view the list of all records contained in the import file. #343153 Rev. B 5/97 10-4 Surfscan 6200 Operations 10.4 IMPORTING DATA Before importing data, enter the path and filename of the file on the diskette drive or hard disk directory using the alphanumeric keyboard. CAUTION: All data with identical IDs will be overwritten when importing a new record. A message will appear indicating that the data is being updated if records with the same ID exist. To import all records from a data file: 1. Select Import From from the File menu. The Import From dialog box appears (Fig. 10-2). 2. Choose the destination drive for the export file from the Drives pull-down list. This can be a network drive if you have the DECnet Option or Windows for Workgroups Option. 3. Select the desired import file and click OK. Note: If the file does not have an SFS extension, select All Files (*.*) from the List Files of Type pull-down list. (If you know the path and filename, you can enter the path and filename of the import file directly into the Device\Path\Filename field of the Import/Export window.) 4. Click on Import in the menu bar. The following message box appears: Figure 10-4 All Records Message Box 5. Click OK. The system imports the data from the file to the database. A message box appears that shows the progress of the data transfer; the Status box is also updated. To import selected records from a data file: 1. Select Import From from the File menu. The Import From dialog box appears (Fig. 10-2). 2. Choose the destination drive for the export file from the Drives pull-down list.This can be a network drive if you have the DECnet Option or Windows for Workgroups Option. 3. Select the desired import file and click OK. Note: If the file does not have an SFS extension, select All Files (*.*) from the List Files of Type pull-down list. (If you know the path and filename, you can enter the path and filename of the #343153 Rev. B 5/97 Export and Import 10-5 import file directly into the Device\Path\Filename field of the Import/Export window.) 4. Click on Get Import Listing in the menu bar to generate an import list in the Status box. You can scroll the Status box, if necessary, to view all data contained in the import file. (See Section 10.3, “Viewing an Import List,” for more information about generating an import listing.) 5. To select a single record, click on the desired row in the Status box. To select multiple records, CTRL-click on each desired row. 6. When you have finished selecting records from the list in the Status box, click on Import in the menu bar. The following dialog box appears: Figure 10-5 Selected Import Dialog Box Click Import Selected Records to proceed. (You can also click on Import All Records to import every item in the import file, or Cancel to abort the import process.) 7. The Confirm Write to Database dialog box appears: Figure 10-6 Confirm Write to Database Dialog Box The Confirm Write to Database dialog box allows you several options: • If you do not want to confirm the writing of any of the indicated records to the database, click Yes to All and all the selected records will be written to the database. • You can also confirm the writing of the indicated record to the database by clicking Yes; the utility will proceed, then redisplay the Confirm Write dialog box for the next selected file. Or, you can skip writing the indicated record to the database by clicking No. • At any time that this dialog box is displayed, you can click Yes to All to finish #343153 Rev. B 5/97 10-6 Surfscan 6200 Operations importing all remaining selected records, or Abort Import to stop the importing process. 8. If an item of the same name already exists in the database, the following dialog box will also appear: Figure 10-7 Record Already Exists in Database Dialog Box The Record Already Exists in Database dialog box allows you several options: • If you do not want to be prompted before overwriting of the indicated record and subsequent records to the database, click Yes to All and all selected records with the same name will be overwritten. • You can also confirm the overwriting of the indicated record to the database by clicking Yes; the utility will proceed, then redisplay the dialog box for the next selected file. Or, you can skip overwriting the indicated record and keep the original in the database by clicking No. • At any time that this dialog box is displayed, you can click Yes to All to accept overwriting any remaining selected records that might seem to already exist, or Abort Import to stop the importing process. 9. NOTE: When the import of selected records is complete, all selected records that were imported will be prefixed with the letter I in the Status box. An existing Summary will not be overwritten if a summary in the import file has the same date and time. 10.5 EXPORTING DATA Selection of data for export from the database is managed through the Selection List in the Import/Export window (see Fig. 10-1). Data can be exported to floppy diskettes, to the hard drive, or to a network drive (requires DECnet or Windows for Workgroups options). NOTE: #343153 Rev. B 5/97 When exporting data for use on a Surfscan 6000-series Desktop system, to reduce the Desktop import time avoid exporting more than 500 wafer summaries in one export operation. Use the Backup and Restore application when you want to move a large number (over 1000 wafer summaries or 25 wafer maps) to a Desktop system. Export and Import 10-7 First, you select a file to export to. Then, you create an export list by selecting data from the database. To create an export file: 1. Select Export To... from the File menu. The following dialog box appears: Figure 10-8 Export To Dialog Box 2. Choose the destination drive for the export file from the Drives pull-down list. This can be a network drive if you have the DECnet Option or Windows for Workgroups Option. 3. Enter a filename for the export file. The filename must follow the DOS convention. When ready, click OK. (If you know the path and filename, you can enter the path and filename of the import file in the Device\Path\Filename field of the Import/Export window.) 10.5.1 SELECTING DATA FOR EXPORT–AN OVERVIEW You can select for export individual Recipes, Summaries/Maps, PSL Spheres on Substrates records, Exclusion Patterns, and Access Codes. Calibration Tables are exported in their entirety, and there is only a single System Configuration and User Configuration table. Table 10-1 is a general guide to the storage requirements for different types of data. #343153 Rev. B 5/97 10-8 Surfscan 6200 Operations Table 10-1 Approximate Storage Space for Surfscan Data Record Type Approximate Storage Required Recipe 300 bytes per record Summaries/Maps: Summary only 1 KB per record With map Varies by substrate diameter and number of defects collected PSL Spheres on substrate 700 bytes per record Exclusion Patterns 120 bytes per record Access Codes 50 bytes per record Calibration tables 51 KB total System configuration 50 bytes total User configuration 60 bytes total Selecting data for export differs slightly for each type of data. The procedures for selecting each type are described in the following sections. 10.5.2 SELECTING RECIPES To select all recipes for export: 1. Click on the check box to the left of the word Recipes in the Selected Items to be Exported section (see Fig. 10-1). 2. When you click on Export, the following message box appears: Figure 10-9 Export All Records Message Box Click Yes to proceed, or No to cancel. #343153 Rev. B 5/97 Export and Import 10-9 To select recipes for export: 1. Click on Select next to the word Recipes in the Selected Items to be Exported section (see Fig. 10-1). The system displays the Select Recipes to Export dialog box: Figure 10-10 Select Recipes to Export Dialog Box The Possible Values list box displays recipes currently available in the database. The Selected Values list box displays recipes selected for export. The move buttons allow you to move recipe items to or from the Selected Values list, as described below: Button Description > Adds the selected recipe to the Selected Values list < Removes the selected recipe from the Selected Values list >> Adds all recipes to the Selected Values list << Removes all recipes.from the Selected Values list 2. Select the recipe(s) to add to the export list, using the Move buttons. Use the horizontal scroll bars at the bottom of each list to see additional data. 3. Choose OK to add these selections to the export list. The number of selected Recipes appears in the Count column to the right. #343153 Rev. B 5/97 10-10 Surfscan 6200 Operations 10.5.3 SELECTING SUMMARIES AND MAPS Wafer summaries and maps can be selected for export, as described in this section. To select all wafer records from the database: 1. Choose select Summaries/Maps from the Export/Import Select menu. The following dialog box appears. Figure 10-11 Data Selection Dialog Box 2. Choose values for one or more selection fields. Only those records matching all the values entered in this dialog box are selected. A blank selection field is a wildcard that matches all field values. If you do not enter any selection values in this dialog box (and Has Map field is Yes/No, Wafer Size is All Sizes, and the Slot Number is Any), Import/Export selects all wafer records in the database. Data can be selected using the fields described in the following table. #343153 Rev. B 5/97 Field Name Description Recipe Name of a recipe. The pull-down list gives current recipe names. ID The substrate ID. ID#1 - ID#7 User ID fields. Pull-down lists give current field values. Has Map Indicates whether the record must have a map: Yes, No, or Yes/ No. Yes/No matches data that is with or without a map. Substrate The substrate size. All Sizes matches all wafer sizes. Slot Number Slot number. Any matches any slot number. Defect Range The defect range of interest. Enter the starting defect total in the From box and the ending defect total in the To box. Export and Import 10-11 Field Name Description Date Range The creation date range. Enter the starting date in the From field and the ending date in the To field. The following keys can be used within the Date field: . (period) fills in the current date. UNDO erases the date field. SEL displays the calendar dialog box: Use arrow keys or mouse to select a date. Use the scroll arrows to view a different month. Choose OK to use the selected date. Time Range The creation time range. Enter the starting time in the From field and the ending time in the To field. 10.5.4 SELECTING PSL SPHERES ON SUBSTRATE RECORDS Selected PSL spheres on substrate records can be exported, as described in this section. To select all PSL Spheres on Substrate records for export: 1. Click on the check box at the left of the PSL Spheres on Substrates row in the Selected Items to be Exported section (see Fig. 10-1). 2. When you click on Export, the following message box appears: Figure 10-12 Export All Film Records Message Box Click Yes to proceed, or No to cancel. #343153 Rev. B 5/97 10-12 Surfscan 6200 Operations To select PSL Spheres on Substrate records for export 1. Click on Select next to the PSL Spheres on Substrates row in the Selected Items to be Exported section (see Fig. 10-1). The system displays the Select dialog box: Figure 10-13 Selecting Films to Export Dialog Box The Possible Values list box displays Film records currently available in the database. The Selected Values list box displays Film records selected for export. The move buttons allow you to move items to or from the Selected Values list, as described below: Button Description > Adds the selected Film record(s) to the Selected Values list < Removes the selected Film record(s) from the Selected Values list >> Adds all Film records to the Selected Values list << Removes all Film records from the Selected Values list 2. Select the Film records(s) to add to the export list, using the Move buttons. Use the horizontal scroll bars at the bottom of each list to see additional data. 3. Choose OK to add these selections to the export list. The number of selected Film records appears in the Count column to the right. #343153 Rev. B 5/97 Export and Import 10-13 10.5.5 SELECTING EXCLUSION PATTERNS Selected exclusion patterns can be exported to floppy disk or to the hard disk. To select all Exclusion Patterns for export: 1. Click on the check box at the left of the Exclusion Patterns row in the Selected Items to be Exported section (see Fig. 10-1). 2. When you click on Export, the following message box appears: Figure 10-14 Export All Exclusion Patterns Message Box Click Yes to proceed, or No to cancel. To select Exclusion Patterns for export 1. Click on Select next to the Exclusion Patterns row in the Selected Items to be Exported section (see Fig. 10-1). The system displays the Select dialog box: Figure 10-15 Selecting Exclusion Patterns to Export Dialog Box The Possible Values list box displays Exclusion Patterns currently available in the database. The Selected Values list box displays Exclusion Patterns selected for export. The move buttons allow you to move items to or from the Selected Values #343153 Rev. B 5/97 10-14 Surfscan 6200 Operations list, as described below: Button Description > Adds the selected Exclusion Patterns(s) to the Selected Values list < Removes the selected Exclusion Patterns(s) from the Selected Values list >> Adds all Exclusion Patterns to the Selected Values list << Removes all Exclusion Patterns from the Selected Values list 2. Select the Exclusion Patterns(s) to add to the export list, using the Move buttons. Use the horizontal scroll bars at the bottom of each list to see additional data. 3. Choose OK to add these selections to the export list. The number of selected Exclusion Patterns appears in the Count column to the right. 10.5.6 SELECTING ACCESS CODES Selected user accounts can be exported to floppy disk or to the hard disk. To select all Access Codes for export: 1. Click on the check box at the left of the Access Codes row in the Selected Items to be Exported section (see Fig. 10-1). 2. When you click on Export, the following message box appears: Figure 10-16 Export All Access Codes Message Box Click Yes to proceed, or No to cancel. #343153 Rev. B 5/97 Export and Import 10-15 To select Access Codes for export 1. Click on Select next to the Access Codes row in the Selected Items to be Exported section (see Fig. 10-1). The system displays the Select dialog box: Figure 10-17 Selecting Access Codes to Export Dialog Box The Possible Values list box displays Access Codes currently available in the database. The Selected Values list box displays Access Codes selected for export. The move buttons allow you to move items to or from the Selected Values list, as described below: Button Description > Adds the selected Access Code(s) to the Selected Values list < Removes the selected Access Code(s) from the Selected Values list >> Adds all Access Codes to the Selected Values list << Removes all Access Codes from the Selected Values list 2. Select the Access Code(s) to add to the export list, using the Move buttons. Use the horizontal scroll bars at the bottom of each list to see additional data. 3. Choose OK to add these selections to the export list. The number of selected Access Codes appears in the Count column to the right. #343153 Rev. B 5/97 10-16 Surfscan 6200 Operations 10.5.7 SELECTING CALIBRATION TABLES The following tables can only be exported as a set: Equidistant sampling (EDS), collector uniformity data, XY alignment data, and haze calibration data. To select calibration tables for export: Click on the check box at the left of the Calibration Tables row in the Selected Items to be Exported section (see Fig. 10-1). 10.5.8 SELECTING CONFIGURATION TABLES System and User configuration tables can be selected for export, as described in this section. To select System Configuration data for export: Click on the check box at the left of the System Config row in the Selected Items to be Exported section (see Fig. 10-1). To select User Configuration for export: Click on the check box at the left of the User Config row in the Selected Items to be Exported section (see Fig. 10-1). #343153 Rev. B 5/97 ViewLog 11-1 11 VIEWLOG This chapter describes viewing, printing, and deleting entries from the System Log. The Database ViewLog utility allows you to view all or selected entries, to format the log listing, to print log reports, and to delete entries from the log. The instrument stores the system log entries (events) specified in the User Configuration dialog box. See Chapter 7, “Setting Up the System.” NOTE: It is good practice to regularly view the system log and delete unwanted entries. This keeps the database smaller and more manageable. To start the ViewLog utility: Choose the ViewLog icon from the Database Menu. The instrument displays the System Log window: Figure 11-1 System Log Window The System Log window displays a blank log listing. The View, Report, and Delete menus can be used, as follows: • The View menu allows you to view all or selected records from the System Log, to specify sorting options, to choose the columns to list, and to clear the listing. See Section 11.1, “Viewing the System Log.” • The Report menu allows you to print a system log report using the current selected log entries. You can preview the report on the screen before printing. See Section 11.2, “Viewing and Printing System Log Reports.” • The Delete menu allows you to delete entries from the System Log. You can delete all log entries or selected log entries. • The Help menu allows you to run the Surfscan Help system. You can select the main help contents screen, select help on using the Viewlog utility, or select instructions on using the help system. You can also display the About Viewlog message box. #343153 Rev. B 5/97 11-2 Surfscan 6200 Operations 11.1 VIEWING THE SYSTEM LOG This section describes how to view entries in the System Log. You can • View all entries or select the log entries to view • Sort the entry list • Move columns from one location to another • Change column widths To view all entries in the system log: 1. If any entries currently appear in the log, choose Clear All Selections from the View menu. 2. Choose All from the View menu. The utility lists all log entries. To view selected entries: See Section 11.3, “Selecting Entries Using Dialog Boxes.” To sort entries by entry number, date and time, user, or access class: 1. Select and view log entries. 2. Choose By Order from the View menu. ViewLog displays the View By Order dialog box: Figure 11-2 View By Order Dialog Box 3. Choose Asc (ascending order), Desc (descending order), or None for each field. 4. Choose OK. The View by Order dialog box disappears and the System Log is redisplayed in the desired order. #343153 Rev. B 5/97 ViewLog 11-3 To choose the columns to list: 1. Choose By Columns from the View menu. The utility displays the View By Columns dialog box: Figure 11-3 View By Columns Dialog Box 2. Select one or more columns to display. Then choose OK. The current entry list is modified as specified in this dialog box. To change the width of a column: 1. In the column head area (the top of the column), move the mouse pointer over the column’s right boundary line. The pointer changes into a expand/reduce cursor: Expand/reduce cursor Figure 11-4 Changing the Width of a Column 2. Drag the mouse left or right to change the column width. #343153 Rev. B 5/97 11-4 Surfscan 6200 Operations 11.2 VIEWING AND PRINTING SYSTEM LOG REPORTS ViewLog provides two report formats: short and long. A system log report is a formatted list of entries. The entries listed in a report are the records selected through and in the order shown in the System Log window. The fields listed in the reports cannot be changed. A full system log report can be printed to the default printer by choosing Print All from the Report menu. Speed improvements of from 3 to 12 times can be achieved. This option speeds system log printing by avoiding the use of special characters, graphics modes, and other features that slow print speed. 11.2.1 CHOOSING A PRINTER Reports from the ViewLog application are printed to the current default printer unless another printer is selected from the Print Setup dialog box. NOTE: To print a system log report, a printer that supports graphics mode must be selected. To select a printer: 1. Choose Print Setup from the Report menu. The following dialog box opens: Figure 11-5 Print Dialog Box 2. Click on the pull-down list under Specific printer. Select one of the following: • HP LaserJet • HP DeskJet and DeskJet Plus • HP PaintJet and PaintJet XL • Generic/Text Only. Best print spooling speed can be achieved when the default printer is a fast, continuous tractor feed printer capable of 66 lines per page. If available, set the default printer to Generic/Text Only. Click the Setup button to verify that printer settings are as follows. #343153 Rev. B 5/97 ViewLog 11-5 Printer: Text Only Paper Size: Letter Paper Feed: Continuous No Page Break: Disabled Printer Codes: (all blank) 11.2.2 VIEWING A REPORT You can view a report on the screen by opening the Viewlog Report window. To view a report: 1. Choose View and Print from the Report menu. 2. Choose either Short Report or Full Report from the submenu. The utility displays the Viewlog Report window: Tool bar Figure 11-6 System Log Report The Report preview window displays the first page of the report. The window contains menus for paging through the report, changing the page view size, and printing the report. To scroll through the current page, use the scroll bars. #343153 Rev. B 5/97 11-6 Surfscan 6200 Operations To display a page from the report: The page buttons in the tool bar control which page you view. The counter between the page buttons identifies which page of the total number of pages is currently displayed. Display first page Display previous page Display last page Display next page Page currently displayed Figure 11-7 System Log Page Buttons Click the first page button to display the first page of the report, the previous page button to display the previous page, the next page button to display the next page, or the last page button to display the last page of the report. Note: In a report with many entries, the Last Page and First Page actions can require several seconds to complete. To change the page view: Click on the magnifying glass icon in the tool bar to reduce the page to fit within the View Report window; click on the magnifying glass again to return to normal view. To close the active report window: Click Close in the tool bar at the bottom of the Viewlog Report window (Fig. 11-6). 11.2.3 PRINTING A REPORT You can print short or full System Log reports. You can also print a fast report to the default printer and export a report to a text file. To view and print a report from the System Log window: 1. Choose View and Print from the Report menu. 2. Choose Short Report or Full Report from the submenu. The Viewlog Report window appears (Fig. 11-6). #343153 Rev. B 5/97 ViewLog 11-7 3. Click on the Print icon in the tool bar at the bottom of the Viewlog Short (or Long) Report window. The Print dialog box appears: Figure 11-8 Print Dialog Box 4. Select the desired print options (range of pages, number of copies, and so on). Then click OK to print the report. To fast print to the default printer: 1. Choose Print All from the Report menu. 2. Choose Long Report or Short Report from the submenu. The selected report is sent immediately to the default printer. To export to a text file: 1. Choose Export to Text from the Report menu. 2. Choose Long Report or Short Report from the submenu. The following dialog box appears: Figure 11-9 Save Export Text As Dialog Box 3. Select the desired path, and enter a file name in the File Name field. You can also select a file name that already exists (if any) from the list box below the File Name field. 4. Click OK, and the text file is created in the selected directory. #343153 Rev. B 5/97 11-8 Surfscan 6200 Operations 11.3 SELECTING ENTRIES USING DIALOG BOXES This section describes how you can select entries to view in the System Log window. You can list and print selected entries based upon message type, user accounts, access class, or dates. For example, you can list all user logon entries, all logons by a specific user, or all logons over a given period of time. Using the Selected item in the View menu, you create a selection criteria. This criteria is tested against all the entries in the System Log. Entries that match the criteria can be listed in the System Log window. To view the entries that match your current selection criteria, choose All from the View menu. See Section 11.1, “Viewing the System Log.” 11.3.1 SELECTING BY LOG MESSAGES To select log messages to list: 1. Choose Selected from the View menu. The utility displays the View Selected... dialog box: Figure 11-10 View Selected Dialog Box 2. #343153 Rev. B 5/97 Click the check box in front of Log Message entry on the left side of the dialog box. The button to the right is activated to allow you to define selection criteria. ViewLog 11-9 3. Click the Log Message Selections button. The following dialog box appears below the View Selected dialog box: Figure 11-11 Log Message Selection Dialog Box 4. 5. Choose one or more message types to list by first selecting from the Possible Log Messages in the list box on the left side, then using the move buttons, as follows: Button Description > Adds the selected message type to Selected Log Messages list < Removes the selected message type from Selected Log Messages >> Adds all message types to Selected Log Messages << Removes all message types from the Selected Log Messages list When all desired types of messages are selected, choose OK to select by the messages chosen. 11.3.2 SELECTING BY USER To select users to list: 1. Choose Selected from the View menu. The utility displays the View Selected... dialog box (Fig. 11-10). 2. Click the check box in front of the User entry on the left side of the dialog box. The button to the right is activated to allow you to define selection criteria. #343153 Rev. B 5/97 11-10 Surfscan 6200 Operations 3. Click the User Selection... button. The following dialog box appears below the View Selected dialog box: Figure 11-12 User Selection Dialog Box 4. 5. Choose one or more message types to list by first selecting from the Possible User in the list box on the left side, then using the move buttons, as follows: Button Description > Adds the selected message type to Selected User list < Removes the selected message type from Selected User >> Adds all message types to Selected User << Removes all message types from the Selected User list When all desired types of messages are selected, choose OK to select by the messages chosen. 11.3.3 SELECTING BY ACCESS CLASS To select an access class: 1. Choose Selected from the View menu. The utility displays the View Selected... dialog box (Fig. 11-10). 2. Click the check box in front of the Access Class entry on the left side of the dialog box. The button to the right is activated to allow you to define selection criteria. #343153 Rev. B 5/97 ViewLog 11-11 3. Click the Access Class Selection... button. The following dialog box appears below the View Selected dialog box: Figure 11-13 Access Class Selection Dialog Box 4. 5. Choose one or more message types to list by first selecting from the Possible Access Class in the list box on the left side, then using the move buttons, as follows: Button Description > Adds the selected message type to Selected Access Class list < Removes the selected message type from Selected Access Class >> Adds all message types to Selected Access Class << Removes all message types from the Selected Access Class list When all desired types of messages are selected, choose OK to select by the messages chosen. 11.3.4 SELECTING BY DATE To select a date or range of dates: 1. Choose Selected from the View menu. The utility displays the View Selected... dialog box (Fig. 11-10). 2. Click the check box in front of the User entry on the left side of the dialog box. The button to the right is activated to allow you to define selection criteria. #343153 Rev. B 5/97 11-12 Surfscan 6200 Operations 3. Click the Date/Time Selection button. The following dialog box appears below the View Selected dialog box: Figure 11-14 User Selection Dialog Box 4. Select the starting date and time from the pair of horizontal scroll bars on the left side of the dialog box as follows: • Scroll the Date horizontal scroll bar until the selected date appears above the scroll bar. • Scroll the Time horizontal scroll bar until the selected time appears above the scroll bar next to the selected date. 5. Select the ending date and time from the pair of horizontal scroll bars on the right side of the dialog box as follows: • Scroll the Date horizontal scroll bar until the selected date appears above the scroll bar. • Scroll the Time horizontal scroll bar until the selected time appears above the scroll bar next to the selected date. 6. #343153 Rev. B 5/97 Choose OK to add the date range to the selection criteria. ViewLog 11-13 11.4 SYSTEM LOG ENTRY DESCRIPTIONS The table below describes the information that is listed in the System Log Description field. Log Message Description field contains: Caution Error message. Error Message for the most severe error. Mode Change New mode (application) name or DOS command line. New Recipe Old recipe -> new recipe. Recipe Change Name of recipe viewed or changed. Status Status message. The least severe error. System Configuration (blank) System Startup System startup information. The user name field contains the last logged user, when Last User Name for System Startup is checked in the User Configuration dialog box. User Configuration (blank) User Logoff User name. User Logon User name. If logon is through the Setup application, this field lists the current user name and logon user name separated by an arrow, for example Analyst -> Op1. Warning Error number in parentheses and warning description. For example: (1000) No summaries found meeting specified criteria. #343153 Rev. B 5/97 Diagnostic Tools 12-1 12 DIAGNOSTIC TOOLS This chapter describes Surfscan 6000-series diagnostic tools, Diagnostic tools are available to users having Analysis Manager access. The tools include • Early warning system • Status application • Scribe mark exclusion zones (SMEZ) 12.1 EARLY WARNING SYSTEM This section describes the Early Warning System (EWS). EWS allows you to monitor and record instrument performance and to set alarm limits for functions. EWS can monitor the following instrument functions: • Forward sweep time • Reverse sweep time • Scanner period—the total of the forward and reverse sweep times • Scanner symmetry—the difference between the forward and reverse sweep times • Laser current at all gains • PMT voltage at each gain setting The Early Warning System collects data from instrument hardware, plots the data in function charts, and saves the data to disk. • EWS can sample data every 100 scans. • EWS can display the data values for the preceding 200 seconds and can plot data within the selected display interval of seconds, minutes, hours, days, or months. • EWS data can be saved to disk at any time. EWS data files are standard DOS files. Using the EWS application, you can set data collection parameters for each instrument function, set graphic display options for each function and for entire panels, and specify EWS graph options and alarm conditions. EWS provides three levels of control: function controls, panel controls, and EWS controls, as described in this chapter. #343153 Rev. B 5/97 12-2 Surfscan 6200 Operations To start the EWS application: Double-click the Early Warning icon from the System Menu. The instrument displays the Early Warning System window, showing Panel 1. Figure 12-1 Early Warning System Window A panel can contain up to eight functions. The chart for each function displays the function’s data values versus time. For forward sweep time, for example, sweep time is plotted in microseconds versus days of instrument operation. You can change display and collection options for a function by choosing from the Variables menu. Display options also can be chosen by clicking on one of the icons at the top of the function chart: Switches the chart to log scale or linear scale. Switches the time interval to D (days), H (hours), M (minutes), S (seconds), moon + M (months). #343153 Rev. B 5/97 Turns on trend data. Switches the display type to points, steps, continuous, or histogram. Switches alarm limits to bidirectional, unidirectional, or none. Diagnostic Tools 12-3 To display a function using full screen: Double-click on the function or select the function and choose Function from the menu bar. To return to panel view from full screen function view: Double-click on the full screen function or choose 3: Panel from the menu bar. To view another panel: Choose Next or Prev from the menu bar, or choose an item from the Panel menu. 12.1.1 FUNCTION CONTROLS For each function you can view data values and set display and collection options. 12.1.2 VIEWING DATA VALUES You can view the current or previous 100 data values in tabular form. To view function data for the selected function: Choose Data from the Variables menu. EWS displays the Data dialog box. Figure 12-2 Data Dialog Box Data values preceded by a pound sign (#) have been calculated by the system. Values without a pound sign are measured values. To view the previous 100 values, choose Previous 100. To change the time scale for the function, choose Change Scale and choose a new time scale from the Time Scale dialog box. #343153 Rev. B 5/97 12-4 Surfscan 6200 Operations 12.1.3 FUNCTION DISPLAY Function displays consist of a unit of measurement for data values, such as microseconds, a display interval, a display scale (linear or logarithmic), limit controls, upper and lower threshold settings, and the display type. To view display options for the selected function: 1. Choose Display from the Variables menu. EWS displays the Display dialog box. Figure 12-3 Display Dialog Box 2. #343153 Rev. B 5/97 Set display options as follows: Display Option Description Units The unit of measurement for the Y-axis. Display Scale The scale: linear or logarithmic. Limits The number of limits to use. Bidirectional sets the lower and upper limits and warnings as shown by Threshold values. Unidirectional sets upper limits and warning. Display Interval The time interval (months, days, hours, minutes, or seconds) and the period of time to display. If the interval from the first and last data point is less than the selected display interval, EWS displays only that interval. Diagnostic Tools 12-5 Display Option Description Display Type The method used to plot data: data points, steps, continuous, or histogram. Thresholds The upper limit and warning level, the lower limit and warning level, the expected nominal value, and minimum or maximum values, as applicable. The types of threshold parameters listed are determined by the Limits setting. Red lines are limits, yellow lines are warnings, a light blue line is the nominal value, and gray lines are minimum or maximum chart levels. Trend Data Enables trend data display. Default values for functions are listed in Table 12-1. Table 12-1 Default EWS Function Values Function Upper Limit Upper Warning Nominal Lower Warning Lower Limit Units Forward sweep 4000 3980 2940 1900 1880 microsec Reverse sweep 4000 3980 2940 1900 1880 microsec Scanner period 8000 7980 5890 3800 3780 microsec Scanner symmetry 120 115 0 115 -120 microsec Laser @ 12 mw 20.0 19.5 10 1.5 1.0 amps Laser @ 24 mw 30.0 29.5 16.5 3.5 3.0 amps PMT @ Gain 1 500 495 300 110 100 volts PMT @ Gain 2 640 630 380 130 120 volts PMT @ Gain 3 840 830 490 150 140 volts PMT @ Gain 4 940 930 555 180 170 volts PMT @ Gain 5 1200 1180 700 290 270 volts PMT @ Gain 6 1400 1380 825 270 250 volts PMT @ Gain 7 1600 1580 935 290 270 volts PMT @ Gain 8 1800 1780 1060 340 320 volts 12.1.4 COLLECTION PARAMETERS Collection options for a function can be viewed. These options are factory set and should not be changed. #343153 Rev. B 5/97 12-6 Surfscan 6200 Operations To view collection parameters for the selected function: 1. Choose Collection from the Variables menu. EWS displays the Data Collection Control dialog box. Figure 12-4 Data Collection Control Dialog Box You can choose the data type and the compression method for a function. Data is compressed in 60-second, 60-minute, 24-hour, and 30-day intervals. 2. Choose one of the compression methods described below: • Average: use the average data value for the period. • Maximum: use the maximum data value for the period. • Minimum: use the minimum data value for the period. • Last: use the last data value for the period. • Random: select a random data value from the period. 3. #343153 Rev. B 5/97 Choose OK to set new collection parameters or Cancel to close the dialog box. Diagnostic Tools 12-7 12.1.5 PANEL CONTROLS EWS provides three system panels. Each panel can contain up to eight functions. You can set display options for all EWS panels. To view a panel: Choose a panel from the Panel menu or choose Prev or Next from the menu bar. To switch from full screen function view to panel view: Choose 3: Function from the menu bar. To set panel display options: Choose Panel Display from the Variables menu. EWS displays the Panel dialog box. Figure 12-5 Early Warning System Panel Dialog Box Choose default options, as required and click OK to accept the changes or Cancel to ignore the changes. Choose Clear to set all panel display options to default values. #343153 Rev. B 5/97 12-8 Surfscan 6200 Operations 12.1.6 EWS CONTROLS You can select preference and alarm settings for EWS and you can clear all or selected functions and data values. 12.1.7 ALARMS EWS can alarm when a limit or warning level has been exceeded. The alarm can be a beep, flashing EWS driver icon, or both. To set alarms: 1. Choose Alarms from the Variables menu to display the Alarms dialog box. Figure 12-6 Alarms Dialog Box 2. #343153 Rev. B 5/97 Select alarm options and choose OK to enable selected alarms. You can choose to have EWS beep, flash the EWS driver icon, or both for signaling an alarm. Alarm Option Description Alarm On Out Of Limits Values Alarm when a data value exceeds a limit for the function Alarm On Warning Levels Alarm when a warning level is exceeded Alarm On Projected Limits Alarm when a function’s data is projected to exceed a limit Alarm On Projected Warnings Alarm when a function’s data is projected to exceed a warning level Diagnostic Tools 12-9 12.1.8 PREFERENCES Using the Preferences dialog box, you can choose to display vertical grids and dotted lines on function charts. To set preferences: 1. Choose Preferences from the Variables menu. EWS displays the Preferences dialog box. Figure 12-7 Preferences Dialog Box 2. Choose options and click OK. Preference Description Large Graph Vertical Grids Show vertical grids on full screen function charts Small Graph Vertical Grids Show vertical grids on function charts shown in panel displays Dotted Lines On Large Grids Show dotted lines on full screen function charts Dotted Lines On Small Grids Show dotted lines on function charts shown in panel displays 12.2 SYSTEM STATUS The System Control and Status application allows you to view and print system status and version information. To start the System Status and Control application: Choose the Status icon from the Diagnostics Tools menu. The System Control and Status window appears. To view system status: Choose System Status from the View menu to display a status window showing the current system date and time, available memory, disk space information, current #343153 Rev. B 5/97 12-10 Surfscan 6200 Operations user name, and current user type. Figure 12-8 System Status NOTE: To view the current disk and database usage, double-click on the disk icon contained in the Tencor Instruments banner at the top of the screen. To view version information: Choose Versions from the View menu to display a status window showing the current date and time, hardware version, Microsoft Windows version, and Surfscan 6000-series software version: Figure 12-9 System Versions To print a status report: Choose an item from the Print menu. #343153 Rev. B 5/97 Diagnostic Tools 12-11 To arrange status windows: Choose options from the Window menu as follows: Option Action Tile Shows all open windows on the screen at one time Cascade Arranges windows in an overlapping fashion Arrange Icons Arranges icons at the bottom of the screen Close All Closes all open status windows Tiled windows all fit within the application window frame: Figure 12-10 Tiled Windows #343153 Rev. B 5/97 12-12 Surfscan 6200 Operations Cascaded windows overlap each other: Figure 12-11 Cascaded Windows 12.3 SCRIBE MARK EXCLUSION ZONES When a scribe mark is placed on wafers for use as a reference point by a SEM, the scribe mark and associated surface damage can be excluded from scan summary statistics by defining a scribe mark exclusion zone (SMEZ). From one to five zones can be defined. Events within a SMEZ are captured by a scan, sized, located by X and Y coordinates, and painted on maps. However, the events are not included in scan summary statistics (for example, LPD counts, area count, and bin counts) and the data within the zones are not used for sorting passed and failed wafers or in mapto-map statistics. Events within a SMEZ are not reported in Tencor File Format (TFF) files, except as selected reference points. Haze maps and haze summary statistics are not affected by the data in scribe mark exclusion zones. When a SMEZ intersects an edge or flat/notch exclusion zone, the edge or flat/notch exclusion zone takes precedence. (A SMEZ cannot be used to measure the surface outside of the flat or notch exclusion zone.) Data within a SMEZ are drawn in the final wafer maps but are not drawn in the real time map. #343153 Rev. B 5/97 Diagnostic Tools 12-13 12.3.1 CONFIGURING SMEZ Scribe mark exclusion zones are defined in the SMEZ.INI file. SMEZ.INI is a text file that can be edited using the Microsoft Windows Notepad accessory. Users with Analysis Manager access can edit the SMEZ.INI file by clicking the Diagnostic Tools icon and then clicking the SMEZ.INI icon. For best results, set wafer orientation and coordinate origin location before defining scribe mark exclusion zones. A SMEZ is defined by specifying its center point (scribe mark) coordinates, its width and height, and angle. A SMEZ is defined relative to the orientation and coordinate system specified in the User Configuration dialog box. If you change the wafer orientation or flat or notch rotation, the SMEZ center point will also have to be changed. Also, if the origin location is changed, SMEZ center point will have to be changed. 12.3.2 APPLYING SMEZ DEFINITIONS Scribe mark exclusion zones are applied to data that is stored in the database. When a map is saved the SMEZ definition is saved with it. When a map is retrieved through the Browser application and rotated, and no SMEZ definitions were saved with the wafer, the current SMEZ definitions for that recipe, if any, will be applied. 12.3.3 CREATING SCRIBE MARK EXCLUSION ZONES This section describes one method for defining a SMEZ. To create a SMEZ: 1. NOTE: Select wafer orientation and coordinate origin from the User Configuration dialog box. Whenever you change wafer orientation or origin, SMEZ definitions must be redefined. 2. Open the SMEZ.INI file. The file can be opened by clicking the Diagnostic Tools icon in the System menu and then clicking the SMEZ.INI icon. 3. Scan a wafer. 4. Rotate the wafer to the edge feature. 5. Zoom and wafer map. Click once in the panning window to display the magnetic cursor. Move the magnetic cursor to the defect of interest. 6. Note the X and Y coordinates at the cursor. 7. Return to the SMEZ.INI file. Press CTRL + ESC to display the Task List, then double-click on the Notepad entry. #343153 Rev. B 5/97 12-14 Surfscan 6200 Operations Or, press ALT + TAB to cycle through open windows and display the Notepad. 8. Enter the X and Y coordinates of the scribe mark (SMEZ center point) and the dimensions of the SMEZ. The format of the SMEZ.INI file is [recipe name] RECT1= x y dx dy θ RECT2= x y dx dy θ RECT3= x y dx dy θ RECT4= x y dx dy θ RECT5= x y dx dy θ Where: Parameter Description recipe name Name of the recipe enclosed in brackets [ ]. RECT1= RECT2= RECT3= RECT4= RECT5= Scribe mark exclusion zone definitions. From one to five zones can be entered for each recipe. x X-coordinate of the scribe mark. y Y-coordinate of the scribe mark. dx Width of the scribe mark exclusion zone in microns. dy Height of the scribe mark exclusion zone in microns. θ Rotation angle, -90 to +90 degrees. The SMEZ keeps its defined width and height and rotates around its center point. Use a positive value to rotate the SMEZ counterclockwise. Use a negative value to rotate the SMEZ clockwise. Figure 12-12 shows a scribe mark exclusion zone and the resulting SMEZ definition. #343153 Rev. B 5/97 Diagnostic Tools 12-15 Scribe mark at (10000, 5000) +Y Scribe mark exclusion zone 800 µm 1200 µm -X +X -Y SMEZ.INI definition: RECT1=10000 5000 1200 800 0 Figure 12-12 SMEZ Definition Example Figure 12-12 shows the scribe mark exclusion zone rotated +45 degrees. Scribe mark at (10000, 5000) +Y Scribe mark exclusion zone 800 µm To rotate counterclockwise, use a positive angle 1200 µm -X +X -Y SMEZ.INI definition: RECT1=10000 5000 1200 800 45 Figure 12-13 SMEZ Definition Example, Rotated +45 Degrees The SMEZ is rotated around its center. #343153 Rev. B 5/97 X-Y Coordinates Option 13-1 13 X-Y COORDINATES OPTION The X-Y Coordinates Option allows you to apply a user-definable coordinate system to a substrate, to rotate the map to an edge feature, and to enable map-to-map displays in Browser. User-defined coordinates from a scanning electron microscope (SEM) or other device can be applied by selecting two features on the map as reference points, assigning coordinates to these reference points, and applying the new coordinates to the map. The Surfscan 6000series instrument automatically relocates the origin, based upon the coordinates you supplied. This chapter discusses • Rotating a map automatically or manually. • Assigning reference points to a map. The points can be assigned user-specified coordinates. • Applying user coordinates to a map. • Sending coordinates and size to the COM3 port. NOTE: To permit map-to-map displays in Browser, one or both maps must have been saved with the X-Y Coordinates Option enabled. In the Scan and Browser windows, X-Y Coordinate actions can be selected from the XY menu: These X-Y Coordinate actions can be used during the scan process in the Scan window or applied to wafers already saved in the database in the Database Browser window. NOTE: If TFF files are to be used on the Tencor DataHub Data Analysis System, Surfscan SWIFT/Station, or Surfscan Revisit Station, set the origin position to Center of Wafer. See Chapter 7, “Setting Up the System,” for details on setting substrate orientation and origin location. #343153 Rev. B 5/97 13-2 Surfscan 6200 Operations 13.1 ROTATING A MAP In the Scan and Browser windows, a map can be rotated to a flat or notch position, as specified by the orientation settings. To have the instrument automatically rotate maps to the selected edge feature: Set the Auto Align (X-Y) recipe parameter to On. See Chapter 5, “Recipes.” To rotate a map manually to the selected edge feature: In the Scan window or Browser window choose Rotate to Edge Feature from the XY menu. 13.2 TRANSLATING X-Y COORDINATES The Surfscan 6000-series instrument allows you to apply user coordinates from a SEM or other device to a map. The translation process consists of the following steps: define two points on the map, assign user coordinates to these points, and apply these coordinates to the map. The instrument relocates the origin as necessary. When defining a reference point on a map, locate a feature using the zoom feature, assign a reference number to the feature, and save the reference point. If user coordinates from a SEM or other device are available, you can assign them as you locate the reference point. If user coordinates are not available, coordinates can be assigned at a later date, as described below. To define an X-Y reference point: 1. Display a map. Double-click the mouse in the map or press ZOOM to magnify the map. The instrument displays the Panning window at the upper left. 2. Move the cross-hair pointer in the Panning window to the general area of a feature you want to use as a reference point. Press ZOOM to activate the zoom cursor. #343153 Rev. B 5/97 X-Y Coordinates Option 3. 13-3 In the wafer map, move the cursor to the feature. Figure 13-1 Moving the Cursor to an LPD You can move the cursor to a given feature using the mouse or from feature to feature with the arrow keys. 4. Press 1 to define reference point #1 or press 2 to define reference point #2. Points can be defined in either order. If the point you specify already exists on the map, the old reference point is deleted. The instrument displays the Reference Coordinate dialog box: Figure 13-2 Reference Coordinate Dialog Box 5. If user coordinates for the reference point are known, enter them in the dialog box X and Y fields. If user coordinates for the point are not known, you can leave the #343153 Rev. B 5/97 13-4 Surfscan 6200 Operations fields set to 0. Choose Save. The instrument displays the point number next to the feature in the panning window and in the map: A defined reference point Figure 13-3 Defined X-Y Reference Point 6. Return to Step 2 if you want to define the other reference point or to change the location of the reference point you just defined. 7. Press CANCEL to exit the zoom mode. #343153 Rev. B 5/97 X-Y Coordinates Option 13-5 To change coordinates for reference points: 1. Choose Reference Points from the XY menu. The instrument displays the Reference Coordinates dialog box, showing the current coordinates for point 1 and point 2. Standard Tencor Instruments coordinates are listed on the right. 2. User coordinates are listed on the left, under SEM. Enter new coordinates for each reference point, for example: Figure 13-4 Reference Coordinates Dialog Box 3. Choose Apply to Wafer to apply the user coordinates to the map. The origin point is repositioned as necessary: Origin Figure 13-5 Applying User Coordinates to the Wafer Map When you apply reference points to a wafer, the points appear in both defect maps and haze maps. #343153 Rev. B 5/97 13-6 Surfscan 6200 Operations To remove user coordinates from the map: 1. Choose Reference Coordinate from the XY menu. Browser displays the Reference Coordinates dialog box. 2. Choose Un-apply. The user coordinates are removed from the map, and Tencor Instruments system coordinates are applied. To delete a reference point: 1. Press ZOOM to magnify the map and display the Panning window. 2. Move the cross hairs to the general area of the point you want to delete and press ZOOM. Move the cursor to the point and press its point number, 1 or 2. The instrument displays the Reference Coordinate dialog box. 3. Choose Delete Reference Point button. The point is deleted, and you can define this point at another feature point on the map. Note: The point number is not erased from the Panning window and map until the screen is redrawn. To delete both reference points: 1. Display the map. 2. Choose Reference Coordinate from the XY menu. The instrument displays the Reference Coordinates dialog box. 3. Choose Delete Reference Points. To assign reference points to any location on the map: 1. Zoom the map to the location. 2. Select a magnification level by pressing SEL. 3. Press NEXT. The map remains zoomed but is no longer in zoom mode. 4. Move the target cursor to the location. Press 1 to define reference point 1 or press 2 to define reference point 2. The application displays the Reference Coordinates dialog box. Enter coordinate values and choose Save to define the point. To transmit defect coordinates and size to the COM3 port: NOTE: The Expanded I/O Option is required for sending data over COM3. 1. Zoom the wafer map and move the particle cursor to the defect of interest. 2. Press SEL. The coordinates and size are sent as a series of ASCII characters over the COM3 port. The format of the string is: X, Y, Size cr/lf. Where X and Y are the defect coordinates, Size is the defect size, and cr/lf are carriage return and line feed characters (ASCII 13/ASCII 10). #343153 Rev. B 5/97 Statistical Process Control Option 14-1 14 STATISTICAL PROCESS CONTROL OPTION This chapter describes the Surfscan 6000-series Statistical Process Control (SPC) package, a software billable option. The SPC feature provides an SPC Editor, SPC Display utility, and a database extraction function using Browser. • Using the SPC Editor, you can create an SPC definition for displaying control charts and tabular data. You can specify the data to analyze, the upper and lower chart limits, and the default data display (X-MR chart, C-Chart, tabular, or any combination of these displays). Fab and Process IDs can be entered for each SPC definition. • Using the SPC Display utility, you can display the current data assigned to an SPC file in chart, table, or chart and table form. You also can change the range of points used in charts and tables. • SPC charts can be printed using the standard instrument screen print features. • The contents of an SPC data file can be printed in tabular format. • Browser is used to extract wafer records from the database. The extracted data is stored in an SPC data file. NOTE: For an introduction to statistical process control and for instructions on using SPC control charts, see Section 14.5, “SPC Tutorial.” 14.1 EDITING SPC DATA FILES An SPC data file should be created for each process step you wish to analyze. The data file specifies the upper and lower chart limits, the default data display, and category of data to use. You create an SPC data file using the SPC Editor. Data can be stored into an SPC file by using the Extract to SPC feature in Browser. #343153 Rev. B 5/97 14-2 Surfscan 6200 Operations To create an SPC data file: 1. Start the SPC Editor by clicking on the SPC Editor icon in the Database menu or by choosing Editor from the SPC Display window. Figure 14-1 SPC Editor 2. Enter the Fab ID and Process ID in the fields provided. 3. The upper and lower limits should be set for each data count category. To specify limits, select a data count category option from the group at the right of the dialog box and choose Set Limits from the Limits menu. The SPC Editor displays the Limits dialog box: Figure 14-2 Set SPC Limits Dialog Box Enter upper and lower limit values and choose OK. NOTE: #343153 Rev. B 5/97 When data has been extracted to the SPC file, you can have the SPC Editor calculate upper and lower limits. Statistical Process Control Option 14-3 4. To save the SPC definition, choose Save As from the File menu. The SPC Editor displays the File Selector dialog box. 5. Enter a new SPC data filename and choose OK. To edit an SPC file: 1. Start the SPC Editor by clicking on the SPC Editor icon in the Database menu or by choosing Editor from the SPC Display window. The SPC Editor dialog box appears. 2. Choose Open from the File menu. At the File Selector dialog box, choose the file to open. 3. Change settings, as required. 4. To calculate limits, select a data category option from the group at the left of the dialog box and choose Calculate Limits from the Limits menu. SPC displays the Calculate SPC Limits dialog box: Figure 14-3 Calculate SPC Limits Dialog Box Enter the first point and last point to use in the limit calculation and choose OK. See Section 14.5, “SPC Tutorial,” for details on limit calculations. 5. To save the new settings, choose Save from the File menu. #343153 Rev. B 5/97 14-4 Surfscan 6200 Operations 14.2 EXTRACTING DATA FOR SPC To analyze wafer data using statistical process control, you must select the wafer records from the database, extract the records, and associate the records with an existing SPC data file. The extracted data replaces any existing wafer data in the SPC file. To extract data from the database for SPC analysis: 1. Open the Browser utility as follows: at the System menu choose the Database icon. The Database menu appears. Choose the Browser icon. 2. Select the wafers to extract from the database, as follows: • Choose Select from the Database menu. Browser displays the Select dialog box. • Using the selection fields, choose the wafers to extract and choose OK. Browsers displays the list of wafers in the Review window. If the list is correct, proceed to step 3. If the list is not correct, return to step 2. 3. Choose Extract to SPC from the Browser menu bar. Browser displays the number of records to extract. Choose OK. 4. Browser asks for the SPC filename. Select an SPC file from the list and choose OK. The data is copied into the SPC file. Any data currently in the SPC file is replaced by the new data. Browser automatically runs the SPC display utility where you can display an X-MR chart, C-chart, data table, or combination of displays. See Section 14.3, “Displaying SPC Data,” for details. #343153 Rev. B 5/97 Statistical Process Control Option 14-5 14.3 DISPLAYING SPC DATA Data stored in an SPC file can be displayed in an X-MR chart, C-chart, data table, or combination of displays using the SPC Display utility. To start the SPC Display utility: Choose the SPC Display icon from the Database menu. The SPC Display window appears. Figure 14-4 SPC Display Window To display an SPC data file: 1. Open the data file to display by choosing Open from the File menu and choosing the SPC file. SPC files have an SPC file extension. 2. The SPC Display utility automatically displays the current data in the default format. To view other formats, choose from the Display menu. You can organize data display windows using the actions in the Windows menu. 3. To change the range of points, choose Display Range from the Display menu. The Select Display Range dialog box appears. Enter the first and last point to be used in the range and choose OK. 4. To change the upper limits, lower limits, or default display for the SPC file, use the SPC Editor. #343153 Rev. B 5/97 14-6 Surfscan 6200 Operations 14.4 PRINTING SPC DATA SPC charts and tables can be printed using the screen print feature and the SPC data file can be printed using the File Print command. To print the contents of an SPC file: 1. Make sure that Windows Printer Setup is set for landscape orientation. 2. Choose Print from the File menu. To set landscape printing: 1. Minimize the current Surfscan window by clicking on the minimize button at the top of the window. 2. Run the Windows Control Panel application. 3. Run the Printer accessory. 4. Choose the printer from the Installed Printers list. 5. Choose the Setup button to view the printers setup options. 6. In the Orientation group, click Landscape. 7. Close all Control Panel dialog boxes and close the Control Panel. 8. Double-click on the Surfscan icon at the bottom of the screen. After printing SPC data, be sure to reset the printer to Portrait orientation for normal Surfscan operation. 14.5 SPC TUTORIAL This section describes the fundamentals of statistical process control. This section presents a brief description of statistical process control methodology, a description of control charts, and a discussion of control limits and rules, and implementation guidelines. 14.5.1 INTRODUCTION There are many ways to describe a body of data. The simplest and least descriptive is to list data in tabular form. Further, data can be described by expressing one or more specific characteristics of the data, such as the mean, median, range, or standard deviation. However, these descriptive statistics provide no information about the overall relationship between data points. A better way to interpret a body of data is to display it graphically. While graphical summaries of data are not as specific as numeric summaries, they often can reveal features that are not otherwise recognizable. Histograms, Pareto charts, pie charts, and trend charts are all examples of graphically summarizing a set of data. A histogram plots the distribution of frequency of data. #343153 Rev. B 5/97 Statistical Process Control Option 14-7 A Pareto chart plots characteristics of the data on one axis and the frequency of those characteristics on the other axis. Generally, the characteristics are arranged in decreasing frequency. A Pareto chart could plot defect type versus number of each defect type, for example. A pie chart is a plot of data represented by a circle divided into pie-shaped segments. Each segment represents a characteristic of the data set. The size of each segment is proportional to the percentage of the full data set represented by the characteristic. A trend chart is a plot of data that preserves the time-order sequence in which the values occur. A trend chart is also called a running record. Graphical summaries provide a good snapshot of the overall relationship between data points, but they do not predict what the next data point will be, what its relationship will be within the present data set, or whether the data is in control. The tool that is used for these kinds of analyses is statistical process control. Statistical process control (SPC) is the use of statistical techniques, such as control charts, to control and improve the capability of a process by analyzing the process or the output of the process. Control charts present a graphical representation of the data and provide statistical analyses in the form of control limits. Control charts enable you to characterize the statistical or random variations in your process. This is powerful for two reasons. First, it allows you to identify and eliminate any special causes or non-random forces that might be acting. Secondly, it prevents you from trying to fix problems that are inherent in the process. The key is to achieve statistical control—the condition of describing a process from which all special causes have been removed, evidenced on a control chart by the absence of points beyond the control limits and by the absence of non-random patterns or trends within the control limits. The benefits of a successful statistical process control program are • predicting out-of-control conditions before they occur • making decisions based upon data rather than best guesses • preventing the “fire-fighting” mode • providing a systematic approach and a pro-active mode of operation • providing constant and rapid response to line problems • enabling continuous improvement A successful SPC program enables you to study the history of a process, learn from your mistakes, and solve problems more quickly. 14.5.2 CONTROL CHARTS The type of control chart you use to track a process depends upon the type of data you are collecting and the sample size. There are two categories of data types used to describe characteristics of a semiconductor manufacturing process: attributes and variables. #343153 Rev. B 5/97 14-8 Surfscan 6200 Operations Attributes are characteristics of the process that can be counted and that describe non-conformities (defects) or nonconforming articles (defectives). For example, the number of failed die per wafer, number of particles per wafer, or percentage of failed wafers per lot are attributes. Attributes are counted using a discrete scale and are described using Poisson statistics. Poisson distributions have the following characteristics: • The distribution is skewed. • The data can range from zero to plus infinity. • The data range is discrete. • The distribution is uniquely defined by its mean. Variables are characteristics of the process that can be measured. For example, line width in micrometers, film thickness in Angstroms, or resistance in Ohms, are variables. Variables are measured using a continuous range of values and are described using Gaussian (normal) statistics. Normal distributions have the following characteristics: • The distribution is symmetric and bell-shaped. • The data can range from minus infinity to plus infinity. • The data range is continuous. • The distribution is uniquely defined by its mean and standard deviation. If the characteristic to be tracked is an attribute, described by Poisson statistics, a C-chart is needed. A C-chart is valid for all sample sizes, provided that the sample size is constant. If the characteristic to be tracked in a variable, described by normal statistics, an X/MR-chart is used, where MR stands for moving range. The moving range is calculated by taking the difference between successive data points. Particle counts, being attributes, should be charted using a control chart technique based on Poisson statistics, that is, a C-chart. To construct a C-chart: 1. Select a (constant) sample size, usually one wafer. 2. For each inspection unit, count the number of defectives, C. 3. After 20 data points have been collected, calculate the process average, C-bar, and the process standard deviation, S. C-bar = total number of defects/number of samples S = SQRT(C-bar) 4. Plot the total counts, C. 5. Calculate the upper control limit (UCL) and lower control limits (LCL): UCL = C-bar + 3 * SQRT(C-bar) LCL = C-bar - 3 * SQRT(C-bar) or zero, whichever is larger #343153 Rev. B 5/97 Statistical Process Control Option 6. 14-9 Plot UCL and LCL. To construct an X/MR chart: 1. Sample size = 1. 2. For each data point, calculate the moving range, R. The moving range is the absolute value of the difference between today’s measurement and yesterday’s measurement. There will not be a moving range for the first point. 3. After 20 data points have been collected, calculate the process average, X-bar, and the process moving range average, MR-bar. 4. Plot the measurement on the X-MR chart. 5. Calculate the upper control limit (UCL) and lower control limit (LCL). 6. Plot UCL and LCL. When the chart has been constructed and the limits calculated, subsequent data points can be tested against these limits to determine whether a point is in-control or out-of-control. Control status can be determined using a set of rules, as developed by AT&T and based upon probability concepts. The probability of a pattern of events occurring by chance alone is calculated. If that probability is less than 1%, then the last point in that pattern is deemed out-of-control. For C-charts and X/MR charts, the following rules apply: • One point outside the control limits. • Five rising or falling consecutive segments. • Six consecutive up and down pairs (only applies during setup). Additionally, X/MR charts can be tested against the following rules: • Two out of three consecutive points beyond zone B (two sigma). • Four out of five consecutive points beyond zone C (one sigma). • Seven points on one side of the center line. • Thirteen consecutive points in zone C (only applies during setup). • Five consecutive points outside of zone C (only applies during setup). #343153 Rev. B 5/97 14-10 Surfscan 6200 Operations 14.5.3 IMPLEMENTATION GUIDELINES The following implementation guidelines should be observed: • Valid control limits can be calculated after 20 data points have been collected. However, trial control limits can be calculated before 20 points have been collected so that you have limits for comparing succeeding measurements. • Prioritize your equipment and processes. Implement your SPC program in phases rather than starting everything at one time. • Break the equipment into sub-processing steps and monitor the steps independently. This will make troubleshooting easier. • For each process and piece of equipment define out-of-control actions. List the specific steps that should be taken when a process is flagged as out-of-control. The aim is to bring the process back into control. • Print out charts and annotate them with historical information. For example, when was the last preventive maintenance, what was done to bring a process back into control, when were wafers broken in the system, and so forth. • Use the charts to target problem areas. Run short loop experiments to attempt to determine what reduces particles. #343153 Rev. B 5/97 Patlite Option 15-1 15 PATLITE OPTION 15.1 INTRODUCTION A Patlite provides a highly visible indicator of a tool’s status. The multi-light device can be used to signal that an instrument is in production or the reason that it is not. The current Patlite implementation allows for customer definition of the lighting corresponding to specific instrument states. This approach involves some relatively simple hardware and new Surfscan software, which translates instrument states into commands to the new hardware. 15.1.1 SYSTEM CONFIGURATION A check box appears in the System Configuration titled “Transmit Patlite Messages.” When checked, the Patlite will be lit corresponding to the instrument’s state. 15.1.2 LIGHTING OPTIONS The implementation allows for any of the three lights (red, yellow and green) to be set independently. Lights can be tuned on, off, or set to flashing. All lights can be turned off simultaneously, or cleared. 15.2 STATUS INFORMATION AVAILABLE Selected portions of the current status of the machine are always available to the Patlite control software. This part of the software will be made aware of any changes in the status of the instrument at the time the changes occur. Each of the tables below lists a keyword (Value) and a description of the state of the Surfscan when that value is true. The keywords shown are specified by the user as described later in this appendix. The following information is available to the Patlite control software: 15.2.1 SCAN STATE At the present time, 18 states are defined for the Scan application. The following 18 states plus several combined states are available for Patlite purposes: Table 15-1 Patlite Scan States Value Description NoScan Scan application is not running. Ready Scan application is idle. WaferInSystem Scan application is idle but there is a wafer on the puck. Cataloging A cassette is currently being cataloged. #343153 Rev. B 5/97 15-2 Surfscan 6200 Operations Table 15-1 Patlite Scan States (continued) Value Description Loading A wafer is currently being loaded from the cassette onto the puck. Scanning A wafer is currently being scanned. Unloading A wafer is currently being unloaded from the puck back into the cassette. Homing One or both of the indexers are being returned to the home position. Raising Preparing the cassette for a scan from an uncataloged cassette. Waiting Next wafer has been loaded to the puck and is ready for scanning; still processing data from the previous scan Holding A wafer is currently being held on the puck, possibly for a microscan operation. Its cassette slot position is known. Direct Idle, only one wafer from the cassette has been selected for scanning Sizing Measuring the size of a wafer in preparation for a safe unload Paused Idle, paused between wafers in a cassette Recovering Scan application is recovering from a previous motion system error Robotics In Robotics mode but no motions are in progress RoboticsInit Positioning pedestals in preparation to enter Robotics mode Handoff Low level puck and wafer handling remote commands are possible in this mode Running Scan application is performing any one of the following processes: Cataloging Cassette Loading Wafer Scanning Wafer Unloading Wafer Homing Indexer(s) Raising Cassette Waiting Manual Scan application is performing any one of several special operator-intensive tasks: Holding Wafer Direct Access Sizing wafer Paused Recovering #343153 Rev. B 5/97 Patlite Option 15-3 15.2.2 CASSETTE STATE The following states represent the status of cassettes on the indexers: Table 15-2 Patlite Cassette States Value Description NoCassette No cassette is present on either indexer. Left A cassette is present on the left indexer but not on the right. Right A cassette is present on the right indexer but not on the left. Both A cassette is present on both indexers. Either A wafer is currently being loaded from the cassette onto the puck. Scanning A cassette is present on one or both of the indexers. CASSETTE DONE STATE Two states are defined that indicate the status of the processing of the wafers in a cassette: Table 15-3 Patlite Cassette Done States Value Description Unknown Processing of all wafers in a cassette is not taking place or is not complete. Complete Processing of all wafers in a cassette is complete; the Lot summary is currently displayed on the screen. (Will not get this status when in Remote mode, controlled by the host.) ERROR MESSAGE STATE Eleven states are defined that indicate the status of error messages displayed on the screen or sent to the host: Table 15-4 Patlite Error Message States Value Description NoError No error message is currently displayed or unresolved. ScreenError An error message requiring user intervention is presently displayed on the screen. ScreenCaution A caution message requiring user intervention is presently displayed on the screen. ScreenWarning A warning message requiring user intervention is presently displayed on the screen. ScreenStatus A status message requiring user intervention is presently displayed on the screen. #343153 Rev. B 5/97 15-4 Surfscan 6200 Operations Table 15-4 Patlite Error Message States (continued) Value Description HostError An error message has been sent to the host but has not yet been cleared by the host. HostCaution A caution error message has been sent to the host but has not yet been cleared by the host. HostWarning A warning message has been sent to the host but has not yet been cleared by the host. HostStatus A status message has been sent to the host but has not yet been cleared by the host. ScreenMsg A message (error, caution, warning, or status) requiring user intervention is presently displayed on the screen. HostMsg A message (error, caution, warning, or status) has been sent to the host but has not yet been cleared by the host. GEM CONTROL STATE Two states are defined for GEM 92 and five states are defined for GEM 93. These states indicate the Local/Remote (and OffLine/OnLine for GEM 93) state of GEM/SECS: Table 15-5 Patlite Error Message States Value Description Local GEM 92: GEM is operating locally. GEM 93: GEM is OnLine but is being operating locally. Remote GEM 92: GEM is being remotely operated by the host. GEM 93: GEM is OnLine and is being operated remotely by the host. OffLineEqOff GEM 92: N/A GEM 93: GEM is OffLine / Equipment is OffLine. OffLineAttemptOn GEM 92: N/A GEM 93: GEM is OffLine, attempting to go OnLine. OffLineHostOff GEM 92: N/A GEM 93: GEM is OffLine / host is OffLine. OffLine GEM 92: Never in this state. GEM 93: GEM is in one of the two OnLine states (Local or Remote). OnLine GEM 92: Always in this state. GEM 93: GEM is in one of the three OffLine states listed above. #343153 Rev. B 5/97 Patlite Option 15-5 GEM LINK STATE Three states are defined that indicate the Link State of the GEM/SECS module: Table 15-6 Patlite GEM Link States Value Description Disabled Communication with the host is disabled on the Surfscan. Operator intervention is required to attempt to communicate with the host. Enabled Communications with the host are enabled, but the host has not yet responded. Communicating Communications with the host are proceeding normally. 15.3 CONFIGURING THE PATLITE 15.3.1 ASCII FILE FORMAT So far, we have defined the bit patterns that must be sent to the Patlite decoder box to turn various lights on and off. Also, we have defined several classes of status information that are available to control the Patlite lights. This section describes how to bind various Surfscan states to lights on a Patlite device. Briefly, the idea is to process data from an ASCII file that maps combinations of states to light displays. Each time the status changes, the new state is compared to entries in the list derived from the ASCII file. When a match is found, the corresponding light configuration is sent to the Patlite device. Each entry in the ASCII file is in the following general format: <Status> = <LightCondition> <Status> is specified as follows: • Select either nothing or one keyword from any of the Tables 15-1 through 15-6 shown earlier in this section. The order of the keywords is unimportant since no keywords are duplicated in any of the tables. When no keyword from one of the tables is specified, that portion of the status information is disregarded. • For a match to occur and the corresponding <LightCondition> to be selected, each specified status must currently exist on the Surfscan. Those status conditions that are not specified (tables from which no keyword has been selected) are ignored and might have any value. <LightCondition> is specified as follows: Clear <AddressOfLight> <Action> The keyword Clear is optional. When present, all existing lights are turned off before the specified action takes place. #343153 Rev. B 5/97 15-6 Surfscan 6200 Operations <AddressOfLight> specifies which light is to be acted upon and is selected from one of the following keywords: • None • Green • Yellow • Red • White • Blue • Beeper <Action> specifies what is to be done to the selected light and is selected from one of the following keywords: • Off • On • FlashSlow • FlashFast The following rules are followed when specifying and processing the ASCII file: • The fully qualified name of the file is C:\SOVA\DATA\PATLITE.DEF. A menu selection will be made available that will invokes Notepad to edit this file. • The file is read and its syntax checked during system startup. If any error is found, processing of the file stops and a message box is displayed that clearly states the error that was found along with the line number on which it was found. The Surfscan continues to initialize normally but the Patlite feature is disabled. • Each line in the file is assumed to end with CR LF (a carriage return and line feed). Lines that are empty and those that begin with either a space or an asterisk (*) are considered to be comments and are ignored. • Each keyword must be separated by one or more spaces. Spaces on either side of the equal sign are optional. • All keywords can be written in mixed case as desired. All syntax checks are performed without regard to case. • When looking for a match of the current Surfscan status and a <Status> file entry, searching always proceeds from the first file entry in the file toward the last. Whenever a match is found, the corresponding <LightCondition> is sent to the Patlite decoder box. • If no file entries match the current Surfscan status, no changes to the Patlite are made. #343153 Rev. B 5/97 Patlite Option 15-7 • This syntax does not easily permit the illumination of more than one light at a time. The beeper can be turned on in conjunction with a light only if a separate status can be identified for which the beeper must be turned on. • If required, an extension to this syntax can be made that easily permits the illumination of more than one light. However, at the present time, the illumination of more than one light at a time or support for a beeper is not required. 15.3.2 AN EXAMPLE The following example demonstrates how to configure version 3.2 software for the Patlite. REQUIREMENTS For this example, consider that the requirement for lighting corresponding to instrument states is as follows: Light Description Red, flashing Indicates failure, abort, immediate assistance is required Red, steady Indicates the equipment is not fully capable, an alarm has been acknowledged but not corrected Yellow, flashing Indicates the alarm is unacknowledged and needs assistance (for example, during unload cassette, completion or run, PM, and so on) Green, flashing Indicates the equipment is capable of performing all functions but no product is running Green, steady Indicates that the equipment is fully capable and is running wafers IMPLEMENTATION The following entries in the ASCII file satisfy (as closely as possible) the above requirements. Note that the order of these entries is important. Table 15-7 Example Patlite ASCII FIle Entries Line in ASCII File Explanation NoScan NoError = Clear Yellow FlashSlow IF Scan is not running, AND no error condition is currently displayed on the screen or has been sent to the host, THEN clear all lights and flash the yellow one. ScreenMsg = Clear Red FlashSlow HostMsg = Clear Red FlashSlow IF any error message is currently being displayed on the screen OR any error message has yet to be acknowledged by the host, THEN clear all lights and flash the red one. Note that since these two entries handle ALL possible error conditions, all remaining entries effectively specify NoError for the ErrorMessageStatus. #343153 Rev. B 5/97 15-8 Surfscan 6200 Operations Table 15-7 Example Patlite ASCII FIle Entries (continued) Line in ASCII File Explanation Complete = Clear Yellow FlashSlow IF the Lot Summary is currently being displayed, THEN clear all lights and flash the yellow one. Ready = Clear Green FlashSlow WaferInSystem = Clear Green FlashSlow Manual = Clear Green FlashSlow IF Scan is idle OR has a wafer on the puck OR is performing an operator intensive function THEN clear all lights and flash the green one. Running = Clear Green On IF Scan is in some normal phase of the wafer scan process THEN clear all lights and turn the green one on. COMMENTS: • If no Surfscan condition clearly meets the requirements for a steady red light, the steady red light is not used. • Error messages displayed on the screen while the Scan application is not running (for example, while Calib or Setup is running) do not cause a flashing red display. NoScan has priority by being first in the file. • The presence or absence of a cassette on either indexer seems to be unimportant and is thus ignored. If you required the light to flash yellow if the Scan was ready but had no material to process, you could add the following entry after the Complete = Clear Yellow FlashSlow entry: Ready NoCassette = Clear Yellow FlashSlow· • The low order Handoff mode and special Robotics modes of Scan are ignored since they do not apply. These states never occur. #343153 Rev. B 5/97 Glossary Glossary-1 GLOSSARY 6XX0 Term used to specify any of the Surfscan 6000-series instruments. Access code The characters a user must enter at the logon screen. Application A software program such as the Scan application. Application icon Graphic symbol representing a software application. The System Menu displays application icons. Application window The main window opened by an application. Area The term that identifies events larger than the maximum particle size for a scan (as set by the recipe’s Area From parameter). Defect maps display areas as a series of chords. Area From A recipe parameter that sets the maximum size for LPDs during data collection. Defects larger than the Area From value are classified as areas. Arrow keys The arrow keys on the operator keypad. These keys can be used to highlight a menu item or dialog box option or to move a text or graphics cursor. Attributes In statistical process control, qualitative data that can be counted. Examples include defects per wafer, number of failed die per wafer, defect density per wafer. Attributes are measures on a discrete scale and use Poisson statistics. Automatic operation A scan option that allows each selected wafer in a cassette to be scanned automatically in sequence. See scan mode and scan sequence. Back up To save data from the instrument’s hard disk to diskettes or a network drive (if available). The data can be restored at a later time. Bin splits Color-coded defect or haze ranges. The instrument displays data on maps and histograms using the color-coding scheme. Data within a bin split range can be enabled or disabled by clicking a bin split button in the wafer summary. Bin split ranges can be changed through the histogram. #343153 Rev. B 5/97 Glossary-2 Surfscan 6200 Operations C-chart In statistical process control, an attribute control chart used to track the number of non-conformities with a constant sample size, for example, to track the total number of defects per wafer. Calibration curve A curve that matches cross section (scattering efficiency) measurements to defect diameters for a given substrate, or that matches measured haze to actual haze. Cassette catalog A part of the Scan window. When a cassette is loaded on an indexer and cataloged, the cassette catalog displays which slots are occupied. The cassette catalog can be used to select one or more wafers for scanning. Catalog (a cassette) To list the cassette slots occupied by wafers. Catalog scan To catalog and then scan wafers from a cassette. The cassette can be cataloged by slot number in 1 to 25 order or 25 to 1 order. Choose To pick a menu item or other item that starts an action. You can choose an item using the mouse or keypad. Chord A line representing one sweep in an area defect. A series of chords forms an area. See area. Click Pressing and releasing the left or right mouse button without moving the mouse. Click the left button on a menu title, on an icon, on a dialog box option or command button, or in a window to select the item. Left and right buttons have different functions when clicking. Compare to double-click. Coefficient of variation A calculated value used when calibrating PSL spheres or haze. This value is the product of variations in instrument sensitivity, sampling errors, Poisson noise broadening, and the natural dispersion of PSL sphere sizes. For a given sample, the coefficient of variation = standard deviation/mean x 100. Control chart In statistical process control, a graphic representation of a characteristic of a process showing plotted values of some statistic gathered from that characteristic and one or two control limits. A control chart is used to judge if a process is in control and as an aid in achieving and maintaining statistical control. Control limit In statistical process control, a line or lines on a control chart that are used as a basis for judging the significance of variations from subgroup to subgroup. Variation beyond a control limit is evidence that special causes are affecting the process. Control limits are calculated from process data. #343153 Rev. B 5/97 Glossary Glossary-3 Cursor An object on the screen that can be moved with the mouse or arrow keys and that allows the user to locate or edit data. See limit cursor, particle cursor, and text cursor. Cycle control A control within dialog boxes that when clicked presents options one at a time. Click the left button to cycle forward through the list of options. Click the right button to cycle backward. Data compression A technique used to reduce the amount of disk space required to store data. DataHub A Tencor Instruments data analysis system. Database A collection of data organized by records. The instrument’s database can contain data summaries, maps, user IDs, system log records, recipe records, and other data. DECnet A local area network protocol that allows the instrument to transfer files to a host computer. Desktop The software running on a desktop computer rather than an instrument. Data data can be analyzed by importing it into the desktop. Dialog box A rectangular box on the screen that can contain a combination of lists, options, data entry fields, and command buttons. A dialog box appears when the instrument needs more information before performing an operation. Direct access mode See One-Wafer mode. Disk space The total amount of space available on the hard disk. Free disk space is the amount of disk space unused. Directory Computer files are stored on the computer’s hard disk in directories. The directory name identifies the location where the files are stored. See Path. DOS Disk Operating System, also called MS-DOS. The central program used to control and manage the computer system. Double-click The mouse action performed when you press and release the mouse button twice in rapid succession. The first click selects the item and the second click performs the action associated with the item. When #343153 Rev. B 5/97 Glossary-4 Surfscan 6200 Operations you double-click the left button on an application icon, the application starts. Left and right buttons have different functions when double-clicking. Compare to click. Drag The mouse action performed when you hold down the mouse button and move the mouse. Dragging can be used to choose a menu item and to move a graphics cursor. Drive (disk) The disk drive identifier. A single character followed by a colon. For example, C: refers to drive C. Edge exclusion The area at the edge of the substrate that is excluded from data collection during a scan. Exclusion regions Regions on a substrate that are excluded from data collection. Export To save selected data, such as recipes, wafer summaries, and wafer maps, to diskette. Exported data can be imported into another Surfscan 6000-series system. See import. Field A rectangle in a dialog box used for entering data. The text cursor (a vertical bar) generally appears in the first field in a dialog box. Also, a data item stored in a database. A collection of related fields is called a record. Gain A recipe parameter that sets the overall measurable defect or haze data collection range. Graphics cursor Graphics cursors appear as vertical bars in histogram windows and can be used to change defect bin splits. Haze Background scatter caused by imperfections in the surface of the substrate, such as intrinsic substrate roughness and polishing damage. Haze data can be displayed in a map, histogram, or both. Haze is measured in parts-per-million (ppm) of the incident beam. Haze average The total haze in parts-per-million divided by the measurable wafer surface area. Haze peak The maximum measured haze value. Haze region The percentage of the measurable wafer surface area containing haze. Histogram A plot of data that has possible values on one axis and frequency of those values on the other axis. In the Scan application, the histogram displays the distribution of defects or haze from the last scan. When #343153 Rev. B 5/97 Glossary Glossary-5 a defect map is displayed, the histogram shows defect size versus counts. When a haze map is displayed, the histogram shows haze value (ppm) versus counts. Histogram zoom Changing the defect or haze range through the histogram. Hold (a scan) Press the MICROSCOPE key. When a scan is on-hold, a MicroView can be performed on the wafer. Home The position of the indexer when it is fully raised. Import To load data previously saved in an export file. See export. Indexer The mechanism that moves the cassette up and down. Keypad Operator keypad provided on the instrument console. The keypad can be used to enter data, move cursors, and execute commands. Light point defect An event characterized as a particle. Limit marker The marker used to change defect or haze bin limits in the histogram. Local area network A computer network connecting a host computer to other nodes on the network. The system provides a DECnet local area network option. Locator The plate upon which a cassette rests when in the indexer. The locator must be changed for different cassette sizes. Log off Sign off from the instrument by choosing the Log Off icon from the System Menu. Log on Sign on to the instrument by entering your access code. Lot ID The ID assigned to a wafer lot. This ID can be entered in the Scan application. Lot summary A summary of the data collected for wafers in a cassette. The instrument displays a lot summary when a scan sequence completes or when you press HOME after a scan. #343153 Rev. B 5/97 Glossary-6 Surfscan 6200 Operations LPD cursor The cursor used in a magnified (zoomed) wafer map. This cursor automatically snaps to the nearest LPD. The particle box displays the location and size of the particle. Map-to-Map A defect comparison technique. The before map and after map are compared and the instrument generates an added defects map (defects found on the after map but not on the before map), removed defects map (defects found on the before map but not on the after map), and common defects map (defects common to both maps). Measurable (wafer) surface area The substrate area measured by the instrument. The total substrate area minus the edge exclusion and exclusion regions, if any. Menu A list of commands. Two types of menus are supported — full-screen menus and drop-down menus. Full-screen menus such as the System Menu display application icons. You can start an application by double-clicking the left button on its icon. A menu in the menu bar opens when clicked. See menu bar. Menu Bar Menu bars are displayed at the top of application windows and list menu titles. You can open a menu listed in the menu bar by clicking on its title. You can choose from the menu by clicking on an item. MicroView An analytical tool that displays the topography of a substrate’s surface and that reveals the characteristic light scattering distribution often associated with contaminants. MicroViews can be rendered in color or wireframe and can be viewed using different perspectives. Microsoft Windows A graphical user environment developed by Microsoft Corp. that uses windows to present information and a pointing device, usually a mouse, for user interaction. On-screen keypad The miniature keyboard displayed on the screen that is used for entering alphabetic and numeric data with the mouse. One-Wafer scan A scan mode in which only one wafer is selected for scanning. Also called Direct Access mode. Option group A group of fields, check boxes, option buttons, or command buttons found on dialog boxes. Out-of-control action In statistical process control, a list of steps to take when a process is flagged as out-of-control. The aim of these actions is to bring the process back into control. Panning cursor The cursor that allows you to select an area of the magnified wafer map to view. #343153 Rev. B 5/97 Glossary Glossary-7 Panning window The window that appears at the upper left of a magnified wafer map and that allows the user to specify the general area of the wafer to magnify. See panning cursor. Pareto chart A plot of data that has characteristics of the data on one axis and the frequency of those characteristics on the other axis. For example, defect type versus number of each defect type. Path (to file) The location of a file or directory. A complete path consists of a drive identifier (A:, for example) followed by the directory and subdirectory names. In C:\DATA\TEMP\TEST.DAT, the path to the TEST.DAT file is C:\DATA\TEMP. Pie chart A plot of data represented by a circle divided into pie-shaped segments. Each segment represents a characteristic of the data set. The size of each segment is proportional to the percentage of the full data set represented by the characteristic. Point To move the mouse until the tip of the pointer overlaps (points to) an item on the screen. See pointer. Pointer The object on the screen that moves when you move the mouse. The pointer changes into other shapes to indicate certain modes or when the system is busy. For example, the pointer changes into the Tencor logo when the software requires time to perform an action. The Tencor logo pointer can be moved on the screen, but you cannot perform another action until the pointer changes back to its normal shape. Process The combination of people, machine, equipment, raw materials, and environment that produces a given product or service. PSL spheres Polystyrene latex (PSL) spheres on a substrate are used when calibrating the instrument for a given substrate, film thickness, and defect size. Query A term that refers to obtaining a subset of data from a database by creating a set of data selection instructions. You use queries when exporting data, reviewing wafer data stored in the database, and managing the system log, for example. Range A measure of the variation in a data set. It is calculated by subtracting the lowest value in the data set from the highest in that same set. Recipe A set of instrument data collection, data display, configuration, and sort parameters that are stored by a unique name. The name of the current recipe is displayed in the Scan window title bar. #343153 Rev. B 5/97 Glossary-8 Surfscan 6200 Operations Rendering A MicroView display format: color or wire frame. Restore To return data previously saved by a backup operation. Sample In statistical process control, one or more individual events or measurements selected from the output of a process. Sample size is denoted by the letter n. Sample wafer A wafer having defects of a known diameter and that is used for calibrating the instrument. Scan To collect defect or haze data from a substrate. The Surfscan 6000-series instrument collects and processes data using the data collection, data display, configuration, and sort parameters specified in the current recipe. The instrument displays the results of the scan and can print or save the data. Scan operation Automatic or manual. In automatic operation, the instrument scans all wafers (or selected wafers) automatically in the specified scan sequence. In manual mode, the operator must press START for each wafer scan. See scan sequence. Scan sequence The order in which wafers in a cassette will be scanned. Select To highlight an item by clicking it with the mouse or by using the keypad. Select button A button within dialog boxes that when selected opens another dialog box. Selection bar The highlighted bar or dotted rectangle appearing in a dialog box that indicates the option or command button that will be selected if you press the ENTER key. The selection bar can be moved by using the keypad. Slot selector A control displayed in Cassette Catalog window that allows you to choose slots for scanning. Sort In the scan application, sort parameters specify the pass/fail limits. When two cassettes are used, substrates can be sorted to appropriate cassettes. SPC See Statistical Process Control. Standard deviation A measure of the spread of the process output or the spread of a sampling statistic from the process. #343153 Rev. B 5/97 Glossary Glossary-9 Statistical control A condition describing a process from which all special causes have been removed, evidenced on a control chart by the absence of points beyond control limits and by the absence of non-random patterns or trends within the control limits. Statistical process control The use of statistical techniques such as control charts to analyze a process or its output so as to take appropriate actions to achieve and maintain a state of statistical control and to improve the capability of the process. Status box The box in the lower left of the Scan window that displays the scan sequence, scan mode, and status messages. Subgroup A collection of samples. Substrate record A database record for a given substrate and film thickness that contains calibration data. Summary The scan summary results. System log A list of activities or events performed on the system. Using the ViewLog utility, the system log can be viewed and printed. Log entries can be deleted when no longer needed. System Menu The System Menu displays icons of the applications available to the user. Tencor File Format A file interchange format that is used for analyzing data on a review station or Surfscan SWIFT/ Station. Text cursor The vertical straight line appearing in fields. The text cursor marks the location where characters will appear when typed. TFF See Tencor File Format. Threshold The bottom limit of the defect or haze range for a scan. Throughput The speed at which the instrument processes wafers. #343153 Rev. B 5/97 Glossary-10 Surfscan 6200 Operations Tile The smallest area on the wafer when collecting haze values. Each tile is 832 x 860 µm. Also, refers to an action of displaying more than one window at a time on the screen. Title bar Each application displays a title bar at the top of the application window. The title bar shows the application name, current recipe in parentheses, communication mode—Local or Remote—and window control buttons. Trend chart A plot of data that preserves the time-order sequence in which the values occur. Also called a running record. User ID A customer-defined data field that is stored in the database. User names The names assigned to operators, engineers, system managers, and other instrument users. This name must be supplied when starting the instrument and determines which functions the user is allowed to perform. Variables In statistical process control, those characteristics of a part or process that can be measured. Variables are measured on a continuous scale and are described by normal statistics. Wafer comment A comment that can be applied to a wafer. Wafer ID A name, number, or other identifier applied to a wafer. Wafer IDs are stored in the database. Wafer map An area on the screen that displays a defect or haze map of the wafer. A part of the Scan and Browser Review windows. Wafer summary An area that displays wafer scan results, defect and haze ranges, and controls for enabling or disabling the display of ranges. Wafer summaries are displayed in the Scan and Browser Review windows. Window Rectangular area for displaying and running an application program. The Scan application displays the Scan window. X/MR-chart In statistical process control, a variables control chart used to track the mean and moving range of a data set having a sample size of one. The moving range is calculated by taking the absolute value of the difference between successive data points. #343153 Rev. B 5/97 Glossary Glossary-11 XY coordinate tracking An optional feature that allows extremely accurate X-Y coordinate tracking between the Surfscan 6000-series instrument and other devices, such as a scanning electron microscope. Zoom To magnify a wafer map. The instrument provides five magnification levels. #343153 Rev. B 5/97 Index Index-1 INDEX A Access class, select by 11-10 Access code at logon 3-1 Access code, defining 7-16 Access codes, exporting 10-14 Adding calibration record Automatic 6-6 Measured 6-5 Application Exiting 3-3 Starting 3-3 Application Windows 2-9 Area count 4-15 Areas and scratches, classifying 5-19 AUTO key 2-4 Automatic calib. curve 6-6 Automatic printing 5-23 Automatic saving of records and files 5-24 Automatic sorting of wafers 5-22 Automatic wafer alignment 5-22 Autorange, haze 5-15 Autozoom, haze 5-15 Auxiliary Panel 2-2 B Backing up the database 8-9 Bin splits 4-15 Editing through histogram 4-21 Setting defect histogram 5-17 Turning off 4-17 Turning on 4-17 Bitmap formats (graphics files) 7-24 BMP (Windows bitmap format) 7-24 Browser utility 9-1 Browser, using 9-6 C Calibrating PSL spheres 6-3 Calibration Cassettes 6-27 Haze 6-20 How substrate curves are used 6-19 Standard curve 6-17 Substrate curve 6-13 Calibration application 6-1 Starting 6-1 Calibration record Automatic 6-6 Measured 6-5 Calibration tables, exporting 10-16 CASS key 2-4 Cassette Calibration 6-27 Loading 2-7, 4-3 Number of slots 7-4 Reverse processing 7-3 Reversing the slot numbering 7-3 Using 2-6 Cassette catalog, using 4-18 Cassette configuration 5-8 Cassette option, 26 slots 7-4 Cassette types 5-8 Check box 2-14 Checking disk and database usage 8-5 Clicking the mouse 2-5 Colors, setting 7-10 COM3 13-6 Command button 2-13 Common particle radius 9-9 Compressed printing mode 7-24 Compression methods, data 7-11 Configuration Printers 7-22 System 7-19 User 7-2 Configuration tables, exporting 10-16 Control charts 14-7 Control menu 2-12 Control Type 7-3 Coordinates (X-Y), translating 13-2 Cycle Control 2-16 D Data compression 7-11 Data entry field 2-17 Data extraction for SPC 9-7 Data, simulated 7-3 Database About the database 8-1 Backing up 8-9 Browser utility 9-1 Checking usage 8-5 Database menu 8-2 Deleting wafers 9-1 Export 10-1 Extracting wafers for SPC 9-1 Import 10-1 Managing 8-3 Repairing 8-7 Report utility 8-15 #343153 Rev. B 5/97 Index-2 Restoring 8-9 Reviewing wafers 9-1 Selecting summaries and maps 9-2 Starting a utility 8-3 Utilities described 8-2 ViewLog utility 11-1 Database menu 8-2 DataHub Data Analysis System 7-13 DataHub requirements 7-12 Date (System Log), select by 11-11 Destination slot numbering 7-4 Diagnotic tools 12-1 Dialog box 2-12 Check box 2-14 Command button 2-13 Cycle control 2-16 Data entry field 2-17 List box 2-15 Pull-down list 2-16 Radio button 2-14 Select button 2-17 Selection bar 2-13 Direct access 4-7 Disk and database space 3-4 Disk full messages 8-4 Disk full recovery 8-6 Disk management 8-3 Disk usage icon 3-5 Disk, checking usage 8-5 Displaying SPC charts 14-5 DOS 3-4 DOS shell warning 3-4 Double-clicking the mouse 2-5 Dragging the mouse 2-5 E Early warning system 12-1 Function controls 12-3 Main controls 12-8 Starting 12-2 Emergency off button 2-2 Exclusion patterns 7-7 Exiting an application 3-3 Expanded I/O option 13-6 Export data, selecting 10-6 Export-Import utility, starting 10-1 Exporting recipes 10-8 Extend puck 4-12 Extract for SPC command 9-7 Extracting data for SPC 14-4 F Factory-set options, system config. 7-20 #343153 Rev. B 5/97 Surfscan 6200 Operations Files, saving TFFs 4-14 Film calibration 6-4 Floppy disk drive 2-6 G Generic/Text Only printer Wide carriage printing 7-24 Getting started 3-1 Graphic printer, selecting 7-22 Graphics file types 7-24 H Haze 4-10 Haze autorange/autozoom 5-15 Haze average 4-16 Haze bin splits 5-15 Haze calibration 6-20 Haze region 4-16 Help 3-4 HELP key 2-3 Help menu 4-11 Histogram LPD 4-20 Using 4-20 Zooming 4-20 HOME key 2-4 I Icon Disk status 3-5 System menu 3-2 ID key 2-3 IDs, database 7-14 Import list, viewing 10-3 Importing data 10-4 Instrument Log on 3-1 Power up 3-1 Shutting down 3-4 Instrument basics 2-8 K Key switch 2-2 Keypad, instrument 2-3 L Landscape printing for SPC data 14-6 Limitations Database 5-25 Disk space 5-25 List box 2-15 Loading a cassette 2-7 Index Log event selection 7-5 Logging off 3-3 Logging on 3-1 Login method 7-3 Logon screen 3-2 Lot ID 4-8 Lot ID, entering 4-4, 4-14 Lot summary 4-34 Lot Summary, suppressing 7-4 Lot Summary, viewing and printing 4-8 LPD mean count 4-15 LPD standard deviation 4-15 M Map-to-map 9-7 Common particle radius 9-9 Memory available 12-9 Memory usage 12-9 MENU key 2-3 Menus System menu 3-2 Working with icons and pull-downs 2-10 Message notification 7-3 Microscan MICROSCOPE key 2-3 MICROSCOPE key 2-3 MicroView Analysis 4-30 Display formats 4-26 Highest peak 4-28 Setting view manually 4-29 Threshold 4-29 Views 4-26 Wireframe 4-26 Mouse 2-4, 2-5 N NEXT key 2-4 NO key 2-3 O Out-of-control rules (SPC) 14-9 Overlaying alternate data 4-17 P Pareto chart 14-7 Particle radius for map-to-map 9-9 PCT (Macintosh PICT format) 7-24 Power off button 2-2 Power on button 2-2 Powering down the instrument 2-8 Powering up the instrument 2-8, 3-1 Index-3 PRINT key 2-4 Printer Resume a print job 4-32 Setup 4-35 Printer configuration 7-22 132-columns 7-24 Fast System Log reports 7-26 Text and graphics printers 7-22 Printer selection 4-35 Printing Lot summary 4-8 Printer selection 4-35 Recipes 8-15 System configuration 8-15 User configuration 8-15 Wafer Summary 4-17 Printing a bitmap to disk 7-23 Printing a wafer map to file 7-22 Printing screens 2-4, 2-19 Printing SPC data 14-6 Printing, automatic 5-23 PSL spheres calibration curves, exporting 10-11 Puck 4-12 Pull-down list 2-16 Q Quick reference, Scan application 4-11 R Radio button 2-14 RCP key 2-3 Recipe Area display options 5-19 Automatic operations 5-22 Automatic printing 5-23 Automatic saving 5-24 Automatic sorting of wafers 5-22 Automatic wafer alignment 5-22 Data collection parameters 5-4 Data collection range 5-11 Data display parameters 5-7 Defect display options 5-17 Dialog box 5-3 Display options 5-16 Guidelines 5-27 Haze display options 5-20 Haze range 5-14 Loading 4-3 LPD range 5-12 Parameter list 5-4, 5-8 Printing report 8-15 Sort options 5-25 Sorting parameters 5-9 #343153 Rev. B 5/97 Index-4 Substrate selection 5-10 Throughput selection 5-16 Recipe menu 4-11, 5-1 Recipes 5-1 Exporting 10-8, 10-9 Managing 7-19 Printing 8-15 Reference Coordinate dialog box 13-3 Repairing the database 8-7 Report 8-15 Choosing a printer 8-18 Exiting 8-19 Fast printing 8-19 Print all selected 8-19 Recipe 8-19 Recipes 8-16, 8-18 Selecting 8-16, 8-18 System configuration 8-16, 8-18, 8-19 User configuration 8-16, 8-18, 8-19 Viewing 8-16, 8-18 Report utillity, database 8-15 Reset button 2-2 Resetting the instrument 2-8 Resume Printer 4-32 Reverse cassette processing 7-3 Reverse ladder 7-3 Rotating a wafer 13-2 S SAVE key 2-4 Saving a bitmap 7-22 Saving maps and summaries automatically 5-24 Saving TFF files 4-14 Saving TFF files automatically 5-24 Scan application 4-1 Cassette catalog 4-18 Histogram 4-20 Menus and commands 4-10 Quick reference 4-11 Starting 4-2 Using the window 4-8 Wafer map 4-22 Wafer summary 4-15 Scan procedures 4-13 Scan sequence, changing 4-19 Scanning one wafer 4-7 Scanning options 4-6 Scanning wafers Details 4-6 General description 4-4 MicroView 4-30 Options 4-6 Scratches, classifying 5-19 #343153 Rev. B 5/97 Surfscan 6200 Operations Screen print 2-19 Scribe mark exclusion zone 12-12 Scroll bars 2-18 SEL key 2-3 Select button 2-17 Selecting wafer records 9-2 Sending X-Y coordinates via COM3 13-6 Setting up for the first time 3-4 Setup Colors 7-10 Data compression 7-11 Database IDs 7-14 Error and message response 7-3 Exclusion patterns 7-7 Log event recording 7-5 Number of cassette slots 7-4 Printers 7-22 Recipes 7-19 Starting the Setup application 7-1 System configuration 7-19 Tencor File Format files 7-12 User accounts 7-15 Wafer orientation 7-6 Shutting down the instrument 3-4 Simulated data 7-3 Simulated data option 7-3 Slots, number of 7-4 SMEZ See Scribe mark exclusion zone 12-12 Software version 12-9, 12-10 SPC data Editing 14-1 Extracting from database 14-4 Printing 14-6 Viewing charts 14-5 Standard curve calibration 6-17 START key 2-4 Statistical Process Control Option 14-1 Statistical process control, tutorial 14-6 Status application 12-9 STOP key 2-4 Substrate and film calibration 6-4 Substrate calibration curve 6-13 Sum of all defects 4-15 Surfscan SWIFT/Station 7-13 System configuration 7-19 Analog board type 7-21 Debug 7-21 GEM version 7-21 Laser type 7-20 Machine type 7-20 Maximum haze at gain 1 7-21 Model number 7-20 Index Printing 8-15 Processor type 7-20 Sampling rate 7-20 SECS 7-21 Wafer handler 7-21 System log Event description 11-13 Reports 11-4 Selecting events 11-8 Sorting 11-2 Viewing 11-2 System menu 3-2 System Sign-on Banner 7-3 System status 12-9 Printing 12-10 System version 12-9 T Tencor File Format 7-12 Database IDs 7-14 Event size format 7-13 Extra precision 7-13 Filenaming 7-12 Setup 7-12 Standard precision 7-13 Text printer, selecting 7-22 TEXTOUT.EXE 7-12 TFF Filename as the Wafer ID 7-14 Threshold, MicroView 4-29 TIF (Tagged image file format) 7-24 Trend chart 14-7 Tutorial, statistical process control 14-6 U UNDO key 2-3 User accounts Adding or changing 7-15 Deleting 7-18 Testing 7-18 User accounts, managing 7-15 User configuration dialog box 7-2 User configuration, printing 8-15 User IDs, entering 4-13 User name Defining 7-16 Select by 11-9 User name and type 12-9 Index-5 ViewLog, starting 11-1 W Wafer alignment, automatic 5-22 Wafer comment, entering 4-16 Wafer ID 4-8 From TFF filename 7-14 Wafer ID, entering 4-16 Wafer map Using 4-22 Zooming 4-23 Wafer orientation 7-6 Wafer origin 7-6 Wafer records, selecting 9-2 Wafer summaries and maps Exporting 10-10 Wafer summary 4-15, 4-32, 4-33 Wafers Selecting 4-19 Wafers, selecting 4-19 Wireframe MicroView 4-26 X X-Y coordinates option 13-1 X-Y coordinates, sending via COM3 13-6 Y YES key 2-3 Z Zoom Histogram 4-20 Wafer map 4-23 ZOOM key 2-3 V Video printer 7-22 Viewing files 7-12 ViewLog utility 11-1 #343153 Rev. B 5/97