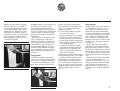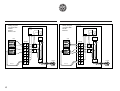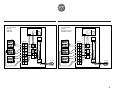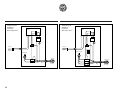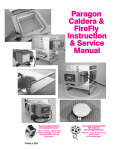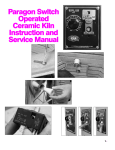
1
OPERATING
MANUAL
KILNMASTER
AUTOMATIC KILNS
®
KILNMASTER
CONTROLLERS
®
EDITION 4 MAY 2002
About thermocouples.
Wall Mounted
Controller Thermocouple
Kiln Thermocouple
Skutt KilnMaster kilns are equipped
with MI (mineral insulated) thermocouples, which feature long life, virtually no
flaking, and ease of installation. Because of
these improvements, an additional thermocouple is not included with your kiln.
Thermocouple wear is progressive, so it
may not be obvious.
Signs that a thermocouple may need
replacing include:
1. A crack in the sheath of the thermocouple.
2. A FAIL message on the display.
3. Erratic temperature swings and/or a
minus sign on the display.
4. A change in firing results as evidenced
by overfiring or underfiring.
Thermocouple elements are available
from your Skutt distributor or from Skutt
Ceramic Products if a distributor is not
conveniently located near you.
Table of Contents
Quick Start........................................................ 1
The Cone Fire Mode................................... 1
The Ramp/Hold Mode............................. 2
Introduction...................................................... 3
Features of the KilnMaster ....................... 4
Skutt kiln/controller features.................. 5
Wall Mounted KilnMaster........................... 5
Controller set up.......................................... 6
Thermocouple.............................................. 7
Kiln settings .................................................. 7
KilnMaster repairs ...................................... 7
Automatic Kiln set up................................... 8
Locating your new kiln ............................. 8
Unpacking and checking the kiln .......... 8
Electrical requirements............................ 10
Preparation before firing......................... 11
First test firing ............................................ 11
General Ceramic Information................... 12
Precautions.................................................. 13
Loading: key to consistent results........ 13
Greenware for bisque firing................... 13
Glaze firing.................................................. 14
Porcelain and stoneware firings ........... 14
Overglaze firings....................................... 14
Glass fusing & sagging firings .............. 14
General Firing Information ....................... 15
Pre-firing checklist .................................... 15
Cold weather operation .......................... 15
Type of firing.............................................. 16
Venting......................................................... 16
Underglaze firing................................... 16
Ceramic glaze firing.............................. 16
“Greenglaze” one-fire ceramics......... 16
Overglaze fires........................................ 16
Firing porcelain ...................................... 17
Firing stoneware .................................... 17
Firing glass............................................... 18
Quick cone reference chart..................... 18
The KilnMaster Controller......................... 18
During the firing ....................................... 18
After each firing......................................... 18
Cone Fire Mode......................................... 19
Profiles....................................................... 19
Programming.......................................... 21
Programming step by step ................. 22
Ramp/Hold Mode................................... 23
Programming.......................................... 24
Programming step by step...................24
Programming examples...................... 26
Key Functions of the Controller............... 28
Temperature Scale Selection.................. 28
Delay Start................................................... 28
Alarm............................................................ 28
Review.......................................................... 29
Cone Table .................................................. 29
View.............................................................. 29
Powering the Kiln..................................... 30
Stop Firing................................................... 30
Start Firing................................................... 30
Questions and Troubleshooting .............. 31
Kiln Problems................................................ 31
Ware imperfections...................................... 32
Repairs............................................................. 34
Wall and slab brick repair .......................34
Replacing elements................................... 35
Replacing thermocouple......................... 35
Glossary........................................................... 35
Appendix 1 Specifications ......................... 37
Appendix 2 Cone Chart, Heat Work ..... 37
Appendix 3 Display Messages................. 39
Appendix 4 Error Messages...................... 40
Appendix 5 KM Wiring Diagrams......... 41
Appendix 6 KM-1 UL Listing................... 45
Appendix 7 PK Production Kilns............ 45
Production Kiln Wiring Diagrams.......... 48
Index................................................................. 50
Ramp/Hold profile masters ..................... 52
KilnMaster® and EnviroVent® are registered trademarks of
Skutt Ceramic Products, 6441 S.E. Johnson Creek Blvd.,
Portland, Oregon 97206-9594 Phone (503) 774-6000
FAX (503) 774-7833 © Copyright 1998. Skutt Ceramic
Products. Printed in U.S.A.
Quick Start—
All you need to start
firing now!
If you:
• are an experienced electric kiln operator,
• know how to set up a new kiln and kiln
wash shelves,
• know about doing the first test firing,
and
• know how to load your ware—
you can use the following Quick Start
Firing Instructions.
If this is your first new kiln, please take the
time to read the set up and general ceramic information sections of this manual, for
your safety and to ensure proper operation and long life of your quality Skutt
kiln.
For those of you who have fired kilns
before, this section offers a brief set of
instructions for programming the controller in both Cone Fire and Ramp/Hold
Modes. Be sure that your kiln is set up
properly and your shelves are kiln
washed.
Please refer to the section on The
KilnMaster Controller for all the features,
programming examples and detailed
instructions on using the controller.
Activate the power source by plugging
in the kiln or controller. “PF” will appear
in the display window indicating that the
power has been turned off for more than
two minutes.
Press Enter to clear the message.
The touch pad should now be in IDLE
mode and will now respond to key presses. The display will flash the internal temperature of the kiln, alternately with
“IDLE.” The controller is ready to program when the temperature appears in
the display window. All programming
begins when the flashing internal kiln
temperature is on the display.
To change from the default setting of ˚F
to ˚ C, press the degrees F/C key, then
Enter. A decimal will appear in the lower
right corner of the display window when
in the centigrade mode.
You’ll notice different default displays.
The Alarm default is 9999. The Delay
default is 00.00. Numbers to left of the
decimal are hours, to the right are minutes. Hold default is 00.00, again in hours
and minutes.
QUICK START:
THE CONE FIRE MODE
The Cone Fire mode replicates your previous firing experience using cones in a kiln
sitter. Use the Hold function to adjust
your final results in the event the shelf
cones are slightly underfired. Be careful
not to add too much time (5-15 minutes is
a good start). Please read Appendix 2
relating to Cones and Heat Work for more
details.
1. From idle mode, press Enter, then
Cone Fire.
2. Enter the Cone number. (Important:
be sure to know the maturing temperature of your clay. For example, a Cone
05 is cooler than a Cone 5.)
Press Enter.
3. Press one of the firing speeds, either
Slow, Medium, or Fast.
Press Enter.
4. Enter a hold time in hours and minutes
or zero for no hold time.
Press Enter.
5. The display will flash two times, and
then show the internal kiln temperature
indicating that the kiln is ready to fire.
6. Press Start.
1
QUICK START:
THE RAMP/HOLD MODE
Important: To effectively use Ramp/
Hold mode, it is imperative to understand heat work theory. If you know the
theory well, and if you have had experience with other programmable kilns or
controllers, then the Quick Start instructions at right will be useful.
If not please read the complete
Ramp/Hold instructions beginning on
page 23, and Appendix 2 for details.
The Ramp/Hold mode can be used for all
firing applications from glass to high fire
porcelain and stoneware. This option
allows you to create your own profiles
with up to eight ramp and hold segments.
Each segment has three components: heating rate, temperature and hold. If you are
programming to approximate cone numbers, be sure to review the Appendix 2 for
information on heat work.
Before you begin input, create a chart
with all of the segments you plan to
include in your program. You may have
fewer than eight segments, but no more.
Select either ˚F/˚C before you begin.
One can store up to six programs in permanent memory by assigning a USEr
number (program number) before
inputting the required data. The next time
that program is desired, simply select the
appropriate USEr number. When all USEr
numbers are programmed, it will be necessary to write over an existing number,
which will erase it from memory.
1. From idle mode, press Ramp/Hold.
2. Enter the USEr Number of the program you wish to fire. If none has been
entered, select 1. Press Enter.
3. Enter the number of segments in
your program. Press Enter.
4. Enter the first heating rate in degrees
per hour. Press Enter.
5. Enter the first temperature to reach.
Press Enter.
Segment
1
2
3
4
5
6
7
8
2
Rate
6. Enter the amount of hold time in
hours and minutes, or zero for no hold
time. Press Enter.
7. Repeat instructions 4-6 for each segment that will be programmed.
8. Enter the ALAr alarm temperature, or
leave at the default setting of 9999 by
pressing Enter.
9. The display will return to idle mode.
10. Press Start.
Temperature
Hold
The Skutt family of
automatic kilns.
INTRODUCTION
Congratulations! You’ve made a great
choice from the proven Skutt kiln line.
First, read this entire manual before you
do anything else. At Skutt Ceramic
Products, we created and refined the
multi-sided electric kiln. And although
there are many imitators, frankly we still
believe that no kiln is designed with more
understanding or manufactured with
more care. Even so, for complete safety
and consistent results, you must understand the principles behind ceramic firing
and how your kiln works.
Whether you have owned an electric
kiln before or not, please take the time to
read this manual from cover to cover. We
think even the most experienced veteran
will learn a few new tips.
This manual covers Skutt Automatic
Kilns with built-in KilnMaster Controllers
and wall-mounted KilnMaster Controllers
for conventional kilns. Because both units
have the same electronic functions, when
we say “KilnMaster” or “controller” we
are referring to the touch pad on either the
kiln or the wall-mounted version.
3
Features and benefits
of the Skutt KilnMaster
controller.
Easy to use. The display guides you
through operating steps by a series of
messages that ask for information. The
internal temperature is displayed during
the entire firing and during the cooling.
Program by cone number. Simply select a
cone number from the table and enter the
speed you want for firing. The lower left
half of the touchpad controls the Cone
Fire functions; the right side controls
Ramp/Hold functions. Review is appropriate for either mode.
Firing speed options. When firing from
the Cone Fire mode, you can select from
three preprogrammed ramp speeds: fast,
medium or slow.
Multiple Ramp/Hold segments. When
firing in the Ramp/Hold mode you can
program up to eight different segments
that include rate, temperature and hold
time.
Permanent program memory. Permanent
memory allows the controller to maintain
values in the memory in case of power
4
failure. This feature also permits you to
store up to six Ramp/Hold programs in
memory, and to use them later by entering their program number.
Delay firing start. You can delay the start
of a firing for up to 99 hours and 99 minutes.
Controlled cooling rate. Now you can
program your own rate of cooling to
achieve your specific results.
Program Review Option. The program
you have entered can be reviewed before
and during a firing. Pressing the View
button displays the segment that is currently being executed during Ramp/Hold
mode firings.
Cone table. This function shows you the
equivalent temperature in degrees
Fahrenheit or Centigrade that corresponds
to a cone number, which is handy when
programming Ramp/Hold firings.
Fahrenheit or Centigrade operation.
Select either temperature scale at the touch
of a button. Permanent memory allows
the temperature scale and values to be
continuously displayed until reprogrammed.
Programmable High Temperature
Alarm. The program lets you set an alarm
that will alert you when a specified tem-
perature has been reached. This allows
you to check firing progress and to be present as shut-off or ramp-down occurs.
Safety Features. Power failure detection.
Firing will continue after power interruptions which cause less than a 250˚ F drop
in internal temperature. Firing will also
continue in Cone Fire mode if the interruption causes less than a 100˚ F drop during the final 100˚ of a firing.
Thermocouple failure detection. The controller can detect a failed thermocouple
and will turn the kiln off automatically.
Controller-operation failure detection. If
a fault is detected in the controller the kiln
will turn off automatically.
Designed and Manufactured in the
United States. Licensed under Orton’s
Patent #4461616. In Cone Fire mode, the
controller uses Orton’s patented method
to adjust final temperature to emulate
cone “heat work”. This is fully described
in Appendix 2, Cone Chart and Heat
Work.
UL and CSA Listed. The KilnMaster
Controller is UL and CSA listed when factory installed in Skutt automatic kilns and
when the wall-mounted KM-1 KilnMaster
Controller is used with the UL-listed Skutt
kiln models listed in Appendix 6.
What you’ll find in
a quality Skutt kiln—
and why.
KilnMaster Controller. At the heart of
your new kiln, or wall mounted KM-1, is
the KilnMaster controller. This unit allows
you much greater control over your kiln
than ever before. It is essentially two controllers in one. You can fire by cone numbers or specify your own firing profile
with multiple ramps & holds.
Brick. Skutt kilns are constructed of the
finest insulating firebrick available today,
offering strength, cleanliness and long life.
All bricks are precision cut and grooved to
assure tight fit, perfect element support
and ease of replacement. Because of their
porous composition, insulating fire brick
are fragile. Always handle your kiln and
its brick with care. The brick in your kiln
may begin to show some fine cracks after
the first few firings, especially after Cone
10 high firings. This is normal and does
not harm the structural integrity of the
kiln or impair its functioning.
Elements. The highest quality iron-aluminum-chromium (Kanthal-type A-1) element wire is used in all Skutt kilns.
Element life will vary depending on
whether the kiln is used primarily for low
firing of bisque or greenware, or high firing of stoneware and porcelain. Elements
will last for many firings if treated
carefully.
Remember these points.
1. Keep the element grooves free of debris:
bits of bisque, glaze, cones, metal or high
fire kiln wash will immediately fuse to an
element and proceed to eat through it.
Kanthal elements become brittle after
repeated firings, so be extremely careful
not to scrape against them.
2. Do not attempt to fire beyond the rating
on your kiln.
Stainless steel jackets. Only the finest
grade stainless steel is used in Skutt kiln
jackets, selected for its expansion qualities
so that the bricks are never unduly
stressed, yet are fully supported during all
stages of heating and cooling. Stainless
steel may discolor with repeated heating.
Stainless steel cleaner is available.
Lid brace. The lid brace holds the lid
securely open for loading and unloading
the kiln. As you open the lid, allow the lid
brace to follow over the anchor pad and
screw that is attached to the side of the
kiln. Simply allow the notched end of the
brace to engage the anchor pad and screw,
allowing the lid to rest in a full upright
position. Periodically test the thumbscrew
for tightness. If loose, tighten.
Modular design. Larger Skutt kilns use
stackable ring segments which makes
them easier to move and allows better
access to elements and firebricks.
The Wall-mounted
KilnMaster Controller.
The wall-mounted KilnMaster functions
in the same manner as the kiln-mounted
version with the exception that it can be
moved from one kiln to another. While
the wall-mounted version cannot fire
more than one kiln at a time, it can control
virtually any kiln in a studio which has
the proper cord plug and receptacle configuration.
5
The Wall-Mounted
KilnMaster Controller
The wall-mounted KM-1 KilnMaster gives
automatic kiln control to most modern
Skutt 208/240V kilns and any other brand
kiln which uses NEMA 6-50 (single phase)
or NEMA 15-50 (3 phase) plugs and
receptacles. It can control virtually any
kiln in a studio which has the proper cord
plug and receptacle configuration.
Once installed, the KilnMaster controller
uses the same operating instructions as
other Skutt Automatic kilns.
Locating the controller. Pick a location
that will put the controller at least two feet
from the kiln to prevent overheating the
controller.
Mounting the controller on the wall.
Mark the hole positions on the wall where
the controller will be installed using the
paper template supplied with the controller.
To mount the controller on stud or post:
1. Use the holes marked “A” on the template and screw a #12 x 2” wood screw
into the wall leaving a 1/8” gap.
2. Repeat for the second screw.
To mount the controller in sheet rock:
1. Using holes marked “A” and “B” on the
template, drill the necessary holes to
properly mount the 1/4” x 2” molly
bolts into the sheet rock.
2. Tighten the first bolt until there is a 1/8”
gap.
3. Repeat for the other three molly bolts.
6
Before hanging the controller on the wall,
loop the cord attached to the quick reference card over a screw so that it hangs
below the controller when mounted.
CONNECTING TO THE KILN.
Single Phase. (Switching capacity 48
Amps on 208-240V) To operate the wallmounted controller, simply engage the
kiln plug in the receptacle located on the
back of the controller. Then plug the controller into the existing wall receptacle.
Three-phase. (Switching capacity 40
Amps on 208-240V) To connect your
three-phase kiln, plug the power cord
from the kiln into the receptacle mounted
on the back of the controller as shown
below. Plug the pilot cord (the smaller
cord) into the small receptacle mounted
on the underside of the controller. The
controller is plugged into a wall receptacle
which provides three phase voltage.
You will no longer need to use the threephase contactor box. However, an electrician may need to wire a receptacle for the
controller if a three-phase contactor box
was used previously. You may need to
make other changes to the supply for kilns
not made by Skutt. Other manufacturers
may not use pilot cords. Please discuss
this with your distributor.
Thermocouple mounting. Skutt kilns
have a hole stamped in the stainless band
where the thermocouple flange should be
mounted This hole is located to the right
of the red switch boxes. You can see the
firebrick through this hole. The thermocouple flange is a metal tube approximately 5/8” in diameter and 1 1/2” long
attached to a metal washer.
1. Remove the thumbscrew from the
flange.
2. Align the thermocouple flange so that it
is exactly over the hole in the stainless
band. Position the flange so the thumbscrew is on the top. Attach the flange to
the kiln using the two Phillips self-tapping screws provided. Note: To start the
screws, lightly hit each screw with a
hammer until the point has pierced the
stainless steel band.
3. Insert a 1/4” twist drill or carpenter’s bit
through the flange holder. Slowly drill
through the kiln wall brick into the kiln
chamber as shown at right.
2. Align the flange holder accurately over
the mark, positioning the thumbscrew
hole on top. Mark the position of the
small holes on the jacket. Push hard or
tap out with a nail and hammer the
small screw holes. Drill two 3/32” holes
for the smaller sheet metal screws. Drill
through the metal only. Install the flange
with the sheet metal screws provided.
3. Follow steps 2-6 above.
KILN SETTINGS
4. Insert the thermocouple into the kiln so
that 1-1/4” to 1-1/2” of the tip protrudes into the kiln chamber. Tighten
the thumbscrew.
5. Uncoil the yellow thermocouple wire
that is hanging from the bottom of the
controller enclosure. Next, take the
receptacle on the end of the wire and
engage it with the two prongs on the
thermocouple which you mounted on
the flange in Step 4. There is only one
way the plug will engage the receptacle.
6. The controller is now ready for use.
If you are installing the thermocouple on a
kiln that is not marked for a thermocouple, please follow these instructions.
1. Mark a 1/2 to 5/8” diameter hole on
the stainless jacket in the center of the
brick next to the Kiln-Sitter brick (one
brick to the right of the master switchbox). Be sure placement is accurate so
that you do not drill through an element. Do not drill yet.
The kiln switches, Kiln-Sitter and limit
timer (if so equipped) need to be properly
set and adjusted for correct operation with
the controller. Please follow the instructions for the option(s) that apply to your
kiln.
Kiln-Sitter. The Dawson Kiln-Sitter is no
longer a control device when used with
the KilnMaster controller, but it can be
used as a backup safety device.
1. Place a Junior cone one or two numbers
hotter than the cone equivalent you program into the KilnMaster to keep the
Kiln-Sitter from shutting off the kiln
early. For example, if you program a
Cone 5 (2156˚) firing in the KilnMaster,
place a Cone 6 or 7 Junior cone in the
Kiln-Sitter. Use your firing experience or
read the relevant sections of this manual
for more information.
2. Push the plunger in. Repeat this procedure using new cones each firing.
Limit timer. If your Dawson Kiln-Sitter is
equipped with a limit timer, set the timer
for 20 hours (the maximum). Because the
KM-1 controller turns the power to your
kiln on and off to control the temperature,
the timer will only run intermittently and
will be useless. If you fail to set a maximum time each firing, the timer may shut
off the kiln early. You may want to disconnect the wires that operate the limit
timer to eliminate the bother of resetting
the timer each firing.
Switches. The switches on your kiln will
no longer be used to control the temperature rise inside your kiln. The KM-1 controller now controls the heating rate.
Set all switches in your kiln to High.
(Exception: do not set the center section of
the 818-WR above 4. )
If you have questions, please call Skutt
Ceramics at (503) 774-6000.
Programming. Refer to the Quick Start
sections on Cone Fire and Ramp/Hold for
instructions on programming.
WALL MOUNT CONTROLLER
The KilnMaster contains many components which cannot be replaced in the
field. Your Skutt distributor may be able
to replace cords, connectors and relays.
The thermocouple can be easily replaced
when needed:
1. Loosen the thumbscrew on the thermocouple flange and gently pull the thermocouple assembly out of the kiln.
2. Discard the old thermocouple and plug
7
a new MI cable thermocouple into the
receptacle mounted on the cord from
the Wall Mounted Controller.
If a problem persists, call the factory to
make arrangements for return of parts.
When the controller is received we will
evaluate the problem and call you with a
cost estimate.
Send to Skutt Ceramic Products, 6441
S.E. Johnson Creek Blvd., Portland,
Oregon 97206-9594. Our telephone number is (503) 774-6000, Fax (503) 774-7833.
See page 35 for details on replacing the
thermocouple elements on KM kilns,
which have a slightly different mount.
8
Automatic kiln set up.
PLANNING THE LOCATION
OF YOUR NEW KM-SERIES KILN.
Location. For safety and convenience follow these basic rules.
1. Locate your kiln near your present electrical outlet or where a new circuit can
be installed with least cost. Position the
kiln to the left of your electrical outlet so
the cord will have an easy run and will
not place a strain on the plug or outlet.
2. Install it in a well ventilated, sheltered
area such as a carport, garage, utility or
hobby room. It should be convenient to
your clay working area, and out of the
way of other traffic.
3. Allow at least 18” of space between
your kiln and adjacent walls.
4. Keep curtains, aprons, plastic or other
flammable materials away from your
kiln.
5. Never fire your kiln within a four sided
cabinet or closet. The fourth side must
always be open to room air to prevent
the kiln from overheating surrounding
surfaces. It is best to leave at least two
sides open for easy access to controls
and peep holes. Fully automatic kilns
should not be located in a room that
exceeds 105˚F (41˚C) or is less than 32˚ F
(0˚ C) as damage to the electronic components may result.
6. Always locate the kiln on a non combustible floor such as cement or ceramic
tile.
7. When installing a kiln in a room with a
fire control sprinkler system, please
check the sprinkler head rating to insure
that heat emitted from the kiln will not
activate the sprinkler system.
UNPACKING AND CHECKING
THE KILN
Checking your kiln for damage. Your
kiln has usually traveled a long way by
rail car or truck to get to you. Even though
it was carefully packed at the Skutt factory, it could have been mishandled in shipping. If you find any problems as you
unpack, do this.
1. Call your freight agent and ask for an
inspection.
2. Save all the packing materials.
3. Contact the dealer where you bought
your kiln.
4. Don’t assemble or fire your kiln until
your damage claim has been inspected.
Fortunately, few Skutt owners will experience any problems.
For information on setting up Skutt PK
Production Kilns, see Appendix 7 beginning
on page 45.
Unpacking the kiln.
1. The bottom tray of each carton is
attached to a wooden pallet. The kiln
rests on foam packing material which is
on the bottom tray. The bottom portion
of the carton is stapled to the tray. After
removing the staples from the tray, the
carton can lift straight up exposing the
assembled kiln. There is foam packing
material that will fall loose from the kiln
when the carton is lifted. Remove the
plastic sheet and paper shields.
2. Open the lid, remove the plastic cover
and carefully remove the kiln stand and
“goodie bag” from the inside of the kiln.
Close the lid.
3. For larger, heavier kilns you may
choose to remove the lid from the top
section. This will reduce the overall
weight. To do this remove one cotter
pin from the lid rod and slide the lid
rod out of the lid hinge assembly. Also
remove the thumbscrew and lid brace.
Place lid on a clean, flat surface.
4. Remove the black plastic feet from the
“goodie bag” and put them on the
stand legs. Set the stand in the location
you have designated for the kiln. See
the section on locating your kiln if you
are not sure about the safety requirements for the kiln site.
7. Position the kiln floor on top of the
stand making certain that the weight is
evenly distributed.
8. Level the kiln. Make sure the stand and
kiln floor are level and do not teeter.
Leveling problems may put unnecessary stress on the kiln during firing. To
level the stand, place firm shims under
the legs (never above them touching the
kiln). Center the kiln’s bottom slab on
the stand and double-check teetering.
6a
6b
6c
5. There are section handles on the kiln.
With a partner, lift the kiln, using the
lower section handles, off the kiln floor
and rest on a clean, flat surface.
6. You may separate the kiln into sections
if it is too heavy to move.
a. The electronic control panel of your kiln
has a hinged box for easy removal.
Remove the screws on the left side of
the box that secure the box to the kiln.
b. Swing the panel to the side.
c. Slide the connectors off of the terminals
noting the placement of the wires. Slide
the thermocouple connectors off the terminal strip, also.
d. Lift the box up to remove it.
9. Again, with a partner, pick the kiln up
and rest it on top of the kiln floor.
10. Replace the kiln control box on the kiln
if removed in step 6 above.
a. Stack the sections on the kiln floor.
b. Return the kiln control box to the side of
the kiln.
c. Slide the connectors back into place.
Plug thermocouple in.
d. Close the box and secure it with screws.
If the lid was removed in step 3 above,
place the lid on top of the kiln, replace the
lid rod and cotter pin and the lid brace
and tighten the thumbscrew.
11. Place peep plugs in all but the top
peep hole. Always leave the top peep
hole open to allow vapors to exhaust
from the the kiln unless you are using a
fan-driven ventilation system such as
the Skutt EnviroVent®. The EnviroVent
allows you to fire with all peep hole
plugs installed.
9
ELECTRICAL REQUIREMENTS
Most important to proper operation of
your new kiln is to make sure it has
enough of the correct power to operate it.
If this is done, your kiln will give you
years of satisfying service; if not, your first
firing could be disappointing or even disastrous for your kiln.The chart at right
shows the recommended electrical specifications for each kiln model. If you are
uncertain about your existing outlets, have
them checked by an electrician. If you are
installing a new receptacle, have the electrician follow this guide.
ADDITIONAL POWER NOTES
Three-phase operation. Only special
order Models KM-1027 and KM-1227 will
operate on a three-phase supply.
However, any Skutt kiln can be properly
powered via unbalanced connection to
two of the three hot wires of a three-phase
supply. Of course, the green safety ground
connection provided in all Skutt power
cords is also used.
Three-phase installation. Three-phase
Models KM-1027 and KM-1227 can be
plugged directly into a three-phase (1550R) wall receptacle.
208 versus 240 supplies. As you can see
from the chart, most Skutt models are
available in either 208 or 240 volt versions.
10
Electrical requirements for Skutt Automatic Kilns and KilnMaster Controller
Model
Volts
KM-614-3
115
KM-614-3
115
KM-714
208-240
KM-818
240
KM-818
208
KM-818-30A-3 240
KM-818-30A-3 208
KM-1018
240
KM-1018
208
KM-1027
240
KM-1027
208
KM-1027 3ph
240
KM-1027 3ph
208
KM-1227
240
KM-1227
208
KM-1227 3ph
240
KM-1227 3ph
208
KM-1
208-240
KM-1 3ph
208-240
Amps
Watts
Copper Wire
Fuse or
Size*
Breaker Size
20
2300
10
30
20
2300
10
30
20
3600
10
30
27.8
6400
8
40
26.7
5550
8
40
21.7
5200
10
30
24.0
4990
10
30
38.4
9460
6
50
40
8320
6
50
48
11520
6
60
48
9980
6
60
29.3
11520
8
40
31.7
11000
8
40
48
11520
6
60
48
9980
6
60
29.3
11520
8
40
31.7
11000
8
40
Switching Capacity
48
Switching Capacity
40
NEMA Receptacle
Configuration
(Canada) 5-30
5-20
14-30
6-50
6-50
6-30
6-30
6-50
6-50
6-50
6-50
15-50**
15-50**
6-50
6-50
15-50**
15-50**
6-50
15-50
*For each additional 50 feet use heavier wire, numerically two numbers lower—for example,
instead of #10, use #8. If you anticipate installing any larger kiln in the future, use the heavier wire.
**See special instructions and wiring diagram.
The exception is Model KM-714 which is
universal, and will fire with 240V or 208V
power.
The “120/208V” supply is increasingly
encountered in schools and newly-built
communities, because it’s more efficient
for heavy 120V loads.
The 208V versions should never be fired
on a 240V supply without first installing a
full set of 240V elements. Otherwise, all
components will be seriously overtaxed.
Conversely, a kiln designed for 240V supply which is powered on a 208V supply
will be severely underpowered.
Important! Connecting and testing
Model KM-714. The wall outlets for
Model KM-714 must be powered by 3wire 120/240-208V solid neutral supply—
as for an electric range. Only No. 10 wire
is required (or No. 8 for runs over 50 feet).
30 Amp fuses or circuit breakers only—no
larger or smaller—are recommended. The
U-shaped fourth blade of the 4W30 Amp
grounding plug is for the pure green wire
grounding of the kiln case. The blade
opposite this U-shaped one takes the
white solid neutral wire. See the diagram
below and refer to the wiring diagram in
Appendix 5 for the 714 plug diagram.
NEMA RECEPTACLE GUIDE.
5-15
5-20
6-30
14-30
6-50
15-50
PREPARATION BEFORE FIRING
THE IMPORTANT FIRST TEST FIRING
Remove any brick chips or other foreign
matter from around the elements. Bits of
bisque and glaze will eat through elements and our warranty cannot cover
such accidents. We recommend that you
vacuum the inside of the kiln to remove
any dust that accumulates during shipment.
Wipe all new shelves clean, and brush
coat one side of each with high fire kiln
wash. Apply a thin coating of kiln wash in
one direction, allow to dry and apply
another thin coating in the opposite direction leaving a 1/2” margin from the outside edge of the shelf. A new coat is seldom needed—just spot-patch and sand
off the surface evenly with coarse sandpaper wrapped around a wooden block. A
fresh coat may be needed before a porcelain firing if glaze has dripped onto the
shelf.
Kiln wash the floor of the kiln, being
careful to leave a one inch margin
unpainted all the way around interior
edge. Never kiln wash the walls or lid of
your kiln!
Now you’re ready to fire. Be sure to
review the preceding sections, double
checking for safety and correct electrical
connections.
It is important to the life of your kiln that
your first firing be done properly. Before
you start, read this entire manual carefully, including the preceding sections and
loading and firing instructions.
New elements and foreign matter like
dust give off vapors that tend to discolor
glazes. Therefore, your first firing should
be a Cone 04 empty test fire with only your
dry shelves in the kiln, posted as though
ware were on them. The first time the elements are fired they will give off some
smoke. This is normal and expected. This
is a good time to use Self-Supporting
Cones on the shelves to test the heat accuracy from top to bottom.
A Cone 04 (1944˚) is recommended for
proper pre-oxidation of a new element.
The steps to accomplish this firing are the
following:
1. Clear the PF message by pressing
Enter.
2. Press Cone Fire mode.
3. Press 0 4 then Enter.
4. Press Medium speed then Enter.
5. Press Enter or an amount of time in
hours and minutes for Hold.
6. Press Start to begin the firing.The firing
will take approximately 7 1/2 hours.
Even though you have gone through a
simple program for a test firing, please
continue to read the detailed instructions
in the Cone Fire and Ramp/Hold sections
of this manual.
Periodically view your Self-Supporting
Cone by removing a peephole plug. It
should bend to the top of the base (5
o’clock position) and the kiln should turn
off about the same time. Watch your kiln
throughout the firing. Don’t rush through
the first firing. Make notes of things that
you want to remember and make visual
observations of the kiln while it is firing.
Likely, everything will work as it
should, and you’re ready to go on to production firings. If things go wrong, re-read
this manual and contact your Skutt dealer.
You will notice a clicking sound while
your kiln is firing. This is normal. The elements are cycling on and off to stay within
the temperature parameters you have programmed.
After the first couple of firings, hairline
cracks may appear in the floor of a kiln.
This is caused by the expansion and contraction of the bottom slab caused by heating and cooling, and is considered normal.
It will not affect the firing of your kiln nor
the life of the kiln floor.
11
General Ceramic
Information
PYROMETRIC CONES
Ceramic firing to the accuracy we know
today would be impossible without pyrometric cones. These long tetrahedrons of
controlled composition measure the combined effects of time and temperature
accomplished during a firing. Please refer
to Appendix 2 which further describes the
theory of heat work. The KilnMaster
Controller uses the patented Orton
process of time and temperature when in
the Cone Fire mode. Even though you are
operating a fully automatic kiln, you still
need to verify the temperature on the shelf
using Self-Supporting Cones.
Senior Cones are designed to be placed
standing in angled holders or Commercial
cone plaques or Self Supporting Orton
Cones. We recommend using the SelfSupporting Cones that have a precise 8˚
angle built into the base allowing the cone
to bend properly. When the cones soften
and bend to the top of the base (90˚ is perfect), the correct firing time and temperature have been reached. It is important
12
that the cone is standing at the proper
angle (as precut at the base) for it to bend
at its standard temperature.
Obviously, if you wish to monitor firing
progress, Cones must be visible through a
peephole.
The traditional and still the most accurate method of monitoring a firing is to
use three Self-Supporting Cones: the one
called the guide cone should be one number cooler than your desired firing; the firing cone should be the desired heat, and
the guard cone should be one number
hotter as shown below in a typical example.
As your firing nears maturity, the guide
cone will bend or “drop”. This alerts you
to watch the firing cone. If the guard cone
is not straight, the best heat work has been
exceeded.
If you discover that your automatic kiln
is underfiring ware, check the load in your
kiln to ensure that it is evenly distributed
from top to bottom. It is easy to program a
5 to 10 minute hold at the end of your
Cone Fire. The hold can be preprogrammed or added at the end of a firing
schedule. See Cone Fire mode for detailed
instructions.
Cones are sensitive to moisture when
stored and to drafts when firing. Keep
them dry or invisible cracks may develop,
causing early bending. If you have a cone
problem, try fresh ones from another
source. Place cones at least 3” back from
peepholes to avoid a false response to cool
air.
At high temperatures cones can be hard
to see. Viewing through dark glasses can
help. Try to keep ware back from cones as
far as possible to avoid a cone melting into
the ware.
PRECAUTIONS
The controller is a temperature control
device. It is not a safety device.
The maximum operating temperature is
105˚ F (41˚C). This temperature refers to
the room temperature and does not pertain to internal temperature of the kiln.
The minimum operating temperature is
40˚ F (4˚ C). See page 15 for cold kiln room
recommendations.
The controller contains static-sensitive
parts that may be damaged by static electricity. Use caution to avoid creating static
that may damage the equipment. In areas
where static electricity is common, or during dry times of the year throughout the
country, touch the kiln lid handle before
touching the controller to discharge the
static.
Never leave the kiln unattended at the
end of the firing.
LOADING:
THE KEY TO CONSISTENT RESULTS
If this is the first firing of the kiln, or if you
have just replaced the elements, please fire
the kiln empty to Cone 04.
Careful loading will always be repaid
with satisfaction. Rushed, careless loading
can bring disaster to pieces you’ve
worked on for hours.
First, never load damp ware into your
kiln! Make sure it’s all bone dry first.
Keep a piece of old greenware on your
drying shelves. New ware should feel no
cooler on your cheek or forearm than an
old piece. If it does, water is still evaporating from it.
Plan your load carefully. Set out all your
pieces before you start loading, and prearrange them as you would to load them.
Always load slowly—dropped ware on
shelves may damage the inside of your
kiln.
Balance out your load by density. If half
your load consists of small, heavy pieces,
and half of large thin-walled pieces, don’t
group the small heavy pieces in one section, but mix them so there is a balance of
each type throughout the kiln. See the
photos at right. Don’t set pieces of ware
directly on the floor of the kiln. The first
shelf should be 1” off the floor of the kiln.
For best results ware should not be placed
within 1” of the elements. If possible, place
ware so that an element groove is under
the shelf.
Don’t place ware too close to the thermocouple. We recommend keeping ware
and shelves at least 2” away.
Large flat pieces like plates that demand
the full width of the kiln should have their
rims positioned between two elements.
We recommend placing a Self-Supporting
Cone in every firing. Although you normally won’t watch it go down, its condition when you unload the kiln will prove
your firing was correct—or alert you to
possible problems if the ware displays
faults.
GREENWARE FOR BISQUE FIRING
Greenware is easier to handle and load
than other ware. Greenware should be
placed in the kiln in its natural position,
but any large flat piece—such as a wall
plaque—can go on its flat side to prevent
warping. Canisters and boxes should be
bisque fired with lids in place for assurance of good fit. For more efficient production, you may wish to experiment
with nesting bisque, as shown below. Just
remember, never strain the rims.
13
GLAZE FIRING
Glaze firings require that you have kiln
washed the bottom of the kiln and one
side of each shelf. Glaze will stick permanently if you fail to keep a good coating of
kiln wash on these surfaces.
Don’t let any of your pieces touch one
another or the side of your kiln.
Stilts are devices used in glaze firing to
elevate the fired pieces from the shelves.
There are many styles. Use those that
provide the widest bearing capacity for
stability. If a piece wobbles on its stilts, it
may tumble during firing. Make sure you
have a good solid base.
“Dry-footing” a glazed piece will eliminate the need to stilt your ware. To dryfoot, avoid glazing the base of your piece.
Or you can apply wax resist to the base
which will cause the glaze to puddle up,
making it easy to remove with a damp
sponge. Any part of the ware that will
touch the shelf cannot have glaze on it.
Leave all possible breathing room
between pieces for best firing uniformity.
Ware should be at least 3/4” apart on the
shelf or bubbles and fumes may contaminate adjoining pieces.
PORCELAIN AND STONEWARE
FIRINGS
These materials differ only in purity of
clays, although they appear different in
color and texture. By definition, both must
be fired hot enough to render the bodies
waterproof (or vitreous) at which temperatures they tend to wilt.
Because the bodies become soft, they
must be bisque and glaze fired resting flat
on a freshly kiln washed surface, or one
sprinkled with silica flour (flint). Flint
must be kept out of the element grooves.
Remember to vacuum the grooves periodically.
Be sure to check clearance at the top of
your porcelain load with a ruler so that
pieces do not touch the lid and stick to it.
To avoid distortion, pieces must either
be carefully designed or the overhangs
specially supported. Figurine arms are
generally supported by hollow greenware
pillars, made of the same clay material.
These will shrink along with the piece,
which in high firings can be as much as 12
percent.
Simpler shapes such as wide plate rims
are generally supported by reusable rings
(setters) made of even higher firing material specifically shaped for that one article.
Both porcelain and stoneware glaze firings are dry-footed to prevent fusion to
the shelves.
OVERGLAZE FIRINGS
Stilting may be helpful because it allows
heat to penetrate between the ware and
the slower-heating shelves. Large doublepointed stilts can be used to hold plates
apart when fired on edge.
GLASS FUSING AND
SAGGING FIRINGS
When firing with more than two shelves,
the lower one is usually posted well off
the kiln floor and the upper one is placed
at least 3” above the first mold. The center
of the load should fall a bit above the center of the kiln.
14
General Firing
Information
When firing a new kiln or one that has
undergone repairs or disturbance, place
and watch a Self-Supporting Cone at three
levels within the kiln chamber.
If you are ever in doubt about a firing,
simply press STOP or unplug it. Never
chance ruining an entire load of ware if
something has toppled off its stilts, if you
hear odd noises, or if the kiln has been
jarred. You won’t harm your ware by
shutting the kiln off before maturity.
Simply set fresh Self-Supporting Cones on
the shelves and begin again. (If you’re firing with a KM-1 wall-mounted controller,
replace the Junior Cone in the Kiln-Sitter
each firing.)
Because you will keep the top peephole
unplugged during the entire firing, never
unplug any of the lower peepholes for
more than a few seconds. This causes a
strong convection “jet-draft” which can
easily fracture ware and chill the cones in
the kiln, particularly visible cones placed
behind that particular peephole.
To determine the adjusted end firing
temperature in Cone Fire Mode, press
Enter to get a blinking temperature, then
press Review. (In Ramp/Hold Mode, this
procedure will flash back the program just
fired.)
PRE-FIRING CHECKLIST
Load kiln.
❏ Set Self-Supporting Cones while loading. See loading instructions for more
detailed information.
❏ Before firing, plug peepholes except the
top one, which is always left open. This
will allow fumes to escape. (Not necessary when using the EnviroVent.)
Kiln ventilation.
❏ The lid needs to be propped 2 1/2”
until the internal temperature of the
kiln reaches approximately 1000˚F, at
which time it is lowered.
❏ If you are using a positive kiln ventilation system such as the Skutt
EnviroVent, the lid does not need to be
propped and peep hole plugs remain in
place throughout the firing. Refer to the
EnviroVent instruction manual for
complete details.
❏ Suggestion: You may wish to place a
final kiln shelf on posts above your load
to deflect any cool air coming in from
the top of the kiln
Wall mounted controllers.
❏ Kilns with a limit timer need to be set
for 20 hours when operating with the
KilnMaster controller.
❏ Use a Junior cone one to two cones hotter in the Kiln-Sitter as a backup for the
controller. See the section on the Wall
Mounted KilnMaster Controller for
more specific information.
Caution:
While the KilnMaster has an excellent
operating record, we recommend that
you do not leave the kiln unattended
during firing.
COLD WEATHER OPERATION
Firing speed.
❏ Keep in mind the heating rate for each
of the speeds: slow, medium and fast.
Consider that the best firing time is
from 6-8 hours for a Cone 04-06 bisque
or glaze firing.
❏ Using this information, program the
kiln for the firing cycle that best suits
the ware you are firing. See The
KilnMaster Controller section for detailed
information regarding programming.
While it is possible to operate a
KilnMaster-controlled kiln in cold weather, the relays which must open and close
freely can tend to stick at low temperatures.
We recommend that your work space be
heated to at least 40˚ F for proper
KilnMaster operation.
If the temperature in your kiln area is
near or below freezing (32˚ F), use a space
heater or hair dryer to gently prewarm the
controller box and thermocouple to 40˚
before starting the firing program.
15
Crystalline glazes often require special
firing to develop fully—including a soaking period at slightly reduced heat after
maturity is reached. Experimentation is
generally needed to discover the correct
amount of soak time and correct soak
temperature for your glaze formulation.
Once your firing schedule is perfected,
store it in permanent memory in
Ramp/Hold mode.
TYPE OF FIRING
This section gives you some useful tips for
various types of firings. Please keep this
information in mind as you program the
KilnMaster.
Venting.
The use of a positive flow downdraft kiln
ventilation system such as Skutt’s
EnviroVent pictured at right keeps the lid
down and all peep hole plugs in place
throughout the firing. This will provide
many benefits, such as:
• a healthy work environment by removing fumes from work area
• more even heat distribution from top to
bottom of kiln
• less color migration between glazes
• eliminates the necessity to lower the
kiln lid during firing
• improves the end firing results of red
glaze.
The most convenient feature is not having
to lower the kiln lid during firing.
16
“Greenglaze” one-fire ceramics
Greater detail can be preserved in conventional and one-stroke underglaze decoration if it is first set by an 019 firing before
glazing and then glaze firing. If the decoration was applied directly to greenware,
the underglaze fire acts as the bisque, and
therefore should be a full Cone 04 firing.
With the talc clay bodies and prepared
glazes available to the ceramist today,
some prefer to “one-fire” their ceramics. In
some instances you can satisfactorily glaze
a piece of greenware and complete it in a
single firing, maturing the clay body and
the glaze at the same time. However,
because there may always be residual
moisture in the clay body, persistent cratering and pin holing may occur, as well
as off-color spots from impurities burning
out of the clay. Fire to at least Cone
05, or preferably to Cone 04.
Ceramic glaze firing.
Overglaze fires.
Warning: Use only lead-free or lead-safe
glazes on any surface which may come in contact with food or drink.
If your ware has been fired to Cone 03 or
04 and is properly glazed, dried, and
loaded, an 06 or 05 low glaze fire or 6 to 10
high fire will normally produce a flawless
surface. If not, consult the ware imperfections section of this manual.
China paints. If fired too hot, fine detail
will be blurred. If fired too cool, china
pigments will not be absorbed into the
glaze and will quickly wear off. Fire until
the paints acquire a sheen similar to the
surrounding glaze. With practice, this can
Underglaze firing.
be judged through the peephole. By setting a group of guide cones, you can note
which cone is down when the sheen
matches, so you can program exactly to
this cone the next firing.
This temperature will vary over several
cones if widely different colors are used.
High quality will be achieved only by
applying and firing the higher temperature colors first, followed by lower temperature ones. The required temperature
also varies with the softening temperature
of the parent surface.
For ceramic and porcelain articles other
than tableware, a single Cone 019 firing
will often be a good compromise.
Metallics (gold, platinum, copper, and
other). These will fire dull if applied too
sparingly, or if underfired. Overfiring,
particularly of larger areas, results in reticulation or “crocking”—shrinkage of the
metal, leaving a network of glaze lines
exposed. Greater overfiring results first in
spotty, then total disappearance of metal
through vaporization. On ceramics and
porcelain start with Cone 019. Metallics
and green glaze are usually incompatible.
Lusters. Luster may flake off if applied
thickly and will “frost” if overfired. To
start over, fire to 06-05. Keep ware well
away from kiln elements. Fire to 019 for
durability, drop to 020 if frost is encountered. Lusters are extremely sensitive to
contamination by kiln vapors, particularly
those from greens, and lid ventilating
must sometimes be continued at 1/2” or
1” throughout the firing.
Overglaze. Breakage of ware during overglaze firings can usually be traced to
roughly-handled, unevenly-dried or
unevenly-sponged greenware. In general,
there is less trouble with art porcelain than
with ceramic pieces, and least with high
quality, pre-glazed, dry-footed imported
china blanks.
Firing schedules for overglazes can usually be accelerated because the ware is
entirely free of moisture. A fast firing rate
will be appropriate for this type of ware.
The lid remains propped until the odor
from the burning medium is no longer
detected. Under-ventilation is the biggest
cause of problems. Of course, if you are
firing with an EnviroVent, this will not be
a concern.
Firing porcelain.
Art porcelain should be bisque fired to
Cone 5 or 6 (not 05-06) in your Skutt kiln
unless glaze is to be applied, in which case
a soft 05 or 06 non-vitrifying fire is appropriate. Ware should be loaded and sup-
ported as noted in the loading instructions. Begin lace fires with the lid posted
open 2 1/2”. Optimum quality can be
achieved several ways:
1. By not loading the kiln very heavily
with ware or extra shelves.
2. By bisque firing twice; one to the firing
temperature of the clay, and another to
one cone equivalent cooler. Wet-sanding with a fine grit silicon carbide paper
between firings will maximize smoothness in the finished piece.
3. “Soaking” for 30-45 minutes slightly
lower than the maturing temperature
will add sheen to the porcelain. The
process for soaking is discussed in the
section about glaze firing.
Porcelain glaze is usually fired to maturity
of the clay and dry-footing is still essential.
Overglaze decoration is fired exactly as
with ceramics, but usually 2 to 4 cones
hotter (017-015) to produce penetration,
gloss and durability on the higher-softening glaze. Overglazes are also frequently
applied directly to porcelain bisque that is
to remain unglazed. Fire to the above
cones.
Firing stoneware.
Most Skutt kilns (except a few 208V models and KM-614-3) can attain Cone 8 or
Cone 10. Because stoneware shapes are
designed for self-support during firing,
the glaze can be matured at the same time
as the body, particularly because the pinholes, sunbursts and scumming which
tend to accompany one-firing are often
highly prized in stoneware. Pieces are dryfooted, of course, and loaded as previously described.
The procedure for stoneware differs
from that for one-fire ceramics in that the
plain or decorated greenware is usually
first given a low bisque firing to Cone 01604 before glazing. Due to the ware’s thickness, the firing rate must be much slower
and more prolonged than in other types of
ware.
While the typical overglaze decorations
are rarely considered suitable on
stoneware, Cone 06-04 reds, oranges and
crackles are sometimes added after firing
to provide effects unobtainable at the
higher temperatures. Warm (130˚F/54˚C)
the vitrified ware to facilitate application
of glaze.
17
YELLOW HEAT
Sagging of sheet glass and bottles is carried out in terra cotta molds dusted with
whiting (calcium carbonate) or one of several similar tradename separators. Use the
Ramp/Hold Mode for glass sagging. This
will allow you to program your own specific rate of climb and hold temperatures.
Glass decoration can often be carried out
with conventional china paints, metallics,
and lusters when the glass is being fired to
sagging temperatures. Freestanding tumblers and other vessels can rarely be taken
above Cone 022 without wilting, so at
such low temperatures the special glass
stains, golds and lusters produce more
dependable results.
Quick Reference Chart
10
9
8
STONEWARE
7
PORCELAIN
6
PORCELAIN
GLAZES
5
4
3
2
ORANGE HEAT
Firing glass.
1
01
CERAMIC
02
BISQUE
03
AND
GLAZE
04
05
06
017
018
019
020
021
18
022
CHINA
GOLD
LUSTERS
GLASS
Temperature
RED HEAT
016
The KilnMaster
Controller
DURING THE FIRING.
AFTER EACH FIRING.
What you’ll see is the internal temperature
of the kiln displayed in the window of the
controller as the temperature increases.
The options available during the firing are:
• Review program at any time.
• View Current Segment of Ramp/Hold
Program.
• Press Stop to interrupt a firing for any
reason.
Please refer to the Key Functions section
of the manual for detailed explanations of
the functions.
1. When the firing is completed, the display will alternately indicate “CPLt” for
complete and show the firing time in
hours and minutes. Press Enter to display the current internal temperature.
In Cone Fire Mode, the KilnMaster will
adjust the shutoff temperature to correspond to the actual heating rate the kiln
can achieve. This may or may not be the
programmed value. To see the adjusted
value, press Review immediately after
activating the touch pad.
2. Allow the kiln to cool naturally. Never
unplug other peepholes or post the lid
until the ware is cool enough for barehanded unloading, about 130˚F.
3. When unloading, be sure to examine
the Self-Supporting Cones on the shelf
to determine if the kiln is firing correctly.
Cone Fire Mode
PROFILES
Segment
Rate
Temperature
Hold
1
80˚/hr
250˚ F
0
2
250˚/hr
1000˚ F
0
3
150˚/hr
1300˚ F
0
4
180˚/hr
1685˚ F
0
5
80˚/hr
1938˚ F
0
Cone Fire–Slow
The Cone Fire mode is extremely easy to
use but gives you access to many
advanced features. You only have to enter
three pieces of information—cone number, speed, and hold time. Cone values
range from Cone 022 through Cone 10.
Entering a cone number causes the controller to look up the final temperature in
a 108˚F/hr Cone Table. You have three
speeds to choose from, slow, medium, or
fast. The speed chooses a ramp profile as
described below. Also, the Cone Fire
mode allows you to specify a hold time at
the final cone temperature. It is also possible to program a preheat or “soaking”
period to insure all the moisture is eliminated from the ware prior to running the
full program.
The Cone Fire mode uses a method
patented by The Edward Orton Jr.
Ceramics Foundation that measures the
rate of firing during the last hour of the firing and adjusts the final temperature to
the correct cone temperature based on the
observed firing rate. This will insure consistent results as the kiln elements become
weaker with normal wear from repeated
firing.
Slow is for hand thrown pottery, porcelain, and stoneware. The firing will take 12
hours* to complete. If you were to program the segments for this firing, they
would look like the chart at right; however, they are automatic.
The graph at right illustrates the segments of a cone 04 firing in Cone Fire
mode, slow speed. The firing will take
approximately 12 hours to complete. The
heating rates are the same for all cones.
The temperature in segment 4 is 250˚ less
than the final temperature for the cone.
*Firing times are approximate, based on a
beginning temperature of 70˚F/21˚C firing to
Cone 04.
Cone 04, Slow Speed
2000
1800
1600
1400
1200
1000
800
600
400
200
0
Hours
0
1938˚
Temperature (˚F)
Description
1685˚
1300˚
1000˚
250˚
2
4
6
8
10
12
19
Medium is the speed you will probably
use for your firings of cast earthenware
and low-fire glazed pieces. It will take
approximately 7.5 hours* to fire. The actual time is dependent on the selected cone
value. Use this speed when the kiln is
packed tighter or your greenware has
thicker sides or a higher moisture content.
If you were to program the segments for
this firing, they would look like the chart
at right.
The graph at right illustrates the segments of a cone 04 firing in Cone Fire
mode, medium speed. The firing will take
approximately 7.5 hours to complete. The
heating rates are the same for all cones.
The temperature in segment 4 is 250˚ less
than the final temperature for the cone.
*Firing times are approximate, based on a
beginning temperature of 70˚F/21˚C firing to
Cone 04.
20
Segment
Rate
Temperature
Hold
1
200˚/hr
250˚ F
0
2
400˚/hr
1000˚ F
0
3
180˚/hr
1150˚ F
0
4
300˚/hr
1694˚ F
0
5
120˚/hr
1946˚ F
0
Cone 04, Medium Speed
2000
1800
1600
1400
1200
1000
800
600
400
200
0
Hours
0
1946˚
Temperature (˚F)
Cone Fire–Medium
1694˚
1150˚
1000˚
250˚
2
4
6
8
10
12
Fast is a speed that will take approximately 4 hours* firing depending on the cone
selected. Fast speed is probably not the
best choice to use during a bisque firing as
it does not allow enough time for the
physical water to burn off and the structural changes to occur. If you were to program the segments for this firing, they
would look like the chart at right:
The graph at right illustrates the segments of a cone 04 firing in Cone Fire
mode, fast speed. The firing will take
approximately 4 hours to complete.
If Review is pressed near the end of the
firing (within one hour of completion) an
adjusted cone temperature of 1937˚ for
Cone 04 will be displayed. For more
explanation, see Appendix 2, Cone Chart
and Heat Work. This section explains why
the end temperature may be higher or
lower than the cone table indicated.
*Firing times are approximate, based on a
beginning temperature of 70˚F/21˚C firing to
Cone 04.
Segment
Rate
Temperature
Hold
1
570˚/hr
1704˚ F
0
2
200˚/hr
1957˚ F
0
PROGRAMMING IN THE
CONE FIRE MODE.
Messages and prompts in the Cone Fire
Mode.
Cone 04, Fast Speed
2000
1800
1600
1400
1200
1000
800
600
400
200
0
Hours
0
1957˚
Temperature (˚F)
Cone Fire–Fast
1704˚
2
4
6
8
10
12
A word about the funny digital characters:
they may seem unreadable now, but
you’ll get used to them.
PF Power Failure, may indicate that the
controller was just plugged in. Press Enter
to clear the PF message and display internal kiln temperature.
HOLd Hold time desired at end of firing
is entered in hours and minutes up to a
maximum of 99 hrs. 99 mins. To enter,
numbers on the right of the decimal are
minutes, to the left are hours. The default
setting is 00 hrs. 00 mins.
ConE Requests firing cone number. Be
sure to enter the correct number keeping
in mind that cooler firing temperatures
have a “0” in front of the number.
SPd Requests the speed of firing, either
slow, medium or fast.
IdLE When idle is flashing alternately
with the internal temperature of the kiln,
the kiln is in IDLE MODE and ready to
pregram.
(Continued overleaf)
21
CPLt Indicates that the firing cycle is
complete. Elapsed firing time in hours and
minutes is displayed.
-ON- Briefly displayed indicating that the
kiln has started.
deLA Indicates the amount of time in
hours and minutes to delay the start of firing. A maximum of 99 hrs. 99 mins. is
allowed. Digits to the right of the decimal
are minutes, to the left are hours.
ALAr Signals the operator that the kiln
has reached a pre-programmed temperature. The default setting is 9999˚F for no
alarm.
PrHt Requests a preheating time be
entered.
A SAMPLE CONE O6 FIRING,
MEDIUM SPEED
At right is a sample of keystrokes for a
Cone 06 firing with medium speed and no
hold.
Helpful hint: If you make a mistake
when entering a cone number, don’t be
discouraged. Simply clear the display by
pressing all zeroes. Press Enter. This will
take you back to ConE. The display will
flash the last value that was input correctly. Enter the correct value and Press Enter.
If a number was incorrectly entered for
HOLd, deLA or ALAr, clear the display
by entering all zeros. Enter the correct
digit(s) for the step being programmed.
Press Enter. If you have already pressed
Enter, you must go back through the program by pressing Enter until you reach
the point where the mistake was made.
Programming a PREHEATING CYCLE
You can now program a preheating or soaking cycle which will run prior to your Cone
Fire program. The program will go from room temperature at a rate of 80˚/hr. to 180˚
and hold at that temperature for the amount of time you enter up to 99 hrs 99 min.
Preheat Instructions
Press “F/C”, “7”, “5”
“PrHt” alternates with the currently selected option, “on” or “off”.
Use the number “1” key to toggle between these two choices.
Press “ENTER” when the option you want is displayed.
If preheat is on then after pressing the conefire button “prHt” will be
displayed and you enter the time you want to hold. Press “ENTER”
and proceed with conefire programming.
Step
1
2
3
4
5
6
7
8
9
10
Press
Action
Cone Fire Enters Cone Fire Mode
06
Enters Cone number desired*
Enter
Stores new Cone number
Med
Enters speed desired
Enter
Stores new speed
5
Enters new hold time
Enter
Stores new hold time
Review
Reviews program segments to ensure accuracy*
Set options if desired:
Delay
Enter delay of start of firing (eg: 1/2 hr. = 00.30)
Alarm
Enter temperature at which alarm sounds (1500)
Review
Reviews all programmed instructions
Start
Begins firing sequence (or Delay countdown)
*Caution: Be sure you have entered the correct
Cone number. 06 is much different from 6! If
you are not certain of the difference, check the
Cone and temperature with the Cone Chart in
Appendix 3.
Display
ConE
06
SPd
MED
HOLd
.05
(Kiln Temp.)
(All segments)
00.30
1500˚F
ConE, SPd,
HOLd, deLA,
ALAr (followed
by their values)
-ON-
To effectively use Ramp/Hold firing programs, it is imperative to understand heat
work theory. See Appendix 2 for further
details.
and will turn On and stay On, effectively
duplicating a High setting on a switch.
The actual rate of heating will be the maximum that particular kiln can achieve on
High. Generally, the maximum heating
rate in a fully loaded kiln is about 100˚ F
per hour as it approaches the top cone rating for the kiln.
Description
Temperature
4
Temperature is the heat you want to reach
before holding or proceeding to the next
rate. The maximum temperature is 2400˚F
(1300˚C). If a Hold temperature is less
than the previous temperature entered,
the controller will ensure that the kiln will
not cool faster than the programmed rate.
Read Appendix 3 on heat work before
you use rate and temperature to emulate a
cone firing.
5
Ramp/Hold Mode
An important note
The Ramp/Hold mode allows you to create your own firing profile. The profile can
consist of 1 to 8 segments. Each segment
consists of three parameters: the rate of
temperature rising or cooling in ˚F or ˚C
per hour; the temperature to fire to during
that segment in ˚F or ˚C; and hold time at
the designated temperature for that segment. The user can program an alarm to
sound when a given temperature is
reached.
Rate
Rate can vary from 13˚ to 9999˚F/hr. For
comparison, in the Cone Fire mode Slow
rate, the initial rate is 80˚F/hr and in
Medium the initial rate is 200˚F/hr. In
Ramp/Hold mode, you decide how fast
you want the kiln to rise in temperature.
Segment 1 will always have a heating rate.
Note: If you should program an
unachievable heating rate such as
9999˚F/hour, the kiln cannot heat that fast
Hold
Hold is the amount of time in hours and
minutes you want to sustain at a given
temperature before it continues to the next
segment. Hold can be from zero to 99
hours 99 minutes. For example, a hold of
15 minutes will appear in the display as
00.15. Digits to the right of the decimal are
minutes; digits to the left are hours.
Segment
Rate
Temperature
Hold
1
2
3
6
7
8
Recording your USEr programs
Before you begin input, copy this page or
create a chart to include all of the segments you plan to program. You may
have 1 to 8 segments. Each segment may
have three components as shown in the
blank chart above.
Calibration for critical work
For those who are doing critical work
which needs exact temperatures, periodically check the accuracy of the thermocouple by placing witness cones on the
shelves. Observe the deformation of the
Self-Supporting Cones at the end of the
firing. If the shelf cone bends to maturity
before the kiln turns off, press Stop and
make a note of the internal temperature.
Adjust the programmed cone or end firing temperature using the knowledge
gained from the cones from the previous
firing. Make a note of any adjustments
you have made so that your future firings
will be more accurate.
Inspect the thermocouple element regularly and replace it as described on page 7
(wall-mounted controller) or 35 (KM kilns)
if it shows signs of flaking or thinning.
23
PROGRAMMING IN
RAMP/HOLD MODE.
Messages and prompts in the
Ramp/Hold Mode.
Some of the characters may appear funny
to you now, but soon you won’t even
notice.
PF Power Failure, also displays when the
controller has just been just plugged in.
Press Enter to clear the message and display the internal kiln temperature.
SEGS (May look like 5E65.) Asks for the
number of segments in the USEr profile.
rA 1-8 Rate for each segment 1-8.
˚F 1-8 Temperature for each segment 1
through 8. Cone Table can be used to look
up cone equivalent values while programming. Please keep in mind the
Time/Temperature equation regarding
heat work discussed in Appendix 2
HLd 1-8 Hold for each segment, 1-8.
USEr Refers to the program you wish to
run or retrieve. As many as six programs
may be stored in permanent memory.
CPLt Indicates that the firing is completed for the number of segments requested.
Firing time in hours and minutes is displayed.
-ON- Indicates that the kiln has started.
deLA Indicates the amount of time to
delay the start of firing. Digits to the right
of the decimal are minutes, to the left are
hours.
24
ALAr Signals the operator that the kiln
has reached a pre-programmed temperature. The default setting is 9999˚F for no
alarm.
IdLE When IdLE is flashing alternately
with the internal temperature of the kiln,
the kiln is in IDLE MODE and ready to
program.
Storing and retrieving programs.
USEr is the first prompt you encounter
when entering a Ramp/Hold program. A
number between 1 and 6 alternately flashes along with the USEr prompt, which
represents the last program which was
fired.
Keep a log near the kiln that tells which
USEr numbers are in use and records the
details of each ramp and hold segment.
If you want to modify or overwrite an
existing program, select that number.
If several people in your studio fire the
kiln, it is always a good idea to review a
stored program and check to be sure that
no one has modified it since you last
used it.
After you have entered all the parameters of your firing profile, you may review
it by pressing Review. The program will
remain in the KilnMaster memory until
changed. You can either leave the USEr
program for later use, or begin firing by
pressing Start. The examples at right give
specific instructions on programming and
retrieving USEr programs..
Segment
Rate
Temperature
Hold
1
570˚/hr
1694˚ F
0
2
200˚/hr
1944˚ F
0
A Sample 2-Segment Cone 04 Firing.
This Cone 04 firing at fast speed in Cone
Fire mode contains 2 segments. The keystrokes needed to duplicate this 04 firing
in Ramp/Hold mode are shown at right.
For comparison, this Ramp/Hold program emulates the Cone Fire–Fast speed
Cone 04 segments shown earlier in the
manual. The difference is that you are
entering each piece of data.
Use the two-segment firing chart at right
as your programming reference.
Helpful hint: When programming a segment, if you make a mistake entering a
number, don’t be discouraged. Simply
clear the display by pressing all zeros,
then enter the correct digits for the step
you are programming. If you have
already pressed Enter, you must go back
through the program by pressing Enter
until you reach the point where the mistake was made.
Step
1
2
3
4
5
6
7
8
9
10
11
12
13
14
15
16
17
18
19
20
21
22
Press
Enter
Ramp/Hold
1
Enter
2
Enter
570
Enter
1694
Enter
0
Enter
108
Enter
1944
Enter
0
Enter
9999
Enter
Action
Display
Clears PF message and displays kiln temperature
Kiln Temp.
Enters Ramp/Hold Mode
USEr / No.
Selects USEr profile number 1
1
Opens the USEr profile to receive data
SEGs / No.
Enters number of segments in profile
2
Stores the number of segments entered
rA1 / No.
Enters the heating rate per hour of segment 1
570
Stores the segment 1 heating rate
˚F 1 / No.
Enters the ˚F temperature to reach in this segment 1694
Stores the target temperature for segment 1
HLd1 / No.
Enters no hold time
00.00
Stores the hold time for segment 1
rA2 / No.
Enters the heating rate per hour of segment 2
108
Stores the segment 2 heating rate
˚F 2 / No.
Enters the ˚F temperature to reach in this segment 1944
Stores the target temperature for segment 2
HLd2 / No.
Enters no hold time
00.00
Stores the hold time for segment 2
HLd2 / No.
Enters temperature to sound alarm (no alarm)
9999
Stores the alarm temperature
- - - - / Temp.
The display will flash “- - - -” twice after programming is complete.
Then it will begin flashing the internal temperature.
Set options if desired:
Delay
Enter delay of start of firing (eg. 1/2 hr. = 00.30)
00.30
Alarm
Enter temperature at which alarm sounds (1500)
1500˚F
Review
Reviews all programmed instructions
SEGS, rA1,˚F 1,
HLd1, rA 2,˚F 2,
HLd2, deLA,
ALAr
Start
Begins firing sequence (or Delay countdown)
-ON- / Temp.)
Quickly accessing a stored program.
If you know that a program you wish to
use has not been modified since you last
fired with it, you do not have to review all
the programming steps.
The instructions below show the details
on quickly accessing a stored program.
This is especially useful for production
studios which need both repeatability and
productivity.
Step
1
2
3
4
Press
Ramp/Hold
1 to 6
Enter
Stop
5
Review
(Optional)
Action
Enters Ramp/Hold Mode
Selects one of your 6 USEr profiles
Opens the USEr profile to receive data
Closes and stores the USEr program selected
Note: Stop only has an effect at this point in the program.
If you start programming, you must press Enter
to all prompts and go through the programming cycle.
Reviews that all of the information is input
correctly and the proper program is selected
6
Start
Begins firing sequence (or Delay countdown)
The Skip Step advanced feature.
Advanced KilnMaster users asked us for
the ability to skip the rest of a step in
Ramp/Hold mode. This is useful if you
know from experience or by viewing
cones through a peep hole that the heat
work is complete for that segment. You
can skip the balance of that segment and
go on to the next one.
Display
USEr / No.
1 to 6
SEGs / No.
----
SEGS, rA1,˚F 1,
HLd1, rA 2,˚F 2,
HLd2, deLA,
ALAr
-ON- (then Kiln
Temp.)
To skip the balance of a segment:
1. Press View, then Enter in quick succession.
2. The display will show SStP (Skip Step).
3. Press Enter again.
4. The display will show the new segment
number.
This feature is not available in Cone Fire
Mode.
25
SAMPLE RAMP/HOLD PROGRAMS
Candling
You may find the following examples of
Ramp/Hold programs helpful. If nothing
else, they will serve as a guide for developing your own programs. Label your
new program and keep it handy for quick
reference on a 3x5 file card or a photocopy
of the blank Ramp/Hold table on page 23.
This Cone 10 firing demonstrates a slow
firing with holds at the lower temperatures. This profile would be gentle and
safe for pottery firing of ware which had
not dried sufficiently before firing. With
modification to the final firing temperatures, this procedure may be used with
other types of clay.
Controlled Cooling
Normal firing to cone 5, rapid* cooling to
1950˚ with a 30 minute hold. Slow cooled
to 1100˚, then normal cooling to room
temperature. This is a useful profile when
glaze firing to ensure gentle cooling and
avoid cracking or crazing.
Quick Fire
A fast fire to Cone 018, rapid* cooling to
1100˚ with a 30 minute hold, then normal
cooling to room temperature. A simple
approach to firing overglazes and china
paints.
26
Segment
Rate
Temperature
Hold
1
50˚/hr
150˚ F
6.00
2
150˚/hr
1100˚ F
2.00
3
570˚/hr
2100˚ F
0
4
108˚/hr
2345˚ F
0
Segment
Rate
Temperature
Hold
1
300˚/hr
1100˚ F
0
2
500˚/hr
1915˚ F
0
3
108˚/hr
2165˚ F
0
4
9999˚/hr*
1950˚ F
.30
5
150˚/hr
1100˚ F
0
Segment
Rate
Temperature
Hold
1
9999˚/hr*
1314˚ F
0
2
9999˚/hr*
1100˚ F
.30
*9999 is the default for the maximum heating or cooling rate. The actual rate will vary with the
kiln model, density of the load, air circulation, and the room temperature.
Porcelain Fire
This 2 segment Porcelain firing is recommended by Seeley’s to fire the porcelain
they manufacture. Upon completion a
Cone 5 witness cone should be touching
the shelf, Cone 6 should have a 10˚ bend
and a Cone 7 witness cone should have no
bend at all.
Crystalline Glaze
This example is fired to Cone 10, taking
approximately 11.5 hours to fire, with a
rapid drop in temperature to 2050˚ and a
hold of 3 hours. To assist with rapid cooling from peak temperature to hold temperature, one may pull peep plugs.
Replace peep plugs when hold temperature is reached.
Glass Fusing
Glass firing is specialized and will require
some experimentation to arrive at the perfect program for your kiln and glass products. However, this will give you a place
to start experimenting.
Segment
Rate
Temperature
Hold
1
500˚/hr
2000˚ F
0
2
100˚/hr
2185˚ F
0
Segment
Rate
Temperature
Hold
1
200˚/hr
800˚ F
0
2
150˚/hr
1250˚ F
0
3
300˚/hr
2100˚ F
0
4
108˚/hr
2330˚ F
0
5
9999˚/hr*
2050˚ F
3.00
Segment
Rate
Temperature
Hold
1
600˚/hr
1480˚ F
.15
2
9999˚/hr
1000˚ F
2.00
3
90˚/hr*
970˚ F
2.00
4
120˚/hr
750˚ F
0
*9999 is the default for the maximum heating or cooling rate. The actual rate will vary with the
kiln model, density of the load, air circulation, and the room temperature.
27
Alarm
Key Functions
of the Controller
Temperature Scale Selection.
You can select either the Fahrenheit or Centigrade temperature scale. You must select a
scale before pressing Start. Do not change the scale during a firing. The scale remains in
permanent memory. To change to Centigrade or back to Fahrenheit, follow these steps:
Step
1
2
Press
˚F or ˚C
Enter
Action
Selects Fahrenheit or Centigrade scale
Stores the new selection
(Decimal point in lower right corner of
display indicates ˚C)
Display
CHG˚
(Flashes Temp.)
Delay Start
The Alarm tells you when the kiln has reached the temperature you selected. The alarm
sounds until you turn it Off by pressing Enter. When the alarm sounds it does not interrupt firing. Pressing Enter to stop the alarm does not interfere with the program.
The alarm temperature can be reset during firing without disturbing the firing program. Do not press Stop during the firing to reprogram the alarm.
When not in use, the alarm should have a value of 9999 entered so it will not sound.
One example of alarm use would be to set it for 1000˚F/538˚C to alert you that it is time
to lower the lid. The following steps describe how to set the alarm temperature.
Step
1
2
3
Press
Alarm
0-9999
Enter
Action
Enters alarm mode
Selects temperature at which alarm is to sound
Stores the new alarm temperature.
Screen begins flashing internal kiln temperature.
Display
ALAr
0-9999
(Flashes Temp.)
Delay start allows the operator to program the kiln now for a start at a later time that is
more convenient. The option provides for a delay programmed in hours and minutes up
to 99 hours and 99 minutes. This option is best utilized when a Skutt EnviroVent kiln
ventilation system is installed on the kiln. With an EnviroVent, the system is completely
automatic. No one will have to be close by to close the lid at the appropriate time.
The delay time is held in memory from one firing to another. To clear the option without clearing the entire program, enter 0 for delay time.
Setting a Delay can begin when the internal kiln temperature is flashing.
A sample heating alarm is illustrated below using a two segment Ramp/Hold program.
The Alarm is programmed after the Ramp/Hold.
Step
1
2
3
The Alarm is set for 1500˚F. The alarm will sound at 1500˚ while the kiln is heating to
1816˚. When the alarm sounds, press Enter to stop it. The kiln will continue to fire the
program until it is complete.
28
Press
Delay
0-9999
Enter
Action
Enters delay start mode
Selects time (hrs.min) to delay start of firing
Stores delay time until reprogrammed.
Screen begins flashing internal kiln temperature.
Display
deLA
0-99.99
(Flashes Temp.)
Segment
Rate
Temperature
Hold
1
570˚/hr
1566˚ F
0
2
108˚/hr
1816˚ F
0
Review
Cone Table Feature
The Review mode can be entered from the “flashing internal kiln temperature”. Caution:
Pressing Review during firing momentarily stops operation of the kiln, allowing temperature to drop. This drop in temperature will increase firing time and may also cause a
slight overfire if this procedure is repeated frequently during firing.
After displaying the current program, the screen will return to its prior state. The
adjusted temperature is displayed during the last hour of Cone Fire Mode. See Appendix
2 for more information on heat work.
The values shown during Review are as entered in the original profile. This is a good
time to recheck the temperature value of the cone you entered during Cone Fire mode.
If the kiln has been started with a 3 hour delay time set and one hour later you enter
Review mode, the delay value will still be displayed as 3, not the remaining 2 hours.
When Review mode is finished for this example, the display will be showing a time
value indicating the time remaining in the delay start segment of the firing profile.
The Review display is quite rapid, so you may need to go through several sequences to
see all the segments. The following are the steps to review the program:
This function allows you to look up the final temperature the controller will reach for a
given cone value. The built-in cone table uses a heating rate for self-supporting cones of
108˚F/hour. It is vitally important that you know the temperature you intend to reach
and the temperature tolerance of the clay you are working with. If the wrong cone number is entered, a possible overfire may occur. Cooler cones begin with a 0 in front of the
number. The larger the number with a 0 in front, the cooler the firing temperature. High
fire cones begin at 1 and go up. The larger the number, the hotter the firing. See the Cone
table in Appendix 2.
This function can be entered when the internal temperature of the kiln is flashing or
when Ramp/Hold mode is asking for temperature in degrees for any of the six segments. The steps are as follows:
Step
1
Press
Review
Action
Displays all programmed functions and values
Display
(See below)
Step
1
2
3
Press
Cone Table
022-10
Enter
Action
Enters cone table mode
Selects desired Cone (eg: 06)
Sends temperature to Ramp/Hold program.
Display
ConE
06
1819
View
Review Display for Cone Fire Mode
Review Display for Ramp/Hold Mode
ConE
SPd
HOld
deLA
ALAr
USEr
SEGS
rA 1-8
˚F 1-8
HLd 1-8
deLA
ALAr
Cone value
Firing speed: Slow, Med, Fast
Time in hrs. min. to hold
Delay start in hours
Temp. when alarm will sound
Stored program number
Number of segments
Rate of temp change ea. segment
Temp. to reach each segment*
Hrs. min hold each segment
Hrs. min delay before firing
Temp. when alarm will sound
*If Centigrade scale is elected, display
will show ˚C.
The View function is used during Ramp/Hold firing to display the current segment of
program currently in operation. If this function key is engaged during a Cone Fire, the
data displayed will not resemble your programmed input. Unlike Review, only the current segment will be displayed.
Step
1
Press
View
Action
During Ramp, displays heating rate and segment.
During Hold, displays Hold and segment.
Display
rA, 1-8
HLd, 1-8
29
Powering the Kiln
Stop Firing
When the kiln is plugged in, the display reads PF. Press Enter and wait for the internal
temperature to flash before proceeding. The internal temperature will flash constantly
even when the kiln is not in use. The controller is not activated until Enter is pressed and
a choice of Cone Fire Mode or Ramp/Hold Mode is selected.
At the end of a firing, the display will read CPLt until you press Enter, at which time it
will flash only the internal kiln temperature. In areas where there are frequent power
fluctuations or electrical storms, it is wise to unplug the kiln, or turn its breaker off, when
it is not operating.
Pressing the Stop key will turn the controller’s output off and cause the display to flash
the internal temperature of the kiln. You can stop any time during operation. During a
firing operation, the only function of Stop is to terminate a program. As explained on
page 25, it is can also be used to quickly enter a stored USEr profile during programming.
Start Firing
From the flashing temperature, press Start to begin a firing. The controller will display
On while it does a self-check. The amount of time in a delay start is then displayed and is
counted down until zero delay is remaining, at which time the firing starts. During firing,
the kiln temperature is displayed.
30
Questions
and Troubleshooting
How can I correct a value that’s been
incorrectly typed before pressing Enter?
Clear the display by pressing all zeros,
then enter the correct digits for the step
you are programming. A cone number
incorrectly entered is not corrected this
way. After pressing 0000 and Enter, the
screen will again ask for a cone number.
Enter the correct cone number and continue entering other data. Press Cone Fire.
Enter the correct cone value and press
Enter for all other questions. Press Start
when you are satisfied that all values are
correct. See pages 19-22 for detailed
instructions.
How can I change only one value for a
complicated Ramp/Hold firing profile
without reentering the whole program?
Use the method for entering a new program, but press Enter for every value that
will remain the same. Make a change in
the value that is incorrect, then continue.
See pages 23-25 for detailed instructions.
How can I change the firing profile during the firing process?
Press the Stop key. This will stop the firing. Use either the Cone Fire mode or
Ramp/Hold mode to input the new firing
profile for the remaining portion of the firing. Press Start to resume the firing. The
controller will automatically determine
where to enter the program (based on the
current internal temperature) to proceed
with the firing. See pages 19-22 for
detailed instructions.
How can I fire my kiln with preprogrammed instructions for a certain cone
number?
Set the kiln in Cone Fire mode where the
only entries are cone number, firing speed
and hold time.
How will I know what the temperature
of a given Cone will fire to?
Proper heat work is a factor of both time
and temperature. Using visual cones is the
most accurate way to ensure proper firing.
The built-in Cone Table gives firing temperatures based on optimum firing conditions. According to Orton’s information, a
Cone 04 with a heating rate of 80˚ F will
produce a final temperature of 1935˚ F
when fired in Slow Mode. A heating rate
of 200˚ F will produce a final temperature
of 1954˚ F firing in Fast Mode. As mentioned earlier, firing at a slower rate usually results in ware with fewer problems.
KILN PROBLEMS
The kiln shuts off too early.
The kiln can be restarted if the cones on
the shelf indicate an under-fired load.
(This should be used only if you were present when the kiln fired off.) The cones are
no longer accurate if they have cooled
much from the time of shut off. To restart
follow these steps.
1. Press Cone Fire or Ramp/Hold to
view the firing just completed.
2. Press Enter to accept any of the segments that are correct until the point
where the cone number or final firing
temperature is requested.
3. Program in a hotter cone or higher firing temperature. You could also add a
few minutes of hold time at the final firing temperature.
4. Press Start after the reprogramming is
complete. The kiln will begin firing
based on current temperature and will
fire to completion using the newly programmed data.
Helpful hint: If the firing is just slightly
underfired, program 5 minutes of hold
time at the final firing temperature. This
will allow the sections of the kiln that are
somewhat cooler to catch up to the hotter
sections.
The kiln says CPLt but the kiln won’t
cool off.
Check to see if elements are still glowing
inside the kiln. This may indicate that a
relay has stuck and needs to be replaced.
Unplug the kiln and contact your distributor for further information.
At night I see a blue flash coming out of
the control box when it clicks. Is it serious?
The flash occurs when the contacts open
causing a small arc. This is a normal
occurrence and should not be a concern.
I pressed a cone number but the new
cone number is not displayed.
After entering new values for any step in
programming, it is necessary to press
Enter.
I programmed a Ramp/Hold profile and
when I pressed Start, the alarm sounded.
Review the program to insure that all segments of the profile have a value entered.
Also, check the alarm to see if a value has
been entered that is lower than the room
temperature. The default setting for the
alarm is 9999.
The kiln is plugged in, but there is nothing on the display.
First check your circuit breaker to ensure it
has not tripped. If the circuit breaker is
okay, check the fuse. The fuse is located
on the bottom of the KM-1 Controller and
on the lower left side of the kiln mounted
controller. Turn the knob a quarter turn
counter-clockwise to remove the fuse.
Check the fuse wire, and if broken, replace
the fuse. If the fuse is smokey, replace it.
After the fuse is replaced, if the new fuse
blows, check for other possible causes. A
blown fuse may be caused by a short in
the circuit or a power surge.
(More overleaf.)
31
Some segments of the display are dimmer than others.
WARE IMPERFECTIONS
When a few segments of the LED display
become dimmer than the others, the problem may be the result of age, indicating
the circuit board may soon fail. Another
possible cause is exposure of the controller
to high heat. This situation needs attention. Do not use the kiln when this problem is present. Contact your distributor.
Common glaze faults
The thermocouple is flaking.
Flaking is normal with Type K thermocouples, especially when high fired. Use a
soft bristle toothbrush to remove the flakes
and vacuum them from the kiln so they
do not attach to your ware. Remove the
thermocouple element periodically and
check it for thinning.
Crawled glaze. In “crawling”, blank or
bald spots appear in the glaze surface after
firing. Crawling may be caused by having
a dusty or dirty bisque surface, or applying the glaze heavily. Skin oils from excessive handling of greenware may clog clay
pores, causing the glaze to be repelled.
Hard spots in the clay surface created by
excessive sponging or polishing of the
greenware is also a cause. To salvage such
a piece, apply additional glaze to the bare
spot and refire, or cover the entire piece
with a textured glaze and refire.
The end firing temperature is different
now than when I first got my kiln and
the results do not seem quite right. What
should I do?
After about 50 Cone 6 firings, or 150 Cone
04 firings, it is necessary to replace the
thermocouple element. When the temperature seems to drift, it is an indication that
the thermocouple is become thinner and
wearing out. Another possibility is a cone
correlation difference. Fine tuning of firing
temperatures is available. Call the Skutt
factory for instructions.
32
Cratered or bubbled glaze. In this glaze
error, the craters develop as a result of
body gases erupting through the glaze
and “freezing” as the kiln cools. This condition is caused by underfiring. To salvage
such a piece, grind down the high spots,
apply a thin coating of glaze and refire to
a higher temperature.
Pinholes, crazing.
Sagging glaze on a vertical surface.
Sagging or running glaze is generally
caused by too heavy an application of
glaze. It is a warning sign that too much
glaze is being applied. Take extra care
with similar pieces.
Craters.
Crawling glaze.
Pinholes. Pinholes are tiny indentations in
the glaze surface which are generally no
larger than the point of a pin. This fault
may occur in almost any type of glaze,
and is caused by underfiring. To salvage
a piece, refire at a higher temperature.
Excess glaze.
Excessive application of glaze. The example shown demonstrates the type of surface which can result from too heavy an
application of glaze. This error is difficult
to salvage, so remember to apply less
glaze in the future. In general glaze should
be the thickness of a postcard when
applied. Allowing the glaze to dry thoroughly between coats will assist in identifying the amount of glaze that has been
applied.
Excess glaze.
Discolored overglazes. Underfiring occasionally leaves small pin holes or pores in
the glaze that can’t be seen without a magnifying glass. If there is poor ventilation in
the kiln, china paint oils may seep into
these pores and burn to charcoal, seriously
affecting the color of the finished piece.
You can sometimes repair the damage by
soaking the piece for several hours at a
low red heat about 1200˚F/650˚C, cooling
and inspecting to be certain that all the
carbon has been oxidized, and then giving
the piece a true glaze firing.
Cracks in the body. When a crack occurs
in the body, examine the glaze at the edge
of the crack. If the glaze is inside the crack
or rounded over the corners, the break
occurred early in the glaze firing, and was
probably present in the clay body before
the piece was glaze fired. In some
instances a sound appearing piece of ware
will crack during a glaze or overglaze firing. This can be caused by an excess of
water used in the original clean-up of the
greenware. Too much moisture applied to
an area of greenware causes that area to
expand while the dry or slightly damp
areas have already gone through normal
shrinkage. Even if a piece of dry, cleaned
greenware shows no visible cracks, it is
possible an internal stress is there. This
crack can open up during later firings. If
the glaze at the edge of the crack is sharp,
the break developed after the glaze was
fired. This type of crack is usually due to
opening the kiln door or peepholes while
the ware is still hot.
Crazing. Crazing is characterized by a network of fine cracks in the glaze surface. It
may be caused by underfiring bisque, clay
or glaze, incompatible clay and glaze, or
by opening the kiln door before the ware
is completely cooled. Crazing might be
eliminated by refiring the piece to a temperature one cone higher than the original
firing.
Pinholes, crazing.
Delayed or aftercrazing. Crazing may
also occur days or months after the piece
has been fired. Although the finish may
look perfect when it is first removed from
the kiln, crazing may occur. While underfiring may not be the direct cause of
immediate crazing, it is the major cause of
delayed crazing. To correct it, refire the
piece to the cone recommended by the
manufacturer of the glaze. Allow the kiln
to cool naturally.
Shiny matte surface. A matte glaze which
becomes glossy in the glaze firing is generally caused by overfiring. It is extremely
difficult to correct. Remember to fire to a
lower temperature in the future.
Textured glazes, smoothed. A textured
glaze is formulated to develop an irregular surface when fired. If it fails to do so, it
is generally due to too light an application
of glaze. It is extremely difficult to correct
this condition. Reglazing and refiring
rarely will help.
Cloudy or discolored glazes. This condition is characterized by a muddy or discolored appearance in the fired glaze. It
may be caused by using dirty or contaminated brushes, by not leaving enough
space between the glazed pieces during
firing so chemical fumes jump from one
glaze to another, or by placing the piece
too close to the kiln elements. It is
extremely difficult to correct.
Grainy glaze. Uneven or irregular color in
the glaze surface is generally caused by
too thin an application of glaze. To correct,
apply a coat of glaze, then refire.
Gray or discolored red glazes. Gray wash
out, or black areas in the red glaze may be
caused by too thin an application of glaze,
the red glaze being fired with colors
which it is incompatible, (generally yellows and greens) or firing too hot. This
may also be the result of too little oxygen
present during the firing. Cone 07 to 06 is
usually the best range for red glazes. To
salvage, apply a heavy coat of glaze and
refire. Use of the Skutt EnviroVent is
another way to eliminate these problems.
Underglaze peeling. Underglaze may
pull away from the clay body. This may
be caused by too heavy an application, or
not firing the underglaze before applying
glaze. It is extremely difficult to correct
this error.
This section on glaze faults prepared in collaboration with Martin L. LaVor who assisted with
information and illustrations.
33
Repairs
KILN REPAIRS
Happily, your Skutt kiln will give you few
occasions to refer to this section. The careful repair person can keep a Skutt kiln
operating with no difficulty. But if you are
not mechanically inclined, it is best to call
an authorized Skutt service person, or
competent small appliance repair person
or electrician. Take this owner’s manual
along with you. To transport your kiln,
handle sections by their outer edges, and
place them on a flat surface, cushioned by
folded blankets.
Wall repairs.
The premium brick used in Skutt walls
will withstand thousands of firings without crumbling. Broken element grooves
are usually the result of carelessness in
handling the kiln sections or in loading
shelves.
It’s almost impossible to cement a broken groove lip back into place without
contaminating the heating element. If the
element starts to sag out of position, hang
it on 1 1/2” element pins inclined toward
the back of the groove.
Caution: Elements become very brittle
after a few firings, so if straightening is
necessary, heat the element electrically to
visible redness, unplug the kiln from the
wall and immediately push the element
34
back into position with a metal implement, reheating whenever stiffening is
detected. Place your hanging pins in a
straight row and the element will serve
the rest of its normal life.
Replacement of wall bricks is simple in
Skutt kilns.
1. Order needed bricks from the parts list
available from your Skutt dealer.
Replacement of terminal bricks
involves cutting and renewing element
connectors and should normally be
postponed until it’s necessary to
replace that element.
2. If repairing a top ring, disconnect the
lid and remove all fittings from the
jacket.
3. Remove the screws that hold the control panel to the kiln. Swing the panel
open. Slide the connectors off the terminal strip (they are pre-numbered for
easy identification). Unplug the thermocouple tabs which are marked positive and negative. Lift the box straight
up to remove it. Place on a clean flat
surface.
4. Place the ring, damaged side up, on a
perfectly flat surface such as the kiln
lid.
5. Pull out the straight element pins at the
ends of the damaged brick.
6. Gently lift elements from troughs with
a pick or long-nose pliers and gently
lift them out into firing chamber just
far enough to allow damaged brick to
be slipped out. Remember that the elements are brittle.
7. Loosen the worm-type jacket fasteners
equally, 1/2” to 3/4”.
8. Make sure element troughs in the brick
are proper side up. Insert the new
brick. This is easiest if a helper holds
the adjoining bricks away.
9. Hold the worm-type jacket fastener
housings with pliers and tighten them
evenly until they meet resistance. Slip
elements into new grooves and pin
down.
10. Use sandpaper over a wood block to
sand the edges of new brick down
flush with its neighbors. Vacuum thoroughly when sanding is completed.
11. Replace hinges and hardware, and
position the kiln so you can finish
tightening the jacket just before the kiln
shuts off on your next Cone 06 or hotter firing.
Floor repairs.
Glaze drips on a properly kiln washed
floor can easily be removed without damage to the surface below. Remember to
remove all glaze drips before taking the
kiln to porcelain/stoneware temperatures,
where the glaze will over-fire and soak
through the kiln wash.
The floor can be patched level again
even if several square inches have been
damaged to a depth of 5/8”. Using a
sharp knife or X-Acto tool, simply undercut or dovetail the edges of the area to
retain a patch made by mixing dry high
fire kiln wash with just enough water to
form a very stiff putty. Compress the
putty into place, and scrape flush with the
rest of the floor. Allow to dry well before
firing.
Don’t forget that your kiln floor has two
lives. Just turn it over to use the second
side. The underside isn’t pretty but it can
be lightly sanded to remove any discoloration, kiln washed and put back into use
to save you money.
Lid repairs.
Because your Skutt lid is so strongly
cemented and well reinforced by its stainless steel band, you’ll have to work hard
to get it to develop a crack which will sift
particles on your ware. Use only the contoured venting prop to “post” your lid to
save the dustproof coating.
If a tall glazed piece expands enough to
fuse to the lid, do not attempt to fill the
resulting hole, but simply smooth its interior with sandpaper and blow clean. A
coating of refractory cement will prevent
the brick from crumbling and falling on
your ware. Your lid has a flip side if ever
needed. Just remove the screws holding
the hinge leaves, turn the lid over, and
reattach the leaves to new 3/32” holes
drilled in the lid’s band.
Replacing elements.
While Skutt kiln elements are not difficult
to replace, they require electrical connector
tools. We recommend you ask your Skutt
dealer about the procedure.
Replacing the thermocouple
element on KM Automatic Kilns.
(See page 5 for instructions on the Wall
mounted KilnMaster.)
1. Remove the screws that secure the red
control box to the kiln.
2. Swing the box open.
3. The thermocouple has a yellow, insulated lead wire attached to the terminal
strip with slide on connectors and
marked with positive (+) and negative
(-). Note: The negative (-) wire is red,
not black!. Slide the connectors off the
terminal strip.
4. Remove the two screws that hold the
thermocouple terminal block onto the
heat shield.
5. Gently pull the thermocouple assembly out of the brick.
6. Loosen the two screws which hold the
thermocouple element in place as
shown in the picture at right and
remove it from the thermocouple
block.
7. Insert the new thermocouple element
in place and tighten the screws. A
porcelain sleeve is included with the
thermocouple element. On early KM
kilns, it may be necessary to insert the
sleeve into the brick to accommodate
the new size thermocouple.
8. Reattach the terminal block onto the
heat shield with the two screws.
9. Reconnect the thermocouple lead wire
to the terminal strip, matching the positive and negative markings.
10. Close the box.
11. Replace the screws.
KILNMASTER CONTROLLER
CIRCUITRY.
The KilnMaster controller components are
solid state and cannot be repaired in the
field. If repairs are necessary, call the factory to make arrangements for return of
parts. When the switchbox is received we
will evaluate the problem and call you
with a cost estimate.
Glossary
Below is a glossary of some useful ceramic
terms.
Aftercrazing. Glaze crazing after firing—
days, weeks or months later.
Bisque. Ware which has passed through
its first firing without benefit of glaze.
Candling. The practice of slow firing and
holding the kiln temperature around 150˚
for a period of time to thoroughly dry
ware.
Ceramic. In general, any man-made solid
product resulting from the fusion of mineral substances. Also used to identify a
type of high-talc body which fuses at
moderate temperatures—Cone 05-03.
Clean-up. The process of cleaning, scraping, sanding and sponging greenware to
make it ready for firing and decoration.
Cone plaque. A stand or rest for holding
shelf cones during firing.
Controller. Electronic device that can be
programmed for specific firing results.
Can be an independent device that is wallmounted, or built into the kiln.
Crackle glaze. A type of glaze which
when fired is intentionally “crazed”.
Stains or other colorants are often rubbed
into the cracks to heighten the effect.
Crazing. Small hairline cracks in glazed
surfaces that appear after firing. Usually
caused by underfiring the body.
Dipping. Application of glaze to bisque or
greenware by simply immersing it in a
container of the glaze.
Dry footing. Leaving the base of a piece of
ware free of glaze, or removing applied
glaze from the underside of the foot by
wiping. Avoids the need to stilt.
Element. A coil of resistance wire through
which current passes, creating the necessary heat for firing.
Element groove. The recess in the kiln
brick into which the element is placed.
Firing. The act of maturing clays and
glazes by the application of heat.
Firebrick. The insulating blocks which
form the chamber of your kiln.
Foot. The supporting rim at the base of a
piece of ware.
Glaze. A special finely ground glass suspended in water with the aid of gum or
emulsifiers. Glaze may be clear or colored;
glossy, eggshell or matte; applied to
bisque or greenware by brushing, spraying, pouring or dipping.
Greenware. Unfired, fragile clay forms,
wet or dried.
Impurities. Minute quantities of foreign
matter in clays which often cause spots in
glaze.
Incising. Cutting through moist greenware in a desired pattern.
35
Kiln-Sitter. A Dawson trade name for
their device which uses pyrometric cones
to automatically and accurately shut off
the kiln.
Kiln wash. A high heat-fusing powder to
which you add water and brush onto kiln
shelves and kiln floor. It allows removal of
accidental glaze drips.
Limit timer. A device which operates by
time alone, back-stopping the KilnSitter in
case it is defeated.
Lusters. Iridescent overglazes, applied
thinly.
Mature. A completely fired piece of ware
or glaze.
Multitester. A combination ohm/volt
meter.
Nesting. Placing one piece of greenware
within another for bisque firing.
Ohm meter. An instrument for measuring
resistance in elements.
One-fire. The practice of applying glaze to
greenware and firing one time.
Overglaze. Decorative liquids applied
over the glazed surface, such as china
paints, lusters, gold and other metallics.
Fired at lower temperatures.
Peephole. An opening in the kiln wall
which allows visual inspection of the
chamber during firing.
Peephole plug. A piece of refectory used
to plug the peephole.
36
Pinholes. Small holes in the glazed surface of ware.
Porcelain. A clay body which when fired
to approximately Cone 6 becomes vitreous and translucent.
Posts. Ceramic shapes that support kiln
shelves during firing. Three posts per shelf
are recommended.
Pouring. The act of filling a mold with
slip.
Pyrometer. A high temperature thermocouple device. Most useful in glass firing.
Pyrometric cone. Slender, unfired clay
pyramids which soften and bend when
the kiln load has matured to the desired
degree. Two sizes are available. Junior
Cones are for use in the KilnSitter and
Self-Supporting Cones are for visual use
on shelves.
Refractory. Any high temperature clay
material.
Sgraffito. The decorative technique of
removing some areas of underglaze from
ware with a sgraffito tool, thus allowing
the color of the body to show through.
Shelf. A slab on which ware is placed in
the kiln. Allows utilization of the full kiln
height separated by posts.
Slip. Liquid clay slurry which is poured
into molds.
Soaking. Holding a kiln at a given temperature.
Stilts. Various single-and multi-pointed
supports used to hold ware up off the
shelves during the glaze fire, thus preventing adhesion.
Stoneware. A high fired ceramic body
which is vitreous, not translucent, and
usually made of native clays.
Talc. A white powder used in ceramic
clay bodies.
Terminal brick. The kiln brick through
which the twisted element ends pass into
the switch box.
Terra cotta. A natural, low firing red clay.
Thermocouple. A pair of wires which are
inserted into the firing chamber to serve as
the temperature-sensing element of the
pyrometer or controller.
Underglaze. Liquid coloring which is
applied directly to bisque or greenware.
Venting. The practice of propping up the
kiln lid (posting) to allow the escape of
vapors during initial stages of firing.
Vitreous. Fully fused, waterproof ware
which need not be glazed to hold water.
For sanitation reasons food surfaces need
to be glazed.
Volt meter. An instrument for measuring
voltage at the kiln.
Warpage. The loss of ware shape during
firing, usually caused by overfiring or
improper placement in the kiln.
Ware. Any shaped piece of pottery,
stoneware, earthenware or porcelain, in
any state of completion.
APPENDIX 1
KilnMaster
Controller
Specifications and
Capabilities
The kiln-mounted controller on Skutt
KM-series automatic kilns and Wallmount KilnMaster controller have the
same specifications.
Thermocouple: Type K
Electronic cold junction compensation
Power supply: 24 volt center tap transformer
Output: Drives up to 450 mA at 12
volts
Fuse: 1/2 Amp, 250 Volt
Control Panel: Sealed Touch Pad,
washable
Control capabilities:
Delay Firing Start: up to 99 hours and
99 minutes
Cone Fire Mode: Entry by cone number, 3 firing speeds, Cone 022 to
Cone 10.
Ramp/Hold Mode: Entry by temperature, create programs from 1 to 8
segments. Each segment can specify
a rate of heating or cooling to a specified temperature with an optional
hold, to maximum temperature of
2,400˚ F. Stores up to six complete
programs.
Electronic Cone Table: Converts cone
numbers to temperature.
Program Review: Review program
and current segment during firing.
Temperature Alarm: Adjustable to
desired temperature.
Safety features: Power Failure
Detection, Thermocouple Failure
Detection, Microprocessor Fault
Detection.
Designed and manufactured in the
USA.
APPENDIX 2
Cone Chart
and Heat Work
Cone deformation
Each cone has a number which corresponds to a heating rate/temperature
combination producing a cone deformation. At the beginning of the firing
the cone is standing at an 8˚ angle. A
perfectly fired cone will be bent to a
90˚ angle. More than a 90˚ angle is
overfired, less than 90˚ is underfired.
How a cone works.
• The maturing temperature or bending point of a cone is determined by
different chemical compounds which
are formulated to relate to heat work
in clays and glazes.
• Time and temperature are key factors in the way a cone operates. Here
are some points to consider:
1. Firing clay takes varying amounts of
time to be “done”. Thick walled
pieces take more time to cure to the
center than thin walled-cast pieces,
just like a 20 lbs turkey takes longer
to cook than a 10 lbs one.
2. Cones continue to drop after the firing is complete. A cone held at a
temperature for a long time will continue to bend even if the programmed temperature is lower than
the cone number. For example, if the
end firing temperature is slightly
short of maturity and put on hold
for a long time, the cone will eventually bend to full maturity.
3. Cone deformation depends on heating rate and the final temperature.
The chart on the next page helps
define this principle. It illustrates the
different temperatures a cone will
bend depending on the heating rate
per hour. For example, heating at
18˚/hr, the cone will deform at
1890˚; heating at 108˚/hr, the cone
will deform at 1944˚, at 175˚/hr, the
cone will deform at 1954˚.
37
Cone 04, 90˚ drop, Relationship of heating rate and shut-off temperature.
Self -Supporting Regular
1960
1957˚F
Shut-off Temperature (˚F)
1950
Cone
Number
1946˚F
1940
1938˚F
1930
1920
1910
1900
1890
1890˚F
1880
Heating Rate Increase
50˚F/hr
How the KilnMaster
can emulate cones.
As you have just seen, a cone drops
according to a complex set of factors.
The KilnMaster has been designed to
take these factors into account when it
shuts off the kiln. Most important to
the KilnMaster is the heating rate if a
cone correlation is to be accurate.
Here’s how the KilnMaster does it.
38
Orton Pyrometric Cones
100˚F/hr
150˚F/hr
200˚F/hr
Cone Fire mode
• By selecting Slow, Medium or Fast,
the controller goes into a set routine
for finishing the firing to insure a
good cone correlation.
• The controller has a preset final
heating rate that allows the
KilnMaster to adjust the final temperature value up or down from the
108˚/hour standard heating rate that
is used on Orton’s Cone chart.
• If the kiln cannot produce the rate,
the KilnMaster still measures the
actual rate and adjusts the final temperature accordingly.
10
9
8
7
6
5
4
3
2
1
01
02
03
04
05
05 1/2
06
07
08
09
010
011
012
013
014
015
016
017
018
019
020
021
022
Final
Temperature
at 108˚ F/hr
2345˚ F
2300
2280
2262
2232
2167
2124
2106
2088
2079
2046
2016
1987
1945
1888
1859
1828
1789
1728
1688
1657
1607
1582
1539
1485
1456
1422
1360
1319
1252
1159
1112
1087
Final temperature for cone maturity depends
on rate of temperature increase during final
300 to 400˚ of firing. Courtesy Edward Orton
Jr. Ceramic Foundation.
Ramp/Hold mode
In Cone Fire mode, the KilnMaster
does all the calculating and thinking
that goes into emulating a cone. In
Ramp/Hold, you the operator must
participate to get accurate cone firing
results.
• If you are trying to fire to a cone
temperature in this mode, you must
use a rate/temperature combination
in the last hour of firing that the kiln
can reasonably accomplish and that
is predictable. Yes, you can program
200˚ or 300˚/hr, but a heating rate of
108˚/hour is about the maximum
final heating rate you can achieve
with an electric kiln when high firing.
• If you program a target heating rate
that the kiln can’t achieve, overfiring
will probably result. That final
Ramp/Hold segment will run until
the desired temperature is reached.
However, the slower actual rate will
cause more heat work to be done
than you desired.
• We recommend using Cone Fire
mode to emulate a cone because the
controller will automatically compensate for the firing rate of your
kiln. When you need to achieve a
temperature between cones, we recommend making the last hour of the
firing your final segment and using
a rate less than 108˚/hour. Use the
108˚F data from the Orton Cone
Chart shown here instead of any
other charts you may be using.
APPENDIX 3
Controller
Display Messages
ALAr
A temperature between 0˚ and 9999˚
that can be programmed to alert the
operator to take action.
CHG˚
Changing from Fahrenheit to
Centigrade or the reverse. When operating in Centigrade a decimal will
appear in the lower right corner of the
display screen.
ConE
The kiln is in Cone Fire mode and
needs the operator to input an appropriate Cone value from 022 to 10.
CPLt
The controller has completed a firing
profile. The firing time in hours and
minutes is displayed. The user needs
to press Enter. The controller will display the current internal temperature
of the kiln.
deLA
Indicates time in hours and minutes
before start of firing.
Err
A software error has occurred. Press
any key to display the elapsed firing
time and the temperature when the
error occurred. Refer to the table of
Errors in Appendix 4.
F1, F2, F3, F4, F5, F6, F7 or F8
The controller is in Ramp/Hold mode.
The user needs to enter an end temperature in ˚F or ˚C for each segment
of the firing profile.
FAIL
The thermocouple and controller are
not properly connected. Fix the connection, then press Enter to display
the kiln’s current temperature. Press
Start after the connection is fixed. The
thermocouple could be damaged.
Check the connections, if still no luck
you may need a new thermocouple.
HOLd
Indicates a holding time in hours and
minutes at the end of a Cone Fire program.
HLd1, HLd2, HLd3, HLd4, HLd5,
HLd6, HLd7 or HLd8
The controller is in Ramp/Hold programming mode. The user needs to
enter a period of time in hours and
minutes that the controller should
maintain for each segment of the firing
profile.
IdLE
Indicates controller is in IDLE MODE
and is ready for programming.
-ONBriefly displayed at the beginning of
firing to indicate that the kiln has
started.
PF
Displays at the time the kiln is initially
powered up. Press Enter to clear the
message and internal kiln temperature
will flash. PF also signals when the
controller has experienced a power
failure of more than 2 minutes.
PrHt
The controller is in Cone Fire
Programming Mode and is asking for
a Preheat soak time to be entered in
hours and minutes.
rA1, rA2, rA3, rA4, rA5, rA6, rA7
or rA8
The controller is in Ramp/Hold programming mode. The user needs to
input an appropriate temperature in
˚F/hr or ˚C/hr for each segment in the
profile.
SEGS
(Looks like SE65) The controller is in
Ramp/Hold mode. The user needs to
enter the number of segments in the
profile being programmed.
SPd
The controller is in Cone Fire mode.
The user needs to enter the appropriate speed; slow, medium or fast for
this firing.
STOP
Designates the intentional termination
of a program while in operation.
USEr
one feels that adequate heat work has
been done in the current segment.
Immediately advances the program to
the next segment.
flashing temperature
The kiln is off and the display is showing the kiln’s current temperature.
alternating display of time and
temperature
The kiln is in a Ramp/Hold firing profile and is in the soak stage. The display is indicating the kiln’s internal
temperature and the remaining Hold
time for that segment.
decreasing time
The kiln is in a Delay start segment of
a Cone Fire or Ramp/Hold mode. The
display is showing the remaining time
before the kiln starts to heat.
steady temperature
the kiln is in the ramping stage of
either a Cone Fire or Ramp/Hold fire
profile. The display is showing the
kiln’s current internal temperature.
decimal point between 10’s and 100’s
Hours.minutes being displayed.
right hand decimal point on
Kiln is operating in ˚C mode. To
change back to ˚F, press Temperature selector then Enter.
A prompt at the beginning of a
Ramp/Hold program which allows
the user to choose a stored program.
SStP
Short for Skip Step. Can be selected
during a Ramp/Hold program when
39
APPENDIX 4
Error and description
Error Messages
1
The following errors may appear in the
window of your controller. Along with
the error number, the display indicates
elapsed time in hours and minutes and
also the temperature the kiln reached
when the error occurred. Please call your
distributor or Skutt Ceramic Products at
(503) 774-6000.
In addition to the error messages in the
chart at right, all of which indicate a problem which needs to be corrected, their is
an informational error message: ErrP.
When it flashes, a brief, non-critical power
outage has occurred. The controller was
able to resume firing and the load of ware
is not in danger. It continues to alternately
display with the internal temperature until
you press Enter.
40
Possible cause
Correction
Ramping up and rate is less than 12˚ per
hour. Rise is checked every 7.5 minutes.
Rate must persist for 22.5 minutes before
display.
Kiln-sitter has tripped. Limit timer has
expired. Elements are weak. Load is
heavy. Relay failed. Low voltage.
Place one cone hotter in Kiln-Sitter.
Add time to limit timer. Check elements. Reduce size of load. Check
relays. Check voltage.
2
Program in hold, temperature 50˚ or
more above hold temperature. Error
must persist for more than 18 seconds
before error is triggered.
Excessive heating rate going into the
hold. One or more relays are stuck in
the closed position.
Reprogram lower heating rate. Turn
Off and unplug. Check resistance at
plug with ohmmeter.
3
Program in hold, temperature 50˚ or
more below hold temperature. Error
must persist for more than 18 seconds
before error is triggered.
Kiln cannot maintain temperature to
reach hold. Lid opened during firing.
Elements may be weak.
Do not open lid during firing. Check
elements with ohmmeter.
4
Program ramping down and temperature more than 50˚ above last hold temperature. Error must persist for more
than 18 seconds before error is triggered.
Relays may be stuck closed (failed
closed).
Turn Off and unplug. Check circuit at
plug with ohmmeter.
5
Program ramping down and temperature more than 50˚ below local set point.
Must persist for 18 seconds to trigger.
Normally kiln will have plenty of
power to maintain a cooling rate. Was
lid opened? Elements failing?
Do not open lid until the kiln has
reached at least 500˚ F. Check elements.
6
Negative reading detected at thermocouple, indicating it is wired improperly.
Thermocouple wires have been
switched. Somewhere lead wires have
been crossed.
Check and fix any backward connections.
7
Ramping up and temperature 50˚ above
local set point.
Possible relay failure in the closed position.
Turn Off and unplug. Check relay.
8
Controller in positive ramp, kiln temperature is ramping down. Negative rate
must persist for 22.5 minutes to trigger
error.
On Wall-Mount KM-1, The Kiln-Sitter
may have tripped or timer depleted
and turned Kiln-Sitter off.
Use hotter cone in Kiln-Sitter. Add
more time to limit timer.
FAIL
System cannot sense thermocouple.
Thermocouple broken or disconnected.
Secure or replace thermocouple.
MASTER SWITCH BOX
Wiring Diagram
Automatic Kiln
Models:
KM-714
KilnMaster
Electronic
Control Unit
+
Yellow
Control Signal
Red
1
1
+
Yellow
120 V Element
Transformer
Terminal Strip
Front
Back
KILN RING
Fuse
Relay
120 V Element
Red
Transformer
Terminal Strip
Front
Back
KILN RING
KilnMaster
Electronic
Control Unit
Control Signal
for kilns produced
after October 1997
MASTER SWITCH BOX
Fuse
1
1
Relay
Wiring Diagram
Automatic Kiln
Models:
KM-614
1
Voltage Supply
2
2
2
2
3
3
4
4
5
5
3
3
4
4
5
5
Relay
120 V Element
3
Relay
2
120 V Element
4
120 V Element
120 V Element
120
120
208/240
6
6
+
+
-
-
Thermocouple
Terminal
Block
120 V Plug
6
6
+
+
-
-
Terminal
Block
120/208-240 V Plug
Thermocouple
APPENDIX 5
Wiring Diagrams
41
MASTER SWITCH BOX
Wiring Diagram
Automatic Kiln
Models:
KM-1018
KilnMaster
Electronic
Control Unit
-
+
Red
Yellow
Transformer
TOP RING
Terminal Strip
Front
Back
208-240 V Element
Fuse
1
208-240 V Element
1
1
2
2
3
3
4
4
5
5
6
6
+
+
-
-
2
2
2
3
3
4
4
5
5
6
6
208-240 V Element
2
BOTTOM RING
208-240 V Element
3
Relay
BOTTOM RING
3
4
208-240 V Element
Thermocouple
42
+
+
-
-
Fuse
1
Relay
1
Transformer
Relay
Terminal Strip
Front
Back
1
Control Signal
+
Yellow
Relay
208-240 V Element
KilnMaster
Electronic
Control Unit
-
TOP RING
208-240 V Element
MASTER SWITCH BOX
Red
Control Signal
Wiring Diagram
Automatic Kiln
Models:
KM-818
KM-818-30A
4
208-240 V Element
Terminal
Block
208/240 V Plug
Thermocouple
Terminal
Block
208/240 V Plug
MASTER SWITCH BOX
Wiring Diagram
Automatic Kiln
Models:
KM-1027, 3 Phase
KM-1227, 3 Phase
KilnMaster
Electronic
Control Unit
-
+
Red
Yellow
Transformer
TOP RING
Terminal Strip
Front
Back
208-240 V Element
Fuse
1
208-240 V Element
1
1
2
2
3
3
4
4
5
5
6
6
+
+
-
-
2
2
3
3
4
4
5
5
6
6
+
+
-
-
208-240 V Element
2
208-240 V Element
3
3
4
5
BOTTOM RING
Thermocouple
5
BOTTOM RING
6
208-240 V Element
208-240 V Element
4
208-240 V Element
Relay
208-240 V Element
Relay
2
MIDDLE RING
Relay
MIDDLE RING
Fuse
1
6
208-240 V Element
Terminal
Block
208-240 V Element
208/240 V Plug
Relay
1
Transformer
Relay
Terminal Strip
Front
Back
1
Control Signal
+
Yellow
Relay
208-240 V Element
KilnMaster
Electronic
Control Unit
-
TOP RING
208-240 V Element
MASTER SWITCH BOX
Red
Control Signal
Wiring Diagram
Automatic Kiln
Models:
KM-1027
KM-1227
Terminal
Block
208/240 V 3φ Plug
Thermocouple
43
KilnMaster Wall Enclosure
Wiring Diagram
KilnMaster
Controller
KM-1 Three Phase
Electronic
Control Unit
KilnMaster Wall Enclosure
Electronic
Control Unit
+
-
+
Yellow
Red
Yellow
Control Signal
Red
Control Signal
Wiring Diagram
KilnMaster
Controller
KM-1 Single Phase
Transformer
Transformer
Fuse
Fuse
Pilot Relay
Pilot Relay
Thermocouple
Thermocouple
Inserted in
firing chamber.
Inserted in
firing chamber.
208/240 V 3φ Receptacle
208/240 V Receptacle
3φ Pilot
Socket
208/240 V Plug
208/240 V 3φ Plug
50 Amp Contactor
40 Amp 3φ Contactor
44
APPENDIX 6
APPENDIX 7
KILN IMPROVEMENTS
Wall-Mounted KilnMaster
UL Listing
Set-up and
specifications for Skutt
PK production kilns
If you are an intensive kiln user, you
might find a PK kiln to be the appropriate
choice for your next kiln purchase. Here
are some the differences from our standard KM kiln line:
First, PK kilns are designed to fire full,
Cone 10 loads without stalling on the high
end. To do so, they are equipped with
industrial gauge wiring and three types of
elements for better firing balance. Because
of their high rating, electrical codes require
that they be direct wired by an electrician;
therefore no plug is included.
Mercury displacement relays are used for
longer life and quieter operation.
The hinged control box is larger, and compression connectors are used on the feeder
wires for easier element replacement.
Finally, Model KM-1231PK comes with an
additional stand for bottom slab support
under heavy loads. This extra stand is not
included when the kiln is ordered with a
Skutt EnviroVent, which provides all the
support needed.
The KM-1 wall-mounted KilnMaster controller is a UL-listed accessory when
used with the following Skutt UL-listed kiln models.
1227-3, 280
1227-3
1027-3
1027-3
1027, 231, 235
1027
1018-3
1018, 231-18
818-3
818, 185
818P-3
818P, 181, 183
714, 145
240 or 208 volt
240 or 208 volt 3 phase
240 or 208 volt
240 or 208 volt 3 phase
240 or 208 volt
240 or 208 volt 3 phase
240 or 208 volt
240 or 208 volt
240 or 208 volt
240 or 208 volt
240 or 208 volt
240 or 208 volt
208-240 volt
Skutt PK production kilns are heavy duty,
high capacity units designed to meet the
needs of the high fire production potter,
tile maker and light industrial user. These
kilns are equipped with upgraded components and wiring that will allow them to
high fire extremely dense loads in a relatively short time.
The KM-1227PK is a twelve sided kiln
similar in capacity to our KM-1227—
27” deep and 9.92 cu. ft.
The KM-1231PK is 31” deep and offers
11.57 cu. ft. of capacity.
Both PK kilns are available in single and
three phase, 240V or 208V.
FIRING
Skutt PK kilns feature our KilnMaster controller, so operation is identical to other
KM kilns. Even though the earlier sections
of this manual do not refer specifically to
the PK kiln line, you may follow all the
instructions on programming and firing
routines.
45
UNPACKING AND MOVING PK KILNS
Follow the general instructions on kiln setup found on pages 8 and 9 of this manual.
You will probably want to separate the
kiln into sections when you set it up or
move it to a different location. These
instructions are slightly different than for
standard KM kilns.
Caution: Before disassembling any PK
kiln, be sure to turn off power to the kiln
by throwing the circuit breaker or removing the fuse on its circuit. Do not restore
power to the kiln until it is fully reassemble.
Note: The mercury relays in the switch
box must be operated only with the
switch box in a normal, vertical orientation.
To disassemble the kiln
1 Remove the screws from the left side of the
control box and swing the control box open.
2 Remove the screws holding the feeder wires
to the two pole blocks on the heat baffle.
There are three sets with two feeder wires
going into each set.
3 Remove the thermocouple wires from the
thermocouple terminal strip on the baffle.
They are attached with slide on connectors
and should be pulled straight off. Pulling at
an angle can damage the connector.
4 Lift the box up and set it aside.
5 Unfasten draw pull catches and lift sections
apart using the handles.
To reassemble PK kilns:
1 Stack the sections in original sequence and
secure the draw pull catches..
2 Place the control box on its hinges.
3 Reattach the feeder wires to their corresponding block. Make sure the connection is very
tight to avoid electrical problems.
4 Reattach the thermocouple wires making sure
that the red wire (-) is secured to the red tab
and the yellow wire is connected to the silver
tab (+). On single zone kilns there will only
be one set of thermocouples and they should
be attached to the center group of tabs.
46
5 Reattach the screws which secure the control
box to the kiln jacket.
CONNECTING PK KILNS
As mentioned earlier, PK kilns must be
direct wired or “hard wired” into your
studio electric system by a qualified electrician. Flat and Phillips screwdrivers are
the only tools required.
At the time of connection, your electrician
should also check your electric wiring
which supplies the kiln, to be sure that the
copper wire size and breaker size are adequate for your PK kiln electrical requirements as shown in the table at right.
Electrical requirements for Skutt PK Production Kilns
PK KILN ELEMENTS
Model
Volts
Amps
Watts
Max. Cone
Copper Wire
Size*
Fuse or
Breaker Size
KM-1231PK
KM-1231PK
KM-1231PK-3ph
KM-1231PK-3ph
KM-1227PK
KM-1227PK
KM-1227PK-3ph
KM-1227PK-3ph
240
208
240
208
240
208
240
208
72
80
44.5
51.5
60
69
40
46.7
17300
16640
17300
17300
14300
14300
14300
14300
10
10
10
10
10
10
10
10
2
2
6
6
4
2
6
6
90
100
60
60
80
90
50
60
*An electrician will need to make the electrical connection. The kilns are “hard wired” to
allow for greater amperage. For each additional 50 feet use heavier wire, numerically two numbers
lower—for example, instead of #6, use #4. If you anticipate installing any larger kiln in the future,
use the heavier wire.
To achieve optimum heat distribution,
there are three types of elements in the
production kilns : Top/Bottom,
Intermediate, and Center. The tables
below show the proper placement and
type when replacing elements.
KM-1227PK
Section
Upper
Master
Lower
Element
Position
Top/Bottom
Intermediate
Center
Center
Intermediate
Top/Bottom
1
2
3
4
5
6
Element
Position
Top/Bottom
Intermediate
Center
Center
Center
Intermediate
Top/Bottom
1
2
3
4
5
6
7
KM-1231PK
Section
Upper
Master
Lower
47
48
49
Index
Aftercrazing .................................................... 35
Alarm............................................... 2, 22, 24, 28
ALAr......................................... 22, 24, 28, 39
Bisque ..............................................................35
Brick repairs.................................................... 34
Candling ................................................... 26, 35
Ceramic ........................................................... 35
Clean-up ......................................................... 35
Clear display .................................................. 31
Clicking .......................................................... 11
Complete
CPLt ............................................... 22, 24, 39
Cone
ConE .............................................. 21, 38, 39
deformation .............................................. 37
heat work .................................................. 38
value .......................................................... 29
Cone Fire .............................................. 1, 19, 31
description .................................................. 1
profiles ...................................... 1, 19, 20, 21
programming ..................................... 21, 22
Cone plaque ................................................... 35
Cone Table ........................................... 4, 29, 38
Cones .............................................................. 12
self-supporting ......................................... 12
senior ......................................................... 12
Controlled cooling ........................................ 26
Controller ......................................................... 4
connecting
3 phase ............................................... 6, 10
single phase ............................................. 6
kiln settings ................................................. 7
Kiln-Sitter ................................................. 7
switches .................................................... 7
timer ......................................................... 7
locating ......................................................... 6
mounting...................................................... 6
50
Crackle glaze .................................................. 35
Cracks in the body......................................... 33
Crazing ..................................................... 33, 35
delayed or aftercrazing ........................... 33
Crystalline glaze ........................................... 27
Delay ................................................... 22, 25, 28
deLA ........................................ 21, 22, 24, 39
Dipping .......................................................... 35
Display dim ................................................... 32
Dry footing ............................................... 14, 35
Electrical
chart of specifications......................... 10, 47
3 phase.................................................... 6, 10
voltage ....................................................... 10
Element
groove......................................................... 35
replacing .................................................... 35
EnviroVent ..................................................... 16
Error
Err ............................................................... 39
messages ................................................... 40
FAIL ................................................................ 39
Firebrick ......................................................... 35
Firing ........................................................ 16, 35
after the firing............................................ 16
china paint ................................................ 16
during the firing ...................................... 18
glass ............................................... 14, 18, 27
glaze ............................................... 14, 16, 27
greenglaze ................................................. 16
lusters ........................................................ 17
metallics .................................................... 16
overglaze ............................................. 14, 16
oxidation ................................................... 11
porcelain ............................................. 14, 17
stoneware ............................................ 14, 17
underglaze ................................................ 16
Floor repairs .................................................. 34
Foot ................................................................. 35
Fuse, electrical ......................................... 32, 37
Glass slumping .............................................. 27
Glaze ................................................... 14, 18, 35
cloudy ........................................................ 33
cratered or bubbled ................................. 32
crawled ...................................................... 32
excessive .................................................... 33
grainy ......................................................... 33
red
discolored .............................................. 33
grayed .................................................... 33
sagging ...................................................... 32
textured ..................................................... 33
Greenware ............................................... 13, 35
Heat work ...................................................... 37
Hold ................................................................. 24
HLD ........................................................... 39
HLd 1-8 ............................................... 25, 39
HOLd ................................................... 22, 39
Impurities ....................................................... 35
Incising ........................................................... 35
Kiln-Sitter ....................................................... 36
Kiln wash ................................................. 11, 36
KilnMaster controller ............................... 4, 35
features ........................................ 1, 4, 19, 37
wall mount
repairs ...................................................... 7
Lid repairs...................................................... 34
Limit timer ..................................................... 36
Loading .................................................... 13, 15
glass fusing ............................................... 14
glaze ........................................................... 14
greenware ................................................. 13
overglaze ................................................... 13
porcelain .................................................... 13
Locating kiln .....................................................8
Lusters ...................................................... 17, 36
Mature ............................................................ 36
Multitester ...................................................... 36
Nesting ........................................................... 36
Ohm meter ..................................................... 36
One-fire .......................................................... 36
Overglaze ................................................. 16, 36
discolored .................................................. 33
PK Production Kilns...................................... 45
Peephole ................................................... 15, 36
Peephole plug .......................................... 15, 36
Pinholes .................................................... 32, 36
Porcelain ............................................ 17, 27, 36
Posts, ............................................................... 36
Pouring, ........................................................... 36
Power failure, PF .............................. 22, 25, 39
Pyrometer ....................................................... 36
Pyrometric Cone ............................... 12, 36, 38
Ramp/Hold ............................. 1, 26, 31, 37, 38
description ................................................ 24
hold ...................................................... 24, 39
programming ..................................... 25, 26
rate ............................................................. 24
temperature .............................................. 24
Rate
rA ............................................................... 39
rA 1-6 ......................................................... 25
Refractory ....................................................... 36
Repairs ............................................................ 34
Wall repairs .............................................. 34
Floor repairs ............................................. 34
Lid repairs ................................................. 34
KilnMaster repairs ..................................... 7
Replacing elements ....................................... 35
Replacing thermocouple ...................... 7, 8, 35
Review ............................................................ 29
Segment .................................................... 24. 29
chart ..................................................... 24, 29
SEGS .................................................... 23, 39
Sgraffito .......................................................... 36
Shelf .......................................................... 10, 36
Shiny matte surface ...................................... 33
Shut off
early ........................................................... 31
Slip .................................................................. 36
Soaking ........................................................... 36
Specifications
fuse ............................................................. 37
Speed
SPd ....................................................... 22, 39
Stilts .......................................................... 14, 36
Start firing ....................................................... 30
Stoneware ................................................ 17, 36
Stop firing ...................................................... 30
Talc .................................................................. 36
Temperature
flashing ............................................ 1, 30, 39
scale selector ............................................. 28
steady ......................................................... 39
Terminal brick ............................................... 36
Terra cotta ...................................................... 36
Thermocouple .....................................7, 36, 37
flaking ........................................................ 32
mounting ..................................................... 7
replacement .......................................... 7, 35
Three-phase
operation ............................................... 6, 10
Time
decreasing ................................................. 39
Troubleshooting ............................................. 31
fuses ........................................................... 32
Underglaze ........................................ 16, 33, 36
Unpacking kiln .......................................... 8, 46
User profile ................................................ 2, 23
USEr ................................................. 2, 24, 39
Venting ..................................................... 15, 36
EnviroVent .......................................... 15, 16
lid ......................................................... 15, 16
View ................................................................ 29
Vitreous .......................................................... 36
Volt meter ...................................................... 36
Ware .......................................................... 32, 36
Warpage ......................................................... 36
Wiring diagrams ...................................... 41, 48
51
Photocopy Masters for your
Ramp/Hold User Profiles
Segment
Temperature
Hold
Segment
1
1
2
2
3
3
4
4
5
5
6
6
7
7
8
8
Segment
52
Rate
Rate
Temperature
Hold
Segment
1
1
2
2
3
3
4
4
5
5
6
6
7
7
8
8
Rate
Temperature
Hold
Rate
Temperature
Hold
Skutt Ceramic Products
6441 S.E. Johnson Creek Blvd.
Portland, Oregon 97206-9594
Telephone (503) 774-6000 Fax (503) 774-7833
www.skutt.com
[email protected]