Download MANU AL - Techgrow
Transcript
WWW.TECHGROW.NL
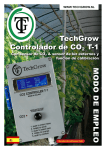
TechGrow
T-1 CO2 CONTROLLER
with external CO2 sensor, light sensor and
calibration function
MANUAL
software version: 2.20
TechGrow T-1
user manual
CONGRATULATIONS!
You have purchased the TechGrow T-1 CO2 controller. This controller is very easy to use and
is by far the best in its class thanks to its fully digital technology and revolutionary Push &
Turn controls.
SPECIAL FEATURES:
• Can be used in both small as well as very large rooms, Plug & Play.
• Adjustable from 300 to 2000 ppm.
• Extremely accurate external CO2 sensor, manufactured by SenseAir® Sweden, the absolute
market standard for CO2 measurements.
• The CO2 sensor has a built-in light sensor that automatically switches between day and night
settings.
• The sensor performs a new measurement every second.
• Turns the CO2 source (CO2 generator, CO2 cylinder) on/off via a 220V relay.
• Automatically detects whether the CO2 sensor is properly connected. (i.e. broken cable, bad
connection).
• Connection of the sensor via regular network cable (UTP). Comes equipped with 5 meters of
cable. The supplied cable can be replaced by a longer UTP cable (maximum length 20 meters,
do not use repeaters).
• Modern blue and white display with automatic background lighting. Display lighting turns off
automatically after 30 seconds.
• Automatic 110V - 230V detection.
• Power interruption memory for: setpoint and hysteresis.
• LED indicator turns on when CO2 is dosed.
• Built-in calibration function to adjust the CO2 sensor for outdoor. Before using the calibration
function, please read the instructions carefully.
2
INSTALLATION:
1.1. It is recommended to mount the CO2 sensor on a wall close to the CO2 source, with a
minimum distance of 50 cm. It is not advisable to place the sensor directly over the CO2
source if that source can reach very high temperatures (CO2 generator). The sensor must be
placed about 1 meter above the floor. For this, use the enclosed mounting bracket.
Sensor can
left or right
Sensor
50 cm
100 cm
CO2
source
ATTN: please make sure the light sensor (the milk-colored cap on top of the CO2
sensor) can absorb any light directly and is not obstructed by e.g. shelves or fixings,
as it will not be able to differentiate between night and day!
2. Also mount the TechGrow T-1 controller on the wall with the enclosed bracket.
3. Connect the sensor to the TechGrow T-1 controller with the supplied UTP cable.
4. Plug the CO2 source into the socket of the TechGrow T-1 controller.
5. Plug the TechGrow T-1 controller in to a 230V wall socket.
6. Ready!
RESET MEMORY MIN./MAX. CO2 VALUES:
• If there is no arrow (=>) or blinking square ▓ on the display,
please press the Push & Turn button for 4 seconds. Min./max. values will be replaced by
the current CO2 level.
3
OPERATING AND ADJUSTING THE TECHGROW T-1 CONTROLLER:
All the settings are adjusted using the Push & Turn Button (PTB).
You enter the menu by briefly pushing the button.
An arrow appears on the left side of the display.
If you rotate the button now, the arrow will alternately switch between CO2 set to CO2 +/- and back
again.
SETTING SETPOINT:
•
•
•
•
Push the PTB once (image 2). An arrow (=>) appears on the display of the value CO2 set.
Push the PTB again (image 3). A blinking square ▓ appears in front of the CO2 value.
You can set the desired CO2 level using the rotary button (image 4).
Confirm this value by pushing the PTB, or wait 5 seconds for automatic confirmation
(image 5).
1
2
3
4
5
4
TechGrow T-1
user manual
ADJUSTING HYSTERESIS (BANDWIDTH):
• Push the PTB once (image 2). An arrow (=>) appears on the display next to CO2 set.
• Use the rotary button to move the arrow (=>) in front of CO2 +/- (image 3).
• Push the PTB once for confirmation (image 4). A blinking square ▓ appears in front of the CO2
values.
• You can set the desired CO2 hysteresis by using the rotary button (image 5)
(advised: 0050 ppm).
• Confirm this value by pushing the PTB or wait a couple of seconds for automatic
confirmation (image 6).
1
2
3
4
5
6
5
TechGrow T-1
user manual
OPERATING THE TECHGROW T-1 CONTROLLER:
If the CO2 value of the room drops below the set value (setpoint), the CO2 source will
be activated. After a while, the CO2 value will rise and when the CO2 set value has
been reached, the source will be deactivated again.
EXAMPLE:
The CO2 set is at 670.
The CO2 +/- is at 40.
The current CO2 value in the room is for example 733, which is higher than the CO2
set, so the CO2 source is deactivated. The red light is turned off.
The CO2 gradually starts to drop to 670: still nothing happens.
Only when the value drops below the CO2 set minus the CO2 +/-, which in this case is
670 – 40 = 630, the CO2 source is activated and the light turns on.
The CO2 is now rising and, as soon as the value of 670 has been reached, the CO2
source is deactivated.
By adjusting the CO2 +/-, a quiet and stable atmosphere can be obtained. The factory
default for the CO2 set is 700 and the CO2 +/- is set to 50.
AUTOMATIC FUNCTIONS OF THE TECHGROW T-1 CONTROLLER:
1.If no CO2 sensor is connected to the TechGrow T-1 controller, the display will
show **NO CO2 SENSOR**, and the CO2 value will automatically be set to 9999,
in order to keep the CO2 source deactivated.
2.At night (when the lights are off), when the light sensor detects very little light
or no light at all, the CO2 source is ALWAYS deactivated. That is why it is very
important that the light sensor can directly see any light source! Otherwise, you
would be unable to dose any CO2 during the day (when the lights are on),
because the TechGrow T-1 controller would think it is night!
3.The display backlight turns off automatically after 30 seconds. Only when the
button is pushed or turned will the display light up again.
TECHNICAL SPECIFICATIONS:
Power supply: 110 or 230 Volt (automatic)
Consumption: 3 Watt (with sensor, without CO2 source)
Adjustment range CO2 set: 300 to 2000 ppm
Adjustment range CO2 +/-: 10 to 200 ppm (advice 50 ppm)
(hysteresis bandwidth)
Measurement time: 1 measurement per second
6
Notes
7
8


