1
WWW.TECHGROW.NL
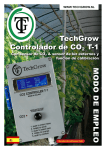
TechGrow
T-1
CO2 CONTROLLER
with external CO2 sensor, light sensor and
calibration function
Issued: 01-11-2014
MANUAL
software version: 2.20
TechGrow T-1
user manual
CONGRATULATIONS!
You have purchased the TechGrow T-1 CO2-controller. This CO2-controller is very easy to use
and is by far the best in its class thanks to its fully digital technology and revolutionary
Push & Turn controls.
SPECIAL FEATURES:
• Plug & Play, can be used in small to very large rooms.
• Adjustable between 300 – 2000 ppm.
• Extremely accurate external CO2-sensor, produced by SenseAir® Sweden, the absolute industry standard in CO2 measurement.
• The CO2-sensor has a built-in light sensor to automatically switch between day-night settings
• The sensor takes a measurement every second.
• Turns the CO2 source (CO2 generator, CO2 cylinder) on/off using a 230V relay.
• Automatically detects broken cable or bad connection of the connected sensors.
• Connecting the sensor is done with a standard network cable (UTP). Included is a 5 meter cable.
• Modern blue-white display with automatic background light. Automatically turns off the backlight
of the display after 30 seconds.
• Automatic 110V – 230V detection.
• Memory in case of power outages for setpoint and hysteresis.
• LED indicates when CO2 is being dosed.
• Built-in calibration function to calibrate the CO2 sensor against outdoor air. Before using the
calibration function, please read the instructions carefully.
• Possibility to connect the TechGrow AM-T: A SMS-module to remotely read the CO2 value of
the CO2 Controller.
2
INSTALLATION:
1. It is recommended to mount the CO2 sensor on a wall close to the CO2 source, with a minimum distance of 50 cm. It is not advisable to place the sensor directly over the CO2 source
if that source can reach very high temperatures (CO2 generator). The sensor must be placed
about 1 meter above the floor. For this, use the enclosed mounting bracket.
Sensor can
left or right
Sensor
50 cm
100 cm
CO2
source
ATTENTION: please make sure that the light sensor (the milk-colored cap on top of the
CO2 sensor) can observe any light directly and is not obstructed by e.g. shelves or fixings, as it will not be able to differentiate between night and day!
2. Also mount the TechGrow T-1 controller on the wall with the enclosed bracket.
3. Connect the sensor to the TechGrow T-1 controller with the supplied UTP cable.
4. Plug the CO2-source into the socket of the TechGrow T-1 controller.
5. Plug the TechGrow T-1 controller into a 230V wall socket.
6. Ready!
OPERATING AND ADJUSTING THE TECHGROW T-1 CONTROLLER:
• All the settings are adjusted by using the Push & Turn button (PTB).
• Enter the menu by briefly pushing the button. An arrow appears on the left side of the display. If you turn the button now, the arrow will switch between CO2 set to CO2 +/- and back
again.
3
TechGrow T-1
user manual
ADJUSTING SETPOINT:
• Push the PTB once (photo 2). An arrow (=>) appears on the display in front of the CO2 setvalue.
• Push the PTB again (photo 3). A blinking square ▓ appears in front of the CO2 value.
• You can modify the desired CO2 level using the rotary button (photo 4).
• Confirm this value by pushing the PTB, or wait 5 seconds for automatic confirmation
(photo 5).
1
2
3
4
5
4
TechGrow T-1
user manual
ADJUSTING HYSTERESIS (BANDWIDTH):
• Push the PTB once (photo 2). An arrow (=>) appears on the display next to CO2 set.
• Use the rotary button to move the arrow (=>) in front of CO2 +/- (photo 3).
• Push the PTB once for confirmation (photo 4). A blinking square ▓ appears in front of the
CO2 values.
• You can modify the desired CO2 hysteresis by using the rotary button (photo 5) (advise: 0050
ppm).
• Confirm this value by pushing the PTB or wait a couple of seconds for automatic confirmation
(photo 6).
1
2
3
4
5
6
5
TechGrow T-1
user manual
RESET MEMORY MIN./MAX. CO2 VALUES
If there is no arrow (=>) or blinking square ▓ on the display, press the PTB and hold
for 4 seconds. The min./max. values will be replaced by the current CO2 level.
6
TechGrow T-1
user manual
OPERATING THE TECHGROW T-1 CONTROLLER:
If the CO2 value in a room drops below the set value (setpoint), the CO2-source will be switched on.
While the CO2 value rises, the source will be switched off at the moment the CO2 value equals the
CO2 set value.
EXAMPLE:
The CO2 set is set at 670 ppm.
The CO2 +/- is set at 40 ppm.
The current CO2 value in the room is for example 733 ppm, which is higher than the CO2 set, so the
CO2-source is switched off. The red light is now off.
The CO2 value now slowly drops to 670: still nothing happens.
Only if the value drops below CO2 set minus CO2 +/-, which in this case is at
670 – 40 = 630 , the source will switch on and the red light will burn as well.
The CO2 value now rises and when the value of 670 is reached, the source will be switched off again.
By adjusting the CO2 +/- a stable atmosphere can be obtained.
Default factory settings are CO2 set at 700, CO2 +/- at 50.
AUTOMATED FUNCTIONS OF THE TECHGROW T-1 CONTROLLER:
1. If the controller detects that there is no CO2 sensor attached, it will notify you on the display immediately by showing **NO CO2 SENSOR**. Also, the CO2 value will be set automatically at 9999.
This will force the CO2 source to be deactivated all of the time.
2. During the night (when the lights are off), when the light sensor will detect no or very little light, the
CO2 source is ALWAYS switched off. Therefore it is very important for the sensor to be able to detect the lightsource directly! Otherwise you would not be able to supply CO2 at daytime (when the
lights are turned on), because the controller will ‘think’ that it is nighttime!
3. The display’s background lighting turns off automatically after 30 seconds.
It only turns back on when the button is pressed or turned.
TECHNICAL SPECIFICATIONS:
Power supply: 110 or 230 Volt (automatic), 50/60 Hz
Usage: 3 Watt (with sensor, without CO2-source)
Adjustment range CO2 set: 300 to 2000 ppm
Adjustment range CO2 +/-: 10 to 2000 ppm (advice 50 ppm)
(hysteresis/bandwith)
Measurement frequency: 1 measurement per second
7
WWW.TECHGROW.NL
TechGrow
T-1 & T-2 CO2 Sensor
CALIBRATION PROCEDURE
software version: 2.20
8
MANUAL
software version: 2.20
TechGrow CO2 Sensor
calibration procedure
The TechGrow T-1 and T2 controllers come with a unique calibration feature that allows you to
calibrate the sensor in case of large deviation.
Only calibrate the sensor if you suspect a deviation. Experience has shown that the
SenseAir® sensors we use function without a problem for two years without calibration
being necessary.
The sensors are calibrated with the highest precision during manufacture, however it could occur after a year in use that the sensor shows a deviation and needs to be re-calibrated.
PREPARATION FOR CALIBRATION:
1. Place the CO2 sensor in a CO2 neutral environment, such as a balcony or your garden for at least
half an hour, or in a sealed and well-ventilated room for at least 8 hours.
This is best done during daytime, because the CO2 values will be closer to 400 ppm. During
nighttime, plants and trees emit CO2 and the outdoor CO2 values will be closer to 420 ppm.
If the minimal value is not much lower than 370 ppm or much higher than 430 ppm, it is not
necessary to re-calibrate the sensor; the value of neutral/clean outdoor air is between 380 ppm and
420 ppm. A deviation of +/- 5% is common with this type of measurement equipment. Please keep this
in mind when setting your CO2 values.
In case of a greater deviation, calibration is necessary. Please continue with step 2.
2. To calibrate the sensor, you have to switch DIP switch 1 (see image) from position 0 to
position 1 (ON). This is to prevent any unintentional calibration caused by any electronic/
dimmable control gear, which can cause much interference to any equipment. This manual override has been built in for exactly that reason.
3. Open the sensor case (4 screws, see image A).
4. Locate DIP switch 1 (see image B).
5. Switch DIP switch 1 to position 1 (ON) using a pen or a small screwdriver (image C).
6. The sensor can now be calibrated.
9
image: A
image: B
image: C
CALIBRATION MENU
1. Disconnect the power supply to the T-1/T-2 CO2-controller.
2. Re-connect the power after 20 seconds.
3. The display will first show the type and software version of the controller.
4. Next, a language menu is shown (image 1); after 5 seconds the question appears to continue
calibrating. Choose Yes (image 2). If you do nothing, or choose No, the controller returns to the
main menu without calibration.
CALIBRATION PROCEDURE
The calibration menu guides you step by step through the procedure.
Please note: at step 5, it is your last chance to terminate the calibration and return to the main menu
without making any modifications.
1. “CO2 calibration - continue” > Yes/No (image 2).
2. “Set DIP switch 1 to position 1 (ON)! - Consult the manual” > Continue (image 3).
3. “Place the sensor outside and wait 20 minutes” > Continue/Stop (image 4).
4. “Start calibrating sensor at 400 ppm” > Yes/No (image 5).
5. “IS THE SENSOR OUTSIDE?” > Push button for 10 seconds to start calibration (image 6).
Arrows (>) will appear on the second line of the display. If the button is released before the line is
completely filled, you will be returned to the main menu. The sensor will not have been calibrated
(image 7).
6. “Calibration is starting - Ready in 20 minutes” (image 8).
7. During these 20 minutes, a message will be displayed every 10 seconds: “Please stay away from
the sensor!” - “Do not forget to switch back the DIP switch!”.
Every minute, an asterisk will appear on the last line of the display (image 9).
8. After 20 minutes, the message “Calibration 400 OK” will appear and the controller will
automatically return to the main menu (image 10).
9. Now you have to switch DIP switch 1 back to position 0! (image B).
10. Close the sensor case (image A).
10
1
English
Nederlands
Deutsch
Francais
3
Set dipswitch 1 to
position 1 (ON)!
See User-Manual!
=> Continue
5
2
CO2 calibration
Continue?
Yes
=> No
4
Place sensor outside
and wait 20 minutes
=> Continue
Stop
6
IS SENSOR OUTSIDE?
Start calibrating
sensor on 400 ppm
=> Yes
No
Push button 10 sec.
to start calibrate
8
7
Calibration started
Ready in 20 minutes
IS SENSOR OUTSIDE?
>>>>>>>>>
Push button 10 sec.
to start calibrate
****
push for 10 seconds
10
9
Calibration started
Ready in 20 minutes
Calibration started
Ready in 20 minutes
*****************
Calibration 400 OK
11
4
12