1
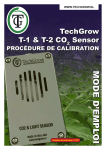
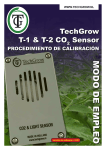
TechGrow
T-1 & T-2 CO 2 sensor
CALIBRATION PROCEDURE
MANUAL
software version: 2.20
TechGrow CO2 sensor
calibration procedure
The TechGrow T-1 and T-2 are equipped with a unique calibration
function which allows you to calibrate the device in case of
deviations.
Only calibrate the sensor if you suspect the levels to be off. Our
experience teaches us that these SenseAir® sensors can easily
function properly for 2 years without having to be calibrated.
The sensors have been calibrated at the factory with the utmost
precision, but it is possible that the sensor starts to deviate after a
year of intense use and has to be calibrated again.
PREPARATIONS FOR CALIBRATION:
1. Place the CO2 sensor in a CO2 neutral environment, such as a balcony or your back
yard, for at least half an hour or in a sealed and well-ventilated room for at least 8
hours.
This is best done during daytime, because the CO2 values will be closer to 400 ppm.
During nighttime, plants and trees emit CO2 and the outdoor CO2 values will be closer to
420 ppm.
If the minimal value isn’t much lower than 370 ppm or much higher than 430 ppm, it is
not necessary to recalibrate the sensor.
That is because the value of neutral/clean outside air is between 380 ppm and 420 ppm.
A deviation of +/- 5% is common with this type of measurement equipment. Please
keep this in mind when setting your CO2 values.
In case of a greater deviation, calibration is necessary. Please continue with step 2.
2. To calibrate the sensor, you have to switch dipswitch 1 (see image) from position 0 to
position 1 (ON). This is to prevent any unintentional calibrations caused by any
electronic/dimmable control gear, which can cause a lot of disturbance on our
measurement equipment. This manual security has been built in for exactly that reason.
3. Open the sensor case (4 screws, see image A).
4. Locate dipswitch 1 (see image B).
5. Switch dipswitch 1 to position 1 (ON) with the use of a pen or a small screwdriver
(image C).
2
6. The sensor can now be calibrated
image A
image B
image C
CALIBRATION MENU
1. Disconnect the power supply to the T-1/T-2 CO2 controller.
2. After 20 seconds, reconnect the power supply.
3. The display will first show the type and the software version of the controller.
4. Afterwards, it will show the language selection menu (image 1), 5 seconds later, you
will be asked if you would like to continue with the calibration. Choose Yes (image 2)
If you do not select anything of if you choose No, the controller will continue to the main
menu without calibration.
CALIBRATION PROCEDURE
In the calibration menu, you will be guided through the procedure step by step.
Attn.: at step 5, it is your last chance to terminate the calibration and return to the main
menu without making any modifications.
1. “CO2 calibration - continue” > Yes/No (image 2)
2. “Set dipswitch 1 to position 1 (ON)! - See User-Manual” > Continue (image 3)
3. “Place sensor outside and wait 20 minutes” > Continue/Stop (image 4)
4. “Start calibration sensor at 400 ppm” > Yes/No (image 5)
5. “IS SENSOR OUTSIDE?” > Push button for 10 seconds to start calibration (image 6)
Arrows (>) will appear on the second line of the display. If the button is released before
the line is completely filled, you will return to the main menu.
The sensor will not have been calibrated (image 7)
6. “Calibration started - Ready in 20 minutes” (image 8)
7. During these 20 minutes, a message will be displayed every 10 seconds: “Please stay
away from the sensor!” - “Do not forget to switch back the dipswitch!”
Every minute, an asterisk will appear on the last line of the display (image 9)
8. After 20 minutes, the message “Calibration 400 OK” will appear and the controller will
automatically return to the main menu (image 10)
9. NOW YOU HAVE TO SWITCH DIPSWITCH 1 BACK TO POSITION 0!!! (image B)
10.Close the sensor case again (image A)
3
2
1
English
Nederlands
Deutsch
Francais
CO2 calibration
Continue?
Yes
=> No
4
3
Set dipswitch 1 to
position 1 (ON)!
See User-Manual!
=> Continue
5
Place sensor outside
and wait 20 minutes
=> Continue
Stop
6
IS SENSOR OUTSIDE?
Start calibrating
sensor on 400 ppm
=> Yes
No
Push button 10 sec.
to start calibrate
8
7
Calibration started
Ready in 20 minutes
IS SENSOR OUTSIDE?
>>>>>>>>>
Push button 10 sec.
to start calibrate
****
push for 10 seconds
10
9
4
Calibration started
Ready in 20 minutes
Calibration started
Ready in 20 minutes
*****************
Calibration 400 OK