1
Troubleshooting Guide
for AlphaEclipse 2500, 2600, and 3500 signs
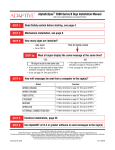
How is your sign connected to the messaging computer? (see back page)
Check one:
SERIAL
MODEM
WIRELESS
Common sign problems
Problem
Possible causes
• AlphaNET software not set up correctly.
• Messaging computer wiring/interface
problem.
Messages sent from AlphaNET software
do not appear on sign(s).
Recommended
solutions
For signs using a serial
connection (RS485 wiring),
see page 3.
• Power not supplied to sign.
• Sign wiring/interface problem.
For signs using a modem, see
page 4.
• Sign DIP switches not set properly.
• Improper network termination.
• Sign damaged.
For signs using a wireless
transceiver, see page 5.
• Temperature probe not connected properly.
Temperature displayed on sign is not
accurate.
• Temperature probe not mounted correctly.
• Temperature probe not adjusted using
AlphaNET software.
See page 6.
• Faulty temperature probe.
• Temperature probe not connected properly.
Temperature displayed on two signs is
different.
• Signs not connected as Master/Slave.
See page 6.
• Faulty temperature probe.
© Copyright 2003 Adaptive Micro Systems, LLC. All rights reserved.
Adaptive Micro Systems • 7840 North 86th Street • Milwaukee, WI 53224 USA • 414-357-2020 • 414-357-2029 (fax) • http://www.adaptivedisplays.com
Trademarked names appear throughout this document. Rather than list the names and entities that own the trademarks or insert a trademark symbol with each mention of the trademarked
name, the publisher states that it is using names for editorial purposes and to the benefit of the trademark owner with no intention of improperly using the trademark.
The following are trademarks of Adaptive Micro Systems: Adaptive, Alpha, AlphaLert, AlphaNET, AlphaNet plus, AlphaEclipse, AlphaPremiere, AlphaTicker, AlphaVision, AlphaVision
InfoTracker, Automode, BetaBrite, BetaBrite Director, BetaBrite Messaging Software, Big Dot, Director, EZ KEY II, EZ95, PagerNET, PPD, PrintPak, Serial Clock, Smart Alec, Solar, TimeNet
.
The distinctive trade dress of this product is a trademark claimed by Adaptive Micro Systems, LLC.
Due to continuing product innovation, specifications in this manual are subject to change without notice.
December 4, 2003
9711-6023
December 4, 2003
Troubleshooting Guide for AlphaEclipse 2500, 2600, and 3500 signs (9711-6023)
Contents
Common sign problems . . . . . . . . . . . . . . . . . . . . . . . . . . . . . . . . . . . . . . . . . . . . . . . . . . . . . . . . . . . . 1
Recommended solutions . . . . . . . . . . . . . . . . . . . . . . . . . . . . . . . . . . . . . . . . . . . . . . . . . . . . . . . . . . . . 3
Troubleshooting procedures . . . . . . . . . . . . . . . . . . . . . . . . . . . . . . . . . . . . . . . . . . . . . . . . . . . . . . . . . 7
PC-TO-SIGN CHECK procedure . . . . . . . . . . . . . . . . . . . . . . . . . . . . . . . . . . . . . . . . . . . . . . . . . . . . . . . . . . . . . . . . . . . .7
PC FEEDBACK procedure . . . . . . . . . . . . . . . . . . . . . . . . . . . . . . . . . . . . . . . . . . . . . . . . . . . . . . . . . . . . . . . . . . . . . . . . .8
ALPHANET MESSAGE procedure. . . . . . . . . . . . . . . . . . . . . . . . . . . . . . . . . . . . . . . . . . . . . . . . . . . . . . . . . . . . . . . . . . .9
PC COM PORT procedure . . . . . . . . . . . . . . . . . . . . . . . . . . . . . . . . . . . . . . . . . . . . . . . . . . . . . . . . . . . . . . . . . . . . . . .11
PC CHECK procedure . . . . . . . . . . . . . . . . . . . . . . . . . . . . . . . . . . . . . . . . . . . . . . . . . . . . . . . . . . . . . . . . . . . . . . . . . . .15
SIGN RESTART procedure . . . . . . . . . . . . . . . . . . . . . . . . . . . . . . . . . . . . . . . . . . . . . . . . . . . . . . . . . . . . . . . . . . . . . . .20
SIGN FEEDBACK procedure . . . . . . . . . . . . . . . . . . . . . . . . . . . . . . . . . . . . . . . . . . . . . . . . . . . . . . . . . . . . . . . . . . . . . .21
SIGN POWER procedure . . . . . . . . . . . . . . . . . . . . . . . . . . . . . . . . . . . . . . . . . . . . . . . . . . . . . . . . . . . . . . . . . . . . . . . .23
SIGN CHECK procedure . . . . . . . . . . . . . . . . . . . . . . . . . . . . . . . . . . . . . . . . . . . . . . . . . . . . . . . . . . . . . . . . . . . . . . . . .26
INSIDE INSPECTION procedure . . . . . . . . . . . . . . . . . . . . . . . . . . . . . . . . . . . . . . . . . . . . . . . . . . . . . . . . . . . . . . . . . . .30
TEMP PROBE CHECK procedure . . . . . . . . . . . . . . . . . . . . . . . . . . . . . . . . . . . . . . . . . . . . . . . . . . . . . . . . . . . . . . . . . .31
TEMP PROBE FIX procedure . . . . . . . . . . . . . . . . . . . . . . . . . . . . . . . . . . . . . . . . . . . . . . . . . . . . . . . . . . . . . . . . . . . . .32
Sign networking. . . . . . . . . . . . . . . . . . . . . . . . . . . . . . . . . . . . . . . . . . . . . . . . . . . . . . . . . . . . . . . . . . 33
Computer-to-sign connection methods . . . . . . . . . . . . . . . . . . . . . . . . . . . . . . . . . . . . . . . . . . . . . . . . . . . . . . . . . . . . .33
Sign-to-sign connection methods . . . . . . . . . . . . . . . . . . . . . . . . . . . . . . . . . . . . . . . . . . . . . . . . . . . . . . . . . . . . . . . . .37
Termination . . . . . . . . . . . . . . . . . . . . . . . . . . . . . . . . . . . . . . . . . . . . . . . . . . . . . . . . . . . . . . . . . . . . . . . . . . . . . . . . . .40
Appendix . . . . . . . . . . . . . . . . . . . . . . . . . . . . . . . . . . . . . . . . . . . . . . . . . . . . . . . . . . . . . . . . . . . . . . . 41
Purpose . . . . . . . . . . . . . . . . . . . . . . . . . . . . . . . . . . . . . . . . . . . . . . . . . . . . . . . . . . . . . . . . . . . . . . . . . . . . . . . . . . . . .41
Revision history . . . . . . . . . . . . . . . . . . . . . . . . . . . . . . . . . . . . . . . . . . . . . . . . . . . . . . . . . . . . . . . . . . . . . . . . . . . . . . .41
Related documentation . . . . . . . . . . . . . . . . . . . . . . . . . . . . . . . . . . . . . . . . . . . . . . . . . . . . . . . . . . . . . . . . . . . . . . . . .41
Safety. . . . . . . . . . . . . . . . . . . . . . . . . . . . . . . . . . . . . . . . . . . . . . . . . . . . . . . . . . . . . . . . . . . . . . . . . . . . . . . . . . . . . . .41
Temperature probe installation . . . . . . . . . . . . . . . . . . . . . . . . . . . . . . . . . . . . . . . . . . . . . . . . . . . . . . . . . . . . . . . . . . .43
How is your sign connected to the messaging computer?. . . . . . . . . . . . . . . . . . . . . . . . . . . . . . . . . . 48
2
Contents
Troubleshooting Guide for AlphaEclipse 2500, 2600, and 3500 signs (9711-6023)
December 4, 2003
Recommended solutions
Problem: “Messages sent from AlphaNET software do not appear on sign(s)” — serial (RS485 cable)
To try to fix this problem, follow the procedures below:
Step
Procedure
Description
Results
1
PC-TO-SIGN CHECK (page 7)
Checks to see if there is
communication between the
messaging computer and the
sign(s).
ALPHANET MESSAGE (page 9)
Attempts to send a simple
message from AlphaNET software
to the sign(s).
• If this procedure fails, try PC COM PORT.
2
• If this procedure fails, try SIGN RESTART.
PC COM PORT (page 11)
Tries to determine the type of
COM ports on the messaging
computer.
• If this procedure fails, try SIGN RESTART.
PC CHECK-RS485 (page 16)
On the messaging computer, tries
to determine if there are any faults
in the RS485 wiring and interface.
3
4
5
6
7
8
9
SIGN RESTART (page 20)
INSIDE INSPECTION (page 30)
SIGN POWER (page 23)
SIGN FEEDBACK (page 21)
SIGN CHECK-RS485 (page 27)
Recommended solutions
Removes and then reapplies
power to the sign(s).
Visual inspection of the inside of
the sign(s) for obvious physical
problems (loose wires, water or
electrical damage, and so on).
Checks to see if power is available
to the sign(s) components.
Using LEDs on the sign, checks to
see if there is communication
between the messaging computer
and the sign(s).
On the sign, tries to determine if
there are any faults in the RS485
wiring and interface.
• If this procedure fails, try PC COM PORT.
• If this procedure succeeds, try ALPHANET
MESSAGE.
• If this procedure succeeds, try creating
and sending other messages.
• If this procedure succeeds, try PC CHECKRS485.
• If this procedure succeeds, try PC-TOSIGN CHECK again.
• If this procedure fails, try INSIDE
INSPECTION.
• If this procedure succeeds, try PC-TOSIGN CHECK again.
• If there are no signs of problems, try SIGN
POWER.
• If there are signs of problems, fix them if
possible then try PC-TO-SIGN CHECK
again.
• If this procedure fails, try SIGN
FEEDBACK.
• If this procedure succeeds, try PC-TOSIGN CHECK again.
• If this procedure fails, try SIGN CHECKRS485.
• If this procedure succeeds, try PC-TOSIGN CHECK again.
• If this procedure fails, contact Adaptive
Technical Support.
• If this procedure succeeds, try PC-TOSIGN CHECK again.
3
December 4, 2003
Troubleshooting Guide for AlphaEclipse 2500, 2600, and 3500 signs (9711-6023)
Problem: “Messages sent from AlphaNET software do not appear on sign(s)” — modem
To try to fix this problem, follow the procedures below:
Step
1
2
3
4
5
6
7
8
9
4
Procedure
Description
PC-TO-SIGN CHECK (page 7)
Checks to see if there is
communication between the
messaging computer and the
sign(s).
ALPHANET MESSAGE (page 9)
Attempts to send a simple
message from AlphaNET software
to the sign(s).
PC COM PORT (page 11)
Tries to determine the type of
COM ports on the messaging
computer.
PC CHECK-MODEM (page 17)
On the messaging computer, tries
to determine if there are any
faults in the modem.
SIGN RESTART (page 20)
INSIDE INSPECTION (page 30)
SIGN POWER (page 23)
SIGN FEEDBACK (page 21)
SIGN CHECK-MODEM (page 28)
Removes and then reapplies
power to the sign(s).
Visual inspection of the inside of
the sign(s) for obvious physical
problems (loose wires, water or
electrical damage, and so on).
Checks to see if power is available
to the sign(s) components.
Using LEDs on the sign, checks
to see if there is communication
between the messaging computer
and the sign(s).
On the sign, tries to determine if
there are any faults in the modem
wiring.
Results
• If this procedure fails, try PC COM PORT.
• If this procedure succeeds, try ALPHANET
MESSAGE.
• If this procedure fails, try PC COM PORT.
• If this procedure succeeds, try creating
and sending other messages.
• If this procedure fails, try SIGN RESTART.
• If this procedure succeeds, try PC
CHECK-MODEM.
• If this procedure fails, try SIGN RESTART.
• If this procedure succeeds, try PC-TOSIGN CHECK again.
• If this procedure fails, try INSIDE
INSPECTION.
• If this procedure succeeds, try PC-TOSIGN CHECK again.
• If there are no signs of problems, try
SIGN POWER.
• If there are signs of problems, fix them if
possible then try PC-TO-SIGN CHECK
again.
• If this procedure fails, try SIGN
FEEDBACK.
• If this procedure succeeds, try PC-TOSIGN CHECK again.
• If this procedure fails, try SIGN CHECKMODEM.
• If this procedure succeeds, try PC-TOSIGN CHECK again.
• If this procedure fails, contact Adaptive
Technical Support.
• If this procedure succeeds, try PC-TOSIGN CHECK again.
Recommended solutions
Troubleshooting Guide for AlphaEclipse 2500, 2600, and 3500 signs (9711-6023)
December 4, 2003
Problem: “Messages sent from AlphaNET software do not appear on sign(s)” — wireless transceiver
To try to fix this problem, follow the procedures below:
Step
1
2
3
4
5
6
7
8
9
Procedure
Description
PC-TO-SIGN CHECK (page 7)
Checks to see if there is
communication between the
messaging computer and the
sign(s).
ALPHANET MESSAGE (page 9)
Attempts to send a simple
message from AlphaNET software
to the sign(s).
PC COM PORT (page 11)
Tries to determine the type of
COM ports on the messaging
computer.
PC CHECK-WIRELESS (page 19)
On the messaging computer, tries
to determine if there are any
faults in the wireless transceiver
wiring.
SIGN RESTART (page 20)
INSIDE INSPECTION (page 30)
SIGN POWER (page 23)
SIGN FEEDBACK (page 21)
SIGN CHECK-WIRELESS
(page 29)
Recommended solutions
Removes and then reapplies
power to the sign(s).
Visual inspection of the inside of
the sign(s) for obvious physical
problems (loose wires, water or
electrical damage, and so on).
Checks to see if power is available
to the sign(s) components.
Using LEDs on the sign, checks
to see if there is communication
between the messaging computer
and the sign(s).
On the sign, tries to determine if
there are any faults in the wireless
transceiver wiring.
Results
• If this procedure fails, try PC COM PORT.
• If this procedure succeeds, try ALPHANET
MESSAGE.
• If this procedure fails, try PC COM PORT.
• If this procedure succeeds, try creating
and sending other messages.
• If this procedure fails, try SIGN RESTART.
• If this procedure succeeds, try PC
CHECK-WIRELESS.
• If this procedure fails, try SIGN RESTART.
• If this procedure succeeds, try PC-TOSIGN CHECK again.
• If this procedure fails, try INSIDE
INSPECTION.
• If this procedure succeeds, try PC-TOSIGN CHECK again.
• If there are no signs of problems, try
SIGN POWER.
• If there are signs of problems, fix them if
possible then try PC-TO-SIGN CHECK
again.
• If this procedure fails, try SIGN
FEEDBACK.
• If this procedure succeeds, try PC-TOSIGN CHECK again.
• If this procedure fails, try SIGN CHECKWIRELESS.
• If this procedure succeeds, try PC-TOSIGN CHECK again.
• If this procedure fails, contact Adaptive
Technical Support.
• If this procedure succeeds, try PC-TOSIGN CHECK again.
5
December 4, 2003
Troubleshooting Guide for AlphaEclipse 2500, 2600, and 3500 signs (9711-6023)
Problem: “Temperature displayed on sign is not accurate”
To try to fix this problem, follow the procedures below:
Step
1
Procedure
TEMP PROBE CHECK (page 31)
Description
Checks if the temperature probe
is operating correctly.
Results
• If this procedure fails, replace the
temperature probe and try TEMP PROBE
CHECK again.
• If this procedure succeeds, then there is
no need for further testing.
Problem: “Temperature displayed on two signs is different”
To try to fix this problem, follow the procedures below:
Step
1
6
Procedure
TEMP PROBE FIX (page 32)
Description
Attempts to correct a faulty
temperature probe.
Results
• If this procedure fails, contact Adaptive
Technical Support.
• If this procedure succeeds, then there is
no need for further testing.
Recommended solutions
Troubleshooting Guide for AlphaEclipse 2500, 2600, and 3500 signs (9711-6023)
December 4, 2003
Troubleshooting procedures
PC-TO-SIGN CHECK procedure
Description:
•
To see if communications exist between a sign and the messaging computer.
•
To get information from the sign, such as its address, baud rate, and so on.
PC-TO-SIGN CHECK
Serial or Wireless
How is the sign connected to the messaging computer?
(see page 48)
Modem
In AlphaNET Diagnostics software:
In AlphaNET Diagnostics software:
1. Click Communications > Serial/
Wireless.
2. When the Serial Settings window
appears, select the computer COM
port that is connected to your
Converter Box III. If you do not
know which COM port to choose,
select 1 to start with.
3. Click Auto Detect. This process
could take a few minutes.
1. Click Communications > Modem.
2. When the Transmitting Modem
Setup window appears, select the
computer COM port that is
connected to your modem. If you
do not know which COM port to
choose, select 1 to start with.
3. Set the following:
Com Port = 1.
Baud Rate = 9600.
Data Format = 8,N,1.
Dialing Prefix = if you need to dial a
number, like 9, to get an outside
phone line, enter it here.
Initialization String = leave blank.
Number to Dial = phone number of
the modem inside the sign.
Timeout = 30.
Configuration String = use the
string that already appear here.
4. Click Configure Modem. This
process could take a few minutes.
In AlphaNET Diagnostics software:
1. Click Actions > Connect to Modem
> Select.
2. This process could take a few
minutes.
No
No
Did this message appear:
“Unable to determine
communication settings”
Yes
Did this message appear:
“Modem failed to connect”
Yes
PC-TO-SIGN CHECK failed.
PC-TO-SIGN CHECK failed.
DONE
DONE
No
PC-TO-SIGN CHECK succeeded.
Did this message appear:
“Modem failed to configure”
Yes
PC-TO-SIGN CHECK succeeded.
Troubleshooting procedures
DONE
PC-TO-SIGN CHECK failed.
7
December 4, 2003
Troubleshooting Guide for AlphaEclipse 2500, 2600, and 3500 signs (9711-6023)
PC FEEDBACK procedure
Description:
•
To see if there is one-way, two-way, or no communication between the messaging computer and the
sign(s) that should receive messages from this computer.
NOTE: This procedure only works if the messaging computer uses one of the following communication
interfaces: Converter Box III, modem, Zeus wireless transceiver, Locus radio modem, Lantronix
MSS485-T, or an interface that has separate transmit and receive indicators. For more information, see
“LED indicator locations” on page 44.
PC FEEDBACK
In the AlphaNET Diagnostics software:
1.
2.
3.
4.
5.
6.
7.
8.
9.
Click Actions > Continuous Temperature Read.
Click Select.
Click Select Addresses.
If you know the address of the sign to be tested, click Selected Address and then add it to the Address List.
Otherwise, click All Addresses.
Click OK.
Check Internal Temperature.
Select 15 Seconds for How Often to Read Temperature.
Click Start.
Each time the Diagnostics software requests a sign to send its temperature, the receive indicator (RxD, RX, or
SD) on the communication interface should briefly blink. When a sign sends information back to the messaging
computer, the transmit indicator (TxD, TX, or RD) on the communication interface should briefly blink. A running
record of which signs responded, and which did not, will appear in the Diagnostics software Results window.
NO
For this sign address,
did the receive (RxD, RX, or SD) indicator blink?
(On a MSS485-T, the serial LED will blink green.)
For this sign address,
did the transmit (TxD, TX, or RD) indicator blink?
(On a MSS485-T, the serial LED will blink red.)
YES
There is at least one-way
communication with this sign address.
YES
There is two-way communication with
this sign address.
NO
• There is no communication with this sign address.
• In the Diagnostics software Results window, the
message “No response from address XX” will appear.
YES
Is there another sign address to test?
NO
DONE
8
Troubleshooting procedures
Troubleshooting Guide for AlphaEclipse 2500, 2600, and 3500 signs (9711-6023)
December 4, 2003
ALPHANET MESSAGE procedure
Description:
•
To see if a message created using AlphaNET software and simulated on a computer screen, looks the same
on an actual sign.
NOTE: This procedure erases all messages currently stored in a sign.
ALPHANET MESSAGE
In the AlphaNET Diagnostics software:
1.
2.
3.
4.
Select Actions > Clear Memory.
Click Selected Addresses.
Click Remove All to clear the Address List.
Select the address of the sign to be tested.
Then click Add.
5. Click OK.
6. Click OK when the prompt appears.
Write down the sign’s
• size (“96 x 16”)
• address (“0C”)
• baud rate (“9600”)
• data format (“8n1”)
(If there was not enough time to write all these down,
repeat this procedure.)
After a few moments, do messages similar to
the ones below appear on the sign?
Start the AlphaNET Site Manager software and create a new
site:
11705001D
ECLIPSE
ECLIPSE
M-096x016
Sign size (columns x rows)
YES
CLEAR
MEMORY
SER ADDR
OC HEX
Sign address
SER. DATA
9600, 8n1
Data format
PERF REV
11704001A0200
Baud rate
(a number or
“Autobaud”)
and so on
NO
ALPHANET MESSAGE failed.
1. First, choose a connection device by selecting Edit >
Connection Device > Add.
2. From the connection device list that appears, select an
appropriate device. Then click OK. For example, if the
messaging computer’s COM 1 port is connected to a
modem, select Modem on Com 1.
3. Click the device that was just added and click Edit.
4. In the window that appears, make sure the connection
device’s baud rate, data format, and other parameters
(such as COM port) match the sign’s baud rate, data
format, and so on.
5. Click OK to close the connection device window.
6. Click File > New Site > Site Info.
7. After Site Name, type “TEST SITE 1”.
8. In the Compatibility drop-down, select Alpha 2.0.
9. Check Use as an Editor transmit site.
10. From the Connection Device drop-down, select the
connection device you just added.
11. Click Sign Info.
12. Type the sign’s address after Address List.
13. Click OK to close the Site Editor window.
DONE
Go to
Troubleshooting procedures
ALPHANET MESSAGE-1 on page 10.
9
December 4, 2003
Troubleshooting Guide for AlphaEclipse 2500, 2600, and 3500 signs (9711-6023)
ALPHANET MESSAGE-1
Start the AlphaNET Message Editor software and create a new message:
1. Click File > New.
2. Click Edit > Customize.
3. Depending on what type of sign you have, select AlphaEclipse 2500, AlphaEclipse 2600, or AlphaEclipse
3500 from the drop-down. Then click OK.
4. In the message window, type “This is Test 1 ”. Add a space after “1”.
5. Click Options > Time.
6. Click File > Simulate.
7. Right-click in the middle of the simulated sign message. From the pop-up, select Change Display.
8. For Display, select the sign size that matches the actual sign.
9. Now send the message to the sign by clicking File > Transmit > To Selected Sites. Then click OK.
ALPHANET MESSAGE failed.
NO
Does the message
on the actual sign
look like the simulated
message on the computer
screen?
YES
Create and test other
messages until you are
satisfied with the sign’s
performance.
DONE
10
Troubleshooting procedures
Troubleshooting Guide for AlphaEclipse 2500, 2600, and 3500 signs (9711-6023)
December 4, 2003
PC COM PORT procedure
Description:
•
To determine the type of COM ports on a Windows 98, 2000, or XP messaging computer.
PC COM PORT
What type of operating system do you have on your messaging computer?
Windows 98
Windows XP
Windows 2000
PC COM PORT-WINDOWS XP
Go to
Go to
Go to
PC COM PORT-WINDOWS 98
PC COM PORT-WINDOWS 2000
on page 14.
on page 13.
on page 12.
Did the procedure you
selected above succeed?
NO
YES
PC COM PORT succeeded.
PC COM PORT failed.
DONE
Troubleshooting procedures
11
December 4, 2003
Troubleshooting Guide for AlphaEclipse 2500, 2600, and 3500 signs (9711-6023)
PC COM PORT-WINDOWS 98 procedure
Description: To determine the type of COM port(s) on a Windows 98 messaging computer.
PC COM PORT-WINDOWS 98
Using the computer mouse,
right-click on the My Computer icon.
A
ILLUSTRATION MISSING
Double click a COM port that you have not already tested.
(In this case, there is only one COM port to test.)
ILLUSTRATION MISSING
Click Properties > Hardware > Device Manager.
Does an item named Ports appear?
NO
ILLUSTRATION MISSING
Check Device status:
Is this COM port working properly?
YES
NO
YES
Have you checked all the COM ports?
NO
Go to
A
above.
YES
Click
to expand Ports.
Is there a Communications port like COM1 below?
YES
ILLUSTRATION MISSING
On the back of the messaging computer, locate the COM port that
you just checked (an example is shown below, but locations vary):
Printer port
USB ports
NO
PC COM PORT-WINDOWS 98 failed.
COM1 port
DONE
12
COM1 port
PC COM PORT-WINDOWS 98 succeeded.
Troubleshooting procedures
Troubleshooting Guide for AlphaEclipse 2500, 2600, and 3500 signs (9711-6023)
December 4, 2003
PC COM PORT-WINDOWS 2000 procedure
Description: To determine the type of COM port(s) on a Windows 2000 messaging computer.
PC COM PORT-WINDOWS 2000
Using the computer mouse,
right-click on the My Computer icon.
A
Double click a COM port that you have not already tested.
(In this case, there is only one COM port to test.)
Click Properties > Hardware > Device Manager.
Does an item named Ports appear?
NO
Check Device status:
Is this COM port working properly?
YES
NO
YES
Have you checked all the COM ports?
NO
Go to
A
above.
YES
Click
to expand Ports.
Is there a Communications port like COM1 below?
YES
On the back of the messaging computer, locate the COM port that
you just checked (an example is shown below, but locations vary):
Printer port
USB ports
NO
PC COM PORT-WINDOWS 2000 failed.
COM1 port
DONE
Troubleshooting procedures
COM1 port
PC COM PORT-WINDOWS 2000 succeeded.
13
December 4, 2003
Troubleshooting Guide for AlphaEclipse 2500, 2600, and 3500 signs (9711-6023)
PC COM PORT-WINDOWS XP procedure
Description: To determine the type of COM port(s) on a Windows XP messaging computer.
PC COM PORT-WINDOWS XP
Using the computer mouse,
right-click on the My Computer icon.
A
Double click a COM port that you have not already tested.
(In this case, there is only one COM port to test.)
Click Properties > Hardware > Device Manager.
Does an item named Ports appear?
NO
Check Device status:
Is this COM port working properly?
YES
NO
YES
Have you checked all the COM ports?
NO
Go to
A
above.
YES
On the back of the messaging computer, locate the COM port that
you just checked (an example is shown below, but locations vary):
Click
to expand Ports.
Is there a Communications port like COM1 below?
YES
Printer port
USB ports
NO
PC COM PORT-WINDOWS XP failed.
DONE
14
COM1 port
COM1 port
PC COM PORT-WINDOWS XP succeeded.
Troubleshooting procedures
Troubleshooting Guide for AlphaEclipse 2500, 2600, and 3500 signs (9711-6023)
December 4, 2003
PC CHECK procedure
Description:
•
To determine if there is a fault in the messaging computer’s cables and/or interfaces (modem, wireless
transceiver, and so on).
PC CHECK
How does the computer send messages to the sign(s)?
Modem
Serial (RS485 cable)
Wireless transceiver
Go to
Go to
Go to
PC CHECK-RS485
PC CHECK-MODEM
PC CHECK-WIRELESS on page 19.
on page 17.
on page 16.
Did the procedure you
selected above succeed?
NO
YES
PC CHECK succeeded.
PC CHECK failed.
DONE
Troubleshooting procedures
15
December 4, 2003
Troubleshooting Guide for AlphaEclipse 2500, 2600, and 3500 signs (9711-6023)
PC CHECK-RS485 procedure
Description:
•
To see if there is communication between the messaging computer and the Converter Box III.
PC CHECK-RS485
Is the red POWER LED lit on the front
of the Converter Box III?
1. Check if power module is plugged
into the back of the Converter Box III.
2. Make sure that power module is
plugged into an appropriate, working
power source.
NO
YES
In AlphaNET Diagnostics software, select Communications > Serial/Wireless
and make sure that
• ComPort is set to the Converter Box III RS232 cable COM port.
• Baud Rate and Data Format are set to the sign’s baud rate and data format.
YES
Is the red POWER LED lit
on the front of the
Converter Box III?
NO
If you do not know the sign’s baud rate and data format, try the following:
• In the Diagnostics software, select Communications > Serial/Wireless >
Auto Detect.
• “PC-TO-SIGN CHECK procedure” on page 7
• “SIGN RESTART procedure” on page 20.
The Converter Box III and/or its power
module may be damaged.
Contact Adaptive Technical Support.
PC CHECK-RS485 failed.
A
Go to
PC FEEDBACK
DONE
on page 8.
Was there at least one-way
communication?
YES
NO
Have you tried attaching the
Converter Box III RS232 cable
to a different COM port?
NO
YES
1. Turn off the computer.
2. Attach the Converter Box III RS232
cable to another COM port.
3. Restart the computer.
4. Start AlphaNET Diagnostics software
and select Communications > Serial/
Wireless.
5. Set the ComPort drop-down to the
RS232 cable COM port.
PC CHECK-RS485 succeeded.
Go to
Have you tried using a different
Converter Box III RS232 cable?
YES
DONE
16
NO
A
above.
1. Turn off the computer.
2. Replace the current Converter Box III
RS232 cable with a different one.
3. Restart the computer.
PC CHECK-RS485 failed.
Troubleshooting procedures
Troubleshooting Guide for AlphaEclipse 2500, 2600, and 3500 signs (9711-6023)
December 4, 2003
PC CHECK-MODEM procedure
Description:
•
To see if there is communication between the messaging computer and a modem.
PC CHECK-MODEM
The transmitting modem
shown here is a USR
modem (pn 1088-9301).
Connect to an analog phone
line, not a digital line that is
found in some offices.
Is the modem’s RS232 cable
connected to one of
the computer’s COM ports?
Connect to modem’s
RS232 cable.
NO
A
YES
In AlphaNET Diagnostics software, select Communications > Modem
and make sure that
• ComPort is set to the modem cable COM port
• Baud Rate is set to 9600.
• Data Format is set to 8N1.
• Number to Dial is set to the sign modem’s telephone number.
• Timeout (in Seconds) is set to 30.
• Configuration String is set to AT&H0&R1&B1&N6&Y0&W0.
Connect to modem’s
power adapter.
1.
2.
3.
4.
Turn off the computer and modem.
Attach the modem’s RS232 cable to a COM port.
Restart the computer and modem.
Start AlphaNET Diagnostics software.
YES
Is the modem’s CS LED lit?
NO
The modem or its power module
may be damaged.
Contact Adaptive Technical Support.
Click Configure Modem.
Does the message
NO
“Modem Configured Properly.”
appear?
Have you tried attaching the
modem’s RS232 cable to a
different COM port?
YES
YES
PC CHECK-MODEM failed.
NO
DONE
Go to
Go to
Troubleshooting procedures
A
above.
PC CHECK-MODEM-1
on page 18.
17
December 4, 2003
Troubleshooting Guide for AlphaEclipse 2500, 2600, and 3500 signs (9711-6023)
PC CHECK-MODEM-1
Using an ordinary telephone, dial
the phone number used as the
Number to Dial (the sign modem’s
telephone number).
Does the sign modem answer?
(If it does, you will hear sounds
similar to what it sounds like when
you dial a fax machine by mistake.)
NO
YES
Go to
PC FEEDBACK
on page 8.
Was there at least one-way
communication?
NO
PC CHECK-MODEM failed.
YES
PC CHECK-MODEM succeeded.
DONE
18
Troubleshooting procedures
Troubleshooting Guide for AlphaEclipse 2500, 2600, and 3500 signs (9711-6023)
December 4, 2003
PC CHECK-WIRELESS procedure
Description:
•
To see if there is communication between the messaging computer and a wireless transceiver.
PC CHECK-WIRELESS
Is the power indicator lit
on the wireless transceiver?
(LED indicators for Zeus and Locus
wireless transceivers are shown below.)
ZEUS
PWR SYNC
TX
1. Check if the wireless transceiver’s power module is
plugged into the transceiver.
2. Make sure that the power module is plugged into
an appropriate, working power source.
NO
LOCUS
RX
RXD
TXD
LINK
PWR
YES
YES
Is the power indicator lit on the wireless transceiver?
NO
A
The wireless transceiver or power module may be
damaged. Contact Adaptive Technical Support.
Go to
PC FEEDBACK
on page 8.
Was there at least one-way
communication?
NO
Have you tried cycling the
power to the wireless
transceiver attached to the
messaging computer?
YES
YES
Have you tried replacing the
RS232 cable that connects the
wireless transceiver to the
messaging computer?
NO
NO
Turn the wireless transceiver
power off then an again.
Go to
A
YES
above.
PC CHECK-WIRELESS succeeded.
Replace the RS232 cable.
Go to
A
above.
PC CHECK-WIRELESS failed.
DONE
Troubleshooting procedures
19
December 4, 2003
Troubleshooting Guide for AlphaEclipse 2500, 2600, and 3500 signs (9711-6023)
SIGN RESTART procedure
Description:
•
To get information from the sign like its address, baud rate, and so on by cycling the sign’s power.
SIGN RESTART
1. Find the power switch for the sign.
(The switch may be located near the
sign or in a nearby building.)
2. Turn this switch off and then on again.
After a few moments, do messages similar
to the ones below appear on the sign?
Write down the sign’s
• size (“96 x 16”)
• address (“0C”)
• baud rate (“9600”)
• data format (“8n1”)
DIP
DISABLED
11705001D
ECLIPSE
NO
ECLIPSE
M-096x016
CLEAR
MEMORY
SER ADDR
OC HEX
Sign size
(columns x rows)
Sign address
SER. DATA
9600, 8n1
Data format
Baud rate
PERF REV
(a number or
11704001A0200
“Autobaud”)
and so on
SIGN RESTART failed.
20
DONE
YES
(If there was not enough time to
write all these down, repeat this
procedure.)
In the AlphaNET Diagnostics
software, make sure the baud rate
and data format match the sign’s.
To do this:
• If RS232/485 cable or a wireless
transceiver is used to send
messages to the sign, then
select Communications > Serial/
Wireless.
• If a modem is used to send
messages to a sign, then select
Communications > Modem.
SIGN RESTART succeeded.
Troubleshooting procedures
Troubleshooting Guide for AlphaEclipse 2500, 2600, and 3500 signs (9711-6023)
December 4, 2003
SIGN FEEDBACK procedure
Description:
•
To see if there is one-way, two-way, or no communication between the messaging computer and the sign.
WARNING
Hazardous voltage.
Contact with high voltage
may cause death or serious
injury.
SM1024
SIGN FEEDBACK
In the AlphaNET Diagnostics software:
1.
2.
3.
4.
5.
6.
7.
Click Actions > Continuous Read Temperature.
Click Select.
Click Internal Temperature.
Set How Often to Read Temperature to 15 seconds (as short as possible).
Click Start.
Click Select Address.
If you do not know the sign’s address, click All Addresses. Otherwise, click Selected Addresses
and if it is not already there, add the sign’s address to the Address List.
8. Click OK.
9. Click Start to being reading sign temperatures.
10. Watch the communication LEDs (shown below) on the sign’s controller board. Each time the
Diagnostic software requests a sign to send the temperature, the communication LEDs should
briefly blink.
RS232 LEDs
RS485 LEDs
Communication LEDs
• Red = transmitted data (TxD)
• Green = received data (RxD)
Go to
Troubleshooting procedures
SIGN FEEDBACK-1
on page 22.
21
December 4, 2003
Troubleshooting Guide for AlphaEclipse 2500, 2600, and 3500 signs (9711-6023)
SIGN FEEDBACK-1
A
For this sign address, did the communication
LEDs look like one of the below?
(SHADED = blinking).
YES
NO
For this sign address, did the communication
LEDs look like one of the below?
(SHADED = solid, non-blinking).
RS485
input
RS232
input
RS485
input
RS232
input
NO
There is at least
one-way
communication with
this sign address.
Are the RS232 or RS485
RxD and TxD wires reversed?
For this sign address, did the communication
LEDs look like the following?
(SHADED = blinking).
YES
YES
There is
two-way
communication with
this sign address.
Correct the reversed wires.
Restart this procedure.
Go to
SIGN FEEDBACK
on page 21.
There is no communication with this
sign address.
Is there another sign address to test?
Contact Adaptive Technical
Support.
YES
NO
Go to
A
above.
SIGN FEEDBACK failed.
DONE
22
Troubleshooting procedures
Troubleshooting Guide for AlphaEclipse 2500, 2600, and 3500 signs (9711-6023)
December 4, 2003
SIGN POWER procedure
Description:
•
To see if power is supplied to the sign and its components (controller board, power supplies, and so on).
WARNING
Hazardous voltage.
Contact with high voltage
may cause death or serious
injury.
SM1024
SIGN POWER
Is power supplied to the sign?
NO
YES
Check the line power supply:
• Is line power switch in on position? LINE POWER FAILURE
• Are circuit breakers in on position
or are fuse(s) not blown?
LINE POWER OK
Is this a 240V sign?
YES
If the power supply fuses are blown,
replace them.
NO
Put sign power switch in the
on (“1”) position.
NO
Is the sign’s power switch in
the on (“1”) position?
YES
Is there a FAN TEST button
located on the power switch?
YES
Press the FAN TEST button.
NO
Do the sign fans start?
NO
SIGN POWER failed.
YES
Go to
Troubleshooting procedures
SIGN POWER-1
on page 24.
DONE
23
December 4, 2003
Troubleshooting Guide for AlphaEclipse 2500, 2600, and 3500 signs (9711-6023)
SIGN POWER-1
Is the green power LED lit on each power supply?
Power LED
(green)
5V output
Line voltage
input
NO
Are any power LEDs lit
on the power supplies?
NO
YES
For each power supply that
has an unlit power LED:
• Check the line voltage
input wiring for loose or
no connections.
• If this fails, replace the
power supply.
YES
SIGN POWER failed.
DONE
NO
Check 5V power lines to the controller board:
• Are the 5V power lines attached to the controller board?
• Are the 5V power lines connected to a 5V connection terminal?
Is the blue power LED flashing
on the controller board?
NO
Power LED (blue)
5V power lines
(on older signs these wires are
soldered to the controller board)
YES
YES
Go to
24
SIGN POWER-2
on page 25
Troubleshooting procedures
Troubleshooting Guide for AlphaEclipse 2500, 2600, and 3500 signs (9711-6023)
December 4, 2003
SIGN POWER-2
NO
Is there a modem, wireless
transceiver, or fiber optic modem in
this sign?
YES
Is the power indicator lit on this unit?
• For a modem, the CS LED should
be lit.
YES • For either a Zeus or Locus wireless
transceiver, the PWR LED should
be lit.
• For a fiber optic modem, the DATA
LED should be lit.
NO
YES
Check the unit’s power supply:
• For a modem or wireless
transceiver, is the power supply
attached to the unit?
• For a modem or wireless
transceiver, is the power adapter
connected to line power?
• For a fiber optic modem, is the
adapter attached to the fiber optic
modem?
• For a fiber optic modem, is the
adapter connected to the controller
board?
NO
SIGN POWER succeeded.
SIGN POWER failed.
DONE
Troubleshooting procedures
25
December 4, 2003
Troubleshooting Guide for AlphaEclipse 2500, 2600, and 3500 signs (9711-6023)
SIGN CHECK procedure
Description:
•
To determine if there is a fault in the sign’s cables and/or interfaces (modem, wireless transceiver, and so
on).
WARNING
Hazardous voltage.
Contact with high voltage
may cause death or serious
injury.
SM1024
SIGN CHECK
How does the sign receive messages sent to it?
Wireless
Modem
Serial (RS485 cable)
Go to
SIGN CHECK-WIRELESS
on page 29.
Go to SIGN CHECK-MODEM on page 28.
SIGN CHECK-RS485
on page 27.
Did the procedure you
selected above succeed?
NO
YES
SIGN CHECK succeeded.
SIGN CHECK failed.
DONE
26
Troubleshooting procedures
Troubleshooting Guide for AlphaEclipse 2500, 2600, and 3500 signs (9711-6023)
December 4, 2003
SIGN CHECK-RS485 procedure
Description:
•
To determine if the sign’s RS485 cabling is working correctly.
WARNING
Hazardous voltage.
Contact with high voltage
may cause death or serious
injury.
SM1024
SIGN CHECK-RS485
Make sure that the RS485 cable from the messaging computer is
wired to the sign according to “Serial (RS485 cable) computer-tosign connection” on page 34.
A
Go to
SIGN FEEDBACK
Was there two-way
communication?
YES
SIGN CHECK-RS485
succeeded.
on page 21.
NO
Have you tried replacing the
RS485 cabling?
NO
Use new or different RS485
cabling.
YES
SIGN CHECK-RS485 failed.
Go to
A
above.
DONE
Troubleshooting procedures
27
December 4, 2003
Troubleshooting Guide for AlphaEclipse 2500, 2600, and 3500 signs (9711-6023)
SIGN CHECK-MODEM procedure
Description:
•
To determine if the sign’s modem and cabling are working correctly.
WARNING
Hazardous voltage.
Contact with high voltage
may cause death or serious
injury.
SM1024
SIGN CHECK-MODEM
Make sure that the modem is wired to the sign according to “Modem
computer-to-sign connection” on page 35.
A
Go to
SIGN FEEDBACK
Was there two-way
communication?
YES
SIGN CHECK-MODEM
succeeded.
on page 21.
NO
Have you tried replacing the
3-wire-to-DB25 cable?
NO
Use new or different 3-wireto-DB25 cable.
YES
SIGN CHECK-MODEM
failed.
Go to
A
above.
DONE
28
Troubleshooting procedures
Troubleshooting Guide for AlphaEclipse 2500, 2600, and 3500 signs (9711-6023)
December 4, 2003
SIGN CHECK-WIRELESS procedure
Description:
•
To determine if the sign’s wireless transceiver and cabling are working correctly.
WARNING
Hazardous voltage.
Contact with high voltage
may cause death or serious
injury.
SM1024
SIGN CHECK-WIRELESS
Make sure that the wireless transceiver is wired to the sign according
to “Wireless computer-to-sign connection” on page 36.
A
Go to
SIGN FEEDBACK
Was there two-way
communication?
YES
SIGN CHECK-WIRELESS
succeeded.
on page 21.
NO
Have you tried replacing the
3-wire-to-DB9 cable?
NO
Use new or different 3-wireto-DB9 cable.
YES
SIGN CHECK-WIRELESS
failed.
Go to
A
above.
DONE
Troubleshooting procedures
29
December 4, 2003
Troubleshooting Guide for AlphaEclipse 2500, 2600, and 3500 signs (9711-6023)
INSIDE INSPECTION procedure
Description:
•
To see if there are any internal, visual indications of damage to the sign(s).
WARNING
Hazardous voltage.
Contact with high voltage
may cause death or serious
injury.
SM1024
INSIDE INSPECTION
•
•
•
•
•
•
•
•
Does there appear to be any physical damage to the sign?
Loose wires or components?
Dust, dirt, or plant material present?
Are the sign’s air vents clear and free of obstructions?
Any evidence of water damage?
Any indications of electrical or lightning damage?
Insect or animal nests?
Evidence of vandalism?
DONE
30
Troubleshooting procedures
Troubleshooting Guide for AlphaEclipse 2500, 2600, and 3500 signs (9711-6023)
December 4, 2003
TEMP PROBE CHECK procedure
Description:
•
To see if a temperature probe is operating correctly.
TEMP PROBE CHECK
In the AlphaNET Diagnostics software,
1.
2.
3.
4.
5.
6.
7.
Click Actions > Continuous Read Temperature > Select.
Click Select Address.
Click Selected Addresses and use Add to include your sign address in the Address List.
Click OK.
Check External Temperature. (If Internal Temperature is selected, this procedure will not work.)
Select 15 Seconds from the How Often to Read Temperature drop-down.
Click Start.
YES
Does a message similar to the following
appear in the Results window:
Address 01 External Temperature is NA?
NO
Temperature probe appears faulty
because a temperature did not appear.
TEMP PROBE CHECK failed.
Temperature probe appears normal.
Is the temperature displayed on the
sign greater than 9°F different from
the ambient temperature?
YES
Remounting the temperature probe.
(See “Temperature probe installation”
on page 43.)
NOTE: The “ambient temperature”
should be measured where the
temperature probe is mounted.
NO
In the AlphaNET Diagnostics
software,
1. Click Actions > Configure Sign >
Select.
2. Click Set Temperature Offset
(Non-Solars).
3. Use the Offset drop-down to
select a temperature offset. For
example. if the temperature
displayed on the sign is
consistently 3 degrees too high,
then select -3.
4. Click Send.
TEMP PROBE CHECK succeeded.
DONE
Troubleshooting procedures
31
December 4, 2003
Troubleshooting Guide for AlphaEclipse 2500, 2600, and 3500 signs (9711-6023)
TEMP PROBE FIX procedure
Description:
•
To correct a faulty temperature probe.
WARNING
Hazardous voltage.
Contact with high voltage
may cause death or serious
injury.
SM1024
TEMP PROBE FIX
NO
Will the temperature be displayed on more than one sign?
YES
Are these signs connected in a Master/Master network?
NO
• See “Master/Master sign-to-sign connection” on page 38.
YES
Reconnect the signs into a Master/Slave network
• See “Master/Slave sign connection” on page 39.
Make sure that the temperature probe is wired to the one
Master sign according to “Temperature probe installation”
on page 43.
Go to
Replace the temperature
probe.
TEMP PROBE CHECK
NO Have you tried to replace the
temperature probe?
YES
TEMP PROBE FIX failed.
NO
on page 31.
Did TEMP PROBE CHECK
succeed?
YES
TEMP PROBE FIX succeeded.
DONE
32
Troubleshooting procedures
Troubleshooting Guide for AlphaEclipse 2500, 2600, and 3500 signs (9711-6023)
December 4, 2003
Sign networking
Computer-to-sign connection methods
There are a number of ways to connect an AlphaEclipse sign to a messaging computer:
•
External connection box (RS232)
•
External connection box (RS485) — used for an IR Message Loader
•
Converter Box (RS485)
•
Fiber optic
•
Ethernet
•
Modem
•
Wireless
Computer-to-sign connection methods
Distance from
computer to sign
(feet)
External
connection
box
(RS232)
External
connection
box
(RS485)
Converter
Box III
(RS485)
Fiber optic2
Ethernet3
Modem1
Wireless1,4
up to 50
Yes
Yes
Yes
Yes
Yes
Yes
Yes
50 to 1000
No
Yes
Yes
Yes
Yes
Yes
Yes
1000 - 4000
No
Yes
Yes
Yes
Yes
Yes
Yes
4000+
No
No
No
Yes
Yes
Yes
No
NOTES:
1
Installed and configured at the factory.
2
For a fiber optic data connection, the maximum distance between the sign and computer is 2 miles (~10,000 feet).
3 A sign cannot be connected directly to the Ethernet. A Lantronics MSS485-T Serial Server must be used as an interface.
4
Maximum indoor range of a Locus OS2400-232 or a Zeus ZLRT2100 wireless transceiver is about 1500 feet. Actual operating
range depends on local environment, including obstructions and electrical interference. The maximum outdoor range of a Locus
OS2400-232 or a Zeus ZLRT2100 wireless transceiver is about 10,000 feet (about 2 miles). Actual operating range depends on local
environment, including obstructions and electrical interference.
Sign networking
33
GND (Blue)
RS232 RXD (Orange)
RS232 TXD (Green)
RS485 - (Red)
SHIELD
RS485 + (Black)
Bank 2
Sign address = 01 (switch #1 ON)
RS485 termination = ON (switches #1 and #2 both ON)
DIP switches
SERIAL PORT
Bank 1
SERIAL PORT (on Controller board)
Controller board DIP switches:
6
7
2
3
4
ON
SHIELD
RS485 -
RS485 - (Red)
RS485 + (Black)
SHIELD
Also, each sign should have its own, unique sign address:
the first sign should be set to sign address 01 (as shown),
the second sign should be set to sign address 02, and so on.
If more than one sign is connected to a Converter Box III,
then the DIP switch settings will be different.
For example, only the Converter Box III and the last sign
on the network need to be terminated. All other signs should
have their two, RS485 termination DIP switches set to OFF.
Use the DIP switch settings shown on the left
when connecting a single sign to a Converter Box III.
METHOD 2: Otherwise, wire the Converter Box III directly to the
SERIAL PORT on the sign's Controller board (right).
METHOD 1: If a sign has a SERIAL I/O terminal block, then wire the
Converter Box III to this block (above).
There are two methods of wiring a Converter Box III to a sign:
SERIAL I/O
terminal block
RS485 +
6
7
SHIELD
}
From
Converter
Box III
DRAWING REVISION 4
RS485 - (Red)
RS485 + (Black)
SERIAL PORT (on Controller board)
METHOD 2 — SERIAL PORT connection:
In order to display messages on a sign, the messaging computer
must be connected to the sign, such as with a Converter Box III.
Converter Box III (pn 1088-1111)
Messaging computer running
AlphaNET software
RS232 cable
(pn 1088-8634)
RS485 outdoor cable
(pn 7122-0284)
Converter Box III
(pn 1088-1111)
10 feet
AlphaEclipse 2500, 2600, and 3500 Series B
up to 4000 feet
METHOD 1 — SERIAL I/O terminal block connection:
AlphaEclipse™ sign
1 2 3 4 5 6 7 8 910
ON
Overview
Wiring
Serial (RS485 cable)
1 2 3 4 5 6 7 8 910
ON
34
DIP switches
December 4, 2003
Troubleshooting Guide for AlphaEclipse 2500, 2600, and 3500 signs (9711-6023)
Serial (RS485 cable) computer-to-sign connection
Sign networking
Overview
Wiring
GND (Blue)
RS232 RXD (Orange)
RS232 TXD (Green)
RS485 - (Red)
SHIELD
RS485 + (Black)
Bank 2
Sign address = 01 (switch #1 ON)
RS485 termination = ON (switches #1 and #2 both ON)
DIP switches
SERIAL PORT
Bank 1
SERIAL PORT (on Controller board)
Controller board DIP switches:
6
7
2
3
4
METHOD 1 — SERIAL I/O terminal block connection:
Receiving modem (inside sign) (pn 1088-9301)
1 2 3 4 5 6 7 8 910
ON
DIP switches
AlphaEclipse™ sign
1 2 3 4 5 6 7 8 910
Sign networking
ON
Modem connection
ON
}
Red
(RING)
Green
(TIP)
}
Telephone service hookup
}
From
modem
3-wire-to-DB25 cable
(pn 1160-9006)
7
3
2
Also, each sign should have its own, unique sign
address: the first sign should be set to sign
address 01 (as shown), the second sign should
be set to sign address 02, and so on.
If more than one sign is connected to a modem,
then the DIP switch settings will be different.
For example, only the first and the last signs in
the network need to be terminated. All other signs
should have their two, RS485 termination DIP
switches set to OFF.
Use the DIP switch settings shown on the left
when connecting a single sign to a modem.
Telephone
service
SERIAL I/O
terminal block
GND (White)
RS232 RXD (Red)
RS232 TXD (Black)
GND (White)
2 3 4 5 6 78
}
From
modem
AT&H0&R1&B1&N6&Y0&W0
Modem AT command setup string:
DRAWING REVISION 5
Switch #1 = ON (Modem ignores DTR)
Switch #2 = OFF (Result codes in words)
Switch #3 = ON (Display result codes)
Switch #4 = ON (Do not echo offline commands)
Switch #5 = OFF (Auto answer on)
Switch #6 = OFF (Carrier detect on)
Switch #7 = OFF (Load user-defined setup from memory)
Switch #8 = ON (Recognize AT commands)
ON 1
7
3
2
Back of modem
RS232 RXD (Red)
RS232 TXD (Black)
3-wire-to-DB25 cable
(pn 1160-9006)
SERIAL PORT (on Controller board)
Modem DIP switch settings:
From
modem
2
3
4
METHOD 2 — SERIAL PORT connection:
Modems can connect to a sign that is almost anywhere.
However, a sign must have its own phone line.
In order to display messages on a sign, the messaging computer
must be connected to the sign, such as with a pair of telephone
modems (a Transmitting modem attached to the messaging
computer and a Receiving modem attached to a sign).
There are two methods of wiring the Receiving modem
to a sign:
METHOD 1: If a sign has a SERIAL I/O terminal block,
then wire the modem to this block (left).
METHOD 2: Otherwise, wire the modem directly to the
SERIAL PORT on the sign's Controller board (right).
Messaging computer
running AlphaNET software
(supplied with modem)
RS232 cable
Transmitting modem (pn 1088-9301)
AlphaEclipse 2500, 2600, and 3500 Series B
Troubleshooting Guide for AlphaEclipse 2500, 2600, and 3500 signs (9711-6023)
December 4, 2003
Modem computer-to-sign connection
35
GND (Blue)
RS232 RXD (Orange)
RS232 TXD (Green)
RS485 - (Red)
SHIELD
RS485 + (Black)
Bank 2
Sign address = 01 (switch #1 ON)
RS485 termination = ON (switches #1 and #2 both ON)
DIP switches
SERIAL PORT
Bank 1
SERIAL PORT (on Controller board)
Controller board DIP switches:
6
7
2
3
4
METHOD 1 — SERIAL I/O terminal block connection:
Receive transceiver (inside sign)
AlphaEclipse™ sign
1 2 3 4 5 6 7 8 910
ON
Overview
Wiring
ON
}
From
transceiver
3-wire-to-DB9 cable
(pn 1160-9007)
5
2
3
Also, each sign should have its own, unique sign address:
the first sign should be set to sign address 01 (as shown),
the second sign should be set to sign address 02, and so on.
If more than one sign is connected to a transceiver,
then the DIP switch settings will be different.
For example, only the first and the last signs in the
network need to be terminated. All other signs should
have their two, RS485 termination DIP switches set to OFF.
Use the DIP switch settings shown on the left
when connecting a single sign to a wireless transceiver.
METHOD 2: Otherwise, wire the Receive transceiver directly
to the SERIAL PORT on the sign's Controller board (right).
METHOD1: If a sign has a SERIAL I/O terminal block, then
wire the Receive transceiver to this block (above).
There are two methods of connecting the Receive wireless
transceiver to a sign:
SERIAL I/O
terminal block
GND (White)
RS232 RXD (Black)
RS232 TXD (Red)
2
3
4
GND (White)
RS232 RXD (Black)
RS232 TXD (Red)
}
From
transceiver
DRAWING REVISION 4
5
2
3
3-wire-to-DB9 cable
(pn 1160-9007)
SERIAL PORT (on Controller board)
METHOD 2 — SERIAL PORT connection:
Wireless transceivers can connect to a sign that is up to 2 miles away. (Actual
distance depends on the local environment, obstructions, electrical
interference, and so on.)
In order to display messages on a sign, the messaging computer must be
connected to the sign, such as with a pair of wireless transceivers (a Master
transceiver attached to the messaging computer and a Receive transceiver
attached to a sign).
AlphaEclipse 2500, 2600, and 3500 Series B
Messaging computer
running AlphaNET software
RS232 cable
(supplied with transceiver)
Master transceiver
Wireless connection (Locus transceiver)
1 2 3 4 5 6 7 8 910
ON
36
DIP switches
December 4, 2003
Troubleshooting Guide for AlphaEclipse 2500, 2600, and 3500 signs (9711-6023)
Wireless computer-to-sign connection
Sign networking
Troubleshooting Guide for AlphaEclipse 2500, 2600, and 3500 signs (9711-6023)
December 4, 2003
Sign-to-sign connection methods
There are two ways to interconnect two or more AlphaEclipse signs:
•
Master/Master
•
Master/Slave
Sign-to-sign connection methods
Description
Signs connected this way can each display a unique message. Messages come into the first Master
sign via an RS232 connection to a modem, wireless transceiver, or a computer.
Master/Master means
RS485
a different message
RS485
on each sign!
Figure 1: Master/Master sign-to-sign connection
Master/Master:
NOTES:
• Messaging — a message can be displayed on all the signs in a Master/Master network by sending
the message to sign address “00”. Also, if each sign in a Master/Master network has a unique
serial address (for example, “01”, “02”, and so on), then a different message can be sent to and
displayed on each sign.
• Temperature — to display the temperature on the signs in a Master/Master network, a temperature
probe must be connected to each sign. If a sign attempts to display the temperature and does not
have a temperature probe attached, the sign will display “ERR” in place of the temperature.
• Time — in Master/Master mode, the time is synchronized whenever a message is sent using the
AlphaNET software.
Signs connected this way always display the same message at the same time. This is called
simultaneous messaging and is often used when signs are mounted back-to-back. Messages come
into the Master sign via an RS232 connection to a modem, wireless transceiver, or a computer.
Master/Slave = same
Master/Slave = same
Series A sign = Turbo cable
Series B sign = Special RS485
Master/Slave = same
Series A sign = Turbo cable
Series B sign = Special RS485
Master/Slave:
Figure 2: Master/Slave sign-to-sign connection
NOTES:
• Messaging — a message will be displayed simultaneously on all the signs in a Master/Slave
network by sending the message to sign address “00” or to all the sign addresses (“01”, “02”, and
so on).
• Temperature — to display the temperature on the signs in a Master/Slave network, a temperature
probe must be connected to the Master sign.
• Time — in Master/Slave mode, the time is synchronized at the top of every hour and also
whenever a message is sent using the AlphaNET software.
Sign networking
37
SERIAL
PORT
Bank 1
Turbo
Extender
board
ON
TEMP/SYNC PORT
RS485 outdoor cable
(pn 7122-0284)
Black
Red
SHIELD
Sign address = 01 (switch #1 ON)
Master/Slave mode = Master (switch #7 = OFF)
RS485 termination = ON (switches #1 and #2 both ON)
If this sign is connected to a Converter Box II, turn switches #1 and #2 both OFF.
DIP switches
SERIAL PORT
Bank 2
Controller board (top view)
1
2
3
4
5
6
7
(On some signs, connections are made
directly to the Controller board's SERIAL PORT.)
MASTER SIGN #1:
Green
Yellow
Black
RS485A (+)
RS485B (-)
SHIELD
RS232 TXD
RS232 RXD
GND
1 2 3 4 5 6 7 8 910
ON
White
Red
1B
2B
3B
4B
5B
6B
SERIAL I/O terminal block
1A
2A
3A
4A
5A
6A
1 2 3 4 5 6 7 8 910
ON
Black
Yellow
not connected
Green
Red
White
MASTER SIGN #1 (sign address = 01)
Signal wire
conduit
Also, a message can be displayed on both Master signs by broadcasting the message to sign address "00".
1B
2B
3B
4B
5B
6B
RS485A (+)
RS485B (-)
SHIELD
RS232 TXD
RS232 RXD
GND
SERIAL
PORT
DRAWING REVISION 4
ON
TEMP/SYNC PORT
Black
Red
SHIELD
Bank 1
Turbo
Extender
board
Sign address = 02 (switch #2 ON)
Master/Slave mode = Master (switch #7 = OFF)
RS485 termination = ON (switches #1 and #2 both ON)
DIP switches
SERIAL PORT
Bank 2
Controller board (top view)
1
2
3
4
5
6
7
(On some signs, connections are made
directly to the Controller board's SERIAL PORT.)
MASTER SIGN #2:
Green
Yellow
Black
White
Red
1A
2A
3A
4A
5A
6A
SERIAL I/O terminal block
Black
Yellow
not connected
Green
Red
White
MASTER SIGN #2 (sign address = 02)
In a Master/Master sign pair, a message can be displayed on Master sign #1 by sending the message to sign address "01" or displayed on Master sign #2 by sending the message to sign address "02".
Two Series B signs connected as a Master/Master pair can each display a unique message — unlike a Master/Slave sign pair which always displays the same message at the same time.
AlphaEclipse 2500, 2600, and 3500 Series B
1 2 3 4 5 6 7 8 910
ON
Overview
Wiring
Master / Master sign connection
1 2 3 4 5 6 7 8 910
ON
38
DIP switches
December 4, 2003
Troubleshooting Guide for AlphaEclipse 2500, 2600, and 3500 signs (9711-6023)
Master/Master sign-to-sign connection
Sign networking
RS485A (+)
RS485B (-)
SHIELD
RS232 TXD
RS232 RXD
GND
SERIAL
PORT
Turbo
Extender
board
RS485 outdoor cable
(pn 7122-0284)
Bank 1
ON
RS485 outdoor cable
(pn 7122-0284)
TEMP/SYNC PORT
RS485 + (Black)
RS485 - (Red)
SHIELD
Black
Red
SHIELD
Sign address = 01 (switch #1 ON)
Master/Slave mode = Master (switch #7 = OFF)
RS485 termination = ON (switches #1 and #2 both ON)
If this sign is connected to a Converter Box III, then switches #1 and #2 both OFF.
DIP switches
SERIAL PORT
Bank 2
Controller board (top view)
1
2
3
4
5
6
7
(On some signs, connections are made
directly to the Controller board's SERIAL PORT.)
MASTER SIGN:
Green
Yellow
Black
1B
2B
3B
4B
5B
6B
1 2 3 4 5 6 7 8 910
ON
White
Red
1A
2A
3A
4A
5A
6A
SERIAL I/O terminal block
Black
Yellow
not connected
Green
Red
White
MASTER SIGN (sign address = 01)
Signal wire
conduit
The Master and
Slave signs
must be the
same size.
To do this, send all messages to sign address "00" or to all the sign addresses ("01", "02", and so on).
1 2 3 4 5 6 7 8 910
ON
Overview
Wiring
1B
2B
3B
4B
5B
6B
RS485A (+)
RS485B (-)
SHIELD
RS232 TXD
RS232 RXD
GND
SERIAL
PORT
Turbo
Extender
board
Black
Red
SHIELD
Bank 1
DRAWING REVISION 3
ON
TEMP/SYNC PORT
RS485 + (Black)
RS485 - (Red)
SHIELD
Sign address = 02 (switch #2 ON)
Master/Slave mode = Slave (switch #7 = ON)
RS485 termination = ON (switches #1 and #2 both ON)
DIP switches
SERIAL PORT
Bank 2
Controller board (top view)
1
2
3
4
5
6
7
(On some signs, connections are made
directly to the Controller board's SERIAL PORT.)
SLAVE SIGN:
Green
Yellow
Black
White
Red
1A
2A
3A
4A
5A
6A
SERIAL I/O terminal block
Black
Yellow
not connected
Green
Red
White
SLAVE SIGN (sign address = 02)
Two Series B signs connected as a Master/Slave pair will both display the same message at the same time. Messages should be sent to both the Master and Slave signs.
1 2 3 4 5 6 7 8 910
ON
DIP switches
AlphaEclipse 2500, 2600, and 3500 Series B
1 2 3 4 5 6 7 8 910
Sign networking
ON
Master / Slave sign connection
Troubleshooting Guide for AlphaEclipse 2500, 2600, and 3500 signs (9711-6023)
December 4, 2003
Master/Slave sign connection
39
December 4, 2003
Troubleshooting Guide for AlphaEclipse 2500, 2600, and 3500 signs (9711-6023)
Termination
When signs are networked together using RS485 connections, EOL (End-Of-Line) termination must be taken
into account so that the signs will function properly.
Improperly terminated signs may be unable to display messages.
Termination DIP switches
Controller board
(side view)
Bank 2
Bank 1
1 2 3 4 5 6 7 8 910
ON
1 2 3 4 5 6 7 8 910
ON
RS485 termination
Both DIP switches 1 & 2 = ON.
Termination examples
One-sign network using a Converter Box III:
RS485
Sign
Converter Box III
RS485 Devices:
Converter Box III
(First device)
Sign
(Last device)
RS485 Termination:
ON
ON
One-sign network using a sign with an internal modem or wireless transceiver:
Sign with internal
modem or transceiver
RS485 Devices:
Sign
(First/Last device)
RS485 Termination:
ON
Termination on multiple signs using RS485 networking:
RS485
Converter
Box III
40
First sign
Second sign
Last sign
RS485 Devices:
Converter Box III
(First device)
First sign
(Middle device)
Second sign
(Middle device)
Last sign
(Last device)
RS485
Termination:
ON
OFF
OFF
ON
Sign networking
Troubleshooting Guide for AlphaEclipse 2500, 2600, and 3500 signs (9711-6023)
December 4, 2003
Appendix
Purpose
This manual is intended to help diagnose and repair common problems in AlphaEclipse 2500, 2600, and 3500
signs.
Revision history
Revision
Date
9711-6023
November 10, 2003
Notes
Preliminary release.
Related documentation
Part #
Manual title
Description
9711-6019
AlphaEclipse 3500 Series B
Service Manual
This manual is intended as a guide for
maintenance and repairs of AlphaEclipse
3500 Series B signs considered field
serviceable.
9711-6009B
AlphaEclipse 3500 Series A
Service Manual
This manual is intended as a guide for
maintenance and repairs of AlphaEclipse
3500 Series A signs considered field
serviceable.
9711-6015F
AlphaEclipse 3500 Series B
Installation Manual
This manual is intended as a guide for the
initial installation of AlphaEclipse 3500 Series
B signs.
9711-7001G
AlphaEclipse 2500/2600 Series
Sign Installation Manual
This manual is intended as a guide for the
initial installation of AlphaEclipse 2500 and
2600 Series signs.
9708-8081G
AlphaNET 3.0 User Manual
Describes the software used to send
messages to an AlphaEclipse sign.
Safety
Warnings and cautions
WARNING
Hazardous voltage.
Contact with high voltage
may cause death or serious
injury.
Always disconnect power to
unit prior to servicing. SM1000A
Other warnings and cautions are posted in appropriate locations throughout this manual.
Appendix
41
December 4, 2003
Troubleshooting Guide for AlphaEclipse 2500, 2600, and 3500 signs (9711-6023)
Preventing electrostatic discharge damage
This equipment contains components that may be damaged by “static electricity”, or electrostatic discharge.
To prevent this from happening, be sure to follow the guidelines in Adaptive Tech Memo 00-0005, “Preventing
Electrostatic Discharge (ESD) Damage,” available on our Web site at http://www.adaptivedisplays.com.
EMI compliance
This equipment has been tested and found to comply with the limits for a Class A digital device, pursuant to
Part 15 of the FCC Rules. These limits are designed to provide reasonable protection against harmful interference
when the equipment is operated in a commercial environment.
This equipment generates, uses, and can radiate radio frequency energy and, if not installed and used in
accordance with installation guidelines, may cause harmful interference to radio communications. Operation of
this equipment in a residential area is likely to cause harmful interference, in which case the user will be required
to correct the interference at his own expense.
42
Appendix
Troubleshooting Guide for AlphaEclipse 2500, 2600, and 3500 signs (9711-6023)
December 4, 2003
Temperature probe installation
Mounting guidelines
•
A good place to locate the temperature probe is underneath the eaves of a protected overhang. Choose a
location where air movement is not restricted by nearby walls or other obstructions. Mount the
temperature probe housing so that convection currents, or rising hot air flows, are not blocked by the
mounting plates.
•
A location on the north side of a building, at least 6 feet off the ground, or other large structure will afford
protection from the afternoon sun. Shield the probe from the effect of the direct sun, reflected heat, or any
nearby sources of heat, such as chimneys, vents, or HVAC ducts.
•
A light-colored background is preferable to a dark-colored mounting background. A location above
vegetation is preferable to a location above asphalt or blacktop.
Installation
1.
Mount the temperature probe vertically using the mounting plate on each side of the probe. The
temperature probe can be mounted on either a flat or a curved surface.
2.
Run the temperature probe cable into the sign through the signal wire conduit opening. Connect the
temperature probe cable to the TEMP/SYNC PORT on the Turbo Extender board:
Mount
vertically to
allow hot air
to flow under
the unit.
Mounting plate
TEMP/SYNC PORT
(on Turbo Extender board)
RS485 –
RS485 +
SHIELD
GND
VCC (+5V)
(Red)
(Black)
(Drain) uninsulated
(Green)
(White)
The TEMP/SYNC PORT is on the
Turbo Extender board.
Appendix
Temperature probe cable
(pn 7122-0401 22 AWG)
Wire
size
(AWG)
Maximum
cable length
(feet)
24
22
20
18
150
250
400
625
43
December 4, 2003
Troubleshooting Guide for AlphaEclipse 2500, 2600, and 3500 signs (9711-6023)
LED indicator locations
Converter Box III
Transmit
indicator (TXD)
Receive
indicator (RXD)
Power
indicator
Zeus wireless transceiver
ZEUS
PWR SYNC
Power
indicator (PWR)
TX
Transmit
indicator (TX))
RX
Receive
indicator (RX)
Locus wireless transceiver
Receive
indicator (RxD)
Transmit
indicator (TxD)
Power
indicator (PWR)
US Robotics modems
Receive
indicator (RD)
44
Transmit
indicator (SD)
Power
indicator (CS)
Appendix
Troubleshooting Guide for AlphaEclipse 2500, 2600, and 3500 signs (9711-6023)
December 4, 2003
NOTES
Appendix
45
December 4, 2003
Troubleshooting Guide for AlphaEclipse 2500, 2600, and 3500 signs (9711-6023)
NOTES
46
Appendix
Troubleshooting Guide for AlphaEclipse 2500, 2600, and 3500 signs (9711-6023)
December 4, 2003
NOTES
Appendix
47
December 4, 2003
Troubleshooting Guide for AlphaEclipse 2500, 2600, and 3500 signs (9711-6023)
How is your sign connected to the messaging computer?
Serial (see page 34 for details)
If two signs are connected as Master/Slave, then attach the RS485 outdoor cable to the Master sign.
If two signs are connected as Master/Master, then attach the RS485 outdoor cable to the Master sign with Address 01.
AlphaEclipse sign
RS485 outdoor cable
10-foot cable
(pn 7122-0284)
(pn 1088-8634)
Converter Box III
(pn 1088-1111)
Messaging computer
with AlphaNET software
Wireless (see page 36 for details)
Cable supplied with
AlphaEclipse sign
Receive wireless transceiver (inside sign)
wireless transceiver.
Messaging computer
with AlphaNET software
Master
wireless transceiver
Modem (see page 35 for details)
Transmitting modem
AlphaEclipse sign
Cable supplied with
modem.
Receiving modem (inside sign)
Messaging computer
with AlphaNET software
MODEM PHONE #: __________________
48
How is your sign connected to the messaging computer?