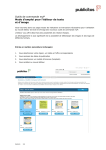
1
EUR-USA v1.1
USER MANUAL
America:
Digital Centre America, Inc.
14271 SW 120th Street Unit #109
USA, Miami, FL 33186
Sales:
Ph: +1.305.387.5005
[email protected]
Europe:
Digital Centre
P.l. St. Isidre
C/ Puigmal, 20-22 St. Fruitós
08272, BARCELONA. Spain
Ph: +34.938.748.158
[email protected]
Tech Support:
Ph: +1.305.387.5115
[email protected]
www.digital-centre.com
Links of interest:
www.facebook.com/digitalcentre
www.twitter.com/photobooth_DC
www.youtube.com/digitalcentrepb
www.photoboothparts.com
2
Copyright and Trademarks
This manual contains materials protected under International copyright Laws. All rights
reserved. No part of this manual may be reproduced, transmitted or transcribed without the express written permission of the manufacturer and author of this manual.
The information of the products in this manual is subject to change without prior notice and does not represent a commitment on the part of the vendor. Who assumes
no liability or responsibility for any errors that appear in this manual.
3
INDEX
1-CUSTOMIZED ONLINE
5
1.1 MYPHOTOCODE.COM
5
1.2. MANAGE YOUR USB STICKS
6
1.2.1 HOW TO LOGIN
7
1.2.2 CUSTOMIZE YOUR PHOTOBOOTH WITH A USB STICK
9
1.2.3 Create your customs:
10
1.2.3.1 LOGO 10
1.2.3.2 TEXT11
1.2.3.3 BACKGROUND MUSIC12
1.2.3.4 FRAMES12
1.2.3.5 WELCOME SCREEN14
1.2.3.6 BYE SCREEN14
1.2.3.7 TOP SCREEN BANNER 15
1.2.3.8 CUSTOM IMAGES ON DEMO SCREEN15
1.2.4 How to save your customizes
16
1.2.4.1 UNZIP ZIP FILE16
1.3 CREATE, MANAGE AND CUSTOMIZE YOUR EVENTS WITH
A USB STICK AND LINK IT TO YOUR MYPHOTOCODE SPACE 17
1.3.1 HOW TO CREATE AN ONLINE EVENT
17
1.3.2 MANAGE THE ONLINE EVENTS
18
1.3.2.1 PHOTOS22
1.3.2.2 EMAILS23
1.3.2.3 EDIT23
4
1-CUSTOMIZED ONLINE
1.1 MYPHOTOCODE.COM
· MYPHOTOCODE.COM
Digital Centre offers your own cloud space where you can create and manage your
events online. Through myphotocode.com can create, edit, and customize your event
and customize your PhotoBooth.
· HOW TO REGISTER:
Send us an e-mail [email protected] with the code printed on the side of
strips to assign you your PhotoBooth. If you have more than a PhotoBooth, take a picture
with each of them and send the codes. We will send an email with your username and
password.
· HOW TO JOIN:
Go to http://www.myphotocode.com and click the top right where it says Login Rental,
Enter your username and password and click ENTER.
· WHAT CAN I DO:
From MyPhotoCode can create and customize your event with a USB Stick Event.
· CUSTOMIZE YOUR PHOTOBOOTH WITH 1 USB STICK (SIMPLE MODE): personalize the
logo, frames, music, welcome, bye, text…
· CUSTOMIZE YOUR PHOTOBOOTH WITH 1 USB STICK AND LINK YOUR EVENT TO YOUR
MYPHOTOCODE SPACE (COMPLEX MODE): customize the title, background, date,
private pictures, available online…
5
Customized online/Manage your USB sticks
Date:1212-2013|Digital-centre.com|QR-Photo|Share Secure|go to MyPhotoCode.com and enter this code FO32TGJBMF
1. You need a username and password
to access to MyPhotoCode.
2. You need identify your Photo booth
to get a username and password.
3. To know the identification number,
please, take a photo and send us the
number that appears in the right side of
the strip, to the following address:
[email protected]
Then, we will send you the username
and password, use them to login.
Date: 12-12-2012 ** go to MyPhotoCode.com and enter this code FO32TGJBMF
Digital-centre.com|QR-Photo|Share Secure
CL1234567
1.2. MANAGE YOUR USB STICKS
6
Customized online/Manage your USB sticks
1.2.1 HOW TO LOGIN
1- Goes to http://myphotocode.com and click on RENTAL LOGIN, it is up in the right side
2- Please, enter your username and password and click ENTER
1
Typing your USERNAME
2
Typing your PASSWORD
3
Click ENTER
7
Customized online/Manage your USB sticks
3- Here you can prepare the USB to customize our Photo Booth . Click on “USB Set Ups”
Click on USB Set Ups
4- Click on “Add New”
Click ADD NEW
8
Customized online/Manage your USB sticks
1.2.2 CUSTOMIZE YOUR PHOTOBOOTH WITH A USB STICK
Create your USB Stick:
• Name: Choose a name for your USB, for example “Night Party” or “Luca’s wedding”.
• Photo Booth: Open the list and selected your photo booth, click the arrow to see all the options.
• Online event: You can link the USB with a created online event or created another! ( See section “ 8.3 create, manage and customize your events with 1
usb stick and link it to your myphotocode space ” ) Save it!
1
Typing a NAME
2
Click on the arrow to
see the box with all Photo
booths. Select your Photo
booth.
9
Customized online/Manage your USB sticks
When the USB has been created we can start to customize.
Click on “Start editing its content”.
Click Here
1.2.3 Create your customs:
You can customize the next parameters:
1.2.3.1 Logo
1.2.3.2 Text on a side of each print
1.2.3.3 Background music
1.2.3.4 Frames
1.2.3.5 Welcome Screen
1.2.3.6 Bye Screen
1.2.3.7 Top Screen Banner (wedding version) *Only STRIP Photo booth
1.2.3.8 Custom images on demo screen
1.2.3.1 LOGO
Image extension.jpg to 300 dpi.
10
Customized online/Manage your USB sticks
1.2.3.2 TEXT
This is the text that will appear in every strip. You can write all that you want.
Look down here and see example, the text appears in the right side along the strip.
Example:
Date
:121
2-20
1
3|D
igita
l-ce
ntre
.com
|QR
-Pho
to|S
hare
Sec
ure|
go to
MyP
hoto
C
ode
.com
and
ente
r
this
cod
eC
L123
4567
Digital-centre.com|QR-Photo|Share Secure
11
Customized online/Manage your USB sticks
1.2.3.3 BACKGROUND MUSIC
You can upload music . Maximum 5 MB. Must be mp3 format.
Look down here and see example, the text appears in the right side along the strip.
1.2.3.4 FRAMES
You have three options
• None
• Upload custom
• Select premade frames from list
• NONE: we don’t upload any new frame
12
Customized online/Manage your USB sticks
• UPLOAD CUSTOM: select 4 frames from our computer. The frames must be in .png format.
• SELECT PREMADE FRAMES FROM LIST: we can choose frame from the list of myphotocode.
You can see this frames before choose. You can see this frames before choose.
Select one, and press SAVE.
13
Customized online/Manage your USB sticks
1.2.3.5 WELCOME SCREEN
There are 2 options:
• Single
• Random
We can upload “Welcome” Images through our computer.
Remember that Images must be in .jpg to 72 dpi.
1.2.3.6 BYE SCREEN
We have 2 options again:
• Single
• Random
We can upload “GoodBye” Images through our computer.
Remember that Images must be in jpg to 72 dpi
14
Customized online/Manage your USB sticks
1.2.3.7 TOP SCREEN BANNER
(WEDDING VERSION) *Only STRIP Photo booth
1.2.3.8 CUSTOM IMAGES ON DEMO SCREEN
15
Customized online/Manage your USB sticks
1.2.4 How to save your customizes
Download the USB Set Up: when you finish customizing, save the changes.
Download the USB Set Up.
Click on “Download the USB
Set Up into a USB Drive”.
It will appear a new window
asking what want you do?
Select Save and accept.
a- Save the document ‘save-in-sub.zip” in the USB pen drive. Don’t change the document
name when you save it.
b- This is an compacted document, that you must decompress in the USB pend drive.
c- When you finish the decompress, you’ll have 2 folders called “PhotoIdUpload” and “PhotoIdEvents”.
d- Inside the USB you only must have these two folders: PhotoIdUpload i PhotoIdEvents.
e- When we have our USB with these folders, connect the USB to the Photo Booth.
IMPORTANT! : Enter in the configuration menu and go out to update the new changes and
customizations.
1.2.4.1 UNZIP ZIP FILE
· To extract a single file or folder, double-click the compressed folder to open it. To extract
the entire contents of the compressed folder, right-click the folder, click Extract All, and
then follow the instructions
16
1.3 CREATE, MANAGE AND CUSTOMIZE YOUR EVENTS WITH A USB
STICK AND LINK IT TO YOUR MYPHOTOCODE SPACE
title, background, date, private pictures, available online…
Click on Online Events Option.
It will open a new window with a list about our events online.
This list it’s empty because there isn’t any event created.
1.3.1 HOW TO CREATE AN ONLINE EVENT
Click on “Add New”
Click ADD NEW
17
Customized online /create, manage and customize your.....
1.3.2 MANAGE THE ONLINE EVENTS
Edit the options:
• Event title: Try a name to the event, for example: Night Party
• Start Date: Indicate when it starts and how long is the event
• Background: You can put on a different background to show in the event online, when
some user take’s a picture and want to recover it, they only have to enter the code in the
website Myphtocode. Instead the background of the web, they could see our personal
background..
• Private pictures:
• If the event is a private event, when the users insert their code,
they only will see their photos.
• If the event isn’t private, when the user introduces the code,
could see all the pictures of the event.
• Single day event: Indicate if the event is for a single day
•Available Online: If the user choose YES, the picture will be seen on the website, otherwise,
the pictures won’t be seen online.
18
Customized online/create, manage and customize your.....
Select Background: we can choose one of the predefined backgrounds or upload another one.
If we upload a background it must be in .jpg or .png to 72 dpi. This image will be repeated.
In case of we upload our logo
19
Customized online /create, manage and customize your.....
At the moment to see the pictures, the logo, will be seen like this:
When we finish the configuration, click on SAVE.
We have already edited i created the online event!
20
Customized online /create, manage and customize your.....
Select “Go back to Online Events
Return to outset where the list was empty, but now we can see our new event
Here you can see all the information about the event that we just created:
• Date : The day of the appointment
• Name: the name that we gave to the event
• Photo booth: the photo booth model that will be used in the event. This section will be empty until the moment we take the first photo, then, the model will appear
automatically.
• Status: indicate if online option is activated
• Photos: how many pictures has been taken
• Video: how many videos has been recorded
• Actions:
1.3.2.1 Photos: can see the pictures from all the users
1.3.2.2 Emails: can see the mail list where the users send the photos
1.3.2.3 Edit: you can edit the event again
21
Customized online /create, manage and customize your.....
1.3.2.1 PHOTOS
You will see a new window with all the photos in a little size.
If you click one of the small photos, this will be opened and some options appear. In this
example, the user didn’t record any video, so the possible options are:
• Post on Facebook
• Send by email
• Tweet photo
22
Customized online /create, manage and customize your.....
But the options are different when the user records a video:
• Watch the video
• Post on Facebook
• Send by email
• Tweet photo
1.3.2.2 EMAILS
Select the Button “ACTIONS > EMAIL” you will see an address list, here you could see the sending historial, every time that users share their photos by e-mail, the e-mail addresses will be
registred in this list.
1.3.2.3 EDIT
See section “3.1 How to create an online event”
23