1
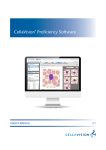
CellaVision® Proficiency Software
USER’S MANUAL
2.0
CellaVision®
Proficiency Software
User’s Manual
CellaVision® Proficiency
Software
Preface
CellaVision® is a trademark of CellaVision AB.
All other trademarks used in this document are property of their respective owners.
No part of this document or the products it describes may be reproduced or transmitted by any
means or in any form without prior consent in writing from CellaVision AB.
Article No.: PM-10509
Revision: 2013-03-04
Copyright © 2013 CellaVision AB. All rights reserved.
Headquarter:
CellaVision AB
Ideon Science Park
SE-223 70 Lund
Sweden
Phone +46 (0) 46 286 44 00
Fax +46 (0) 46 286 44 70
User’s Manual
PM-10509 2013-03-04
iii
CellaVision® Proficiency
Software
1 INTRODUCTION................................................................................................................... 1
1.1 General Description and Intended Use................................................................... 1
1.2 About this User’s Manual.......................................................................................... 1
1.3 Help ............................................................................................................................. 1
2 EXAMINER............................................................................................................................ 2
2.1 GETTING STARTED................................................................................................. 2
2.1.1 Creating a Free Trial Account ....................................................................... 2
2.1.2 Requesting a Full Account ............................................................................ 2
2.1.3 Logging in ........................................................................................................ 2
2.1.4 Retrieving the Password................................................................................ 3
2.1.5 Customizing the Workspace ......................................................................... 3
2.2 CREATING, MANAGING AND EVALUATING TESTS......................................... 4
2.2.1 The TESTS Tab .............................................................................................. 4
2.2.2 Creating a New Test....................................................................................... 5
2.2.3 Monitoring Ongoing Tests............................................................................ 10
2.2.4 Viewing Test Results.................................................................................... 11
2.2.5 Exporting Test Results ................................................................................. 18
2.2.6 Attaching a Test Conclusion........................................................................ 19
2.2.7 Deleting Tests................................................................................................ 19
2.3 VERIFYING AND MANAGING SLIDES ............................................................... 19
2.3.1 Uploading Slides........................................................................................... 19
2.3.2 The SLIDES Tab........................................................................................... 21
2.3.3 Managing Slides ........................................................................................... 21
2.3.4 Verifying Slides ............................................................................................. 23
2.3.5 Adding or Editing Slide Comments ............................................................ 27
2.3.6 Marking Slides as Done............................................................................... 28
2.3.7 Deleting Slides .............................................................................................. 28
2.4 ADDING AND MANAGING PARTICIPANTS....................................................... 28
2.4.1 The PARTICIPANTS Tab............................................................................. 28
2.4.2 Adding Participants ...................................................................................... 29
2.4.3 Filtering the Participant List* ....................................................................... 30
2.4.4 Managing Participants ................................................................................. 30
2.4.5 Setting Lab Supervisor Privileges*............................................................. 30
2.4.6 Deleting Participants .................................................................................... 31
2.5 SETTINGS................................................................................................................ 31
2.5.1 Editing Account Information........................................................................ 31
2.5.2 License........................................................................................................... 31
2.5.3 Managing User-defined Classes ................................................................ 32
2.6 TROUBLESHOOTING............................................................................................ 33
2.6.1 No Slides Shown in Wizard Step 1 ............................................................ 33
2.6.2 Missing Slides in Wizard Step 1 ................................................................. 33
2.6.3 No Participants Shown in Wizard Step 2................................................... 33
iv
PM-10509 2013-03-04
User’s Manual
CellaVision® Proficiency
Software
2.6.4 No Results Available in Test Results View................................................ 33
3 PARTICIPANT..................................................................................................................... 34
3.1 GETTING STARTED............................................................................................... 34
3.1.1 Logging in ...................................................................................................... 34
3.1.2 Retrieving the Password.............................................................................. 34
3.2 TAKING A TEST....................................................................................................... 35
3.2.1 The TESTS Tab ............................................................................................ 35
3.2.2 Viewing a Test ............................................................................................... 36
3.2.3 Verifying Slides ............................................................................................. 37
3.2.4 Signing Slides ............................................................................................... 42
3.3 VIEWING TEST RESULTS .................................................................................... 42
3.3.1 Definitions...................................................................................................... 42
3.3.2 Opening a Completed Test.......................................................................... 43
3.3.3 The Results View.......................................................................................... 43
3.3.4 Test Summary ............................................................................................... 44
3.3.5 WBC Classes................................................................................................ 45
3.3.6 WBC Cells ..................................................................................................... 47
3.3.7 RBC Characteristics..................................................................................... 50
3.3.8 Test Conclusions .......................................................................................... 50
APPENDIX - A BUTTONS AND SYMBOLS ..................................................................... 51
A.1 General ..................................................................................................................... 51
A.2 Buttons...................................................................................................................... 51
A.3 Symbols.................................................................................................................... 52
APPENDIX - B RECOMMENDED WORKFLOW ............................................................. 53
APPENDIX - C CALCULATIONS........................................................................................ 55
APPENDIX - D GLOSSARY ................................................................................................ 57
User’s Manual
PM-10509 2013-03-04
v
CellaVision® Proficiency
Software
INTRODUCTION
1 INTRODUCTION
1.1
General Description and Intended Use
The CellaVision® Proficiency Software is a tool for education and proficiency
testing of manual blood cell differentials in laboratories.
There are two types of users in the CellaVision® Proficiency Software:
Examiner and Participants.
The Examiner performs the testing and education by creating and managing
Participants, correct classifications and tests.
The Examiner can view the results of all Participants. Participants can view their
own results and compare them to the correct result, the majority result, or
anonymized fellow Participant results.
1.2
About this User’s Manual
This User’s Manual will guide you step-by-step through the operation of the
CellaVision® Proficiency Software (also referred to as the software), aiming for
an efficient way to give you a good understanding and knowledge of the
program and its features. References are made to appendices providing
additional information. Some self-explaining dialogs have been left out in the
text.
Typographical convention:
Names of keys and on-screen objects are presented in bold; e.g.click Print.
1.3
Help
A help button
is located in the top right-hand corner.
Click it to open a window containing links to the following help resources:
• Online version of this manual
• Support community
• FAQ’s
The Help window can be opened or closed at any time and does not affect the
current state of work. Additional resources can be found at http://www.
cellavision-proficiency.com.
User’s Manual
PM-10509 2013-03-04
1
CellaVision® Proficiency
Software
EXAMINER
2 EXAMINER
The following chapters are intended for the Examiner. A Participant cannot
access these parts of the program.
2.1
2.1.1
GETTING STARTED
Creating a Free Trial Account
1. Open an internet browser window and go to https://www.cellavisionproficiency-software.com.
2. Click the Create a free trial account link.
3. Fill out the form and accept CellaVisions Terms & Conditions.
4. Click Create account.
The trial account will be active for 90 days during which time it is possible to
view the results of completed example tests, add up to two Participants and
create tests using example slides.
2.1.2
Requesting a Full Account
A full account requires the purchase of a CellaVision® Proficiency Software
license. Find out more at http://www.cellavision-proficiency.com/licenses.
2.1.3
Logging in
1. Open an internet browser window and go to https://www.cellavisionproficiency-software.com.
2
PM-10509 2013-03-04
User’s Manual
CellaVision® Proficiency
Software
EXAMINER
2. Enter your email/username and password.
3. Click Log in.
If more than one account are associated with the login credentials a drop-down
menu will be shown after logging in where the desired account can be chosen.
2.1.4
Retrieving the Password
1. In the login screen click the Forgot password? link.
2. Enter your email address and click Reset password.
3. A new password will be sent to this email address.
2.1.5
Customizing the Workspace
The first log-in to a CellaVision® Proficiency Software account prompts the
Customize your account window to open.
Take a minute to:
• Choose a new password to replace the temporary password.
• Set the preferred Language for the user interface.
• Check that the Email address is correct.
Account settings can be changed at any time later in the SETTINGS tab. See
2.5 SETTINGS for more information.
User’s Manual
PM-10509 2013-03-04
3
CellaVision® Proficiency
Software
EXAMINER
2.2
2.2.1
CREATING, MANAGING AND EVALUATING TESTS
The TESTS Tab
1
2
5
3
4
1. Create a new test
2. Under construction
3. Ongoing
4. Completed
5. Detailed view
The TESTS tab is the starting point for creating a new test (1). It also displays a
list of all tests that are currently either under Construction (2), Ongoing (3) or
Completed (4), sorted by test creation date.
Test results can be accessed from this tab by double-clicking on a completed
test. See also 2.2.4 Viewing Test Results for more information.
Click on any test in the list to view more detailed information in the detailed
view (5).
2.2.1.1
Under Construction Tests
A test stays under construction until the creation of the test is finished and the
test is distributed to the Participants.
Double-click on an under construction test to continue working on it.
Under construction tests are not visible to the Participants.
2.2.1.2
Ongoing Tests
Once test creation is finished the test is flagged as ongoing and becomes visible
to its Participants.
4
PM-10509 2013-03-04
User’s Manual
CellaVision® Proficiency
Software
EXAMINER
Participants can now classify and/or characterize cells.
Double-click on an ongoing test to view the Participants’ progress (see also
2.2.3 Monitoring Ongoing Tests).
2.2.1.3
Completed Tests
A test is flagged as completed when one of the following applies:
• The completion date of the test has been reached.
• All Participants have completed and signed all slides in the test.
• The test is manually set to completed by the Examiner (see also 2.2.3.2 Stop
an Ongoing Test).
An email is sent to both the Examiner and the Participants when a test is
completed.
Double-click on a completed test to view the results (see also 2.2.4 Viewing Test
Results).
2.2.2
Creating a New Test
1. Enter a test name and click Create.
2. Select one or more slides in the Available slides list(s). Click on the column
headers to sort the list. If no slides are shown click on the SLIDES tab and
follow instructions (see also 2.6.1 No Slides Shown in Wizard Step 1 and
2.6.2 Missing Slides in Wizard Step 1.
User’s Manual
PM-10509 2013-03-04
5
CellaVision® Proficiency
Software
EXAMINER
Note:
A maximum of 20 slides can be added per test. Tests can only include slides
with either peripheral blood or body fluid samples, but not both.
3. Click
to add the selected slides to the test and then click Next to proceed
to Step 2 of the wizard.
4. Select one or more Participants in the Available Participants list. Click on the
column headers to sort the list. Click to filter the list on Lab, Region or
Country.* If no participants are shown click on the PARTICIPANTS tab and
add Participants (see also 2.6.3 No Participants Shown in Wizard Step 2).
* Only available in the Enterprise version.
5. Click
to add the selected participants to the test and then click Next.
6. Choose the test preferences (see 2.2.2.1 Test Settings for more information)
and then click Next.
6
PM-10509 2013-03-04
User’s Manual
CellaVision® Proficiency
Software
EXAMINER
7. Review the test to ensure that the correct slides and Participants were added
and the correct preferences were set.
8. Click Finish to distribute the test to all Participants. A notification email will
be sent to all Participants who have an email address associated with their
account. Participants with no email address need to be notified manually.
User’s Manual
PM-10509 2013-03-04
7
CellaVision® Proficiency
Software
EXAMINER
2.2.2.1
Test Settings
Test Duration
Automatically close
this test on
Specify an end date using the drop down menu or
calendar. At the end of the chosen day the test will
close automatically independent of the Participants
progress and be flagged as completed. Test end
dates will be visible to the Participants.
Note:
If a test closes before all Participants have verified
all slides it will reduce the data available for the
results statistics. Any slide a Participant has not
completed will be excluded from the results for that
particular Participant.
End dates of ongoing tests can be extended as
described in 2.2.3.3 Extending the Test End Date.
Do not set an automatic If no end date is set the test will be flagged as
completion date
completed as soon as all Participants have verified
all slides.
8
PM-10509 2013-03-04
User’s Manual
CellaVision® Proficiency
Software
EXAMINER
Visible Information
Show patient
information
If checked, patient information associated with a
slide (if available) will be visible to all Participants.
See 2.3.3.5 Add or Edit Patient Information for
more information.
Make reference cells
available
If checked, Participants are able to open reference
cell libraries whilst they are verifying slides. If no
reference cells are available this setting is disabled.
See 2.3.4.4 White Blood Cell Classification, Create
WBC Reference Libraries for more information.
Show additional slide
data
If checked, additional data associated with a slide
(if available) will be visible to all Participants. See
2.3.3.6 Add or Delete Additional Slide Data for
more information.
Give early access to
results
If checked, individual Participants who have
completed the test will be able to view their results
even before the test is completed by the entire
group.
Early access results only show that particular
Participants results compared to the Examiner
results. No incomplete results from fellow
Participants are shown.
Test Comment
Write a test comment
User’s Manual
Add a comment about the test. Test comments are
visible to all Participants taking this test.
PM-10509 2013-03-04
9
CellaVision® Proficiency
Software
EXAMINER
2.2.3
Monitoring Ongoing Tests
1
3
2
1. Progress bar
2. Progress grid
3. Sort
2.2.3.1
View an Ongoing Test
Double-click on an ongoing test in the TESTS tab to view its progress.
Progress Bar
The progress bar (1) indicates how many Participants have completed the test.
Participants are only classed as having completed the test once they have
verified and signed all slides.
Progress Grid
The progress grid (2) shows which slides each individual Participant has
completed. Participants are shown on the y-axis and slides on the x-axis of the
progress grid.
Sorting
Choose to sort (3) the progress grid on names, completed or not completed.
2.2.3.2
Stop an Ongoing Test
Stop an ongoing test at any time by clicking End test now. This will
immediately close the test for all Participants, independent of their progress.
Once stopped, the test is flagged as completed and its results will be available
for viewing. See also 2.2.4 Viewing Test Results on how to access test results.
10
PM-10509 2013-03-04
User’s Manual
CellaVision® Proficiency
Software
EXAMINER
Note:
Closing a test before all Participants have verified all slides will reduce the data
available for the results statistics. Any slide a Participant has not completed will
be excluded from the results for that particular Participant.
Note:
Once a test has been stopped it cannot be returned to an ongoing status.
2.2.3.3
Extending the Test End Date
1. Go to the TESTS tab and click on an ongoing test.
2. In the detailed view of that test click on the date underneath Test end date.
3. Enter a new date and click Save.
Note:
The test end date can never be set to a more recent date than the previous end
date. It is only possible to extend the test end date if a test end date has been set
from the beginning.
2.2.4
Viewing Test Results
2.2.4.1
Definitions
Examiner Result
The Examiner result is the WBC classification and/or RBC characterization
performed by the Examiner.
Majority Result
For WBC, it is the cell class assigned to a particular cell by the majority of
Participants.
For RBC, it is the characterization grade chosen by the majority of Participants.
If the majority cannot be decided unanimously one of the cell classes/
characterizations is at random used as majority.
Reference
The reference is either the Examiner result or Majority result depending on the
selection made by the viewer.
WBC Agreement
WBC Agreement shows how well the Participant's classification agrees
(percentage) with the reference.
RBC Agreement
The RBC Agreement shows how well the Participant’s characterization agrees
(percentage) with the reference.
2.2.4.2
Opening a Completed Test
In the TESTS tab double-click on a completed test to open the results view.
User’s Manual
PM-10509 2013-03-04
11
CellaVision® Proficiency
Software
EXAMINER
2.2.4.3
The Results View
1
3
5
4
2
1. Summary of results
2. Collapse/Expand
3. Slide list
4. Slide comments
5. Slide counter
Results View Navigation
In the results view the test results are automatically compiled to show:
• A summary of results.
• WBC classification statistics on a class level.
• WBC classification statistics on a cell level.
• RBC characterization statistics.
Click the results view navigation tabs to browse the results.
Collapse/Expand
Click on the arrow to collapse/expand (2) the side panel.
Slide List
The slides list (3) shows all slides in the test that contribute to the current results
view. Include and exclude slides from the results by clicking on the slide.
Hold down CTRL or SHIFT whilst clicking to select multiple slides.
Only results from selected slides (i.e. highlighted in blue) are presented.
Slide Comments
If one or more slide comments (4) exist for a slide the comment icon
will be
shown next to the slide in the slide list. Click on the comment icon to open a
window with all comments.
12
PM-10509 2013-03-04
User’s Manual
CellaVision® Proficiency
Software
EXAMINER
Slide Counter
The slide counter (5) shows how many slides are currently selected and
contributing to the shown results.
2.2.4.4
Test Summary
4
Legend:
1
2
3
1. Bar chart
2. Compare to
3. Agreement percentages
4. Infographics
Click the Summary of results tab to see an overview of how Participants
performed in the test.
Bar Chart
The bar chart (1) shows the average WBC and RBC agreement for each
Participant displayed as percentage values. The higher the agreement the better a
Participant is considered to have performed in the test.
Switch between using either the Examiner or Majority result as a reference for
the agreement using the radio buttons in the Compare to (2) box.
The Agreement percentages (3) box shows the values used for drawing the bars
in the bar chart.
Sort the bar chart using the drop-down menu.
Filter the bar chart using the drop-down menus.*
* Only available in the Enterprise version.
User’s Manual
PM-10509 2013-03-04
13
EXAMINER
CellaVision® Proficiency
Software
Infographics
The infographics (4) displays the following key metrics of the test:
• Total Participant number.
• Average WBC and RBC agreement for all Participants compared to the
reference selected in the Compare to box (Examiner or Majority result).
• Highest and lowest WBC and RBC agreements compared to the reference
selected in the Compare to box (Examiner or Majority result).
2.2.4.5
WBC Classes
Click the WBC classes tab to see the results of WBC classification on a class
level.
Switch between Examiner and Majority in the Compare to box to change the
reference classifications.
Switch between showing One participant - all cell classes and One cell class all participants in the Display box to show different views of the data.
One Participant - All Cell Classes
When selecting One participant - all cell classes the selected Participant’s
classification results are shown as a total number of cells per cell class compared
to the reference classification.
Each cell class is shown with a top and bottom bar. The top bar (dark grey)
shows the total number of cells classified to this class by the reference.
The bottom bar shows the total number of cells classified to this class by the
Participant. The blue part of the bar indicates the number of cells where the
Participant and reference agreed on the classification. The orange part indicates
where they disagreed.
14
PM-10509 2013-03-04
User’s Manual
CellaVision® Proficiency
Software
EXAMINER
Change Participant using the drop down menu in the Display box.
One Cell Class - All Participants
When selecting One cell class - all participants the total number of cells
classified to the selected cell class by all Participants as well as the reference is
shown.
The top bar (dark grey) shows the reference result.
The following bars show the Participant results. The blue part of the bar
indicates the number of cells where the Participant and reference agreed on the
classification. The orange part indicates where they disagreed.
Change cell class using the drop down menu in the display box.
2.2.4.6
User’s Manual
WBC Cells
Click the WBC cells tab to see the results of WBC classification on a cell level.
PM-10509 2013-03-04
15
CellaVision® Proficiency
Software
EXAMINER
View Classifications
1
3
4
2
1. View classifications
2. Main view
3. Cell classifications
4. Individual cell classifications
Click on the View classifications (1) tab in the side panel to see which WBCs
caused the most classification disagreements.
All cells from the currently selected slides are compiled and shown in the main
view (2), starting with the cell that has the highest number of disagreements.
The total number of cells in the current list is shown in brackets next to the
heading All cells above the cell image.
The Cell classifications (3) box shows the cell classes and number of total
classifications to each cell class for the currently shown cell. It also shows
which slide the cell originates from.
The Individual cell classifications (4) box shows how the Examiner and each
Participant classified the cell.
Use the arrow buttons underneath the cell or the arrow keys on the keyboard to
go through all the cells. The cells are sorted so that the cells with highest
number of different classifications are shown first.
16
PM-10509 2013-03-04
User’s Manual
CellaVision® Proficiency
Software
EXAMINER
Compare Individuals
1
3
4
2
1. Compare individuals
2. Main view
3. Compare
4. Comparison results
Click on the Compare individuals (1) tab in the side panel to see how the
WBC classification results compare between each individual Participant and a
chosen reference.
Change the Participant or the reference using the drop-down menus in the
Compare (3) box.
The first two columns in the Comparison results (4) table show the number of
cells the two selected individuals have classified to each class. The third column
shows the number of cells where the classification differs between the two
individuals.
Sort WBC classes with the most disagreements to the top of the list by clicking
on the table headers in the Comparison results (4) table.
Click on a cell class name to show cell images with disagreements in the main
view (2). The two differing classifications are shown above the cell image. Use
the arrow buttons underneath the cell image or the arrow keys on the keyboard
to go through all disagreements of that class.
Cell comments (if available) are shown underneath the cell image.
Showing Examiner Cells
Click Open Cell Class to show all cells for that slide that were classified to this
class by the Examiner. Use the drop-down menu to change to a different class.
User’s Manual
PM-10509 2013-03-04
17
EXAMINER
CellaVision® Proficiency
Software
Note:
Examiner cells are not to be confused with WBC reference libraries. Cells from
WBC reference libraries can be compiled from many different slides and serve
as examples for their particular cell class (see Create WBC Reference
Libraries for more information).
2.2.4.7
RBC Characteristics
Click the RBC characteristics tab to see the results of RBC characterization.
Switch between Examiner and Majority in the Compare to box to change the
reference characterization.
The table shows the Examiner, Majority and Participant(s) characterization
grades for the different morphologies.
Cells with an orange background color indicate where the characterization
differs from the reference.
The stronger the orange color the greater the deviation.
Click Show RBC image to bring up the RBC image. Click outside of the image
to close it.
Note:
RBC characterization results can only be viewed for one slide at a time.
2.2.5
Exporting Test Results
The Summary of results, WBC classes and RBC characteristics tabs allow
exporting of the presented data to a CSV file.
1. In the TESTS tab double-click on a completed test to open it.
2. In the side panel click Export data.
18
PM-10509 2013-03-04
User’s Manual
CellaVision® Proficiency
Software
EXAMINER
3. Choose a location to save the file and click Save.
2.2.6
Attaching a Test Conclusion
Test Conclusions are reports created externally by the Examiner.
1. Save a test conclusion as either a PDF file, Microsoft Word document or JPG,
PNG, GIF or BMP-file. The maximum allowed file size is 3MB. Only one
test conclusion can be added per test.
2. In the TESTS tab click on the completed test relevant to the test conclusion
to so that test is highlighted.
3. In the detailed view of that test click Attach conclusion.
4. Navigate to the file.
5. Click OK.
Deleting a Test Conclusion
Click
2.2.7
(Delete) next to the test conclusion link.
Deleting Tests
1. In the TESTS tab click on any test to bring up the test information in the
detailed view.
2. Click
(Delete) to delete the test.
Note:
Deleting an ongoing or completed test will remove it from all associated
Participant accounts. Deleting a completed test will also delete its results.
2.3
2.3.1
VERIFYING AND MANAGING SLIDES
Uploading Slides
The CellaVision® Proficiency Software accepts slides from the following
CellaVision® databases:
• CellaVision® Processing Database
• CellaVision® Competency Software Database
Step 1: Preparation
1. Go to the computer running the CellaVision® Remote Review Software and
open an internet browser window.
2. Navigate to https://www.cellavision-proficiency-software.com.
3. Log in to your CellaVision® Proficiency Software account.
4. Click on the SLIDES tab.
5. Click Get the Transfer Tool.
6. Install the Transfer Tool.
User’s Manual
PM-10509 2013-03-04
19
CellaVision® Proficiency
Software
EXAMINER
Note:
Administrator privileges are required to install the Transfer Tool.
Note:
Steps 2-6 can be skipped if the Transfer Tool has previously been installed on
the computer.
Step 2: Export
1. Start the Transfer Tool and select the database containing the slides (orders)
to transfer.
2. Log in to that database.
3. Select individual orders by clicking on the check mark next to the orders.
Select multiple orders at once by holding down SHIFT or CTRL whilst
clicking on order rows.
4. Click Mark all highlighted. Select and add all orders in the database by
clicking the check box in the column header.
Note:
Orders that have already been marked for transfer in a CellaVision® DM
Software are indicated by the
(Mark for Transfer Tool) icon. The option
to mark orders for transfer is only available in CellaVision® DM Software
version 4.0 or higher. Right-click in the order list view to mark an order for
transfer.
5. Click Transfer in the Transfer selection panel to the right.
6. Select a location on the hard-drive and save the files.
Step 3: Upload
1. In the CellaVision® Proficiency Software navigate to the SLIDES tab and
click Upload slides.
2. Navigate to the previously saved slide files and select one or more slides for
upload.
3. Click Open. The slides may take a few minutes to upload.
Note:
No patient identification information is transferred with the slides. All
transferred cell images are copies from the original.
20
PM-10509 2013-03-04
User’s Manual
CellaVision® Proficiency
Software
2.3.2
EXAMINER
The SLIDES Tab
2
1
1. Slide list
2. Detailed view
Navigate to the SLIDES tab to:
• Upload slides to your CellaVision® Proficiency Software account.
• View and manage uploaded slides.
• Verify slides.
Slides are automatically grouped into distinct slide lists (1) according to their
sample type.
Detailed View
Click on a slide in a slide list(s) to view the detailed view (2) of that slide.
2.3.3
2.3.3.1
Managing Slides
Slide States
Done
Empty field
Slide has not been marked as done but all cells are
classified.
Slide is marked as done (optional step).
Slide contains unclassified cells.
User’s Manual
PM-10509 2013-03-04
21
CellaVision® Proficiency
Software
EXAMINER
Locked
Empty field
Slide is not being used in an ongoing or completed
test and is not locked.
Slide is locked.
Verification cannot be changed and the slide cannot
be deleted.
2.3.3.2
Sorting
Click on the column headers to sort the list.
2.3.3.3
Edit the Slide Identifier
1. Click on a slide in the slide list to focus the detailed view to that slide.
2. Click on the slide identifier in the detailed view.
3. Edit the identifier and click Save.
2.3.3.4
Add or Edit Slide Notes
Slide notes are only visible to the Examiner and serve as an internal memo
about that slide.
1. Click on a slide in the slide list to focus the detailed view to that slide.
2. Click on Add note or, if a slide note already exists, on the note itself.
3. Add or edit the note.
4. Click Save to save the change or Cancel to return the slide note to its
previous state.
2.3.3.5
Add or Edit Patient Information
1. Click on a slide in the slide list to focus the detailed view to that slide.
2. Click on Add information or, if patient information already exists, on the
information itself.
3. Add or edit the information.
4. Click Save to save the change or Cancel to return the patient information to
its previous state.
2.3.3.6
Add or Delete Additional Slide Data
1. Click on a slide in the slide list to focus the detailed view to that slide.
2. Click Upload file in the detailed view.
3. Navigate to the files on the hard drive and click Open. A link to the file is
generated in the detailed view. The file format must be either a PDF file,
Microsoft Word document or TXT-, JPG-, PNG-, GIF- or BMP-file. The
maximum allowed file size is 3MB and only two files can be added per slide.
22
PM-10509 2013-03-04
User’s Manual
CellaVision® Proficiency
Software
EXAMINER
4. Click on a link to open it. The file will open in an program suitable for that
file type.
5. To delete additional slide data click on
(Delete) next to the link.
Note:
Additional slide data is only visible to the Participants if the setting “Show
additional slide data” is selected in the test creation wizard.
2.3.4
2.3.4.1
Verifying Slides
Opening a Slide for Verification
In the SLIDES tab double-click on a slide to verify it.
2.3.4.2
The Verification View
1
2
3
1. WBC/RBC navigation
2. Collapse/Expand
3. Main view
WBC/RBC Navigation
Switch between WBC and RBC (1) verification using the tabs. When a slide
has no RBC only the WBC tab is shown and vice versa.
Collapse/Expand
Click on the arrow to collapse/expand (2) the side panel.
Main View
The main view (3) shows either the WBC images of the currently selected
classes or the RBC image.
User’s Manual
PM-10509 2013-03-04
23
CellaVision® Proficiency
Software
EXAMINER
2.3.4.3
Adjust Image Brightness and Color
1. Click
.
2. Adjust the sliders.
3. Click Save.
Clicking Reset will restore the default settings.
2.3.4.4
White Blood Cell Classification
General Workflow
1. Click on the WBC tab.
2. Click on a WBC class in the side panel to show a gallery of all cells classified
to that class in the main view. When using the two-class layout, left-click on a
class to open it in the left gallery and right-click on a class to open it in the
right gallery. Use the drop-down menu in an open WBC class gallery to
switch between classes.
3. If necessary, re-classify cells by dragging and dropping them from one open
class gallery to another or from an open class gallery to a class in the side
panel. Select multiple cells at once by pressing CTRL or SHIFT.
Note:
It is not possible to re-classify cells from slides that are locked.
Note:
It is possible to add user-defined WBC classes. See also 2.5.3 Managing Userdefined Classes for more information.
24
PM-10509 2013-03-04
User’s Manual
CellaVision® Proficiency
Software
EXAMINER
Customize the Layout
Switch between a one-class, two-class or all-classes layout using the
Layout Toggle buttons.
Increase or decrease the size of the cell images using the Zoom
Slider.
Magnify Individual WBC
1. Double-click on a cell.
2. Use the mouse-wheel to change the zoom level.
3. Use the arrow keys on the keyboard to show the next cell in the gallery.
4. Click Close to close the magnified view.
Add or Edit Individual Cell Comments
1. Double-click on a cell.
2. Click in the comment box underneath the magnified cell and write a
comment.
3. Click Save to save the comment.
4. Click Close to close the magnified view.
Cells with comments are marked by a comment icon in the top right corner.
Cell Marker
The cell marker is a square marking the cell for identification. Click
show/hide the square.
Split WBC
to
1. Right-click on a cell and choose Split cell from the menu.
2. Click on the center of all individual cells to mark them.
3. Click OK to split the cell. The new cells are added to the same class as the
original cell.
Delete WBC
Delete cells by dragging them to the Trash class in the side panel or by choosing
Trash from the right-click menu. Deleted cells are not visible for Participants.
User’s Manual
PM-10509 2013-03-04
25
CellaVision® Proficiency
Software
EXAMINER
Retrieve deleted cells by opening the Trash class and dragging cells from the
Trash class to another cell class.
Create WBC Reference Libraries
1. Right-click on the cell that should be used as a reference for that class.
2. Select Add as reference cell from the right-click menu.
To view reference libraries:
1. Switch to either the one-class or two-class layout.
2. Open the cell class of interest.
3. Click Reference cells. The reference cell gallery for that class will open as a
separate gallery.
To delete cells from reference libraries:
1. Right-click on a cell.
2. Select Delete from the menu.
Note:
Reference libraries will be available to Participants if specified during test
creation. Only reference cells created before the test is created will be shown to
Participants. See 2.2.2.1 Test Settings for more information.
2.3.4.5
Red Blood Cell Characterization
1
2
3
1. RBC tab
2. Zoom slider
3. Magnified area
26
PM-10509 2013-03-04
User’s Manual
CellaVision® Proficiency
Software
EXAMINER
General Workflow
1. Click on the RBC (1) tab.
2. Zoom in to the RBC image using either the mouse wheel or the zoom slider
(2). The RBC image corresponds to the area of 8 microscopic high power
fields (HPF) (100x objective and a 22mm ocular).
Note:
Be aware that RBC images captured using a CellaVision® Image Capture
System can be of different magnifications.
3. Move around the image by clicking and dragging it.
4. Double-click anywhere on the RBC image to magnify that area. Move the
mouse around the RBC image to move the position of the magnified area (3).
Click again to close it.
5. Grade the RBC morphology using the radio buttons in the side panel. If
required, reset all morphologies grades to a normal level by clicking Report
all as normal.
RBC Characterization Grades
0
Normal level
1
Morphology is present at a low level
2
Morphology is present at a moderate level
3
Morphology is present at a high level
Using the Ruler
In the top left-hand corner of the RBC image there is a cross-shaped ruler that
represents 14 μm across.
Click on the ruler and drag it to the desired area in the RBC image. The ruler
automatically scales up or down according to the zoom level of the RBC image.
2.3.5
Adding or Editing Slide Comments
1. In the SLIDES tab double-click on a slide to open the verification view.
2. Click
(Comment) next to the slide identifier.
3. Add or edit the comment and click Save.
User’s Manual
PM-10509 2013-03-04
27
CellaVision® Proficiency
Software
EXAMINER
2.3.6
Marking Slides as Done
To remember which slides are ready to be used in tests they can be marked with
a check mark by clicking Mark as done
in the verification view.
Note:
This can only be done if there are no unidentified cells.
2.3.7
Deleting Slides
1. In the SLIDES tab click on any slide to bring up the slide information in the
detailed view.
2. Click
(Delete) to delete the slide.
Note:
Slides that are currently included in tests are locked and cannot be deleted.
2.4
2.4.1
ADDING AND MANAGING PARTICIPANTS
The PARTICIPANTS Tab
2
1
1. Participant list
2. Detailed view
Participant List
The participant list (1) shows all Participants in the account. It also shows the
number of ongoing and completed tests for each Participant.
Detailed View
Click on a Participant in the participant list to view the detailed view (2).
28
PM-10509 2013-03-04
User’s Manual
CellaVision® Proficiency
Software
2.4.2
2.4.2.1
EXAMINER
Adding Participants
Add Participants Manually
1. Click on Add participants.
2. Enter First name and Last name of the Participant. If available, enter the
Participant's Email address to enable account notification and test status
emails to be sent. Enter Lab, Region and Country.*
3. Select the print checkbox if the account information of the newly created
Participants should be printed.
4. Click Create. An email listing all newly created Participants will be sent to
the Examiner. Participants where an email address was provided will also
receive an email containing their account information.
*Only available in the Enterprise version.
Note:
The number of available Participants that can be added is determined by the
license type. See 2.5.2.1 Upgrading the License on how to increase Participant
seats.
2.4.2.2
Add Participants Via CSV File Upload
CSV File Guidelines
1. Arrange the column as shown in the table.
Note:
The fields Lab, Region and Country are only available in the Enterprise
version.
2. Ensure that the maximum number of free Participant seats is not exceeded.
3. Save the file as a .csv file.
User’s Manual
PM-10509 2013-03-04
29
CellaVision® Proficiency
Software
EXAMINER
2.4.3
Filtering the Participant List*
1. Click Filter.
2. Choose Group by or Search and then select a category.
3. Click OK.
*Only available in the Enterprise version.
2.4.4
Managing Participants
Click on a Participant in the participant list to focus the detailed view to that
Participant.
2.4.4.1
Edit Participant Location*
1. Click Edit next to Location.
2. Enter Lab, Region and Country and click OK.
*Only available in the Enterprise version.
2.4.4.2
Reset Participant Password
1. Click Reset next to Password.
2. A new password is automatically generated and emailed to the Examiner.
Note:
Passwords can only be reset for Participants that have no email address
associated with their account. Participants with email addresses can reset their
password from within their own account.
2.4.5
Setting Lab Supervisor Privileges*
1. In the PARTICIPANTS tab click on any Participant to focus the detailed
view to that Participant.
2. Click
(Set Lab Supervisor Privileges).
3. Choose Lab, Region or Country to allow the Lab Supervisor to view test
results with Participant names within the selected category.
30
PM-10509 2013-03-04
User’s Manual
CellaVision® Proficiency
Software
EXAMINER
*Only available in the Enterprise version.
2.4.6
Deleting Participants
1. In the PARTICIPANTS tab click on any Participant to focus the detailed
view to that Participant.
2. Click
2.5
(Delete) to delete the Participant.
SETTINGS
Click on the SETTINGS tab to manage your account and customize the
workspace.
2.5.1
Editing Account Information
1. In the Account information box click on the current name or email address.
2. Edit the information and click Save.
3. Customize the password by clicking Change and entering a new password.
4. Customize the language using the drop-down menu.
2.5.2
License
The License box contains information about license type, number, renewal date
and the organization name.
User’s Manual
PM-10509 2013-03-04
31
CellaVision® Proficiency
Software
EXAMINER
2.5.2.1
Upgrading the License
Click the Read more about how to upgrade licenses link for more
information.
2.5.3
Managing User-defined Classes
1. In the Classes box select either Peripheral blood or Body fluid samples.
2. Under Manage user-defined classes click on either the WBC, non-WBC or
RBC tab.
3. Enter the name of the new class and click Create.
Editing User-defined Classes
1. Click on the class.
2. Edit the class name.
3. Click Save.
Deleting User-defined Classes
Click
(Delete) next to the class to delete it.
All cells of a deleted class are automatically moved to the Unidentified class and
need to be re-classified. Affected slides will be marked with
in the SLIDES
tab.
Note:
User-defined cell classes that is used in a test cannot be deleted.
32
PM-10509 2013-03-04
User’s Manual
CellaVision® Proficiency
Software
2.6
2.6.1
EXAMINER
TROUBLESHOOTING
No Slides Shown in Wizard Step 1
1. Navigate to the SLIDES tab.
2. Upload slides to your CellaVision® Proficiency Software (see also 2.3.1
Uploading Slides).
3. Return to the TESTS tab and double-click on the respective under
construction test to continue setup.
2.6.2
Missing Slides in Wizard Step 1
Slides containing un-classified cells cannot be included in tests and are marked
with
in the SLIDES tab. To make these slides available for tests:
1. Navigate to the SLIDES tab.
2. Double-click on the slide in question.
3. Classify all WBC in the Unidentified class.
See also 3.2.3 Verifying Slides for more information.
2.6.3
No Participants Shown in Wizard Step 2
1. Navigate to the PARTICIPANTS tab.
2. Click Add particpants or Import CSV file and add Participants.
3. Return to the TESTS tab and double-click on the respective under
construction test to continue setup (see also 2.4 ADDING AND MANAGING
PARTICIPANTS).
2.6.4
No Results Available in Test Results View
The following scenarios can cause no results to be shown:
• The test was completed early and no Participant completed the selected slide
(s).
• Nobody completed the test.
If possible, select a different slide or a different Participant to see results.
If no results are available for any of the slides it is likely that an ongoing test
was manually stopped before any slides could be completed. See 2.2.3.2 Stop
an Ongoing Test for more information.
User’s Manual
PM-10509 2013-03-04
33
CellaVision® Proficiency
Software
PARTICIPANT
3 PARTICIPANT
The following chapters are intended for the Participant. An Examiner cannot
access these parts of the program.
3.1
3.1.1
GETTING STARTED
Logging in
1. Open an internet browser window and go to https://www.cellavisionproficiency-software.com.
2. Enter your email/username and password.
3. Click Log in.
3.1.2
Retrieving the Password
1. In the login screen click the Forgot password? link.
2. Enter your email address and click Reset password.
3. A new password will be sent to this email address.
Note:
If no email address is associated with your account, please contact your
Examiner.
34
PM-10509 2013-03-04
User’s Manual
CellaVision® Proficiency
Software
3.2
3.2.1
PARTICIPANT
TAKING A TEST
The TESTS Tab
3
4
1
6
2
5
1. Ongoing
2. Completed
3. Test completion dates
4. Test comments
5. Test results
6. Account settings
The TESTS tab lists all Ongoing (1) and Completed (2) tests set by the
examiner.
3.2.1.1
Test Completion Dates
Test completion dates (3) are shown as the second date next to the test name. If
a completion date is given a test must be completed before that date.
3.2.1.2
Test Comments
Test comments (4) are indicated by the
(comment icon) next to a test. Move
the mouse over the test comment icon to see the comment.
3.2.1.3
Results Status
(Hourgass Icon) before a completed test indicates that the test results (5) are
not yet available.
(Early access icon) before a completed test indicates that results are available
but not all Participants in the test group have yet completed the test. Incomplete
test results from fellow Participants will not be shown.
User’s Manual
PM-10509 2013-03-04
35
CellaVision® Proficiency
Software
PARTICIPANT
3.2.1.4
Account Settings
1. Click on the user name in the top right corner. The Account settings (6)
window opens.
2. Click on the text box next to Email: to edit your email address.
3. Click on Change next to Password: to customize your password.
4. Select the language for the user interface using the drop down menus.
5. Click Save to save your changes.
3.2.2
Viewing a Test
3.2.2.1
Opening a Test
Double-click on an ongoing test.
Each test contains one or more slides that need to be verified and signed in order
to complete the test.
36
PM-10509 2013-03-04
User’s Manual
CellaVision® Proficiency
Software
3.2.2.2
PARTICIPANT
Slide States
S lide 1
Unsigned slide.
The verification of this slide is not yet
complete and the slide has not yet
been signed.
S lide 1
Signed slide.
Verification of this slide is complete
and the slide has been signed.
Note:
To complete a test all slides must be signed.
3.2.2.3
Slide Information
Click on a slide to obtain more information about that slide at the bottom of the
page.
Slide Comment
1. Click Add comment.
2. Add or edit the comment.
3. Click Save to save the change or Cancel to return the comment to its
previous state.
Note:
Slide comments are visible to the Examiner.
Additional Slide Data
Additional slide data is sometimes provided and gives information to help
correctly classify and characterize the cells.
Click on the link to open the file. It will open in a program suitable for that file
type.
3.2.3
3.2.3.1
Verifying Slides
Opening a Slide for Verification
In the test overview page double-click on a slide to verify it.
User’s Manual
PM-10509 2013-03-04
37
CellaVision® Proficiency
Software
PARTICIPANT
3.2.3.2
The Verification View
4
1
3
2
1. WBC/RBC navigation
2. Collapse/Expand
3. Main view
4. Sign slide
WBC/RBC Navigation
Switch between WBC and RBC (1) verification using the tabs. When a slide has
no RBCs only the WBC tab is shown and vice versa.
Collapse/Expand
Click on the arrow to collapse/expand (2) the side panel.
Main View
The main view (3) shows either the WBC images of the currently selected
classes or the RBC image.
Sign Slide Button
Click Sign Slide (4) to sign the slide when verification is complete.
3.2.3.3
Adjust Image Brightness and Color
1. Click
2. Adjust the sliders.
3. Click Save.
Clicking Reset will restore the default settings.
38
PM-10509 2013-03-04
User’s Manual
CellaVision® Proficiency
Software
3.2.3.4
PARTICIPANT
White Blood Cell Classification
General Workflow
1. Click on the WBC tab. When starting WBC classification all cells will be
listed in the Unidentified class.
2. Click on a WBC class in the side panel to show a gallery of all cells classified
to that class in the main view. When using the two-class layout, left-click on a
class to open it in the left gallery and right-click on a class to open it in the
right gallery. Use the drop-down menu in an open WBC class gallery to
switch between classes.
3. Classify cells by dragging and dropping them from one open class gallery to
another or from an open class gallery to a class in the side panel or by rightclicking on a cell and selecting a class from the menu. Select multiple cells at
once by pressing CTRL or SHIFT.
4. Continue until all cells are classified.
Customize the Layout
Switch between a one-class, two-class or all-classes layout using the
layout toggle buttons.
Increase or decrease the size of the cell images using the zoom slider.
Magnify Individual WBC
1. Double-click on a cell. A magnified version of that cell will open.
2. Use the mouse-wheel to change the zoom level.
3. Use the arrow keys on the keyboard to show the next cell in the gallery.
4. Click Close to close the magnified view.
Add or Edit Individual Cell Comments
1. Double-click on a cell. A magnified version of that cell will open.
User’s Manual
PM-10509 2013-03-04
39
CellaVision® Proficiency
Software
PARTICIPANT
2. Click in the Comment box underneath the magnified cell and write a
comment.
3. Click Save to save the comment.
4. Click Close to close the magnified view.
Cells with comments are marked by a comment icon in the top right corner.
Cell Marker
The cell marker is a square that surrounds the cell for identification. Click
to show/hide the square.
WBC Reference Libraries
1. Switch to either the one-class or two-class layout.
2. Open the cell class of interest.
3. Click Reference cells. The reference cell gallery for that class will open as a
separate gallery.
Note:
Reference libraries are only available if specified so by the Examiner.
40
PM-10509 2013-03-04
User’s Manual
CellaVision® Proficiency
Software
3.2.3.5
PARTICIPANT
Red Blood Cell Characterization
1
2
3
4
1. RBC tab
2. Zoom slider
3. Magnified area
4. Report all as normal
General Workflow
1. Click on the RBC (1) tab.
2. Zoom in to the RBC image using either the mouse wheel or the zoom slider
(2). The RBC image corresponds to the area of 8 microscopic high power
fields (HPF) (100x objective and a 22mm ocular).
Note:
Be aware that RBC images captured using a CellaVision® Image Capture
System can be of different magnifications.
3. Move around the image by clicking and dragging it.
4. Double-click anywhere on the RBC image to magnify that area. Move the
mouse around the RBC image to move the position of the magnified area (3).
Click again to close it.
5. Grade the RBC morphology using the radio buttons in the side panel. If
required, reset all morphologies grades to a normal level by clicking Report
all as normal (4).
User’s Manual
PM-10509 2013-03-04
41
CellaVision® Proficiency
Software
PARTICIPANT
RBC Characterization Grades
0
Normal level
1
Morphology is present at a low level
2
Morphology is present at a moderate level
3
Morphology is present at a high level
Using the Ruler
In the top left-hand corner of the RBC image there is a cross-shaped ruler that
represents 14 μm across.
Click on the ruler and drag it to the desired area in the RBC image. The ruler
automatically scales up or down according to the zoom level of the RBC image.
3.2.4
Signing Slides
Signing a slide indicates that the verification of that slide is completed.
1. Double-click on a slide to open it for verification.
2. Classify all WBC's until there are no cells left in the unidentified class and
characterize the RBC image. The Sign slide button activates.
Sign slide
3. Click Sign slide.
Signed slides are indicated in the test overview page by a check mark. See also
3.2.2.2 Slide States for more information.
Note:
Once a slide has been signed it is no longer possible to change verification.
3.3
3.3.1
VIEWING TEST RESULTS
Definitions
3.3.1.1
Examiner result
The Examiner result is the WBC classification and/or RBC characterization
performed by the Examiner.
3.3.1.2
Majority result
For WBC, it is the cell class assigned to a particular cell by the majority of
Participants.
For RBC, it is the characterization grade chosen by the majority of Participants.
42
PM-10509 2013-03-04
User’s Manual
CellaVision® Proficiency
Software
PARTICIPANT
If the majority cannot be decided unanimously one of the cell classes/
characterizations is at random used as majority.
3.3.1.3
Reference
The reference is either the Examiner result or Majority result depending on the
selection made by the viewer.
3.3.1.4
WBC Agreement
WBC Agreement shows how well the Participant's classification agrees
(percentage) with the reference.
3.3.1.5
RBC Agreement
The RBC Agreement shows how well the Participant’s characterization agrees
(percentage) with the reference.
3.3.2
Opening a Completed Test
In the TESTS tab double-click on a completed test to open the results view.
3.3.3
The Results View
1
3
5
4
2
1. Results view navigation
2. Collapse/Expand
3. Slide list
4. Slide comments
5. Slide counter
3.3.3.1
Results View Navigation
Click the results view navigation (1) tabs to browse the results.
Test results are automatically compiled to show:
• A summary of results.
• WBC classification statistics on a class level.
• WBC classification statistics on a cell level.
User’s Manual
PM-10509 2013-03-04
43
CellaVision® Proficiency
Software
PARTICIPANT
• RBC characterization statistics.
3.3.3.2
Collapse/Expand
Click on the arrow to collapse/expand (2) the side panel.
3.3.3.3
Slide list
The slides list (3) shows all slides included in the test. Include and exclude
slides from the results by clicking on the slide. Hold down CTRL or SHIFT
whilst clicking to select multiple slides. Only results from selected slides (i.e.
highlighted in blue) are presented.
3.3.3.4
Slide comments
If one or more slide comments (4) exist for a slide the comment icon
will be
shown next to the slide in the slide list. Click on the comment icon to open a
window with all comments.
3.3.3.5
3.3.4
Slide counter
The slide counter (5) shows how many slides are currently selected and
contributing to the shown results.
Test Summary
4
1
2
3
1. Bar chart
2. Compare to
3. Agreement percentages
4. Infographics
44
PM-10509 2013-03-04
User’s Manual
CellaVision® Proficiency
Software
PARTICIPANT
Click the Summary of results tab to see an overview of how Participants
performed in the test. Participant names are anonymized, but your results are
indicated by You.
3.3.4.1
Bar Chart
The bar chart (1) shows the average WBC and RBC agreement for each
Participant displayed as percentage values. The higher the agreement the better a
Participant is considered to have performed in the test.
Switch between using either the Examiner or Majority result as a reference for
the agreement using the radio buttons in the Compare to (2) box.
The Agreement percentages (3) box shows the values used for drawing the bars
in the bar chart.
Sort the bar chart using the drop-down menu.
Filter the bar chart using the drop-down menus.*
* Only available in the Enterprise version.
3.3.4.2
Infographics
The infographics (4) display the following key metrics of the test:
• Total Participant number.
• Average WBC and RBC agreement for all Participants compared to the
reference selected in the compare to box (Examiner or Majority result).
• Highest and lowest WBC and RBC agreements compared to the reference
selected in the Compare to box (Examiner or Majority result).
3.3.5
WBC Classes
Click the WBC classes tab to see the results of WBC classification on a class
level.
Switch between Examiner and Majority in the compare to box to change the
reference classifications.
Switch between showing One participant - all cell classes and One cell class all participants in the Display box to show different views of the data.
User’s Manual
PM-10509 2013-03-04
45
PARTICIPANT
3.3.5.1
CellaVision® Proficiency
Software
One participant - all cell classes
When selecting One participant - all cell classes your classification results are
shown as a total number of cells per cell class compared to the reference
classification.
Each cell class is shown with a top and bottom bar. The top bar (dark grey)
shows the total number of cells classified to this class by the reference.
The bottom bar shows the total number of cells classified to this class by you.
The blue part of the bar indicates the number of cells where you and reference
agreed on the classification. The orange part indicates where you disagreed.
46
PM-10509 2013-03-04
User’s Manual
CellaVision® Proficiency
Software
3.3.5.2
PARTICIPANT
One cell class - all participants
When selecting One cell class - all participants the total number of cells
classified to the selected cell class by all Participants as well as the reference is
shown.
The top bar (dark grey) shows the reference result.
The following bars show the Participant results. The blue part of the bar
indicates the number of cells where the Participant and reference agreed on the
classification. The orange part indicates where they disagreed.
Change cell class using the drop down menu in the Display box.
3.3.6
WBC Cells
Click the WBC cells tab to see the results of WBC classification on a cell level.
User’s Manual
PM-10509 2013-03-04
47
CellaVision® Proficiency
Software
PARTICIPANT
3.3.6.1
View Classifications
1
3
4
2
1. View classifications
2. Main view
3. Cell classifications
4. Individual cell classifications
Click on the View classifications (1) tab in the side panel to see which WBCs
caused the most classification disagreements.
All cells from the currently selected slides are compiled and shown in the main
view (2), starting with the cell that has the highest number of disagreements.
The total number of cells in the current list is shown in brackets next to the
heading All cells above the cell image.
The Cell classifications box (3) shows the cell classes and number of total
classifications to each cell class for the currently shown cell. It also shows
which slide the cell originates from.
The Individual cell classifications (4) box shows how the Examiner and each
Participant classified the cell.
Use the arrow buttons underneath the cell to click through all cells. The cells are
sorted so that the cells with highest number of different classifications are at the
beginning of the list.
48
PM-10509 2013-03-04
User’s Manual
CellaVision® Proficiency
Software
3.3.6.2
PARTICIPANT
Compare Individuals
1
3
4
2
1. Compare individuals
2. Main view
3. Compare
4. Disagreement results
Click on the Compare individuals (1) tab in the side panel to see how the
WBC classification results compare between you and a chosen reference.
Change the reference using the drop-down menu in the Compare (3) box.
The first two columns in the Disagreement results (4) table show the number of
cells you and the reference classified to each class. The third column shows the
number of cells where the classification differs.
Sort WBC classes with the most disagreements to the top of the list by clicking
on the table headers in the Disagreement results (4) table.
Click on a cell class name to show cell images with disagreements in the main
view (2). The two differing classifications are shown above the cell image. Use
the arrow buttons underneath the cell image to click through all disagreements
of that class.
Cell comments (if available) are shown underneath the cell image.
3.3.6.3
Showing Cell Libraries
Click Open cell class to show all cells for that slide that were classified to this
class by the Examiner.
Use the drop-down menu to change to a different class.
User’s Manual
PM-10509 2013-03-04
49
PARTICIPANT
3.3.7
CellaVision® Proficiency
Software
RBC Characteristics
Click the RBC characteristics tab to see the results of RBC characterization.
Switch between Examiner and Majority in the compare to box to change the
reference characterization.
The table shows the Examiner, Majority and Participant(s) characterization
grades for the different morphologies. Cells with an orange background color
indicate where the characterization differs from the reference. The stronger the
orange color the greater the deviation.
Click Show RBC image to bring up the RBC image. Click outside of the image
to close it.
Note:
RBC characterization results can only be viewed for one slide at a time.
3.3.8
Test Conclusions
Test conclusions are reports created externally by the Examiner and may be
attached to the result of a test.
1. Double-click on a completed test in the TESTS tab to open the results.
2. A
button next to the test name indicates that a test conclusion is
available.
3. Click on the button. The test conclusion will open in a program that supports
that file type.
50
PM-10509 2013-03-04
User’s Manual
CellaVision® Proficiency
Software
Buttons and Symbols
Appendix - A Buttons and Symbols
A.1
General
Place the mouse-pointer over any button or symbol to view a short explanation
in a tooltip.
A.2
Buttons
Help.
Delete.
Add the selected items.
Remove the selected items.
Open slide verification.
Add or edit a comment.
Change the WBC gallery layout.
Zoom in.
Zoom out.
Adjust image color and brightness.
Show the cell markers.
Open the attached test conclusion.
Show next cell image.
Show previous cell image.
Set Lab Supervisor privileges.
User’s Manual
PM-10509 2013-03-04
51
CellaVision® Proficiency
Software
Buttons and Symbols
A.3
Symbols
Patient information.
Additional slide data.
Slide contains unclassified cells / general warning symbol.
Slide is locked. Verification cannot be changed and the slide cannot
be deleted.
Examiner: Slide is marked as done. Participant: Slide is signed.
Comment.
Print.
Trash.
Cell ruler.
Early access to results.
Mark for Transfer Tool.
Lab Supervisor.
52
PM-10509 2013-03-04
User’s Manual
CellaVision® Proficiency
Software
Recommended Workflow
Appendix - B Recommended Workflow
Confirm correct classification of slides (Examiner)
Gothe
SL
Double-ci
IDE
ckona
Ver
sl ide
i f y WBC
Ver
he
i f yR
Ma
RB
C tab.
B C cl as si f ic at ion.
r kthe
sl ide
Click
w i th
.
cl as si f ic at ion.
C l ickt
R e peat
S tab.
as
done.
Close
hen
xts
.
li dei
nthe
li st as
ne
de.
Create a New Test
Gothe
Enteraw
T E ST
st nam
Folwea
ea
chs
ndcl
S tab.
ic k Creat
te pof
R e viewth
the
.Thewizardopns
te st andc
w i za r danc
li ck
li ck
Finsh
NT
S tab.
Next
.
.
Create Participants (Examiner)
Click
Ad
dp
Gothe
PA
ar t ic ipan
t f or m
Adpar
User’s Manual
t ic pant
RT
ICPA
anu
ladi
sa
PM-10509 2013-03-04
ndcl
ngor
cl ic k Imp
ic k Creat
.
or t C SV
f i le .
53
CellaVision® Proficiency
Software
Recommended Workflow
Take a test (Participant)
Gothe
T E ST
S ta bandc
li ckona
Double-ci
ckona
C l as
C l ickont
he
Signthe
RB
C ta b(
sl ide
nogit
ifavl
if ya
ia ble
bycl
sl ide
ic king
l WB
) andc
es t.
.
C s.
har
Signslde
a ct er i ze the
andc
R B C mor
li ck
Close
phol
ogy.
.
View Results
Gothe
Double-ci
54
T E ST
ckona
PM-10509 2013-03-04
Com
S tab.
p l et e d te st .
User’s Manual
CellaVision® Proficiency
Software
Calculations
Appendix - C Calculations
WBC Agreement
The WBC Agreement in the Summary of results tab is the percentage of cells
where the participant's classification agrees with the reference classification for
the selected orders in the test case.
Example:
Assume that there are 200 cells in the selected orders and that the participant's
classification agrees with the reference for 165 of the 200 cells. The WBC
Agreement is now calculated as:
.
Mean
The mean (average, arithmetic mean) is calculated by dividing the sum of the
observations with the number of observations.
RBC Agreement
The RBC agreement measure for each Participant is calculated as follows. For
all morphologies and all selected orders the maximum difference from the
reference is calculated as,
where
is the reference characterization and
is the Participant’s
characterization of the morphology. Then the total maximum difference from
the reference is the sum of all the differences,
. For all
slides and morphologies the absolute difference between the Participants and the
reference is calculated as
.
The sum of these differences is calculated,
The RBC agreement is now calculated as:
.
.
User’s Manual
PM-10509 2013-03-04
55
CellaVision® Proficiency
Software
Calculations
Example:
The table below shows how the RBC agreement is calculated for one slide.
Reference
Characterization
Morphology
Participant
Characterization
obsmax
inddiff
Polychromasia
3
3
3
0
Hypochromasia
3
2
3
1
Anisocytosis
3
1
3
2
Microcytosis
3
0
3
3
Marcocytosis
2
3
2
1
Poikilocytosis
2
2
2
0
Target cells
2
1
2
1
Schistocytosis
2
0
2
2
Helmet cells
1
3
2
2
Sickle cells
1
2
2
1
Spherocytosis
1
1
2
0
Elliptocytosis
1
0
2
1
Ovalocytosis
0
3
3
3
Tear drop cells
0
2
3
2
Stomatocytosis
0
1
3
1
Acanthocytosis
0
0
0
0
Echinocytosis
3
3
3
0
Howell-Jolly
2
2
2
0
Pappenheimer
1
1
2
0
Basophilic stippling
0
0
0
0
Parasites
1
1
2
0
diffmax =
46
indtotal =
20
The RBC skillfulness is:
56
PM-10509 2013-03-04
User’s Manual
CellaVision® Proficiency
Software
Glossary
Appendix - D Glossary
User’s Manual
Term
Description
Examiner
The person assessing proficiency.
Participant
The person taking the proficiency tests.
Lab Supervisor
A Participant given allowance by the Examiner to view
the test results with Participant names within a specific
category.
Examiner result
The WBC classification and/or RBC characterization
performed by the Examiner.
Majority result
The result decided by the majority of the participants.
WBC
White blood cells, leukocytes.
RBC
Red blood cells, erythrocytes.
Non-WBC
Cells and objects identified as not being WBCs.
WBC Agreement
WBC Agreement shows how well the Participant's
classification agrees (percentage) with the reference.
RBC Agreement
A measure that describes how close to the reference
result a Participant has characterized the RBC.
Classification
The process of assigning WBCs to pre-defined classes.
Characterization
The process of assigning RBCs to pre-defined classes.
Verification
The process of verifying existing cell classifications
and/or (re-)classifying WBCs.
Reference cells
Cells displaying typical characteristics for their class.
Reference results
The Examiner result or the majority result depending
on the context which it appears in.
Signing
Finally confirming analysis results before locking and
reporting them.
Unidentified
A cell class for cells and objects which are not yet
classified.
PM-10509 2013-03-04
57
CellaVision® Proficiency
Software
Index
A
P
access to results ................................ 9
Available Participants....................... 6
Available slides ................................ 5
Participants....................................... 1
Password .......................................... 3
Patient Information..................... 9, 22
Progress Bar ................................... 10
Progress Grid.................................. 10
C
Cell Marker .................................... 40
classification disagreements........... 16
collapse/expand.............................. 12
Compare Individuals ...................... 17
Completed ........................................ 5
CSV File......................................... 29
D
databases ........................................ 19
distribute the test .............................. 7
E
End test........................................... 10
Examiner .......................................... 1
Examiner result ...............................11
RBC Agreement..............................11
RBC Characteristics....................... 18
reference..........................................11
reference cell .................................. 26
reference cells................................... 9
Reference Libraries .............. 9, 18, 26
ruler ................................................ 27
S
slide data .......................................... 9
Slide Data................................... 9, 22
sort.............................................. 5, 10
Stop ...................................... 5, 10, 33
T
F
Full Account..................................... 2
L
Lab Supervisor ............................... 30
license............................................... 2
Logging in.................................. 2, 34
M
Majority result.................................11
N
New Test .......................................... 5
notification email.............................. 7
O
Ongoing............................................ 4
58
R
PM-10509 2013-03-04
Test Comment .................................. 9
Test Conclusions ............................ 19
Test Duration.................................... 8
Test End Date ..............................8, 11
test preferences................................. 6
Test results...................................... 42
Transfer Tool .................................. 19
Trash............................................... 26
Trash class...................................... 26
Trial Account.................................... 2
U
Under Construction .......................... 4
User-defined Classes ................ 24, 32
W
WBC Agreement.............................11
WBC Cells ..................................... 15
WBC Classes.................................. 14
Workflow.................................. 53–54
User’s Manual
CellaVision AB·Ideon Science Park·SE-223 70 Lund, Sweden
Phone +46 (0) 46 286 44 00·Fax +46 (0) 46 286 44 70
[email protected]·www.cellavision.com
PM-10509
2013-03-04