1
NEC Express5800/120Re-1(Xeon/3.60G(1))
NEC Express5800/120Rg-2(Xeon/3.60G(1))
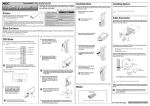
Notification for using N8100-1026F/G・1027F/G
Thank you very much for purchasing NEC Express5800/120Re-1,120Rg-2 lately.
The supplementary matter about this product is indicated by this book.
Keep this document for future reference.
Please read model name N8100-949F/G・950F・951F/G・952F/G・953F・954F/G as
N8100-1026F/G・1027F/G using the USERS GUIDE and the on-line document included in
EXPRESSBUILDER, and various utilities.
The following is the difference of N8100-949F/G・950F・951F/G・952F/G・953F・954F/G, and
N8100-1026F/G・1027F/G.
There is no difference except a CPU clock.
<Express5800/120Re-1>
Difference item
N8100-949F/G
N8100-950F
N8100-951F/G
N8100-1026F/G
CPU(clock/cache)
3DGHz/1MB
3.20DGHz/1MB
3.40GHz/1MB
3.60GHz/1MB
Difference item
N8100-952F/G
N8100-953F
N8100-954F/G
N8100-1027F/G
CPU(clock/cache)
3DGHz/1MB
3.20DGHz/1MB
3.40GHz/1MB
3.60GHz/1MB
<Express5800/120Rg-2>
856-124508-106-0-1
NEC Express5800/120Re-1(Xeon/3.60G(1))
NEC Express5800/120Rg-2(Xeon/3.60G(1))
使用N8100-1026F/G・1027F/G时的注意事项
感谢您购买 Express5800/120Re-1,120Rg-2。
本文中记载了有关本产品的补充事项。
请妥善保管以便参考。
请将用户指南、存储于“EXPRESSBUILDER”中的在线文档,以及各种实用程序中的型号名称
N8100-1026F/G・1027F/G 替换为 N8100-949F/G・950F・951F/G・952F/G・953F・954F/G 请利用。
以下为 N8100-949F/G・950F・951F/G・952F/G・953F・954F/G 与 N8100-1026F/G・1027F/G 的差
别。
不存在 CPU 时钟以外的差别。
<Express5800/120Re-1>
Difference item
N8100-949F/G
N8100-950F
N8100-951F/G
N8100-1026F/G
CPU(clock/cache)
3DGHz/1MB
3.20DGHz/1MB
3.40GHz/1MB
3.60GHz/1MB
Difference item
N8100-952F/G
N8100-953F
N8100-954F/G
N8100-1027F/G
CPU(clock/cache)
3DGHz/1MB
3.20DGHz/1MB
3.40GHz/1MB
3.60GHz/1MB
<Express5800/120Rg-2>
856-124508-106-0-1
*856-124508-106-00P*
N8100-958F/959F/949F/950F/951F
NEC Express5800/120Re-1
User's Guide
1st Edition
8-2004
856-124045-101-00
PROPRIETARY NOTICE AND LIABILITY DISCLAIMER
The information disclosed in this document, including all designs and related materials, is the
valuable property of NEC Corporation (NEC) and /or its licensors. NEC and/or its licensors, as
appropriate, reserve all patent, copyright and other proprietary rights to this document, including all
design, manufacturing, reproduction, use, and sales rights thereto, except to the extent said rights are
expressly granted to others.
The NEC product(s) discussed in this document are warranted in accordance with the terms of the
Warranty Statement accompanying each product. However, actual performance of each such
product is dependent upon factors such as system configuration, customer data, and operator control.
Since implementation by customers of each product may vary, the suitability of specific product
configurations and applications must be determined by the customer and is not warranted by NEC.
To allow for design and specification improvements, the information in this document is subject to
change at any time, without notice. Reproduction of this document or portions thereof without
prior written approval of NEC is prohibited.
First Printing, August 2004
Copyright 2004
NEC Corporation
7-1 Shiba 5-Chome, Minato-Ku
Tokyo 108-8001, Japan
All Rights Reserved
Printed in Japan
Keep this User's Guide at hand for quick reference at anytime necessary.
SAFETY INDICATIONS
Follow the instructions in this User's Guide for your safety to use the server.
The server contains components with possible danger, hazards that may cause by ignoring warnings,
and preventive actions against such hazards.
Server components with possible danger are indicated with a warning label placed on or around them
as well as described in this User's Guide.
In the User's Guide or warning labels, "WARNING" or "CAUTION" is used to indicate a degree of
danger. These terms are defined as follows:
WARNING
CAUTION
Indicates the presence of a hazard that may result in death or serious
personal injury if the instruction is ignored.
Indicates the presence of a hazard that may cause minor personal injury,
including burns, or property damage if the instruction is ignored.
Precautions and notices against hazards are presented with one of the following three symbols.
individual symbols are defined as follows:
The
This symbol indicates the presence of a hazard if the instruction is ignored.
An image in the symbol illustrates the hazard type. (Attention)
This symbol indicates prohibited actions. An image in the symbol illustrates a
particular prohibited action. (Prohibited Action)
This symbol indicates mandatory actions. An image in the symbol illustrates a
mandatory action to avoid a particular hazard. (Mandatory Action)
(Example)
Symbol to draw attention
Term indicating a degree of danger
CAUTION
Hot surface
Immediately after the server is powered off, its internal components such as
hard disks are very hot. Leave the server until its internal components fully
cool down before installing/removing any component.
Symbol indicating a prohibited
action (may not always be
indicated)
Description of a danger
SYMBOLS USED IN THIS USER'S GUIDE AND WARNING
LABELS
Attentions
Indicates that improper use may cause an electric shock.
Indicates that improper use may cause personal injury.
Indicates that improper use may cause fingers to be caught.
Indicates that improper use may cause fumes or fire.
Indicates a general notice or warning that cannot be specifically identified.
Indicates that improper use may cause loss of eyesight due to laser beam.
Prohibited Actions
Indicates a general prohibited action that cannot be specifically identified.
Do not disassemble, repair, or modify the server.
may be caused.
Otherwise, an electric shock or fire
Mandatory Action
Unplug the power cord of the server. Otherwise, an electric shock or fire may be
caused.
Indicates a mandatory action that cannot be specifically identified.
follow the instruction.
Make sure to
NOTE: This equipment has been tested and found to comply with the limits for a Class A digital
device, pursuant to Part 15 of the FCC Rules. These limits are designed to provide reasonable
protection against harmful interference when the equipment is operated in a commercial
environment. This equipment generates, uses, and can radiate radio frequency energy and, if not
installed and used in accordance with the instruction manual, may cause harmful interference to
radio communications. Operation of this equipment in a residential area is likely to cause harmful
interference in which case the user will be required to correct the interference at his own expense.
CE Statement
Warning: This is a Class A product. In domestic environment this product may cause radio
interference in which case the user may be required to take adequate measures (EN55022).
BSMI Statement
Trademarks
NEC DianaScope, NEC ESMPRO and NEC EXPRESSBUILDER are trademarks of NEC Corporation.
Microsoft, Windows, Windows Server, Windows NT, and MS-DOS are registered trademarks or trademarks of
Microsoft Corporation in the United States and other countries.
Intel and Pentium are registered trademarks of Intel Corporation.
Datalight is a registered trademark of Datalight, Inc.
ROM-DOS is a trademark of Datalight, Inc.
LSI-Logic, MegaRAID, and Power Console Plus are registered trademarks or trademarks of LSI Logic Corp.
Novell and NetWare are registered trademarks of Novell, Inc. of the United States.
AT is a registered trademark of International Business Machines Corporation in the United States and other
countries.
Adaptec and its logo is a registered trademark of Adaptec, Inc. of United States.
SCSISelect is a trademark of Adaptec, Inc. of the United States.
Adobe, Adobe logo, and Acrobat are trademarks of Adobe Systems Incorporated.
DLT and DLTtape are trademarks of Quantum Corporation of the United States.
All other product, brand, or trade names used in this publication are the trademarks or registered trademarks of
their respective trademark owners.
Windows XP stands for Microsoft® Windows® XP Professional operating system and Microsoft® Windows®
XP Home Edition operating system. Windows 2000 stands for Microsoft® Windows® 2000 Server operating
system and Microsoft® Windows® 2000 Advanced Server operating system, and Microsoft® Windows® 2000
Professional operating system. Windows 2003 stands for Microsoft® Windows Server 2003 operating
system and Microsoft® Windows Server 2003 Standard Edition and Enterprise Edition. Windows Me stands
for Microsoft® Windows® Millennium Edition operating system. Windows 98 stands for Microsoft®
Windows®98 operating system. Windows 95 stands for Microsoft® Windows®95 operating system.
Momentary voltage drop prevention:
This product may be affected by a momentary voltage drop caused by lightning. To prevent a
momentary voltage drop, an AC uninterruptible power supply (UPS) unit should be used.
Notes:
(1) No part of this manual may be reproduced in any form without the prior written permission of
NEC Corporation.
(2) The contents of this User's Guide may be revised without prior notice.
(3) The contents of this User's Guide shall not be copied or altered without the prior written
permission of NEC Corporation.
(4) All efforts have been made to ensure the accuracy of all information in this User's Guide. If
you notice any part unclear, incorrect, or omitted in this User's Guide, contact the sales agent
where you purchased this product.
(5) NEC assumes no liability arising from the use of this product, nor any liability for incidental or
consequential damages arising from the use of this User's Guide regardless of Item (4).
(6) If you find any missing pages or pages out of order in this manual, please contact your dealer
for a replacement.
i
PREFACE
Welcome to the NEC Express5800/120Re-1 server.
The NEC Express5800 server holds powerful performance and employs the latest technology to
implement a computer for the next generation. With its potential capabilities, the server may be
used as the workstation PC that configures a client-server system and provides high-speed
processing and superior reliability.
Read this User's Guide thoroughly to fully understand handling of the server and appreciate its
functions to the maximum extent.
ii
ABOUT THIS USER'S GUIDE
This User's Guide is a guide for proper setup and use of the server.
This User's Guide also covers useful procedures for dealing with difficulties and problems that may
arise during setup or operation of the server.
Keep this manual for future use.
The following describes how to proceed with this User's Guide.
How to Use This User's Guide
To aid you in finding information quickly, this User's Guide contains the following information:
Chapter 1 Notes on Using Your Server
includes information that needs attention to use the server. Make sure to read this chapter
before setting up and using the server. It also includes requirements and advisory information
for transfer and disposal of the server.
Chapter 2 General Description
includes information necessary to use the server, such as names and functions of its
components, handling of the floppy disk and CD-ROM drives.
Chapter 3 Setting Up Your Server
tells you how to select a site, unpack the system, assemble the rack-mount subsystem, make
cable connections, and power on your system.
Chapter 4 Configuring Your Server
tells you how to configure the system and provides instructions for running the BIOS Setup
Utility and the Adaptec Configuration Utility, which is used to configure SCSI devices in your
system. This chapter also provides information on mother board jumper settings.
Chapter 5 Installing the Operating System with Express Setup
describes how to install the operating system.
Chapter 6 Installing and Using Utilities
describes how to install the utilities for the server. It also includes a description on using the
attached CD-ROM "NEC EXPRESSBUILDER".
Chapter 7 Maintenance
provides you with all the information necessary to maintain successful operation of the server.
This chapter also includes a description on relocating and storing the server.
Chapter 8 Troubleshooting
contains helpful information for solving problems that might occur with your system.
Chapter 9 Upgrading Your Server
provides you with instructions for upgrading your system with an additional processor, optional
memory, optional add-in cards, hard disk drives, peripheral devices, and power supply.
Appendix A Specification
provides specifications for your server.
Appendix B Other Precautions
provides supplementary notes on using the server.
iii
Appendix C IRQ and I/O Port Address
provides a list of factory-set IRQs and I/O port addresses assigned.
Appendix D Installing Windows Server 2003
describes how to install Microsoft Windows Server 2003 without using Express Setup. Using
the Express Setup tool is recommended for installing Windows Server 2003. See Chapter 5
for details.
Appendix E Installing Windows 2000
describes how to install Microsoft Windows 2000 without using Express Setup. Using the
Express Setup tool is recommended for installing Windows 2000. See Chapter 5 for details.
Appendix F Product Configuration Record Table
provides a table to be filled with your server configuration.
Text Conventions
The following conventions are used throughout this User's Guide. For safety symbols, see
"SAFETY INDICATIONS" provided earlier.
IMPORTANT:
Items that are mandatory or require attention when using the server
NOTE:
Helpful and convenient piece of information
IN THE PACKAGE
The carton contains various accessories, as well as the server itself. See the packing list to make
sure that you have everything and that individual components are not damaged. If you find any
component missing or damaged, contact your sales agent.
Store the provided accessories in a designated place for your convenience. You will need
them to install an optional device or troubleshoot the server, as well as to set it up.
Make a backup copy of each provided floppy disk, if any. Store the original disk as the
master disk in a designated place, and use its copy.
Improper use of any provided floppy disk or CD-ROM may alter your system
environment. If you find anything unclear, immediately ask your sales agent for help.
iv
(This page is intentionally left blank.)
v
CONTENTS
PREFACE.........................................................................................................................................i
ABOUT THIS USER'S GUIDE ......................................................................................................ii
In the Package.................................................................................................................................iii
Chapter 1 Notes on Using Your Server........................................................................ 1-1
Warning Labels.............................................................................................................................1-2
Safety Notes..................................................................................................................................1-3
General .....................................................................................................................................1-3
Power Supply and Power Cord Use .........................................................................................1-5
Rack .........................................................................................................................................1-6
Installation, Relocation, Storage, and Connection....................................................................1-7
Cleaning and Working with Internal Devices...........................................................................1-9
During Operation ...................................................................................................................1-10
For Proper Operation ..................................................................................................................1-11
Transfer to Third Party ...............................................................................................................1-12
Disposal and Consumables .........................................................................................................1-13
User Support...............................................................................................................................1-14
Chapter 2 General Description ..................................................................................... 2-1
Overview ......................................................................................................................................2-2
External View...........................................................................................................................2-3
Front View with Front Bezel Closed ........................................................................................2-4
Front View with Front Bezel Removed....................................................................................2-5
Rear View.................................................................................................................................2-6
Internal View ............................................................................................................................2-8
Mother Board ...........................................................................................................................2-9
Status Indicators .........................................................................................................................2-10
POWER Lamp ......................................................................................................................2-10
STATUS Lamp ......................................................................................................................2-10
DISK ACCESS Lamp ...........................................................................................................2-12
ACT Lamp ............................................................................................................................2-12
UID Lamp (UID)....................................................................................................................2-12
Disk Access Lamp..................................................................................................................2-12
Hard Disk Lamp (SCSI hot-plug HDD model only) ..............................................................2-13
LAN Connector Lamps ..........................................................................................................2-14
Standard Features .......................................................................................................................2-15
Power Supply .........................................................................................................................2-16
Peripheral Bays ......................................................................................................................2-16
System Cooling ......................................................................................................................2-16
SAF-TE Logic ............................................................................................................................2-17
System Board Features ...............................................................................................................2-17
Processor ................................................................................................................................2-17
Memory ..................................................................................................................................2-17
PCI Riser Slots .......................................................................................................................2-18
Video ......................................................................................................................................2-18
SCSI Controller......................................................................................................................2-18
vi
Network Controller................................................................................................................ 2-19
Keyboard and Mouse............................................................................................................. 2-20
ACPI...................................................................................................................................... 2-20
Remote Management Card (RMC)........................................................................................ 2-21
Degradation Feature................................................................................................................... 2-22
Remote Power-On Feature (Wake On LAN) ............................................................................. 2-22
AC-Link Feature ........................................................................................................................ 2-22
System Security ......................................................................................................................... 2-23
Security with Mechanical Locks and Monitoring.................................................................. 2-23
Software Locks via the BIOS Setup Utility........................................................................... 2-23
NEC EXPRESSBUILDER ........................................................................................................ 2-27
NEC ESMPRO .......................................................................................................................... 2-28
Off-line Maintenance Utility...................................................................................................... 2-28
System Diagnostic Utility .......................................................................................................... 2-28
NEC DianaScope ....................................................................................................................... 2-28
Using Your Server...................................................................................................................... 2-29
Front Bezel ............................................................................................................................ 2-29
POWER Switch ..................................................................................................................... 2-31
Identification of Servers ~ UID Switch ~ .............................................................................. 2-36
Floppy Disk Drive ................................................................................................................. 2-37
CD-ROM Drive ..................................................................................................................... 2-39
Chapter 3 Setting Up Your Server ................................................................................ 3-1
Setup Flow ................................................................................................................................... 3-2
Selecting Server Site .................................................................................................................... 3-3
Unpacking the System ................................................................................................................. 3-5
Installing the Server ..................................................................................................................... 3-6
Restricted Access Location...................................................................................................... 3-7
ESD Precaution ....................................................................................................................... 3-7
Checking Components............................................................................................................. 3-7
Required Tools......................................................................................................................... 3-7
Installation Procedure for NEC Rack/Third Vendor's Rack..................................................... 3-8
Removing the Server from the Rack Assembly..................................................................... 3-14
Connecting Peripheral Devices.................................................................................................. 3-16
Connecting Power Cord............................................................................................................. 3-18
Turning On the Server................................................................................................................ 3-20
Installing Operating System....................................................................................................... 3-22
Installing Utilities ...................................................................................................................... 3-22
Making Backup Copies of System Information......................................................................... 3-22
Chapter 4 Configuring Your Server .............................................................................. 4-1
System BIOS (SETUP)................................................................................................................ 4-1
Starting SETUP Utility ............................................................................................................ 4-2
Description on On-Screen Items and Key Usage .................................................................... 4-3
Menu and Parameter Descriptions........................................................................................... 4-4
Configuring Mother Board Jumpers .......................................................................................... 4-17
vii
SCSI BIOS (SCSISelect) ............................................................................................................4-19
Using SCSISelect Utility ........................................................................................................4-19
Configuring SCSI Controller on Mother Board .....................................................................4-19
Configuring SCSI Controller on Optional Board ...................................................................4-25
RAID BIOS ................................................................................................................................4-26
SATA RAID Configuration Utility .............................................................................................4-27
Installing the Hard Disk Drives..............................................................................................4-27
Activating the SATA RAID Feature .......................................................................................4-27
Running the Array Configuration Utility (ACU) ...................................................................4-28
Using the Array Configuration Utility....................................................................................4-29
Chapter 5 Installing the Operating System with Express Setup............................... 5-1
About Express Setup ....................................................................................................................5-2
Microsoft Windows Server 2003 ..................................................................................................5-4
Installation Notice ....................................................................................................................5-4
The Flow of Setup ....................................................................................................................5-7
Installing and Setting Device Drivers.....................................................................................5-12
Setting for Solving Problems .................................................................................................5-17
Installing Maintenance Utilities .............................................................................................5-20
Updating the System ..............................................................................................................5-21
Making Backup Copies of System Information .....................................................................5-21
Exceptional Setup...................................................................................................................5-22
Microsoft Windows 2000 ...........................................................................................................5-23
Installation Notice ..................................................................................................................5-23
The Flow of Setup ..................................................................................................................5-26
Installing and Setting Device Drivers.....................................................................................5-31
Setting for Solving Problems .................................................................................................5-36
Installing Maintenance Utilities .............................................................................................5-39
Updating the System - Installing Service Pack - ....................................................................5-40
Making Backup Copies of System Information .....................................................................5-40
Exceptional Setup...................................................................................................................5-41
HostRAID...................................................................................................................................5-42
Overview of HostRAID .........................................................................................................5-42
Notes ......................................................................................................................................5-43
HostRAID Setup Flow ...........................................................................................................5-45
Chapter 6 Installing and Using Utilities ....................................................................... 6-1
NEC EXPRESSBUILDER...........................................................................................................6-2
NEC EXPRESSBUILDER for DOS-Based with Local Console.............................................6-4
NEC EXPRESSBUILDER for DOS-based with Remote Console ..........................................6-9
Starting ...................................................................................................................................6-10
NEC EXPRESSBUILDER for Windows-Based (Master Control Menu)..............................6-13
Configuration Diskette Creator...................................................................................................6-14
NEC ESMPRO ...........................................................................................................................6-17
Functions and Features...........................................................................................................6-17
Adaptec Storage Manager...........................................................................................................6-18
viii
Power Console Plus ................................................................................................................... 6-19
Major Functions..................................................................................................................... 6-19
Components........................................................................................................................... 6-19
Server Setup .......................................................................................................................... 6-21
Management PC Setup .......................................................................................................... 6-22
NEC DianaScope ....................................................................................................................... 6-23
Chapter 7 Maintenance.................................................................................................. 7-1
Making Backup Copies................................................................................................................ 7-1
Cleaning....................................................................................................................................... 7-2
Cleaning the Server ................................................................................................................. 7-3
Cleaning the Interior................................................................................................................ 7-4
Cleaning the Keyboard/Mouse ................................................................................................ 7-5
Cleaning CD-ROM.................................................................................................................. 7-6
System Diagnostics...................................................................................................................... 7-7
Test Items................................................................................................................................. 7-7
Starting and Ending the System Diagnostics ........................................................................... 7-8
Relocating/Storing The Server....................................................................................................7-11
Chapter 8 Troubleshooting ........................................................................................... 8-1
System Viewers............................................................................................................................ 8-2
Lamps .......................................................................................................................................... 8-3
Error Messages ............................................................................................................................ 8-4
Error Messages after Power-on ............................................................................................... 8-4
POST Error Messages ............................................................................................................. 8-5
Beep Codes.............................................................................................................................. 8-8
Solving Problems ......................................................................................................................... 8-9
Problems with the Server......................................................................................................... 8-9
Problems with NEC EXPRESSBUILDER............................................................................ 8-18
Problems with Express Setup ................................................................................................ 8-19
Problems with Master Control Menu .................................................................................... 8-23
Problems with Configuration Diskette Creator ..................................................................... 8-24
Problem with Disk Array....................................................................................................... 8-24
Collecting Event Log ................................................................................................................. 8-25
Collecting Configuration Information........................................................................................ 8-26
Collecting Dr. Watson Diagnostic Information.......................................................................... 8-27
Memory Dump........................................................................................................................... 8-27
Preparing for Memory Dumping ........................................................................................... 8-27
Saving the Dump File ............................................................................................................ 8-28
Backup IPMI Information.......................................................................................................... 8-29
Recovery for Windows 2000 System......................................................................................... 8-30
Off-Line Maintenance Utility .................................................................................................... 8-33
Starting the Off-line Maintenance Utility .............................................................................. 8-34
Features of Off-line Maintenance Utility............................................................................... 8-35
Resetting the Server ................................................................................................................... 8-36
Forced Shutdown ....................................................................................................................... 8-36
ix
Chapter 9 Upgrading Your Server ................................................................................ 9-1
Safety Notes..................................................................................................................................9-2
Anti-static Measures .....................................................................................................................9-3
Preparing Your System for Upgrade .............................................................................................9-4
Device Installation or Removal Procedure ...................................................................................9-5
Hard Disk Drive .......................................................................................................................9-5
Power Supply Unit (SCSI Hot-plug HDD Model).................................................................9-14
Server (Pull-out from the Rack) .............................................................................................9-18
Drive Cover............................................................................................................................9-20
Logic Cover............................................................................................................................9-21
DIMM ....................................................................................................................................9-22
Processor (CPU).....................................................................................................................9-26
PCI Board...............................................................................................................................9-33
RAID Controller Board..........................................................................................................9-38
Redundant Hot Swap-fan (SCSI Hard Disk Drive Model Only)............................................9-45
Remote Management Card (RMC) ........................................................................................9-49
Appendix A Specifications............................................................................................A-1
Appendix B
Other Precautions.....................................................................................B-1
Transfer Rate of the On-board LAN Controller ...................................................................... B-1
Server Management Software ................................................................................................. B-1
Floppy Disk............................................................................................................................. B-1
CD-ROM................................................................................................................................. B-4
Tape Media.............................................................................................................................. B-4
Keyboard ................................................................................................................................. B-5
Mouse...................................................................................................................................... B-6
Appendix C IRQ..............................................................................................................C-1
Appendix D
Installing Windows Server 2003 ..............................................................D-1
Before Installing Windows Server 2003 ......................................................................................D-1
Installing Service Pack ............................................................................................................D-1
Updating System .....................................................................................................................D-1
Re-installing to the Hard Disk which has been upgraded to Dynamic Disk ...........................D-1
Manual Installation when N8103-65F/80F/81F/86F Keeps Connection.................................D-1
MO Device ..............................................................................................................................D-2
Partition Size ...........................................................................................................................D-2
Installing Windows Server 2003..................................................................................................D-3
Creating "Windows Server 2003 OEM-DISK for NEC EXPRESSBUILDER" .....................D-3
Windows Server 2003 Clean Installation ................................................................................D-5
Upgrade Installation ................................................................................................................D-7
Reinstallation to Multiple Logical drives ................................................................................D-9
Updating the System ............................................................................................................. D-11
x
Driver Installation and Advanced Settings.................................................................................D-12
PROSet ..................................................................................................................................D-12
Network Driver......................................................................................................................D-13
Re-install the Network Driver ...............................................................................................D-14
Graphics Accelerator Driver..................................................................................................D-14
Setting for Collecting Memory Dump (Debug Information) ..................................................D-14
Appendix E Installing Windows 2000...........................................................................E-1
Before Installing Windows 2000.................................................................................................. E-1
Installing Service Pack ............................................................................................................ E-1
Updating System ..................................................................................................................... E-1
Re-installing to the Hard Disk which has been upgraded to Dynamic Disk............................ E-1
MO Device .............................................................................................................................. E-2
Partition Size ........................................................................................................................... E-2
Installing Windows 2000 ............................................................................................................. E-3
Creating "Windows 2000 OEM-DISK for NEC EXPRESSBUILDER"................................. E-3
Windows 2000 Clean Installation............................................................................................ E-5
Reinstallation to Multiple Logical Drives ............................................................................... E-6
Updating the System - Installing Service Pack - ..................................................................... E-8
Driver Installation and Advanced Settings................................................................................... E-9
PROSet .................................................................................................................................... E-9
Network Driver...................................................................................................................... E-10
Re-install the Network Driver ............................................................................................... E-11
Graphics Accelerator Driver.................................................................................................. E-12
USB 2.0 Driver...................................................................................................................... E-12
Setting for Collecting Memory Dump (Debug Information) .................................................. E-12
Appendix F
Product Configuration Record Table.......................................................F-1
Hardware ................................................................................................................................. F-1
Software................................................................................................................................... F-3
Chapter 1
Notes on Using Your Server
This chapter includes information necessary for proper and safe operation of the server.
1-2 Notes on Using Your Server
WARNING LABELS
The warning label is attached to components with possible danger or their vicinity in your server to
inform the user that a hazardous situation may arise when operating the server. (Do not
intentionally remove or damage any of the labels.)
If you find any labels totally/partially removed or illegible due to damage, contact your sales
representative.
This label is attached only to
N8100-949F/950F/951F.
REAR
FRONT
Notes on Using Your Server 1-3
SAFETY NOTES
This section provides notes on using the server safely. Read this section carefully to ensure proper
and safe use of the server. For symbols, see "SAFETY INDICATIONS" provided earlier.
General
WARNING
Do not use the server for services where critical high availability may directly
affect human lives.
Your server is not intended to be used with or control facilities or devices
concerning human lives, including medical devices, nuclear facilities and
devices, aeronautics and space devices, transportation facilities and devices;
and facilities and devices requiring high reliability. NEC assumes no liability for
any accident resulting in personal injury, death, or property damage if the server
has been used in the above conditions.
Do not use the server if any smoke, odor, or noise is present.
If smoke, odor, or noise is present, immediately turn off the POWER switch and
disconnect the power plug from the outlet, then contact your sales agent.
Using the server in such conditions may cause a fire.
Keep needles or metal objects away from the server.
Do not insert needles or metal objects into ventilation holes in the server or
openings in the floppy disk or CD-ROM drive. Doing so may cause an electric
shock.
Do not use the server in any unapproved place.
Install the server on a standard EIA 19-inch rack assembly. Do not install the
rack containing the server in a place inappropriate to the rack installation
environment.
Failure to follow these instructions may cause some bad influences to be
imposed on the server and other systems installed on the rack and also a fire or
personal injury due to falling of the rack may occur. For the detailed
explanation on the place where the server should be installed and the
earthquake-resistant construction for the rack, refer to the manual attached to
the rack or contact you sales agent.
Always install the server on a rack conforming to the relevant standard.
Install the server on a rack confirming to the EIA standard for the server to be
used. Do not use the server with installed on any other rack than standard EIA
19-inch rack or without the installation on a proper rack. Failure to follow these
instructions may cause the server to operate incorrectly and/or personal injury or
damages of surrounding devices to occur. Contact your sales agent for the
racks available for the server.
1-4 Notes on Using Your Server
CAUTION
Keep water or foreign matter away from the server.
Do not let any form of liquid (water etc.) or foreign matter (e.g., pins or paper
clips) enter the server. Failure to follow this warning may cause an electric
shock, a fire, or a failure of the server. When such things accidentally enter the
server, immediately turn off the power and disconnect the power plug from the
outlet. Do not disassemble the server. Contact your sales agent.
Notes on Using Your Server 1-5
Power Supply and Power Cord Use
WARNING
Do not hold the power plug with a wet hand.
Do not disconnect/connect the plug while your hands are wet. Failure to follow
this warning may cause an electric shock.
Do not connect the ground wire to a gas pipe.
Never connect the ground wire to a gas pipe.
may cause a gas explosion.
Failure to follow this warning
CAUTION
Plug in to a proper power source.
Use a proper wall outlet. Use of an improper power source may cause a fire or
a power leak.
Do not install the server where you need an extension cord. Use of a cord that
does not meet the power specifications of the server may heat up the cord and
cause a fire.
Do not connect the power cord to an outlet that has an illegal number of
connections.
The electric current exceeding the rated flow overheats the outlet, which may
cause a fire.
Insert the power plug into the outlet as far as it goes.
Heat generation resulting from a halfway inserted power plug (imperfect contact)
may cause a fire. Heat will also be generated if condensation is formed on
dusty blades of the halfway inserted plug, increasing the possibility of fire.
Use the authorized power cord only.
Use only the power cord that comes with your server. Use of an unauthorized
power cord may cause a fire when the electric current exceeds the rated flow.
Also, observe the following to prevent an electric shock or fire caused by a
damaged cord.
Do not stretch the cord harness.
Do not alter, modify, or repair the
Do not pinch the power cord.
power cord.
Do not bend the power cord.
Do not secure the power cord with
Keep chemicals away from the
staples or equivalents.
power cord.
Do not use any damaged power
Do not twist the power cord.
cord. (Replace a damaged power
Do not place any object on the
cord with a new one of the same
power cord.
specifications. Ask your sales
Do not bundle power cords.
agent for replacement.)
Do not use the attached power cord for any other devices or usage.
The power cord that comes with your server is designed aiming to connect with
this server and to use with the server, and its safety has been tested. Do not use
the attached power cord for any other purpose. Doing so may cause a fire or an
electric shock.
1-6 Notes on Using Your Server
Rack
CAUTION
Do not carry or install the server only by a single person.
More than one person is required to carry or install the rack. Failure to follow
this instruction may cause the rack to fall to result in personal injury and/or
breakages of surrounding devices. In particular, a high rack (such as 44U
rack) is unstable if it is not fixed by stabilizers. More than one person must
always carry or install the rack while they support it.
Do not install the server so that the load may be concentrated on a specific
point.
Install stabilizers on the rack so that the total load of the rack and devices
mounted on the rack is not concentrated on a singe point or join more than one
rack with each other to distribute the load. Failure to follow this instruction may
cause the rack to fall to result in personal injury.
Do not install components on the server only by a single person.
More than one person is required to install parts including the doors and trays for
the rack. Failure to follow this instruction may cause some parts to fall to be
broken and/or to result in personal injury.
Do not pull out a device from the rack if the rack is unstable.
Always pull out a device from the rack in the state that the rack is made stable
(by the installation of stabilizers or earthquake-resistant construction).
Do not leave more than one device being pulled out from the rack.
Pulling out more than one device from the rack may cause the rack to be fallen.
Only pull out a single device from the rack at a time.
Do not provide the wiring for the server to exceed the rating of the power supply.
To prevent burns, fires, and device damages, the power supplied to the power
supply in the rack shall not exceed the rating load of the power branch circuit.
Contact your electric constructor or the local power company for the
requirements on the wiring and installation of electric facilities.
Notes on Using Your Server 1-7
Installation, Relocation, Storage, and Connection
WARNING
Disconnect the power cord(s) before installing or removing the server.
Make sure to power off the server and disconnect the power cord(s) from a
power outlet before installing/removing the server. All voltage is removed only
when the power cords are unplugged.
CAUTION
Never attempt to lift the server only by yourself.
The server weighs max. 20 kg (depending on its hardware configuration).
Carrying the server only by yourself may strain your back. Hold the server
firmly by its bottom with another person to carry it. Do not hold the front door to
lift the server. The front door may be disengaged from the server, causing
personal injury.
Do not install the server in any place other than specified.
Do not install the server in the following places or any place other than specified
in this User's Guide. Failure to follow this instruction may cause a fire.
a dusty place
a humid place such as near a boiler
a place exposed to direct sunlight
an unstable place
Do not install the server on a rack with leaving covers removed.
Do not install the server on a rack with the cover being removed. Failure to
follow this instruction may reduce the cooling effect in the server to result in
some malfunction and/or dusts to enter the server to result in a fire or electric
shock.
Do not pinch your finger with rails or other components.
Note sufficiently that your fingers may not be caught between a rail and another
mechanical part or cut by a rail at installation or removal of the server from the
rack.
Do not apply any load on the server pulled out from the rack.
Do not apply any load on the server pulled out from the rack. Doing so bends
the frame of the server. Consequently, the server cannot be pushed back into
the rack. Placing an object on the server may also cause personal injury if the
server drops.
1-8 Notes on Using Your Server
CAUTION
Do not connect any interface cable with the power cord of the server plugged to
a power source.
Make sure to power off the server and unplug the power cord from a power
outlet before installing/removing any optional internal device or
connecting/disconnecting any interface cable to/from the server. If the server
is off-powered but its power cord is plugged to a power source, touching an
internal device, cable, or connector may cause an electric shock or a fire
resulted from a short circuit.
Do not use any unauthorized interface cable.
Use only interface cables provided by NEC and locate a proper device and
connector before connecting a cable. Using an authorized cable or connecting
a cable to an improper destination may cause a short circuit, resulting in a fire.
Also, observe the following notes on using and connecting an interface cable.
Do not use any damaged cable connector.
Do not step on the cable.
Do not place any object on the cable.
Do not use the server with loose cable connections.
Notes on Using Your Server 1-9
Cleaning and Working with Internal Devices
WARNING
Do not disassemble, repair, or alter the server.
Never attempt to disassemble, repair, or alter the server on any occasion other
than described in this User's Guide. Failure to follow this instruction may cause
an electric shock or fire as well as malfunctions of the server.
Do not look into the CD-ROM drive.
A laser beam is used in the CD-ROM drive. Do not look into or insert a mirror
into the drive while the drive is powered. If a laser beam is caught in your eyes,
you may lose your eyesight (the laser beam is invisible).
Do not remove the lithium battery.
The server contains the lithium battery. Do not remove the battery. Placing
the lithium close to a fire or in the water may cause an explosion.
When the server does not operate appropriately due to the dead lithium battery,
contact your sales agent. Do not disassemble the server to replace or
recharge the battery by yourself.
Disconnect the power plug before cleaning the server.
Make sure to power off the server and disconnect the power plug from a power
outlet before cleaning or installing/removing internal optional devices.
Touching any internal device of the server with its power cord connected to a
power source may cause an electric shock even of the server is off-powered.
Disconnect the power plug from the outlet occasionally and clean the plug with a
dry cloth. Heat will be generated if condensation is formed on a dusty plug,
which may cause a fire.
CAUTION
Avoid installation in extreme temperature conditions.
Immediately after the server is powered off, its internal components such as
hard disks are very hot. Leave the server until its internal components fully
cool down before installing/removing any component.
Make sure to complete board installation.
Always install a board firmly. An incompletely installed board may cause a
contact failure, resulting in smoking or fire.
1-10 Notes on Using Your Server
During Operation
CAUTION
Do not pull out or remove the server from the rack unnecessarily.
Do not pull out or remove the server from the rack unnecessarily. Pulling out or
removing the server from the rack may cause not only the server to operate
incorrectly but also the server to fall on people to make them injured.
Stay away from the fan.
Keep your hand or hair away from the cooling fan on the rear of the server.
Failure to follow this warning may get your hand or hair caught in the fan,
resulting in injury.
Avoid contact with the server during thunderstorms.
Disconnect the power plug from the outlet when a thunderstorm is approaching.
If it starts thundering before you disconnect the power plug, do not touch any
part of the server including the cables. Failure to follow this warning may cause
a fire or an electric shock.
Keep animals away from the server.
Failure to follow this warning may cause a fire or an electric shock.
Do not place any object on top of the server.
The server may fall and cause property damage to the surroundings.
Do not leave the server with its CD-ROM tray ejected.
Dust may enter the server through openings and cause malfunctions of the
server. Any person may also bump it and get injured.
Do not use a cellular phone or pager around the server.
Turn off the cellular phone or pager. Radio interference may cause
malfunctions of the server.
Notes on Using Your Server 1-11
FOR PROPER OPERATION
Observe the following notes for successful operation of the server.
notes will cause malfunctions or failures of the server.
Use of the server ignoring the
Install the rack assembly in a place that meets requirements for successful operation. For
details, see Chapter 3, "Setting Up Your Server."
The server is intended for installation in a Restricted Access Location, mounted above a
non-combustible material.
Do not delete the hard disk partition exclusively provided for maintenance of the server
although it may appear on the OS.
Make sure to power off the server before connecting or disconnecting cables between the
server and peripheral devices.
Verify that the access lamp on the server is unlit before turning off the server or ejecting
the floppy disk.
The server management logic on your system board monitors and logs system voltage
changes. When plugging the power cord to the system, you may experience 10 seconds
delay from the time you press the POWER switch on the front panel. This is normal
system operation and is required by the server management logic.
Do not turn off the server until the "NEC" logo appears on the screen.
When you have just turned off the server, wait at least 30 seconds before turning it back
on.
Turn off the power and unplug the power cord from the outlet before relocating the server.
Clean the server on a regular basis. (See Chapter 7 for cleaning.) Regular cleaning
proactively prevents various failures of the server.
Lightning may cause a momentary voltage drop. To prevent this problem, it is
recommended to use of an uninterruptible power supply unit.
Check and adjust the system clock before the operation if any of the following conditions
is applicable.
– After carriage of device
– After storage of device
– After the device is entered into the pause state under the environmental condition
enduring device operation (temperature: 10°C - 35°C, humidity: 20% - 80%)
Check the system clock at the rough rate of once per month. When the system clock is
installed in a system requiring high time precision, it is recommended to use a time server
(NTP server).
If the system clock is remarkably delayed or advanced as the passage of time in spite of
adjustment, contact your sales agent to ask maintenance.
Store the unit under the storage condition (temperature: –10°C - 55°C, humidity: 20% 80%, without condensation) to allow built-in devices and the unit to operate correctly in
the next operation.
Make sure to use optional devices supported by the server. Some non-supported devices
may be physically installed/connected but cause failures of the server as well as a
malfunctions of the server.
NEC recommends you use NEC's genuine products. Some third-party products claim
that they support the server. However, repair of the server due to a failure or damage
resulted from use of such third-party products will be charged.
1-12 Notes on Using Your Server
TRANSFER TO THIRD PARTY
The following must be observed when you transfer (or sell) the server or software provided with the
server to a third party:
Server
Make sure to provide this User's Guide along with the server to a third party.
Provided Software
To transfer or sell any software application that comes with the server to a third party, the following
requirements must be satisfied:
All provided software applications must be transferred and no backup copies must be
retained.
Transfer requirements listed in "Software License Agreement" that comes with each
software application must be satisfied.
Software applications that are not approved for transfer must be uninstalled before
transferring the server.
Notes on Using Your Server 1-13
DISPOSAL AND CONSUMABLES
Dispose the server, all the internal devices, floppy disks, and CD-ROMs according to all
national laws and regulations.
IMPORTANT: For disposal (or replacement) of the battery on the
mother board of the server, consult with your sales agent.
The server contains some components that are only good for a limited period of time and
require replacement, such as fans, internal batteries, the internal CD-ROM drive, the
floppy disk drive, and the mouse. For stable operation of the server, NEC recommends
you replace these components on a regular basis. Consult with your sales agent for
replacement or the product lives.
WARNING
Do not remove the lithium battery.
The server contains the lithium battery. Do not remove the battery. Placing
the lithium or nickel cadmium battery close to a fire or in the water may cause an
explosion.
When the server does not operate appropriately due to the dead lithium battery,
contact your sales agent. Do not disassemble the server to replace or recharge
the battery by yourself.
Mother board
1-14 Notes on Using Your Server
USER SUPPORT
Before Asking for Repair, do the following when the server appears to fail:
1.
Check if the power cord and the cables to other devices are properly connected.
2.
See Chapter 8 to find if your problem fits the description. If it does, take the
recommended measure for it.
3.
Check if the software required for operation of the server is properly installed.
If the server still appears to fail after you have taken the above actions, consult with your sales agent
immediately. Take notes on lamp indications of the server and alarm indications on the display
unit before consultation, which may provide a significant help to your sale agent.
Notes on Using Your Server 1-15
Advice for Health
The longer you keep using the computer equipment, the more you become
tired, which may cause disorders of your body. When you use a
computer, observe the following to keep yourself from getting tired:
Good Working Posture
You have good posture if the following are satisfied when you use a
computer:
• You sit on a chair with your back straight.
• Your hands are parallel with the floor when you put them on the
keyboard.
• You look at the screen slightly lower than your eye height.
You have "good working posture" as described in the above when no part
of your body is under excess strain, in other words when your muscles are
most relaxed.
You have "bad posture" when you sit with your back hunched up or you
operate a display unit with your face close to the screen. Bad working
posture may cause eye strain or poor eyesight.
Adjustment of Display Unit Angles
Most display units are designed for adjustment of the horizontal and
vertical angles. This adjustment is important to prevent the screen from
reflecting bright lights and to make the display contents easy to see. You
will not be able to keep "good working posture" and you will feel more tired
than you should if you operate a display unit without adjusting horizontal
and vertical angles.
Adjustment of Screen Brightness and Contrast
The display unit has brightness and contrast adjustment functions. The
most suitable brightness and contrast depend on the individual and the
working environment (well-lighted room or insufficient light). Adjust
brightness and contrast so that the screen will be easy to see. An
extremely bright or dark screen will give a bad effect to your eyes.
Adjustment of Keyboard Angle
The keyboard provided with the server is designed for adjustment of an
angle. Adjust the keyboard angle at which the keyboard is easy to
operate. The adjustment assists in reducing strain on your shoulders,
arms, and fingers.
Cleaning of Equipment
Clean equipment regularly. It is difficult to see the display contents on a
dusty screen. Keeping equipment clean is also important for your sight.
Fatigue and Rest
If you feel tired, you should stop working and do light exercises.
1-16 Notes on Using Your Server
(This page is intentionally left blank.)
Chapter 2
General Description
This chapter provides information that you should be familiar with before using the server. It
includes names and functions of the components and features of the server.
2-2 General Description
OVERVIEW
Your server is a modular, multiprocessing server based on the Intel Xeon microprocessor. It is
a solid performer and offers the latest technology. The combination of compute performance,
memory capacity, and integrated I/O provides a high performance environment for many server
market applications. These range from large corporations supporting remote offices to small
companies looking to obtain basic connectivity capability such as file and print services, e-mail,
web access, web site server, etc.
Your server is housed and available as a rack-mount system. Your server conveniently installs into
a standard EIA 19-inch rack assembly.
Your server includes a 3.5-inch diskette drive, a CD-ROM drive and three (SCSI) or two (SATA)
hard disk drive bays. The hot-swap SCSI hard disk drive bays support up to three 1.0-inch SCSI
hard disk drives that can be swapped in or out of the system without powering it down, if RAID
functionality is configured in the system.
As application requirements increase, you can expand your server with an additional processor,
additional memory, add-in boards and peripheral devices: tape devices, CD-ROM, and hard disk
drives.
General Description 2-3
External View
The following figure shows the SCSI hot-plug hard disk drive model.
3
2
1
2
1
Drive cover
2
Release buttons
3
Logic cover
2-4 General Description
Front View with Front Bezel Closed
The following figure shows the location of the front system features.
3
4
1
1
2
3
4
5
6
7
5-1
5-2
6
7
2
Front bezel
The front bezel is a cover protecting the front devices during daily operation. A security key
is provided to lock the cover.
Key slot
Insert the security key into this slot when unlocking the front bezel.
POWER lamp (green)
This lamp turns green when the power is turned on.
DISK ACCESS lamp (green/amber)
This lamp is green during access to the internal hard disks. The lamp turns amber when
even one of the internal hard disks fails.
ACT lamp (green)
This lamp is on while the system is connected to the network. The number "1" on the icon
indicates LAN port 1, and the number "2" indicates LAN port 2.
UID lamp (blue)
This lamp goes on when the UID switch is pressed. (The lamp also goes on or flashes when
software issues a command.)
STATUS lamp (green/amber) (on the front panel)
This lamp indicates the server status. The lamp is green during normal operation. The
lamp turns amber or flashes when the server enters the abnormal state.
General Description 2-5
Front View with Front Bezel Removed
Hot-plug SCSI hard disk drive model
See 3 - 7 on the previous page.
1
2
3
9-0
4
10
5
6
7-1 7-2 7-3
9-1
8-1 8-2 8-3
1
9-2
SATA fixed hard disk drive model
9-0
1
2
3
4
5
6
7
8
9
10
11
9-1
Handles (1 at the right and left each)
Hold the handles when dismounting/mounting the server from/in the rack.
Serial port B (COM B) connector
Connect device having a serial interface to this connector (such as remote console PC).
USB connectors (2 ports)
Connect device compliant with the USB interface to the connectors.
DUMP (NMI) switch
Press this switch to dump system memory.
POWER switch
Press this switch to turn on/off the power. Pressing the switch once turns on the power, and
the POWER lamp goes on. Pressing it again turns off the power. Keep pressing the switch
for 4 seconds or more forcibly turns off the power.
UID (Unit ID) switch
Press this switch to turn on/off the UID lamps on the front and rear panels of the server.
Pressing the switch once turns on the lamps. Pressing it again turns them off.
CD-ROM drive
This drive reads data from the CD-ROM.
7-1 Disk access lamp
7-2 CD tray eject button
7-3 Emergency hole
3.5-inch floppy disk drive
This drive reads/writes data from/to the 3.5-inch floppy disk.
8-1 Disk access lamp
8-2 Disk slot
8-3 Eject button
Hard disk bays
Mount SCSI hard disks in the bays. Each number following the bold-faced number indicates
the SCSI ID. Dummy sponge blocks are mounted in the bays except 9-1 in the standard
configuration.
DISK lamp (green/amber)
Hard disk lamp. Each hard disk lamp is green during access to the hard disk. The lamp
turns amber when the hard disk fails. The lamp flashes switching back and forth between
green and amber during build processing (in only disk array configuration).
SATA hard disk drive bays
Mount SATA hard disks in the bay. The left side bay is connected to channel 1 of the SATA
connector on the mother board. The right side bay is connected to channel 2 of the SATA
connector on the mother board.
2-6 General Description
Rear View
SCSI hot-plug hard disk drive model
3
2
1
17
13 12
11 10
9
5
4
7
8
14-2
14-1
16
15
16
15
SATA fixed hard disk drive model
1
2
17
13 12 11 10
14-2
14-1
16
15
16
15
3
9
7
4
5
6
General Description 2-7
1
2
3
4
5
6
7
8
9
10
11
12
13
14
15
16
17
Low-profile PCI board extension slot
Mount PCI board of the low-profile type into this slot. The slot number is 1C.
Full-height PCI board extension slots
Mount PCI board of the full-height type in the slot. The slot number is 1B.
Captive thumbscrew
Secures the logic cover to the chassis.
Power supply
Supplies DC power to the server.
AC inlet
Connect the power cord to this socket.
Redundant power supply slot
Hot-swap SCSI hard disk drive model only.
An optional slot for 1+1 redundant power configuration.
Mouse/keyboard connectors
Connect the mouse and keyboard to the connectors through the provided relay cables.
SCSI connector
Hot-swap SCSI hard disk drive model only.
Connect external SCSI device to this connector.
UID lamp (blue)
This lamp goes on when the UID switch is pressed. (The lamp also goes on when software
issues a command.)
UID switch
Press this switch to turn on/off the UID lamps on the front and rear panels of the server.
Pressing the switch once turns on the lamps. Pressing it again turns them off.
DUMP (NMI) switch
Press this switch to dump system memory.
Monitor connector
Connect the display unit to this connector.
USB connector
Connect device compliant with the USB interface to this connector.
LAN connectors
Connect network systems on the LAN to the connectors.
The number "1" following the bold-faced number indicates LAN port 1, and the number "2"
indicates LAN port 2.
Speed lamp (amber)
This lamp indicates the transmission speed of the LAN.
LINK/ACT lamp (green)
This lamp indicates the access status of the LAN.
Serial port A (COM A) connector
Connect device having a serial interface to this connector.
A leased line cannot be connected directly to this connector.
2-8 General Description
Internal View
4-4
4-3
4-2
4-1
4-8
5
6
7-2
2-0
7-1
3
2-1
8
2-2
1
4-5
11 4-6
4-9
4-10 4-7 10
9
1
CD-ROM drive
2
Disk bays
(Each number following the bold-faced number indicates the channel number.
used only for SCSI hot-plug hard disk drive model.)
Floppy disk drive
3
4
Item 2-1 is
5
Cooling fans
(Each number following the bold-faced number indicates the fan number.)
Fans #3, #4, #5, #6, and #9 are redundant options for SCSI hot-plug hard disk drive model.
Fan duct
6
Mother board
7
Power supply (SATA fixed hand disk drive model)
7-1 Standard (SCSI hot-plug hand disk drive model)
7-2 Option (SCSI hot-plug hand disk drive model)
8
Riser card assembly
9
DIMM
10
Processor (mounted under the CPU and heat sink)
11
Backplane
General Description 2-9
Mother Board
1
15
2
3
4
5
6
7
8
14
13-1
9
13-2
FRONT
REAR
12
1
2
3
4
5
6
7
8
9
10
11
12
13
14
15
11
10
Main power connector
Lithium battery
CMOS clear jumper switch
Hard disk drive access lamp pin header
(Connect the LED relay cable of an additional SCSI/RAID controller.)
Remote management card socket
SCSI 2 connector (for SCSI hard disk drives)*1
SCSI 1 connector (not used in this system)*1
*1 SCSI hot-plug hard disk model only
Password clear jumper switch
Connectors for external device
PCI riser card slot
(For full-height boards. 133 MHz/64-bit, 3.3V, PCI-X)
PCI riser slot
(For only low-profile boards. 66MHz/64-bit, 3.3V, PCI-X)
DIMM sockets (for the interleave type)
(The sockets are called #1, #2, #3, #4, #5, and #6 sequentially from top.)
Processor sockets
13-1 Processor #1 (CPU #1)
13-2 Processor #2 (CPU #2)
Redundant fan jumper switch
SATA connector
2-10 General Description
STATUS INDICATORS
This section explains the indication and meanings of the server lamps.
POWER Lamp (
)
The POWER lamp is on (green) while the server power switch is on. It is off while no power is
supplied to the server.
The POWER lamp indicates that the server is running in the power-saving mode (sleep mode). If
the OS supports the power-saving mode such as Windows 2000, running the command blinks the
POWER lamp in green and place the server in the power-saving mode. Press the POWER switch
to turn out the POWER lamp and place the server back in the normal mode.
The power-saving mode is only available when the OS supports the power-saving feature. Some
OS's allow you to set the server to automatically turn in the power-saving mode when no access is
made to the server for a certain period of time or to select the power-saving mode with a command.
STATUS Lamp (
)
The STATUS lamp is on (green) while the server is operating normally. (The rear panel also has
the STATUS lamp on it.) If the STATUS lamp is off or turns amber and flashes, it indicates that
the server is in abnormal state.
The table below explains the STATUS lamp indication, the meanings, and the procedures.
NOTES:
If NEC ESMPRO or the offline maintenance utility is installed, you
can confirm the cause of a failure by referring to the error log.
If shutdown processing can be performed through the operating
system when you want to restart the system after turning the power
off, restart the system by performing shutdown processing. If
shutdown processing cannot be performed, restart the system by
resetting, forcibly turning the power off, or disconnecting and then
connecting the power cord.
General Description 2-11
STATUS lamp
indication
On (green)
Flashing
(green)
Description
Procedure
The server is operating normally.
• The server is operating with the
memory or CPU in degraded
state.
–
Identify the device in degraded state
by using the BIOS setup utility
"SETUP," and replace it as soon as
possible.
• A single-bit memory error has
often occurred.
Off*
The power is off.
POST is in progress.
A CPU error occurred.
A CPU temperature alarm was
detected. (Thermal-Trip)
A timeout occurred when the time
set for the watchdog timer arrived.
A CPU bus error occurred.
A memory dump request is made.
On (amber)*
Flashing
(amber)*
A temperature alarm was detected.
A voltage alarm was detected.
The power supply units failed.
A fan alarm was detected.
A temperature warning was
detected.
*
–
Wait for a while. The STATUS lamp
turns green when POST is completed.
Turn the power off and then turn it on.
If the POST screen displays an error
message, take notes of the message,
and contact your sales representative.
Wait until the memory dump is
completed.
Check if the internal fans are clean
and if the fan units are firmly
connected.
If the STATUS lamp indication does
not change when the fans are normal,
contact your sales representative.
Contact your sales representative.
Check if the fan units are firmly
connected.
If the STATUS lamp indication does
not change when the fans are normal,
contact your sales representative.
Check if the internal fans are clean
and if the fan units are firmly
connected.
If the STATUS lamp indication does
not change when the fans are normal,
contact your sales representative.
Indicate only when the optional remote management card is installed in your server.
2-12 General Description
DISK ACCESS Lamp ( )
The DISK ACCESS lamp indicates the status of the hard disk mounted in the 3.5-inch disk bay.
The lamp turns green each time access is made to the hard disk.
When the DISK ACCESS lamp turns amber, it indicates that a hard disk failure has occurred.
Check the hard disk lamp for the status of the failing hard disk.
IMPORTANT: If a hard disk in the server is connected to the internal
disk array controller (which is additionally mounted), the access lamp
signal cable (connected to the connector on the mother board) must be
connected from the disk array controller to the mother board.
ACT Lamp (
)
The ACT lamp is green while the server is connected to the LAN. The lamp flashes while the
server is accessed via the LAN (during transmission/reception of packets). The number next to the
icon indicates the network port number on the rear panel of the server.
UID Lamp (UID)
Pressing the UID switch toggles the front panel UID lamp (blue) and the mother board UID lamp on
and off. The mother board UID lamp is visible through the rear of the chassis and allows you to
locate the server you're working on from the rear of the servers on a rack.
Disk Access Lamp
The disk access lamp of the floppy disk drive or CD-ROM drive is on while the drive is accessed.
General Description 2-13
Hard Disk Lamp (SCSI hot-plug HDD model only)
The disk lamp mounted in the 3.5-inch disk bay indicates the following depending on the status:
Lamp
Flashing (green)
The lamp indicates that the hard disk is accessed.
On (amber)
The lamp indicates a failure of a hard disk mounted in disk array configuration.
NOTE: Even if one of the hard disks fails in disk array configuration
(RAID1 or RAID5), the server can continue operation. However,
replace the disk as soon as possible, and perform reconstruction
(rebuild) processing. (The failing disk can be replaced in hot swap
mode.)
Flashing switching back and forth between green and amber
The lamp indicates that reconstruction (rebuild) processing is being performed for the
hard disk. (This flashing does not indicate a failure.) When a failing hard disk is
replaced in disk array configuration, the system automatically rebuilds the data. (Autorebuild function) The lamp switches back and forth between green and amber during
rebuild processing.
The lamp goes off when the rebuild processing has terminated.
rebuild processing fails.
It turns amber when the
2-14 General Description
IMPORTANT: If the server is turned off during rebuild processing, the
processing is stopped. Restart the server, mount the new hard disk in
hot swap mode, and then perform rebuild processing again. Observe
the following notes on using the auto-rebuild function.
Do not turn the power off. (Once the power is turned off, the autobuild function does not start.)
Let 90 seconds or more pass between when dismounting a failing
hard disk and when mounting the new one.
Do not replace a failing hard disk while rebuild processing is being
performed for another hard disk.
LAN Connector Lamps
There are two lamps for each of the two LAN ports (connectors) on the rear panel.
LINK/ACT
SPEED
LINK/ACT
SPEED
LINK/ACT lamps
Each LINK/ACT lamp indicates the status of the standard network port of the server.
While power is supplied to the server and HUB and the connection is correct, the lamp is
on (green). The lamp turns green and flashes while the network port is
transmitting/receiving data.
If the lamp does not go on when the LINK state is placed, check if the network cable is in
normal state and if it is connected correctly. If the lamp does not go on yet when the
network cable is normal, the network (LAN) controller may be faulty. In this case,
contact your sales representative.
Speed lamp
This lamp indicates whether each of the network ports normally equipped with the server
is operated through the 1000BASE-T, 100BASE-TX or 10BASE-T network interface. If
the lamp is lit amber, the network port is operated through 1000BASE-T. If the lamp is
lit green, the network port is operated through 100BASE-TX. If the lamp is off, the
network port is operated through 10BASE-T.
General Description 2-15
STANDARD FEATURES
High performance
Intel Xeon processor
High-speed network interface
(1000Mbps/100Mbps/10Mbps supported)
High-speed disk access
(Ultra320 SCSI or SATA)
High-speed memory access (168-pin, 72bit ECC registered DDR DIMM (DDR333
compatible)
Expandability
One 64-bit/133MHz PCI-X and one 64bit/66MHz PCI-X
Large memory of up to 12 GB
Three hot-swap SCSI hard disk drive
bays*1
Up to two multi-processors are available
for upgrade.
USB interface (A USB-support driver is
required.)
Two network ports
High-reliability
Memory monitoring feature (single-bit
error correction/multiple-bit error
detection)
CPU/memory degradation feature (logical
isolation of a failed device)
Memory chip kill
Bus parity error detection
Temperature detection
Error notification
Internal fan monitoring feature
Internal voltage monitoring feature
Auto-rebuild feature (optional, hotswappable)
BIOS password feature
Mechanical security lock
Onboard RAID controller
Redundant fans
Redundant power supply
Remote Management Card (RMC),
option
Many Available Features
Graphic accelerator "RADEON 7000"
support
El Torito Bootable CD-ROM (no
emulation mode) format support
POWER switch mask
Software power-off
Remote power-on feature
AC-Link feature
Consoleless feature
Management Utilities
NEC ESMPRO
NEC DianaScope
Maintenance Features
Off-line Maintenance Utility
Memory dump feature using the DUMP
switch
*1 SCSI hot-plug hard disk drive model
*2 SATA fixed hard disk drive model
Self-diagnosis
Power On Self-Test (POST)
Test and Diagnosis (T&D)
Easy and Fine Setup
NEC EXPRESSBUILDER (system setup
utility)
Configuration Parameter Diskette Creator
SETUP (BIOS setup utility)
SCSISelect (SCSI device RAID
configuration*1 utility)
Array configuration*2
2-16 General Description
Power Supply
The SCSI hot-plug hard disk drive model contains one auto-sensing 465-watt power supply at an
operating frequency of 50/60Hz.
A second optional power supply may be added as part of a fault-tolerant hot-swap design. With two
power supplies installed, in the unlikely event of a power supply failure, the load is transferred to
the remaining power supply without interruption to normal operation. In this case the faulty power
supply can be replaced without powering down the system.
NOTE: The power supplies are not hot-swappable unless there are two
power supplies installed.
The power supply for SATA fixed hard disk drive model is rated for 425 watts of power at an
operating frequency of 50/60Hz.
The power subsystem supports implementation of remote management features including remote
enable that permits power to be activated from a variety of sources.
Peripheral Bays
Your server supports a variety of standard PC AT-compatible peripheral devices. The chassis
includes these peripheral bays:
A 3.5-inch front panel bay for mounting the standard 3.5-inch diskette drive (supports 720
KB and 1.44 MB diskette media)
A standard CD-ROM drive bay
Three hot-swap SCSI hard disk drive bays or two SATA hard disk drive bays for mounting
hard disk drives installed in easily removable drive carriers.
NOTE: The hot-swap SCSI hard disk drive bays contain a hot-swap
back plane that require an 80-pin single connector attachment (SCA)
connector on the drives that you install.
System Cooling
The chassis includes a fan module with five fans for cooling the processor(s), hard drives, and PCI
cards. The fan system is located in the middle of the chassis to pull cooling air through the chassis.
The power supply contains two built-in fans for cooling.
The SCSI hot-plug hard disk drive model can include five optional redundant fans.
General Description 2-17
SAF-TE LOGIC
NOTE: SAF-TE Logic is in systems that include the hot-swap SCSI
disk drive cage. SAF-TE Logic is not available in systems that
include the standard SCSI disk drive cage.
The SCSI backplane includes SAF-TE (SCSI Accessed Fault Tolerant Enclosure) logic that provides
an interface to the disk subsystem that supports status signals, hot swapping drives, and enclosure
monitoring.
The transport mechanism for the standardized alert detection and status reporting is the SCSI bus.
Disk drives, power supplies, cooling fans, and temperature are continually monitored and the
conditions then reported over the SCSI bus to the system. When used with RAID management
software the user can be alerted of impending or imminent disk conditions requiring attention.
This allows the user to react to conditions that could normally go unnoticed until data loss.
SYSTEM BOARD FEATURES
The following subsections describe the system board major components.
Processor
The system board accommodates one or two Intel Xeon processors with 1MB cache in the
INT3/FCPGA socket package. This processor uses the .13 micron technology and offers advanced
performance. The processor external interface operates at a maximum of 800 MHz.
Memory
The system board contains six 168-pin DIMM slots each supporting 72-bit ECC (64-bit main
memory plus ECC) registered SDRAM DIMMs (DDR333 compatible). Memory is two-way
interleaved and partitioned in three banks. You may install a minimum of 1 GB (512 MB × 2) and as
much as 12 GB.
The controller automatically detects, sizes, and initializes the memory array, depending on the type,
size, and speed of the installed DIMMs, and reports memory size and allocation to the server via
configuration registers.
NOTE: Use DIMMs that have been tested for compatibility with the
server board.
Contact your sales representative or dealer for a current list of approved
memory modules.
2-18 General Description
PCI Riser Slots
The mother board has two PCI riser slots. Riser B provides the following features:
Bus speed up to 133 MHz
184 pin, 5 volt keyed, 64-bit expansion slot connector
Support for a 1-slot PCI riser card
Support for both full length and low profile PCI cards
Riser C provides the following features:
Bus speed up to 66MHz
184 pin, 5 volt keyed, 64-bit expansion slot connector
Support for a 1-slot PCI riser card
Support for only low profile PCI cards
Video
The mother board uses an ATI RADEON 7000 PCI graphics accelerator with 8 MB of video
SDRAM. The embedded SVGA video subsystem supports:
Resolutions up to 1600 x 1200 under 2D and 1024 x 768 under 3D
CRT and LCD monitors up to 100 Hz vertical refresh rate
The mother board supports disabling of the onboard video through the BIOS setup menu or when a
plug in video card is installed in any of the PCI slots.
SCSI Controller
The SCSI version of the server board includes an embedded Adaptec AIC-7902 controller providing
dual Ultra320 Low Voltage Differential (LVD) SCSI channels.
The SCSI bus is terminated on the server board with active terminators that cannot be disabled. The
onboard device must always be at one end of the bus. The device at the other end of the cable must
also be terminated. LVD devices generally do not have termination built-in and need to have a
termination source provided. Non-LVDs devices generally are terminated through a jumper or
resistor pack on the device itself.
General Description 2-19
Network Controller
NOTE: To ensure EMC product regulation compliance, the system
must be used with a shielded LAN cable.
The mother board uses a dual-channel Ethernet Controller and supports 10Base-T/100BaseTX/1000Base-T network subsystems.
The network controller supports the following features:
64-bit, 100 MHz PCI-X interface
Integrated IEEE 802.3 10Base-T, 100Base-TX, and 1000Base-T compatible PHY
IEEE 820.3u auto-negotiation support
Chained memory structure similar to the 82559, 82558, 82557 and 82596
Full duplex support at both 10 Mbps, 100 Mbps, and 1000 Mbps operation
Low power +3.3 V device
On the system board, NIC 1 can be used as both a network interface and server management
interface.
2-20 General Description
Keyboard and Mouse
The keyboard/mouse controller is PS/2-compatible. A Y-cable can be used if both a PS/2 mouse and
keyboard are required at the same time.
ACPI
The mother board supports the Advanced Configuration and Power Interface (ACPI) as defined by
the ACPI 2.0 specifications. An ACPI aware operating system can put the system into a state where
the hard drives spin down, the system fans stop, and all processing is halted. However, the power
supply will still be on and the processors will still be dissipating some power, so the power supply
fans will still run.
The system board supports sleep states s0, s1, s4, and s5:
s0: Normal running state.
s1: Processor sleep state. No context will be lost in this state and the processor caches will
maintain coherency.
s4: Hibernate or Save to Disk: The memory and machine state are saved to disk. Pressing
the power button or other wakeup event will restore the system state from the disk and
resume normal operation. This assumes that no hardware changes have been made to the
system while it was off.
s5: Soft off: Only the RTC section of the CSB and the BMC are running in this state. No
context is saved by the OS or hardware.
IMPORTANT: The system is off only when the AC power cord is
disconnected.
General Description 2-21
Remote Management Card (RMC)
Server management is concentrated in the optional Remote Management Card (RMC). The RMC
and associated circuitry are powered from a 5Vdc standby voltage, which remains active when
system power is switched off, but the ac power source is still on and connected.
The RMC supports the NEC DianaScope, which allows remote server management via a modem or
direct connection to a manager system. Events monitored by the manager system include overtemperature and over-voltage conditions, fan failure, or chassis intrusion.
Information on NEC DianaScope may be found in the NEC EXPRESSBUILDER CD-ROM.
One major function of the RMC is to autonomously monitor system management events, and log
their occurrence in the nonvolatile System Event Log (SEL). The events being monitored include
overtemperature and overvoltage conditions, fan failure, or chassis intrusion. To enable accurate
monitoring, the RMC maintains the nonvolatile Sensor Data Records (SDRs), from which sensor
information can be retrieved. The RMC provides an ISA host interface to SCR sensor information,
so that software running on the server can poll and retrieve the server's current status.
The RMC performs the following:
Monitors server board temperature and voltage*
Monitors processor presence and controls Fault Resilient Boot (FRB)
Detects and indicates baseboard fan failure*
Manages the SEL interface
Manages the SDR Repository interface
Monitors the SDR/SEL teimestamp clock
Monitors the system management watchdog timer
Monitors the periodic SMI timer
Monitors the event receiver
Controls secure mode, including video blanking, diskette write-protect monitoring, and
front panel lock/unlock initiation
Controls Wake On LAN via Magic Packet support.
*Also, NEC ESMPRO supports these features.
2-22 General Description
DEGRADATION FEATURE
The degradation feature automatically isolates a failed DIMM or processor to assure continuous
operation of the server when the POST (Power On Self-Test, self-diagnosis program after power on)
detects such a DIMM or processor.
NOTE: The degradation feature is only available when at least two
DIMMs or processors are installed.
Failed DIMMs and processors may be identified on the screen that the POST displays, or with the
BIOS setup utility of the server, "SETUP." They may also be identified on the system that has the
NEC ESMPRO installed.
REMOTE POWER-ON FEATURE (WAKE ON LAN)
The remote power-on function turns on the server through a network. It sends a special packet
from the management computer to a remote server to turn it on if the server is off-powered.
To enable this feature, use the BIOS setup utility, "SETUP." (See Chapter 4.)
The remote power-on feature is not available in the following cases. Press the POWER switch
once to start the OS, and turn off the server in an appropriate procedure.
Abnormal previous system shut-down
No power supply to the server (due to turned-off breaker, disconnected power cord, power
blackout, etc.)
AC-LINK FEATURE
When the power cord of the server is connected to an uninterruptible power supply (UPS) unit, the
server supports the power linkage feature that enables control over the power supply from the UPS
to the server. The AC-Link feature can be enabled or disabled with the Server menu of the BIOS
setup utility, "SETUP." (See Chapter 4.)
General Description 2-23
SYSTEM SECURITY
To help prevent unauthorized entry or use of the system, the system includes a full lockable front
bezel and Server Management software that monitors the front bezel intrusion switch.
Security with Mechanical Locks and Monitoring
To unlock the bezel, insert the key in the lock and turn the lock counterclockwise until it stops
(about a quarter turn). The bezel is now unlocked and can be opened again.
To lock the bezel, insert the key in the lock. Turn the lock clockwise until it stops (about a quarter
turn). The bezel is now locked and cannot be opened.
Software Locks via the BIOS Setup Utility
The BIOS Setup Utility provides a number of security features to prevent unauthorized or accidental
access to the system. Once the security measures are enabled, you can access the system only after
you enter the correct password(s). For example:
Enable the keyboard lockout timer so that the server requires a password to reactivate the
keyboard and mouse after a specified time out period – 1 to 120 minutes.
Set and enable a supervisor password.
Set and enable a user password.
Set secure mode to prevent keyboard or mouse input and to prevent use of the front panel
reset and power switches.
Activate a hot key combination to enter secure mode quickly.
Disable writing to the diskette drive when secure mode is set.
Disable access to the boot sector of the operating system hard disk drive.
2-24 General Description
Using Passwords
You can set either the user password, the supervisor password, or both passwords. If only the user
password is set, you:
Must enter the user password to enter BIOS Setup.
Must enter the user password to boot the server if Password on Boot is enabled in the
BIOS Setup.
Must enter the user password to exit secure mode.
If only the supervisor password is set, you:
Must enter the supervisor password to enter BIOS Setup.
Must enter the supervisor password to boot the server if Password on Boot is enabled in
the BIOS Setup.
Must enter the supervisor password to exit secure mode.
If both passwords are set, you:
May enter the user password to enter BIOS Setup. However, you will not be able to
change many of the options.
Must enter the supervisor password if you want to enter BIOS Setup and have access to all
of the options.
May enter either password to boot the server if Password on Boot is enabled in either the
BIOS Setup.
May enter either password to exit secure mode.
Secure Mode
Configure and enable the secure boot mode by using the BIOS Setup. When secure mode is in
effect:
You can boot the server and the operating system will run, but you must enter the user
password to use the keyboard or mouse.
You cannot turn off system power or reset the server from the front panel switches.
Secure mode has no effect on functions enabled via remote server management or power control via
the watchdog timer.
Taking the server out of secure mode does not change the state of system power. That is, if you
press and release the power switch while secure mode is in effect, the system will not be powered
off when secure mode is later removed. However, if the front panel power switch remains depressed
when secure mode is removed, the server will be powered off.
General Description 2-25
Summary of Software Security Features
The table below lists the software security features and describes what protection each offers. In
general, to enable or set the features listed here, you must run the BIOS Setup and go to the Security
Subsystem Group, menu. The table also refers to the Setup utility.
Software Security Features
Feature
Secure mode
Description
How to enter secure mode:
• Setting and enabling passwords automatically places the system in
secure mode.
• If you set a hot-key combination (through Setup), you can secure the
system simply by pressing the key combination. This means you do not
have to wait for the inactivity time-out period.
When the system is in secure mode:
The server can boot and run the operating system, but mouse and
keyboard input is not accepted until the user password is entered.
At boot time, if a CD is detected in the CD-ROM drive or a diskette in drive
A, the system prompts for a password. When the password is entered, the
server boots from CD or diskette and disables the secure mode.
If there is no CD in the CD-ROM drive or diskette in drive A, the server
boots from drive C and automatically goes into secure mode. All enabled
secure mode features go into effect at boot time.
To leave secure mode: Enter the correct password(s).
Disable writing to
diskette
In secure mode, the server will not boot from or write to a diskette unless a
password is entered.
To write protect access to diskette whether the server is in secure mode or
not, use the Setup main menu, Floppy Options, and specify Floppy Access
as read only.
Set a time out period
so that keyboard
and mouse input are
not accepted.
Also, screen can be
blanked, and writes
to diskette can be
inhibited
Control access to
using the BIOS
Setup: set
supervisor password
Specify and enable an inactivity time out period of from 1 to 120 minutes.
If no keyboard or mouse action occurs for the specified period, attempted
keyboard and mouse input will not be accepted.
The monitor display will go blank, and the diskette drive will be write
protected (if these security features are enabled through Setup).
To resume activity: Enter the correct password(s).
To control access to setting or changing the system configuration, set a
supervisor password and enable it through Setup.
If both the supervisor and user passwords are enabled, either can be used
to boot the server or enable the keyboard and/or mouse, but only the
supervisor password will allow Setup to be changed.
To disable a password, change it to a blank entry in the Change Password
menu of the Supervisor Password Option menu found in the Security
Subsystem Group.
To clear the password if you cannot access Setup, change the Clear
Password jumper (see Chapter 4).
2-26 General Description
Feature
Control access to
the system other
than BIOS Setup:
set user password
Description
To control access to using the system, set a user password and enable it
through Setup.
To disable a password, change it to a blank entry in the Change Password
menu of the User Password Option menu found in the Security Subsystem
Group.
To clear the password if you cannot access Setup, change the Clear
Password jumper (see Chapter 4).
Boot without
keyboard
The system can boot with or without a keyboard. During POST, before the
system completes the boot sequence, the BIOS automatically detects and
tests the keyboard if it is present and displays a message.
Specify the boot
sequence
The sequence that you specify in setup will determine the boot order. If
secure mode is enabled (a user password is set), then you will be
prompted for a password before the server fully boots. If secure mode is
enabled and the “Secure Boot Mode” option is also enabled, the server will
fully boot but will require a password before accepting any keyboard or
mouse input.
General Description 2-27
NEC EXPRESSBUILDER
The CD-ROM that comes with the server contains a setup utility called "NEC
EXPRESSBUILDER." When you have first installed the server or append features to the server,
use the NEC EXPRESSBUILDER to set up your server.
Refer to Chapter 6 for details.
IMPORTANT: Do not use the NEC EXPRESSBUILDER for any
other computers than the server, nor other NEC Express5800 series
servers than the one that NEC EXPRESSBUILDER is provided for.
Not following this instruction may cause failures.
The major functions of the NEC EXPRESSBUILDER are:
To install the OS.
It installs an operating system.
To diagnose the system.
It diagnoses the server.
To create a support disk.
It copies utilities in the NEC EXPRESSBUILDER CD-ROM into a floppy disk to launch
them from the floppy disk.
To update the BIOS and firmware
It updates the BIOS features and firmware program of the server.
To update the Windows System*
It updates the several resources of Microsoft Windows Server 2003, Microsoft Windows
2000.
To install the utilities
It install the management utilities of NEC ESMPRO and NEC DianaScope.
To read the online documents*
It opens the online document files (".pdf" files).
* These functions are available under Windows system.
NOTE: Some features among those listed above can be used from the
remote computer via cross cable, modem, or LAN (consoleless feature).
See Chapter 6 for details.
2-28 General Description
NEC ESMPRO
The NEC ESMPRO is server management software that runs on the OS. The NEC ESMPRO
includes the NEC ESMPRO Manager for the server monitoring terminal and the NEC ESMPRO
Agent for the server.
NOTE: For details of major functions of the NEC ESMPRO, system
configuration and setups with the NEC ESMPRO, see Chapter 6.
Available functions of the NEC ESMPRO depend on the OS you install.
Ask your sales agent for details.
OFF-LINE MAINTENANCE UTILITY
The Off-line Maintenance Utility is used for proactive maintenance and fault analysis of the server.
Normally this utility is used by the maintenance engineer.
Refer to Chapter 8 for details.
SYSTEM DIAGNOSTIC UTILITY
The system diagnostic utility contained in the NEC EXPRESSBUILDER is useful to prevent the
hardware failures. See Chapter 7 for details.
NEC DianaScope
The NEC DianaScope is a software for the remote management of the NEC Express5800 series.
The NEC DianaScope can control the managed server even if OS is not running on the managed
server. To use the NEC DianaScope, you need to purchase the separately priced server license.
See Chapter 6 and online document in the NEC EXPRESSBUILDER.
General Description 2-29
USING YOUR SERVER
This section describes basic operations of the server including how to use devices such as the floppy
disk drive and the CD-ROM drive. See Appendix B for notes on using the floppy disk, CD-ROM,
and accessories including the keyboard and the mouse.
Front Bezel
Remove the front bezel to power on/off the server, to access the floppy disk drive and CD-ROM
drive, and to install/remove hard disks to the 3.5-inch disk bays.
IMPORTANT: To open the front door, you must unlock the door with
the provided security key.
Installing or Removing the Front Bezel
When turning the power of the server on/off, accessing to the floppy disk drive or CD-ROM drive,
or installing or removing a hard disk on or from the 3.5-inch disk bay, first remove the front bezel.
IMPORTANT: The front bezel can be opened only when you unlock
it by using the attached security key.
1.
Insert the attached security key into the key slot and turn the key to the front bezel side
with it pressed lightly to release the lock.
Unlock
2.
Hold the right end of the front bezel lightly to pull it toward you.
Lock
2-30 General Description
3.
Slide the front bezel to the left a little to remove the tab from the frame and then remove
the front bezel from the server.
2
1
To install the front bezel, latch the tab at the left side of the front bezel on the server frame. After
the installation, lock the front bezel by using the key for security.
Tab
Frame
General Description 2-31
POWER Switch
Use the POWER switch to turn on/off the server.
Power On
Press the POWER switch on the front of the computer chassis.
The POWER lamp lights in green.
POWER lamp
POWER switch
IMPORTANT:
If the power cord is connected to a power control device such as a
UPS (Uninterruptive Power Supply), make sure that the power
control device is powered.
If the power cord is connected to the server, an initial diagnosis of
the hardware starts. The POWER switch does not work while in
diagnosis. Wait for about 10 seconds, then press the POWER
switch.
Always allow POST to complete before powering down your
system.
2-32 General Description
POST
POST (Power On Self-Test) is the self-diagnostic program stored in the system memory.
When you power on the server, the system automatically runs POST to check the mother board,
ECC memory module, CPU module, keyboard, and mouse. POST also displays messages of the
BIOS setup utility, such as the start-up message, while in progress.
With the factory setup of the server, the NEC logo appears on the display unit while POST is in
progress. (To display the POST check results, press Esc.)
NOTE: You can set the POST check results to appear on the display
unit without pressing Esc. To do so, select "Enabled" for "Boot-time
Diag Screen" under the Advanced menu of the BIOS SETUP utility.
The POST check results should be checked in the following cases.
When the server is used for the first time.
When the server appears to fail.
When the server beeps for many times between power-on and OS start-up.
When an error message appears on the display unit.
General Description 2-33
POST Execution Flow
The following describes the progress of POST in the chronological order.
IMPORTANT:
Do not make key entries or perform mouse operations while POST
is in progress.
Some system configurations may display the message "Press Any
Key" to prompt a key entry. This message is driven by BIOS of an
installed optional board. Make sure to read the manual that comes
with the optional board before any key entry.
Powering on the server, after you installed or removed an optional
PCI board or moved it to another slot, may display the message that
indicates incorrect board configuration and suspend POST.
In such a case, press F1 to continue POST. Board configuration
can be made using the utility described later.
1.
After a few seconds from power-on, POST starts checking the memory. The count
message of the basic and expansion memory appears at top left on the display unit screen.
The memory check may takes a few minutes to complete depending on the memory size
of the server. Also, it may take approximately one minute for the screen display to
appear after rebooting the server.
2.
Some messages appear upon completion of the memory check. These messages appear
to indicate that the system has detected the CPU, keyboard, and mouse.
3.
POST then detects the internal SCSI controller and display the message prompting you to
launch the SCSI device utility. (Ignore the message. POST will automatically proceed
a few seconds later.)
Press <Ctrl> <A> for SCSISelect(TM) Utility!
To launch the SCSI device utility, press Ctrl and A. See Chapter 4 for setup and
parameters.
You need to use the SCSI device utility in the following cases:
When new SCSI device is installed in a 5.25-inch device bay.
When an external SCSI device connection is changed.
When the internal SCSI device connection is changed.
When the internal hard disk drives are configured with HostRAID.
The server automatically restarts POST all over again when you exit the SCSI device
utility.
If more than one SCSI controller board is installed on the PCI bus of the server, the
system detects the boot devices in order of the PCI slots 1C and 1B.
2-34 General Description
4.
POST displays SCSI ID numbers used by the connected SCSI devices on the screen.
5.
After a few seconds, POST displays the following message prompting you to launch the
BIOS setup utility, SETUP, stored in the system memory of the server. This message
appears at bottom left on the screen.
Press <F2> to enter SETUP
Launch the BIOS setup utility when you need to change the settings to meet the
requirements for the server. As long as the above message is not displayed with an error
message, you don't have to launch the utility. (Ignore the message. POST will
automatically proceed.)
To launch the SETUP utility, press F2 while the above message is displayed. See
Chapter 4 for setup and parameters.
The server automatically restarts POST all over again when you exit the SETUP utility.
6.
If your server uses onboard serial ATA (SATA) RAID feature, the following message is
displayed on the screen to prompt you to run Array Configuration Utility (ARC).
Press <Ctrl><A> for Adaptec RAID Configuration Utility
Press Ctrl + A to run ARC. For detail explanation, see Chapter 4.
7.
If the server has an optional RAID controller installed, POST displays the message
prompting you to launch the RAID configuration utility and the RAID BIOS setup utility.
Refer to the manual supplied with the RAID controller for detail instructions.
POST will automatically proceed a few seconds later.
8.
If you set a password using the BIOS setup utility, SETUP, the password entry screen
appears upon successful completion of POST.
Up to three password entries will be accepted. Three incorrect password entries disable
the server to boot. In such a case, turn off the power and wait about ten seconds before
turning on to boot the server.
IMPORTANT: Do not set a password before installing an OS.
9.
The OS starts when POST completes.
General Description 2-35
POST Error Messages
When POST detects an error, it displays an error message on the display unit screen. See Chapter
8 for POST error codes.
IMPORTANT: Take a note on the messages displayed before
consulting with your sales agent. Alarm messages are useful
information for maintenance.
Power Off
Follow the procedure below to power off the server. If the power cord of the server is connected to
a UPS, refer to the manual that comes with the UPS or the manual for the application that controls
the UPS.
IMPORTANT: Always allow POST to complete before turning off
the server.
1.
Shut down the OS.
2.
Press the POWER switch on the front of the server.
The POWER lamp goes off.
3.
Power off peripheral devices.
2-36 General Description
Identification of Servers ~ UID Switch ~
An "UID (Unit ID) lamp" is provided on the front panel and rear panel. If more than one server is
mounted in a single rack, the lamp identifies the server you are going to maintain.
The UID lamp goes on when the UID (Unit ID) switch on the front panel is pressed. It goes off
when the switch is pressed again.
Maintenance from the rear of the rack has to be carried out in a dark, narrow space. The interface
cable of a server or power supply unit in normal state may be disconnected by accident in this
situation. To prevent this problem, you should start maintenance after confirming the target server
by using the UID switch.
UID lamp
UID switch
UID switch
UID lamp
General Description 2-37
Floppy Disk Drive
The server is provided with the 3.5-inch floppy disk drive on its front to write/read data to/from a
floppy disk.
The server supports the following 3.5-inch floppy disks:
2HD floppy disk (double-sided high-density track type)
Stores data of 1.44MB.
2DD floppy disk (double-sided double-density track type)
Store data of 720KB.
Make sure that the server is powered (the POWER lamp is lit) before inserting a floppy disk into the
floppy disk drive.
When you completely insert the floppy disk into the floppy disk drive, the drive clicks and the eject
button on the floppy disk is slightly pushed out.
NOTES:
When an unformatted floppy disk is inserted, the message notifying
that date read is not available and the message prompting formatting
are displayed. Refer to the manual that comes with the OS to
format the floppy disk.
If the floppy disk contains a system, powering on or restarting the
server with the floppy disk inserted boots the system from the
floppy disk.
To eject the floppy disk from the floppy disk drive, press the eject button.
NOTE: Make sure that the floppy disk access lamp is unlit before
ejecting the floppy disk. Ejecting the disk when the access lamp is lit
may destroy the disk data.
2-38 General Description
NOTE: Use of the floppy disk
The floppy disk is an important data storage media with delicate
structure and requires care. Keep the following notes in mind to use
it:
Insert the floppy disk into the floppy disk drive gently as far as it
goes.
Attach the label to the correct position.
Do not write anything directly onto the disk surface with a pencil or
ball-point pen.
Do not open the shutter.
Do not use the floppy disk in a dusty place.
Do not place anything on the floppy disk.
Do not leave the floppy disk in a high-temperature place (e.g., place
exposed to direct sunlight or close to a heater).
Keep the floppy disk away from cigarette smoke.
Keep the floppy disk away from any liquid (e.g., water) and
chemicals.
Keep the floppy disk away from any magnetic objects (e.g.,
magnet).
Do not pinch the floppy disk with a paper clip or drop it.
Keep the floppy disk in a floppy disk case that protects it from
magnetism and dust.
A floppy disk has a write-protect switch that prevents the stored data
from accidental erasure. You can read data from a write-protected
floppy disk, but you cannot save data into the floppy disk or format
it. NEC recommends that you should write-protect any floppy disk
containing valuable data unless you are about to save data. To
write-protect a 3.5-inch floppy disk, use the write-protect switch
provided on its back.
Write-protect switch
Write
Write
disable enable
The floppy disk is a very delicate storage media. Dust or thermal
changes, as well as operator's misconduct or sever failures, may
cause loss of data. To avoid loss of data, NEC recommends that
you should make a back-up copy of your valuable data on a regular
basis. (Make sure to make a back-up copy of every floppy disk
provided with the server.)
General Description 2-39
CD-ROM Drive
The server is provided with the CD-ROM drive on its front to read data from a CD-ROM (read-only
compact disk). The CD-ROM provides larger and faster data read than the floppy disk.
CAUTION
Observe the following instructions to use the server safely. Failure to follow
these instructions may cause a fire, personal injury, or property damage. See
pages 1-3 to 1-8 for details.
■
Do not leave the tray ejected from the CD-ROM drive.
Set a CD-ROM on the CD-ROM drive in the following procedure.
1.
Confirm that the power of the server is on (with the POWER lamp being lit in green)
before setting the CD-ROM on the CD-ROM drive.
2.
Press the Eject button on the front of the CD-ROM drive.
The tray comes out a little.
3.
Hold the tray lightly and pull it out toward you until the tray stops.
4.
Put the CD-ROM on the tray carefully and securely with the character printed surface
facing upward.
2-40 General Description
5.
As shown in the figure below, hold the tray with a hand and press the CD-ROM with
fingers of another hand to make the hole of the CD-ROM fit to the rotor at the center of
the tray.
Rotor
Press this part of CD-ROM.
6.
Push the front of the tray lightly to retract it into the drive.
IMPORTANT: If a noisy sound in driving the CD-ROM drive occurs
after setting a CD-ROM, set it again correctly.
To take out the CD-ROM from the CD-ROM drive, press the Eject button in the similar way in
setting the CD-ROM to make the tray go out.
If the access lamp is lit in orange, the CD is being accessed.
before pressing the Eject button.
Confirm that the access lamp is not lit
As shown in the figure below, hold the tray with a hand and take the end of the CD-ROM lightly by
the fingers of another hand with the suppression of the rotor at the center of the tray to remove the
CD-ROM from the tray.
General Description 2-41
After taking out the CD-ROM, return the tray into the drive.
When you fail to eject the CD-ROM tray with the Eject button and take out the CD-ROM from the
server, follow the procedure below.
Emergency hole
1.
Press the POWER switch to power off the server. (The POWER lamp goes off.)
2.
Insert a metal pin of approximately 1.2 mm in diameter and 100 mm in length (a
straightened large paper clip will make a substitute) into the emergency hole on the right
front of the CD-ROM drive and gently push it in until the tray is ejected.
IMPORTANT:
Do not use a toothpick or plastic stick that is easy to break.
If the above procedure does not let you take out the CD-ROM,
contact your sales agent.
3.
Hold the tray and pull it out.
4.
Take out the CD-ROM.
5.
Push the tray back into position.
2-42 General Description
NOTE: Use of the CD-ROM
Keep the following notes in mind to use the CD-ROM for the server:
For the disk which does not conform to the CD standard, the
playback of such a disk with the CD drive is not guaranteed.
Do not drop the CD-ROM.
Do not place anything on the CD-ROM or bend the CD-ROM.
Do not attach any label onto the CD-ROM.
Do not touch the signal side (nothing is printed on this side) with
your hand.
Place the CD-ROM with its printed side upward and gently put it on
the tray.
Do not scratch the CD-ROM or write anything directly on it with a
pencil or ball-point pen.
Keep the CD-ROM away from cigarette smoke.
Do not leave the CD-ROM in a high-temperature place (e.g., place
exposed to direct sunlight or close to a heater).
When dust or fingerprints are attached on the CD-ROM, wipe the
CD-ROM from its center to edge with a dry soft cloth slowly and
gently.
Use the CD cleaner to clean the CD-ROM. Do not use record
spray/cleaner, benzene, or thinner.
Keep the CD-ROM in a CD-ROM case when not in use.
If the CD-ROM emits large noise in the CD-ROM drive, remove the
CD-ROM and insert it back again.
Chapter 3
Setting Up Your Server
This chapter describes how to set up the server appropriate for your system, on a step-by-step basis.
3-2 Setting Up Your Server
SETUP FLOW
Follow the flowchart below to set up the server.
Selecting the server site
Select a suitable site for the server and assemble the 19-inch rack assembly.
Unpacking the system
Unpack the server and accessories from the chipping carton box.
Install the server
Install the server into the rack assembly.
Connecting peripheral devices
Connect peripheral devices to the server.
Connecting the power cord
Connect the power cord to the server.
Turning on the server
Power on the server to start software setups. Setups depend on the optional
internal devices installed and the peripheral devices connected.
Installing the operating system
Install an operating system to the server.
See Chapter 5.
Installing the utilities
Install the utilities in the provided NEC EXPRESSBUILDER CD-ROM. See
Chapter 6.
Making backup copies of system information
After all the system setup procedures are completed, make backup copies of
system information.
System information is required for recovering the server from the trouble or after
replacing the system board.
Setting Up Your Server
3-3
SELECTING SERVER SITE
To use the server, install it on a standard EIA 19-inch rack assembly.
Refer to the documentation attached to the rack or contact your sales agent for the installation of the
server on the rack.
WARNING
Observe the following instructions to use the server safely. Failure to follow
these instructions may result in death or serious personal injury. See pages 1-3
to 1-8 for details.
■
■
Do not use the server in any unapproved place.
Do not connect the ground line to a gas pipe.
CAUTION
Observe the following instructions to use the server safely. Failure to follow
these instructions may cause a fire, personal injury, or property damage. See
pages 1-3 to 1-8 for details.
■
■
■
■
■
■
Do not carry or install the server only by a single person.
Do not install the server where the load may be concentrated on a specific
point.
Do not install any component on the server only by a single person.
Do not pull out a device from the rack if the rack is unstable.
Do not leave more than one device being pulled out from the rack.
Do not provide the wiring exceeding the rating power.
3-4 Setting Up Your Server
Do not install the rack in the places listed below. Installing the rack or mounting the server on the
rack in such a place may cause some malfunction to occur.
Narrow space from which devices cannot be pulled out from the rack completely
Place that cannot bear the total weights of the rack and devices mounted on the rack
Place where stabilizers cannot be installed or where the rack can be installed only after the
practice of proper earthquake-resistant construction
Place of uneven or slanting floor
Place of drastic temperature change (near a heater, air conditioner, or refrigerator)
Place where intense vibration may be generated
Place where corrosive gas is generated, chemicals are nearby, or chemicals may be
accidentally sprayed over
Place where a carpet not subject to anti-static process is laid.
Place where some objects may be fallen on the rack
Place near a device generating intense magnetic field (such as a TV, radio,
broadcast/communication antenna, power transmission wire, and electromagnetic crane) is
placed (If unavoidable, contact your sales agent to request proper shield construction.)
Place where the power cord of the server must be connected to an AC outlet that shares
the outlet of another device with large power consumption.
Place near equipment that generates power noise (e.g., contact spark at power-on/poweroff of commercial power supply through a relay). If you must install the server close to
such equipment, request your sales agent for separate power cabling or noise filter
installation.
Setting Up Your Server
3-5
UNPACKING THE SYSTEM
When you receive your system, inspect the shipping containers prior to unpacking. If the shipping
boxes are damaged, note the damage, and if possible, photograph it for reference. After removing
the contents of the containers, keep the cartons and the packing materials. If the contents appear
damaged when you unpack the boxes, file a damage claim with the carrier immediately.
3-6 Setting Up Your Server
INSTALLING THE SERVER
This subsection provides the instructions for the rack-mount server unit into a standard EIA 19-inch
rack cabinet.
Also this subsection describes the removal procedures for the rack-mount server unit from the 19inch rack cabinet.
WARNING
Observe the following instructions to use the server safely. Failure to follow
these instructions may result in death or serious personal injury. See pages 1-3
to 1-8 for details.
■
■
Do not use any rack which does not conform to the relevant standard.
Disconnect the power cord(s) before installing or removing the server.
CAUTION
Observe the following instructions to use the server safely. Failure to follow
these instructions may cause a fire, personal injury, or property damage. See
pages 1-3 to 1-8 for details.
■
■
■
■
■
Do not leave more than one device being pulled out from the rack.
Do not lift the server only by a single person.
Always install the server in the specified place.
Do not install the server on the rack leaving the cover removed.
Do not pinch your finger with mechanical components.
Setting Up Your Server
3-7
Restricted Access Location
The server is intended for installation in a Restricted Access Location, mounted above a noncombustible material.
ESD Precaution
An electrostatic discharge (ESD) can damage disk drives, option boards, and other components. You
can provide some ESD protection by wearing an antistatic wrist strap attached to chassis ground
when handling system components.
Electronic devices can be easily damaged by static electricity. To prevent damage, keep them in
their protective packaging when they are not installed in your system.
Checking Components
Confirm that the following tools or components are provided to install the server on the rack.
x6
M5 screw
x8
M5 core nut
Required Tools
You may only prepare a Phillips driver to install the server on the rack.
3-8 Setting Up Your Server
Installation Procedure for NEC Rack/Third Vendor's Rack
This server can be installed in either the NEC rack or a third vendor's rack. Take the following
procedure to install the server in the rack:
Removing the Rail Assemblies
Remove the sliding rails from the server.
Hold the rails and slowly slides them toward the rear of the server until a "click" is heard. The
click indicates that the rails are locked.
Push the release levers on the right and left sides of the server, and remove the rail assemblies from
the server while unlocking.
Only the inner rails remain screwed to the server when the rail assemblies have been removed.
Inner rails
IMPORTANT: The removed rail assemblies are to be installed on the
inner rails later. To install each rail assembly on the correct inner rail,
make a mark on the assemblies. Similarly, when installing more than
one server, distinguish between the pairs of inner rails and rail
assemblies of the servers by making marks.
Setting Up Your Server
3-9
Installing the Core Nuts
Install three core nuts on the front of the rack for each of the right and left sides and also two core
nuts on the rear of the rack for each of the right and left sides.
Install three core nuts in 1U (the minimum unit of rack height). Three slots (angle holes) are
opened per 1U of a rack. Install the core nuts at the three slots. (For any NEC rack, round marks
are put in the unit of 1U.) For one core nut installed on the front of the rack, the lower nut is used to
fix the front of the rail assembly, and the upper nut is used to support the set screw of the server.
The core nuts installed on the rear of the rack are used to fix the rear of the rail assemblies.
Hang either clip of a core nut on a square hole on the rack and insert another clip into the hole by
using a tool such as a flat tip screwdriver.
NOTE: Confirm that all the core nuts are installed at the level.
3-10 Setting Up Your Server
Installing the Rail Assemblies
Make sure of the right side rail assembly or the left one when installing it. See the figure below.
Front
Rear
Left side rail assembly
Right side rail assembly
1.
Loosen a screw securing the rail assembly.
Screws
2.
Align the front and rear frames of rail assembly to the location where the core nuts are
installed.
Locate the rail assembly so that the frame of the rack is located between core nuts and
frames of rail assembly.
NOTE: Confirm that the portion of the frame to fix the rail assembly is
located in front of the rack frame.
3.
Firmly secure the rail assembly (one screw for the front of a rail, two screws for the rear
of a rail).
Setting Up Your Server
3-11
Installing the Server
CAUTION
Observe the following instructions to use the server safely. Failure to follow
these instructions may cause a fire, personal injury, or property damage. See
pages 1-3 to 1-8 for details.
■
■
1.
Do not lift the server only by a single person.
Do not pinch your finger with mechanical components.
Pull out the sliding rails of the right and left rail assemblies until they are locked.
3-12 Setting Up Your Server
2.
At least two persons are required to install the server. Securely hold the server and
install it in the rack.
Firmly fit the inner rails on the sides of the server into the rail assemblies that are installed
on the rack, and then slowly push the server into the rack.
If the server is locked on its way into the rack, slowly push it in while pressing the release
levers on the right and left sides of the server.
When the server is installed for the first time, the mechanical parts are rather hard to slide.
You may feel strong friction when pushing in the server. In this case, strongly push it in.
Release lever
3.
Confirm that the sliding rails work normally by pulling the server out of the rack and
pushing it in several times.
NOTE: Confirm that the sliding rails work normally. If the sliding
rails are stuck to the rack frame and do not come out, reinstall them.
Setting Up Your Server
3-13
Securing the Server
Captive thumb screws
1.
Push the server into the rack as far as it will go.
2.
Tighten the right and left captive thumb screws on the front panel to secure the server to
the rack.
3.
Install the front bezel.
If you have an optional cable arm, attach the cable arm as shown in figure below to anchor the
server to the rack assembly.
This completes the installing of the server.
3-14 Setting Up Your Server
Removing the Server from the Rack Assembly
The server should be removed from the rack by at least two persons.
WARNING
Observe the following instructions to use the server safely. Failure to follow
these instructions may result in death or serious personal injury. See pages 13 to 1-8 for details.
■
■
■
■
■
1.
Do not lift the server only by a single person.
Do not pinch your finger with mechanical components.
Note high temperature.
Do not pull out a device from the rack if the rack is unstable.
Do not leave more than one device being pulled out from the rack.
Release the security lock to remove the front bezel.
Security lock
2.
Confirm that the power of the server is OFF, and disconnect the power cable and all the
interface cables connected to the server.
3.
<This step is required only when the optional cable arm is mounted.>
Remove the two screws securing the cable arm, and dismount the cable arm from the
server.
4.
Loosen the two captive thumb screws.
Setting Up Your Server
5.
3-15
Hold the handle and pull out the server from the rack slowly and carefully.
The server clicks to be latched.
Captive thumb screws
Handles
6.
Pull out the server from the rack with the right and left release lever pressed to release the
latch.
IMPORTANT:
Pull out the server slowly holding the bottom of the server by at
least two persons.
Do not apply any load on the server pulled out from the rack.
Doing so may cause personal injury if the server drops.
To remove some mechanical parts of the rack, see the installation procedure.
Release lever
3-16 Setting Up Your Server
CONNECTING PERIPHERAL DEVICES
Connect peripheral devices to the server. The server is provided with connectors for wide variety
of peripheral devices on its front and rear. The figure on the next page illustrates available
peripheral devices for the server in the standard configuration and locations of the connectors for the
devices.
CAUTION
Observe the following instructions to use the server safely. Failure to follow
these instructions may cause a fire, personal injury, or property damage. See
pages 1-3 to 1-8 for details.
■
■
Do not connect any interface cable with the power cord of the NEC Express
Server plugged to a power source.
Do not use any unauthorized interface cable.
IMPORTANT:
Power off the server and a peripheral device before connection.
Connecting a powered peripheral device to the powered server will
cause malfunctions and failures.
To connect a third-party peripheral device or interface cable to the
server, consult with your sales agent for availability of such a device
or cable. Some third-party devices may not be used for the server.
The total length of a cable (including the connection cable in SCSI
device) is limited by the SCSI standard. Ask your sales
representative for details. (The internal cable of the server is 0.1 m
long.)
A leased line cannot be connected directly to the serial port
connectors.
Secure the power cord(s) and interface cables with a tie wrap.
Form the cables in such a way that they will not come into contact
with the door or the guide rails on the sides of the server.
Setting Up Your Server
Device with the serial
interface
(e.g., Management PC)*2
USB device *1
FRONT
Hub
(multiport repeater)
100BASE-T/
1000BASE-TX/
10BASE-T
Device with the
serial interface*2
Device with the
SCSI interface
Finally connect the provided
power cord to the receptacle. *4
If connecting the server to UPS,
see the explanation below.
100BASE-T/
1000BASE-TX/
10BASE-T
1
2
REAR
*3
USB device *1
Keyboard
Mouse
Display unit
*1
*2
*3
*4
Any USB keyboard and mouse are not supported.
A leased line cannot be connected directly to this connector.
The console of a management PC can be connected to only serial port 2.
Use the provided branch cable.
Connect the power cord to a circuit breaker of 15 A or less.
(BIOS setup required.)
3-17
3-18 Setting Up Your Server
CONNECTING POWER CORD
Connect the provided power cord to the server.
WARNING
Observe the following instructions to use the server safely. Failure to follow
these instructions may result in death or serious personal injury. See pages 1-3
to 1-8 for details.
■
■
Do not hold the power plug with a wet hand.
Do not connect the ground wire to a gas pipe.
CAUTION
Observe the following instructions to use the server safely. Failure to follow
these instructions may cause a fire, personal injury, or property damage. See
pages 1-3 to 1-8 for details.
■
■
■
■
Do not plug the power cord in to an improper power source.
Do not connect the power cord to an outlet that has an illegal number of
connections.
Insert the power plug into the outlet as far as it goes.
Use the authorized power cord only.
1.
Plug the provided power cord into the power receptacle on the rear of the server.
2.
Plug the other end of the power cord into the wall outlet.
IMPORTANT:
Connect the power cord to a circuit breaker of 15A or less.
Secure the power cord with a tie wrap.
Setting Up Your Server
3-19
To connect the power cord from the server to an interruptive power supply (UPS), use service
outlets on the rear of the UPS.
The UPS service outlets are categorized into two groups: SWITCH OUT and UN-SWITCH OUT.
(They may be called "OUTPUT1" and "OUTPUT2".)
To control power supply with an application (NEC ESMPRO/UPSController) that controls the UPS,
connect the power cord to an SWITCH OUT outlet.
For constant power supply, connect the power cord to a UN-SWITCH OUT outlet. (Connect the
modem that is in service for 24 hours to this outlet.)
<Example>
2
OUTPUT
(UNSWITCHOUT)
OUTPUT(SWITCH OUT)
AC100V 50/50HZ
When the power cord from the server to a UPS, change the BIOS setup of the server to link with
power supply from the UPS.
To power on the server from the UPS (Uninterruptible Power Supply), select [Server] - [AC-LINK]
- [Power On].
Change a parameter for "AC-LINK" under the Server menu of the BIOS SETUP utility.
Chapter 4 for details.
See
3-20 Setting Up Your Server
TURNING ON THE SERVER
Turn on the server and follow the on-screen instructions for setup.
IMPORTANT: Before turning on the server:
Some optional boards require setups with the SETUP utility before
installation. If the server has a PCI board with the PCI-to-PCI
bridge installed, the SETUP utility is enabled to launch. Check on
the board specifications to find out whether it requires preinstallation setups before actually installing the board.
Some installed optional devices or connected peripheral devices
require setups before proceeding to the next step.
To use the server with no optional devices installed besides the graphic
board, install a desired OS to the server.
1.
Make sure all external devices, such as a video display, keyboard, and mouse (optional)
have been connected, and the power cords are connected.
2.
Power on the video display and any other external devices.
3.
Make sure that the floppy disk drive contains no floppy disk and the CD-ROM drive
contains no bootable CD-ROM.
4.
Open the front bezel.
5.
Press the POWER switch.
NOTES:
If the power cord is connected to the power control unit such as the
UPS, turn on the power control unit.
If an optional remote management card (RMC) is installed in your
server, connect the power cord and wait a few seconds before
pressing the POWER switch. The POWER switch does not work
in a few seconds after connecting the power cord due to RMC
firmware start-up.
Setting Up Your Server
3-21
POWER
lamp
POWER switch
The POWER lamp on the front of the server comes on.
In a few seconds, the NEC logo appears on the screen and the Power On Self-Test (POST)
begins.
The POST runs automatically when you power on the server or reset it with a keyboard
operation (Ctrl + Alt + Delete). The POST runs diagnostics, initializes the server, sets
interrupt vectors, detects installed peripheral devices, and boots the operating system (if
installed). See Chapter 2 for detailed description on POST.
If the server halts before completing the POST, the POST emits a beep code indicating a
fatal system error requiring immediate attention. (See Chapter 8, "Troubleshooting," for
troubleshooting information.)
During memory test, the POST displays the amount of memory it was able to access and
test. Depending on the amount of installed memory, it may take several minutes to
complete the memory test.
NOTE: The factory-set is defined to hide the POST screen with the
NEC logo screen. You can always change the NEC logo screen to the
POST screen by pressing Esc. To change the start-up screen, use the
BIOS setup utility, "SETUP." (See Chapter 4 for details.)
During the POST, you will see the banner message to prompt you to launch the BIOS SETUP utility
stored in ROM on system board or on an installed option board.
Start the BIOS SETUP utility appropriate to your system environment to change the BIOS setup.
For the BIOS SETUP for the server, see Chapter 4. For the BIOS SETUP for the option board,
refer to the manual that comes with the option board.
3-22 Setting Up Your Server
INSTALLING OPERATING SYSTEM
See Chapter 5 for installing the Microsoft Windows Server 2003 or Microsoft Windows 2000
operating systems.
To install the other operating system listed above, contact your sales agent.
IMPORTANT:
Use NEC EXPRESSBUILDER for initial setup of your server.
The NEC EXPRESSBUILDER is a support software for the NEC
Express5800 server. It simplifies the process of installing and
configuring your server. See Chapter 6 for details on NEC
EXPRESSBUILDER.
Before installing the operating system, adjust the system date and
time by using the BIOS setup utility "SETUP." See the next
chapter for detail.
INSTALLING UTILITIES
Install the utilities that come with the server. See Chapter 6 for details.
MAKING BACKUP COPIES OF SYSTEM INFORMATION
The system information includes the current BIOS settings and any specific information for the
server.
Save the information after completing the system setup.
Without the backup data, you will not be able to recover the information.
You can save the information by the following process.
1.
Set the NEC EXPRESSBUILDER CD-ROM in the CD-ROM drive and reboot the
system.
2.
Select [Tools].
3.
Select [Off-line Maintenance Utility].
4.
Select [System Information Management].
5.
Set a floppy disk in the floppy disk drive.
6.
Select [Save].
Chapter 4
Configuring Your Server
Configuration and setup utilities are used to change your system configuration. You can configure
your system, as well as option boards you may add to your system, using the BIOS Setup Utility.
Several unique system parameters are configured using the BIOS Setup, which is stored in the
system FLASH memory.
The Adaptec Configuration Utility detects the SCSI host adapters on the system board. Use this
utility if you need to configure the two SCSI controllers in your system, to configure the hard disk
drives connected to a SCSI controller as a RAID drive, or to perform a SCSI disk format or verify
disk operation on the SCSI disk drives. The Adaptec Configuration Utility is also used to configure
any SCSI removable media devices installed in your system.
If your system has been factory configured, the BIOS Setup or Adaptec Configuration Utility do not
need to be run unless you want to change the password or security features, add certain types of
option boards or devices, or upgrade your system board.
This chapter also provides information on several system configuration parameters that are set by
jumpers on the system board. However, these parameters do not usually require change.
SYSTEM BIOS (SETUP)
The SETUP utility is used to change system configuration parameters. This utility is pre-installed in
the flash memory of the server and ready to run.
The server is configured with the correct parameters using the SETUP utility and shipped in the best
conditions. Thus, you don't need to use the SETUP utility in most cases. However, you might
wish to use the SETUP utility in the cases described below.
IMPORTANT:
The SETUP utility is intended for system administrator use only.
The SETUP utility allows you to set a password. The server is
provided with two levels of password: Supervisor and User. With
the Supervisor password, you can view and change all system
parameters of the SETUP utility. With the User password, system
parameters available for viewing and changing are limited.
Do not set any password before installing the OS.
The server contains the latest version of the SETUP utility. Dialog
boxes appear on your SETUP utility, thus, may differ from
descriptions in this manual. If you find anything unclear, see the
online help or ask your sales agent.
Use the Exit menu when exiting the SETUP utility. Exiting the
utility with the POWER switch or reset operation causes the stored
parameters to lose.
4-2 Configuring Your Server
Starting SETUP Utility
Powering on the server starts POST (Power On Self-Test) and displays its check results. If the
NEC logo is displayed, press Esc.
After a few seconds, the following message appears at bottom left on the screen.
Press <F2> to enter SETUP
Press F2 to start the SETUP utility and display its Main menu.
If you have previously set a password with the SETUP utility, the password entry screen appears.
Enter the password.
Enter password:[
]
Up to three password entries will be accepted. If you fail to enter the password correctly for three
consecutive times, the server halts. (You can no longer proceed.) Power off the server.
NOTE: The server is provided with two levels of password:
Administrator and User. With the Administrator password, you can
view and change all system parameters. With the User password,
system parameters available for viewing and changing are limited.
Configuring Your Server
4-3
Description on On-Screen Items and Key Usage
Use the following keyboard keys to work with the SETUP utility. (Key functions are also listed at
the bottom of the screen.)
Indicates the current menu.
Indicates there
are submenus.
Online help
window
Setup item
menu*
Explanation of key
functions menu
Parameter (high-lights upon selection) menu
* The menus displayed in gray indicates the information only or unchangeable secured by BIOS
password.
Cursor (↑, ↓):
Selects an item on the screen. The highlighted item is currently
selected.
Cursor (←, →):
Selects the Main, Advanced, Security, Server, Boot, or Exit menu.
– and +:
Changes the value (parameter) of the selected item. When a
submenu option (an option preceded by "³") is selected, these
keys are disabled.
Enter
Press Enter to select (determine) parameters.
Esc
Exit SETUp and return to the previous screen.
F9:
Sets the parameter of the currently displayed item back to the
factory set parameter.
F10:
Save and exit the SETUP utility.
4-4 Configuring Your Server
Menu and Parameter Descriptions
The SETUP utility has the following six major menus:
Main
Advanced
Security
Server
Boot
Exit
To set minute functions, select a submenu from the above menus. The following describes
available functions and parameters, as well as the factory-set, for each menu.
Configuring Your Server
4-5
Main
Option
System Time
System Date
Legacy Floppy A
Legacy Floppy B
Hard Disk Pre-Delay
Primary IDE Master/
Primary IDE Slave
Secondary IDE Master
Secondary IDE Slave
Serial ATA Channel 0
Master
Serial ATA Channel 1
Master
Processor Settings
Language
Parameter
HH:MM:SS
MM/DD/YYYY
Disabled
360Kb 51/4
1.2MB 51/4
720Kb 31/2
[1.44/1.25MB 31/2]
2.88MB 31/2
[Disabled]
360Kb 51/4
1.2MB 51/4
720Kb 31/2
1.44/1.25MB 31/2
2.88MB 31/2
[Disabled]
3 seconds
6 seconds
9 seconds
12 seconds
15 seconds
21 seconds
30 seconds
Select submenu
Description
Set the system time.
Set the system date.
Set the settings of floppy disk
drive A (standard configuration).
Select submenu
Shows the processor settings
submenu.
Select which language BIOS
displays.
[English (US)]
Italiano
Español
Français
Deutsch
Your Setting
Set the settings of floppy disk
drive B. No second floppy disk
drive is included in this system.
Allows slower spin-up drives to
come ready.
Set the information on the device
connected to each channel on
the submenu. The settings of
some items may be changed.
However, leave the items as they
are at the shipment.
[
]: Factory-set
4-6 Configuring Your Server
Primary IDE Master/Primary IDE Slave/Secondary IDE Master/Secondary IDE
Slave/Serial ATA Channel 0 Master/ Serial ATA Channel 1 Master
Correspondence between the menu items and devices:
Primary IDE Master:
ATA hard disk drive 1 (option)
Primary IDE Slave:
ATA hard disk drive 2 (option)
Secondary IDE Master:
CD-ROM drive (standard)
Secondary IDE Slave:
None
Serial ATA Channel 0 Master:
Serial ATA hard disk drive 1 (option)
Serial ATA Channel 1 Master:
Serial ATA hard disk drive 2 (option)
Option
Type
Parameter
Description
None
Selects the type of device attached to
User
the IDE or serial ATA channel. It is
[Auto]
strongly recommended to keep the
CD-ROM
factory setting [Auto].
The following options do not appear when None or Auto are selected for Type.
Specifies the number of sectors that
Multi-Sector
Disabled
are transferred per block during
Transfers
2 Sectors
multiple sector transfers.
4 Sectors
8 Sectors
16 Sectors
LBA Mode Control Enabled
Enable/disable LBA instead of
cylinder, head, sector, addressing.
Disabled
Select the method for moving data
Transfer Mode
Standard
to/from the drive.
Fast PIO 1
Fast PIO 2
Fast PIO 3
Fast PIO 4
FPIO 3/DMA1
FPIO 4/DMA2
Ultra DMA
Disabled
Select the Ultra DMA mode used for
moving data to/from the drive.
Mode 0
Mode 1
Mode 2
Mode 3
Mode 4
Mode 5
Your Setting
[
]: Factory-set
Configuring Your Server
4-7
Processor Settings
Option
Processor Retest
Parameter
[No]
Yes
Processor Speed
nnn GHz
Processor 1 CPUID
Numeral
Disabled
Processor 1 L2 Cache
nnn KB
Processor 2 CPUID
Numeral
Disabled
Processor 2 L2 Cache
nnn KB
Hyper-Threading
Technology
[Enabled]
Disabled
Description
If yes, BIOS will clear historical
processor status and retest the
processor on the next boot.
Displays clock speed for the
processor. (View only)
Displays CPU ID for processor, if
present.
"Disabled" indicates that the
processor is defected. (View only)
Displays L2 cache size for
processor.
Displays CPU ID for processor, if
present.
"Disabled" indicates that the
processor is defected. (View only)
Displays L2 cache size for
processor.
Disable or enable the HyperThreading Technology.
Your Setting
[
]: Factory-set
Advanced
Option
Memory Configuration
Parameter
–
PCI Configuration
–
Peripheral Configuration
–
Advanced Chipset Control
–
Boot-time Diagnostic
Screen
[Enabled]
Disabled
Reset Configuration Data
[No]
Yes
NumLock
[Auto]
On
Off
[Boot]
Halt
[Disabled]
Enabled
Memory/Processor Error
SATA RAID Enable
Description
Displays Memory Configuration
submenu.
Displays PCI Configuration
submenu.
Displays Peripheral Configuration
submenu.
Displays Advanced Chipset Control
submenu.
If enabled, the BIOS will display the
NEC logo during POST. Press Esc
to switch to the POST execution
screen.
Select "Yes" if you want to clear the
system configuration data during the
next boot. Automatically reset to
"No" in the next boot.
Sets power on Numlock state.
Your Setting
If "Halt" is selected, the boot is
stopped when POST error occurs.
If enabled, the BIOS uses the hard
disk drives connected to the onboard
SATA connectors as the RAID drive.
[
]: Factory-set
4-8 Configuring Your Server
Memory Configuration
Option
System Memory
Parameter
nnn KB
Extended Memory
nnnnnnn KB
DIMM Group
#1 - #3
Normal
Disabled
Not installed
Memory Retest
Extended RAM
Step
Yes
[No]
1MB
1KB
Every location
[Disabled]
Online Spare
Memory
[Disabled]
Enabled
Description
Indicates the total capacity of the basic
memory. (View only)
Indicates the total capacity of the
extended memory. (View only)
Indicates the current memory status.
"Normal" indicates the normal status,
"Disabled" indicates a memory error, and
"Not installed" indicates no DIMM installed
(view only).
Bank #1 indicates DIMMs in DIMM
sockets #1 and #2.
Bank #2 indicates DIMMs in DIMM
sockets #3 and #4.
Bank #3 indicates DIMMs in DIMM
sockets #5 and #6.
(Memory is interleaved and two DIMMs
are used in pair.)
Causes BIOS to retest all memory on the
next boot.
"1MB" indicates that the memory test is
done in the unit of 1MB. "1KB" indicates
that the memory test is done in the unit of
1KB. "Every location" tests every memory
location. "Disabled" indicates that only
memory initialization is done.
Disables or enables online spare memory
feature. See "DIMM" in Chapter 8 for
details.
Your Setting
[
]: Factory-set
Configuring Your Server
4-9
PCI Configuration
– Embedded SCSI submenu
Option
SCSI Controller
Option ROM Scan
Parameter
[Enabled]
Disabled
[Enabled]
Disabled
Description
Enables or disables the onboard SCSI
controllers.
If Enabled, initialize device expansion ROM.
Your Setting
[
]: Factory-set
– Embedded NIC (Dual Gbit) submenu
Option
LAN Controller
Parameter
Disabled
[Enabled]
Option ROM Scan
[Enabled]
Disabled
Description
If Disabled, the BIOS will hold the
embedded chip in reset. In this
configuration, the controller hardware is
completely disabled, and will be invisible to
the PnP operating systems.
If Enabled, initialize device expansion ROM.
Your Setting
[
]: Factory-set
– Embedded Video Controller submenu
Option
Onboard VGA
Control
Parameter
Disabled
[Enabled]
Description
If Disabled, the BIOS will hold the
embedded chip in reset. In this
configuration, the controller hardware is
completely disabled, and will be invisible to
the PnP operating systems.
Your Setting
[
Option
PCI Slot 1B
Option ROM
Parameter
Disabled
[Enabled]
PCI Slot 1C
Option ROM
Disabled
[Enabled]
Description
Used to enable or disable an option ROM
on a PCI board connected to the full-height
riser card.
Used to enable or disable an option ROM
on a PCI board connected to the low-profile
riser card.
]: Factory-set
Your Setting
[
]: Factory-set
4-10 Configuring Your Server
Peripheral Configuration
IMPORTANT: Note that the interrupt and/or base I/O address are not
overlapped with others. If the value set for the interrupt or base I/O
address is used in another resource, the yellow asterisk (*) appears.
Reset any item with the yellow asterisk properly.
Option
Serial Port A
Base I/O address
Interrupt
Serial Port B
Base I/O address
Interrupt
PS/2 Mouse
USB Host Controller
Parameter
Disabled
[Enabled]
Auto
[3F8]
2F8
3E8
2E8
IRQ 3
[IRQ 4]
Disabled
[Enabled]
Auto
3F8
[2F8]
3E8
2E8
[IRQ 3]
IRQ 4
Disabled
[Enabled]
Auto Detect
Disabled
[Enabled]
Legacy USB
Support
Disabled
[Enabled]
Parallel ATA
Disabled
Channel 0
Channel 1
[Both]
Disabled
[Enabled]
Serial ATA
Description
Selects whether serial port A is
enabled or disabled.
Your Setting
Selects the base I/O address for serial
port A.
Selects the interrupt for a serial port A.
Selects whether serial port B is
enabled or disabled (display only).
Selects the base I/O address for serial
port A.
Selects the interrupt for a serial port A.
If disabled, PS/2 mouse port will not
function.
If disabled, the USB ports do not
accept the USB device class 3 (HID:
Human Interface Device).
Selects whether the USB keyboard is
made available in OS which does not
support USB formally.
Selects parallel ATA is enabled or
disabled.
Selects whether the serial ATA is
enabled or disabled.
[
]: Factory-set
Configuring Your Server
4-11
Advanced Chipset Control
Option
Enable Multimedia
Timer
Wake On
LAN/PME
Parameter
[No]
Yes
Disabled
[Enabled]
Wake On Ring
[Disabled]
Enabled
Wake On RTC
Alarm
[Disabled]
Enabled
Description
Specify whether the system supports
the multimedia timer feature.
Specify whether the remote power-on
function through embedded NIC, PCI
devices in slots 1 to 5 is enabled or
disabled.
Specify whether the remote power-on
function through a serial port is
enabled or disabled.
Specify whether the remote power-on
function by using RTC alarm feature is
enabled or disabled.
Your Setting
[
]: Factory-set
4-12 Configuring Your Server
Security
The Security menu appears if you move the cursor to the position of "Security."
Press Enter on "Set Supervisor Password" or "Set User Password," to display the following screen.
Enter the passwords on the dialog box. Passwords may have up to eight characters including
alphanumerics and symbols.
IMPORTANT:
User password can be set only when Administrator password is
already set.
Set the passwords only after OS is installed.
See the table below for the items.
Option
User Password Is
Parameter
Clear
Set
Supervisor
Password Is
Clear
Set
Set User
Password
Up to eight
alphanumerics
Description
Status only, user cannot modify.
Once set, this can be disabled by
setting it to a null string, or by clearing
password jumper on system board
(see Configuring Mother Board
Jumpers in this Chapter).
Status only, user cannot modify.
Once set, this can be disabled by
setting it to a null string, or by clearing
password jumper on system board
(see Configuring Mother Board
Jumpers in this Chapter).
Supervisor password controls access
to the setup utility.
When Enter is pressed, the user is
prompted for a password; press Esc
to abort. Once set, this can be
disabled by setting it to a null string, or
by clearing password jumper on
system board (refer to Configuring
Mother Board Jumpers in this
chapter).
Your Setting
Configuring Your Server
Option
Set Supervisor
Password
Parameter
Up to eight
alphanumerics
Password on boot
[Disabled]
Enabled
[Normal]
Write Protect
Fixed disk boot
sector
Secure Mode
Timer
Security Hot Key
CTRL-ALT-
[Disabled]
1 min
2 min
5 min
10 min
20 min
1 hr.
2 hr.
[L]
Z
Description
When the <Enter> key is pressed, the
user is prompted for a password;
press ESC key to abort. Once set, this
can be disabled by setting it to a null
string, or by clearing password jumper
on system board (refer to Configuring
Mother Board Jumpers in this
chapter).
Disables or enables password entry
on boot.
Will write protect the boot sector of the
hard drive to prevent viruses from
corrupting the drive under DOS if set
to write protect.
Set the period from no input from the
keyboard or mouse to the point at
which the system enters into the
secure mode.
4-13
Your Setting
Specify the hot key to invoke secure
mode features. Pressing the assigned
key along with Ctrl and Alt invoke
secure mode. This option is enabled
when User Password is set.
Specify whether the system boots in
secure mode. This option is enabled
when User Password is set.
Secure Mode Boot
[Disabled]
Enabled
Video Blanking
[Disabled]
Enabled
Specify whether to turn off the
monitor when secure mode is
activated.
Floppy Write
Protect
Power Switch
Inhibit
[Disabled]
Enabled
[Disabled]
Enabled
Controls access to the floppy disk
drive during the secure mode.
Enables or disables the POWER
switch. If "Enabled" is selected,
power-off with the POWER switch
becomes unavailable after OS bootup. (Forced shut down also becomes
unavailable. Forced shut down is a
feature to shut down by pressing the
POWER switch for at least four
seconds.)
[
]: Factory-set
4-14 Configuring Your Server
Server
Option
System
Management
Console
Redirection
Assert NMI on
PERR
Assert NMI on
SERR
Post Error Pause
Parameter
–
AC LINK
Stay Off
[Last State]
Power On
–
Disabled
[Enabled]
Disabled
[Enabled]
Disabled
[Enabled]
Description
System Management submenu is
displayed.
Console Redirection submenu is
displayed.
Indicates whether PCI PERR is
supported or not.
Indicates whether PCI SERR is
supported or not.
Indicates whether POST is aborted once
at the end of POST if an error occurs
during the execution of POST.
Indicates the AC LINK function. Shows
the state of the power of the server.
Your Setting
[
]: Factory-set
IMPORTANT: To power on the server from the UPS (Uninterruptible
Power Supply), select [Server] - [AC LINK] - [Power On].
The table below shows the operation when the AC power to the server is turn off once and then on
again, depending on the setting of "AC LINK."
System status before AC power off
Operating
Aborting (DC power being off also)
Forced shutdown
Setting of AC LINK
Stay Off
Last State
Off
On
Off
Off
Off
Off
* Press the power switch continuously for four seconds or longer.
power.
Power On
On
On
On
This forcibly turns off the
Configuring Your Server
4-15
System Management Submenu
Option
BIOS Version
Parameter
–
IPMI Specification
Version *
BMC Device ID *
BMC Device
Version *
BMC Firmware
Version *
PIA Version *
–
–
SDR Revision *
–
–
–
–
Description
Displays the current BIOS version.
(View only)
Displays IPMI specification version.
(View only)
Displays BMC device ID. (View only)
Displays BMC device version. (View
only)
Displays BMC firmware version. (View
only)
Displays version of the platform
information area. (View only)
Displays revision of the sensor data
record.
Your Setting
[
]: Factory-set
* Displayed only when an optional remote management card is installed in your system.
Console Redirection Submenu
Option
BIOS Redirection
Port
ACPI Redirection
Port
Baud Rate
Flow Control
Console Type
Parameter
[Disabled]
Serial Port A
Serial Port B
[Disabled]
Serial Port A
Serial Port B
9600
[19.2K]
38.4K
57.6K
115.2K
None
Xon/Xoff
[CTS/RTS]
CTS/RTS+CD
[PC ANSI]
VT100+
VT-UTF8
Description
Specify the address/interrupt of the
serial port to which a remote console
is connected.
Your Setting
Specify the serial port to which an
ACPI console is connected.
Specify the baud rate used for the
interface with successive remote
consoles.
Specify the flow control method.
Specify the type of remote console.
[
]: Factory-set
4-16 Configuring Your Server
Boot
If you move the cursor to the position of "Boot," the Boot menu appears, which is used to set the
boot priority.
The factory-default boot order is listed below.
1. CD-ROM drive
2. Removable Devices
3. Hard Drive
4. IBA GE Slot 0200 v1216
5. IBA GE Slot 0219 v1216
The server searches for devices in the order set in this menu on booting.
the server starts the software.
Finding the boot software,
The priority of the boot devices can be changed by using the ↑, ↓, +, and - keys. Move the cursor
to the desired device with the ↑ or ↓ key and change the priority with the + or - key.
IMPORTANT: To boot NEC EXPRESSBUILDER, set the priority of
the devices as shown in the figure above.
Exit
The options on the menu are described below.
Exit Saving Changes
Exit after writing all modified BIOS Setup item values to CMOS.
Exit Discarding Changes
Exit leaving CMOS unmodified. User is prompted if any of the setup fields ware modified.
Load Setup Defaults
Load default values for all BIOS Setup items.
IMPORTANT: This option sets [SATA RAID Enabled] in the
[Advanced] menu to [Disable]. If the SATA hard disk drives are
installed in your server and the onboard SATA RAID feature is used,
change the parameter of the [SATA RAID Enabled] from [Disable] to
[Enable] before exiting BIOS Setup.
Discard Changes
Read the previous values of the all BIOS Setup items from CMOS.
Save Changes
Write all BIOS Setup item values to CMOS.
Configuring Your Server
4-17
CONFIGURING MOTHER BOARD JUMPERS
With the pre-installed SETUP utility, you can set desired passwords to protect the data stored in the
server against access from unauthorized users. When you forget the passwords, however, you may
want clear them. The following describes how to clear these passwords. You can also use the
following procedure to clear the CMOS data in the server.
IMPORTANT:
Clearing the CMOS data resumes the factory-set configuration data.
After clearing CMOS, you must run the BIOS SETUP utility and
execute the following menus to reconfigure your mother board.
– Load Setup Defaults in the Exit menu
– Memory Retest of Memory Configuration in the Advanced menu
– Processor Retest of Processor Settings in the Main menu
– SATA RAID Enable in the Advanced menu (if your internal SATA
hard disk drives are configured with the SATA HostRAID feature)
To clear passwords or the CMOS data, use the jumper switch on the mother board of the server.
The following figure illustrates the jumper switch location.
IMPORTANT: Do not change any other switch settings. Any
change may cause the server to fail or malfunction.
: Strapped
JBAT1
1 2 3
Protect
Clear
Pin for protecting/
clearing the CMOS contents
J7
Protect
Clear
Pin for protecting/
clearing the password
4-18 Configuring Your Server
The following describe the clearing procedure.
WARNING
Observe the following instructions to use the server safely. Failure to follow
these instructions may result in death or serious personal injury. See pages 13 to 1-8 for details.
■
■
■
Do not disassemble, repair, or alter the server.
Do not remove the lithium battery.
Do not connect the ground line to a gas pipe.
CAUTION
Observe the following instructions to use the server safely. Failure to follow
these instructions may result in death or serious personal injury. See pages 13 to 1-8 for details.
■
■
■
■
■
■
■
Never attempt to lift the server only by yourself.
Make sure to complete board installation.
Do not install the server on a rack with leaving covers removed.
Do not pinch your finger with mechanical components.
Note high temperature.
Do not pull out a device from the rack if the rack is unstable.
Do not leave more than one device being pulled out from the rack.
1.
See the section "Preparing for Installation and Removal" as described in Chapter 9 of this
guide to prepare.
2.
Remove the logic cover.
3.
Locate the position of the jumpers on the mother board you are changing.
4.
For clearing the BIOS password, remove the jumper strap on the BIOS password clear
jumper. For Clearing the CMOS, move the jumper strap to the CMOS clear position.
Refer to the previous illustration to find the location of the jumper.
5.
Wait for a while (about 5 seconds), and then reinstall the jumper block to the default
position.
6.
Reinstall the server removed in Step 2.
7.
Plug the power cord to your server and turn on the server.
8.
Press F2 at the prompt to run the BIOS SETUP utility, and select "Load Setup Defaults"
at the Exit menu.
IMPORTANT: If the onboard SATA RAID feature is used in the
SATA hard disk drive model, change the parameter of the "SATA RAID
Enable" in the Advanced menu from [Disable] to [Enable].
Configuring Your Server
4-19
SCSI BIOS (SCSISelect)
The SCSISelect utility is provided to configure the SCSI controller on the mother board (or the
SCSI controller on an optional board). This utility may be started with a simple key operation
while POST is in progress and requires no specific start-up disk.
Using SCSISelect Utility
Use the SCSISelect utility mainly to set the transfer speed of connected SCSI devices or to
configure the internal hard disk drives connected to the onboard SCSI controller as a RAID drive
(HostRAID). The SCSI devices include those installed in the backup file bay, such as an external
DAT and MO, but not hard disks.
IMPORTANT: SCSI configuration must be made on a per-SCSI
controller basis with a utility. The server contains one SCSI controller.
When you added optional SCSI controllers, you need to make
configuration for each SCSI controller in addition to the standard
internal SCSI controller. Some additional SCSI controllers may
require a different utility to make changes to the configuration.
Configuring SCSI Controller on Mother Board
The following describes configuration for the SCSI controller on the mother board of the server.
4-20 Configuring Your Server
Running the Utility
To run the utility, perform the following procedures:
1.
Power on the server.
The following message appears while POST is in progress.
IMPORTANT: The message appears for each additional SCSI
controller.
Adaptec SCSI BIOS Vxxx xxxxx
(c) 2000 Adaptec, Inc. All Rights Reserved
Press <Ctrl> <A> for SCSISelect(TM) Utility! 2.
Press and hold Ctrl and A.
The SCSISelect utility starts and its Main menu appears.
3.
Select the channel and press Enter.
AIC-7902 A at Slot 23 02:03:00
AIC-7902 B at Slot 23 02:03:01
NOTE: "AIC-7902A" is for backup file devices. "AIC-7902B" is for
internal SCSI hard disk drives.
The Options menu appears.
4.
Select option in the Option menu and press Enter.
If you wish to configure the adapter or a device, select "Configure/View SCSI Controller
Settings".
If you wish to format a disk, verify disk media, or display a list of devices and their SCSI
IDs, select "SCSI Disk Utilities".
Configuring Your Server
4-21
Exiting the Utility
To exit the utility, press Esc until a message prompts you to exit (if you changed any setting, you
are prompted to save the changes before you exit).
Configure/View SCSI Controller Settings
The Configure/View Host Adapter Settings has the following menu items and parameters.
descriptions to select a correct parameter for each menu item.
Read
SCSI Bus Interface Definitions
To set three menu items under "SCSI Bus Interface Definitions", select a menu item with the cursor
keys (↓ or ↑) and press Enter to fix the item. Use the cursor keys (↓ or ↑) for parameter selection.
The following table lists menu items, available parameters, and descriptions.
Menu item
SCSI Controller ID
SCSI Controller Parity
SCSI Controller
Termination
Parameter
0 - [7] - 15
[Enabled]
Disabled
[Enabled]
Disabled
Description
Select "7".
Select "Enabled".
Enable or disable the SCSI termination.
Select "Enabled".
[
]: Factory-set
Additional Options
To set three menu items under "Additional Options", select a menu item with the cursor keys (↓ or
↑) and press Enter to display its submenu. Then, select a submenu item with the cursor keys (↓ or
↑) and press Enter to fix the item. Use the cursor keys (↓ or ↑) for parameter selection.
Boot Device Configuration
Move the cursor onto "Boot Device Configuration" and press Enter to display the
submenu. The Boot Device Configuration submenu allows you to select the device
connected to the channel A or B as a boot device. Always select "AIC-7902 A".
4-22 Configuring Your Server
SCSI Device Configuration
Move the cursor onto "SCSI Device Configuration" and press Enter to display the
submenu.
The following table lists submenu items, available parameters, and descriptions.
IMPORTANT: Select a parameter for each submenu item on a perSCSI ID basis. Verify the SCSI ID of a desired device before
configuration.
NOTE: To find out the SCSI ID for the optional device connected,
select "SCSI Disk Utilities" on the Options menu and press Enter.
See "SCSI Disk Utilities" for detail.
Submenu item
Sync Transfer Rate
(MB/Sec)
Packetized
Parameter
[320]
33.3
160
20.0
80.0
10.4
66.6
ASYN
40.0
[Yes]
No
QAS
[Yes]
No
Initiate Wide
Negotiation
Enable Disconnection
[Yes]
No
[Yes]
No
[Yes]
No
Yes
[No]
[Yes]
No
Send Start Unit
Command
BIOS Multiple LUN
Support
Include in BIOS Scan
Description
Select "320".
You may need to change the value
depending on your optional device.
Refer to the manual that comes with your
optional device for details.
Optimizes bus utilization and minimizes
command overhead to bolster performance
by transferring commands, data, and status
using Deal Transition (DT) data phases.
Quick Arbitration and Selection (QAS)
reduces the overhead of control release on
the SCSI bus from one device to another to
help decrease command overhead and
increase bus utilization.
Select "Yes" if your SCSI device supports the
Wide SCSI interface. Select "No" if not.
Select "Yes".
Select "Yes" to send the command to the
hard disk. Otherwise select "No".
Select "No".
Select "Yes".
[
]: Factory-set
Configuring Your Server
4-23
Advanced Configuration
Move the cursor onto "Advanced Configuration" and press Enter to display the submenu.
The following table lists submenu items, available parameter, and descriptions.
Submenu item
Reset SCSI Bus at
IC Initialization
Display <Ctrl><A>
Message During
BIOS Initialization
Extended Int 13
Translation for DOS
Drives > 1 GByte
POST Display Mode
SCSI Controller Int
13 Support
Domain Validation
Support Removable
Disks Under Int 13
as Fixed Disks
BIOS Support for
Bootable CD-ROM
Parameter
[Enabled]
Disabled
[Enabled]
Disabled
Description
Select "Enabled".
[Enabled]
Disabled
Select "Enabled".
[Verbose]
Silent
Diagnostic
[Enabled]
Disabled:
NOT Scan
Disabled:
scan bus
Select "Verbose".
[Enabled]
Disabled
Boot Only
All Disks
[Disabled]
[Enabled]
Disabled
Select "Enabled".
Enable or disable SCSI BIOS.
Select "Enabled" for most cases other than the
following:
• To boot the OS from a hard disk connected to
any other controller than SCSI controller. (If
the controller has no hard disks connected,
there is no problem.)
• BIOS of the SCSI controller may be disabled to
reserve an area in the expansion ROM space
if the controller has no hard disks connected.
Select "Enabled".
AIC-79xx BIOS automatically controls the
removable disks.
Select "Enabled".
[
]: Factory-set
HostRAID
Move the cursor onto "HostRAID" and press Enter to choose the HostRAID option.
Submenu item
HostRAID
Parameter
Enabled
[Disabled]
Description
Select "Disabled" if the onboard HostRAID
controller is not used.
[
]: Factory-set
NOTE: For detail explanation on the HostRAID feature, see
SCSISelect Utility User's Manual and Adaptec Storage ManagerTM Browser Edition User's Guide. You may view or print the SCSISelect
Utility User's Manual and Adaptec Storage ManagerTM - Browser
Edition User's Guide from the NEC EXPRESSBUILDER CD-ROM.
4-24 Configuring Your Server
SCSI Disk Utilities
This utility scans the SCSI bus for SCSI devices, reports a description of each device. Run these
utilities before configuring SCSI devices.
To enter the utility, select "SCSI Disk Utilities" on the Options menu.
The SCSI ID scan begins displaying the message as shown below.
AIC-7901 at Slot 00. 23 03:03:00
Scanning SCSI ID:14: Lun Number
When the SCSI ID scan completes, the screen listing SCSI IDs and associated devices appears.
Find out the SCSI ID for the installed optional on this screen. You can also view the device
information by selecting a device and pressing Enter.
The following sub menu appears.
SCSI ID#4 : xxxxxxxxx
Firmware : xxxx xxx
Capacity : xxGB
Format Verify Disk Media
The following table lists submenu items and descriptions.
Submenu item
Format
Verify Disk Media
Description
Formats the selected device in the raw level.
Verifies all the sectors in the selected device. If one or
more bad sectors are found, reassigns the sectors.
Configuring Your Server
4-25
Configuring SCSI Controller on Optional Board
To configure SCSI devices connected to an optional SCSI controller board, use the SCSI BIOS
utility provided with the optional SCSI controller board.
Refer to the manual that comes with the optional SCSI controller board for details.
When the server has multiple SCSI controller boards installed, the server first displays the start-up
message of the SCSISelect utility for the SCSI controller on the mother board. It then displays the
utility start-up message for additional SCSI controllers one by one. The start-up message appears
for the SCSI controller board in the PCI #6 slot first, the PCI #5, #4, #3, onboard SCSI, #2, and
finally #1. The message displayed may vary depending on the optional SCSI controller board.
Refer to the manual that comes with the optional SCSI controller board for details.
4-26 Configuring Your Server
RAID BIOS
The RAID (Redundant Array of Inexpensive Devices) option available for your system is N810380F/81F/86F RAID controller boards which give your system the added security of fault tolerance.
If you want to change the RAID level or add additional hard disks to the array, use the RAID
configuration utility. The RAID configuration utility is included with a RAID controller.
If you are adding the RAID controller to an existing system, the RAID configuration utility allows
you to configure your disk array before reinstalling your network operating system. The RAID
controllers support various versions of RAID technology (referred to as RAID levels). To use any
RAID level, you must configure the RAID controller using the RAID configuration utility prior to
installing your Network Operating System. For an explanation of this utility, refer to the
documentation that comes with the RAID controller. It describes RAID technology and provides
tips on making your array perform well in your specific application. It also covers array hardware
preparation, configuration, and initialization. After completing the steps in the manual, you can
install your Network Operating System.
If you want to remotely configure the array (from a PC client); increase array capacity online; or
monitor statistics on disk and controller activity, you must install the array manager provided with
your RAID subsystem. Increasing array capacity is covered in the documentation shipped with the
option.
Configuring Your Server
4-27
SATA RAID CONFIGURATION UTILITY
SATA fixed HDD model includes the serial ATA RAID controller by supporting the RAID levels 0
and 1. The Array Configuration Utility (ACU) that is an embedded BIOS utility is used to create,
configure, and manage arrays.
NOTES:
You can also configure the SATA RAID drive by using NEC
EXPRESSBUILDER. Refer to Chapter 6 for detail.
To configure the RAID drive with the SCSI or IDE hard disk drives,
purchase the optional RAID controller board and hard disk drives.
Installing the Hard Disk Drives
Install the two serial ATA hard disk drives to your server. Refer to Chapter 9 for detail.
IMPORTANT: Use hard disks of the same capacity and revolution.
Activating the SATA RAID Feature
To run the Array Configuration Utility (ACU), run the BIOS setup utility and change the "SATA
RAID Enable" option in the "Advanced" menu to "Enable". Refer to "System BIOS (BIOS SETUP
Utility)" described earlier in this chapter for detail.
4-28 Configuring Your Server
Running the Array Configuration Utility (ACU)
To run ARC, press Ctrl+A when prompted by the following message during the system startup:
Press <Ctrl><A> for Adaptec RAID Configuration Utility
The ARC menu appears, presenting these options:
Array Configuration Utility (ACU)
Disk utilities
To select an option from this menu, browse with the arrow keys and then press Enter. In some
cases, selecting an option displays another menu. To return to the previous menu at any time, press
Esc.
Configuring Your Server
4-29
Using the Array Configuration Utility
The Array Configuration Utility (ACU) enables you to create, manage, and delete arrays from the
controller’s BIOS, and initialize drives.
Managing Arrays
Use the Manage Arrays option to view array properties and members, and delete arrays. The
following sections describe these operations in greater detail.
Viewing Array Properties
To view the properties of an existing array:
1.
At the BIOS prompt, press Ctrl + A.
2.
From the ACU menu, Array Configuration Utility.
3.
From the main menu, select Manage Arrays.
4.
From the List of Arrays dialog box, select the array you want to view and press Enter.
The Array Properties dialog box appears, showing detailed information on the array. The
physical disks associated with the array are displayed here.
5.
Press Esc to return to the previous menu.
4-30 Configuring Your Server
Deleting Arrays
IMPORTANT: Back up the data on an array before you delete it.
Otherwise, all data on the array is lost. Deleted arrays cannot be
restored.
To delete an existing array:
1.
Turn on your server and press Ctrl + A when prompted to access the ACU.
2.
From the ACU menu, Array Configuration Utility.
3.
From the main menu, select Manage Arrays.
4.
Select the array you wish to delete and press Delete.
5.
In the Array Properties dialog box, select Delete and press Enter.
The following prompt is displayed:
Warning!! Deleting the array will render array unusable. Do you want to delete
the array?(Yes/No):
RAID 1 only—the following prompt is also displayed:
Deleting the partition will result in data loss! Do you also want to delete the
partition? (Yes/No):
6.
Press Y to delete the array or partition or N to return to the previous menu.
7.
Press Esc to return to the previous menu.
Configuring Your Server
4-31
Creating Arrays
Before creating arrays, make sure the disks for the array are connected and installed in your system.
Note that disks with no usable space, or disks that are uninitialized are shown in gray and cannot be
used. See Initializing Disk Drives described later.
To create an array:
1.
Turn on your server and press Ctrl + A when prompted to access the ACU.
2.
From the ACU menu, Array Configuration Utility.
3.
From the main menu, select Create Array.
4.
Select the disks for the new array and press Insert. To deselect any disk, highlight the
disk and press Delete.
5.
Press Enter when both disks for the new array are selected.
The Array Properties menu displays.
4-32 Configuring Your Server
Assigning Array Properties
NOTE: Once the array is created and its properties are assigned, you
cannot change the array properties using the ACU. Instead, use Adaptec
Storage Manager - Browser Edition. (See Chapter 6 for details.)
To assign properties to the new array:
1.
In the Array Properties menu, select an array type and press Enter. Note that only the
available array types, RAID0 and RAID1, are displayed. Each of these types requires two
drives.
2.
Type in an optional label for the array and press Enter.
Configuring Your Server
3.
4-33
For RAID0, select the desired stripe size. Available stripe sizes are 16, 32, and 64 KB
(default).
NOTE: NEC recommends that you do not change the default.
4.
Create RAID via allows you to select between the different creation methods for RAID0
and RAID1. The following table gives examples of when each is appropriate.
RAID level
RAID0
RAID0
Create via
No Init
Migrate*
RAID1
Build*
RAID
Clear
RAID1
Quick Init
When appropriate
Creating a RAID0 on new drives.
Creating a RAID0 from on new drive and one drive with
data you wish to preserve.
Any time you wish to create RAID1, but especially if you
have data on one drive that you wish to preserve.
Creating a RAID1 on new drives, or when you want to
ensure that the array contains no data after creation.
Fastest way to create a RAID1. Appropriate when using
new drives.
IMPORTANT: Do not interrupt the creation of a RAID 0 using the
Migrate option. If you do, there is no way to restart, and no way to
recover the data that was on the source drive.
4-34 Configuring Your Server
NOTES:
Before adding a new drive to an array, back up any data contained
on the new drive. Otherwise, all data will be lost.
If you stop the Build or Clear process on a RAID1 from ACU, you
can only restart it from Adaptec Storage Manager - Browser
Edition. (See Chapter 6 for details.)
A RAID1 created using the Quick Init option may return some data
miscompares if you later run a consistency check. This is normal
and is not a cause for concern.
The ACU allows you to use drives of different sizes in a RAID1.
During a build operation however, only the smaller drive can be
selected as the source or first drive.
When migrating from single volume to RAID0, migrating from a
larger drive to a smaller drive is allowed. However the destination
drive must be at least half the capacity of the source drive.
Adaptec does not recommend that you migrate or build an array on
Windows dynamic disks (volumes), as it will result in data loss.
5.
Select a source drive from the Select Source Drive list box and press Enter.
6.
When you are finished, press Done.
Configuring Your Server
4-35
Initializing Disk Drives
If an installed disk does not appear in the disk selection list for creating a new array or if it appears
grayed out, you may have to initialize it before you can use it as part of an array. Drives attached to
the controller must be initialized before they can be used in an array.
IMPORTANT: Initializing a disk overwrites the partition table on the
disk and makes any data on the disk inaccessible. If the drive is used in
an array, you may not be able to use the array again. Do not initialize a
disk that is part of a boot array. To determine which disks are associated
with a particular array, see Viewing Array Properties described earlier
in this section.
To initialize drives:
1.
Turn on your server and press Ctrl + A when prompted to access the ACU.
2.
From the ACU menu, Array Configuration Utility.
3.
Select Initialize Drives.
4.
Use the up and down arrow keys to highlight the disk you wish to initialize and press
Insert.
5.
Repeat Step 3 so that both drives to be initialized are selected.
6.
Press Enter.
7.
Read the warning message and ensure that you have selected the correct disk drives to
initialize. Type Y to continue.
4-36 Configuring Your Server
Using the Disk Utilities
The Disk Utilities enable you to format or verify the media of your Serial ATA hard disks.
To access the disk utilities:
1.
Turn on your server and press Ctrl + A when prompted to access the ACU.
2.
From the ACU menu, select Disk Utilities.
3.
Select the desired disk and press Enter.
Configuring Your Server
4-37
You are offered the following options:
Format Disk—Simulates a low-level format of the hard drive by writing zeros to the
entire disk. Serial ATA drives are low-level formatted at the factory and do not need to
be low-level formatted again.
IMPORTANT: Formatting destroys all data on the drive. Be sure to
back up your data before performing this operation.
Verify Disk Media—Scans the media of a disk drive for defects.
4-38 Configuring Your Server
(This page is intentionally left blank.)
Chapter 5
Installing the Operating System with Express
Setup
This section describes information on using Express Setup to install and configure the following
operating systems to the server.
Microsoft® Windows® Server 2003 Standard Edition / Microsoft® Windows® Server
2003 Enterprise Edition
Microsoft® Windows® 2000 Server / Microsoft® Windows® 2000 Advanced Server
To use the server with the other operating systems described in this section, contact your service
representative.
IMPORTANT: Before installing the operating system, adjust the
system date and time by using the BIOS setup utility "SETUP." See
Chapter 4 for detail.
This chapter also includes information on configuring the HostRAID™ drive used with the onboard
serial ATA interface. Refer to the end of this chapter for detail.
5-2 Installing the Operating System with Express Setup
About Express Setup
"Express Setup" contained in your NEC EXPRESSBUILDER CD-ROM is intended for initial setup
of the server. Its automatic installation mode guides the user easily through the process by
detailing specific hardware features and providing screen prompts for software selection and
configuration. The program loads the utilities and drivers, applies RAID settings, partitions the
disk, and installs the desired operating system.
IMPORTANT: Express Setup is intended for the initial setup of the
server system. Therefore, it clears the contents of the hard disk.
For Microsoft Windows Server 2003 and Windows 2000, Express Setup automatically configures
your server and installs the operating system. After a few tasks are completed, all that remains to
be done is to remove the NEC EXPRESSBUILDER CD-ROM and set the Windows CD-ROM,
input a product ID number, and acknowledge the license agreement.
For the other operating systems, Express Setup initializes the target disk(s), creates the maintenance
partition, and installs the various maintenance utilities from the NEC EXPRESSBUILDER CDROM to lead your server to ready-to-install for the desired operating system.
Installing the Operating System with Express Setup
5-3
Express Setup uses "Configuration Diskette". The Configuration Diskette is a floppy disk that
includes the configuration information for the server setup used in the automatic installation mode.
Express Setup will perform all the process of the setup using the information in the floppy disk.
During this procedure, you do not have to be in front of the Express server to confirm the state of
the setup. Also, using the same Configuration Diskette used before allows you to re-setup your
server with the same condition as before.
Express Setup includes two types of installation method.
Quick start
Quick start uses the Configuration Diskette that the configuration parameters for server
setup are pre-loaded before starting the Express Setup. The configuration parameters are
loaded by using the Configuration Diskette Creator (see Chapter 6).
Normal start
Normal start is to create the Configuration Diskette after starting the Express Setup.
NOTES:
Use the blank disk in the accessory box to create Configuration
Diskette.
You can create Configuration Diskette in advance using
"Configuration Diskette Creator" included in NEC
EXPRESSBUILDER.
If you create Configuration Diskette in advance, you can
abbreviate the items that is necessary to input or select during
Express Setup. (You can also create or modify the setup
information restored in Configuration Diskette during Express
Setup.) If you have a computer other than your servers that is
running with Windows 95/98/Me/XP, Windows NT 3.51 or later,
or Windows 2000, Windows Server 2003, we recommend you to
edit setup information from the computer in advance using
Configuration Diskette Creator.
For more information on how to create Configuration Diskette using
Configuration Diskette Creator, see Chapter 6.
5-4 Installing the Operating System with Express Setup
Microsoft Windows Server 2003
This subsection provides information on installing Microsoft® Windows® Server 2003 Standard
Edition / Enterprise Edition in the Server. Read instruction in this section before proceeding the
installation.
NOTE: If you install Windows Server 2003 without using Express
Setup, see Appendix D.
Installation Notice
This section explains precautions and matters you should be aware of before beginning installation
in order to install Windows Server 2003 correctly.
Supported OS on this model
The server supports the following edition:
Microsoft Windows Server 2003 Standard Edition / Microsoft Windows Server 2003
Enterprise Edition (hereinafter, referred to as "Windows Server 2003")
On installing other OS, contact sales dealer or the maintenance service representative.
Installing Optional Mass Storage Driver
To install optional mass storage driver, see "Installing Optional Mass Storage Driver" of
"Configuration Diskette Creator" in Chapter 6 to create setup inf file.
BIOS Specification
Before installing Windows Server 2003, confirm if the BIOS specification of the hardware is correct.
See Chapter 4 to specify them.
NEC ESMPRO Agent
On Windows Server 2003 systems, the ESMPRO Agent needs the necras.sys driver. To install the
necras.sys, run the System update from NEC EXPRESSBUILDER CD-ROM.
Installing the Operating System with Express Setup
5-5
Windows Server 2003
Express Setup can install Windows Server 2003 operating system.
issue:
However, note the following
IMPORTANT:
Before starting the installation, complete all the process of adding
the optional device and the setup of Express server mainframe
(BIOS and optional board specification)
The document for installing Windows Server 2003 is also attached
to the other software package which is sold separately from NEC,
but refer to this document when you install Windows Server 2003
on this model.
After completing Express Setup, see "Setup for Solving Problems"
described later to specify the settings for trouble recovery such as
"Specifying Memory Dump".
Installing on the Mirrored Volume
If you want to install Windows Server 2003 on the volume that is mirrored using "Disk
Management", invalid the mirroring before operating the installation to set back to the basic disk,
and valid the mirroring again after the installation has completed.
Creating, invalid, delete mirror volume can be operated from "Disk Management" in "Computer
Management".
Connecting MO Device
If you operate installing Windows Server 2003 with MO device connected, the installation may not
be completed normally. In such case, detach MO device and then re-install the system from the
beginning.
Connecting Hard Disk Drive
Connect the hard disk drive that OS is not going to be installed after installing OS.
If you create multiple logical drives in your system, refer to "Re-installing the operation system
when multiple logical drives exist" (Appendix D).
5-6 Installing the Operating System with Express Setup
Creating Partition Size
The minimum size for the partition that the system is to be installed can be calculated from the
following formula.
Size necessary to install the system + Paging File Size + Dump File Size
Size necessary to install the system = 2900MB
Paging File Size (Recommended) = Mounted Memory Size × 1.5
Dump file Size
= Mounted Memory Size + 12MB
IMPORTANT:
The above paging file size is necessary for collecting debug
information (memory dump). If you set the default value of
paging file size smaller than the 'recommended' value, the accurate
debug information (memory dump) may not be collected.
The maximum paging file size which can be set on one partition is
4095MB. If the above paging file size exceeds 4095MB, specify
4095MB for the paging file size.
The dump file size for the system with more than 2GB memory
mounted is '2048MB + 12MB'.
If you install any application program or the like, add necessary
space to the partition to install these programs.
For example, if the mounted memory size is 512MB, the minimally required partition size will be
calculated by the above formula as follows:
2900MB + (512MB * 1.5) + (512MB + 12MB) = 4192MB
Re-installing to the hard disk which has been upgraded to Dynamic Disk
You cannot re-install Windows Server 2003 with the current partition of the hard disk upgraded to
Dynamic Disk kept remained.
If you want to keep the current partition remained, see Appendix D to re-install the system.
Disk Configuration (Concerning the area displayed as "EISA")
In disk area, an area displayed as "EISA" may exist. This area is maintenance partition for saving
configuration information and utilities. Do not delete the area.
Installing the Operating System with Express Setup
The Flow of Setup
This section visually describes the flow of the setup operated by Express Setup.
: Process that continues automatically
: Process that need to input or select
Read notes and restrictions.
Go back
Confirmed
Select how to install
No
Yes
Insert floppy disk into the floppy disk drive.
Confirmed
Select Setup Parameter File.
Terminate
New File
Select OS
Retrieve
again
Existing File
Check Setup Parameter File
If you need to
reset the
specification
Correct
Incorrect
Confirm the
setting/select whether
or not to modify
Yes
No
Confirm the specification and input the value.
OK
Insert Windows CD-ROM
Agree Software License Agreement
Express Setup
↓
Log on Automatically
After restarting the
computer, the installation
completed.
Re-select
Disk Array Configuration *1
↓
Restart
↓
Creating Maintenance Partition
↓
Restart
↓
Installing Utilities
↓
Restart
↓ *2
Creating OS Partition
↓
Restart
↓
Formatting OS Partition
↓
Copying NEC Modules
↓
Copying Selected Application Modules
*1 The process is operated only when Disk Array Controller Board is connected and the configuration is
specified.
*2 If you select [Others], the process is completed here.
5-7
5-8 Installing the Operating System with Express Setup
Installing the Windows Server 2003
This section describes on how to setup the system using Express Setup.
Prepare Configuration Diskette. You can operate the installation if you do not have Configuration
Diskette specified in advance, but one floppy disk formatted by MS-DOS 1.44MB is necessary also
in such case. For Configuration Diskette, use the blank disk in NEC EXPRESSBUILDER
package or prepare other floppy disk personally.
IMPORTANT:
If you modified the system configuration, execute "System
Update".
If you want to modify or add Graphics Accelerator Driver or the
drivers of Network Adapter and so on, see Appendix D.
1.
Turn the power of peripheral device on, and then turn on the server.
NOTES:
If you operate installing Windows Server 2003 with MO device
connected, the installation may not be completed normally. In such
case, detach MO device and then re-install the system from the
beginning.
Connect the hard disk drive that OS is not going to be installed
after installing OS.
If you create multiple logical drives in your system, refer to "Reinstalling the operation system when multiple logical drives exist"
(Appendix D).
2.
Insert NEC EXPRESSBUILDER CD-ROM into the CD-ROM drive of the server.
3.
Ensure that the floppy disk drive is empty.
4.
Press the RESET switch or press Ctrl, Alt, and Delete to reboot from the NEC
EXPRESSBUILDER. (You may also turn off and then on again to reboot the server.)
The system will boot from the CD-ROM and NEC EXPRESSBUILDER starts.
5.
Click [Express Setup].
"Note" will be displayed.
6.
Read the instruction carefully and click [OK].
The message "Insert Configuration Diskette" appears.
7.
Insert "Configuration Diskette" into the floppy disk drive and click [OK].
NOTE: If you do not have "Configuration Diskette", insert a blank
floppy disk formatted by 1.44MB into the floppy disk drive and click
[OK].
Installing the Operating System with Express Setup
5-9
[Using the specified Configuration Diskette]
The Setup File included in "Configuration Diskette" will be displayed.
1)
Select the Setup File name to use during the installation.
NOTE: If there is any problem that can not be modified in the Setup
File you selected, the message to set another "Configuration Diskette"
appears. In such case, confirm the floppy disk you inserted.
After the Setup File is specified, the message "Do you want to review or modify the
Setup File parameters?" is displayed.
2)
If you want to edit the information file, click [Review]. If you do not want to edit
the information file and continue the installation, click [Skip].
Click [Review] → Go to step 8.
Click [Skip] → Go to step 9.
[Using Blank disk]
1)
Click the box under [Setup File Name: (A)] or press A.
The input box appears.
2)
Input the file name.
[Operating System to Install] appears.
The OS supported by the computer is displayed in the list.
3)
8.
Select [Windows Server 2003] you want to install from the list box.
Confirm the contents specified during OS installation.
If Disk Array Controller Board is connected to Express server mainframe, the [Configure
RAID] screen appears. Confirm the specification, modify if necessary, and then click
[Next].
Next, [Basic Information] screen appears. Confirm the specification, modify if
necessary, and then click [Next]. ("Supported Computer" shown in the screen differs
according to the model.)
After that, click [Next], [Back], or [Help] on the screen to continue.
specification each time if necessary.
Modify the
5-10 Installing the Operating System with Express Setup
IMPORTANT:
Reserve the partition to install the OS more than the minimally
required size.
If you select "Use Existing Array" at "New/Existing RAID
Configuration", the information included in the first partition
(excluding maintenance partition) will all be formatted and deleted.
The information included in the other partition will be retained.
In the figure below, describes the partition which information will
be deleted when maintenance partition exists.
First Partition
<Maintenance Partition>
Retained
Second
Partition
Deleted
Third
Partition
Retained
Fourth
Partition
Retained
You can not re-install the system with the existing partition that is
upgraded to Dynamic Disk remained. Do not select "Use
Existing Array" at "New/Existing RAID Configuration".
If "Create New Partition" at "New/Existing RAID Configuration"
is selected, do not specify the value for the partition more than
120GB.
If you specify other than 4095MB for the "Installing Partition", it
is necessary to convert to NTFS.
If "Use Existing Array" at "New/Existing RAID Configuration" is
selected but the partition other than the one to install Windows
Server 2003 does not exist (excluding maintenance partition),
Express Setup will reserve the maximum area of the hard disk to
install Windows Server 2003.
You can not go to the next screen if the specification is incorrect.
On specification, an error may occur in relationship with the
specified contents of the former screen and require to go back to
modify the specification.
During the setup, the screen to specify the partition that Windows
Server 2003 is to be installed appears. The first 55MB area
displayed on the screen is a partition that is used to store the
configuration information or utilities unique of the server. We do
not recommend to delete this area, but if you do not want to
reserve this 55MB area, perform the installation by manual setup.
It is unable to delete this area by Express Setup.
If you specify other than 120GB for the actual area, you may not
create the partition specified as the entire area in sizes more than
120GB.
Installing the Operating System with Express Setup
5-11
NOTES:
If you click [Cancel] in [Basic Information] screen, the screen will
go back to select the Setup File. [Cancel] exists only in [Basic
Information] screen.
If you click [OK] in [Role of Computer] screen, the setup
automatically selects default value for the later specification to
continue the installation.
When all the specification has completed, the system reboots automatically.
9.
Copy the modules for the optional mass storage driver.
If you want to install the optional mass storage driver, insert the floppy disk attached to
mass storage driver into the floppy disk drive and follow the message to operate the
installation.
10.
Follow the message and take NEC EXPRESSBUILDER CD-ROM and Configuration
Diskette out of the CD-ROM drive and floppy disk drive, and insert Windows Server
2003 CD-ROM into the CD-ROM drive.
[Software License Agreement] screen appears.
11.
Read the contents carefully and click [I agree.] or press F8 if you do agree. If you do not
agree, click [I disagree] or press F3.
IMPORTANT:
If you do not agree to this agreement, the setup terminates and
Windows Server 2003 will not be installed.
If "NetWare Gateway (and Client) Service" is specified to install,
the window to specify the details of "NetWare Gateway (and
Client) Service" pops up on the first logon. Specify the
appropriate value.
Now the Setup using Express Setup has completed.
5-12 Installing the Operating System with Express Setup
Installing and Setting Device Drivers
Follow these steps to install and configure the device drivers.
PROSet
PROSet is a utility that confirms the function of network contained in network driver.
Utilizing PROSet enables the following items:
Confirm detailed information of the adapter.
Diagnose loop back test, packet transmission test and so on.
Setup of teaming.
Configuring several network adapters as one team provides the server a tolerant environment on any
trouble and enhance throughput between the switches.
PROSet is necessary to utilize these features.
Follow the procedure below to install PROSet.
1.
Insert the NEC EXPRESSBUILDER CD-ROM into the CD-ROM drive.
2.
The [Windows Explorer] dialog starts.
* The procedure in the case of the standard start menu
Click Start menu and click [Windows Explorer].
* The procedure in the case of the classic start menu
Click Start menu, point to [Programs], [Accessories] and click [Windows Explorer].
3.
Run "PROSET.EXE" in the following directory.
CD-ROM DriveLetter:\WINNT\DOTNET\BC3\PROSET\WS03XP32
The [Intel(R) PROSet - InstallShield Wizard] dialog starts.
4.
Click [Next].
5.
Choose "I accept the terms in the license agreement" and click [Next].
6.
Choose "Typical" and click [Next].
7.
Click [Install].
8.
When [InstallShield Wizard Completed] window is displayed, click [Finish].
9.
Restart the system.
Installing the Operating System with Express Setup
5-13
Network Driver
Specify the details of network driver.
One standard network driver that is mounted will be installed automatically, but the link speed and
Duplex mode need to be specified manually.
[When PROSet is not installed]
1.
The [Local Area Connection Properties] dialog box appears.
* The procedure in the case of the standard start menu
1. Click Start menu, Click [Control Panel], Click [Network Connections], and Click
[Local Area Connection].
* The procedure in the case of the classic start menu
1. Click Start menu, Click [Settings] and Click [Network Connections].
The [Network Connections] dialog box appears.
2. Right-click [Local Area Connection] and click [Properties] from pop-up menu.
2.
Click [Configure].
The property dialog box for network adapter appears.
3.
Click the [Advanced] and specify the [Link Speed & Duplex] value the same as the value
specified for HUB.
4.
Click [OK] on the property dialog box for network adapter.
[When PROSet is installed]
1.
The [Intel(R) PROSet for Wired Connections] dialog box appears.
* The procedure in the case of the standard start menu
Click Start menu, point to [Control Panel] and click [Intel(R) PROSet Wired].
* The procedure in the case of the classic start menu
1. Click Start menu, point to [Settings] and click [Control Panel].
2. Double-click [Intel(R) PROSet Wired] on the [Control Panel] window.
2.
Click [(Network Adapter Name)] in the list.
3.
Click the [Speed] and specify the [Link Speed & Duplex Settings] value the same as the
value specified for HUB.
4.
Click [Apply] and click [OK].
Also, add or delete any protocols and services if necessary.
You can operate the process on the property dialog box for local area network which can be
appeared from [Network and Dial-up Connection].
5-14 Installing the Operating System with Express Setup
NOTE: We recommend you to add [Network Monitor] at
[AddingServices]. [Network Monitor] can monitor the frame (or the
packet)that the computer installing [Network Monitor] sends or
receives. This tool is valuable when analyzing network trouble. For
information on how to install the tool, see the "Setting for Solving
Problems" described later in this chapter.
Optional Network Board Driver
If you want to utilize optional Network Board (N8104-84/103/113), the network driver will be
installed automatically. Therefore, the driver attached to the Network board should not be used.
If you want to utilize optional Network Board (N8104-86/111), install the driver stored in NEC
EXPRESSBUILDER CD-ROM.
In case of utilizing (N8104-86/111)
"CD-ROM Drive Letter:\WINNT\DOTNET\BC3\PRO100\WS03XP32"
If the procedure of installation is not clear, refer to the installation procedure described in the
section "Installation of the Optional Network Board Driver".
IMPORTANT: If you want to utilize optional Network Board
"N8104-103", open the [Advanced] in PROSet window and change
the [Offload TCP Segmentation] value to "Off".
Installation of the Optional Network Board Driver
1.
Start Device Manager.
2.
Click [Network adapters] and Double-Click [(Network Adapter Name)].
[(Network Adapter Name) Properties] appears.
NOTE: [(Intel(R) PRO/1000...)] is the name of On-Board adapter.
All other names show the Optional Network Board.
3.
Click [Driver] tab and click [Update Driver...]. [Hardware Update Wizard] appears.
4.
Select the [Install from a list or specific location(Advanced)] radio button and click
[Next].
5.
Select the [Search for the best driver in these locations] radio button and check off the
[Search removable media (floppy, CD-ROM...)] check box.
6.
Check the [Include this location in the search] check box and when using [(N810486/111)], specify [CD-ROM driveletter:\WINNT\DOTNET\BC3\PRO1000\WS03XP32].
Then click [Next].
7.
Click [Finish].
Installing the Operating System with Express Setup
5-15
Adapter Fault Tolerance (AFT)/Adaptive Load Balancing (ALB)
Adapter Fault Tolerance (AFT) is a feature that creates a group containing more than one adapter
and automatically converts the process of the working adapter to the other adapter in the group
when any trouble occurred on that adapter.
Adaptive Load Balancing (ALB) is a feature that creates a group containing more than one adapter
and enhance the through put by operating packet transmission from the server by all the adapters.
This feature includes AFT feature.
IMPORTANT:
AFT/ALB setup must be operated after installing the drivers and
restarting the system.
All the adapters specified as a group of Adapter Teaming must
exist on the same LAN. If they are connected to the separate
switches, they will not work normally.
If you want to utilize AFT/ALB feature, follow the procedure below to setup.
1.
Double-click [Intel(R) PROSet Wired] on the [Control Panel] dialog box.
The [Intel(R) PROSet for Wired Connections] dialog box appears.
2.
Put the mouse cursor on "Intel(R) PRO/1000 MT Network Connection" in the list and
right-click.
Pull-down menu appears.
3.
Select [Add to Team>] and then click [Create New Team...].
The [Teaming Wizard] dialog box appears.
4.
Select "Adapter Fault Tolerance" or "Adaptive Load Balancing" and click [Next].
5.
Check the adapter to join the team and click [Next].
6.
Click [Finish].
7.
The setup will go back to [Intel(R) PROSet for Wired Connections] dialog box, so click
[OK].
8.
Restart the system.
5-16 Installing the Operating System with Express Setup
Installing SCSI Controller Driver
If you utilize SCSI controller driver (N8103-65F/75F), install it according to the following
procedure:
1.
Start [Device Manager] from [Start] menu → [Control Panel]→ [Administrative Tools] →
[Computer Management].
2.
Double click the SCSI Controller driver which Device Manager lists as unknown device.
3.
Click [Update Driver].
4.
When the "Update Device Driver Wizard" appears, select "Install from a list or specific
location [Advanced]" and click [Next].
5.
Select "Don't search. I will choose the driver to install" and click [Next].
6.
Click [Have Disk..].
7.
Insert "Windows Server 2003 OEM-DISK for NEC EXPRESSBUILDER" into the floppy
disk drive, enter "a:\" into "copy manufacturer's file from:" and click [OK].
8.
Specify the following driver and click [Next].
[INITIO INI-A10XU2W PCI SCSI Controller] (When N8103-65F board is installed.)
[Adaptec SCSI Card 29320ALP -Ultra320 SCSI] (When N8103-75F board is installed.)
The installation of the driver is completed.
Restart the system according to the message appeared on the screen.
Graphics Accelerator Driver
Update Graphics Accelerator Driver mounted in standard.
1.
Insert the NEC EXPRESSBUILDER CD-ROM into the CD-ROM drive.
2.
Click Start menu, point to [Programs], [Accessories] and click [Windows Explorer]
3.
Run "SETUP.EXE" in the following directory.
<CD-ROM Drive Letter>:\WINNT\VIDEO\RADEON7000\W2K3\SETUP.EXE
* Install the graphics accelerator driver in the following directory if you communicate
your server with the remote KVM console. (Optional advanced remote management
card (N8115-02) must be installed in your server to use the remote KVM console.)
<CD-ROM Drive Letter>:\N8115-02\VIDEO\RADEON7000\SETUP.EXE
4.
Follow the message to continue the installation.
5.
Remove the NEC EXPRESSBUILDER CD-ROM from the CD-ROM drive, follow the
direction on the screen and restart the system.
Installing the Operating System with Express Setup
5-17
Setting for Solving Problems
Setup the following issue in advance so that your computer can recover from any trouble precisely
and as soon as possible when it should occur.
Memory Dump (Debug Information)
This section describes the procedures for collecting memory dump (debug information) in the
server.
IMPORTANT: Cautions for the Memory Dump
The staff of maintenance service representative is in charge of
collecting memory dump. Customers need only to specify the
memory dump.
If any trouble occur after specifying the process below, the
message to inform that the system is in short of virtual memory
may appear, but continue to start the system. If you re-start the
system in such case, memory dump may not be stored correctly.
Follow the procedure below to specify.
1.
Select [Control Panel] and click [System].
The [System Properties] dialog box appears.
2.
Select [Advanced] tab.
3.
Click [Settings] on the [Startup and Recovery] group box.
IMPORTANT:
To specify "Complete Memory Dump" to write the debug
information is recommended.
If the mounted memory size is larger than 2GB, "Complete
Memory Dump" cannot be specified so that specify "Kernel
Memory Dump" instead.
Specify the drive where there is a free area more than the size of
"the memory capacity mounted on Express server + 12MB".
In case the mounted memory size exceeds 2GB due to the added
memory, change the write debugging information to [Kernel
Memory Dump] before adding memory. The size of debugging
information (memory dump) to be taken also changes due to
adding memory. Verify the size of the empty space in the
debugging information (memory dump) write destination drive.
5-18 Installing the Operating System with Express Setup
4.
Specify "Complete memory dump" and modify [Dump file:] in the [Write debugging
information] group box.
e.g. Write the debug information in D drive write the file name "MEMORY.DMP".
D:\MEMORY.DMP
5.
Click [Settings] on the [Performance] group box.
The [Performance Options] window appears.
6.
Click [Advanced] tab on the [Performance Options] window.
7.
Click [Change] on the [Virtual memory] group box.
8.
Modify [Initial Size] in the [Paging file size for selected drive] box to the value larger than
[Recommended], and click [Set].
IMPORTANT:
9.
Be sure to create memory dump with the size described above on
the OS partition. If [Default Size] of the paging file is specified
to the value smaller than "Recommended" value, the correct debug
information (memory dump) may not be collected.
For more information on "Recommended" value, see "Partition
Size to be Created" described earlier.
To prepare for the situation when any trouble occurred, we
recommend you to press dump switch to confirm that the dump
will be collected normally in advance.
In case the memory is expanded, re-specify the paging file to suit
the new memory size.
Click [OK].
The message to restart the system may appear according to the modified specification.
In such case, follow the message to restart the system.
Installing the Operating System with Express Setup
Windows Dr. Watson
Windows Dr. Watson is a debugger for application errors. If any application error is detected,
Dr. Watson diagnoses the server and logs diagnostic information (log). Follow the procedure
below and specify Dr. Watson to collect diagnostic information.
1.
Click [Run] on Start menu.
2.
Type "drwtsn32.exe" in the [Open] box, and click [OK].
The [Dr. Watson for Windows] dialog box appears.
3.
Specify the location to store the diagnostic information in the [Log File Path] box.
The diagnostic information will be stored with the file name "DRWTSN32.LOG".
NOTE: You can not specify network pass.
computer.
4.
Specify the pass on local
Specify the location of crash dump file in the [Crash Dump] box.
NOTE: "Crash Dump File" is a binary file that can be read with
Windows Debugger.
5.
Check the following check box on the [Option] box.
Dump Symbol Table
Dump All Thread Contexts
Add To Existing Log File
Create Crash Dump File
For more information on each function above, refer to Online Help.
6.
Click [OK].
5-19
5-20 Installing the Operating System with Express Setup
Network Monitor
Utilizing Network Monitor helps you to investigate and manage with network trouble. To utilize
Network Monitor, you need to restart the system after the installation has completed, so we
recommend to install Network Monitor before any network trouble may occur.
1.
Point to [Settings] from Start menu and click [Control Panel].
The [Control Panel] dialog box appears.
2.
Double-click [Add/Remove Programs].
The [Add/Remove Programs] dialog box appears.
3.
Click [Add/Remove Windows Component].
The [Windows Components Wizard] dialog box appears.
4.
Check the [Management and Monitoring Tools] check box of the component ON and click
[Next].
5.
If the setup asks to install the disk, insert Windows Server 2003 CD-ROM into CD-ROM
drive and click [OK].
6.
Click [Complete] in the [Windows Component Wizard] dialog box.
7.
Click [Close] in the [Add/Remove Application] dialog box.
8.
Close the [Control Panel] dialog box.
To start Network Monitor, point to [Program] → [Administrative Tools] and click [Network
Monitor]. For information on how to operate Network Monitor, refer to Online Help.
Installing Maintenance Utilities
Various maintenance utilities are contained in your NEC EXPRESSBUILDER CD-ROM. See
Chapter 6 for installing the utilities to your server or management workstations.
Installing the Operating System with Express Setup
5-21
Updating the System
Update the system in the situation below:
Modified system configuration.
Recovered the system using recovery process.
Log on to the system with the account that has administrative authority (e.g. Administrator) and
insert the NEC EXPRESSBUILDER CD-ROM into the CD-ROM drive of the server.
[Setup Software] in [Master Control Menu] screen appears, so left-click the item. Click [Update
the System] from the menu and the setup will start. After that, follow the message to continue the
setup process.
Making Backup Copies of System Information
The system information includes the current BIOS settings and any specific information for the
server.
Save the information after completing the system setup.
Without the backup data, you will not be able to recover the information.
You can save the information by the following process.
1.
Insert the NEC EXPRESSBUILDER CD-ROM into the CD-ROM drive and reboot the
system.
2.
Select [Tools].
3.
Select [Off-line Maintenance Utility].
4.
Select [System Information Management].
5.
Insert a floppy disk into the floppy disk drive.
6.
Select [Save].
5-22 Installing the Operating System with Express Setup
Exceptional Setup
This section explains how to setup with the exceptional way. You usually do not have to do as
follows. If your system has any Mass storage devices, you have to set as follows depending on your
system. The detailed information is provided by the manual of the Mass storage device.
Installation of Mass storage device not to be supported by ExpressSetup
If you would like to install or re-install the OS when the system has new mass storage device not to
be supported by NEC EXPRESSBUILDER, you have to set as follows.
1.
Read the manual supplied with the mass storage device before setting the server.
2.
If the mass storage device is disk array controller, configure the RAID system before
running the NEC EXPRESSBUILDER.
3.
Boot the system from NEC EXPRESSBUILDER CD-ROM.
4.
(a) When the dialog of Disk array configuration appears, check "Use Existing Array".
(b) Check "Apply OEM-FD for Mass storage device".
5.
Copy the driver for the mass storage device in the ExpressSetup.
Insert the floppy disk attached the mass storage device into the floppy disk drive.
Continue the ExpressSetup, referring to messages displayed on the display.
Installing the Operating System with Express Setup
5-23
Microsoft Windows 2000
This subsection provides information on installing Microsoft® Windows® 2000 in the server.
Read instruction in this section before proceeding the installation.
NOTE: If you install Windows 2000 without using Express Setup, see
Appendix D.
Installation Notice
This section explains precautions and matters you should be aware of before beginning installation
in order to install Windows 2000 correctly.
Supported OS on this model
The server supports the following edition:
Microsoft Windows 2000 Server / Microsoft Windows 2000 Advanced Server (hereinafter,
referred to as "Windows 2000")
On installing other OS, contact sales dealer or the maintenance service representative.
Installing Optional Mass Storage Driver
To install optional mass storage driver, see "Installing Optional Mass Storage Driver" of
"Configuration Diskette Creator" in Chapter 6 to create setup inf file.
BIOS Specification
Before installing Windows 2000, confirm if the BIOS specification of the hardware is correct. On
BIOS specification, there are some items to specify for the new functions provided from Windows
2000 (Plug and Play, support for USB interface and so on). See Chapter 4 to specify them.
NEC ESMPRO Agent
On Windows 2000 systems, the ESMPRO Agent needs the necras.sys driver. To install the
necras.sys, run the System update from NEC EXPRESSBUILDER CD-ROM.
5-24 Installing the Operating System with Express Setup
Windows 2000
Express Setup can install Windows 2000 operating system.
However, note the following issue:
IMPORTANT:
Before starting the installation, complete all the process of adding
the optional device and the setup of Express server mainframe
(BIOS and optional board specification)
The document for installing Windows 2000 is also attached to the
other software package which is sold separately from NEC, but
refer to this document when you install Windows 2000 on this
model.
After completing Express Setup, see "Setup for Solving Problems"
described later to specify the settings for trouble recovery such as
"Specifying Memory Dump".
Installing on the Mirrored Volume
If you want to install Windows 2000 on the volume that is mirrored using "Disk Management",
invalid the mirroring before operating the installation to set back to the basic disk, and valid the
mirroring again after the installation has completed.
Creating, invalid, delete mirror volume can be operated from "Disk Management" in "Computer
Management".
Connecting MO Device
If you operate installing Windows 2000 with MO device connected, the installation may not be
completed normally. In such case, detach MO device and then re-install the system from the
beginning.
Connecting Hard Disk Drive
Connect the hard disk that OS is not going to be installed after installing OS.
If you create multiple logical drives in your system, refer to "Re-installing the operation system
when multiple logical drives exist" (Appendix E).
Disk Configuration (Concerning the area displayed as "MAINTE_P")
In disk area, an area displayed as "MAINTE_P" may exist. This area is maintenance partition for
saving configuration information and utilities. Do not delete the area.
Installing the Operating System with Express Setup
5-25
Creating Partition Size
The minimum size for the partition that the system is to be installed can be calculated from the
following formula.
Size necessary to install the system + Paging File Size + Dump File Size
Size necessary to install the system = 1000MB
Paging File Size (Recommended) = Mounted Memory Size × 1.5
Dump file Size
= Mounted Memory Size + 12MB
IMPORTANT:
The above paging file size is necessary for collecting debug
information (memory dump). If you set the default value of
paging file size smaller than the 'recommended' value, the accurate
debug information (memory dump) may not be collected.
The maximum paging file size which can be set on one partition is
4095MB. If the above paging file size exceeds 4095MB, specify
4095MB for the paging file size.
The dump file size for the system with more than 2GB memory
mounted is '2048MB + 12MB'.
If you install any application program or the like, add necessary
space to the partition to install these programs.
For example, if the mounted memory size is 512MB, the minimally required partition size will be
calculated by the above formula as follows:
1000MB + (512MB * 1.5) + (512MB + 12MB) = 2292MB
NOTES:
If you want to install using Express Setup, calculate the minimally
required partition size as follows:
If you do not apply Windows 2000 Service Pack
The larger value of either one: 'Minimum Partition Size' described
above, or '4095MB'.
If you want to apply Windows 2000 Service Pack
The larger value of either one: 'Minimum Partition Size' described
above + 850MB or '4095MB'.
Re-installing to the hard disk which has been upgraded to Dynamic Disk
You cannot re-install Windows 2000 with the current partition of the hard disk upgraded to
Dynamic Disk kept remained.
If you want to keep the current partition remained, see Appendix D to re-install the system.
5-26 Installing the Operating System with Express Setup
The Flow of Setup
This section visually describes the flow of the setup operated by Express Setup.
: Process that continues automatically
: Process that need to input or select
Read notes and restrictions.
Go back
Confirmed
Select how to install
No
Yes
Insert floppy disk into the floppy disk drive.
Confirmed
Select Setup Parameter File.
Terminate
New File
Select OS
Retrieve
again
Existing File
Check Setup Parameter File
If you need to
reset the
specification
Correct
Incorrect
Confirm the
setting/select whether
or not to modify
Yes
No
Confirm the specification and input the value.
OK
Insert Windows CD-ROM
Agree Software License Agreement
Insert SP CD-ROM
Express Setup
↓
Log on Automatically
After restarting the
computer, the installation
completed.
Re-select
Disk Array Configuration *1
↓
Restart
↓
Creating Maintenance Partition
↓
Restart
↓
Installing Utilities
↓
Restart
↓ *2
Creating OS Partition
↓
Restart
↓
Formatting OS Partition
↓
Copying NEC Modules
↓
Copying Selected Application Modules
*1 The process is operated only when Disk Array Controller Board is connected and the configuration is
specified.
*2 If you select [Others], the process is completed here.
Installing the Operating System with Express Setup
5-27
Installing the Windows 2000
This section describes on how to setup the system using Express Setup.
Prepare Configuration Diskette. You can operate the installation if you do not have Configuration
Diskette specified in advance, but one floppy disk formatted by MS-DOS 1.44MB is necessary also
in such case. For Configuration Diskette, use the blank disk in NEC EXPRESSBUILDER
package or prepare other floppy disk personally.
IMPORTANT:
1.
If you modified the system configuration, execute "System
Update".
If you want to modify or add Graphics Accelerator Driver or the
drivers of Network Adapter and so on, see Appendix D.
Turn the power of peripheral device on, and then turn on the server.
NOTES:
If you operate installing Windows 2000 with MO device connected,
the installation may not be completed normally. In such case,
detach MO device and then re-install the system from the
beginning.
Connect the hard disk that OS is not going to be installed after
installing OS.
If you create multiple logical drives in your system, refer to "Reinstalling the operation system when multiple logical drives exist"
(Appendix E).
2.
Insert NEC EXPRESSBUILDER CD-ROM into the CD-ROM drive of the server.
3.
Ensure that the floppy disk drive is empty.
4.
Press the RESET switch or press Ctrl, Alt, and Delete to reboot from the NEC
EXPRESSBUILDER. (You may also turn off and then on again to reboot the server.)
The system will boot from the CD-ROM and NEC EXPRESSBUILDER starts.
5.
Click [Express Setup].
"Note" will be displayed.
6.
Read the instruction carefully and click [OK].
The message "Insert Configuration Diskette" appears.
7.
Insert "Configuration Diskette" into the floppy disk drive and click [OK].
NOTE: If you do not have "Configuration Diskette", insert a blank
floppy disk formatted by 1.44MB into the floppy disk drive and click
[OK].
5-28 Installing the Operating System with Express Setup
[Using the specified Configuration Diskette]
The Setup File included in "Configuration Diskette" will be displayed.
1)
Select the Setup File name to use during the installation.
NOTE: If there is any problem that can not be modified in the Setup
File you selected, the message to set another "Configuration Diskette"
appears. In such case, confirm the floppy disk you inserted.
After the Setup File is specified, the message "Do you want to review or modify the
Setup File parameters?" is displayed.
2)
If you want to edit the information file, click [Review]. If you do not want to edit
the information file and continue the installation, click [Skip].
Click [Review] → Go to step 8.
Click [Skip] → Go to step 9.
[Using Blank disk]
1)
Click the box under [Setup File Name: (A)] or press A.
The input box appears.
2)
Input the file name.
[Operating System to Install] appears.
The OS supported by the computer is displayed in the list.
3)
8.
Select [Windows 2000] you want to install from the list box.
Confirm the contents specified during OS installation.
If Disk Array Controller Board is connected to Express server mainframe, the [Configure
RAID] screen appears. Confirm the specification, modify if necessary, and then click
[Next].
Next, [Basic Information] screen appears. Confirm the specification, modify if
necessary, and then click [Next]. ("Supported Computer" shown in the screen differs
according to the model.)
After that, click [Next], [Back], or [Help] on the screen to continue.
specification each time if necessary.
Modify the
Installing the Operating System with Express Setup
IMPORTANT:
Reserve the partition to install the OS more than the minimally
required size.
If you select "Use Existing Array" at "New/Existing RAID
Configuration", the information included in the first partition
(excluding maintenance partition) will all be formatted and deleted.
The information included in the other partition will be retained.
In the figure below, describes the partition which information will
be deleted when maintenance partition exists.
First Partition
<Maintenance Partition>
Retained
Second
Partition
Deleted
Third
Partition
Retained
Fourth
Partition
Retained
You can not re-install the system with the existing partition that is
upgraded to Dynamic Disk remained. Do not select "Use
Existing Array" at "New/Existing RAID Configuration".
If "Create New Partition" at "New/Existing RAID Configuration"
is selected, do not specify the value for the partition more than
120GB.
If you specify other than 4095MB for the "Installing Partition", it
is necessary to convert to NTFS.
If "Use Existing Array" at "New/Existing RAID Configuration" is
selected but the partition other than the one to install Windows
2000 does not exist (excluding maintenance partition), Express
Setup will reserve the maximum area of the hard disk to install
Windows 2000.
You can not go to the next screen if the specification is incorrect.
On specification, an error may occur in relationship with the
specified contents of the former screen and require to go back to
modify the specification.
During the setup, the screen to specify the partition that Windows
2000 is to be installed appears. The first 55MB area displayed on
the screen is a partition that is used to store the configuration
information or utilities unique of the server. We do not
recommend to delete this area, but if you do not want to reserve
this 55MB area, perform the installation by manual setup. It is
unable to delete this area by Express Setup.
If you specify other than 120GB for the actual area, you may not
create the partition specified as the entire area in sizes more than
120GB.
5-29
5-30 Installing the Operating System with Express Setup
NOTES:
If you click [Cancel] in [Basic Information] screen, the screen will
go back to select the Setup File. [Cancel] exists only in [Basic
Information] screen.
If you click [OK] in [Role of Computer] screen, the setup
automatically selects default value for the later specification to
continue the installation.
When all the specification has completed, the system reboots automatically.
9.
Copy the modules for the optional mass storage driver.
If you want to install the optional mass storage driver, insert the floppy disk attached to
mass storage driver into the floppy disk drive and follow the message to operate the
installation.
10.
Follow the message and take NEC EXPRESSBUILDER CD-ROM and Configuration
Diskette out of the CD-ROM drive and floppy disk drive, and insert Windows 2000 CDROM into the CD-ROM drive.
[Software License Agreement] screen appears.
11.
Read the contents carefully and click [I agree.] or press F8 if you do agree. If you do not
agree, click [I disagree] or press F3.
IMPORTANT:
12.
If you do not agree to this agreement, the setup terminates and
Windows 2000 will not be installed.
If "NetWare Gateway (and Client) Service" is specified to install,
the window to specify the details of "NetWare Gateway (and
Client) Service" pops up on the first logon. Specify the
appropriate value.
If you selected [Apply] on [Apply Service Pack] at Basic Information, follow the
procedure below.
1)
Follow the message to take Windows 2000 CD-ROM out of the CD-ROM drive.
2)
Follow the message to insert Windows 2000 Service Pack 4 or later into the CDROM drive.
Windows 2000 and the specified application will be installed automatically and logon to
the system. Install and configure the device drivers.
Now the Setup using Express Setup has completed.
Installing the Operating System with Express Setup
5-31
Installing and Setting Device Drivers
Follow these steps to install and configure the device drivers.
PROSet
PROSet is a utility that confirms the function of network contained in network driver. Be sure to
install. Utilizing PROSet enables the following issues:
Confirm detailed information of the adapter.
Diagnose loop back test, packet transmission test and so on.
Specify teaming.
Configuring several network adapters as one team provides the server an environment tolerant on
any trouble and enhance throughput between the switches.
PROSet is necessary to utilize these features.
Follow the procedure below to install PROSet.
1.
Insert the NEC EXPRESSBUILDER CD-ROM into the CD-ROM drive.
2.
Click Start menu, point to [Program], [Accessory] and click [Explorer].
3.
Run "PROSET.EXE" in the following directory.
<CD-ROM Drive Letter>:\WINNT\W2K\BC3\PROSET\WIN2K
The [Intel(R) PROSet - InstallShield Wizard] dialog starts.
4.
Click [Next].
5.
Choose "I accept the terms in the license agreement" and click [Next].
6.
Choose "Typical" and click [Next].
7.
Click [Install].
8.
When [InstallShield Wizard Completed] window is displayed, click [Finish].
9.
Restart the system.
5-32 Installing the Operating System with Express Setup
Network Driver
[When PROSet is not installed]
1.
Click Start menu and click [Network and Dial-Up Connection].
The [Network and Dial-Up Connection] dialog box appears.
2.
Right-click [Local Area Connection] and click [Properties] from pop-up menu.
The [Local Area Connection Properties] dialog box appears.
3.
Click [Configure].
The property dialog box for network adapter appears.
4.
Click the [Advanced] and specify the [Link Speed & Duplex]value the same as the value
specified for HUB.
5.
Click [OK] on the property dialog box for network adapter.
6.
Click [OK] on the [Local Area Connection Properties] dialog box.
Also, add or delete any protocols and services if necessary. You can operate the process from
[Network and Dial-up Connection] to display the property dialog box for local area network.
NOTE: We recommend you to add [Network Monitor] at
[AddingServices]. [Network Monitor] can monitor the frame (or the
packet) that the computer installing [Network Monitor] sends or
receives. This tool is valuable when analyzing network trouble. For
information on how to install the tool, see the "Setting for Solving
Problems" described later in this chapter.
[When PROSet is installed]
1.
Double-click [Intel(R) PROSet] on the [Control Panel] window.
The [Intel(R) PROSet] dialog box appears. Double-click the [Intel(R) PROSet Wired]
icon.
2.
Put the cursor to the network driver in the list.
3.
Click the [Advanced] and specify the [Link Speed & Duplex] value the same as the value
specified for HUB.
Also specify the other network driver with the same progress above.
Installing the Operating System with Express Setup
5-33
Optional Network Board Driver
If you want to utilize optional Network Board (N8104-84/111/86/103/113), install the driver
stored in NEC EXPRESSBUILDER CD-ROM.
Refer to the re-installation procedure described in Appendix E.
Network Driver for (N8104-86/111)
[CD-ROM Drive Letter:\WINNT\W2K\BC3\PRO100\WIN2K]
Network Driver for (N8104-84/103/113)
[CD-ROM Drive Letter:\WINNT\W2K\BC3\PRO1000\WIN2K]
Adapter Fault Tolerance (AFT)/Adaptive Load Balancing (ALB)
Adapter Fault Tolerance (AFT) is a feature that creates a group containing more than one adapter
and automatically converts the process of the working adapter to the other adapter in the group
when any trouble occurred on that adapter.
Adaptive Load Balancing (ALB) is a feature that creates a group containing more than one adapter
and enhance the through put by operating packet transmission from the server by all the adapters.
This feature includes AFT feature.
IMPORTANT:
AFT/ALB setup must be operated after installing the drivers and
restarting the system.
All the adapters specified as a group of Adapter Teaming must
exist on the same LAN. If they are connected to the separate
switches, they will not work normally.
If you want to utilize AFT/ALB feature, follow the procedure below to setup.
1.
Double-click [Intel(R) PROSet Wired] on the [Control Panel] dialog box.
The [Intel(R) PROSet for Wired Connections] dialog box appears.
2.
Put the mouse cursor on "Intel(R) PRO/1000 MT Network Connection" in the list and
right-click.
Pull-down menu appears.
3.
Select [Add to Team] and then click [Create New Team...].
The [Teaming Wizard] dialog box appears.
4.
5.
6.
7.
Select "Adapter Fault Tolerance" or "Adaptive Load Balancing" and click [Next].
8.
Restart the system.
Check the adapter to join the team and click [Next].
Click [Finish].
The setup will go back to [Intel(R) PROSet for Wired Connections] dialog box, so click
[OK].
5-34 Installing the Operating System with Express Setup
Installing SCSI Controller Driver
If you utilize SCSI controller driver (N8103-65F/75F), install it according to the following
procedure:
1.
Start [Device Manager] from [Start] menu → [Control Panel]→ [Administrative Tools] →
[Computer Management].
2.
Double click the SCSI Controller driver which Device Manager lists as unknown device.
3.
Click [Update Driver].
4.
When the "Update Device Driver Wizard" appears, select "Install from a list or specific
location [Advanced]" and click [Next].
5.
Select "Don't search. I will choose the driver to install" and click [Next].
6.
Click [Have Disk..].
7.
Insert "Windows 2000 OEM-DISK for NEC EXPRESSBUILDER" into the floppy disk
drive, enter "a:\" into "copy manufacturer's file from:" and click [OK].
8.
Specify the following driver and click [Next].
[INITIO INI-A10XU2W PCI SCSI Controller] (When N8103-65F board is installed.)
[Adaptec SCSI Card 29320ALP -Ultra320 SCSI] (When N8103-75F board is installed.)
The installation of the driver is completed.
Restart the system according to the message appeared on the screen.
Installing the Operating System with Express Setup
5-35
Graphics Accelerator Driver
Install Graphics Accelerator Driver mounted in standard.
If you want to utilize optional Graphics Accelerator Driver board, follow the document attached to
the board to install the driver.
1.
Insert the NEC EXPRESSBUILDER CD-ROM into the CD-ROM drive.
2.
Click Start menu, point to [Programs], [Accessories] and click [Windows Explorer].
3.
Run "SETUP.EXE" in the following directory.
<CD-ROM Drive Letter>:\WINNT\VIDEO\RADEON7000\W2K\SETUP.EXE.
* Install the graphics accelerator driver in the following directory if you communicate
your server with the remote KVM console. (Optional advanced remote management
card (N8115-02) must be installed in your server to use the remote KVM console.)
<CD-ROM Drive Letter>:\WINNT\VIDEO\RADEON7000\W2K\SETUP.EXE
4.
Follow the message to continue the installation.
If the dialog message "Digital Signature could not been found." appears, select [Yes] to
continue. If the dialog message "Direct X Ver.8 isn't installed." appears, select [continue]
to continue.
5.
Remove the NEC EXPRESSBUILDER CD-ROM from the CD-ROM drive, follow the
direction on the screen and restart the system.
USB 2.0 Driver
USB 2.0 Driver is pre-installed.
When restoring the system or re-installing the system, the driver is automatically installed in the
process of updating the system.
5-36 Installing the Operating System with Express Setup
Setting for Solving Problems
Setup the following issue in advance so that your computer can recover from any trouble precisely
and as soon as possible when it should occur.
Memory Dump (Debug Information)
This section describes the procedures for collecting memory dump (debug information) in the
server.
IMPORTANT: Cautions for the Memory Dump
The staff of maintenance service representative is in charge of
collecting memory dump. Customers need only to specify the
memory dump.
If any trouble occur after specifying the process below, the
message to inform that the system is in short of virtual memory
may appear, but continue to start the system. If you re-start the
system in such case, memory dump may not be stored correctly.
Follow the procedure below to specify.
1.
Point to [Settings] in Start menu and click [Control Panel].
The [Control Panel] dialog box appears.
2.
Double-click [System].
The [System Properties] dialog box appears.
3.
Click [Advanced].
4.
Click [Startup and Recovery].
5.
Enter the location to write the debug information to the text box.
e.g. Write the debug information in D drive with the file name "MEMORY.DMP".
D:\MEMORY.DMP
Installing the Operating System with Express Setup
5-37
IMPORTANT:
To specify "Complete Memory Dump" to write the debug
information is recommended. If the mounted memory size is larger
than 2GB, "Complete Memory Dump" cannot be specified so that
specify "Kernel Memory Dump" instead.
Specify the drive where there is a free area more than the size of
"the memory capacity mounted on Express server + 12MB".
In case the mounted memory size exceeds 2GB due to the added
memory, change the write debugging information to [Kernel
Memory Dump] before adding memory. The size of debugging
information (memory dump) to be taken also changes due to
adding memory. Verify the size of the empty space in the
debugging information (memory dump) write destination drive.
6.
Click [Performance Options].
7.
Click [Change] on the [Virtual Memory] dialog box.
8.
Modify [Initial Size] in the [Paging File Size for Selected Drive] box to the value larger
than [Recommended Size], and click [Specify].
IMPORTANT:
9.
Be sure to create memory dump with the size described above on
the OS partition. If [Default Size] of the paging file is specified
to the value smaller than "Recommended" value, the correct debug
information (memory dump) may not be collected.
For more information on "Recommended" value, see "Partition
Size to be Created" described earlier.
To prepare for the situation when any trouble occurred, we
recommend you to press dump switch to confirm that the dump
will be collected normally in advance.
In case the memory is expanded, re-specify the paging file to suit
the new memory size.
Click [OK].
The message to restart the system may appear according to the modified specification.
In such case, follow the message to restart the system.
5-38 Installing the Operating System with Express Setup
Windows 2000 Dr. Watson
Windows 2000 Dr. Watson is a debugger for application errors. If any application error is
detected,
Dr. Watson diagnoses the server and logs diagnostic information (log). Follow the procedure
below and specify Dr. Watson to collect diagnostic information.
1.
Click [Run] on Start menu.
2.
Type "drwtsn32.exe" in the [Open] box, and click [OK].
The [Dr. Watson for Windows 2000] dialog box appears.
3.
Specify the location to store the diagnostic information in the [Log File Path] box.
The diagnostic information will be stored with the file name "DRWTSN32.LOG".
NOTE: You can not specify network pass.
computer.
4.
Specify the pass on local
Specify the location of crash dump file in the [Crash Dump] box.
NOTE: "Crash Dump File" is a binary file that can be read with
Windows Debugger.
5.
Check the following check box on the [Option] box.
Dump Symbol Table
Dump All Thread Contexts
Add To Existing Log File
Create Crash Dump File
For more information on each function above, refer to Online Help.
6.
Click [OK].
Installing the Operating System with Express Setup
5-39
Network Monitor
Utilizing Network Monitor helps you to investigate and manage with network trouble. To utilize
Network Monitor, you need to restart the system after the installation has completed, so we
recommend to install Network Monitor before any network trouble may occur.
1.
Point to [Settings] from Start menu and click [Control Panel].
The [Control Panel] dialog box appears.
2.
Double-click [Add/Remove Programs].
The [Add/Remove Programs] dialog box appears.
3.
Click [Add/Remove Windows Component].
The [Windows Components Wizard] dialog box appears.
4.
Check the [Management and Monitoring Tools] check box of the component ON and click
[Next].
5.
If the setup asks to install the disk, insert Windows 2000 CD-ROM into the CD-ROM
drive and click [OK].
6.
Click [Complete] in the [Windows Component Wizard] dialog box.
7.
Click [Close] in the [Add/Remove Application] dialog box.
8.
Close the [Control Panel] dialog box.
To start Network Monitor, point to [Program] → [Administrative Tools] and click [Network
Monitor]. For information on how to operate Network Monitor, refer to Online Help.
Installing Maintenance Utilities
Various maintenance utilities are contained in your NEC EXPRESSBUILDER CD-ROM. See
Chapter 6 for installing the utilities to your server or management workstations.
5-40 Installing the Operating System with Express Setup
Updating the System - Installing Service Pack Update the system in the situation below:
Modified system configuration.
Recovered the system using recovery process.
Log on to the system with the account that has administrative authority (e.g. Administrator) and
insert the NEC EXPRESSBUILDER CD-ROM into the CD-ROM drive of the server.
[Setup Software] in [Master Control Menu] screen appears, so left-click the item. Click [Update
the System] from the menu and the setup will start. After that, follow the message to continue the
setup process and apply Service Pack.
Making Backup Copies of System Information
The system information includes the current BIOS settings and any specific information for the
server.
Save the information after completing the system setup.
Without the backup data, you will not be able to recover the information.
You can save the information by the following process.
1.
Insert the NEC EXPRESSBUILDER CD-ROM into the CD-ROM drive and reboot the
system.
2.
Select [Tools].
3.
Select [Off-line Maintenance Utility].
4.
Select [System Information Management].
5.
Insert a floppy disk into the floppy disk drive.
6.
Select [Save].
Installing the Operating System with Express Setup
5-41
Exceptional Setup
This section explains how to setup with the exceptional way. You usually do not have to do as
follows. If your system has any Mass storage devices, you have to set as follows depending on your
system. The detailed information is provided by the manual of the Mass storage device.
Installation of Mass storage device not to be supported by Express Setup
If you would like to install or re-install the OS when the system has new mass storage device not to
be supported by NEC EXPRESSBUILDER, you have to set as follows.
1.
Read the manual supplied with the mass storage device before setting the server.
2.
If the mass storage device is disk array controller, configure the RAID system before
running the NEC EXPRESSBUILDER.
3.
Boot the system from NEC EXPRESSBUILDER CD-ROM.
4.
(a) When the dialog of Disk array configuration appears, check "Use Existing Array".
(b) Check "Apply OEM-FD for Mass storage device".
5.
Copy the driver for the mass storage device in the Express Setup.
Insert the floppy disk attached the mass storage device into the floppy disk drive.
Continue the Express Setup, referring to messages displayed on the display.
5-42 Installing the Operating System with Express Setup
HostRAID
The following explains the overview of HostRAID and the setup procedure.
Overview of HostRAID
HostRAID provides RAID feature through the onboard serial ATA or SCSI interface in your system.
HostRAID consists of the driver that controls disk arrays and "Adaptec Storage Manager Browser Edition (hereinafter abbreviated to ASMBE) that is a disk array management utility.
The software products are mandatory for HostRAID to function normally. Be sure to install both
software products. For the driver, refer to the setup procedure explained in this manual. For
ASMBE, refer to the "Adaptec Storage Manager - Browser Edition User's Guide."
Overview of the specifications
Hard disk drive:
SCSI HostRAID:
Four hard disk drives for each channel + 2 spare drives
SATA HostRAID:
One hard disk drive for each channel
(two hard disk drives max.)
RAID level:
SCSI HostRAID:
RAID0 or RAID1 or RAID10 (0+1)
SATA HostRAID:
Operating system:
RAID0 or RAID1
Microsoft Windows Server 2003 Standard Edition/Enterprise
Edition
Microsoft Windows 2000 Server/Advanced Server
Configuration Method of disk arrays: BIOS utility, NEC EXPRESSBUILDER and ASMBE
Features
HostRAID supports the hot swap rebuild function for the hot plug insertion (Hot-Swap) of
hard disk drives (when SCSI HostRAID is installed).
HostRAID enables the BIOS utility to select the disk array/standard SCSI for each
channel (when SCSI HostRAID is installed).
HostRAID enables the BIOS utility to select the disk array/standard SATA for each
channel (when SATA HostRAID is installed).
Since the JAVA-based management utility ASMBE uses the browser (IE5.5 or later), the
software does not need to be installed into each client PC for management. (The software
must be installed in each server.)
Installing the Operating System with Express Setup
5-43
Notes
The following explains general notes on HostRAID:
<SCSI HostRAID>
Only a hard disk drive can be connected to a channel with which HostRAID is enabled
through SCSI BIOS.
To connect a device other than a hard disk drive, disable HostRAID and use it as the
standard SCSI.
If you replace a hard disk drive being used with HostRAID, let 60 seconds or more pass
after removing the hard disk drive, and then install a new hard disk drive.
If the interval is too short, an unexpected event may occur. (You should install a new hard
disk drive after confirming the removal of the old hard disk drive on the ASMBE
window.)
After rebuilding by using hot spare, do the rebuilding again to make the installation
positions of hard disks and the configuration of an array using the disks same as those
before the configuration of the array. Without the operation, the boot priority may be
changed. The priority can be changed by the SCSISelect Utility.
The timeout message below may be recorded into the event log if I/O operation is delayed
while HostRAID is running with a high load applied. However, HostRAID internal
processing retries the I/O processing, and the delay does not influence AP and system
operations.
Event source: a320raid.sys
Event ID:
9
Description: The device \Device\Scsi\a320raid* did not respond within timeout period.
(*: Arbitrary)
When Hot Spare Rebuild is performed, please perform Rebuild again to become the
original hard disk mounting position and the same position. If this work is not done, a
boot priority may change. A boot priority can be changed in BIOS.
<SATA HostRAID>
Only use the HostRAID drive as a system drive.
Only a hard disk drive can be connected to a channel with which HostRAID is enabled
through the BIOS setup utility.
To connect a device other than a hard disk drive, disable HostRAID and use it as the
standard SATA.
If you replace a hard disk drive being used with HostRAID, please replace the hard disk
drive after power-off of the system. Be sure to check the PORT number of the hard disk
drive to be replaced in ASMBE in advance.
5-44 Installing the Operating System with Express Setup
<Common NOTES>
In addition to driver installation, ASMBE installation is mandatory for using HostRAID
functions. For the installation of ASMBE, refer to the "Adaptec Storage Manager Browser Edition User's Guide."
HostRAID does not permit the use of the standby/hibernation mode of ACPI functions.
Use ASMBE to maintain HostRAID, but do not use any other utilities.
Create at least one OS partition in the array you have created. If the OS partition does not
exist, the Verify may be executed for the array at the system boot.
If the following messages are included in the application log or log generated by the
ASMBE, your RAID system operates normally.
– Spare test failed for pool spare (bus=%2, ch=%3, id=%4)
– Test of all spares completed with %1 failures
Installing the Operating System with Express Setup
5-45
HostRAID Setup Flow
The flowchart below shows the HostRAID system setup procedure.
Start
Is HostRAID used as
boot disk?
No
Yes
Enable the HostRAID
feature and create RAID by
using SCSISelect Utility
Refer to SCSISelect
Utility User's Manual.*1
Install driver
(install OS).
See Appendix D or E of
this guide.
Update system.
See this chapter.
Install ASM.
See ASMBE User's
Guide*2.
Install Standby/Hibernation
Lock driver.
See appendix of ASMBE
User's Guide*2.
End
Enable the HostRAID
feature and create RAID
by using SCSISelect
Utility
Refer to SCSISelect
Utility User's Manual.*1
Install driver.
Create the support disk
by using NEC
EXPRESSBUILDER
and install the HostRAID
driver with the Windows
hardware wizard.
Install ASMBE.
See ASMBE User's
Guide*2.
Install
Standby/Hibernation
Lock driver.
See appendix of ASMBE
User's Guide*2.
End
*1 You can create RAID by using the NEC EXPRESSBUILDER. In this case, only you need to do is to
set the HostRAID feature to "Enabled" by using SCSISelect Utility.
*2 ASMBE User's Guide: Adaptec Storage Manager - Browser Edition User's Guide.
You may view or print the SCSISelect Utility User's Manual and Adaptec Storage Manager Browser Edition User's Guide from the NEC EXPRESSBUILDER CD-ROM.
5-46 Installing the Operating System with Express Setup
(This page is intentionally left blank.)
Chapter 6
Installing and Using Utilities
This section describes how to use the NEC EXPRESSBUILDER CD-ROM that comes with your
server and to install the utilities stored on the NEC EXPRESSBUILDER.
6-2 Installing and Using Utilities
NEC EXPRESSBUILDER
NEC EXPRESSBUILDER is an automated software integration tool to help simplify the process of
installing and configuring your server. Shipped with all NEC servers, the NEC
EXPRESSBUILDER CD-ROM provides a flexible, guided installation process for system
administrators to install Microsoft Windows 2003 Server, Microsoft Windows 2000 or other
operating systems (contact your service representative for the server certified operating systems).
NOTE: Before using NEC EXPRESSBUILDER for initial setup,
complete the hardware configuration.
NEC EXPRESSBUILDER includes two distinct programs. One can be booted under DOS for
initial setup, and one is for use under Windows operating system.
DOS-based with local console
Used to set up the server at the first time. This program is also used to diagnose the
server and to install/uninstall the management utilities on the maintenance partition of the
system drive.
DOS-based with remote console
Used to set up the server from the management workstation by accessing the server over
the network or via serial port B.
NOTES:
This menu is displayed only when an optional remote management
card is installed in your system.
No keyboard connected to the server is permitted to run this
program.
Installing and Using Utilities
6-3
Windows-based
This program is called as "Master Control Menu" that can run under the Microsoft
Windows system (Windows 95 or later and Windows NT 4.0 or later). You can install
the several applications and read the documentation from the menu.
6-4 Installing and Using Utilities
NEC EXPRESSBUILDER for DOS-Based with Local Console
This subsection describes the procedures for using NEC EXPRESSBUILDER for DOS-based with
local console.
Starting NEC EXPRESSBUILDER
The following procedure instructs you to start NEC EXPRESSBUILDER.
IMPORTANT: Do not remove the NEC EXPRESSBUILDER CDROM while NEC EXPRESSBUILDER is running.
1.
Turn on peripheral devices and the server in this order.
2.
Insert the NEC EXPRESSBUILDER CD-ROM supplied with your server into the CDROM drive of your server.
3.
Ensure that the floppy disk drive is empty.
4.
Press the RESET switch or press Ctrl, Alt, and Delete to reboot from the NEC
EXPRESSBUILDER. (You may also turn off and then on again to reboot the server.)
NEC EXPRESSBUILDER boots up displaying the top menu.
Installing and Using Utilities
6-5
Express Setup
"Express Setup" is intended for initial setup of the server. Its automatic installation mode guides
the user easily through the process by detailing specific hardware features and providing screen
prompts for software selection and configuration. The program loads the utilities and drivers,
applies RAID settings, partitions the disk, and installs the desired operating system.
If you install Windows Server 2003 or Windows 2000 Server, after a few tasks are completed, all
that remains to be done is to remove the NEC EXPRESSBUILDER CD-ROM and install the
Windows CD-ROM, input a product ID number, and acknowledge the license agreement.
IMPORTANT:
The Express Setup is intended for the initial setup of the server
system and, therefore, the Express Setup clears the contents of the
hard disk.
Once Express setup is started, do not remove "Configuration
Diskette" from the floppy disk drive without any directions.
Tools
"Tools" is also intended for initial setup of the server. It provides more installation options than
Express Setup and permits the user to quickly create utility support disks, run the Off-line
Maintenance Utility and system diagnostic utility, set up a maintenance partition, and update the
various BIOS programs.
NEC Express5800 NEC EXPRESSBUILDER Ver3. xxxx-x Copyright (C) NEC Corporation 2004
Tools Menu
Save/Restore RAID Configuration Data
Off-line Maintenance Utility
System Diagnostics
Create Support Disk
Setup Maintenance Partition
BIOS/FW/etc. Update
Initialize Remote Management Card
System Management
Help
Return to the Top Menu
RAID Board: Present
Total Drives: 1
Drives in Group: 1
Hot Spares: 1
RAID Level: 7
Write Mode: WRITE_THRU
Maint Part: Present
Save/Restore RAID Configuration Data
The item allows the configuration information on the disk array system to be saved or
restored from the floppy disk.
If the HostRAID and LSI-Logic disk array controllers are used together, the configuration
information of HostRAID is saved or restored. If the Adaptec Zero channel raid controller
(ZCR) and LSI-Logic disk array controller are used together, the configuration
information of ZCR is saved or restored.
IMPORTANT: In these cases, If you want to save or restore the
configuration information of LSI-Logic disk array controller, refer to
the "Power Console Plus User's Guide".
6-6 Installing and Using Utilities
– Save Disk Array Configuration Data
The configuration information on the disk mirroring controller is saved into the floppy
disk. If you set or change RAID, always use this function to save the configuration
information into a floppy disk.
IMPORTANT: Some Disk Array Controllers do not support this
function. In that case, this menu will not be shown.
– Restore Disk Array Configuration Data
The configuration information saved in a floppy disk is restored to NVRAM and hard
disk on the disk mirroring controller.
If the configuration information is broken or changed by mistake, restore the
configuration information.
When the defected disk array controller is replaced, the configuration information on
the hard disk must be saved into the disk array controller.
However, if the configuration information on the new disk mirroring controller is saved
into a hard disk, use this function to restore the configuration information.
IMPORTANT:
Some Disk Array Controllers do not support this function. In that
case, this menu will not be shown.
This is a function for maintenance. Please do not use it except
maintenance.
Off-line Maintenance Utility
Off-line Maintenance Utility is an OS-independent maintenance program that performs
preventive maintenance and error analysis for your server. See Chapter 8 or online help
for details.
System Diagnostics
Executes various tests on the server system to check if the server functions are normal and
if the connection between the server and additional board is normal.
After the System Diagnostics is executed, a system check program assigned to each model
starts. See Chapter 7 for details.
Create Support Disk
NEC EXPRESSBUILDER CD-ROM contains a number of device drivers and utilities
that you can put on floppy disks and load onto your system.
Using this menu creates a support disk by copying from the NEC EXPRESSBUILDER
CD-ROM. If your system has the Windows operating system, you may find it more
convenient to use NEC EXPRESSBUILDER for Windows-based to make support disks
Write the displayed title on the floppy disk label, which is useful for management in the
future. Customers are to provide a floppy disk to create a support disk.
Installing and Using Utilities
6-7
– Windows Server 2003 OEM-DISK for NEC EXPRESSBUILDER
Creates a support disk for installing Windows Server 2003 Standard Edition and
Windows Server 2003 Enterprise Edition. (No need to create this disk when installing
the operating system with the Express Setup.)
– Windows 2000 OEM-DISK for NEC EXPRESSBUILDER
Creates a support disk for installing Windows 2000 Server and Windows 2000
Advanced Server. (This disk is utilized for Windows 2000 clean installation and for
Recovery for Windows 2000 system.) (No need when installing the operating system
with the Express Setup.)
– ROM-DOS Startup FD
Creates a support disk for starting the ROM-DOS system.
– Off-line Maintenance Utility Bootable FD
Creates a support disk for activating the Off-line Maintenance Utility.
– System Management FD
Creates a support disk for activating the System Management.
Setup Maintenance Partition
Maintenance partition is a specific partition for the server and created on your system disk.
About 55MB of the maintenance partition includes the various maintenance utilities and
executable commands.
In this menu, you can create the maintenance partition, install the various utilities, and
update the utilities. The maintenance utilities installed in the maintenance partition are
system diagnostics, System Management, and Off-line Maintenance Utility.
IMPORTANT:
Do not reset or turn off the server while the running this menu. If
the processing is discontinued, the system becomes unable to start.
The existence of the maintenance partition may be identified from
the operating system. In order to retain the Configuration Data,
do not delete the partition.
NOTES:
The maintenance partition, once created, will not be recreated
again.
When the maintenance partition does not exist, some menu items
do not appear.
– Create Maintenance Partition
NEC EXPRESSBUILDER creates about 55MB of the maintenance partition on the
system disk (or disk array system) as work area. The various utilities are installed
when the maintenance partition is created successfully or when the maintenance
partition is already created.
6-8 Installing and Using Utilities
– Install Maintenance Partition Utilities
Various utilities are installed in the maintenance partition from the CD-ROM.
– Update Maintenance Partition Utilities
Various utilities are copied in the Maintenance Partition from the update disk. This
menu is only used when the update disk is supplied from your service representative or
attached with your system.
– FDISK
Execute FDISK command of ROM-DOS system. You can create/delete partitions,
etc.
BIOS/FW/etc. Update
This menu allows you to update the software module such as BIOS and firmware of the
server by using the update disk (3.5-inch floppy disk) that is distributed from NEC
customer service representative.
After rebooting the system, an update program is started automatically from the floppy
disk, and the various BIOS and firmware programs are updated.
IMPORTANT: Do not turn off the server while the update program
is running. If the update processing is discontinued, the system
becomes unable to start.
Initialize Remote Management Card
"Initialize Remote Management Card" is used to configure the Remote Management Card
with correct parameters of the system installed it.
IMPORTANT: This menu is indicated when optional Remote
Management Card is attached.
System Management
The parameters of BMC (Baseboard Management Controller) are set for remote control
and alert.
IMPORTANT: This menu is indicated when optional Remote
Management Card is attached.
Help
Displays explanations about various functions of NEC EXPRESSBUILDER.
Return to the Top Menu
Choosing this menu returns to the Top Menu.
Installing and Using Utilities
6-9
NEC EXPRESSBUILDER for DOS-based with Remote Console
This subsection describes the procedures for using NEC EXPRESSBUILDER for DOS-based with
remote console.
NEC EXPRESSBUILDER contains the remote console feature that allows the system administrator
to set up the server from the management workstation (management PC) via the network or the
server's COM B (serial) port.
IMPORTANT:
Do not use this feature on any other computer than the server, or
on any other server obtained without the NEC
EXPRESSBUILDER. Doing so may cause a failure of the
server.
When a keyboard is connected to the server, the remote console
feature is disabled. The NEC EXPRESSBUILDER determines
that the server has a console. (Nothing is displayed on the
management PC.)
If you fail to configure the disk array controller N8103-80F or 81F
from the remote console, try again using the server console.
The system may fail to operate with the transfer rate of 115.2 Kbps
for serial console redirection. Specify any other transfer rate than
115.2 Kbps.
6-10 Installing and Using Utilities
Starting
The following two methods are available to start the server.
Running NEC EXPRESSBUILDER from the management PC via LAN
Running NEC EXPRESSBUILDER from the management PC via direct connection
(COM B)
For the procedure for starting NEC EXPRESSBUILDER for DOS-based with Remote Console, see
"NEC DianaScope".
IMPORTANT:
Do not change the boot device order in BOOT menu in BIOS
SETUP. NEC EXPRESSBUILDER cannot be used if the CDROM drive is not the first device to launch the system.
To use this feature, you need 3.5-inch floppy disk. Please prepare
the floppy disk.
NOTE: The following items of BIOS setup information will be set as
shown below.
LAN Controller:
[Enabled]
Serial Port A:
Base I/O Address:
Interrupt:
[Enabled]
[3F8]
[IRQ 4]
Serial Port B:
Base I/O Address:
Interrupt:
[Enabled]
[2F8]
[IRQ 3]
BIOS Redirection Port:
[Serial B]
Baud Rate:
[19.2K]
Flow Control:
[CTS/RTS]
Console Type:
[PC ANSI]
Installing and Using Utilities
6-11
Main Menu
Shown below are the main menu items.
Setup
Automatically sets up the server.
Tools
Launch the features of NEC EXPRESSBUILDER individually.
Help
Help message on NEC EXPRESSBUILDER.
Quit
Quit NEC EXPRESSBUILDER.
Setup
The NEC EXPRESSBUILDER checks the hardware configuration of the server. The disk array
and maintenance partition are automatically configured.
6-12 Installing and Using Utilities
Tools
When you select the [Tools] on the Main Menu, the following screen appears.
The menu items available only in remote console operation among those described in section "NEC
EXPRESSBUILDER for DOS-based with Local Console" are displayed. See the previous
subsection for detailed explanation of menu items.
IMPORTANT: The followings are varied from the [Tools] menu in
the local console mode.
Test items and operation method of System Diagnostics. See
Chapter 7 for details.
Type of disks to be created in [Create Support Disk]
Installing and Using Utilities
6-13
NEC EXPRESSBUILDER for Windows-Based (Master Control Menu)
The Master Control Menu is used to,
Read documentation,
Install the management software, and
Install the viewer application (Adobe Acrobat Reader).
NOTES:
Master Control Menu requires Microsoft Windows 95 (or later) or
Windows NT 4.0 (or later).
Some documents are provided in the PDF format. Use the Adobe
Acrobat Reader to read these documents.
Insert the NEC EXPRESSBUILDER CD-ROM into the CD-ROM drive. Master Control Menu
appears on the screen automatically. If the Autorun function is invalid in your system, run the
\MC\1ST.EXE file in the CD-ROM directly. Some items are grayed-out when the logon user does
not have the authority of the administrator or the item is not proper for the system.
To use Master Control Menu,
Click on [Online Document], [Setup] or [Quit], or
Click the right mouse button on Master Control Menu window.
6-14 Installing and Using Utilities
CONFIGURATION DISKETTE CREATOR
"Configuration Diskette Creator" is a tool to create [Configuration Diskette] that is used for
configuring the server with the Express Setup (see Chapter 5 for details).
If you use the Configuration Diskette created by the Express Setup and Configuration Diskette
Creator to operate the setup, you can setup from the installation of OS to several utilities
automatically except for a few key input to confirm the specification. Also, you can install the
system with the same specification as before when re-installing the system. We recommend you to
create [Configuration Diskette] to setup the servers from NEC EXPRESSBUILDER.
NOTE: You can install Windows Server 2003 and Windows 2000
without [Configuration Diskette]. Also, you can modify/newly
create [Configuration Diskette] during the setup with NEC
EXPRESSBUILDER.
Creating Configuration Diskette
This section describes about specifying setup information that is necessary for OS installation and
creating [Configuration Diskette]. Follow the procedure below.
NOTE: In the procedure below, the folder name that is specified when
installing Trekking command is assumed as [Configuration Diskette
Creator].
1.
Start the OS.
2.
Insert the attached NEC EXPRESSBUILDER CD-ROM into the CD-ROM drive.
Master Control Menu will appear.
3.
Right-click on the screen or left-click [Software Setup]. The menu will appear.
4.
Click [Configuration Diskette Creator].
Configuration Diskette Creator window is displayed.
Installing and Using Utilities
5.
6-15
Click [Create New Information files] from the [File] menu.
The [Disk Environment] dialog box will be displayed.
6.
Specify each item and click [OK].
The dialog boxes to specify setup information will be displayed in order, such as [Basic
Information] dialog box.
6-16 Installing and Using Utilities
7.
Follow the message to specify each item on the dialog box and click [Next].
NOTE: If you click [Cancel], all the input value will be deleted.
When completing the specification of setup information, the [Save the Files] dialog box
will appear.
8.
Confirm that the [Configuration Diskette] check box is checked, and input file name for
the Setup File in [File Name].
9.
Insert the floppy disk formatted by 1.44MB into the floppy disk drive and click [OK].
Now [Configuration Diskette] has been created. [Configuration Diskette] is used when
you install Windows Server 2003 or Windows 2000. Put a label and keep it where it will
not be lost.
NOTE: For the information on the contents of each specifying item,
refer to the Help.
If you want to modify the information file that already exists, click [Modify information
files] on Configuration Diskette Creator window. Refer to the Help to modify the inf
file.
Installing and Using Utilities
6-17
NEC ESMPRO
The NEC ESMPRO (referred to as ESMPRO hereafter) lets a system administrator manage remote
servers across a network. ESMPRO monitors server hardware and software configurations,
failures, and performance. With log data collected by ESMPRO, a system administrator can track
long-term and short-term performance, monitor server usage, create graphs to record trends, and
check server failure rates. The administrator can use the information collected to create more
efficient data routing procedures and optimize server usage.
Functions and Features
The ESMPRO offers many functions and features for managing remote servers across a network.
These features help the system administrator perform daily system operation, system extension, and
transfer tasks. Some features of ESMPRO Manager include:
Hardware and software server configuration
– Hardware resources mounted in servers, such as the CPU, memory, disks, disk arrays,
and LAN boards.
– Software resources, such as operating system information and drivers running on each
server.
Server failures
– On-screen real-time displays provide the system administrator with the failure type,
location, cause, and suggested corrective action.
– Failure data includes hardware failure information such as system board temperature,
memory failure, crashes, and software failure information.
Performance
– ESMPRO monitors server performance and displays server usage on the screen and
displays information, such as the rate of CPU load, memory usage, disk usage, and
LAN traffic. Usage threshold values can help the system administrator monitor and
prevent server overloads.
For installation procedure and detailed explanations on NEC ESMPRO, refer to the online
document in the NEC EXPRESSBUILDER CD-ROM.
6-18 Installing and Using Utilities
Adaptec Storage Manager
Adaptec Storage Manager - Browser Edition (hereinafter abbreviated to ASMBE) is a Web-based
application that locally or remotely manages Zero Channel RAID (hereinafter abbreviated to ZCR)
and HostRAID storage system provided by Adaptec Inc.
Features
Creating disks at a level of RAID0, RAID1, or RAID10
Creating Hot Spare disks that are to be used for automatically executing Rebuild if a
redundant disk array enters the Degraded state
Making a consistency check on redundant disk arrays
Recording HostRAID events into the event log
Omitting the installation of client software into each management PC if the previously
mentioned browser is installed. This is because ASMBE uses the browser (Internet
Explorer 5.5 or later).
Before attempting to operate ASMBE, read the "Adaptec Storage ManagerTM - Browser Edition
User's Guide" included in NEC EXPRESSBUILDER CD-ROM. The manual explains the ASMBE
installation procedure and notes on operating ASMBE.
Installing and Using Utilities
6-19
Power Console Plus
Power Console Plus is a utility to control the RAID system of the disk array controller (MegaRAID
controller) produced by LSI Logic. Use of Power Console Plus enables operations (e.g., monitoring
and maintenance) of RAID systems that are constructed on local NEC Express servers and NEC
Express servers connected through networks (TCP/IP). The operations can be done online on
graphical screens without the system being stopped.
Major Functions
Power Console Plus has the following features:
Supporting the Wizard function to facilitate configuration
Enabling the change of RAID levels
Being compatible with SAF-TE
Supporting the performance monitor
Supporting enclosure functions such as temperature monitoring, power monitoring, and
fan monitoring
Enabling the settings of Write, Read, and Cache policies for each logical drive
Supporting the save and restore functions for configuration
Enabling the display of the SCSI transfer rate
Components
Power Console Plus consists of the following five components:
SNMP Agent
This function is not yet supported. Do not install SNMP Agent.
MegaRAID Service Monitor
Enables NEC ESMPRO to monitor the MegaRAID controller by registering event logs.
Install MegaRAID Service Monitor in the NEC Express server in which the MegaRAID
controller is mounted.
MegaRAID Client
Controls the RAID system on graphical screens. Install MegaRAID Client in the NEC
Express server in which the MegaRAID controller mounted or in the management PC that
is connected through the NEC Express server and network.
MegaRAID Server
Enables control of the MegaRAID controller via the network. Install MegaRAID Server in
the NEC Express server in which the MegaRAID controller mounted.
6-20 Installing and Using Utilities
MegaRAID Registration Server
Enables control of the MegaRAID controller via the network. Install in one of NEC
Express servers and management PCs that are connected through network. The above
components must be installed correctly for establishing the environment to use Power
Console Plus.
Power Console Plus components to be installed are different between the target servers and
management PC.
Server:
NEC Express server in which the MegaRAID controller is mounted
Install the following three components in this server:
– MegaRAID Service Monitor
– MegaRAID Server
– MegaRAID Client
Management PC:
Management PC that monitors and controls servers via the network (TCP/IP)
When managing array on Terminal Server working on Windows NT Server Version 4.0
Terminal Server Edition, prepare PC, and install Management PC component.
Management PC does not guarantee operation on Client, which used Terminal Server,
Terminal Server Emulator, WBT.
Start Power Console Plus of management PC, after the Power On machine that installed
"Server" and "Management Server".
Install the following component in this PC:
– MegaRAID Client
Management server:
Machine that manages all servers that are monitored and controlled by management PCs
Install the following component in one of the servers or management PCs:
– MegaRAID Registration Server
Installing and Using Utilities
6-21
Server Setup
This section explains Power Console Plus setup in the NEC Express server in which the MegaRAID
controller is mounted.
Operating Environment
This section explains the operating environment required for Power Console Plus to operate on a
server.
Hardware
– Machine:
NEC Express5800 series connected with the AMI disk array controller (A)
– Memory:
Size large enough for OS operation + 8MB or more
– Free space of the hard disk:
5MB or more
– Display unit:
Screen size 1024 × 768 or larger
– Required peripheral equipment:
Network Interface card
CD-ROM unit
Pointing device such as a mouse
Software
– Microsoft Windows NT version 4.0
(Windows NT Version 4.0 Service Pack 5 or later + Internet Explorer 4.01 Service
Pack 2 or later)
– Microsoft Windows 2000
6-22 Installing and Using Utilities
Management PC Setup
This section explains Power Console Plus setup in a computer that manages servers via the network
(TCP/IP).
Operating Environment
This section explains the operating environment required for Power Console Plus to operate on a
management PC.
Hardware
– Machine:
NEC Express5800 series
PC/AT-compatible machine (which contains Intel Pentium or a CPU at least equivalent
to it)
– Memory:
Size large enough for OS operation + 8MB or more
– Free space of the hard disk:
5 MB or more
– Display unit:
Screen size 1024 × 768 or larger
– Required peripheral equipment:
Network Interface card
CD-ROM unit
Pointing device such as a mouse
Software
– Microsoft Windows NT Version 4.0
(Windows NT Version 4.0 Service Pack 5 or later + Internet Explorer 4.01 Service
Pack 2 or later)
– Microsoft Windows 2000
– Microsoft Windows 95/98/Me
Installing and Using Utilities
6-23
NEC DianaScope
NEC DianaScope is software for the remote management of the NEC Express5800 series.
See the online documents for details on the functions and installation of NEC DianaScope.
NOTE: To activate NEC DianaScope, purchase the following license
key.
UL1198-001E SystemGlobe DianaScope Additional Server
License (1)
UL1198-011E SystemGlobe DianaScope Additional Server
License (10)
Notes
The online documents explain general information about servers to be managed by NEC
DianaScope. This section explains specific notes on managing this product remotely from NEC
DianaScope.
This product can be managed remotely from NEC DianaScope only when it is equipped
with a remote management card or advanced remote management card that is an optional
product.
This product does not support the remote FD function.
This product does not support the chassis ID function. A chassis ID command issued on
NEC DianaScope is executed normally, but some operations such as turning on the unit
ID lamp on the server are not performed.
6-24 Installing and Using Utilities
(This page is intentionally left blank.)
Chapter 7
Maintenance
This chapter describes the daily maintenance of the server and precautions when relocating or
storing the server.
MAKING BACKUP COPIES
NEC recommends you make backup copies of your valuable data stored in hard disks of the server
on a regular basis. For backup storage devices suitable for the server and backup tools, consult
with your sales agent.
When you have changed the hardware configuration or BIOS configuration, select "System
Information Management" and then "Save" of the Off-line Maintenance Utility to make a backup
copy of the system information.
Also make a backup copy of the disk array configuration data if your system is in the array
configuration. When your hard disks have been auto-rebuilt due to a failure, it is recommended to
make a backup copy of the configuration data. To make a backup copy of the configuration data,
use the configuration utility that is resident in the FLASH memory on the optional disk array
controller board. Refer to the manual supplied with the board.
7-2 Maintenance
CLEANING
Clean the server on a regular basis to keep the server in a good shape.
WARNING
Observe the following instructions to use the server safely. Failure to follow
these instructions may result in death or serious personal injury. See pages
1-3 to 1-8 for details.
■
■
■
■
Do not disassemble, repair, or alter the server.
Do not look into the CD-ROM drive.
Do not remove the lithium battery.
Disconnect the power plug before working with the server.
CAUTION
Observe the following instructions to use the server safely. Failure to follow
these instructions may cause a fire, personal injury, or property damage. See
pages 1-3 to 1-8 for details.
■
■
■
Avoid installation in extreme temperature conditions.
Make sure to complete board installation.
Protect the unused connectors with the protective cap.
Maintenance
Cleaning the Server
For daily cleaning, wipe the external surfaces of the server with a dry soft cloth. Follow the
procedure below if stains remain on the surfaces:
IMPORTANT:
To avoid altering the material and color of the server, do not use
volatile solvents such as thinner and benzene to clean the server.
The power receptacle, the cables, the connectors on the rear panel of
server, and the inside of the server must be kept dry. Do not
moisten them with water.
1.
Make sure that the server is off-powered (the POWER/SLEEP lamp goes off).
2.
Unplug the power cord of the server from a power outlet.
3.
Wipe off dust from the power cord plug with a dry cloth.
4.
Soak a soft cloth in neutral detergent that is diluted with cold or lukewarm water, and
squeeze it firmly.
5.
Rub off stains on the server with the cloth prepared in Step 4.
6.
Soak a soft cloth in water, squeeze it firmly, wipe the server with it once again.
7.
Wipe the server with a dry cloth.
8.
Wipe off dust from the fan exhaust opening on the rear of the server with a dry cloth.
7-3
7-4 Maintenance
Cleaning the Interior
One of the most important items in a good maintenance program is regular and thorough cleaning of
the interior of the server, especially around the mother board.
Dust buildup inside the server can lead to several problems. As dust acts as a thermal insulator, a
buildup can prevent proper system cooling. Excessive heat will shorten the life of server
components. Also, dust may contain conductive or corrosive materials that can cause short circuits
or corrosion of electrical contacts.
How often you should clean the interior of the server depends on the environment in which it is
located. For most office environments, you probably should clean the server every 12 months.
For more severe environments, clean the interior every 6 months.
Cleaning the interior of the server entails powering off the server and removing the left side cover.
You will need a small vacuum cleaner (with plastic tipped nozzle and electrostatic protection),
computer grade canned air, and a small brush for cleaning the interior.
Follow the procedure below to clean the interior of the server.
WARNING
Unplug all power cords.
Unplug all power cords before performing any maintenance. Voltage is present
inside the server and display unit even after the power is turned off. All voltage
is removed only when the power cord is unplugged.
1.
Turn off the server and unplug all power cables.
2.
Remove the logic cover and drive cover.
3.
Use a small brush to loosen any dust and debris on the mother board.
4.
Use computer grade canned air to blow dust off components on the mother board.
5.
Use a small vacuum cleaner with plastic tip to vacuum out dust and debris from the
interior of the server.
6.
Reinstall the left side cover.
7.
Reconnect all power cables and turn on the server.
(See Chapter 9.)
(See Chapter 9.)
Maintenance
7-5
Cleaning the Keyboard/Mouse
Make sure that the server and peripheral devices are all off-powered (the POWER/SLEEP lamp
goes off), and then wipe the keyboard surface with a dry cloth.
The mouse operation depends on the degree of smoothness of the internal ball rotation. To keep
the mouse ball clean, use the mouse in a place with little dust. Follow the steps below to clean the
mouse regularly:
1.
Prepare cold or lukewarm water, neutral detergent, alcohol, two dry soft clothes, and
cotton swabs.
2.
Make sure that the server is off-powered (the POWER/SLEEP lamp goes off).
3.
Turn the mouse upside down, and rotate the mouse ball cover counterclockwise to remove
it.
4.
Take out the ball from the mouse. Cover the bottom of the mouse with your hand, and
turn your hand holding the mouse (the mouse is on your palm with the button upward).
The mouse ball is released onto your palm.
Mouse ball
Mouse ball cover
Bottom View
Roller
5.
Soak a soft cloth in neutral detergent that is diluted with cold or lukewarm water, and
squeeze it firmly.
6.
Rub off stains on the mouse ball. Softly wipe the mouse ball with the cloth prepared in
Step 5.
7.
Wipe the mouse ball with a dry soft cloth.
8.
Wipe three small rollers inside the mouse with a cotton swab soaked with alcohol. Wipe
stains slowly and carefully by rotating rollers with the tip of the cotton swab.
9.
Blow out any dust from the mouse. Protect your eyes from the dust.
10.
Put the mouse ball back into the mouse.
11.
Place the mouse ball cover, and rotate it clockwise until it is locked.
7-6 Maintenance
Cleaning CD-ROM
A dusty CD-ROM or dust-accumulated tray causes the device to fail to read data correctly.
Follow the procedure below to clean the tray and CD-ROM regularly:
1.
Make sure that the server is powered (the POWER/SLEEP lamp is lit).
2.
Press the CD tray Open/Close button on the front of the CD-ROM drive.
The tray opens.
3.
Hold the CD-ROM lightly and take it out from the tray.
NOTE: Do not touch the signal side of the CD-ROM with your hand.
4.
Wipe the tray with a dry soft cloth.
IMPORTANT: Do not wipe the lens of the CD-ROM drive. Doing
so may damage the lens and may cause a malfunction of the drive.
5.
Push on the tray front to close the tray.
6.
Wipe the signal side of the CD-ROM with a dry soft cloth.
IMPORTANT: Wipe CD-ROMs from the center to the outside. Use
only CD-ROM cleaner if necessary. Cleaning a CD-ROM with record
spray/cleaner, benzene, or thinner causes damage to the CD-ROM
contents. At worst, inserting the CD-ROM into the server may cause
failure.
Maintenance
7-7
SYSTEM DIAGNOSTICS
The System Diagnostics runs several tests on the server.
Use the System Diagnostics program in the NEC EXPRESSBUILDER provided with the server to
diagnose the server.
Test Items
The following items are tested in system diagnostics.
Memory
CPU cache memory
Hard disk used as a system
IMPORTANT: When executing the System Diagnostics, make sure to
remove the LAN cable. Executing the System Diagnostics with the
LAN cable connected, the network may be influenced.
NOTE: On checking the hard disk, no data is written into the disk.
7-8 Maintenance
Starting and Ending the System Diagnostics
There are two ways to diagnose the server: to use the local console (keyboard) of the server itself,
and to use the management PC via serial port (remote console).
IMPORTANT: Two methods of LAN and the serial port are
mentioned in Chapter 6 "NEC EXPRESSBUILDER" in the way of
communicating in remote console. Use the serial port to execute
System Diagnostics with remote console. The LAN connection is not
for System Diagnostics.
Procedures to start the diagnostics program is as follows:
1.
Shutdown the OS, and turn off the server. Then, unplug the power cord.
2.
Disconnect all the LAN cables from the server.
3.
Plug the power cord and turn on the server.
4.
Use the NEC EXPRESSBUILDER CD-ROM to reboot the server.
See the Chapter 6 "NEC EXPRESSBUILDER" for details.
The following menu appears when started the server using the NEC EXPRESSBUILDER.
Local console
5.
Select [Tools].
Remote console
Maintenance
6.
7-9
Select [System Diagnostics].
The System Diagnostics starts and completes in approximately three minutes.
When the diagnosis completes, the test window title shows "Test End", as the following
figure.
Diagnosis tool title
Test windows title
TeDoLi(TEst & Diagnosis On Linux) Ver001.00(Build020901.1.1m)
Test result
Test End
Start10:06:58 End 10:09:58
Test End : NormalEnd
03
<System>
MEM
Memory
CACHE
Cache
<SCSI>
HDD_02:000 DK32DJ-36W
[Enter] Detail Information
Pass 000:03:00 TestTime 000:03:00
AbnormalEnd 00 ForceEnd 00
16 count
49 count
NormalEnd
NormalEnd
89 count
NormalEnd
[ESC] Return to Enduser Menu
Guide line
Test window
Diagnosis tool title: shows a name of this diagnosis and Version information.
Test windows title: shows the progress of diagnosis. When it completes, it shows "Test
End"
Test Result:
shows the information including time of start, end and progress, and
result of the diagnosis.
Guide line:
shows a description of keys to navigate the window.
Test window:
Move the cursor and press Enter to view the detail of the diagnosis.
If an error is detected during the System Diagnostics, the test result shows "Abnormal
End" in red color. Move the cursor and press Enter on the diagnosis which error
occurred. Take a note of the error message showed, and contact your sales agent.
7-10 Maintenance
7.
Follow the Guide line showed in the bottom of the screen and press ESC to show the End
user Menu showed below.
TeDoLi (TEst & Diagnosis On Linux) Ver001.00 (Build020901.1.1m)
Enduser Menu
<Test Result>
<Device List>
<Log Info>
<Option>
<Reboot>
Please choose a function by the arrow key and push Enter key.
<Test Result>
shows the screen of the diagnosis completed aforementioned.
<Device List> shows the information of all the devices connected.
8.
<Log Info>
shows the log information and error messages of the diagnosis. It can be
saved to a floppy disk. To save the log information to a floppy disk,
insert a formatted floppy disk to a floppy disk drive and select
<Save[F]>.
<Option>
change where to output log
<Reboot>
Restarts the Express Server.
Select <Reboot> in the End user Menu above.
The Express Server restarts, and NEC EXPRESSBUILDER boot the system.
9.
Exit the NEC EXPRESSBUILDER, and remove the CD-ROM from the CD-ROM drive.
10.
Turn off the server and unplug the power cord from the receptacle.
11.
Reconnect all the LAN cables to the server.
12.
Plug the power code.
This completes the System Diagnostics.
Maintenance
7-11
RELOCATING/STORING THE SERVER
Follow the procedure below to relocate or store the server:
CAUTION
Observe the following instructions to use the server safely. Failure to follow
these instructions may cause a fire, personal injury, or property damage. See
pages 1-3 to 1-8 for details.
■
■
■
Never attempt to lift the server only by yourself.
Do not install the server in any place other than specified.
Do not connect/disconnect any interface cable with the power cord of the
server plugged to a power source.
IMPORTANT:
If the server needs to be relocated/stored due to a change in the floor
layout to a great extent, contact the sales agent.
Make sure to make a backup copy of your valuable data in the hard
disk, if any.
Make sure not to apply a shock to hard disks to relocated the server
if the contains any.
1.
Take a floppy disk and a CD-ROM out of the server, if any.
2.
Power off the server (the POWER/SLEEP lamp goes off).
3.
Unplug the power cord of the server from a power outlet.
4.
Remove all the cables from the server.
5.
Hold the server by its bottom with at least three persons to carry the server.
IMPORTANT: Do not hold the front door to lift the server. The
front door may be disengaged from the server, causing personal injury.
6.
Protect the server with the shock-absorbing materials, and pack it securely.
7-12 Maintenance
(This page is intentionally left blank.)
Chapter 8
Troubleshooting
If your server does not operate as expected, read this chapter before assuming a failure.
NOTE: For provision against an unexpected failure, it is
recommended to install the maintenance utility, NEC ESMPRO, to the
server and client computers.
8-2 Troubleshooting
SYSTEM VIEWERS
Monitor the occurrence of fault by NEC ESMPRO during the system operation.
Especially take note on whether any alert is reported to NEC ESMPRO Manager on the
management PC. Check whether any alert is reported on the Joint Viewer, Data Viewer, or Alert
Viewer of NEC ESMPRO Manager.
[Example]
NEC ESMPRO Manager
Troubleshooting 8-3
LAMPS
The server includes lamps to indicate the server states by a variety of colors and display patterns on
the front panel, hard disk drive, and power supply.
Chapter 2 "Status Indicators" lists the lamp displays and their meanings and the actions taken at
occurrences of failures.
8-4 Troubleshooting
ERROR MESSAGES
If an error occurs in the server, an error message appears on the display unit connected to the server.
Error Messages after Power-on
Powering on the server automatically starts the self-diagnostic program, POST (Power On SelfTest). When the POST detects any error, it displays an error message and its measure on the
display unit.
Follow the table below to troubleshoot such errors. However, even when there is no hardware
failure, use of the keyboard or mouse at the following timing causes the POST to assume a
keyboard controller error and stop processing.
Immediately after the server is powered
Immediately after the system is rebooted in response to a keyboard instruction
(simultaneous key entry of Ctrl + Alt + Delete)
Immediately after the system is rebooted in response to an OS instruction
During hardware initialization following restart of the POST
When the POST detects a hardware failure due to the above reason, restart the server once again.
If the same error message reappears, you may assume there is no hardware error. To ensure
normal operation of the server, however, make sure to follow the following restrictions.
Do not make any keyboard entry or use the mouse before the memory count appears on
the screen following the server power-on.
Do not make any keyboard entry or use the mouse before the start-up message of the SCSI
Configuration Utility appears on the screen following the server reboot.
IMPORTANT: Take a note on the on-screen message before
contacting your sales agent. The alarm indication would be a great
help for maintenance.
Troubleshooting 8-5
POST Error Messages
When POST detects an error, it displays an error message on the display unit screen. The
following table lists error messages and actions to take.
IMPORTANT: Take a note on the messages displayed before
consulting with your sales agent. Alarm messages are useful
information for maintenance.
Error
code
0200
0210
0213
Error message
Recommended Action
Failure Fixed Disk.
Stuck Key.
Keyboard locked - Unlock key switch.
Contact your service representative.
Disconnect the keyboard and connect it again.
Release the lock of the key switch. If the
error cannot be corrected in spite of the
release of the lock, contact your service
representative.
Start the SETUP. If the error cannot be
corrected in spite of the start of SETUP,
contact your service representative.
Contact your service representative.
0220
Monitor type does not match CMOS - Run
SETUP.
0230
0231
0232
0250
System RAM Failed at offset.
Shadow Ram Failed at offset.
Extended RAM Failed at address line.
System battery is dead - Replace and run
SETUP.
0251
System CMOS checksum bad - Default
configuration used.
0252
0260
0270
0271
Password checksum bad - Passwords
cleared.
System timer error.
Real time clock error.
Check date and time setting.
02B0
Diskette drive A error.
02B2
Incorrect Drive A type - run SETUP.
02D0
System cache error - Cache disabled.
Contact your service representative to replace
the battery. (After restarting the computer,
start the SETUP to provide the setting again.)
The default values have just been set. Start
the SETUP to provide the setting again. If
the error cannot be corrected, contact your
service representative.
The password has just been cleared. Start
the SETUP to provide the setting again.
Start the SETUP to set the date and time
again. If the same error occurs successively
in spite of the resetting, contact your service
representative.
Start the SETUP to set the "Legacy Floppy A"
in the Main menu again. If the same error
occurs successively in spite of the resetting,
contact your service representative.
Start the SETUP to provide the setting again.
If the error cannot be corrected, contact your
service representative.
The cache cannot be used. Contact your
service representative.
8-6 Troubleshooting
Error
code
02D1
02F4
02F5
02F6
02F7
0B22
0B28
0B29
0B30
0B31
0B32
0B33
0B34
0B35
0B36
0B37
0B38
0B39
0B5F
0B60
0B61
0B62
0B70
0B71
0B74
0B75
0B80
0B81
0B82
0B83
0B8B
0B8C
0B8D
0B8E
Error message
Recommended Action
System Memory exceeds the CPU's caching
limit.
EISA CMOS not write able.
DMA Test Failed.
Software NMI Failed.
Fail-safe Timer NMI Failed.
Processors are installed out of order.
Unsupported Processor detected on
Processor 1.
Unsupported Processor detected on
Processor 2.
FAN1 Alarm occurred.
FAN2 Alarm occurred.
FAN3 Alarm occurred.
FAN4 Alarm occurred.
FAN5 Alarm occurred.
FAN6 Alarm occurred.
FAN7 Alarm occurred.
FAN8 Alarm occurred.
FAN9 Alarm occurred.
FAN10 Alarm occurred.
Forced to use Processor with error
Contact your service representative.
DIMM group #1 has been disabled
DIMM group #2 has been disabled
DIMM group #3 has been disabled
The error occurred during temperature
sensor reading.
System Temperature out of the range.
The error occurred during voltage sensor
reading.
System voltage out of the range.
BMC Memory Test Failed.
BMC Firmware Code Area CRC check failed.
BMC core Hardware failure.
BMC 1BF or 0BF check failed.
BMC progress check timeout.
BMC command access failed.
Could not redirect the console - BMC Busy Could not redirect the console - BMC Error -
Request the maintenance to replace the CPU.
Make sure that the server supports the CPU.
If you are not sure, contact your service
representative to request the maintenance.
Contact your service representative to replace
the fan.
Because an error is detected in every CPU,
the system is forcibly started. Contact your
service representative.
Contact your service representative.
Contact your service representative.
Contact your service representative to replace
the fan.
Contact your service representative.
Turn off the power once and then on again to
start the server. If the error cannot be
corrected, contact your service representative.
Turn off the power once and then on again to
start the server. If the error cannot be
corrected, contact your service representative.
Troubleshooting 8-7
Error
code
0B8F
Error message
Recommended Action
0B90
0B91
0B92
Could not redirect the console - BMC
Parameter Error BMC Platform Information Area corrupted.
BMC update firmware corrupted.
Internal Use Area of BMC FRU corrupted.
Turn off the power once and then on again to
start the server. If the error cannot be
corrected, contact your service representative.
0B93
BMC SDR Repository empty.
0B94
IPMB signal lines do not respond.
0B95
BMC FRU device failure.
0B96
0B97
0B98
0B99
0B9A
BMC SDR Repository failure.
BMC SEL device failure.
BMC RAM test error.
BMC Fatal hardware error.
Management controller not responding.
0B9B
0B9C
0B9D
0B9E
0B9F
0BB0
0BB1
8100
8101
8102
None
Private I2C bus not responding.
BMC internal exception.
BMC A/D timeout error.
SDR repository corrupt.
SEL corrupt.
SMBIOS – SROM data read error.
SMBIOS – SROM data checksum bad.
Memory Error detected in DIMM group #1.
Memory Error detected in DIMM group #2.
Memory Error detected in DIMM group #3.
Expansion ROM not initialized – PCI Mass
Storage Controller in slot n (n: slot number)
H/W Configuration of BMC is corrupted.
!! Update BMC F/W Configuration by
configuration tool !!
!! Refer to BMC configuration manual !!
This is not a fatal error. Turn off the power
once and then on again to restart the server.
If the error cannot be corrected, contact your
service representative.
Turn off the power once and then on again to
restart the server. If the error cannot be
corrected, contact your service representative.
This is not a fatal error. Turn off the power
once and then on again to restart the server.
If the error cannot be corrected, contact your
service representative.
This is not a fatal error. Turn off the power
once and then on again to restart the server.
If the error cannot be corrected, contact your
service representative.
Turn off the power once and then on again to
start the server. If the error cannot be
corrected, contact your service representative.
Update the RMC firmware. If the error cannot
be corrected, contact your service
representative.
Turn off the power once and then on again to
start the server. If the error cannot be
corrected, contact your service representative.
Contact your service representative.
Contact your service representative to replace
the DIMM in the relevant group.
Disable initialization of the optional device
expansion ROM by using the BIOS SETUP
utility (see Chapter 4).
Update BMC firmware according to "BMC
Online Update" in Chapter 6 by using the NEC
EXPRESSBUILDER.
8-8 Troubleshooting
Beep Codes
If an error occurs during the POST, the server beeps, indicating the type of error.
Each number indicates the number of short beeps, and a hyphen indicates a pause. For example,
the beep interval 1-5-2-2 indicates 1 beep, pause, 2 beeps, pause, 2 beeps, pause, and 3 beeps
notifying that no processor is detected on the mother board.
Beep code
1-2
Description
Option ROM initialization
error
3-3
1-2-2-3
1-3-1-1
ROM checksum error
1-3-1-3
Keyboard controller error
1-3-3-1
No memory or capacity
check error
DRAM address error
DRAM test Low Byte
error
DRAM test High Byte
error
CPU startup error
No CPU installed
Abnormal voltage
1-3-4-1
1-3-4-3
1-4-1-1
1-5-1-1*
1-5-2-1*
1-5-4-4*
2-1-2-3
2-2-3-1
DRAM refresh test error
BIOS ROM copyright test
error
Unexpected interrupt test
error
Recommended action
1. Check if the optional add-in card is properly
installed.
2. Run the BIOS SETUP utility to check the IRQ
assignment.
3. Ask your service representative to replace the addin card or mother board..
Replace the mother board.
1. Check if the DIMM is properly installed.
2. Remove the DIMM once, and then re-install it to
check if it operates normally.
3. Ask your service representative to replace the failed
DIMM or mother board.
1. Check if the keyboard is properly connected.
2. Replace the mother board.
1. Check if the DIMM is properly installed.
2. Remove the DIMM once, and then re-install it to
check if it operates normally.
3. Ask your service representative to replace the failed
DIMM or mother board..
1. Check if the CPU is properly installed.
2. Remove the CPU once, and then re-install it to
check if it operates normally.
3. Ask your service representative to replace the failed
CPU.
Replace the mother board.
* Beeps only when the optional remote management card is installed in your system.
Troubleshooting 8-9
SOLVING PROBLEMS
When the server fails to operate as expected, see the following to find out your problem and follow
the instruction given before asking for repair.
If the server still fails to operate successfully after solving your problem, take a note on the onscreen message and contact your sales agent.
Problems with the Server
Fail to power on the server:
T Is the server is properly supplied with power?
→ Check if the power cord is connected to a power outlet (or UPS) that meets the
power specifications for the server.
→ Make sure to use the power cord provided with the server. Check the power cord
for broken shield or bent plugs.
→ Make sure the power breaker for the connected power outlet is on.
→ If the power cord is plugged to a UPS, make sure the UPS is powered and it
outputs power. See the manual that comes with the UPS for details.
Power supply to the server may be linked with the connected UPS using the BIOS
SETUP utility of the server.
<Menu to check: [Server] - [AC-LINK]>
T Did you press the POWER switch?
→ Press the POWER switch on the front of the server to turn of the power (the
POWER lamp lights).
Fail to power off the server:
T Is the POWER switch enabled?
→ Restart the server and start the BIOS SETUP utility.
<Menu to check: [Security] - [Power Switch Inhibit]>
T Is the server running in the Secure Mode?
→ The POWER switch is disabled in the Secure Mode. (Forced shutdown is also
not available.) To release the Secure Mode, enter the password specified with the
BIOS SETUP utility.
8-10 Troubleshooting
No screen display appears with beep:
→ Check whether DIMMs are connected to the mating connectors firmly.
→ Check whether DIMMs of different specifications are installed in the specific bank.
See Chapter 9 for the specifications of DIMMs.
→ DIMMs must be populated in pairs and in the following order:
#5 and #6, #3 and #4, then #1 and #2.
→ Installed DIMMs must be the same speed and must all be registered.
→ Take a note of beep code pattern, and take appropriate action according to the table
listed earlier in "Beep Codes".
POST fails to complete:
T Is the DIMM board installed?
→ At least two DIMM boards are required for operation.
→ Installed DIMMs must be the same speed and must all be registered.
→ DIMMs must be populated in pairs and in the following order:
#5 and #6, #3 and #4, then #1 and #2.
T Is the memory size large?
→ The memory check may take a few seconds if the memory size is large. Wait for
a while.
T Did you perform any keyboard or mouse operation immediately after you started the
server?
→ If you perform any keyboard or mouse operation immediately after start-up, POST
may accidentally detect a keyboard controller error and stops proceeding. In
such a case, restart the server once again. Do not perform any keyboard or
mouse operation until the BIOS start-up message appears when you restart the
server.
T Does the server have contains appropriate memory boards or PCI devices?
→ Operation of the server with unauthorized devices is not guaranteed.
Troubleshooting 8-11
Fail to access to internal or external devices (or such devices fail to operate):
T Are cables properly connected?
→ Make sure that the interface cables and power cord are properly connected. Also
make sure that the cables are connected in the correct order.
T Is the power-on order correct?
→ When the server has any external devices connected, power on the external
devices first, then the server.
T Did you install drivers for connected optional devices?
→ Some optional devices require specific device drivers.
comes with the device to install its driver.
Refer to the manual that
T Is BIOS configuration correct?
→ When the server has PCI devices connected, make sure to set the PCI device
interrupt and others with the BIOS SETUP utility of the server. (Most PCI
devices generally do not require any change to the configuration, but some boards
do require specific settings. Refer to the manual that comes with the board for
details to make correct settings.
<Menus to check: [Advanced] - [PCI Configuration] - [PCI Slot xx ROM]
x: PCI slot number>
→ Some devices connected to the serial or parallel port may require I/O port address
or operation mode settings. Refer to the manual that comes with the board for
details to make correct settings.
<Menu to check: [Advanced] - [Peripheral Configuration]>
The POWER switch and sleep feature are disabled:
T Is the server in the Secure Mode?
→ In the Secure Mode, the POWER switch and sleep feature are disabled. To
release the Secure Mode, enter the password specified with the BIOS SETUP
utility.
8-12 Troubleshooting
The keyboard or mouse fails to operate:
T Is the cable properly connected?
→ You must use the provided keyboard/mouse branch cable (Y cable) for this server.
Make sure that the provided cable is connected to the correct connector on the rear
of the server.
→ The keyboard or mouse does not operate if it is connected when the server is
powered (not applicable to USB devices). Power of the server first and connect
it properly.
T Is BIOS configuration correct?
→ The keyboard and mouse may be disabled with the BIOS SETUP utility of the
server. Check the settings with the BIOS SETUP utility.
<Menus to check: [Advanced] - [Numlock]>
T Are the server drivers installed?
→ Refer to the manual that comes with your OS to check that the keyboard and
mouse drivers are installed. (These drivers are installed along with the OS.)
Some OS's allow you to change the keyboard and mouse settings. Refer to
manual that comes with your OS to check that the keyboard and mouse settings
are correct.
T Is the server in the Secure Mode?
→ In the Secure Mode, the keyboard and mouse are disabled. To release the Secure
Mode, enter the password specified with the BIOS SETUP utility.
Troubleshooting 8-13
Fail to access (read or write) to the floppy disk:
T Does the floppy disk drive contain a floppy disk?
→ Insert a floppy disk into the floppy disk drive until it clicks.
T Is the floppy disk write-protected?
→ Place the write-protect switch on the floppy disk to the "Write-enabled" position.
T Is the floppy disk formatted?
→ Use a formatted floppy disk or format the floppy disk in the floppy disk drive.
Refer to the manual that comes with the OS for formatting a floppy disk.
T Is BIOS configuration correct?
→ The floppy disk drive may be disabled with the BIOS SETUP utility of the server.
Check the setting with the BIOS SETUP utility.
<Menus to check:
[Main] - [Floppy A]
[Security] - [Diskette Write Protect]
T Is the server in the Secure Mode?
→ In the Secure Mode, write access to the floppy disk may be disabled. To release
the Secure Mode, enter the password specified with the BIOS SETUP utility.
Fail to access to the CD-ROM:
T Is the CD-ROM properly set in the CD-ROM drive tray?
→ The tray is provided with a holder to secure the CD-ROM. Make sure that the
CD-ROM is placed properly in the holder.
T Is the CD-ROM applicable to the server?
→ The CD-ROM for Macintosh is not available for use.
Inserted the correct CD-ROM but the message like the following is displayed:
The CD-ROM is not inserted or the wrong CD-ROM is inserted.
Please insert the correct CD-ROM.
OK
T Is the data side of the CD-ROM dirty or injured?
→ Take the CD-ROM out of the CD-ROM drive, confirm that it is not dirty or
injured, reset and click [OK].
8-14 Troubleshooting
Fail to access the hard disk:
(Refer to the documentation supplied with the disk array controller.)
T Is the hard disk applicable to the server?
→ Operation of any device that is not authorized by NEC is not guaranteed.
T Is the hard disk properly installed?
→ Make sure to lock the hard disk with the lever on its handle. The hard disk is not
connected to the internal connector when it is not completely installed (see
Chapter 9).
Fail to access the external SCSI devices:
T Is the SCSI device applicable to the server?
→ Operation of any SCSI device that is not authorized by NEC is not guaranteed.
T Are SCSI devices properly configured?
→ When the server has external SCSI devices connected, hard disk settings,
including SCSI ID and terminator, are required. Refer to the manual that comes
with the SCSI device for details.
T Are the SCSI controllers (including optional controllers) properly configured?
→ Use the BIOS SETUP utility for proper configuration of SCSI devices connected
to the SCSI connector on the mother board. When the server has an optional
SCSI controller installed and SCSI devices connected to it, use the BIOS SETUP
utility that comes with the optional SCSI controller for proper configuration. See
the manual that comes with the optional SCSI controller for details.
Cannot install the operating system correctly.
T Did you confirm the notes on installing the operating system?
→ See Chapter 6.
Fail to start the OS:
T Is a floppy disk in the floppy disk drive?
→ Take out the floppy disk and restart the server.
T Is the NEC EXPRESSBUILDER CD-ROM in the CD-ROM drive?
→ Take out the NEC EXPRESSBUILDER CD-ROM and restart the server.
T Is the OS broken?
→ Use recovery process to recover the system.
System" in this Chapter.)
(See "Recovery for Windows 2000
Troubleshooting 8-15
The server is not found on the network:
T Is the LAN cable connected?
→ Make sure to connect the LAN cable to the network port on the rear of the server.
Also make sure that the LAN cable to use conforms with the network interface
standard.
T Is BIOS configuration correct?
→ The internal LAN controller may be disabled with the BIOS SETUP utility of the
server. Check the setting with the BIOS SETUP utility.
<Menus to check:
[Advanced] - [PCI Configuration] - [Onboard NIC] - [Embedded NIC (Dual
Gbit)]>
T Have the protocol and service already configured?
→ Install the distinctive network driver for the server. Make sure that the protocol,
such as TCP/IP, and services are properly specified.
T Is the transfer speed correct?
→ Open the network property dialog box in control panel to specify the "Link Speed
& Duplex" value the same as the value specified for HUB.
8-16 Troubleshooting
Windows 2000
During Windows 2000 installation, the following warning is registered in the System Log of the
Event Viewer:
Error detected on the device \Device\CdRom0
during the paging operation.
→ There is no problem on this issue.
Fail to start the OS:
T Is a floppy disk in the floppy disk drive?
→ Take out the floppy disk and restart the server.
T Is the NEC EXPRESSBUILDER CD-ROM in the CD-ROM drive?
→ Take out the NEC EXPRESSBUILDER CD-ROM and restart the server.
T Is the OS broken?
→ Use recovery process to recover the system.
System" in this Chapter.)
(See "Recovery for Windows 2000
The event log after every logon to Windows 2000 includes the following error log:
Description (D)
The CPUs in this multiprocessor system are not all the same revision level.
To use all processors the operating system restricts itself to the features of
the least capable processor in the system. Should problems occur with
this system, contact the CPU manufacture to see if this mix of processors
is supported.
T Has the CPU been expanded?
→ If the different revision (stepping) of the processor is installed in the
multiprocessor system, Windows 2000 logs the above information every startup.
If this message is logged, it is no problem for operation.
The OS presents unstable operation:
T Did you update the system?
→ Installing a network drive after installation of the OS may cause unstable
operation. Use the NEC EXPRESSBUILDER CD-ROM to update the system.
(See Chapter 6.)
The system does not restart automatically when a stop error occurs, though the system is
adjusted to automatically restarting.
→ When the system does not restart automatically, restart it manually.
Troubleshooting 8-17
The system restarts automatically when a stop error occurs, though the system is NOT
adjusted to automatically restarting.
→ There is no problem about this issue.
Check the System Event Log to confirm that STOP error occurred.
Cannot turn the power OFF at the blue screen:
→ If you want to turn off the power at the blue screen, execute forced shutdown
(forced shutdown: continue to press POWER switch for 4 seconds). The power
will not be turned off if you press the switch for less than 3 seconds.
The event log after every logon to Windows 2000 includes the following error log:
Description (D)
The CPUs in this multiprocessor system are not all the same revision level.
To use all processors the operating system restricts itself to the features of
the least capable processor in the system. Should problems occur with
this system, contact the CPU manufacture to see if this mix of processors
is supported.
T Has the CPU been expanded?
→ If the different revision (stepping) of the processor is installed in the
multiprocessor system, Windows 2000 logs the above information every startup.
If this message is logged, it is no problem for operation.
The OS presents unstable operation:
T Did you update the system?
→ Installing a network drive after installation of the OS may cause unstable
operation. Use the NEC EXPRESSBUILDER CD-ROM to update the system.
(See Chapter 6.)
When any trouble occurred, the system does not run according to the specification of "Restart
automatically":
→ When any trouble occurred on Windows 2000, the system may not restart
automatically even if "Restart automatically" is specified. In such case, restart
the system manually.
Cannot turn the power OFF at the blue screen:
→ If you want to turn off the power at the blue screen, execute forced power off
(forced shut down: continue to press POWER switch for 4 seconds). The power
will not be turned off if you press the switch just one time.
8-18 Troubleshooting
Problems with NEC EXPRESSBUILDER
When the server is not booted from the NEC EXPRESSBUILDER CD-ROM, check the following:
T Did you set the NEC EXPRESSBUILDER during POST and restart the server?
→ If you do not set the NEC EXPRESSBUILDER during POST and restart the
server, an error message will appear or the OS will boot.
T Is BIOS configuration correct?
→ The boot device order may be specified with the BIOS SETUP utility of the server.
Use the BIOS SETUP utility to change the boot device order to boot the system
from the CD-ROM drive first.
<Menu to check: [Boot]>
T Is an error message appeared?
→ When an error occurs while the NEC EXPRESSBUILDER is in progress, the
following message appears. After this message appears, check the error and take
the appropriate corrective action according to the message listed in the table
below.
Message
This machine is not supported.
NvRAM access error
Hard disk access error
The system-specific information
does not exist on the baseboard.
Please restore the backup data
or write the data by using
[System Information
Management] of the Off-line
Maintenance Utility.
Only the authorized personnel
are allowed to do this operation.
Cause and Remedy
This NEC EXPRESSBUILDER version is not
designed for this server. Execute the NEC
EXPRESSBUILDER on the compliant server.
An access to the nonvolatile memory
(NvRAM) is not acceptable.
The hard disk is not connected or it is failed.
Check whether the hard disk is correctly
connected.
The system-specific information can't be
acquired in the mother board exchange and
so on.
Troubleshooting 8-19
Problems with Express Setup
Following message appeared when you tried to install Express Setup to the hard disk that has
smaller capacity than the specified partition size:
The specified partition size has exceeded the capacity of the hard disk.
The setup created the partition at the maximum size that can be reserved on the hard disk.
Setup will continue the process.
OK
→ It is not an abnormal condition. Press Enter to continue the installation.
The message can not be displayed correctly when copying the files from CD-ROM or checking
CD-ROM:
→ Press R. When the message appears again even if you press R, restart the Express
Setup from the beginning. In case the same result occurred after the restart of
installation, contact Maintenance Service Company and ask them to check the CDROM drive.
Express Setup terminated and asks to input setup information.
→ There are some errors on the specified setup information.
Follow the instruction to input the correct value. It is not necessary to cancel the
installation. On Windows 2000, you might be asked to press Enter again after the
last reboot of the setup.
[Complete] appears on the [Role of Computer] screen.
→ If you click [Complete] here, the setup will select the default value of Express Setup
for the later specification to continue the process.
<The Default Value>
The specification of network protocol
Protocol :
TCP/IP[DHCP Specified]
Service :
Select sharing Microsoft network files and printer.
Client :
Microsoft network client.
Component :
SNMP, IIS (Excluding Professional)
Application :
NEC ESMPRO Agent
Power Console Plus
(if optional RAID controller is installed in the system)
8-20 Troubleshooting
The following error log is included in the event log while operating the system:
Event ID:
Source:
Type:
Category:
Description:
16
iANSMiniport
Error
None
Team #0:The last adapter has lost link.
Network connection has been lost.
→ Though the above error is included in the event log when specifying the teaming, the
LAN driver can work properly.
[Complete] does not appear on [Role of Computer] screen.
→ The [Complete] does not appear if the Setup File that has already been created is
loaded.
→ [Complete] appears only when you first entered the [Role of Computer] screen.
Once you go to the next screen from [Role of Computer], the [Complete] will not
appear even if you enter [Back] to go back to the [Role of Computer] screen.
Select [Use Existing Array] at [New/Existing RAID Configuration], but the OS is installed in the
whole area of the disk.
→
Is there any other partition than the partition to re-use (excluding maintenance area)?
If the partition other than the one to re-use does not exist, the setup will reserve the
whole area of the disk to install Windows 2000.
Specified to join the Domain, but the system is installed as Workgroup.
→ When the setup fails to join the Domain during the installation, it will install the
system as Workgroup. Open [System] in Control Panel to specify joining the
Domain.
Specified large value as partition size, but when Windows 2000 is actually started, the system
partition is created by 4095MB.
→ Is the [Partition Size] specified by the value larger than the real area? If you want to
create one partition in all area of the hard disk(excluding the maintenance area) to
install the OS, specify [All Area].
→ Are you specifying over 200GB for the partition size?
Be sure to specify less than 200GB for the partition size.
Windows 2000 started with different display resolution from the specified value.
→ If the specified display resolution can not be used, the system will use the nearest
value or the default value of the driver.
Troubleshooting 8-21
Entered the incorrect Product ID/CD key.
→ Even if you entered the incorrect Product ID/CD key, Express Setup will start.
However, the setup will stop and asks you to re-enter the correct value. Also in this
case, input request will occur when rebooting after GUI setup completed during
Express Setup. If these 2 inputs are done correctly, there is no problem on Windows
2000 setup.
Unable to specify the details of Network adapter.
→ In Express Setup, you can not specify the details of Network adapter.
from Control Panel after starting Windows 2000.
Specify them
Windows 2000 is started with Network adapter that has not been specified during Express
Setup
→ Windows 2000 will install the recognized Network adapter specified as default value.
If you want to modify the specification, it can be done from Control Panel after
starting Windows 2000. Also, the Network adapter that has been specified during
Express Setup but that is not connected will not be setup, though the protocol will
only be installed.
Connected more than two Network adapter and specified different protocol for each adapter,
but all the protocols are specified on either adapter.
→ It's a design. Each adapter is specified so that all the installed protocols can be used.
The value that can not be specified during Express Setup will all be specified by
default value.
When more than two Network adapter are specified, the detailed specification of TCP/IP
protocol are all set to use DHCP.
→ When more than two Network adapter are specified, the detailed specification of the
protocol may all be set by default value. Re-specify the details from Control Panel.
Not more than two Network adapter is connected, but the detailed specification of the protocol
are all set by default.(e.g. Specified IP Address on TCP/IP, but DHCP is specified)
→ Are you specifying more than two protocols?
In this case, the situation will be the same as connecting more than two Network
adapter, so the detailed specification of the protocol are all set by default.
Re-specify the details from Control Panel after starting the OS.
8-22 Troubleshooting
The following message appears on the screen and the setup is suspended while the Express
Setup is executing:
Bad Command or filename
Insufficient disk space
→ Follow the procedure described below and check the BIOS settings for the SCSI
controller.
As for the procedure on the SCSI controller which is not described in this User's
Guide, refer to the manual accompanied with the controller and check the setting for
"Int13 Extensions".
<In case the SCSI Controller is AIC-7892>
1. Press Ctrl + A when POST displays "AIC-7892".
2. Select "Configure/View Host Adapter Settings".
3. Select "Advanced Configuration Options" and press Enter.
4. Change the setting of "BIOS Support for Int13 Extensions" to "Enabled".
5. Exit from BIOS setup menu and restart the system.
6. Start the Express Setup.
Troubleshooting 8-23
Problems with Master Control Menu
The master control menu fails to appear:
T Is your system Windows NT 4.0 or later, or Windows 95 or later?
→ The CD-ROM Autorun feature is supported by Windows NT 4.0 and Windows 95.
The older versions do not automatically start from the CD-ROM.
T Is Shift pressed?
→ Setting the CD-ROM with Shift pressed down cancels the Autorun feature.
T Is the system in the proper state?
→ The menu may not appear depending on the system registry setting or the timing
to set the CD-ROM. In such a case, start the Explorer and run \MC\1ST.EXE in
the CD-ROM.
8-24 Troubleshooting
Problems with Configuration Diskette Creator
The bit map of the Configuration Diskette Creator window is not displayed correctly
during setting of setup information. (When the Trekking command is used)
→ If the specified number of colors is fewer than 256 in the display setting, the bit map
is not displayed correctly, but the setup information can be displayed correctly.
The Point to Point tunneling protocol cannot be set.
→ The protocol is not supported at present. After installation, set the protocol through
Control Panel. In this case, rebooting is not necessary.
The details of a network adapter cannot be set.
→ Configuration Diskette Creator is unable to set the details of network adapters. Start
Windows 2000/2003, and set the details through Control Panel.
More than one network board is connected during setting of setup information, but
TCP/IP cannot be set for each network.
→ Perform the installation procedure during DHCP setting. To create a temporary IP
configuration, perform the installation procedure during DHCP setting, and then set
TCP/IP again through Control Panel.
Problem with Disk Array
Refer to the manual that comes with the disk array controller for any trouble occurred on disk array
in this system.
Troubleshooting 8-25
COLLECTING EVENT LOG
This section describes on how to collect the log of various events that occurred on the server.
IMPORTANT: If STOP error, system error, or stall occurred, follow
the procedure below after restarting the system.
NOTE: The different revision processor may be mixed in additional
CPU kit. When Windows 2000 is used, following message may be
appeared in the System Log of the Event Viewer after extension the
different revision of two or more CPUs in the NEC Express server. If
this message is logged, it is no problem for operation.
1.
Click [Management Tool] → [Event Viewer] from the Control Panel.
2.
Select the type of the log to collect.
On [Application Log], the events related to the running application is archived. On
[Security Log], the events related to the security is archived. On [System Log], the
events occurred at the item which configures Windows 2000 system is archived.
3.
Click [Save as...] in the [Run] menu.
4.
Input the file name of archived log in the [File Name] box.
5.
Select the type of the log file you want to save in the [File Type] list box and click [OK].
For more information, refer to Windows 2000 Online Help.
8-26 Troubleshooting
COLLECTING CONFIGURATION INFORMATION
This section describes on how to collect the information on hardware configuration and inside
specification.
In order to collect information, "Diagnostic Program" is used.
IMPORTANT: If STOP error, system error, or stall occurred, follow
the procedure below after restarting the system.
<For Windows Server 2003>
Refer to Windows online help.
<For Windows 2000>
1.
Point to [Settings] in Start menu, and click [Control Panel].
The [Control Panel] dialog box appears.
2.
Double-click [Management Tool], and double-click [Computer Management].
The [Computer Management] dialog box appears.
3.
Click [System Tool] → [System Information].
4.
Click [Save as System Information File] in the [Operation] menu.
5.
Input the file name to save in the [File Name] box.
6.
Click [Save].
Troubleshooting 8-27
COLLECTING DR. WATSON DIAGNOSTIC INFORMATION
Dr. Watson collects diagnostic information related to application errors. The location to save the
information can be specified as you like. For more information, refer to Chapter 5.
MEMORY DUMP
If an error occurs, the dump file should be saved to acquire necessary information.
If you saved the dump to DAT, write down that it is saved as "NTBackup" or "ARCServe" on the
label. You can specify the location to save the diagnostic information as you like.. For more
information, refer to "Specifying Memory Dump (Debug Information (refer to Chapter 5 for
detail)".
IMPORTANT:
Consult with your sales agent before dumping the memory.
Dumping the memory while the server is in the successful operation
may affect the system operation.
Restarting the system due to an error may display a message
indicating insufficient virtual memory. Ignore this message and
proceed. Restarting the system may result in dumping improper
data.
Preparing for Memory Dumping
Memory dumping with the DUMP switch may disable the server to restart. In such a case, it is
required to force the server to shut down. This forced shutdown, however, is not available if
"Enable" is selected for "Power Switch Inhibit" on the Security menu of the BIOS setup utility,
SETUP, because this setting disables POWER switch operation.
Follow the procedure below to change the setting to enable the forced shutdown and restart of the
server.
1.
Power on the server and start the BIOS setup utility, SETUP.
2.
Select "Disable" for "Power Switch Inhibit" in the Security menu.
3.
Save the configuration data and exit the SETUP.
8-28 Troubleshooting
Saving the Dump File
Press the DUMP switch to save the dump file when an error occurs. Insert a metal pin (a
straightened large paper clip will make a substitute) into the switch hole to press the DUMP switch.
DUMP switch
Pressing the DUMP switch saves the dump file in the specified directory. (Memory dumping may
not be available when the CPU stalls.)
IMPORTANT: Do not use a toothpick or plastic stick that is easy to
break. Do not use any pin easily broken such as a toothpick or plastic
pin.
Troubleshooting 8-29
BACKUP IPMI INFORMATION
This section describes on how to collect IPMI information. To collect the information, NEC
ESMPRO Agent must be installed.
1.
Select [Program] → [ESMPRO Agent] → [ESRAS Utility] from the Start pop-up menu.
The [ESRAS Utility] window appears.
2.
Select [Latest Information] from the Tree View to collect the information of local
computer.
If the data is displayed, it means the data is collected normally.
3.
Click [Backup Current IPMI Information] from the [File] menu.
4.
Confirm the computer name to backup the information.
5.
Specify the backup file name to save and the location to save it, and click [Backup].
8-30 Troubleshooting
RECOVERY FOR Windows 2000 SYSTEM
If any file necessary for running the OS is damaged, use the following procedures to recover the
system.
IMPORTANT:
After recovering the system, see "Updating the System" in Chapter
5 and be sure to update the system.
Also on Windows 2000, you need to update all the drivers after the
system update. For more information, see "Installing and Setting
Device Drivers" in Chapter 5.
If the hard disk can not be recognized, you can not recover the
system.
Follow the procedure below and use the information in the disk, not system recovery disk, to
recover the system.
1.
Turn on the system power.
2.
Insert the Windows 2000 CD-ROM in the CD-ROM drive.
3.
Press Ctrl + Alt + Delete to reset the system.
After a bootable operating system has been installed on the hard disk, press Enter while
the message "Press any key to boot from CD..." is displayed at the top of the screen.
If no bootable operating system exists on the hard disk, this step is unnecessary.
The Windows 2000 setup screen will appear.
If the screen is not displayed, Enter was not pressed properly.
Begin after turning on the system power again.
4.
Press F6 in a few seconds when the window is in either of the following states.
"Setup is inspecting your computer's hardware configuration ..." is displayed.
A screen with a solid blue background is displayed.
IMPORTANT: There is no visible indication on screen when F6 has
been pressed.
Troubleshooting 8-31
5.
When the following message is displayed, press S.
Setup could not determine the type of one or more mass storage devices
installed in your system, or you have chosen to manually specify an adapter.
Currently, Setup will load support for the following mass storage devices.
The following message is displayed.
Please inert the disk labeled
manufacturer-supplied hardware support disk
into Drive A:
*Press ENTER when ready.
6.
Insert the Windows 2000 OEM-DISK for NEC EXPRESSBUILDER into the floppy disk
drive, and press Enter.
A list of mass storage devices is displayed.
Select the [Adaptec Ultra320 SCSI Cards (Win2000)] and press Enter.
Then, it returns to the screen of Procedure 5.
7.
If the optional board or SCSI HostRAID is installed, select the proper SCSI Adapter and
press Enter.
– Adaptec HostRAID U320 Driver Ver 1.02 For Windows 2000/XP/2003 (When SCSI
HostRAID is installed.)
– INITIO INI-A10XU2W SCSI Host Adapter (When N8103-65F board is installed.)
– MegaRAID SCSI320-1 Controller Driver (When N8103-80F board is installed.)
– MegaRAID SCSI320-2 Controller Driver (When N8103-81F board is installed.)
– Adaptec I2O RAID Driver Disk for 32bit Windows 2000/XP/2003 (When N8103-86F
board is installed.)
8.
Press R to select the recovery option.
9.
Select the keyboard.
10.
If you are requested, press R to select system recovery procedure.
11.
If you are requested, select either of the procedure below:
[Manual Recovery] (Press M)
Do not select this option unless you are a high-level user or a system administrator.
If you use this option, you can recover the problems of system files, partition boot
sector, and start-up environment.
[Quick Recovery] (Press F)
This option is very easy to use and the user does not need to do anything during the
procedure. If you select this option, the system recovery disk program starts to
recover the problems concerning system files, partition boot sector of system disk,
and start-up environment (if multiple operating systems are installed on the system).
8-32 Troubleshooting
12.
Follow the instruction displayed on the screen, and then press L at the screen which
request you to insert system recovery disk. The system will be restarted once.
NOTE: Starts the procedure without system recovery disk.
13.
Repeat steps 1 to 11.
The recovery procedure will be started.
During the recovery, the missing files and the damaged files are replaced either to the files
in C:\ I386 folder of hard disk or the files in systemroot\ Repair of the system partition.
These replaced files do not reflect the changes of the configuration after the setup at all.
14.
Follow the instruction displayed on the screen.
If you take a note of any file name in which trouble is detected during the procedure, it is
useful to diagnose how the system has been damaged.
15.
Terminates the procedure if the recovery is successful.
You can verify that the replaced files are correctly copied to the hard disk if the computer
is restarted normally.
Troubleshooting 8-33
OFF-LINE MAINTENANCE UTILITY
The Off-line Maintenance Utility is an OS-independent maintenance program. When you are
unable to start the OS-dependent NEC ESMPRO to troubleshoot a problem, the Off-line
Maintenance Utility can be used.
IMPORTANT:
The Off-line Maintenance Utility is intended for use of your sales
agent. The NEC EXPRESSBUILDER CD-ROM and the Off-line
Maintenance Utility Bootable FD you have created contain a file
that describes operation of the utility, but do not attempt to use the
utility by yourself. Contact your sales agent and follow
instructions.
Starting the Off-line Maintenance Utility disables any access from a
client to the server.
8-34 Troubleshooting
Starting the Off-line Maintenance Utility
The Off-line Maintenance Utility may be started in many ways.
You can set the Off-line Maintenance Utility to automatically start at an error occurrence in addition
to starting it manually.
IMPORTANT: Do not start the Off-line Maintenance Utility while the
server is in successful operation.
From the CD-ROM
Set the NEC EXPRESSBUILDER CD-ROM in the CD-ROM drive and reboot the
system.
After the menu is displayed on the screen, select "Tools" - "Off-line Maintenance Utility".
The Off-line Maintenance Utility program starts from the CD-ROM.
From the floppy disk
Set the Off-line Maintenance Utility Bootable FD in the floppy disk drive and reboot the
system.
The Off-line Maintenance Utility program starts from the boot disk.
The Off-line Maintenance Utility Bootable FD is created by selecting "Tools" - "Create
Support FD" on the NEC EXPRESSBUILDER.
Manual start (by pressing F4)
When the Off-line Maintenance Utility is installed, press F4 while the start-up screen of
the server is on screen. The Off-line Maintenance Utility starts from the hard disk.
Automatic start (OS panic)
When a critical error occurs during OS operation, shut down and restart the system. The
Off-line Maintenance Utility automatically starts. (You need to select "Start the Off-line
Maintenance Utility when an error occurs." in the NEC ESMPRO Agent beforehand.)
Automatic start (OS boot retry out)
If the OS boot monitoring feature is enabled, the Off-line Maintenance Utility
automatically starts when after three consecutive OS boot failures.
Troubleshooting 8-35
Features of Off-line Maintenance Utility
The Off-line Maintenance Utility provides the following features. (Available features vary
depending on the way you started the Off-line Maintenance Utility.)
IMPORTANT: See the on-line help for details of the Off-line
Maintenance Utility. For further information, ask your sales agent.
IPMI Information Viewer
Provides the functions to view the system event log (SEL), sensor data record (SDR), and
field replaceable unit (FRU) and to make a backup copy of them.
Using this feature, you can find system errors and events to determine a maintenance part.
BIOS Setup Viewer
Provides the functions to export the current configuration data defined with the SETUP
utility to a text file.
System Information Viewer
Provides the functions to view information on the processor and the BIOS and export it to
a text file.
System Information Management
Provides the function to make a back-up copy of your data.
Without the backup data, the system-specific information and/or configuration may not be
restored.
Only the authorized personnel is allowed to restore the backup data.
Start of Utilities
With the NEC EXPRESSBUILDER, you can start the following utilities installed in the
maintenance partition.
–
System Management*
–
System Diagnostics
–
Maintenance Partition Update
Chassis Identify*
This function can distinguish the machine with the lamp or buzzer of the machine. This is
convenient if you have to distinguish a machine among many machines on the rack.
* Available only when the optional remote management card is installed.
8-36 Troubleshooting
RESETTING THE SERVER
If the server halts before starting the OS, press and hold Ctrl and Alt and press Delete.
This restarts the server.
IMPORTANT: Resetting the server clears the DIMM memory and the
data in process. To reset the server when it is not frozen, make sure
that no processing is in progress.
FORCED SHUTDOWN
Use this function when an OS command does not shut down the server, the POWER switch does not
turn off the server, or resetting does not work.
Press and hold the POWER switch on the server for at least four seconds. The power is forcibly
turned off. To turn on the power back again, wait approximately 10 seconds after turning off the
power (forced shutdown).
POWER
lamp
POWER switch
IMPORTANT: If the remote power-on function is used, cycle the
power once to load the OS, and turn off the power again in the normal
way.
Chapter 9
Upgrading Your Server
This chapter describes internal optional devices available for the server, procedures for install or
removing such optional devices, and notes on using them.
IMPORTANT:
Optional devices described in this chapter may be installed or
removed by any user. However, NEC does not assume any
liability for damage to optional devices or the server or
malfunctions of the server resulted from installation by the user.
NEC recommends you ask your sales agent for install or removing
any optional devices.
Make sure to use only optional devices and cables authorized by
NEC. Repair of the server due to malfunctions, failures, or
damage resulted from installing such devices or cables will be
charged.
When you made any change to the hardware configuration, make
sure to update the system (see Chapter 5 for details.).
9-2 Upgrading Your Server
SAFETY NOTES
Observe the following notes to install or remove optional devices safely and properly.
WARNING
Observe the following instructions to use the server safely. Failure to follow
these instructions may result in death or serious personal injury. See pages
1-3 to 1-8 for details.
■
■
■
■
Do not disassemble, repair, or alter the server.
Do not look into the CD-ROM drive.
Do not remove the lithium battery.
Disconnect the power plug before working with the server.
CAUTION
Observe the following instructions to use the server safely. Failure to follow
these instructions may cause a fire, personal injury, or property damage. See
pages 1-3 to 1-8 for details.
■
■
■
■
■
Avoid installation in extreme temperature conditions.
Make sure to complete board installation.
Do not lift the server only by a single person.
Do not install the server on the rack leaving the cover removed.
Do not install the server on the rack halfway.
Upgrading Your Server 9-3
ANTI-STATIC MEASURES
The server contains electronic components sensitive to static electricity. Avoid failures caused by
static electricity when installing or removing any optional devices.
Wear a wrist strap (an arm belt or anti-static glove).
Wear a wrist strap on your wrist. If no wrist strap is available, touch an unpainted metal
part of the cabinet before touching a component to discharge static electricity from your
body.
Touch a metal part regularly when working with components to discharge static
electricity.
Select a suitable work space.
– Work with the server on the anti-static or concrete floor.
– When you work with the server on a carpet where static electricity is likely to be
generated, make sure take anti-static measures beforehand.
Use a work table.
Place the server on an anti-static mat to work with it.
Cloth
– Do not wear a wool or synthetic cloth to work with the server.
– Wear anti-static shoes to work with the server.
– Take off any jewels (a ring, bracelet, or wrist watch) before working with the server.
Handling of components
– Keep any component in an anti-static bag until you actually install it to the server.
– Hold any component by its edge to avoid touching any terminals or parts.
– To store or carry any component, place it in an anti-static bag.
9-4 Upgrading Your Server
PREPARING YOUR SYSTEM FOR UPGRADE
Follow the procedure below to prepare for installing or removing components.
1.
Prepare the Phillips screwdriver.
2.
Shut down the OS.
3.
Unlock the front bezel.
Unlocked
Locked
4.
Remove the front bezel.
5.
Press the POWER switch to power off the server (the POWER lamp goes off).
6.
Remove all cables and power cords from the server.
Upgrading Your Server 9-5
DEVICE INSTALLATION OR REMOVAL PROCEDURE
Install or remove a component from the server in the following procedure.
Hard Disk Drive
The server has three device bay slots to install hard disks with the SCA2 interface (Ultra 160 SCSI)
in the disk bay of the front of the server.
IMPORTANT:
Do not use any hard disks that are not authorized by NEC. Installing
a third-party hard disk may cause a failure of the server as well as
the hard disk. Purchase hard disks of the following models:
<SCSI hard disk drive>
– N8150-161F (18.1 GB, 10,000 rpm, Ultra 320)
– N8150-162F (36.3 GB, 10,000 rpm, Ultra 320)
– N8150-163F (73.2 GB, 10,000 rpm, Ultra 320)
– N8150-171F (146 GB, 10,000 rpm, Ultra 320)
– N8150-164F (18.1 GB, 15,000 rpm, Ultra 320)
– N8150-165F (36.3 GB, 15,000 rpm, Ultra 320)
– N8150-172F (73.2 GB, 15,000 rpm, Ultra 320)
<SATA hard disk drive>
– N8150-184 (80 GB, 7,200 rpm, serial ATA)
– N8150-185 (120 GB, 7,200 rpm, serial ATA)
– N8150-184 (250 GB, 7,200 rpm, serial ATA)
To make array configuration, specify RAID0, RAID1 or RAID5 as
the RAID level.
All drive slots may contain a hard disk approximately 25.4 mm (1 inch) high. The drive IDs are
always assigned to hard disks as shown below.
SCSI ID0
Channel 1
SCSI ID1
SCSI ID2
Not used.
Channel 2
9-6 Upgrading Your Server
The hard disk drive bays are connected to the SCSI connector on the mother board when the server
is shipped. To use the hard disk drives in a disk array configuration, reconnect the cable from the
connector on the mother board to which the SCSI controller is connected to the disk array controller
connector. For the cable reconnection, see "Disk Array Controller".
A dummy block or tray is installed in the hard disk drive bays. The purpose of a dummy block is to
increase the cooling effect in the server. Install a dummy block in slots not containing a hard disk
drive.
Installation (SCSI hot-plug HDD model)
Take the following steps to install a hard disk drive. This procedure applies to all the hard disk drive
bays. See the next section for the procedure installing a hard disk drive in the flex bay.
NOTE: Any hard disk can be installed or removed in or from the server
only by removing the front bezel.
IMPORTANT:
In the disk array configuration, use the hard disks having the same
specification including the capacity.
Do not press the POWER switch during the installation or removal
of the hard disk drive if your server is running.
1.
See the section "Preparing for Installation and Removal" described earlier to prepare.
2.
Unlock the front bezel with the security key and remove the front bezel.
3.
Locate the slot in which you are going to install a hard disk drive.
The server has three slots. Install hard disk drives in ascending order of the SCSI ID
numbers starting from the leftmost slot. The SCSI IDs assigned to the slots are all
determined.
4.
Remove the dummy block or tray if installed.
IMPORTANT: Keep the dummy block for future use.
5.
Unlock the hard disk drive handle.
Upgrading Your Server 9-7
6.
Firmly hold the additional hard disk drive (with the tray provided) and handle, and insert
it into the slot.
IMPORTANT:
7.
Push the hard disk drive until it docks with the SCSI backplane
connector.
Carefully hold the hard disk drive with both hands.
Do not press the POWER switch during the installation or removal
of the hard disk drive if your server is running.
Slowly close the handle.
The handle is locked when a "click" is heard.
IMPORTANT: Be careful not to get your finger caught between the
handle and tray.
NOTE: Confirm that the handle is hooked to the frame when having
inserted the hard disk drive.
8.
Install the front bezel you removed in step 2.
There are tabs on the left side of the front bezel. Engage the tabs with the server frame,
install the front bezel, and lock it with the security key.
9-8 Upgrading Your Server
Installation (SATA fixed HDD model)
Install a hard disk in the following procedure. A hard disk may be installed in any other slot in the
similar procedure.
NOTE: Hard disks can be installed or removed in or from the server
only by opening the front bezel.
IMPORTANT: In the disk array configuration, hard disks configuring
a specific pack should have the same specification including the
capacity.
1.
See the section "Preparing for Installation and Removal" described earlier to prepare.
2.
Unlock of the front bezel with the security key and remove the front bezel.
3.
Check the slot in which the hard disk is installed.
4.
Loosen two screws securing the drive carrier.
Upgrading Your Server 9-9
5.
Remove the drive carrier.
IMPORTANT: To maintain the cooling effect in the server, install the
dummy tray in the vacant slot of the disk bay.
6.
Remove four screws securing the drive tray.
7.
Remove the drive tray from the carrier.
NOTE: Keep the drive tray for future use.
9-10 Upgrading Your Server
8.
Place the hard disk onto the carrier, with its connector facing the rear of the carrier.
9.
Secure the hard disk in the carrier with four screws removed in Step 6.
10.
Install the drive carrier into the hard disk bay and secure the carrier to the chassis with two
screws removed in Step 5.
11.
Reinstall the side cover.
12.
Close the front bezel.
Upgrading Your Server 9-11
Removal (SCSI hot-plug HDD model)
Take the following steps to remove a hard disk drive:
NOTE: If removing a failing hard disk drive, confirm the slot in which
the DISK lamp of the hard disk drive is amber before starting the
removal.
DISK lamp
1.
See the section "Preparing for Installation and Removal" described earlier to prepare.
2.
Unlock the front bezel with the security key, and remove the front bezel.
3.
Push the lever to unlock, and open the handle.
IMPORTANT: Do not press the POWER switch during the
installation or removal of the hard disk drive if your server is running.
4.
Firmly hold the handle and hard disk drive, and pull out the hard disk drive.
9-12 Upgrading Your Server
5.
If using the server with the hard disk drive removed, install the dummy block in the empty
slot.
6.
Install the front bezel you removed in step 2.
When the hard disks are in the disk array configuration, you can restore the state before an error
using the auto-rebuild feature that stores the data in the old hard disk into a new one.
The auto-rebuild feature is available for the RAID1, RAID5, or RAID010 disk array configuration.
Auto-rebuild is carried out when you hot-swap a failed hard disk with a new one (replace the disk
while the server is powered). While auto-rebuild is in progress, the DISK lamp flashes green and
amber alternatively to indicate it.
IMPORTANT:
When auto-rebuild fails, the DISK lamp lights in amber. Remove
and install the hard disk again to restart auto-rebuild.
If the disk array monitoring utility is installed, it may display or act
as follows. If the DISK lamp does not light in amber after autorebuild, however, auto-rebuild has completed successfully.
– Displays "Rebuild was cancelled" on the screen while autorebuild is in progress.
– Appears to stop and restart auto-rebuild.
Observe the following notes for auto-rebuild.
Do not power off the server in the period between a hard disk error and completion of
auto-rebuild.
When you removed a hard disk, wait at least 90 seconds before installing the hard disk
back again.
Do not replace another hard disk while rebuilding is in progress. (The DISK lamp flashes
in green and amber alternatively while rebuilding the hard disk.)
Upgrading Your Server 9-13
Removal (SATA fixed HDD model)
Remove the hard disk in the reverse procedure of the installation.
In the disk array configuration, the auto rebuild function can be used. The auto rebuild function
can record the information saved in a defected hard disk into the new replaced disk to recover the
server to the state before the occurrence of the fault.
The auto rebuild function is valid for disk arrays set to RAID1.
See Chapter 4 for detail explanation.
9-14 Upgrading Your Server
Power Supply Unit (SCSI Hot-plug HDD Model)
Your server contains one or two power supplies.
The second power supply is optional and provides a redundant configuration that ensures continued
operation of the system in the unlikely event one of the power supplies fails.
Installation
Take the following steps to install a power supply unit:
1.
See the section "Preparing for Installation and Removal" described earlier to prepare.
IMPORTANT: Be sure to turn off the power. Failure to do so causes
the server to malfunction or fail.
2.
Pull the cable arm toward the rear of the server, and confirm the slot for installing an
optional power supply unit.
3.
Hold and pull the lever of the blank cover and remove the blank cover.
IMPORTANT: Keep the removed blank cover for future use.
Upgrading Your Server 9-15
4.
Insert the power supply unit.
IMPORTANT: Do not touch the terminals of the power supply unit.
Gold-plated
connectors
5.
Grasp the handle and firmly push the power supply.
The power supply unit is locked when a distinct "click" is heard.
9-16 Upgrading Your Server
6.
Connect two power cords.
Use the power cord provided with the standard power supply unit and the one provided
with the optional unit. The AC POWER lamps flash when the power cords are connected.
Power supply unit 1
(Standard)
Power supply unit 2
(Option)
Power cord for
power supply unit 1
7.
Power cord for
power supply unit 2
Power on the server.
The AC POWER lamps go on.
8.
Confirm, by the STATUS lamp or on the POST screen, that there are no errors related to
the power supply units.
See Chapter 8 for details on the error messages.
If the AC POWER lamps are off, reinstall the power supply units. If the same error
message still appears, contact your sales representative.
Upgrading Your Server 9-17
Replacing a Failing Power Supply Unit
Replace only a failing power supply unit.
IMPORTANT: Do not remove a power supply unit operating
normally.
NOTE: If one power supply unit fails while the server contains two
power supply units in a redundant configuration, the failing power
supply unit can be replaced with the system operating (power-on state).
(Skip step 2.)
1.
Locate the failing power supply unit by the AC POWER lamp on the rear of each power
supply unit. (The lamp of the failing power supply unit is amber.)
2.
Shutdown the system, and press the POWER switch to turn off the power.
3.
Disconnect the power cord from the failed power supply.
4.
Hold the handle of the failing power supply.
5.
While pressing the lever, pull the power supply to remove if from the chassis.
1
2
6.
If operating the server with a single power supply unit without installing a new one, install
the cover you removed in step 3 of installation procedure.
IMPORTANT: To maintain the cooling effect in the server, install the
blank cover in the vacant slot.
7.
Install the new power supply unit taking steps 4 to 8 of "Installation", and confirm that the
power supply unit is installed normally.
NOTE: If one of the two power supply units of the server is replaced
while the power is on, the POWER lamp of the new power supply unit
goes on. (If it is replaced while the power is off, the lamp flashes. The
lamp goes on when the power is turned on.)
9-18 Upgrading Your Server
Server (Pull-out from the Rack)
The server needs to be pulled out from the rack for installing/removing any components other than
the hard disk drives and power supply units.
CAUTION
Observe the following instructions to use the server safely. Failure to follow
these instructions may result in death or serious personal injury. See pages 1-3
to 1-8 for details.
■
■
■
■
■
1.
Do not install the server on a rack with leaving covers removed.
Do not pinch your finger with mechanical components.
Note high temperature.
Do not pull out a device from the rack if the rack is unstable.
Do not leave more than one device being pulled out from the rack.
See the section "Preparing for Installation and Removal" described earlier to prepare.
NOTE: To confirm the device you are going to maintain, use the UID
switch and the UID lamp that goes on when the switch is pressed.
2.
Loosen the thumb screws at the right and left of the front panel, hold the handles, and
slowly pull out the server from the rack.
The server is locked while you are pulling it. Stop pulling when it is locked.
Captive thumb screws
Upgrading Your Server 9-19
To place the server in the rack, push it back into the rack while pressing the right and left
lock arms.
IMPORTANT: Be very careful not to get your finger caught in the
arms or rails.
Release lever
9-20 Upgrading Your Server
Drive Cover
Open the drive cover when installing/removing a fan assembly, processor, and backup file device or
reconnecting an internal cable.
Removal
1.
See the section "Preparing for Installation and Removal" described earlier to prepare.
2.
Pull out the server from the rack.
3.
Slide the drive cover toward the rear of the server while pressing the lock button on the
cover.
4.
Lift off the drive cover from the server.
Installation
When installing the drive cover, confirm that the tab of the cover is securely inserted into the slot in
the server frame.
Slide the drive cover toward the rear of the server. The drive cover is locked when a distinct "click"
is heard. At this time, check the release button for normal state.
Upgrading Your Server 9-21
Logic Cover
Open the logic cover when installing/removing a DIMM, processor, and PCI add-in card or
reconnecting an internal cable.
Removal
1.
See the section "Preparing for Installation and Removal" described earlier to prepare.
2.
Pull out the server from the rack.
3.
Loosen a captive thumbscrew at the rear of the server.
4.
Slide the logic cover toward the rear of the server and lift off the cover from the server.
Installation
When installing the logic cover, confirm that the tab of the cover is securely inserted into the slot in
the server frame.
Slide the logic cover toward the rear of the server and secure the cover with captive thumbscrew.
9-22 Upgrading Your Server
DIMM
Install the additional DIMM (Dual Inline Memory Module) to the DIMM socket on the mother
board in the server. The mother board is provided with six DIMM board slots.
NOTE: Up to 12GB of memory (2GB DIMM x 6) can be installed.
(The DIMMs installed as standard need to be replaced in this case.)
Two DIMMs of 512MB are installed in DIMM slots #5 and #6 at
shipment.
IMPORTANT:
The DIMM is extremely sensitive to static electricity. Make sure to
touch the metal frame of the server to discharge static electricity
from your body before handling the DIMM. Do not touch the
DIMM terminals or on-board parts by a bare hand or place the
DIMM directly on the desk. For static notes, see the section "Antistatic Measures" described earlier.
Make sure to use the DIMM authorized by NEC. Installing a thirdparty DIMM may cause a failure of the DIMM as well as the server.
Repair of the server due to failures or damage resulted from
installing such a board will be charged.
Upgrading Your Server 9-23
Installation Order
DIMMs must be populated in pairs and in the following order:
#5 and #6, #3 and #4, then #1 and #2.
REAR
FRONT
Group #3
DIMM 1
DIMM 2
Group #2
Group #1
DIMM 3
DIMM 4
DIMM 5
DIMM 6
Mother board
IMPORTANT:
Install two additional DIMMs for each group*1 because the server
uses interleaved memory. If DIMMs of different specifications*2 are
installed in a bank, the server does not operate normally.
*1 A group is a unit of two DIMM slots. Each pair of DIMM slots
#5 and #6 (group #1), #3 and #4 (group #2), and #1 and #2
(group #3) in the figure is a bank. (The symbols are also
printed on the mother board.)
*2 DIMM specification is shown on the label attached to the
DIMM as follows:
Example: Frequency of 333 MHz, buffered, capacity of 512 MB,
raw address of 12 bits, column address of 10 bits, and
single side
333 / B / 512 / R12 C10 S
Single side
Column address
Raw address
Capacity
Buffered
Frequency
DIMMs must be populated in pairs and in the following order:
#5 and #6, #3 and #4, then #1 and #2.
Install DIMMs starting from the one having largest capacity.
Installed DIMMs must be the same speed and must all be registered.
Take a note of beep code pattern, and take appropriate action
according to the table listed earlier in "Beep Codes".
9-24 Upgrading Your Server
Installation
Install a DIMM in the following procedure.
IMPORTANT: The server supports DIMMs of only the low-profile
type (30 mm (1.2 inches) in height). It does not support DIMMs
exceeding the specified height.
1.
See the section "Preparing for Installation and Removal" described earlier to prepare.
2.
Pull out the server from the rack.
3.
Open the logic cover.
4.
Push the DIMM straight into the socket.
NOTE: Make sure of the orientation of the DIMM.
Position the DIMM so that a notch in the bottom edge of the DIMM
aligns with the keyed socket. Applying too much pressure can damage
the socket. Keyed DIMMs insert only one way.
IMPORTANT: To avoid damage to the socket, do not apply
excessive force while pressing the DIMM.
The levers automatically close when the DIMM is inserted into the socket.
Key slot
Key
5.
Install the components you removed in steps 1 to 3.
6.
Power on the server and verify that POST displays no error messages.
If POST displays an error message, take a note on the message and see the POST error
messages listed in Chapter 8.
7.
Start the SETUP and select [Advanced] → [Memory Configuration] to verify that the
installed DIMM shows the status "Normal". (See Chapter 4 or details.)
8.
Select "Yes" for [Reset Configuration Data] on the [Advanced] menu.
This setting is required to change the hardware configuration data. See Chapter 4 for
details.
9.
If the Windows operating system is in use, set the paging file size to the recommended
value (total memory size × 1.5) or a greater value. See Chapter 5 for details.
Upgrading Your Server 9-25
Removal
Remove the DIMM depending on the following procedure.
NOTES:
To remove the failed DIMM, check the error message appearing in
POST or NEC ESMPRO to identify the DIMM socket (group) in
which the failed DIMM is installed.
The server operates only when at least two DIMMs are installed.
1.
See the section "Preparing for Installation and Removal" described earlier to prepare.
2.
Pull out the server from the rack.
3.
Open the logic cover.
4.
Open the levers at both sides of the socket from which you remove the DIMM.
The DIMM is unlock and ready for removal.
5.
Reinstall all parts removed in Step 2.
Power on the server and verify that POST displays no error messages.
If POST displays an error message, take a note on the message and see the POST error
messages listed in Chapter 8.
6.
Start the SETUP and select [Advanced] → [Memory Configuration] → [Memory Retest]
→ [Enabled] to clear the error information of the removed DIMM. (See Chapter 4 for
details.)
7.
Select "Yes" for [Reset Configuration Data] on the Advanced menu.
This setting is required to change the hardware configuration data. See Chapter 4 for
details.
9-26 Upgrading Your Server
Processor (CPU)
The server may have another CPU installed in addition to the standard CPU (Intel Xeon Processor).
IMPORTANT:
The CPU is extremely sensitive to static electricity. Make sure to
touch the metal frame of the server to discharge static electricity
from your body before handling the CPU. Do not touch the CPU
pins by a bare hand or place the CPU directly on the desk. For static
notes, see the section "Anti-static Measures" described earlier.
Do not operate the system until confirming that the additionally
installed CPU is in normal state.
Make sure to use the CPU authorized by NEC. Installing a thirdparty CPU may cause a failure of the CPU as well as the server.
Repair of the server due to failures or damage resulted from
installing such a board will be charged.
Processor 1
Processor 2
FRONT
REAR
Mother board
NOTE: If the different revision of the processor is installed in the
multiprocessor system, Windows logs the following information every
startup. If this message is logged, it is no problem for operation.
Upgrading Your Server 9-27
Installation
Take the following steps to install the CPU.
1.
See the section "Preparing for Installation and Removal" described earlier to prepare.
2.
Pull out the server from the rack.
3.
Open the drive cover and logic cover.
4.
Remove two screws securing the support arm.
5.
Remove the support arm from the chassis.
6.
Remove the processor duct from the chassis.
7.
Locate the CPU socket which you are going to install CPU.
8.
Raise the locking lever on the socket.
IMPORTANT: Open the lever until it stops. The bar can be opened to
approx. 120 degrees.
9-28 Upgrading Your Server
9.
Aligning the pins of the CPU with the socket, insert the CPU slowly and gently into the
socket.
IMPORTANT:
Be aware of CPU direction. Pin layouts on two corners among four
differ from others to prevent an incorrect insertion. Confirm the pin
mark and pin layout on the socket, and insert the CPU correctly.
The mother board has "zero insertion force" sockets. If CPU does
not drop easily into socket holes, make sure lever is in the full-open
position.
Pin mark
10.
Push the CPU lightly to the socket, and push down the lever to secure the CPU.
Upgrading Your Server 9-29
11.
Put the heat sink on CPU.
NOTE: Be aware of direction of heat sink (see figure below).
REAR
12.
Fix the heat sink clips with four screws.
2
4
3
1
9-30 Upgrading Your Server
13.
Make sure that the heat sink is level.
NOTES:
If the heat sink is not level, remove it, and then install it again. The
following probably causes the heat sink not to be level:
– The CPU is not positioned correctly.
– All screws are not completely tightened.
14.
Do not move the secured heat sink.
Install the processor air duct.
NOTE: Put the SCSI cable through the tunnel under the full-length
riser card receiver of the bracket. Attach the bracket while making
sure that the cable is not caught in the bracket. Also make sure that
the signal cable from the power supply unit that runs through the slit on
the left side of the bracket is not caught when attaching the bracket.
Lay the SCSI cable as shown in the figure below.
Upgrading Your Server 9-31
15.
Install the covers you removed previously.
16.
Power on the server, start the SETUP utility, and set "Processor Retest" of "Processor
Settings" on the Main menu to "Enable".
17.
Verify that POST displays no error messages.
If POST displays an error message, take a note on the message and see the POST error
messages listed in Chapter 8.
18.
Set "Reset Configuration Data" on the Advanced menu to "Yes".
This setting is required to change the hardware configuration data. See Chapter 4 for
details.
19.
To add one or more CPUs to the server in 1-CPU configuration to operate the server with
more than one CPU, change the driver of [Computer] in the device manager to [ACPI
multi-processor PC] and then update the system (see Chapter 5).
NOTE: Step 19 is required when the Hyper-threading technology
feature is disabled in the BIOS SETUP Utility.
9-32 Upgrading Your Server
Removal
To remove the CPU, prepare the removal referring to steps 1 and 6 in the installation procedure and
do the reverse procedure of steps 12 to 8.
IMPORTANT:
Do not remove any CPU unless it is failed.
Install the dust cover onto the vacant processor socket.
After the operation, heat may make the cool seat at the bottom of
the heat sink adhere to the CPU. To remove the heat sink from the
CPU, first turn the heat sink to the left and right lightly to make sure
that the heat sink can be apart from the CPU. Removing the heat
sink with it adhering to the CPU may cause the CPU and/or socket
to be defected.
Do the following procedure if a CPU is removed (or replaced).
1.
Start SETUP to select menus "Main" – "Processor Settings" – "Processor Retest" in the
order to clear the error information on the removed CPU (see Chapter 4).
When a CPU is replaced, select menus "Main" – "Processor Settings" to confirm that the
ID and L2 Cache of the additional CPU are defined normally (see Chapter 4).
2.
Set "Reset Configuration Data" on the Advanced menu to "Yes."
This is required to update the hardware configuration information.
details.
See Chapter 4 for
Upgrading Your Server 9-33
PCI Board
The server has a riser card assembly on the mother board that enable installation of PCI boards. The
riser card assembly can hole up to two PCI boards.
Insert PCI boards for network extension and file device function extension into PCI board slots in
each riser card.
IMPORTANT:
The PCI board is extremely sensitive to static electricity. Make sure
to touch the metal frame of the server to discharge static electricity
from your body before handling the PCI board. Do not touch the
PCI board terminals or on-board parts by a bare hand or place the
PCI board directly on the desk. For static notes, see the section
"Anti-static Measures".
Some restrictions are imposed on the combination of PCI boards
which can be installed in the server. Contact your sales agent for
details.
A riser card is designed for installing only low-profile PCI boards or
full-height PCI boards. Before installing a PCI board, make sure of
the card specification.
NOTE: Some PCI boards use an on-board expanded ROM. See the
manual provided with the PCI board to determine whether expanded
ROM needs to be loaded. Use the BIOS setup utility "SETUP" for the
setting. For details, see Chapter 4.
FRONT
REAR
Riser card slot
(Dedicated to full-height PCI boards)
Slot number: 1B
Riser card slot
(Dedicated to low-profile PCI boards)
Slot number: 1C
Mother board
PCI board slot (B)
Connect to riser card slot (B)
PCI board slot (C)
Riser card
Connect to riser card slot (C)
9-34 Upgrading Your Server
Notes
Observe the following notes on installing/removing a PCI board:
Do not touch the terminals of the riser cards and the leads of electronic components with
your bare hand. Fingerprints and dust left on them cause the server to malfunction due to a
connection failure or damage to the leads.
A riser card is designed for installing only low-profile PCI boards or full-height PCI
boards. Before installing a PCI board, make sure of the card specification.
PCI slot number "1C" is assigned to the riser card for low-profile PCI boards, and "1B" is
assigned to the riser card for full-height PCI boards.
The system detects the boot devices in order of the PCI bus slots 1C (low-profile PCI
board) and then 1B (full-height PCI board).
The PCI devices of the same type (including onboard PCI device) may be recognized in
different order from that described above, depending on OS or disk array BIOS utility.
Check the slot location of PCI device by PCI bus number, device number and function
number shown in the table below.
Onboard NIC1
Onboard NIC2
Slot 1C
Onboard SCSI Ch A (external)
Onboard SCSI Ch B (internal)
Slot 1B
Bus number
2
2
2
2
2
3*
Device number
1
1
2
3
3
7
Function number
0
1
X
0
1
X
* The bus number may be 5 or greater depending on the board installed in Slot 1B.
Set "Disabled" for the optional ROM of a LAN device not to be booted by using the BIOS
SETUP utility.
If an additional LAN device is installed, it is hard to push the catch of the connector with
your finger that is connected to the LAN port. Disconnect the connector pushing the catch
with a standard screwdriver. At this time, be very careful for the screwdriver not to
damage the LAN port or other ports.
If a bootable PCI board (e.g., a disk array controller, SCSI controller, or LAN card) is
additionally installed, the boot priority is changed. After the additional installation, start
the BIOS SETUP utility, select [Boot] and set the new boot priority.
Contact your service representative for the acceptable optional PCI board.
Upgrading Your Server 9-35
Installation
Take the following steps to install a PCI board on the riser card:
IMPORTANT: The full-height riser card is equipped with an
"insulator (black)" to protect PCI boards. Do not remove the insulator,
and handle it carefully. The insulator is not shown in the figures in
this manual for simplifying the illustrations.
NOTES:
Each riser card supports low-profile or full-height PCI boards.
Before installing a PCI board, confirm that the type of the PCI
board.
When installing a PCI board, confirm that the card connector
matches the connector of the riser card.
1.
See the section "Preparing for Installation and Removal" described earlier to prepare.
2.
Pull out the server from the rack.
3.
Remove the drive cover and logic cover.
4.
Grasp a handle on the riser card assembly and lift straight up and remove the riser card
from the server.
5.
Remove the screw from the riser card, and remove the extension slot cover.
NOTE: Keep the removed extension slot cover for future use.
Extension slot cover
Extension slot cover
Low-Profile side
Full-height side
9-36 Upgrading Your Server
6.
Install the PCI board on the riser card.
Align the PCI board terminal section with the riser card slot, and firmly push the PCI
board until it is fully seated.
Insert the end of the PCI board bracket
in the frame slot of the riser card.
Low-Profile side
Full-height side
IMPORTANT:
Do not touch the terminals of the riser cards and PCI boards with
your bare hand. Fingerprints and dust left on them cause the server
to malfunction.
If you are unable to install a PCI board correctly, remove it, and
then install it again. Be careful not to apply excess force to a PCI
board or riser card. Doing so may damage the card.
NOTE: Confirm that the end of the PCI board bracket is inserted in the
frame slot of the riser card.
7.
Secure the PCI board with the screw you removed in step 5.
IMPORTANT: This step is to protect the terminals of the riser card
from dust or fingerprints. Dust and fingerprints left on them cause the
server to malfunction.
Low-Profile side
Full-height side
Upgrading Your Server 9-37
8.
Insert the riser card assembly into the slot on the mother board.
Align the riser card terminal section with the slot on the mother board, and firmly push the
riser card until it is fully seated.
NOTE: There are catches on the riser card frame that are used to
secure the riser card to the cabinet. When inserting the riser card,
confirm that the catches are correctly fit into the holes on the rear of the
cabinet. After the insertion, push the riser card with your fingers until
you cannot see any part of the riser card terminal section. The riser card
is now fully seated in the slot.
9.
10.
Install the components you removed previously.
Verify that POST displays no error messages.
If POST displays an error message, take a note on the message and see the POST error
messages listed in Chapter 8.
11.
Run the BIOS SETUP utility and select "Yes" for [Advanced] → [Reset Configuration
Data].
This setting is required to change the hardware configuration data. See Chapter 4 for
details.
Removal
Remove a PCI board in reverse order of the installation steps.
9-38 Upgrading Your Server
RAID Controller Board
Using the optional RAID controller allows you to use hard disks in the device bays of the server and
those in the optional expansion disk cabinet in the disk array configuration.
IMPORTANT:
The disk array controller board is extremely sensitive to static
electricity. Make sure to touch the metal frame of the Server to
discharge static electricity from your body before handling the disk
array controller board. Do not touch the disk array controller board
terminals or on-board parts by a bare hand or place the disk array
controller board directly on the desk. For static notes, see the section
"Anti-static Measures" described earlier.
Making hard disks in the disk array configuration or changing the
RAID level initializes hard disks. If the hard disk to be configured
in the array has your valuable data stored, make sure to make a
backup copy of the data in another hard disk before installing the
disk array controller board and configuring the array.
The disk array configuration requires at least two hard disks.
Use hard disks of the same capacity and performance (e.g.,
revolution) for each pack to configure them in the array.
NOTES:
Before installing a disk array controller board, start the SETUP
utility, select [Advanced] → [PCI Configuration], and confirm that
[Enabled] is set for the parameter [PCI Slot xx ROM] (xx: PCI slot
number).
A disk array configuration of RAID1 or RAID5 increases disk
reliability. However, the actually available capacity becomes smaller
than the total hard disk capacity in the disk array configuration.
When you use the onboard RAID controller, refer to the following documentation.
SCSI RAID controller:
Online document in the NEC EXPRESSBUILDER CD-ROM
SATA RAID controller: Chapter 4 in this manual
Upgrading Your Server 9-39
Installation
See "PCI Board" for the installation of a SCSI RAID controller.
Removal
Remove a SCSI RAID controller board in reverse order of the installation steps.
Use of internal hard disk drives in a RAID configuration
To use the internal hard disk drives in a RAID configuration in the server containing an optional
SCSI RAID controller, reconnect the SCSI cables on the mother board to the disk array controller.
The internal hard disk drive interface is connected to the SCSI connector on the mother board at
shipment.
SCSI connector
Hard disk drive
SCSI ID0
FRONT
Hard disk drive
SCSI ID1
REAR
Hard disk drive
SCSI ID2
SCSI backplane
Mother board
9-40 Upgrading Your Server
The following figures show the example of cable connection for RAID configuration.
Connecting SCSI cable to optional RAID controller in low-profile PCI slot
Hard disk drive
SCSI ID0
FRONT
Hard disk drive
SCSI ID1
REAR
Hard disk drive
SCSI ID2
N8103-86F
disk array controller
Connecting SCSI cable to optional RAID controller in full-height PCI slot
Hard disk drive
SCSI ID0
FRONT
SCSI connector
Hard disk drive
SCSI ID1
REAR
Hard disk drive
SCSI ID2
N8103-80F/81F
disk array controller
Upgrading Your Server 9-41
IMPORTANT: Some disk array controller boards have more than one
channel (connector). They may have connectors for internal
connection and external connection. However, the connectors may be
under exclusive specification in consideration of the internal connection
of the disk array controller board. Make sure that each connector
(channel) is for internal connection or external connection. For the
connectors and channels, see the manual provided with the disk array
controller board.
Example of connecting the SCSI cable
This section explains the procedure for connecting the internal hard disk drives to the
N8103-80F disk array controller board installed on the riser card dedicated to low-profile
PCI boards.
1.
Remove the fan duct.
2.
Install the N8103-80F to the low-profile side of the PCI riser card assembly.
3.
Disconnect the SCSI cable from the mother board.
4.
Connect the connector of the SCSI cable to the disk array controller.
9-42 Upgrading Your Server
LED relay cable connection
To indicate the status of access to the internal hard disk drives in a disk array
configuration, connect the LED relay cable (connected on the mother board) to the HDD
LED connector of the disk array controller.
1.
Connect the LED relay cable connector (black) to the LED Active pin on the disk array
controller.
Connect the pin having the red cable to the LED Active pin. Do not connect any pin
having the black cable.
2.
Confirm that the LED relay cable connector (brown) is connected to the HDD LED
connector on the mother board.
Pin (red)
N8103-80F
Pin (Red)
Upgrading Your Server 9-43
N8103-81F
Pin (Red)
Disk array configuration of internal hard disk drives
Observe the following notes on configuring a disk array:
– The server must contain more than one SCSI hard disk drive having the same capacity
and the same rotational speed. (The minimum number of required disks depends on the
configuration of RAID (Redundant Arrays of Inexpensive [Independent] Disks).)
– Select/set a RAID level "RAID0", "RAID1", or "RAID5" of disk array configuration.
When installing a system in an internal hard disk, you should use "Express Setup" to
perform all the procedures for RAID configuration, OS installation, and then OS setup.
Use Express Setup even when not installing a system. Start Express Setup, select [OS
Selection] → [Others]. The installer automatically performs all the procedures for RAID
configuration, maintenance partition setting, and then maintenance utility installation.
When making the setup in manual mode, use the RAID configuration utility in the chip on
the board. You can start the utility during execution of POST that automatically starts
immediately after you turn on the server power switch. For details, see the online
document in the NEC EXPRESSBUILDER CD-ROM provided with the server. (The
utility varies depending on the disk array controller board.) For details on the data transfer
rate, RAID, and array configuration, see the manual provided with the disk array
controller board as well as the online document.
9-44 Upgrading Your Server
Use of a disk expansion unit in a disk array configuration
A disk expansion unit is an exclusive device that can install up to 14 hard disk drives. (The number
of hard disk drives depends on the model.) The server containing a disk array controller board can
connect one or two of these devices. For details on the number of devices connected, see the
manuals provided with the disk array controller and disk expansion unit.
IMPORTANT: A disk expansion unit is provided with no hard disk
drives. You need to purchase hard disk drives separately.
An optional cable may be required to connect with a disk expansion unit. Refer to the manual
coming with the disk expansion unit for details.
After connecting the disk expansion unit, use the RAID configuration utility in the chip on the board
to set the disk expansion unit in a disk array configuration (RAID0, RAID1, or RAID5). (The utility
varies depending on the board.) For details on settings and the setting methods, see the online
document in the NEC EXPRESSBUILDER CD-ROM provided with the server or the manual
provided with the board.
While a disk expansion unit is set in a disk array configuration, you can use the "Auto Rebuild"
feature of the disk array controller to restore data if one of the hard disk drives installed in the disk
expansion unit fails. (Replace the failing hard disk drive while the power is on. (Hot swapping))
Upgrading Your Server 9-45
Redundant Hot Swap-fan (SCSI Hard Disk Drive Model Only)
Your server can include four optional redundant hot-swap fans.
Installation
1.
See the section "Preparing for Installation and Removal" described earlier to prepare.
2.
Pull out the server from the rack.
3.
Open the drive cover.
4.
Locate the installation slot.
9-46 Upgrading Your Server
5.
Disconnect all five fan cables from the mother board and remove all the fans from the
chassis.
6.
Install the fans as show figure below.
Upgrading Your Server 9-47
7.
Change the jumper (J11) setting as shown in figure below.
: Strap
Standard
Redundant
configuration
Mother board
IMPORTANT: To avoid system malfunction, leave other jumpers at
its default position.
If the remote management card (option) is installed in your server, follow these steps to
configure the firmware program.
8.
Place the NEC EXPRESSBUILDER CD-ROM into the CD-ROM drive and reboot the
server.
9.
Run "Initialize Remote Management Card".
Refer to Chapter 6 for details.
9-48 Upgrading Your Server
Removal
Follow these steps to remove or replace the hot-swap fan.
1.
Pull out the server from the rack.
2.
Open the drive cover.
3.
Locate the failed fan.
Fault lamp on the fan turns on when a fan failure occurs. A fan failure is also indicated by
NEC ESMPRO and system event log.
4.
While pressing release tabs on the top of the fan, pull the fan up to remove from the fan
slot.
5.
Install the new fan into the vacant slot.
IMPORTANT: If all the redundant fans are removed. Change the
jumper (J11) setting described earlier in the installation procedure.
If the remote management card (option) is installed in your server, follow these steps to
configure the firmware program.
Upgrading Your Server 9-49
Remote Management Card (RMC)
Remote Management card (RMC) is an optional expansion card that includes the Baseboard
Management Controller (BMC) based on IPMI 1.5.
See Chapter 2 for detail functions of RMC.
IMPORTANT: The RMC is extremely sensitive to static electricity.
Make sure to touch the metal frame of the server to discharge static
electricity from your body before handling the RMC. Do not touch the
RMC terminal pins by bare hand or place the RMC directly on the desk.
For static notes, see the section "Anti-static Measures" described earlier.
RMC connector
FRONT
REAR
Mother board
NOTE: The illustrations in this subsection might slightly differ from
your optional remote management card.
9-50 Upgrading Your Server
Installation
Follow these steps to install the RMC.
1.
See section "Preparing for Installation and Removal" described earlier to prepare.
2.
Pull out the server from the rack.
3.
Open the logic cover.
4.
Adhere the shock absorbers to the back of the RMC.
Refer to the manual that comes with the RMC for detail location.
5.
Insert the RMC into the RMC connector.
Align the notch in the bottom of the RMC with the keyed socket on the RMC connector.
6.
Press down the RMC until it locks.
Upgrading Your Server 9-51
7.
Check to see that the RMC is fixed with both levers on the RMC connector.
8.
<Advanced Remote Management card (ARMC) only>
a) Assemble the management network card that attached to the ARMC and install the card
to the riser card.
b) Connect the internal cable that attached to ARMC to ARMC and the management
network card as shown in the figure below.
The following figure shows the cable rooting of the internal cable.
9.
10.
Reassemble the server
Turn on the server and check that the no error messages other than the following message
are displayed on the POST screen.
H/W Configuration of BMC is corrupted.
!!Update BMC H/W Configuration by configuration tool!!
!!Refer to BMC configuration manual!!
Refer to Chapter 8 for POST error messages.
9-52 Upgrading Your Server
11.
Place the NEC EXPRESSBUILDER CD-ROM into the CD-ROM drive and reboot the
server.
12.
Run "Initialize Remote Management Card".
Refer to Chapter 6 for details.
13.
Run BIOS SETUP utility and check to see that the menus related to the RMC are
displayed.
Refer to Chapter 4 for details. If no additional menus are displayed, reinstall the RMC.
14.
In the BIOS SETUP utility, select "Yes" for [Reset Configuration Data] in the [Advanced]
menu.
This setting is required to change the hardware configuration data. See Chapter 4 for
details.
15.
Reboot the server and run NEC EXPRESSBUILDER to save system information.
Refer to Chapter 3 or 6 for details.
16.
If the advanced remote management card is installed and KVM console feature is used,
update the graphics accelerator (see Chapter 5).
NOTE: Refer to the manual that comes with an Optional advanced
remote management card for the monitor resolution.
17.
Uninstall NEC ESMPRO Agent if installed.
18.
(Re)install NEC ESMPRO Agent.
To correct the system information and event log from the management PC, NEC
ESMPRO Agent must be installed in the server.
Appendix A
Specifications
NEC Express5800/120Re-1
SCSI hot-plug hard disk drive model
N8100-949F
N8100-950F
N8100-951F
CPU
Type
Intel Xeon processor
Clock/Cache
3DGHz/1MB
3.20GHz/1MB
3.40GHz/1MB
Standard
1
Maximum
2
Chipset
E7520 (800MHz)
Memory
Standard
1GB (512MB×2)
Maximum
12GB (The standard DIMM must be replaced.)
Expansion unit
2 DIMMs (512MB/1GB/2GB)
Expansion times
2 times
Memory module
SDRAM DIMM (Low Profile DDR-333 Buffered Type)
Error check
ECC
Graphics (VRAM)
ATI RADEON 7000 (VRAM 8MB)
Auxiliary
Floppy disk (standard) 3.5-inch drive × 1
input
Hard disk (standard)
None
device
Hard disk (maximum)
439.5 GB (146.5 GB × 3)
CD-ROM (standard)
ATAPI interface × 1 (Load on tray type, x24 speed)
Hard disk bay
Slots: 3
RAID: RAID0, RAID1, RAID5 (option)
Additional PCI-X (64-bit/133MHz) 1 slot
slot
PCI -X(64-bit/66MHz) 1 slot (low-profile)
LAN interface
1000Base-T/100Base-TX/10Base-T (2 ports)
External
Keyboard/mouse
MINI DIN 6-pin connector (1 port)
interface
USB
4-pin (4 ports, 2 for front panel, 2 for rear panel)
Serial
DB-9 (2 ports, 1 for front panel, 1 for rear panel)
Network
RJ-45 (2 ports)
Display
MINI D-sub 15-pin (1 port)
SCSI
Ultra 320 SCSI (1 port)
Power supply
1+1 (redundant option), hot-swappable
Fan
5+5 (redundant option)
Cabinet design
Rack-mount type (1U)
External dimensions
467 (width) × 43 (height) × 714.1* (depth) mm
Weight (Max.)
15 kg (20 kg)
Power supply
100 to 120 VAC ±10%, 200 to 240 VAC ±10%, 50/60 Hz ±1 Hz
Power consumption (maximum)
471 VA, 465 W
Environmental
Temperature
10 to 35°C (operating), -10 to 55°C (non-operating, storage)
requirements
Humidity
20 to 80% RH (no condensation)
Others
NEC EXPRESSBUILDER supported, NEC ESMPRO provided
in the standard configuration
Item
* Excluding the front bezel.
A-2 Specifications
NEC Express5800/120Re-1
SATA fixed hard disk drive model
N8100-958F
N8100-959F
CPU
Type
Intel Xeon processor
Clock/Cache
3DGHz/1MB
3.40GHz/1MB
Standard
1
Maximum
2
Chipset
E7520 (800MHz)
Memory
Standard
1GB (512MB×2)
Maximum
12GB (The standard DIMM must be replaced.)
Expansion unit
2 DIMMs (512MB/1GB/2GB)
Expansion times
2 times
Memory module
SDRAM DIMM (Low Profile DDR-333 Buffered Type)
Error check
ECC
Graphics (VRAM)
ATI RADEON 7000 (VRAM 8MB)
Auxiliary
Floppy disk (standard) 3.5-inch drive × 1
input
Hard disk (standard)
None
device
Hard disk (maximum)
500 GB (250 GB × 2)
CD-ROM (standard)
ATAPI interface × 1 (Load on tray type, x24 speed)
Hard disk bay
Slots: 2
RAID: RAID0, RAID1
Additional PCI-X (64-bit/133MHz) 1 slot
slot
PCI -X(64-bit/66MHz) 1 slot (low-profile)
LAN interface
1000Base-T/100Base-TX/10Base-T (2 ports)
External
Keyboard/mouse
MINI DIN 6-pin connector (1 port)
interface
USB
4-pin (4 ports, 2 for front panel, 2 for rear panel)
Serial
DB-9 (2 ports, 1 for front panel, 1 for rear panel)
Network
RJ-45 (2 ports)
Display
MINI D-sub 15-pin (1 port)
SCSI
Ultra 320 SCSI (1 port)
Power supply
1+1 (redundant option), hot-swappable
Fan
5+5 (redundant option)
Cabinet design
Rack-mount type (1U)
External dimensions
467 (width) × 43 (height) × 714.1* (depth) mm
Weight (Max.)
15 kg (17 kg)
Power supply
100 to 120 VAC ±10%, 200 to 240 VAC ±10%, 50/60 Hz ±1 Hz
Power consumption (maximum)
430 VA, 425 W
Environmental
Temperature
10 to 35°C (operating), -10 to 55°C (non-operating, storage)
requirements
Humidity
20 to 80% RH (no condensation)
Others
NEC EXPRESSBUILDER supported, NEC ESMPRO provided
in the standard configuration
Item
* Excluding the front bezel.
Appendix B
Other Precautions
Transfer Rate of the On-board LAN Controller
The mother board includes the two network interface controllers that supports 10Base-T, 100BaseTX, and 1000Base-T networks and a capable of full or half duplex.
The both controllers can automatically detect and switch for network speed and transfer mode
connected to the HUB. However, for proper network operation, specify the "Link Speed & Duplex"
value the same as the value specified for HUB.
Server Management Software
The NEC EXPRESSBUILDER CD-ROM that comes with the server contains the NEC ESMPRO
utility.
NEC recommends that you should install the NEC ESMPRO for effective use of the reliability
enhancement features of the server.
Floppy Disk
The following describes use of the floppy disk.
Floppy disk type
The server uses 3.5-inch floppy disks. You can use the following two types of 3.5-inch floppy
disks:
2HD floppy disk (double-sided high-density track type)
Stores data of 1.44MB.
2DD floppy disk (double-sided double-density track type)
Stores data of 720KB.
Shutter
Insertion direction
indicator
Catching hole
Head window
Centering hub
Label
Centering hole
High-density media hole
(2HD only)
Write protection
hole
Front
Write protection switch
Rear
B-2 Other Precautions
Notes on use
The floppy disk is an important data storage media with delicate structure and requires care.
the following notes in mind to use it:
Keep
Insert the floppy disk into the floppy disk drive gently as far as it goes.
Attach the label to the correct position.
Do not write anything directly onto the disk surface with a pencil or ball-point pen.
Do not open the shutter.
Do not use the floppy disk in a dusty place.
Do not place anything on the floppy disk.
Do not leave the floppy disk in a high-temperature place (e.g., place exposed to direct
sunlight or close to a heater).
Do not leave the floppy disk with foods and drinks, or in a place exposed to cigarette
smoke.
Do not leave the floppy disk near any form of liquid or a chemical or in a place where a
chemical may be accidentally sprayed over them.
Do not place any magnetic objects (e.g., magnet) near the floppy disk.
Do not clip the floppy disk or drop it.
Keep the floppy disk in a floppy disk case that protects it from magnetism and dust.
Other Precautions B-3
Write-protection
A floppy disk has a write-protect switch that prevents the stored data from accidental
erasure.
You can read data from a write-protected floppy disk, but you cannot save data into the
floppy disk or format it. NEC recommends that you should write-protect any floppy disk
containing valuable data unless you are about to save data.
To write-protect a 3.5-inch floppy disk, use the write-protect switch provided on its back.
Disk format
To write data into a floppy disk, the floppy disk must be "formatted." "Formatting" is to
initialize the floppy disk and make it available for the system environment (operating
system).
IMPORTANT:
Formatting a used floppy disk clears all the data contained in it, if
any.
Formatting a floppy disk from the DOS command line is not
available with the server. Use a formatted floppy disk to work
with it on the DOS command line.
The format method depends on your operating system.
with your operating system for details.
Refer to the manual that comes
Data backup
"Data backup" is to copy data stored in a media into another media (e.g., floppy disk,
digital audio tape, or magnet-optical disk).
IMPORTANT: Make sure to make a back-up copy of every floppy
disk, if provided.
The floppy disk is a very delicate storage media. Dust or thermal changes, as well as
operator's misconduct or server failures, may cause loss of data. To avoid loss of data,
NEC recommends that you should make a back-up copy of your valuable data on a
regular basis.
B-4 Other Precautions
CD-ROM
Keep the following notes in mind to use the CD-ROM for the server:
Press the center of the storage case to remove the CD-ROM from the case.
Do not drop the CD-ROM.
Do not place anything on the CD-ROM or bend the CD-ROM.
Do not attach any label onto the CD-ROM.
Do not touch the signal side (nothing is printed on this side) with your hand.
Place the CD-ROM with its printed side upward and gently put it on the tray.
Do not scratch the CD-ROM or write anything directly on it with a pencil or ball-point
pen.
Do not leave the CD-ROM with foods and drinks, or in a place exposed to cigarette
smoke.
Do not leave the CD-ROM in a high-temperature place (e.g., place exposed to direct
sunlight or close to a heater).
When dust or fingerprints are attached on the CD-ROM, wipe the CD-ROM from its
center to edge with a dry soft cloth slowly and gently.
Use the CD cleaner to clean the CD-ROM. Do not use record spray/cleaner, benzene, or
thinner.
Keep the CD-ROM in a CD-ROM case when not in use.
Tape Media
The following describes data handling with the DAT, DLT, or AIT optionally available for the
server.
Saving your valuable data
When you save your valuable data or programs into the cartridge tape, you should save
them into two cartridge tapes to make the primary and secondary tapes.
This enables you to restore your data from one tape when the other makes a read error, as
well as to protect your valuable data and programs from loss.
Three-generation data management
NEC recommends that you should employ three-generation data management for data
storage.
Three-generation data management uses three cartridge tapes: A, B, and C. You save
data to tape A on the first day, tape B on the second day, tape C on the third day, tape A on
the forth day, and so on. That is, you save data into cartridge tapes cyclically from tape
A through C.
Other Precautions B-5
This enables you, for example, to use tape B to restore the data when tape C makes a read
error. Also when both tapes B and C make a read error, you can restore your valuable
data by using the data stored in tape A.
Keyboard
The keyboard is a device to instruct you computer by entering alphanumeric characters or symbols.
IMPORTANT:
Do not pour any liquid such as water or put anything into the
keyboard. Doing so may cause a failure of the keyboard.
The keyboard provided with the server is designed for adjustment of
an angle. Adjust the keyboard angle at which the keyboard is easy
to operate. The adjustment assists in reducing strain on your
shoulders, arms, and fingers.
NOTE: The keyboard functions depend on the software. Refer to the
manual that comes with the software for details.
B-6 Other Precautions
Mouse
Like the keyboard, the mouse is a device to instruct your computer.
software require the mouse for operation.
Many OS's and application
NOTE:
Functions assigned to the mouse buttons vary depending on the
software. For details, refer to the manual provided with the
software.
Use the mouse on a clean desk. Using the mouse on a dusty or
dirty desk disturbs smooth movement or normal operation of the
mouse. When your mouse movement seems dull, clean your
mouse. (See Chapter 7.)
Mouse operation includes "Click," "Double-click," and "Drag."
Click:
Press the button only once and release it.
Double-click:
Press the button twice consecutively and release it.
Drag:
Press and hold the button and move the mouse.
Operation of the server involves combinations of these mouse operations and data entries with the
keyboard.
Click
Pressing
Click
Click
Click
Double-click
Drag
Appendix C
IRQ
The factory-set interrupt requests is listed below. Find an appropriate one to install an optional
device.
IRQ
0
1
2
3
4
5
6
7
8
9
10
11
Peripheral Device (Controller)
System timer
Keyboard
–
COM2 serial port (PCI)
COM1 serial port (PCI)
PCI
Floppy disk drive
PCI
Real-time clock
ACPI compliant system
PCI
PCI
IRQ
12
13
14
15
16
17
18
19
30
31
49
50
Peripheral Device (Controller)
Mouse
Numeric processor
Primary IDE
Secondary IDE
USB
VGA
–
USB
LAN1
LAN2
Adaptec SCSI
Adaptec SCSI
C-2 IRQ
(This page is intentionally left blank.)
Appendix D
Installing Windows Server 2003
This section describes the procedures for installing Windows Server 2003 without using Express
Setup tool.
BEFORE INSTALLING WINDOWS SERVER 2003
Please read carefully the following information BEFORE commencing your Windows Server 2003
Installation.
Installing Service Pack
You can install the Service Pack on the server. When the Service Pack is not attached to your
system, prepare it by yourself.
Updating System
If you change the configuration of the system, update your system with NEC EXPRESSBUILDER
CD-ROM attached to your system.
Re-installing to the Hard Disk which has been upgraded to Dynamic
Disk
If you want to leave the existing partition when installing the system on the hard disk upgraded to
Dynamic Disk, note the following issue:
Do not select the partition that OS had been installed as the partition to install the OS
newly.
Select "Use the current File System" for the format of OS partition.
Manual Installation when N8103-65F/80F/81F/86F Keeps Connection
If you keep those controllers connecting during installation process, pop-up messages may appear.
This does not affect on system behavior. Click [YES] and continue the installation. Follow the
message hereafter.
D-2 Installing Windows Server 2003
MO Device
If you specify the file system as NTFS with MO Device connected during the installation, the file
system will not be converted normally. Disconnect MO Device and restart the installation from
the beginning.
Partition Size
The minimum required partition size for installation of Windows Server 2003 is:
2900MB + Paging file size + Dump file size
Paging file size (recommended) = Mounted memory size * 1.5
Dump file size
= Mounted memory size + 12 MB
IMPORTANT:
The above paging file size is necessary for collecting debug
information (memory dump). If you set the default value of
paging file size smaller than the 'recommended' value, the accurate
debug information(memory dump) may not be collected.
The maximum paging file size which can be set on one partition is
4095MB. If the above paging file size exceeds 4095MB, specify
4095MB for the paging file size.
The dump file size for the system with more than 2GB memory
mounted is '2048MB + 12MB'.
If you install any application program or the like, add necessary
space to the partition to install these programs.
For example, if installed memory size is 512MB, the minimum required partition size is
2900MB + (512MB * 1.5) + (512MB + 12MB) = 4192MB.
Dividing into the partition of the recommended size into multiple disks as written below will solve
problem that it cannot be reserved in one disk.
1.
Set the "Size required for installation + Paging file size".
2.
See Chapter 5 and set that debugging information (equivalent to the dump file size) is to
be written to a separate disk.
(If the disk does not have enough free space to enable the file size to be written, then after
installing the system using the "Size required for installation + Paging file size," install an
additional new disk.)
Installing Windows Server 2003 D-3
INSTALLING WINDOWS SERVER 2003
Preparations for Installation
NEC EXPRESSBUILDER CD-ROM
Microsoft Windows Server 2003 Standard Edition/ Microsoft Windows Server 2003
Enterprise Edition (CD-ROM)
User's Guide
Getting Started
Windows Server 2003 OEM-DISK for NEC EXPRESSBUILDER
Creating "Windows Server 2003 OEM-DISK for NEC
EXPRESSBUILDER"
Before installing, create Windows Server 2003 OEM-DISK for NEC EXPRESSBUILDER.
NOTE: If you have already "Windows Server 2003 OEM-DISK for
NEC EXPRESSBUILDER" for NEC Express5800 Server which you
are going to install Windows Server 2003, you do not need to create it
again.
You can create Windows Server 2003 OEM-DISK for NEC EXPRESSBUILDER with the
following two procedures.
Create from the menu which appears when running NEC Express5800 Server with NEC
EXPRESSBUILDER.
If you have only NEC Express5800 Server to create Windows Server 2003 OEM-DISK
for NEC EXPRESSBUILDER, use this procedure.
If Windows Server 2003 or Windows 2000 can be operated on NEC Express5800 Server,
you can use the other procedure described later.
Follow the steps below.
1.
Prepare one 3.5-inch floppy disk.
2.
Turn on your NEC Express5800 Server.
3.
Insert the NEC EXPRESSBUILDER CD-ROM into the CD-ROM drive of the server.
4.
Press the RESET switch or press Ctrl + Alt + Delete to reboot the server .(You may also
turn off and then on again to reboot the server.)
The system will boot from the CD-ROM and NEC EXPRESSBUILDER starts.
5.
Select [Create Support Disk] from [Tools].
6.
Select [Windows Server 2003 OEM-DISK for NEC EXPRESSBUILDER] from [Create
Support Disk] menu.
D-4 Installing Windows Server 2003
7.
Insert a floppy disk into the floppy disk drive according to the instruction on the screen.
Windows Server 2003 OEM-DISK for NEC EXPRESSBUILDER will be created.
Write-protect and attach a label, then keep it safely.
Create from [Master Control Menu]
[Master Control Menu] runs on the following operating systems.
–
–
–
–
–
Windows Server 2003
Windows 2000
Windows Me/98/95
Windows NT 4.0
Windows XP
You can create Windows Server 2003 OEM-DISK for NEC EXPRESSBUILDER from
[Master Control Menu], if you have the computer on which the above operating systems
operate.
Follow the steps below.
1.
Prepare a 3.5-inch floppy disk.
2.
Run the operating system.
3.
Insert the NEC EXPRESSBUILDER CD-ROM into the CD-ROM drive of the server.
[Master Control Menu] will appear.
4.
Click on [Setup] with left mouse button and click [Make OEM-DISK] and then [for
Windows Server 2003].
NOTE: You can do the same operation with the menu appeared by the
Right-click.
5.
Insert the floppy disk into the floppy disk drive according to the message.
Windows Server 2003 OEM-DISK for NEC EXPRESSBUILDER will be created.
Write-protect and attach a label, then keep it safely.
Installing Windows Server 2003 D-5
Windows Server 2003 Clean Installation
This section explains how to perform a clean installation of Windows Server 2003.
1.
Turn on the system power.
2.
Insert the Windows Server 2003 CD-ROM into the CD-ROM drive.
3.
Press Ctrl + Alt + Delete to reset the system.
After a bootable operating system has been installed on the hard disk, press Enter while
the message "Press any key to boot from CD..." is displayed at the top of the screen.
If no bootable operating system exists on the hard disk, this step is unnecessary.
The Windows Server 2003 setup screen will appear.
If the screen is not displayed, Enter was not pressed properly.
Begin after turning on the system power again.
4.
If the RAID controller (including embedded HostRAID feature) or SCSI controller is
installed in the system, press F6 in a few seconds when the window is in either of the
following states.
–
"Setup is inspecting your computer's hardware configuration ..." is displayed.
–
A screen with a solid blue background is displayed.
IMPORTANT: There is no visible indication on screen when F6 has
been pressed.
5.
When the following message is displayed, press S.
Setup could not determine the type of one or more mass storage devices
installed in your system, or you have chosen to manually specify an adapter.
Currently, Setup will load support for the following mass storage devices.
The following message is displayed.
Please insert the disk labeled
manufacturer-supplied hardware support disk
into Drive A:
*Press ENTER when ready.
6.
Insert the Windows Server 2003 OEM-DISK for NEC EXPRESSBUILDER into the
floppy disk drive, and press Enter.
SATA Model: A list of mass storage devices is displayed.
SCSI Model: Select the [Adaptec Ultra320 SCSI Cards (WinXP/Server 2003 IA-32)] and
press Enter.
D-6 Installing Windows Server 2003
7.
Select the proper SCSI Adapter and press Enter.
– Adaptec HostRAID U320 Driver Ver 1.02 For Windows 2000/XP/2003
(When SCSI HostRAID is installed.)
– Adaptec Embedded Serial ATA HostRAID Driver for Windows 2000/XP/2003
(When SATA HostRAID is installed.)
– MegaRAID SCSI 320-1 RAID Controller
(When N8103-80F board is installed.)
– MegaRAID SCSI 320-2 RAID Controller
(When N8103-81F is installed.)
– Adaptec I2O RAID Driver Disk for 32bit Windows 2000/XP/2003
(When N8103-86F is installed.)
Continue performing tasks according to the subsequent messages that appear.
After installation is completed, be sure to execute the tasks described in "Driver Installation and
Advanced Settings" and "Updating the System" of this manual.
Installing Windows Server 2003 D-7
Upgrade Installation
Procedures below upgrade the installed Windows 2000 to Windows Server 2003.
1.
Power on the system and start Windows 2000.
2.
Log on as an administrator.
3.
Insert the Windows Server 2003 CD-ROM into the CD-ROM drive.
Then, [Select an operation] dialog will appear.
NOTE: If the [Select an operation] dialog box does not appear, start
\SETUP.EXE from CD-ROM drive.
4.
Select [Install Windows Server 2003].
Then, a dialog box asks to select the upgrade or clear installation.
5.
Select "Upgrade (recommended)" and click the Next.
Follow the messages and continue. The system will automatically restart after copying
the files.
NOTE: You can leave the Windows Server 2003 CD-ROM in CDROM drive.
6.
If the RAID controller (including embedded HostRAID feature) is installed in the system,
press F6 while a message, "Setup is inspecting your computer's hardware configuration...",
is on the screen.
IMPORTANT: There is no visible indication on screen when F6 has
been pressed.
7.
When the following message is displayed, press S.
Setup could not determine the type of one or more mass storage devices
installed in your system, or you have chosen to manually specify an adapter.
Currently, Setup will load support for the following mass storage devices.
The following message is displayed.
Please insert the disk labeled
manufacturer-supplied hardware support disk
into Drive A:
*Press ENTER when ready.
D-8 Installing Windows Server 2003
8.
Insert the Windows Server 2003 OEM-DISK for NEC EXPRESSBUILDER into the
floppy disk drive, and press Enter. A list of SCSI adapters will be displayed.
SATA Model: A list of mass storage devices is displayed.
SCSI Model: Select the [Adaptec Ultra320 SCSI Cards (WinXP/Server 2003 IA-32)] and
press Enter.
9.
If the optional board is installed, select the proper SCSI Adapter and press Enter.
– Adaptec Ultra160 SCSI Cards (Win Server 2003)(When N8103-56F board is installed.)
– Adaptec Ultra320 SCSI Cards (WinXP/Server 2003 IA-32)(When N8103-75F board is
installed.)
– MegaRAID SCSI 320-1 RAID Controller Driver (When N8103-80F board is installed.)
– MegaRAID SCSI 320-2 RAID Controller Driver (When N8103-81F board is installed.)
Continue performing tasks according to the subsequent messages that appear.
10.
Update the system.
11.
Install the driver and make detailed settings.
SCSI controller (N8103-56F)
If your system has a controller (N8103-56F), following message often appears on the
display during the upgrade installation to Windows Server 2003.
Please type D:/i386 and click OK. (D: CD-Drive)
Insert disk
The file 'adpu160m.sys' on Adaptec Windows 2000 Family Manager set V1.12 S2 is
needed.
Type the path where the file is located, and then click OK.
If PROSet is already installed, uninstall the PROSet before upgrading.
If the teaming function is enabled, disable the function before uninstalling PROSet.
During upgrade installation, [Disk Insert] dialog box may appear.
If it appears, click Cancel.
When upgrade installation is completed, [Device Driver Wizard] dialog box may appear.
If it appears, click Cancel, then update the system.
Installing Windows Server 2003 D-9
Reinstallation to Multiple Logical drives
This subsection describes the procedure for reinstalling the operation system if the multiple logical
drives exist.
Before Re-installing the Operation System
Be sure to make backup copies before re-installing the operation system just in case.
Re-installing the Operation System
1.
Start the clean installation following the procedure described in this manual.
2.
Specify the partition in which you want to install the operating system when the following
message appears:
The following list shows the existing partitions and
unpartitioned space on this computer.
Use the UP and DOWN ARROW keys to select an item in the list.
*
3.
Cannot modify the drive letter of your system or boot volume. Confirm the proper
drive letter is assigned and then, continue the setup.
Continue the clean installation again following the procedure described earlier in this
chapter.
The drive letter of the re-installed system may differ from the one of the previous system.
If you need to modify the drive letter, modify it according to the "Procedure for
Modifying the Drive Letter".
D-10 Installing Windows Server 2003
Procedure for Modifying the Drive Letter
Be careful that the drive letter of the system or boot volume cannot modify with the following
procedure.
1.
Click Start menu, right-click [My Computer], and specify [Manage] to start
[Computer Management].
2.
Specify the [Disk Management] in the left side of the window.
3.
Right-click the volume you want to modify the drive letter and specify the [Change Drive
Letter and Path...].
4.
Click [Yes].
5.
Choose the [Assign a drive letter] and specify the drive letter you want to assign.
6.
Click [OK].
7.
If the following message appears, click [Yes].
Changing the drive letter of a volume may cause programs to no
longer run. Are you sure you want to change this drive letter?
8.
Close the [Computer Management].
Installing Windows Server 2003 D-11
Updating the System
To ensure normal system operation you should update your system using the following procedures.
1.
Logon to the system using the administrator account or other account which is a member
of the Administrators group.
2.
Insert the NEC EXPRESSBUILDER CD-ROM into the CD-ROM drive.
Master Control Menu is automatically appeared on the screen.
3.
Click on [Setup] with left mouse button and click on [Update NEC Express5800 system]
section.
4.
Continue your work for system update as the following message.
5.
Click on [Restart Computer] to restart the system.
6.
Remove the NEC EXPRESSBUILDER CD-ROM from the CD-ROM drive immediately
after clicking on [Restart Computer]
IMPORTANT: If you change the configuration of the system (by
adding or removing hardware or Operating system software
components) or repair the system, you must run the system update
again.
D-12 Installing Windows Server 2003
DRIVER INSTALLATION AND ADVANCED SETTINGS
This section describes on how to install and setup various standard drivers mounted on the device.
For the information on installing and setting up the driver that is not described in this section, please
refer to the document attached to the driver.
PROSet
PROSet is a utility that confirms the function of network contained in network driver.
Utilizing PROSet enables the following items:
Confirm detailed information of the adapter.
Diagnose loop back test, packet transmission test and so on.
Setup of teaming.
Configuring several network adapters as one team provides the server a tolerant environment on any
trouble and enhance throughput between the switches.
PROSet is necessary to utilize these features.
Follow the procedure below to install PROSet.
1.
Insert the NEC EXPRESSBUILDER CD-ROM into the CD-ROM drive.
2.
The [Windows Explorer] dialog starts.
* The procedure in the case of the standard start menu
Click Start menu and click [Windows Explorer].
* The procedure in the case of the classic start menu
Click Start menu, point to [Programs], [Accessories] and click [Windows Explorer].
3.
Run "PROSET.EXE" in the following directory.
CD-ROM DriveLetter:\WINNT\DOTNET\BC3\PROSET\WS03XP32
The [Intel(R) PROSet - InstallShield Wizard] dialog starts.
4.
Click [Next].
5.
Choose "I accept the terms in the license agreement" and click [Next].
6.
Choose "Typical" and click [Next].
7.
Click [Install].
8.
When [InstallShield Wizard Completed] window is displayed, click [Finish].
9.
Restart the system.
Installing Windows Server 2003 D-13
Network Driver
Specify the details of network driver.
One standard network driver that is mounted will be installed automatically, but the link speed and
Duplex mode need to be specified manually.
[When PROSet is not installed]
1.
The [Local Area Connection Properties] dialog box appears.
* The procedure in the case of the standard start menu
1. Click Start menu, Click [Control Panel], Click [Network Connections], and Click
[Local Area Connection].
* The procedure in the case of the classic start menu
1. Click Start menu, Click [Settings] and Click [Network Connections].
The [Network Connections] dialog box appears.
2. Right-click [Local Area Connection] and click [Properties] from pop-up menu.
2.
Click [Configure].
The property dialog box for network adapter appears.
3.
Click the [Advanced] and specify the [Link Speed & Duplex] value the same as the value
specified for HUB.
4.
Click [OK] on the property dialog box for network adapter.
[When PROSet is installed]
1.
The [Intel(R) PROSet for Wired Connections] dialog box appears.
* The procedure in the case of the standard start menu
Click Start menu, point to [Control Panel] and click [Intel(R) PROSet Wired].
* The procedure in the case of the classic start menu
1. Click Start menu, point to [Settings] and click [Control Panel].
2. Double-click [Intel(R) PROSet Wired] on the [Control Panel] window.
2.
Click [(Network Adapter Name)] in the list.
3.
Click the [Speed] and specify the [Link Speed & Duplex Settings] value the same as the
value specified for HUB.
4.
Click [Apply] and click [OK].
Also, add or delete any protocols and services if necessary.
You can operate the process on the property dialog box for local area network which can be
appeared from [Network and Dial-up Connection].
D-14 Installing Windows Server 2003
NOTE: We recommend you to add [Network Monitor] at
[AddingServices]. [Network Monitor] can monitor the frame (or the
packet) that the computer installing [Network Monitor] sends or
receives. This tool is valuable when analyzing network trouble. For
information on how to install the tool, see the "Setup for
TroubleProcess" later in this document.
Re-install the Network Driver
The network driver will be installed automatically.
Graphics Accelerator Driver
Update Graphics Accelerator Driver Mounted in Standard.
1.
Insert the NEC EXPRESSBUILDER CD-ROM into the CD-ROM drive.
2.
Click Start menu, point to [Programs], [Accessories] and click [Windows Explorer]
3.
Run "SETUP.EXE" in the following directory.
<CD-ROM Drive Letter>:\WINNT\VIDEO\RADEON7000\W2K3\SETUP.EXE
* Install the graphics accelerator driver in the following directory if you communicate
your server with the remote KVM console. (Optional advanced remote management
card (N8115-02) must be installed in your server to use the remote KVM console.)
<CD-ROM Drive Letter>:\N8115-02\VIDEO\RADEON7000\SETUP.EXE
4.
Follow the message to continue the installation.
5.
Remove the NEC EXPRESSBUILDER CD-ROM from the CD-ROM drive, follow the
direction on the screen and restart the system.
SETTING FOR COLLECTING MEMORY DUMP
(DEBUG INFORMATION)
Set for collecting memory dump using the procedure described in Chapter 5.
Appendix E
Installing Windows 2000
This section describes the procedures for installing Windows 2000 without using Express Setup
tool.
BEFORE INSTALLING WINDOWS 2000
Please read carefully the following information BEFORE commencing your Windows 2000
Installation.
Installing Service Pack
You can install the Service Pack on the server. When the Service Pack is not attached to your
system, prepare it by yourself.
Updating System
If you change the configuration of the system, update your system with NEC EXPRESSBUILDER
CD-ROM attached to your system.
Re-installing to the Hard Disk which has been upgraded to Dynamic
Disk
If you want to leave the existing partition when installing the system on the hard disk upgraded to
Dynamic Disk, note the following issue:
Do not select the partition that OS had been installed as the partition to install the OS
newly.
Select "Use the current File System" for the format of OS partition.
E-2 Installing Windows 2000
MO Device
If you specify the file system as NTFS with MO Device connected during the installation, the file
system will not be converted normally. Disconnect MO Device and restart the installation from
the beginning.
Partition Size
The minimum required partition size for installation of Windows 2000 is:
1000MB + Paging file size + Dump file size
Paging file size (recommended) = Mounted memory size * 1.5
Dump file size
= Mounted memory size + 12 MB
IMPORTANT:
The above paging file size is necessary for collecting debug
information (memory dump). If you set the default value of
paging file size smaller than the 'recommended' value, the accurate
debug information(memory dump) may not be collected.
The maximum paging file size which can be set on one partition is
4095MB. If the above paging file size exceeds 4095MB, specify
4095MB for the paging file size.
The dump file size for the system with more than 2GB memory
mounted is '2048MB + 12MB'.
If you install any application program or the like, add necessary
space to the partition to install these programs.
For example, if installed memory size is 512MB, the minimum required partition size is
1000MB + (512MB*1.5) + (512MB+12) = 2292MB.
Dividing into the partition of the recommended size into multiple disks as written below will solve
problem that it cannot be reserved in one disk.
1.
Set the "Size required for installation + Paging file size".
2.
See Chapter 5 and set that debugging information (equivalent to the dump file size) is to
be written to a separate disk.
(If the disk does not have enough free space to enable the file size to be written, then after
installing the system using the "Size required for installation + Paging file size," install an
additional new disk.)
Installing Windows 2000 E-3
INSTALLING WINDOWS 2000
Preparations for Installation
NEC EXPRESSBUILDER CD-ROM
Microsoft Windows 2000 Server / Microsoft Windows 2000 Advanced Server (CD-ROM)
Windows 2000 Service Pack (CD-ROM)
User's Guide
Getting Started
Windows 2000 OEM-DISK for NEC EXPRESSBUILDER
Creating "Windows 2000 OEM-DISK for NEC EXPRESSBUILDER"
Before installing, create Windows 2000 OEM-DISK for NEC EXPRESSBUILDER.
NOTE: If you have already "Windows 2000 OEM-DISK for NEC
EXPRESSBUILDER" for NEC Express5800 Server which you are
going to install Windows 2000, you do not need to create it again.
You can create Windows 2000 OEM-DISK for NEC EXPRESSBUILDER with the following two
procedures.
Create from the menu which appears when running NEC Express5800 Server with NEC
EXPRESSBUILDER.
If you have only NEC Express5800 Server to create Windows 2000 OEM-DISK for NEC
EXPRESSBUILDER, use this procedure.
If Windows Server 2003 or Windows 2000 can be operated on NEC Express5800 Server,
you can use the other procedure described later.
Follow the steps below.
1.
Prepare one 3.5-inch floppy disk.
2.
Turn on your NEC Express5800 Server.
3.
Insert the NEC EXPRESSBUILDER CD-ROM into the CD-ROM drive of the Server.
4.
Press the RESET switch or press Ctrl, Alt and Delete to reboot the server .(You may also
turn off and then on again to reboot the server.)
The system will boot from the CD-ROM and NEC EXPRESSBUILDER starts.
5.
Select [Create Support Disk] from [Tools].
6.
Select [Windows 2000 OEM-DISK for NEC EXPRESSBUILDER] from [Create Support
Disk] menu.
E-4 Installing Windows 2000
7.
Insert a floppy disk into the floppy disk drive according to the instruction on the screen.
Windows 2000 OEM-DISK for NEC EXPRESSBUILDER will be created.
Write-protect and attach a label, then keep it safely.
Create from [Master Control Menu]
[Master Control Menu] runs on the following operating systems.
–
–
–
–
–
Windows Server 2003
Windows 2000
Windows Me/98/95
Windows NT 4.0
Windows XP
You can create Windows 2000 OEM-DISK for NEC EXPRESSBUILDER from [Master
Control Menu], if you have the computer on which the above operating systems operate.
Follow the steps below.
1.
Prepare one 3.5-inch floppy disk.
2.
Run the operating system.
3.
Insert the NEC EXPRESSBUILDER CD-ROM into the CD-ROM drive of the server.
[Master Control Menu] will appear.
4.
Click on [Setup] with left mouse button and click [Make OEM-DISK] and then [for
Windows 2000].
NOTE: You can do the same operation with the menu appeared by the
Right-click.
5.
Insert the floppy disk into the floppy disk drive according to the message.
Windows 2000 OEM-DISK for NEC EXPRESSBUILDER will be created.
Write-protect and attach a label, then keep it safely.
Installing Windows 2000 E-5
Windows 2000 Clean Installation
This section explains how to perform a clean installation of Windows 2000.
1.
Turn on the system power.
2.
Insert the Windows 2000 CD-ROM in the CD-ROM drive.
3.
Press Ctrl + Alt + Delete to reset the system.
After a bootable operating system has been installed on the hard disk, press Enter while
the message "Press any key to boot from CD..." is displayed at the top of the screen.
If no bootable operating system exists on the hard disk, this step is unnecessary.
The Windows 2000 setup screen will appear.
If the screen is not displayed, Enter was not pressed properly.
Begin after turning on the system power again.
4.
If the RAID controller (including embedded HostRAID feature) or SCSI controller is
installed in the system, press F6 in a few seconds when the window is in either of the
following states.
–
"Setup is inspecting your computer's hardware configuration ..." is displayed.
–
A screen with a solid blue background is displayed.
IMPORTANT: There is no visible indication on screen when F6 has
been pressed.
5.
When the following message is displayed, press S.
Setup could not determine the type of one or more mass storage devices
installed in your system, or you have chosen to manually specify an adapter.
Currently, Setup will load support for the following mass storage devices.
The following message is displayed.
Please insert the disk labeled
manufacturer-supplied hardware support disk
into Drive A:
*Press ENTER when ready.
6.
Insert the Windows 2000 OEM-DISK for NEC EXPRESSBUILDER into the floppy disk
drive, and press Enter.
SATA Model: A list of mass storage devices is displayed.
SCSI Model: Select the [Adaptec Ultra320 SCSI Cards (Win2000)] and press Enter.
Then, it returns to the screen of Procedure 5.
E-6 Installing Windows 2000
7.
Select the proper SCSI Adapter and press Enter.
– Adaptec HostRAID U320 Driver Ver 1.02 For Windows 2000/XP/2003
(When SCSI HostRAID is installed.)
– Adaptec Embedded Serial ATA HostRAID Driver for Windows 2000/XP/2003
(When SATA HostRAID is installed.)
– MegaRAID SCSI 320-1 Controller Driver (When N8103-80F board is installed.)
– MegaRAID SCSI 320-2 Controller Driver (When N8103-81F is installed.)
– Adaptec I2O RAID Driver Disk for 32bit Windows 2000/XP/2003
(When N8103-86F is installed.)
Continue performing tasks according to the subsequent messages that appear.
After installation is completed, be sure to execute the tasks described in "Driver Installation and
Advanced Settings" and "Updating the System" of this manual.
Reinstallation to Multiple Logical Drives
This subsection describes the procedure for reinstalling the operation system if the multiple logical
drives exist.
Before Re-installing the Operation System
Be sure to make backup copies before re-installing the operation system just in case.
Re-installing the Operation System
1.
Start the clean installation following the procedure described in this manual.
2.
Specify the partition in which you want to install the operating system when the following
message appears:
The following list shows the existing partitions and
unpartitioned space on this computer.
Use the UP and DOWN ARROW keys to select an item in the list.
*
3.
Cannot modify the drive letter of your system or boot volume. Confirm the proper
drive letter is assigned and then, continue the setup.
Continue the clean installation again following the procedure described earlier in this
chapter.
The drive letter of the re-installed system may differ from the one of the previous system.
If you need to modify the drive letter, modify it according to the "Procedure for
Modifying the Drive Letter".
Installing Windows 2000 E-7
Procedure for Modifying the Drive Letter
Be careful that the drive letter of the system or boot volume cannot modify with the following
procedure.
1.
Click Start menu, right-click [My Computer], and specify [Manage] to start [Computer
Management].
2.
Specify the [Disk Management] in the left side of the window.
3.
Right-click the volume you want to modify the drive letter and specify the [Change Drive
Letter and Path...].
4.
Click [Yes].
5.
Choose the [Assign a drive letter] and specify the drive letter you want to assign.
6.
Click [OK].
7.
If the following message appears, click [Yes].
Changing the drive letter of a volume may cause programs to no
longer run. Are you sure you want to change this drive letter?
8.
Close the [Computer Management].
E-8 Installing Windows 2000
Updating the System - Installing Service Pack To ensure normal system operation you should update your system using the following procedures.
1.
Logon to the system using the administrator account or other account which is a member
of the Administrators group.
2.
Insert the NEC EXPRESSBUILDER CD-ROM into the CD-ROM drive.
Master Control Menu is automatically appeared on the screen.
3.
Click on [Setup] with left mouse button and click on [Update NEC Express5800 system]
section.
4.
Continue your work for system update as the following message.
5.
Click on [Restart Computer] to restart the system.
6.
Remove the NEC EXPRESSBUILDER CD-ROM from the CD-ROM drive immediately
after clicking on [Restart Computer]
IMPORTANT: If you change the configuration of the system (by
adding or removing hardware or Operating system software
components) or repair the system, you must run the system update
again.
Installing Windows 2000 E-9
DRIVER INSTALLATION AND ADVANCED SETTINGS
This section describes on how to install and setup various standard drivers mounted on the device.
For the information on installing and setting up the driver that is not described in this section, please
refer to the document attached to the driver.
PROSet
PROSet is a utility that confirms the function of network contained in network driver. Be sure to
install. Utilizing PROSet enables the following issues:
Confirm detailed information of the adapter.
Diagnose loop back test, packet transmission test and so on.
Specify teaming.
Configuring several network adapters as one team provides the server an environment tolerant on
any trouble and enhance through put between the switches.
PROSet is necessary to utilize these features.
Follow the procedure below to install PROSet.
1.
Insert the NEC EXPRESSBUILDER CD-ROM into the CD-ROM drive.
2.
Click Start menu, point to [Program], [Accessory] and click [Explorer].
3.
Run "PROSET.EXE" in the following directory.
<CD-ROM DriveLetter>:\WINNT\W2K\BC3\PROSET\WIN2K\
The [Intel(R) PROSet - InstallShield Wizard] dialog starts.
4.
Click [Next].
5.
Choose "I accept the terms in the license agreement" and click [Next].
6.
Choose "Typical" and click [Next].
7.
Click [Install].
8.
When [InstallShield Wizard Completed] window is displayed, click [Finish].
9.
Restart the system.
E-10 Installing Windows 2000
Network Driver
[When PROSet is not installed]
1.
Click Start menu and click [Network and Dial-Up Connection].
The [Network and Dial-Up Connection] dialog box appears.
2.
Right-click [Local Area Connection] and click [Properties] from pop-up menu.
The [Local Area Connection Properties] dialog box appears.
3.
Click [Configure].
The property dialog box for network adapter appears.
4.
Click the [Advanced] and specify the [Link Speed & Duplex]value the same as the value
specified for HUB.
5.
Click [OK] on the property dialog box for network adapter.
6.
Click [OK] on the [Local Area Connection Properties] dialog box.
Also, add or delete any protocols and services if necessary. You can operate the process from
[Network and Dial-up Connection] to display the property dialog box for local area network.
NOTE: We recommend you to add [Network Monitor] at
[AddingServices]. [Network Monitor] can monitor the frame (or the
packet) that the computer installing [Network Monitor] sends or
receives. This tool is valuable when analyzing network trouble. For
information on how to install the tool, see the "Setup for
TroubleProcess" later in this document.
[When PROSet is installed]
1.
Double-click [Intel(R) PROSet Wired] on the [Control Panel] window.
The [Intel(R) PROSet for Wired Connections] dialog box appears. Double-click the
[Intel(R) PROSet Wired] icon.
2.
Put the cursor to the network driver in the list.
3.
Click the [Advanced] and specify the [Link Speed & Duplex] value the same as the value
specified for HUB.
Also specify the other network driver with the same progress above.
Installing Windows 2000 E-11
Re-install the Network Driver
After installing OS and deleting the network drivers, if you want to re-install the network drivers,
follow the procedure below.
1.
Restart OS and logon to your system.
2.
[Upgrade Device Driver Wizard] dialog box appears.
Click [Next].
3.
Confirm that the [Search for a suitable driver for my device (recommended)] radio button
is selected and click [Next].
4.
Select the [Specify a location] check box and deselect other check boxes.
Click [Next].
5.
Other [Upgrade Device Driver Wizard] dialog box opens.
When using [Intel(R) PRO/1000CT Network Connection],specify [<CD-ROM drive
letter>:\WINNT\W2K\BC3\PRO1000\WIN2K].
Then click [OK].
6.
Click [Next].
7.
Click [Finished].
After re-installing the network drivers, the link speed and Duplex mode need to be
specified.
Refer to "Network Driver" described earlier.
E-12 Installing Windows 2000
Graphics Accelerator Driver
Install Graphics Accelerator Driver mounted in Standard.
1.
Insert the NEC EXPRESSBUILDER CD-ROM into the CD-ROM drive.
2.
Click Start menu, point to [Programs], [Accessories] and click [Windows Explorer]
3.
Run "SETUP.EXE" in the following directory.
<CD-ROM Drive Letter>:\WINNT\VIDEO\RADEON7000\W2K\SETUP.EXE
* Install the graphics accelerator driver in the following directory if you communicate
your server with the remote KVM console. (Optional advanced remote management
card (N8115-02) must be installed in your server to use the remote KVM console.)
<CD-ROM Drive Letter>:\N8115-02\VIDEO\RADEON7000\SETUP.EXE
4.
Follow the message to continue the installation.
If the dialog message "Digital Signature could not been found." appears, select [Yes] to
continue.
If the dialog message "Direct X Ver.8 isn't installed." appears, select [continue] to
continue.
5.
Remove the NEC EXPRESSBUILDER CD-ROM from the CD-ROM drive, follow the
direction on the screen and restart the system.
USB 2.0 Driver
USB 2.0 Driver is pre-installed. When restoring the system or re-installing the system, the driver is
automatically installed in the process of updating the system.
SETTING FOR COLLECTING MEMORY DUMP
(DEBUG INFORMATION)
Set for collecting memory dump using the procedure described in Chapter 5.
Appendix F
Product Configuration Record Table
Use this table for information about setup and system environment change.
Hardware
Main Unit
CPU
#1
#2
Memory
#5, #6
#3, #4
#1, #2
Monitor
Hard Disk
ID0
ID1
ID2
ID3
ID4
ID5
Model name
Serial No.
Date Installed
Clock
Clock
Serial No.
Serial No.
Date Installed
Date Installed
Size
Size
Size
Serial No.
Serial No.
Serial No.
Date Installed
Date Installed
Date Installed
Type
Model name
Serial No.
Date Installed
Type
Capacity
Type number
Type
Capacity
Type number
Type
Capacity
Type number
Type
Capacity
Type number
Type
Capacity
Type number
Type
Capacity
Type number
Serial No.
Date Installed
Serial No.
Date Installed
Serial No.
Date Installed
Serial No.
Date Installed
Serial No.
Date Installed
Serial No.
Date Installed
F-2 Product Configuration Record Table
Backup Device
Slot 1
Size
Model name
PCI Slot #1B
Model name
Capacity
Type number
Serial No.
Date Installed
Serial No.
Date Installed
PCI Slot #2B
Model name
Serial No.
Date Installed
Model name
Serial No.
Date Installed
Model name
Serial No.
Date Installed
Model name
Serial No.
Date Installed
Model name
Serial No.
Date Installed
PCI Slot #3B
PCI Slot #1C
PCI Slot #2C
PCI Slot #3C
Printer
Model name
Manufacturer
Additional Cabinet for Disk
Model name
External Peripheral Device 1
Model name
Manufacturer
External Peripheral Device 2
Model name
Manufacturer
External Peripheral Device 3
Model name
Manufacturer
External Peripheral Device 4
Model name
Manufacturer
Serial No.
Date Installed
Serial No.
Date Installed
Serial No.
Date Installed
Serial No.
Date Installed
Serial No.
Date Installed
Serial No.
Date Installed
Product Configuration Record Table
Software
Firmware version
OS
Application of RUR media
File system
Bundled software installed
Licensed software installed
Application running when a failure
occurred
Apply
FAT
Others (
Name:
Name:
HPFS
Version:
Version:
NTFS
)
F-3
F-4 Product Configuration Record Table
(This page is intentionally left blank.)