1
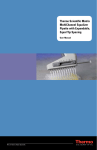
Thermo Scientific
E1-ClipTip Electronic
Pipette
Single Channel
Multichannel
Adjustable Tip Spacing Equalizer
User Manual
Thermo Fisher Scientific
Thermo Scientific E1-ClipTip User Manual 1
CONTENT
A.INTRODUCTION . . . . . . . . . . . . . . . . . . . . . . . . . . . . . . . . . . . . . 5
A.1 Thermo Scientific E1-ClipTip Pipette Models . . . . . . . . . . . . . . . . . . . . . . . . . . . . . . . . . . . . . . . . 6
A.1.1 Thermo Scientific E1-ClipTip Model Selection. . . . . . . . . . . . . . . . . . . . . . . . . . . . . . . . . . . 7
A.2 Safety. . . . . . . . . . . . . . . . . . . . . . . . . . . . . . . . . . . . . . . . . . . . . . . . . . . . . . . . . . . . . . . . . . . . . . . 8
A.2.1 Intended Use. . . . . . . . . . . . . . . . . . . . . . . . . . . . . . . . . . . . . . . . . . . . . . . . . . . . . . . . . . . . . 8
A.2.2 Safety Symbols and Markings. . . . . . . . . . . . . . . . . . . . . . . . . . . . . . . . . . . . . . . . . . . . . . . 8
A.2.3 Safety Precautions . . . . . . . . . . . . . . . . . . . . . . . . . . . . . . . . . . . . . . . . . . . . . . . . . . . . . . . . 9
A.3 Getting Started. . . . . . . . . . . . . . . . . . . . . . . . . . . . . . . . . . . . . . . . . . . . . . . . . . . . . . . . . . . . . . . 10
A.3.1 Installing the Battery. . . . . . . . . . . . . . . . . . . . . . . . . . . . . . . . . . . . . . . . . . . . . . . . . . . . . . 10
A.3.2 Charging the Pipette. . . . . . . . . . . . . . . . . . . . . . . . . . . . . . . . . . . . . . . . . . . . . . . . . . . . . . 11
A.3.3 Using the Power Supply . . . . . . . . . . . . . . . . . . . . . . . . . . . . . . . . . . . . . . . . . . . . . . . . . . . 11
A.3.4 Using the Charging Stand . . . . . . . . . . . . . . . . . . . . . . . . . . . . . . . . . . . . . . . . . . . . . . . . . 12
A.3.5 Turning the Pipette On and Off. . . . . . . . . . . . . . . . . . . . . . . . . . . . . . . . . . . . . . . . . . . . . . 13
A.3.6 Power Saving. . . . . . . . . . . . . . . . . . . . . . . . . . . . . . . . . . . . . . . . . . . . . . . . . . . . . . . . . . . . 13
B.PIPETTE OVERVIEW . . . . . . . . . . . . . . . . . . . . . . . . . . . . . . . . 14
B.1 Components . . . . . . . . . . . . . . . . . . . . . . . . . . . . . . . . . . . . . . . . . . . . . . . . . . . . . . . . . . . . . . . . . 14
B.2 Keypad and Operation Keys. . . . . . . . . . . . . . . . . . . . . . . . . . . . . . . . . . . . . . . . . . . . . . . . . . . . . 15
B.3 Rotating Display. . . . . . . . . . . . . . . . . . . . . . . . . . . . . . . . . . . . . . . . . . . . . . . . . . . . . . . . . . . . . . 17
B.4 ClipTip Interface and Electrical Tip Ejection. . . . . . . . . . . . . . . . . . . . . . . . . . . . . . . . . . . . . . . . . 17
B.4.1 ClipTip (96-format Tips). . . . . . . . . . . . . . . . . . . . . . . . . . . . . . . . . . . . . . . . . . . . . . . . . . . . 17
B.4.2 ClipTip 384 (384-format Tips) . . . . . . . . . . . . . . . . . . . . . . . . . . . . . . . . . . . . . . . . . . . . . . . 17
B.4.3 Tip Attachment . . . . . . . . . . . . . . . . . . . . . . . . . . . . . . . . . . . . . . . . . . . . . . . . . . . . . . . . . . 18
B.5 Adjustable Tip Spacing. . . . . . . . . . . . . . . . . . . . . . . . . . . . . . . . . . . . . . . . . . . . . . . . . . . . . . . . . 18
B.5.1 To Set the Stop Buttons to Match the Application . . . . . . . . . . . . . . . . . . . . . . . . . . . . . . 19
B.5.2 Use of the Adjustable Tip Spacing. . . . . . . . . . . . . . . . . . . . . . . . . . . . . . . . . . . . . . . . . . . 20
C.RECOMMENDATIONS FOR ACCURATE PIPETTING . . . . . 21
D.PROGRAMMING AND OPERATION . . . . . . . . . . . . . . . . . . . 23
D.1 User Interface Overview . . . . . . . . . . . . . . . . . . . . . . . . . . . . . . . . . . . . . . . . . . . . . . . . . . . . . . . 23
D.1.1 Introduction to Pipetting View. . . . . . . . . . . . . . . . . . . . . . . . . . . . . . . . . . . . . . . . . . . . . . 25
D.1.2 Volume Adjustment. . . . . . . . . . . . . . . . . . . . . . . . . . . . . . . . . . . . . . . . . . . . . . . . . . . . . . . 26
D.1.3 Pipetting Speed Adjustment. . . . . . . . . . . . . . . . . . . . . . . . . . . . . . . . . . . . . . . . . . . . . . . . 27
D.2 Pipetting Functions. . . . . . . . . . . . . . . . . . . . . . . . . . . . . . . . . . . . . . . . . . . . . . . . . . . . . . . . . . . . 28
D.2.1 Matrix Function. . . . . . . . . . . . . . . . . . . . . . . . . . . . . . . . . . . . . . . . . . . . . . . . . . . . . . . . . . 28
D.2.2 Presets Function. . . . . . . . . . . . . . . . . . . . . . . . . . . . . . . . . . . . . . . . . . . . . . . . . . . . . . . . . 32
D.2.2.1 Forward . . . . . . . . . . . . . . . . . . . . . . . . . . . . . . . . . . . . . . . . . . . . . . . . . . . . . . . . . . . . 32
D.2.2.2 Stepper (Multi dispensing) . . . . . . . . . . . . . . . . . . . . . . . . . . . . . . . . . . . . . . . . . . . . . 33
D.2.2.3 Reverse. . . . . . . . . . . . . . . . . . . . . . . . . . . . . . . . . . . . . . . . . . . . . . . . . . . . . . . . . . . . . 34
D.2.2.4 Repetitive. . . . . . . . . . . . . . . . . . . . . . . . . . . . . . . . . . . . . . . . . . . . . . . . . . . . . . . . . . . 34
D.2.2.5 Dilute. . . . . . . . . . . . . . . . . . . . . . . . . . . . . . . . . . . . . . . . . . . . . . . . . . . . . . . . . . . . . . 35
D.2.2.6 Forward + Mix. . . . . . . . . . . . . . . . . . . . . . . . . . . . . . . . . . . . . . . . . . . . . . . . . . . . . . . 37
D.2.2.7 Dilute + Mix. . . . . . . . . . . . . . . . . . . . . . . . . . . . . . . . . . . . . . . . . . . . . . . . . . . . . . . . . 38
D.2.2.8 Manual. . . . . . . . . . . . . . . . . . . . . . . . . . . . . . . . . . . . . . . . . . . . . . . . . . . . . . . . . . . . . 40
D.2.3 Programs Function. . . . . . . . . . . . . . . . . . . . . . . . . . . . . . . . . . . . . . . . . . . . . . . . . . . . . . . . 41
2 Thermo Scientific E1-ClipTip User Manual
Thermo Fisher Scientific
D.3 Supporting Functions. . . . . . . . . . . . . . . . . . . . . . . . . . . . . . . . . . . . . . . . . . . . . . . . . . . . . . . . . . 43
D.3.1 My Pipette . . . . . . . . . . . . . . . . . . . . . . . . . . . . . . . . . . . . . . . . . . . . . . . . . . . . . . . . . . . . . 43
D.3.1.1 Pipette Name. . . . . . . . . . . . . . . . . . . . . . . . . . . . . . . . . . . . . . . . . . . . . . . . . . . . . . . . 43
D.3.1.2 Shortcuts . . . . . . . . . . . . . . . . . . . . . . . . . . . . . . . . . . . . . . . . . . . . . . . . . . . . . . . . . . . 44
D.3.1.3 Organize Icons. . . . . . . . . . . . . . . . . . . . . . . . . . . . . . . . . . . . . . . . . . . . . . . . . . . . . . . 45
D.3.1.4 Password Protection . . . . . . . . . . . . . . . . . . . . . . . . . . . . . . . . . . . . . . . . . . . . . . . . . . 46
D.3.2 Settings. . . . . . . . . . . . . . . . . . . . . . . . . . . . . . . . . . . . . . . . . . . . . . . . . . . . . . . . . . . . . . . . 47
D.3.2.1 Sounds. . . . . . . . . . . . . . . . . . . . . . . . . . . . . . . . . . . . . . . . . . . . . . . . . . . . . . . . . . . . . 47
D.3.2.2 Calibrate. . . . . . . . . . . . . . . . . . . . . . . . . . . . . . . . . . . . . . . . . . . . . . . . . . . . . . . . . . . . 47
D.3.2.3 Calibration Tracker. . . . . . . . . . . . . . . . . . . . . . . . . . . . . . . . . . . . . . . . . . . . . . . . . . . . 47
D.3.2.4 Service Tracker. . . . . . . . . . . . . . . . . . . . . . . . . . . . . . . . . . . . . . . . . . . . . . . . . . . . . . . 48
D.3.2.5 Product Information. . . . . . . . . . . . . . . . . . . . . . . . . . . . . . . . . . . . . . . . . . . . . . . . . . . 49
D.3.2.6 Date and Time. . . . . . . . . . . . . . . . . . . . . . . . . . . . . . . . . . . . . . . . . . . . . . . . . . . . . . . 49
D.3.2.7 Recovery. . . . . . . . . . . . . . . . . . . . . . . . . . . . . . . . . . . . . . . . . . . . . . . . . . . . . . . . . . . . 50
D.3.2.8 Connect Piston . . . . . . . . . . . . . . . . . . . . . . . . . . . . . . . . . . . . . . . . . . . . . . . . . . . . . . 50
D.4 Power Function. . . . . . . . . . . . . . . . . . . . . . . . . . . . . . . . . . . . . . . . . . . . . . . . . . . . . . . . . . . . . . . 50
D.5 Application Examples . . . . . . . . . . . . . . . . . . . . . . . . . . . . . . . . . . . . . . . . . . . . . . . . . . . . . . . . . 51
E. CALIBRATION AND ADJUSTMENT . . . . . . . . . . . . . . . . . . . 56
E.1 Terminology. . . . . . . . . . . . . . . . . . . . . . . . . . . . . . . . . . . . . . . . . . . . . . . . . . . . . . . . . . . . . . . . . . 56
E.2 Factory Calibration . . . . . . . . . . . . . . . . . . . . . . . . . . . . . . . . . . . . . . . . . . . . . . . . . . . . . . . . . . . . 56
E.3 Responsibilities of the User. . . . . . . . . . . . . . . . . . . . . . . . . . . . . . . . . . . . . . . . . . . . . . . . . . . . . 57
E.4 Performing the Calibration. . . . . . . . . . . . . . . . . . . . . . . . . . . . . . . . . . . . . . . . . . . . . . . . . . . . . . 57
E.4.1 Device Requirements and Test Conditions . . . . . . . . . . . . . . . . . . . . . . . . . . . . . . . . . . . . 57
E.4.2 Procedure. . . . . . . . . . . . . . . . . . . . . . . . . . . . . . . . . . . . . . . . . . . . . . . . . . . . . . . . . . . . . . . 58
E.4.3 Calculation Formulas . . . . . . . . . . . . . . . . . . . . . . . . . . . . . . . . . . . . . . . . . . . . . . . . . . . . . 59
E.4.3.1 Volume Calculation. . . . . . . . . . . . . . . . . . . . . . . . . . . . . . . . . . . . . . . . . . . . . . . . . . . . 59
E.4.3.2 Inaccuracy. . . . . . . . . . . . . . . . . . . . . . . . . . . . . . . . . . . . . . . . . . . . . . . . . . . . . . . . . . . 59
E.4.3.3 Imprecision. . . . . . . . . . . . . . . . . . . . . . . . . . . . . . . . . . . . . . . . . . . . . . . . . . . . . . . . . . 60
E.5 Adjustment . . . . . . . . . . . . . . . . . . . . . . . . . . . . . . . . . . . . . . . . . . . . . . . . . . . . . . . . . . . . . . . . . . 60
E.5.1 Changing Default Calibration Setting . . . . . . . . . . . . . . . . . . . . . . . . . . . . . . . . . . . . . . . . 60
E.5.2 Creating Special Adjustments . . . . . . . . . . . . . . . . . . . . . . . . . . . . . . . . . . . . . . . . . . . . . . 62
E.5.3 Editing Special Adjustments . . . . . . . . . . . . . . . . . . . . . . . . . . . . . . . . . . . . . . . . . . . . . . . 63
E.5.4 Deleting a Stored Adjustment Setting . . . . . . . . . . . . . . . . . . . . . . . . . . . . . . . . . . . . . . . . 63
F.TROUBLESHOOTING. . . . . . . . . . . . . . . . . . . . . . . . . . . . . . . . 64
G.MAINTENANCE . . . . . . . . . . . . . . . . . . . . . . . . . . . . . . . . . . . . 68
G.1 Regular and Preventive Maintenance. . . . . . . . . . . . . . . . . . . . . . . . . . . . . . . . . . . . . . . . . . . . . 68
G.2 Replacing Tip Fitting and Sealing Ring(s) . . . . . . . . . . . . . . . . . . . . . . . . . . . . . . . . . . . . . . . . . . 69
G.3 Disassembly and Assembly. . . . . . . . . . . . . . . . . . . . . . . . . . . . . . . . . . . . . . . . . . . . . . . . . . . . . 71
G.3.1 Single Channel Pipettes – Disassembly. . . . . . . . . . . . . . . . . . . . . . . . . . . . . . . . . . . . . . . 71
G.3.2 Single Channel Pipettes – Cleaning. . . . . . . . . . . . . . . . . . . . . . . . . . . . . . . . . . . . . . . . . . 71
G.3.3 Single Channel Pipettes – Assembly. . . . . . . . . . . . . . . . . . . . . . . . . . . . . . . . . . . . . . . . . 71
G.3.4 Multi Channel Pipettes. . . . . . . . . . . . . . . . . . . . . . . . . . . . . . . . . . . . . . . . . . . . . . . . . . . . 73
G.4 Decontamination Procedure. . . . . . . . . . . . . . . . . . . . . . . . . . . . . . . . . . . . . . . . . . . . . . . . . . . . . 74
G.5 Autoclaving. . . . . . . . . . . . . . . . . . . . . . . . . . . . . . . . . . . . . . . . . . . . . . . . . . . . . . . . . . . . . . . . . . 74
Thermo Fisher Scientific
Thermo Scientific E1-ClipTip User Manual 3
G.6 Disposal of Materials. . . . . . . . . . . . . . . . . . . . . . . . . . . . . . . . . . . . . . . . . . . . . . . . . . . . . . . . . . 75
G.6.1 Disposal of the Materials. . . . . . . . . . . . . . . . . . . . . . . . . . . . . . . . . . . . . . . . . . . . . . . . . . 75
G.6.2 Disposal of the Pipette . . . . . . . . . . . . . . . . . . . . . . . . . . . . . . . . . . . . . . . . . . . . . . . . . . . 76
G.7 Spare Parts. . . . . . . . . . . . . . . . . . . . . . . . . . . . . . . . . . . . . . . . . . . . . . . . . . . . . . . . . . . . . . . . . . 76
H.TECHNICAL DATA. . . . . . . . . . . . . . . . . . . . . . . . . . . . . . . . . . . 77
I.WARRANTY. . . . . . . . . . . . . . . . . . . . . . . . . . . . . . . . . . . . . . . . 79
J. TECHNICAL SERVICE . . . . . . . . . . . . . . . . . . . . . . . . . . . . . . . 80
J.1 Packing for Service. . . . . . . . . . . . . . . . . . . . . . . . . . . . . . . . . . . . . . . . . . . . . . . . . . . . . . . . . . . . 80
J.2 Contact Information . . . . . . . . . . . . . . . . . . . . . . . . . . . . . . . . . . . . . . . . . . . . . . . . . . . . . . . . . . . 81
4 Thermo Scientific E1-ClipTip User Manual
Thermo Fisher Scientific
A. INTRODUCTION
Congratulations on purchasing a Thermo Scientific E1-ClipTip Electronic Pipette!
The Thermo ScientificTM E1-ClipTipTM is a general purpose
electronic micropipette that operates on the air-displacement
principle. Its intended use is for aspirating and dispensing
liquids. The E1-ClipTip operates only with Thermo ScientificTM
ClipTipTM pipette tips.
Notice the difference with the E1-ClipTip
Electronic Pipette
Ideal experience even for complex protocols
When combined with the secure, interlocking ClipTip
technology*, the electronic pipetting action and flexible user
interface, the E1-ClipTip Pipetting System provides a premium
pipetting experience for even the most complex protocols.
Electronic operation helps you enjoy pipetting again
The E1-ClipTip Pipette combines interlocking ClipTip technology with electronic tip ejection and index finger pipetting
action, helping to reduce pipetting, tip attachment and ejection forces. This makes pipetting a more comfortable, safe
and enjoyable experience.
Perfect fit for sample transfers between different lab formats
One pipette: the E1-ClipTip Equalizer allows you to transfer samples between a variety of lab formats, where only
traditional single-channel pipettes would have been suitable in the past. Adaptable tip spacing allows you to set the
distance between tips simply by sliding the scale to expand and contract to the desired setting. This means fewer
repetitions for multiple applications.
Ideal operation for multiple users and environments
The E1-ClipTip provides simple and fast operation with increased user flexibility. Users have complete control to set
personalized functions for their applications, and utilize optional password protection. This is ideal for multi-user
environments so you can avoid unnecessary editing and scrolling through submenus.
Pipette for multiple applications
Choose from single channels, 8-16 channel multichannels, or 6-12-channel adjustable tip spacing multichannel pipettes
within the volume range of 0.5-1250 μl. 384 format E1-ClipTip pipettes are ideal for 384-microplate applications.
Flexible re-charging
You can decide whether to use either a charging stand or a plug. Each E1-ClipTip pipette is shipped with a universal
wall power plug. The charging stand allows safe storage while ensuring that the E1-ClipTip is always charged when
you need it.
Two-year extended warranty
The E1-ClipTip pipette is guarenteed to be free of defects in material and workmanship for a period of two years
from the date of purchase. A two-year warranty applies for pipettes that have been registered, while one-year
warranty to non-registered ones. Visit www.thermoscientific.com/pipettewarranty to register the pipette and for
more information.
* Utilized in all 96-format E1-ClipTip pipettes except 0.5-12.5 µl.
Thermo Fisher Scientific
Thermo Scientific E1-ClipTip User Manual 5
Using this Manual
Read the User Manual before using the device (pipette
and tip) for the first time.
Please check the User Manual if needed.
Package
1. E1-ClipTip Pipette
2. Universal charger
3. Service tool A (1062800)
4. Service tool B (1062500) *not included in multichannel pipettes
5. Tip Fitting tool C (2215870) *not included in 384 multichannel pipettes
6. Instructions for Use Manual
7. Tip Fitting sealing-ring *not included in 384 pipettes
8. ClipTips sample
9. Li-ion battery
Remove the content from the package and check that all items listed above
are included. Inspect for possible shipping damage. Make sure that the
pipette has the desired volume range and that the voltage of the charger
is correct.
A.1 Thermo
Scientific E1ClipTip Pipette
Models
Single Channel
6 Thermo Scientific E1-ClipTip User Manual
Multichannel
Equalizer Adjustable Tip
Spacing Multichannel
Thermo Fisher Scientific
A.1.1 Thermo Scientific E1-ClipTip Model Selection
E1-ClipTip
models
E1-ClipTipSingle
SingleChannel
Channel
models
Cat.No.
Channels
Cat.no.
Channels
4670000
4670020
4670030
4670040
1
1
1
1
Volume
Volume
Range (µl)
Range (ul)
Calibration
Calibration
Range (µl)*
Range (ul)*
0.5-12.5
2-125
10-300
50-1250
1.25-12.5
12.5-125
30-300
125-1250
Volume
Volume
Range (µl)
Range
(ul)
Calibration
Calibration
Range (µl)*
Range
(ul)*
0.5-12.5
2-125
10-300
50-1250
0.5-12.5
2-125
10-300
30-850
0.5-12.5
1-30
2-125
1.25-12.5
12.5-125
30-300
125-1250
1.25-12.5
12.5-125
30-300
85-850
1.25-12.5
3-30
12.5-125
Color
Compatible
Color Compatible
Code ClipTip
Code
ClipTip
ClipTip 12.5
ClipTip 200
ClipTip 300
ClipTip 1250
E1-ClipTip
models
E1-ClipTipMultichannel
Multichannel
models
Cat.No.
Cat.no.
4671000
4671040
4671070
4671100
4671010
4671050
4671080
4671090
4671020
4671030
4671060
Channels
Channels
8
8
8
8
12
12
12
12
16
16
16
Format
Format
96
96
96
96
96
96
96
96
384
384
384
Color
Compatible
Color Compatible
Code ClipTip
Code
ClipTip
ClipTip 12.5
ClipTip 200
ClipTip 300
ClipTip 1250
ClipTip 12.5
ClipTip 200
ClipTip 300
ClipTip 1000
ClipTip 384 12.5
ClipTip 384 30
ClipTip 384 125
E1-ClipTip
Spacing Equalizer
Multichannel
models
E1-ClipTipAdjustable
EqualizerTip
Adjustable
Tip Spacing
Multichannel
models
Cat.No.
Cat.no.
Channels
Channels
Tip
Tip Spacing
Spacing
(mm)
(mm)
4672050
4672080
4672090
4672100
4672010
4672030
4672060
4672020
4672040
4672070
8
8
6
8
8
8
8
12
12
12
9-14.2
9-14.2
9-19.8
9-14.2
4.5-14.2
4.5-14.2
4.5-14.2
4.5-9
4.5-9
4.5-9
Volume
Volume
Range (µl)
Range
(ul)
Calibration
Calibration
Range(ul)*
(µl)*
Range
2-125
10-300
50-1250
50-1250
0.5-12.5
1-30
2-125
0.5-12.5
1-30
2-125
12.5-125
30-300
125-1250
125-1250
1.25-12.5
3-30
12.5-125
1.25-12.5
3-30
12.5-125
Color Compatible
Compatible
Code
ClipTip
Code ClipTip
ClipTip 200
ClipTip 300
ClipTip 1250
ClipTip 1250
ClipTip 384 12.5
ClipTip 384 30
ClipTip 384 125
ClipTip 384 12.5
ClipTip 384 30
ClipTip 384 125
*Calibration Range
Rangeaccording
accordingtotoISO8655
ISO8655standard
standards
*Calibration
Thermo Fisher Scientific
Thermo Scientific E1-ClipTip User Manual 7
A.2 Safety
A.2.1 Intended Use
The intended use of the device is to transfer liquids with different properties
accurately and reliably. The E1-ClipTip pipette and ClipTip tips are designed
to be part of an analyzing system for an end user, who is responsible for the
validation of the system to enable production of reliable and safe results. The
performance related cautions in Chapter: E: CALIBRATION AND ADJUSTMENT
should be checked.
If the pipetting performance is critical for the outcome of the specific
application, the result has to be assured with an alternative test, and if this
is not an option, by duplicate testing. The possibility of an incorrect volume
delivery during pipetting cannot be completely mitigated. This device is
to be used by trained personnel that have adequate laboratory skills. Use
of the device for pipetting any liquid to be injected into the human body is
not permitted.
A.2.2 Safety Symbols and Markings
These symbols are intended to draw your attention to particularly important
pieces of information and alert you to the presence of hazards as indicated.
Caution Risk of damage to the instrument, other equipment or loss of
performance or function in a specific application.
Warning Risk of injury to the user(s).
Warning Risk of electric shock.
Warning Biohazard risk.
WEEE symbol This product is required to comply with the European Union’s
Waste Electrical & Electronic Equipment (WEEE) Directive 2012/19/EC.
Note Marks a hint, important information that is useful in the optimum
operation of the system, or an item of interest.
8 Thermo Scientific E1-ClipTip User Manual
Thermo Fisher Scientific
A.2.3 Safety Precautions
The following safety precautions provide important information intended
to prevent personal injury to the operator and/or others, and damage to
the E1-ClipTip pipette.
Warning Follow general instructions for hazard prevention and safety
instructions; e.g., wear protective clothing, eye protection, and gloves.
Warning Follow the ergonomic guidelines for laboratory work to minimize
the risk of repetitive strain injury (RSI), e.g., the Good Laboratory Pipetting
Guide available at www.thermoscientific.com/glp.
Warning Follow the safety instructions and general laboratory practice for
use and waste disposal of hazardous material e.g., radioactive and
potentially infectious.
Warning Ensure that the power transformer is connected to a power
receptacle that provides the voltage and current specified in this user manual.
Use of an incompatible power receptacle can cause shock and fire hazard.
Warning Follow the E1-ClipTip pipette instructions presented in this user
manual in Chapter: H: TECHNICAL DATA. Failure to follow the instructions
may cause a safety risk.
Warning Do not immerse the unit in liquid and do not clean the upper part of
the pipette by spraying. Fluid seepage can damage internal components and
may cause a safety risk.
Warning Incorrect handling of the battery or pipette may cause personal
injury. Do not drop the battery. Do not expose the battery to any kind of
mechanical stress or extreme temperatures: above 60°C (45°C when charging)
or under 0 C°.
Warning An old battery can cause the pipette to malfunction and may cause
a safety risk (thermal runaway). We recommend that you change the battery
every two years. If the battery’s recharging interval decreases significantly,
the battery should also be changed. It is recommended to charge the pipette
every two months even if the pipette is not used daily.
Warning The E1-ClipTip pipette contains a Li-ion battery and a potential
malfunction of the battery (short circuit, mechanical damage, overheating,
etc.) may cause explosion.
Warning Do not use a battery that causes the following notifications “battery
failure 2 or 3” on the pipette display. Such a battery may cause a potential
safety risk. For more instructions, see Chapter: F: TROUBLESHOOTING.
Thermo Fisher Scientific
Thermo Scientific E1-ClipTip User Manual 9
Caution Use only the power transformer supplied by Thermo Fisher Scientific.
Use of an incompatible power transformer can damage the pipette.
Caution Always turn off the power and unplug the power transformer before
cleaning the exterior. Fluid seepage can damage internal components.
Caution Do not autoclave the entire unit. Extreme heat can damage the
display and other electronic components.
Caution Do not clean the keypad with bleach solution or other solvents.
Caustic cleaning solutions can damage the keypad.
Note Do not hold the pipette horizontally or upside down when there is liquid
inside the tip: The sample liquid may enter the pipette, which may affect
pipetting performance and impair the pipette.
Note Refer to section G.5 Autoclaving for autoclaving specific portions of the
pipette, or call Thermo Fisher Scientific Technical Service for instructions.
A.3 Getting Started
A.3.1 Installing the Battery
The E1-ClipTip pipette is delivered with a detached battery. Install the battery
as follows:
Warning Incorrect handling of the battery or pipette may cause personal
injury. Do not drop the battery. Do not expose the battery to any kind of
mechanical stress or extreme temperatures: above 60°C (45°C when charging)
or under 0 C°.
B
A
12345
1. Open the battery lid (press (A) and slide (B)).
2. Slide in the battery with the label side visible.
3. Connect the battery connector. Note that the connector can be attached in
two different orientations, both of which are acceptable.
4. Check that the battery wires are as shown in the picture.
5. Slide back the battery lid as shown in the picture.
10 Thermo Scientific E1-ClipTip User Manual
Thermo Fisher Scientific
A.3.2 Charging the Pipette
The charging time to full capacity is approx. 2 h. An indicator on the LCD
display shows the charge level of the battery.
Battery full
Battery empty
Battery charging; the level indicator scrolls down and up
When the indicator shows that the battery is empty, pipetting is no more
possible, and the pipette has to be recharged. To extend the battery life
cycle, it is recommended to charge the pipette every two months even if
the pipette is not used daily. A typical E1-ClipTip battery lasts for around
300 charging cycles.
Warning An old battery can cause the pipette to malfunction and may cause
a safety risk (thermal runaway). It is recommended that you change the
battery every two years. If the battery’s recharging interval decreases
significantly, the battery should also be changed. It is recommended to
charge the pipette every two months even if the pipette is not used daily.
A.3.3 Using the Power Supply
Insert the country specific power plug adapter into the power supply unit.
The power supply unit is marked with number 5 in the picture on the right.
Power plug adapters:
1. Australia
2. Europe
3. United Kingdom
4. USA / Japan
1
3
2
4
5
Connect the lead of the charger
to the socket on top of the display. Then connect the charger to an AC wall
socket. You can use the pipette while the charger is connected.
Caution The charger’s plug must be inserted in to a socket that is easy to
reach and from which it can be easily unplugged in case of emergency.
Warning Use only the original E1-ClipTip charger and battery pack. The
pipette battery may be empty when delivered and must be charged before
initial use. It is recommended to charge the battery for at least 2.5 h when
charged for the first time.
Thermo Fisher Scientific
Thermo Scientific E1-ClipTip User Manual 11
Caution The pipette must be charged at temperatures between 0°C to 45°C.
The battery may be damaged if charged at other temperatures. For indoor
use only.
Warning Use of incorrect power supply units may result in fatal injuries and
damage to the device.
Use of incorrect power supply units may result in overheating, burning,
melting, short-circuiting of the E1-ClipTip pipette or similar damage. Only use
the supplied power supply unit for charging the pipette. You can recognize the
correct power supply by the Thermo Scientific logo and the pipette name on
the power supply unit. Do not charge the pipette in a hot location (>45°C).
A.3.4 Using the Charging Stand
Connect the lead of the charger to the socket on the back of the charging
stand. Then connect the charger to an AC wall socket. Place the pipette in to
the stand as shown in the picture. See also the previous section A.3.3 Using
the Power Supply.
12 Thermo Scientific E1-ClipTip User Manual
Thermo Fisher Scientific
A.3.5 Turning the Pipette On and Off
After the battery is charged, the device can be powered up:
1. Press one of the selection keys
,
,
or arrow keys
,
,
below the display for more than 1 s. Note that tip ejection buttons
are not available. See section B.2 Keypad and Operation Keys for more
information about the keypad.
2. If the battery was just installed, then you need to set the date and time to
the pipette. Follow the instructions on the display.
3. Press the trigger switch to initialize home positioning. See section B.2 for
more information about control buttons.
4. The pipette will show the main menu and is ready for use.
5. The pipette can be turned off by selecting the “Power” icon from the
main menu.
A.3.6 Power Saving
If the pipette is not used for a minute, the brightness of the display is
decreased and after 10 minutes the screen saver mode is entered. Exit the
screen saver by pressing one of the selection keys
,
,
,
,
or arrow keys
. Home positioning needs to be initialized again after
screen saving and is done by pressing the trigger switch. If the pipette is not
used for an hour, it will automatically turn itself off.
Thermo Fisher Scientific
Thermo Scientific E1-ClipTip User Manual 13
B. PIPETTE OVERVIEW
B.1 Components
1. Connector Socket
For connecting the power supply.
2. Battery Case
Case for the Li-ion battery. See section A.3.1 for installation.
3. Display
LCD backlit color display.
1
2
4. Charging Pins
3
Charging pins to connect the pipette to the charging stand. See section A.3.4.
5. Keypad
5
4
6
7
8
For interacting with the pipette user interface. See section B.2.
6. Tip Ejection Keys*
For ejecting pipette tips.
7. Pipetting trigger*
Trigger button to operate the piston movement. See section B.2.
8. Finger Hook
9
Adjustable finger hook. See section B.2.
10
9. Tip Ejector
11
10. Tip Fitting
11. ClipTip
See section B.4.
1. Spacing Set Buttons*
To set the tip spacing movement range within the scale.
See section B.5.
2. Spacing Adjuster
1
To change the space between the tips within the scale.
See section B.5.
2
*Color coded parts
14 Thermo Scientific E1-ClipTip User Manual
Thermo Fisher Scientific
B.2 Keypad and Operation Keys
A. Selection keys
B. Arrow keys
C. Tip ejection keys
Picture B1. E1-ClipTip keypad
A. Selection keys: The selection keys are used for activating modes and
confirming selections.
B. Arrow keys: The Up and Down arrow keys are used to move up and down
in the user interface. The Left and Right arrow keys are used to edit settings,
such as volume and speed changes.
C. Tip ejection keys: The tip ejection keys are used to eject the tips from
the pipette electronically. There are two ejection keys to ensure convenient
use for both right and left handed users. When the pipette is ejecting tips the
ejecting tips icon is shown on the display.
The tip ejections keys are active only when the entire pipetting cycle is
completed to prevent accidental tip ejection during pipetting. The keys are
always inactive during the pipetting cycle.
Thermo Fisher Scientific
Thermo Scientific E1-ClipTip User Manual 15
D.Trigger: The index finger operated trigger is used to aspirate and dispense
liquid. It is also used to initiate mixing. The trigger and finger rest can be
rotated 15 degrees in both directions to ensure an optimal pipetting position.
D.Trigger
15°
Dispensing into air
1. Press the trigger shortly to dispense the liquid (Picture B2).
2. The pipette returns to the ready position.
Note When using small volumes and certain liquid types, it is recommended
to keep the trigger pressed until all liquid has been dispensed from the tip.
Note After dispensing, it is recommended to touch the tip(s) against the edge
of the reservoir to remove possible remaining liquid on the outside surface of
the tip.
Dispensing into liquid
1. Put the tip into the liquid (Picture B3).
2. Press the trigger to dispense the liquid and keep the trigger pressed until
the tip is withdrawn from the liquid.
3. Lift the tip from the liquid and release the trigger.
4. The pipette returns to the ready position.
Picture B2.
16 Thermo Scientific E1-ClipTip User Manual
Picture B3.
Thermo Fisher Scientific
B.3 Rotating
Display
The E1-ClipTip features a rotating full color display, ensuring optimal visibility
in different working environments. The display rotates 30 degrees in both
directions from the center position. The rotating angle can be adjusted by
turning the display left or right.
30°
B.4 ClipTip
Interface and
Electrical Tip
Ejection
Picture B4. Rotating display
The ClipTip technology is based on a mechanical locking solution. E1-ClipTip
pipettes feature two different locking types. Both enable easy-to-use
procedures to use the correct attachment force to the tips.
B.4.1 ClipTip (96-format Tips)
*
Small claws lock the tip into the tip fitting. The claws prevent accidental tip
detachment during pipette operations. Note that the small volume ClipTip
12.5 is similar to the ClipTip 384 tips.
B.4.2 ClipTip 384 (384-format Tips)
Picture B5.
ClipTip 96-format Tips
ClipTip 12.5 and all ClipTip 384 tips feature a unique snap mechanism for
tip attachment. The tip has small incorporated protrusions that snap on the
tip fitting flange, ensuring light-force and secure tip attachment. The flexible
plastic lip design seals the tip against the tip fitting.
All E1-ClipTip pipettes utilize an electronic tip ejection. Two color coded
buttons are located to enable both right and left handed persons to operate
the system smoothly (see section B.2).
Note The tip ejection function is prevented whenever there is liquid inside
the tip to avoid accidental ejection of tips.
Picture B6.
ClipTip 384
Thermo Fisher Scientific
Caution Always eject the tips into an appropriate waste container. Do not
point the ejecting tips at other persons.
Thermo Scientific E1-ClipTip User Manual 17
B.4.3 Tip Attachment
1. To attach the tip, guide the pipette into a ClipTip in a rack and press with a
light force until the tip is attached. A delicate click sound will indicate that the
tip is attached.
The tip is attached when the clips are locked into the tip fitting. Do not use
excessive force when attaching the tips as the device requires minimum
attachment force.
2. Lift the pipette.
3. If the tip is not attached, repeat Steps 1 and 2.
B.5 Adjustable Tip
Spacing
The E1-ClipTip Equalizer pipette allows one to change the tip-to-tip spacing.
This enables pipetting into or between vessels of varying center-to-center
configurations.
E1-ClipTip Equalizer Adjustable Tip Spacing Multichannel models
Tip Spacing Volume
Cat.no.
Cat.No.
4672050
4672080
4672090
4672100
4672010
4672030
4672060
4672020
4672040
4672070
Channels
Channels
8
8
6
8
8
8
8
12
12
12
Tip Spacing
(mm)
(mm)
9-14.2
9-14.2
9-19.8
9-14.2
4.5-14.2
4.5-14.2
4.5-14.2
4.5-9
4.5-9
4.5-9
Volume
Range
(ul)
Range (µl)
2.0-125
10.0-300
50.0-1250
50.0-1250
0.5-12.5
1.0-30
2.0-125
0.5-12.5
1.0-30
2.0-125
Equalizer
Window
Equalizer
Window
Color Compatible
48
24
48
24 Color Compatible
MCT Tube
Tube Code
ClipTip
4.5
9
Code ClipTip
384
96
MCT
ClipTip 200
ClipTip 300
ClipTip 1250
ClipTip 1250
ClipTip 384 12.5
ClipTip 384 30
ClipTip 384 125
ClipTip 384 12.5
ClipTip 384 30
ClipTip 384 125
*Calibration Range according to ISO8655 standard
Equalizer
Window
18 Thermo Scientific E1-ClipTip User Manual
Spacing (mm)
Application
384
4.5
384-well microplates
384 PCR plates
Agarose gels
96
9
96-well microplates
Deepwell blocks
48
MCT
13
48-well microplates
Deepwell blocks
Microcentrifuge tube racks
24
Tube
18
Test tube racks
24-well microplates
Thermo Fisher Scientific
B.5.1 To Set the Stop Buttons to Match the Application
There are three ways to set the stop buttons in the correct positions for
application when using the adjustable tip spacing.
Stop button maximum
Stop button minimum
Indicator line
Spacing indicator
Equalizer window
Spacing adjuster
Using the millimeter scale
When the user knows the tip spacing of the application in millimeter range,
1. Depress the stop buttons while moving them along the scale.
2. Set the Stop button minimum and maximum along the spacing indicator scale.
Match the Indicator line with the desired millimeter spacing.
3. Release the stop buttons to lock the positions for use.
Using application formats
We recommend using the Equalizer window when the application formats
are known.
1. Depress the stop buttons while moving them to the outmost positions.
2. Slide the Spacing adjuster to view the alternatives in the Equalizer window.
3. Depress the Stop button minimum and move it to the edge of the Spacing
adjuster with the selected format (min.) in the Equalizer window with the marker
dot visible.
4. Release the stop button to lock the positions for use.
5. Depress the Stop button maximum and move it to the other edge of the
Spacing adjuster with the selected format (max.) in the Equalizer window with
the marker dot visible.
6. Release the stop button to lock the positions for use.
Thermo Fisher Scientific
Thermo Scientific E1-ClipTip User Manual 19
Picture B7.
Using an unknown tip spacing
If the tip spacing of the application is unknown, for example, when there is a
need for aligning the tips to the vessel or tip rack, etc.,
1. Depress the stop buttons while moving them to the outmost positions.
2. Attach the tips.
3. Slide the tips into the desired minimum position using the Spacing adjuster.
4. Depress the Stop button minimum and move it to the edge of the
Spacing adjuster.
5. Release the stop button to lock the positions for use.
6. Slide the tips into the desired maximum position using the Spacing adjuster.
7. Depress the Stop button maximum and move it to the other edge of the
Spacing adjuster.
8. Release the stop button to lock the positions for use.
B.5.2 Use of the Adjustable Tip Spacing
The following instructions are examples of how to use the adjustable tip
spacing. Note that the amount and sequence of used tip spacing positions
can vary according to the requirements of the application.
Note Always use the minimum tip spacing position when attaching tips from
a rack.
Picture B8.
20 Thermo Scientific E1-ClipTip User Manual
The stop button positions are ready set according to the instructions in
section 5.1.
1. Slide the Spacing adjuster to the edge of the Stop button minimum.
2. Attach the tips from a rack.
3. Slide the Spacing adjuster to the edge of the Stop button maximum.
4. Press the pipetting trigger to fill the tips with liquid, for example, from
Microcentrifuge tubes (Picture B7).
5. Slide the Spacing adjuster to the edge of the Stop button minimum.
6. Press the pipetting trigger to dispense the liquid, for example, into
a 96-well microplate (Picture B8).
Thermo Fisher Scientific
C.RECOMMENDATIONS FOR
ACCURATE PIPETTING
For optimal pipetting results we advise you to follow the following:
If possible, make sure that the pipette, tips and liquid are at the same
temperature.
Pre-rinsing the tip three to five times with the liquid to be pipetted improves
accuracy and precision.
Pre-rinsing is especially important when pipetting volatile compounds since it
prevents liquid from dripping out of the tip.
During aspiration, it is recommended to wait until the liquid movement in the
tip(s) stops before withdrawing the tip from the liquid.
After aspiration and dispensing, it is recommended to touch the tip(s) against
the edge of the reservoir to remove any possible remaining liquid on the
outside surface of the tip.
Samples should be pipetted in the same manner, aspiration depth, pipetting
angle (preferably in the upright direction), and dispensing technique
(dispensing into air, immersed into liquid, or touching the wall).
Aspiration and dispense at low speeds when working with high
viscosity liquids.
The pipette can be adjusted for liquids of a different density or viscosity
to improve accuracy and precision. See Chapter E: CALIBRATION AND
ADJUSTMENT for further information.
To improve pipetting results in multi-dispensing operations (stepper and multi
functions), it is recommended to use a pre-step. In the stepper mode, the
default setting for the pre-step is “In use”.
In step based programs, the user needs to program a separate dispensing
step as the pre-step.
Do not clean tips for reuse, as their metrological characteristics will no longer
be reliable. Tips are designed for single use only.
Thermo Fisher Scientific
Thermo Scientific E1-ClipTip User Manual 21
Note Pipetting performance cannot be guaranteed if the tip is reused.
Choose only a tip and pipette of matching color. See information on compatibility
in section A.1.1.
Note When dispensing into liquid, the trigger should be kept pressed until the
tip is withdrawn from the liquid to prevent aspiration of the liquid.
Caution The user should check that the device is resistant to liquids that are
intended to be handled. The user should also verify the resistance to the used
cleaning methods.
22 Thermo Scientific E1-ClipTip User Manual
Thermo Fisher Scientific
D. PROGRAMMING AND
OPERATION
D.1 User Interface
Overview
The E1-ClipTip user interface contains icons on the main menu showing six
main functions (Picture D1). The main menu appears when the pipette is
turned on and also when the pipette is initiated from the power save mode.
See the detailed menu map in Picture D2.
All pipetting actions are included in the Matrix and Presets icons. Matrix and
Presets are designed for fast and easy pipetting without saving. The last used
parameters will be saved automatically.
The Matrix function uses the step based operating technique. Each pipetting
step is entered separately in the sequence in which they will be performed.
Presets includes application based pipetting styles. The pipetting sequence is
preset. Only volumes and speeds have to be set.
Picture D1.
Storing different kinds of programs can be done under the Programs icon.
Twenty programs with specific names and calibrations can be stored.
Support functions are divided into three icons: My Pipette, Settings,
and Power.
Navigate to the desired icon in the main menu by using the
,
Press
Thermo Fisher Scientific
,
and
keys.
(Select) to select the icon of interest.
Thermo Scientific E1-ClipTip User Manual 23
add
step
select
function
add and save
programs
* single channel models only
Picture D2. Menu Map
24 Thermo Scientific E1-ClipTip User Manual
Thermo Fisher Scientific
D.1.1 Introduction to Pipetting View
The E1-ClipTip pipette features a simple pipetting view, including all the
information needed during the pipetting cycle. The pipetting view can be
entered via the Matrix, Presets and Programs icons. A typical pipetting view
layout is explained below.
A. Pipetting function
D. Battery indicator
E. Pipetting speed in/out
with indicator
B. Ongoing pipetting
step and volume
C. Upcoming pipetting step
followed after ongoing step
F. Text guidance
Picture D3. Display layout and functionality
A. Name of the ongoing pipetting function
B. The ongoing pipetting step and the volume. During aspiration the arrow
points upwards, and downwards during dispensing. Different arrow types and
colors are used to show different functions, such as purge and mixing.
C. Indicates the following pipetting step taking place after the ongoing step.
D. Battery indicator
E. Pipetting speed indicator. The number next to the arrow indicates the
present speed setting. The arrow changes direction depending on whether
the pipette is aspirating (arrow up) or dispensing (arrow down).
F. Text guidance for both selection keys
Thermo Fisher Scientific
Thermo Scientific E1-ClipTip User Manual 25
D.1.2 Volume Adjustment
The volume adjustment for different pipetting functions in the E1-ClipTip
pipette can be done using three different methods.
Method 1.
In this method the volume is adjusted by scrolling through the volume range.
1. The volume can be changed by pressing
(Edit) or
,
while
in the active pipetting function (Picture D4).
2. The Volume field will be highlighted (Picture D5).
Picture D4.
3.Use
to increase the volume and
to decrease the volume. Volume
scrolling can be accelerated by keeping the keys pressed.
4. Press
(Done) when the changes are ready.
Method 2.
In this method it is possible to adjust the digits of the volume number
separately, allowing a quicker setup from a low value to a high one or vice
versa, e.g., from ‘0010’ to ‘1220’.
1. The volume can be changed by pressing
(Edit) or
,
while
in the active pipetting function (Picture D4).
2. The Volume field will be highlighted (Picture D5).
Picture D5.
to activate the Volume editor (Picture D6).
3. Press
4.Use
to increase the selected number and
5. Use
,
6. Press
to decrease the number.
to highlight the next number to be edited.
(Done) when the changes are ready.
Method 3.
In this method it is possible to select a volume from a recently used volume
list. The list is located on the right edge of the Volume editor window. The
maximum number of volumes in this list is six.
Picture D6.
26 Thermo Scientific E1-ClipTip User Manual
Thermo Fisher Scientific
1. The volume can be changed by pressing
(Edit) or
,
,
while in the active pipetting function (Picture D4).
2. The Volume field will be highlighted (Picture D5).
to activate the Volume editor (Picture D6).
3. Press
4. When the last number of the volume is highlighted (Picture D6), use
to move into the volume list. The volume at the top of the list will be
automatically highlighted (Picture D7). Use
,
to navigate in the
volume list.
Picture D7.
5. When the preferred volume is highlighted, press
(Done) to enter into
the basic volume field to continue editing.
D.1.3 Pipetting Speed Adjustment
It is possible to adjust aspiration (speed in) and dispensing (speed out)
separately in the E1-ClipTip pipette. There are 10 different speeds available.
The speed can be set as a value from 1 (slowest) to 10 (fastest).
The speed is also indicated as a horizontally laid set of bars located next
to the speed value. The number of bars is the same as the maximum speed
value. Dark bars, starting from the left edge, indicate the current value. The
other bars have a lighter color.
1.Press
Picture D8.
,
in the pipetting mode view (Picture D4).
2. Use
,
3.Use
to increase the speed and
4.Press
Thermo Fisher Scientific
(Edit) or
to highlight the Speed in or Speed out (Picture D8).
to decrease the speed.
(Done) when the changes are ready.
Thermo Scientific E1-ClipTip User Manual 27
D.2 Pipetting
Functions
D.2.1 Matrix Function
The Matrix function uses the step based operating technique. Each pipetting
step is entered separately in the sequence in which they will be performed.
Creating a new sequence
1. Select the
(Matrix) icon in the main menu. A list of possible
steps to be added to the pipetting sequence appears on the display
(Picture D9).
2. Select the first step to be entered to the sequence by using
and by pressing
,
(Select). The selected step’s editing window appears
(Picture D10).
3. The step specific parameters can be edited, the volume, speed, etc.
Press
Picture D9.
(Done) when the changes are ready.
4. To add a second or an additional step to the pipetting sequence, highlight
the Add new step row (Picture D11) and press
5. Press
(Add).
(Done) when all the steps are added to the pipetting
sequence and the program is ready for use.
Picture D10.
28 Thermo Scientific E1-ClipTip User Manual
Picture D11.
Thermo Fisher Scientific
To use the mode
1. Select
(Matrix) and press
(Select). The pipetting mode
view appears on the display.
2. Place the tip(s) under the liquid surface and press the trigger to aspirate
the liquid.
3. Continue until all the selected steps have been completed.
(Back) to go back to the main menu.
4. Continue dispensing or press
Editing an existing program
For each step it is possible to (Picture D12):
1. Edit step parameters: Use
,
to highlight the
icon and press
(Edit). Note that the tip ejection step cannot be edited.
,
2. Add a step above another step: Use
and press
to highlight the
icon
(Add above).
3. Delete a step: Use
,
to highlight the
icon and press
(Delete).
All steps in the sequence can be deleted by highlighting the last row
Picture D12.
and pressing
(Delete).
Available Steps
The maximum amount of steps that can be added to one sequence is 20.
The following steps can be selected by scrolling and pressing
(Select):
Fill (= filling the tip with liquid):
Change the volume using
,
or the Volume editor (section D.1.2).
Scroll to Speed and change the value using
Press
,
.
(Done) when the changes are ready.
Dispense (= dispensing liquid):
Change the volume using
,
or the Volume editor (section D.1.2).
Scroll to Speed and change the value using
Press
Thermo Fisher Scientific
,
.
(Done) when the changes are ready.
Thermo Scientific E1-ClipTip User Manual 29
Multi (= repeated dispensing of the same volume)
or the Volume editor (section D.1.2).
,
Change the volume using
Scroll to Repetitions and change the number using
Scroll to Speed and change the value using
Press
,
,
.
.
(Done) when the changes are ready.
Purge (= emptying the tip)
Change the speed using
Press
,
.
(Done) when the speed has been changed.
Mix (= mixing by pipetting a selected volume)
Select the mix type: “User controlled” or “Cycle based” using
Scroll to Mix volume and change the value using
,
Scroll to Speed and change the value using
.
,
,
.
.
If “Cycle based” is enabled, change the amount of mix cycles using
,
.
Scroll to Mix counter and select Counter off / Counter on using
,
.
Press
(Done) when the changes are ready.
Air gap (= a selected volume of air used to separate two liquids)
Change the volume using
,
or the Volume editor (section D.1.2).
Scroll to Speed and change the value using
Press
,
.
(Done) when the changes are ready.
Auto (= repeated dispensing of the same volume on defined time
intervals)
Change the volume using
,
or the Volume editor (section D.1.2).
Scroll to Repetitions and change the number using
Scroll to Speed and change the value using
Scroll to Time and change the value using
Press
30 Thermo Scientific E1-ClipTip User Manual
,
,
,
.
.
.
(Done) when the changes are ready.
Thermo Fisher Scientific
Timer (= selected time before the next step can be performed)
The time is defined showing two numbers for the minutes and two numbers
for the seconds. Each number can be selected separately.
Use
to increase the time and
the next number by using
,
to decrease the volume. Switch to
. Press
(Done) when the time has
been changed.
Note text (= a note text (e.g., a reminder) can be added)
To add a text, see section D.3.1.1. The maximum length of the text is one row.
Press
(Done) when the text is ready.
Tip eject (= ejection of the tips)
A tip ejection step can be selected in the custom program when there is no
more liquid in the tip.
Note If no purge step has been added to the pipetting program, then the text
“A purge step will be added” will appear on the screen. Press
(Ok).
Note If the volume in a step makes the total dispense volume greater than
the total fill volume before that step, then an exclamation mark will appear in
front of the step to indicate that the pipetting sequence has not been correctly
created. The note text “Invalid program. Edit steps.” will appear upon
completion of the pressing stage. The pipetting sequence has to be edited
before use is possible.
Note If no runnable steps have been defined to the mode, the note text
“Program does not contain any steps” will appear. Edit the program to add
steps. Press
(Edit) to add steps or
(Cancel) to return to the
main menu.
Caution The user is responsible for the validity of the created pipetting
sequence in Matrix and Programs functions.
Caution Ensure that the charge level of the battery is high enough, especially
when using a longer pipetting sequence in the Matrix function.
Thermo Fisher Scientific
Thermo Scientific E1-ClipTip User Manual 31
D.2.2 Presets Function
The Presets function is designed for fast and easy pipetting without saving.
The last used parameters will be saved automatically. The following pipetting
modes are included:
Forward
Stepper
Reverse
Repetitive
Dilute
Pipette + Mix
Dilute + Mix
Manual
When selecting Presets, a list of preset pipetting functions will appear on the
display (Picture D13). Select the function by using
By pressing
.
,
(Use) you enter the view where you can start using the
selected dispensing function.
Picture D13.
D.2.2.1 Forward
The forward mode is recommended for aquaeous solutions, such as buffers,
diluted acids or alkalis.
To use the mode
1. Select
(Presets) and press
2.Select Forward from the list and press
(Select).
(Use).
The pipetting mode view appears on the display (Picture D14).
3. Place the tip(s) under the liquid surface and press the trigger to aspirate
the liquid.
4. Press the trigger to dispense the liquid.
Picture D14.
32 Thermo Scientific E1-ClipTip User Manual
Thermo Fisher Scientific
To change the settings
The volume, speeds and counter options can be edited (Picture D15).
1.Press
(Edit) in the pipetting mode view.
2. Change the volume using
,
or the Volume editor (section D.1.2).
3. Scroll to Speed in and change the value using
,
.
4. Scroll to Speed out and change the value using
,
5. Scroll to Counter and select Counter off / on using
6.Press
.
,
.
(Done) when the changes are ready.
D.2.2.2 Stepper (Multi dispensing)
Picture D15.
Repeated dispensing of a selected volume is possible with the stepper mode.
The stepper mode is particularly suitable for microplate applications.
To use the mode
1. Select
(Presets) and press
(Select).
2.Select Stepper from the list and press
(Use).
3. Place the tip(s) under the liquid surface and press the trigger to aspirate
the liquid.
4. Press the trigger to discard the pre-step (if in use).
5. Press the trigger to dispense the first step and repeat until all steps
have been dispensed.
6. Press the trigger to empty the tip (purge).
To change the settings
1.Press
(Edit) in the pipetting mode view.
2. Change the volume using
,
or the Volume editor (section D.1.2).
3. Scroll to Repetitions and change the amount using
4. Scroll to Speed in and change the value using
5. Scroll to Speed out and change the value using
,
,
.
.
,
.
6. Pre-step is an additional dispensing step that may improve the results
when using certain liquids. The default setting for the pre-step is “In use”, but
it can be changed to “Not in use”. Scroll to Pre-step and change the setting
Picture D16.
Thermo Fisher Scientific
using
7. Press
,
(Picture D16) .
(Done) when the changes are ready.
Thermo Scientific E1-ClipTip User Manual 33
D.2.2.3 Reverse
The Reverse mode (reverse pipetting) is recommended for viscous and volatile
liquids. It is also recommended for solutions with low surface tension (e.g.,
liquids with foaming tendency). In this mode, an excess amount of liquid
is aspirated in addition to set the volume. This mode is also useful when
performing reagent addition where no purge is desired when dispensing.
To use the mode
1. Select
(Presets) and press
(Select).
2.Select Reverse from the list and press
(Use).
3. Place the tip(s) under the liquid surface and press the trigger to aspirate
the liquid.
4. Press the trigger to dispense the liquid. An excess volume will remain
inside the tip.
5. The display shows “Purge” (Picture D17). Press the trigger to discard the
excess volume.
To change the settings
Picture D17.
1. Press
(Edit) in the pipetting mode view.
2. Change the volume using
,
or the Volume editor (section D.1.2)
3. Scroll to Speed in and change the value using
,
4. Scroll to Speed out and change the value using
.
,
.
5. Scroll to Counter and select Counter off / Counter on using
6.Press
,
.
(Done) when the changes are ready.
D.2.2.4 Repetitive
The Repetitive mode is recommended when the reverse pipetting technique
is needed for a few repeated dosings of the same volume. This is particularly
useful when working with volumes close to the maximum volume of the
pipette.
To use the mode
1. Select
(Presets) and press
2.Select Repetitive from the list and press
(Select).
(Use).
3. Place the tip(s) under the liquid surface and press the trigger to aspirate
the liquid.
34 Thermo Scientific E1-ClipTip User Manual
Thermo Fisher Scientific
4. Press the trigger and keep it pressed to dispense the liquid. Touch the tip
against the edge of the reservoir to remove any possible remaining liquid on
the outside surface of the tip. An excess volume will remain inside the tip.
5. Return to the original liquid reservoir and place the tips below the surface.
Release the trigger to aspirate.
6. Repeat Steps 4 and 5 as long as needed.
7. Press the trigger shortly with the last dose.
8. The display shows “Purge”. Press the trigger to discard the excess
volume.
To change the settings
1. Press
Picture D18.
(Edit) in the pipetting mode view.
2. Change the volume using
,
or the Volume editor (section D.1.2).
3. Scroll to Speed in and change the value using
4. Scroll to Speed out and change the value using
,
.
,
.
5. Scroll to Counter and select Counter off / Counter on using
6.Press
,
.
(Done) when the changes are ready.
D.2.2.5 Dilute
The dilute mode enables the user to dispense two selected volumes with an
air gap in-between. This is useful, for instance, when making standard curves.
To use the mode
1. Select
(Presets) and press
2.Select Dilute from the list and press
(Select).
(Use).
3. Place the tip(s) under the surface of liquid 1 and press the trigger to
aspirate the liquid (fill 1).
4. Remove the tips from the liquid. The display shows “Air gap” (Picture D19).
5. Press the trigger to aspirate an air gap.
6. Place the tip(s) under the surface of liquid 2 and press the trigger to
aspirate the liquid (fill 2).
7. Press the trigger to dispense both volumes.
Picture D19.
Thermo Fisher Scientific
Thermo Scientific E1-ClipTip User Manual 35
To change the settings
The volumes used in the Dilute mode can be set in two different ways: ratio
based and volume based.
The ratio based method uses different dilution ratios to determine the
volumes to be used. Total volume and the dilution ratio define the diluent (fill
1) and sample (fill 2) volumes automatically. The diluent (fill 1) is the larger of
the volumes.
In the volume based method the volumes are set directly. This volume based
method uses user-defined diluent (fill 1) and sample (fill 2) volumes.
Press
(Edit) in the pipetting mode view. Use
,
to select
between ratio based and volume based dilution (Picture D20).
Volume based:
1. Scroll to Fill 1 volume and change the volume using
,
or
,
or
the Volume editor (section D.1.2).
2. Scroll to Fill 2 volume and change the volume using
the Volume editor.
3. Scroll to Fill 1 speed and change the value using
,
.
4. Scroll to Fill 2 speed and change the value using
,
.
5. Scroll to Speed out and change the value using
Picture D20.
6. Press
,
.
(Done) when the changes are ready.
Ratio based:
1. Scroll to Ratio and change the value using
,
(Picture D21).
2. Scroll to Total volume and change the volume using
,
or
the Volume editor (section D.1.2). Fill 1 and Fill 2 volumes will be calculated
automatically.
3. Scroll to Fill 1 speed and change the value using
,
.
4. Scroll to Fill 2 speed and change the value using
,
.
5. Scroll to Speed out and change the value using
Picture D21.
6. Press
,
.
(Done) when the changes are ready.
Note The volume and the speed of the air gap are defined automatically.
36 Thermo Scientific E1-ClipTip User Manual
Thermo Fisher Scientific
D.2.2.6 Forward + Mix
The Forward mode is recommended for aquaeous solutions, such as buffers,
diluted acids or alkalis. A mixing step is added after dispensing of the liquid.
To use the mode
1. Select
(Presets) and press
(Select).
2.Select Forward + Mix from the list and press
(Use).
3. Place the tip(s) under the liquid surface and press the trigger to aspirate
the liquid.
4. Press the trigger to dispense the liquid.
5. Place the tips under the surface of the liquid. Press the trigger to
start mixing.
6. a) User controlled mix type: As long as the trigger is pressed down, ca.
70% of the total volume is pipetted (Picture D22).
6. b) Cycle based mix type: The set amount of mixing cycles is done by
the pipette.
7. Next the display shows “Purge”. Press the trigger to empty the tip (purge).
Picture D22.
To change the settings
1.Press
(Edit) in the pipetting mode view.
2. Change the volume using
,
or the Volume editor
(section D.1.2).
3. Scroll to Speed in and change the value using
4. Scroll to Speed out and change the value using
,
.
,
.
5. Scroll to Mix type and select between “User controlled” and
“Cycle based” using
,
.
6. If Mix type is cycle based, scroll to Mix cycles and change the value
using
,
(Picture D23).
7. Scroll to Mix speed and change the value using
Picture D23.
8. Scroll to Counter and select Counter off / on using
9.Press
Thermo Fisher Scientific
,
.
,
.
(Done) when the changes are ready.
Thermo Scientific E1-ClipTip User Manual 37
D.2.2.7 Dilute + Mix
With the Dilute + Mix mode it is possible to dispense two selected volumes
with an air gap in-between, followed by mixing of the liquid.
To use the mode
1. Select
(Presets) and press
(Select).
2.Select Dilute + Mix from the list and press
Picture D24.
(Use).
3. Place the tips under the surface of liquid 1 and press the trigger to
aspirate the liquid (fill 1).
4. Press the trigger to aspirate an air gap.
5. Place the tips under the surface of liquid 2 and press the trigger to
aspirate the liquid (fill 2).
6. Press the trigger to dispense the total volume (Picture D24).
7. Place the tips under the surface of the liquid. Press the trigger to
start mixing.
8. a) User controlled mix type: As long as the trigger is pressed down, ca.
70% of the total volume is pipetted.
8. b) Cycle based mix type: The set amount of mixing cycles is done by
the pipette.
If the mix counter is set on, a number indicating the amount of mixing cycles
appears in the bottom left corner of the display (Picture D25).
9. Next the display shows “Purge”. Press the trigger to empty the tip (purge).
To change the settings
The volumes used in the Dilute + Mix mode can be set in two different ways:
ratio based and volume based.
The ratio based method uses different dilution ratios to determine the
volumes to be used. Total volume and the dilution ratio define the diluent (fill
1) and sample (fill 2) volumes automatically. The diluent (fill 1) is the larger of
the volumes.
In the volume based method the volumes are set directly. This volume based
method uses user-defined diluent (fill 1) and sample (fill 2) volumes.
Picture D25.
Press
(Edit) in the pipetting mode view. Use
,
to select
between ratio based and volume based dilution.
Ratio based:
1. Scroll to Ratio and change the value using
,
2. Scroll to Total volume and change the volume using
.
,
or the Volume editor (section D.1.2). Fill 1 and Fill 2 volumes will be
calculated automatically.
38 Thermo Scientific E1-ClipTip User Manual
Thermo Fisher Scientific
3. Scroll to Fill 1 speed and change the value using
,
.
4. Scroll to Fill 2 speed and change the value using
,
.
5. Scroll to Speed out and change the value using
,
.
6. Scroll to Mix type and select between “User controlled” and
“Cycle based” using
,
.
7. If Mix type is cycle based, scroll to Mix cycles and change the value
using
,
.
8. Scroll to Mix speed and change the value using
,
.
9. Scroll to Counter and select Counter off / on using
Picture D26.
,
(Picture D26).
10.Press
(Done) when the changes are ready.
Volume based:
1. Scroll to Fill 1 volume and change the volume using
,
or
,
or
the Volume editor (section D.1.2).
2. Scroll to Fill 2 volume and change the volume using
the Volume editor (section D.1.2).
3. Scroll to Fill 1 speed and change the value using
,
.
4. Scroll to Fill 2 speed and change the value using
,
.
5. Scroll to Speed out and change the value using
,
.
6. Scroll to Mix type and select between “User controlled” and
“Cycle based” using
,
.
7. If Mix type is cycle based, scroll to Mix cycles and change the value
using
,
.
8. Scroll to Mix speed and change the value using
,
.
9. Scroll to Counter and select Counter off / Counter on using
10.Press
Thermo Fisher Scientific
,
.
(Done) when the changes are ready.
Thermo Scientific E1-ClipTip User Manual 39
D.2.2.8 Manual
The Manual mode can be used in different applications. It can be used, for
instance, to evaluate the amount of remaining liquid in the reservoir or to
dispense small amounts of liquid when slow speeds are needed (e.g., gel
electrophoresis). The volume reset function can be utilized, for instance, in
titration.
Note The Manual mode contains slower speed options than the other
operation modes.
To use the mode
1. Select
(Presets) and press
(Select).
2.Select Manual from the list and press
(Use).
3. Press the trigger to aspirate the liquid.
4. The display indicates the volume aspirated into the tip.
5. Liquid is aspirated for as long as the trigger is kept pressed or until
the Limit volume has been reached. The motion stops when the trigger
is released.
6. When the trigger has been released before achieving the Limit volume,
the movement direction can be changed by pressing
Picture D27.
(Out) or
(In)
(the text guided button depends on the current movement direction)
(Picture D27).
7. Dispensing the liquid will show as a descending value on the display.
8. Optional: The volume value on the display can be reset to 0 at any point
by pressing
(Reset/Cancel). The Reset/Cancel selection window
appears (Picture D28). Select Reset using
,
and press
(Done). The volume on the display is 0. Dispensing liquid from the tip will
show as a negative value.
9. Optional: The ongoing dispensing sequence can be interrupted by pressing
(Reset/Cancel). The Reset/Cancel selection window appears. Select
Cancel using
Picture D28.
,
and press
(Done). Press
(Yes) to
cancel the dispensing sequence. “Purge” will appear on the display. Press the
trigger to dispense.
40 Thermo Scientific E1-ClipTip User Manual
Thermo Fisher Scientific
Note After all the liquid has been dispensed, the Back button will appear
again. Press
(Back) to go back to the Presets list.
To change the settings
1. Press
(Edit) in the pipetting mode view.
2. Change the limit volume using
,
or the Volume editor
(section D.1.2). The limit volume value is the maximum volume that can be
aspirated. The limit volume can be set between the minimum and maximum
volumes of the pipette model (Picture D29).
3. Scroll to Speed in and change the value using
,
4. Scroll to Speed out and change the value using
5. Press
Picture D29.
.
,
.
(Done) when the changes are ready.
D.2.3 Programs Function
Application: The Programs function is designed for creating and storing
programs. Save time and ensure data integrity by storing your most used
protocols.
Description: The Programs function includes both Matrix and Presets based
programming styles. See the chart in section D.1. It is possible to store up to
20 individual programs with personalized names and with liquid or application
specific calibrations (adjustment settings) for increased accuracy and
precision See sections E.5.2 and E.5.3 for further information.
Adding a new program
1. Select
(Program) and press
2. Scroll to Add new program and press
(Select).
(Add) to add a new
program (Picture D30).
3. The following programs can be selected by scrolling and pressing
(Select):
Matrix, Forward, Stepper, Reverse, Repetitive, Dilute, Pipette + Mix,
Dilute + Mix, and Manual.
Picture D30.
Thermo Fisher Scientific
Thermo Scientific E1-ClipTip User Manual 41
4. The new program is given a default name that can be edited. Scroll to
Program name and press
(Edit name) (Picture D31). To add a text,
see section D.3.1.1 on how to use the virtual keypad to change the name.
Press
(Done) when the changes are ready.
5. The new program is linked to the “Default calibration”. Different
calibrations can be selected if special adjustment settings have been created
Picture D31.
(section 5.2). Scroll to Calibration and press
(Calibration list). Scroll
to the intended adjustment setting and press
(Select). The pipette
returns to the program settings.
6. Each program contains a set of values that need to be defined before use.
Press
(Done) when the changes are ready.
Note When the user changes the default adjustment setting to a user created
adjustment setting, the pipette indicates this with a balance symbol together
with the name of the selected calibration in the display title field during the
use of the program.
Editing an existing program
1. Select
(Programs) and press
(Select).
2. Scroll to the stored program to be edited.
3. Use
,
to highlight the
icon and press
(Edit).
4. Each program contains a set of values that need to be defined before use.
Press
(Done) when the changes are ready.
Deleting a program
1. Select
(Programs) and press
(Select).
2. Scroll to the stored program to be deleted.
3. Use
Picture D32.
,
to highlight the
(Delete)
(Picture D32).
4. Confirm deleting by pressing
42 Thermo Scientific E1-ClipTip User Manual
icon and press
(Yes).
Thermo Fisher Scientific
Using a stored program
1. Select
(Programs) and press
(Select).
2. Scroll to the stored program to be used.
3. Use
,
to highlight the
icon and press
(Use)
(Picture D33).
Picture D33.
Caution The user is responsible for the validity of the created pipetting
sequence in the Matrix and Programs functions.
Caution Ensure that the charge level of the battery is high enough,
especially when using a longer pipetting sequence in the Matrix function.
D.3 Supporting
Functions
D.3.1 My Pipette
It is possible to personalize the E1-ClipTip pipette user interface in the
My Pipette function.
D.3.1.1 Pipette Name
It is possible to give the E1-ClipTip pipette a personal name in this mode.
The name is shown in the main menu title field and on the display when the
pipette is in sleep mode (Picture 34). E1-ClipTip is used as a default name.
To change the default name:
(My Pipette) and press
1. Select
2.Select Pipette Name and press
Picture D34.
(Select).
(Select).
3. The display shows a virtual keypad that is used to edit the name
(Picture D35).
4. To edit the text in the editor field, move the cursor in the virtual keypad
and enter a character pressing
(Select). The character set can be
changed or a character can be deleted by selecting the desired type slot on
the upper row of the virtual keypad
,
and
,
by using the
keys and pressing
(Select).
5. Different key functions are defined in the table below.
6.Press
(Done) after entering the desired name or text.
Picture D35.
Thermo Fisher Scientific
Thermo Scientific E1-ClipTip User Manual 43
Virtual keypad functions:
Move the highlight within the keypad in a horizontal direction.
Move the highlight within the keypad in a vertical direction.
The Left selection key (Select) confirms the virtual keypad selection.
The Right selection key (Done) confirms the contents of the editor field and
stops editing.
Move the cursor left/right in the editor field (text).
Deletes a character to the left of the cursor in the editor field.
Changes the characters in the keypad to lowercase letters.
The uppercase keypad is used at the beginning and after a full stop,
otherwise, the lowercase keypad is used.
Changes the characters in the keypad to uppercase letters.
Changes the characters in the keypad to numbers and special characters.
D.3.1.2 Shortcuts
This mode enables the user to create icon shortcuts and place them in the
main menu view to provide quick access to favorite programs and pipetting
functions. Select a shortcut icon to quickly start the program or pipetting
function – without scrolling in menus or folders.
There are four icon shortcut slots available in the E1-ClipTip pipette. Shortcuts
are placed in the main menu in addition to the six main function icons.
Shortcuts can be created for Presets pipetting modes or user created
programs saved under the Programs function. The
Presets pipetting mode shortcuts and the
icon is used for
icon for program shortcuts.
The name of the pipetting mode or program will be displayed below the icon.
44 Thermo Scientific E1-ClipTip User Manual
Thermo Fisher Scientific
Creating a shortcut
(My Pipette) and press
1. Select
2.Select Shortcuts and press
(Select).
(Select).
3. A list of four icon shortcut slots is displayed (Picture D36).
4.Use
,
5. Press
to highlight the preferred slot.
(Change) to change the content of each shortcut.
6. A list of Matrix and Presets functions pipetting modes and stored
programs will appear.
Picture D36.
7. Use
,
and press
to highlight the preferred mode or program or “None”,
(Ok).
8. Select the icon color using
9. Press
,
and press
(Ok).
(Done) when the changes are ready.
10.The created shortcut appears at the top of the main menu view
(Picture D37).
Picture D37.
Note When a pipetting function or program is edited through a shortcut, the
changes will also be stored in the original function or program.
When the original function or program is edited, the shortcut will be updated
automatically.
When a stored program is deleted, a program shortcut is also deleted.
D.3.1.3 Organize Icons
In this mode it is possible to organize the icons in the main menu, enabling
fast access to the most used functions.
1. Select
(My Pipette) and press
2. Select Organize icons and press
(Select).
(Select).
3. Move the cursor over to the desired icon using the
keys. Press
,
and
,
(Move) to select a desired icon.
4. Arrow symbols appear within the cursor frame around the icon to be
moved (Picture D38). Move the icon using the
keys to a desired place in the menu, and press
Picture D38.
and
,
(Ok). The icon has now
been moved to a new location in the main menu.
5. Press
Thermo Fisher Scientific
,
(Ready) after the changes have been done.
Thermo Scientific E1-ClipTip User Manual 45
D.3.1.4 Password Protection
It is possible to protect against editing certain items with a password, as
with all created programs located under the Programs main function. Also the
default calibration and special made calibrations located under the Settings
function can be protected with a password. In addition, under the My Pipette
main function, the Pipette name, Shortcuts and Organizing of icons can be
protected: Use the same set password for all selected protections.
(My Pipette) and press
1. Select
(Select).
2.Select Password protection and press
3. Press
(Select).
(Select) to set the password (Picture D39).
4. Set the password using the virtual keypad (Picture D40). Press
Picture D39.
(Done) when ready. Note that the set password is the same for all protections
that will be set.
5. An info text confirming the password appears on the display.
Press
(Ok).
6. First select the main function name where the protectable item is located
from the list (Picture D41) and press
(Select).
7. Select the item to be protected from the list and press
(Picture D42). A
(Protect)
icon appears on the item row to indicate that the item
is locked and cannot be edited before the password is entered or protection
is removed.
8.Press
(Back) when all items to be locked are protected. The
icon also appears on the main function row that contains a locked item. The
Picture D40.
icon is black if all items under the main function are protected and
gray if only certain items are locked under the main function (Picture D43).
9.Press
Picture D41.
46 Thermo Scientific E1-ClipTip User Manual
Picture D42.
(Back) to exit the Password protection mode.
Picture D43.
Thermo Fisher Scientific
D.3.2 Settings
The Settings function contains the tools to define basic functions, tracking
settings, and audio response of the pipette (Picture D44).
D.3.2.1 Sounds
The Sounds option allows the user to control the function indicator sounds
and keypad key response sounds.
To modify the buzzer settings:
1. Select
(Settings) and press
2.Select Sounds and press
3. Scroll in the menu using
(Select).
(Select).
,
.
4. Set the pipetting and keypad sounds on/off using
,
.
5. The sound level can be set at 5 different volumes.
6. Press
Picture D44.
(Done) after editing the settings.
D.3.2.2 Calibrate
It is possible to reset the adjustment parameters for Default calibration or
add and define new calibration settings (special adjustment settings) in the
Calibrate function.
Default calibration values have been set at the factory quality control.
Changing the Default calibration parameters will affect all pipetting modes
under the Matrix and Presets functions. For more information on how to
change Default calibration, see section E.5.1.
Add new calibration allows the user to define a special adjustment setting
that can be used in stored programs. It is possible to define up to five different
adjustment settings. For more information on how to define and use special
adjustment settings, see sections E.5.2 to E.5.4.
D.3.2.3 Calibration Tracker
The Calibration tracker function allows the user to set up a reminder that
appears as an icon in the upper field of the pipette display. The Calibration
tracker informs the user when the set time limit or a pipetting cycle limit is
reached, and reminds the user to recheck the pipette performance.
Thermo Fisher Scientific
Thermo Scientific E1-ClipTip User Manual 47
To set the Calibration tracker:
1. Select
(Settings) and press
(Select).
2.Select Calibration tracker and press
3. Scroll in the menu using
,
(Select).
.
4. Set the remainder on/off using
,
.
5. Select the cycle based (pipetting cycles) or time based tracker type
using
,
.
6. Scroll to Reminder interval. Pressing
interval window. Set the limits using
,
,
activates the Reminder
and
,
for the
selected tracker type. The cycle based tracker can be set between 1 and 999999
pipetting cycles. The time based tracker can be set between 1 and 999 days.
The Calibration tracker window also shows the cumulative values from the
last calibration, cycles when the cycle based option has been selected and
days when the time based option has been selected, and the date of the last
calibration. These values are reset when the default calibration is changed
(section E.5.1).
Caution The Calibration counter notifies the user only about the limits
reached according to the Default calibration. The user is responsible for
checking the validity of personalized adjustment settings used in stored
programs.
D.3.2.4 Service Tracker
This mode allows the user to set up the service tracker reminder parameters.
The tracker will show a reminder icon in the upper field of the display when
the set time limit has been reached. Also the counter from the last service can
be viewed in this mode.
1. Select
(Settings) and press
(Select).
2.Select Service tracker and press
3. Move in the menu using
(Select).
,
.
4. Switch the tracker on/off using
,
5. Scroll to Reminder interval. Using
.
,
set window will open. Set the interval using
the Tracker interval
,
and
,
.
The interval can be set between 1 to 999 days.
6. Press
48 Thermo Scientific E1-ClipTip User Manual
(Done) after setting the interval.
Thermo Fisher Scientific
(Reset tracker).
7. The tracker counter can be reset by pressing
8. Exit the Service tracker mode by pressing
9. Press
(Done).
(Yes) to verify the changes.
Note The tracker counter is not reset automatically. The user only needs to
perform the reset manually (see Step 7).
D.3.2.5 Product Information
1. Select
(Settings) and press
(Select).
2.Select Product information and press
(Select).
3. The product information will appear on the screen. This is important
in product specific customer enquiries and product service issues. Provide
this information when corresponding with the manufacturer or dedicated
service houses.
D.3.2.6 Date and Time
The Date and time option allows the user to change the corresponding
settings. The date and time affect calibration and service tracker functions.
To edit the date and time settings:
1. Select
(Settings) and press
(Select).
2.Select Date and time and press
3. Scroll in the menu using
,
(Select).
.
4. Set the Date and Time by selecting the corresponding slot and press
(Set).
5. Press
(Done) after entering the value.
6. Date format and Time format can be changed by using
,
(Picture D45).
7. Press
(Done) when all the values have been defined.
Picture D45.
Thermo Fisher Scientific
Thermo Scientific E1-ClipTip User Manual 49
D.3.2.7 Recovery
Recovery is used to return the factory settings to the pipette.
To return the factory settings:
1. Select
(Settings) and press
2.Select Recovery and press
(Select).
(Select).
3. The pipette warns against clearing all user data. Press
(Proceed)
to continue.
4. Press
(Ok) to confirm the recovery process.
5. The pipette will restart.
6. Scroll in the menu using
,
. Set the Date, Time, and the
desired Date and Time formats by selecting the corresponding slot, and
press
Picture D46.
(Set).
7. Press
(Done) after entering the value.
8. Press
(Done) when all the values have been defined.
The Recovery function can be protected with a password (Picture D46).
See section D.3.1.3.
Caution All user edited programs, calibration settings and personalized
pipette settings will be cleared. The user is responsible for redefining personal
changes after the recovery procedure.
D.3.2.8 Connect Piston
The settings menu also contains the piston detachment/connection mode for
single channel pipettes.
1. Select
(Settings) and press
2.Select Connect piston and press
(Select).
(Select).
This mode allows the user to move the piston to a position where it is easy to
remove using the piston tool B. The mode is also used to connect the piston
to the motor after service operations. See section G.3 on how to remove and
connect the piston.
D.4 Power
Function
50 Thermo Scientific E1-ClipTip User Manual
The Power function allows the user to manually shut down the pipette and
save the battery when the pipette is not used for a longer period of time.
Thermo Fisher Scientific
To shut down the pipette:
1.Select
2. Press
(Power) and press
(Select).
(Yes) to confirm the shut down.
Note The pipette will automatically go to power off mode after 1 h if not used.
D.5 Application Examples
Examples of creating different pipetting sequences are given below. Both
“Matrix” and “Preset” can be used for the same tasks. The preferred
method is always described first.
Note These examples assume that the Matrix program is empty. If not so,
then use the ”Delete all steps” option in the Matrix edit view.
Sample Transfers
Example: Fill and dispense 100 µl.
Using Presets:
1.
(Select). Select the Presets icon from
the main menu.
2.
Use the Up/Down keys to highlight ”Forward”.
3.
(Use). Select the function to use.
4.
(Edit). Edit the function.
5.
Use the Left/Right keys or the Volume editor to
adjust the volume of 100 µl.
6.
(Done). The volume is accepted and the function
is ready to run.
Using Matrix:
Thermo Fisher Scientific
1.
(Select). Select the Matrix icon from
the main menu.
2.
(Select).
3.
Use the Left/Right keys or the Volume editor to
adjust the volume to 100 µl.
4.
(Done). The volume is accepted.
5.
(Done). The program is ready.
6.
(Ok).
7.
(Done). The function is ready to run.
Fill step is added.
Purge step is added.
Thermo Scientific E1-ClipTip User Manual 51
Serial Dispensing
Example: Fill a 96-well plate with 100 µl per well using an 8-channel
1250 µl pipette.
Using Presets:
1.
(Select). Select the Presets icon from
the main menu.
2.
Use the Up/Down keys to highlight ”Stepper”.
3.
(Use). Select the function to use.
4.
(Edit). Edit the function.
5.
Use the Left/Right keys or the Volume editor to adjust
the volume of 100 µl.
6.
Use the Up/Down keys to highlight ”Repetitions”.
7.
Use the Left/Right keys to adjust the repetitions to 12.
8.
(Done). The function is ready to run.
Note It is recommended to set Pre-step to ”In use” in the Stepper function.
Using Matrix:
52 Thermo Scientific E1-ClipTip User Manual
1.
(Select). Select the Matrix icon from the main
menu.
2.
(Select).
3.
Use the Left/Right keys or the Volume editor to adjust
the volume to 1250 µl.
4.
(Done). The volume is accepted.
5.
(Add). Add a new step.
6.
Use the Down key to highlight ”Dispense”.
7.
Dispense step is added. This step is
(Select).
for discarding the first 50 µl.
Fill step is added.
8.
Use the Left/Right keys or the Volume editor to adjust
the volume of 50 µl.
9.
(Done). The volume is accepted.
10.
(Add). Add a new step.
11.
Use the Down key to highlight ”Multi”.
12.
(Select).
Multi step is added.
Thermo Fisher Scientific
Simple Dilutions
13.
Use the Left/Right keys or the Volume editor to adjust
the volume to 100 µl.
14.
Use the Up/Down keys to highlight ”Repetitions”.
15.
Use the Left/Right keys to adjust the repetitions to 12.
16.
(Done). The volume is accepted.
17.
(Done). The editing is ready.
18.
(Ok).
19.
(Done). The function is ready to run.
Purge step is added.
Example: Prepare a 1:10 dilution with a 10 µl sample volume.
Note The first fill volume is for the diluent followed by the air gap volume and
finally by the sample volume.
Note Tenfold serial dilutions can be done by repeating this example multiple
times.
Using Presets:
1.
(Select). Select the Presets icon from
the main menu.
2.
Use the Up/Down keys to highlight ”Dilute”.
3.
(Use). Select the function to use.
4.
(Edit). Press Edit.
5.
Use the Left/Right keys to select ”Volume
based” dilution.
6.
Use the Up/Down keys to highlight ”Fill 1
volume”.
Use the Left/Right keys or the Volume editor to
adjust the volume to 90 µl.
7.
8.
9.
10.
Thermo Fisher Scientific
Use the Up/Down keys to highlight ”Fill 2
volume”.
Use the Left/Right keys or the Volume editor to
adjust the volume to 10 µl.
(Done). The function is ready to run.
Thermo Scientific E1-ClipTip User Manual 53
Using Matrix:
Timed Dispensing
1.
(Select). Select the Matrix icon from
the main menu.
2.
(Select).
3.
Use the Left/Right keys or the Volume editor to
adjust the volume to 90 µl.
4.
(Done). The volume is accepted.
5.
(Add). Add a new step.
6.
Use the Down key to highlight “Air gap”.
7.
(Select).
8.
Use the Left/Right keys or the Volume editor to
adjust the volume of 20 µl.
9.
(Done). The volume is accepted.
10.
(Add). Add a new step.
11.
(Select).
12.
Use the Left/Right keys or the Volume editor to
adjust the volume to 10 µl.
13.
(Done). The volume is accepted.
14.
(Done). The editing is ready.
15.
(Ok).
16.
(Done). The function is ready to run.
Fill step is added.
Air gap step is added.
Fill step is added.
Purge step is added.
Example: Using the timer in initiation of enzymatic reactions
at 30 s intervals.
Note The timer is available in Matrix only.
54 Thermo Scientific E1-ClipTip User Manual
Thermo Fisher Scientific
Using Matrix:
1.
(Select). Select the Matrix icon from
the main menu.
2.
(Select).
3.
Use the Left/Right keys or the Volume editor to
adjust the volume to 150 µl.
4.
(Done). The volume is accepted.
5.
(Add). Add a new step.
6.
Use the Down key to highlight “Dispense”.
7.
(Select).
8.
Use the Left/Right keys or the Volume editor to
adjust the volume of 30 µl.
9.
(Done). The volume is accepted.
10.
(Add). Add a new step.
11.
Use the Down key to highlight “Timer”.
12.
(Select).
13.
Use the Up/Down and the Left/Right keys to set
the timer to 30 s.
14.
(Done). The timer setting is accepted.
15.
Thermo Fisher Scientific
Fill step is added.
Dispense step is added.
Timer step is added.
Repeat Steps 5 to 14 three times in order to create three more
dispense and timer steps. The last dispensing will be done
with the Purge step.
16.
(Done). The editing is ready.
17.
(Ok).
18.
(Done). The function is ready to run.
Purge step is added.
Thermo Scientific E1-ClipTip User Manual 55
E.CALIBRATION AND
ADJUSTMENT
E.1 Terminology
Calibration: Determination of the difference between the actual volume
given by the device and the target volume. Also enables statistical evaluation
of the deviation between individual doses.
Adjustment: Altering the pipette settings to change the actual volume to
correspond to the target volume.
Default calibration: Adjustment setting for Matrix and Presets functions.
The pipette uses this parameter.
Special adjustment: A user-created parameter setting that can be
stored in the pipette to be used in the Programs function to improve the
device performance.
Manufacturer specifications: Acceptance criteria for pipettes used
by the manufacturer under strictly defined conditions. Used for quality
control purposes.
ISO 8655 specifications: Acceptance criteria for pipettes recommended for
pipette service or end users under strictly defined conditions. Allows more
tolerance for different influencing factors.
Inaccuracy = accuracy: The error of the measured mean volume to the
target volume. Can be shown as an absolute value (e.g., A = 1.0 µl) or as a
relative value (e.g., ACC% = 0.15%). Inaccuracy is a systematic error.
Imprecision = precision: Statistical evaluation value of the calibration
measurement series. Can be shown as an absolute standard deviation value
(e.g., s = 1.0 µl) or as a relative coefficient of variation value (e.g., CV% = 0.1%).
Imprecision is a random error.
Nominal volume = maximum volume indicated by the device volume range.
E.2 Factory
Calibration
All Thermo Scientific pipettes are factory calibrated and adjusted to give
the volumes as specified with distilled or deionized water. The performance
values are defined at the nominal (maximum) volume and at 10% of the
nominal volume using series of 5 doses at both points. With multichannel
pipettes all channels are calibrated. Calibration is performed in a
monitored environment.
Note Calibration results are place and environmental condition specific.
Factory calibration assures that the devices were functional on leaving the
factory. The user is responsible for checking that the calibration applies to in
the intended use.
56 Thermo Scientific E1-ClipTip User Manual
Thermo Fisher Scientific
E.3 Responsibilities
of the User
To assure the proper functionality of the device the user is responsible to:
•• Follow the instructions of this Instructions for Use booklet.
•• Assure that the device and used accessories are suitable for the intended
application and are functioning properly in the intended conditions.
•• Define a regular service interval for the device (calibration check
and maintenance) depending on the conditions of use. The starting
recommendation is every 3 months, but this can be changed according to
the follow-up results. Devices should be serviced at least once a year.
•• Define suitable acceptance criteria for calibration. As many premises do
not necessarily meet the strict environmental and device requirements stated
in the ISO 8655 standard, the user should establish acceptance criteria that
meet the demands of the tasks that the devices are used for.
E.4 Performing the
Calibration
The following calibration procedure is recommended to be performed under
strict conditions defined below. It is recognized that many premises do not
have the possibility to meet these requirements.
Note The calibration procedure is also the same under nonconforming
conditions, however, the manufacturer specifications or the ISO 8655 standard
specifications do not apply in these cases.
E.4.1 Device Requirements and Test Conditions
•• An analytical balance should be used. The scale graduation value of
the balance should be chosen according to the selected test volume of
the pipette:
Minimum requirements for balances according to ISO 8655.
Thermo Fisher Scientific
Tested volume area
Resolution
Repeatability and
linearity
V
1 µl ≤ V ≤ 10 µl
10 µl < V ≤ 100 µl
100 µl < V ≤ 1000 µl
1 ml < V ≤ 10 ml
mg
0.001
0.01
0.1
0.1
mg
0.002
0.02
0.2
0.2
Standard uncertainty of
measurement
mg
0.002
0.02
0.2
0.2
Thermo Scientific E1-ClipTip User Manual 57
If the uncertainty of the measurement of the balance is known, this may be
used instead of the repeatability and linearity.
•• Test liquid: Distilled or deionized water conforming to the ISO 3696
grade 3 requirements.
•• Tests should be done in a draft-free room at a constant (±0.5°C)
temperature of water, pipette and air between 15°C to 30°C.
•• The relative humidity should be above 50%. Especially with volumes
under 50 μl the air humidity should be as high as possible to reduce the
effect of evaporation loss. Special accessories, such as an evaporation trap,
are recommended.
Note It is recommended to use an environmental monitoring device to assure
the reliability of condition values.
E.4.2 Procedure
Note the temperature (water temperature recommended) and air pressure
values before testing.
Select the Z-correction coefficient value from Appendix 1.
1. Take a new tip from the tip rack box using the pipette. Do not touch
the tips by hand.
2. Pre-wet the tip 3–5 times.
3. Dispense 10 doses at 10% of the nominal volume.
4. Dispense 10 doses at the nominal volume.
5. Calculate the inaccuracy (A and ACC%) and imprecision (s and CV%) of
both series (see section D.4.3).
6. Compare the results to the limits in Appendix 2 or 3.
If the calculated results are within the selected limits, the adjustment of
the pipette is correct.
With multichannel pipettes calibration can be performed either to all channels
(standard demand) or for the edge channels of the device.
A pipette should always be adjusted for delivery (Ex) of the selected volume.
Measuring volumes taken from the balance are not allowed. Calibration
should be performed using the forward pipetting method.
For maximum permissible errors, see Appendix 2. Manufacturer Factory
Specification Limits and Appendix 3. ISO8655 Calibration Specification Limits.
58 Thermo Scientific E1-ClipTip User Manual
Thermo Fisher Scientific
Note Inaccuracy and imprecision calculations can also be done using the
Pipette Calibration Calculator that can be found on the Thermo Scientific
web pages.
Note According to the ISO8655 the acceptance specifications mentioned in
this document apply only in the Forward mode. Typical performance values
for the Stepper mode can be inquired from the manufacturer.
E.4.3 Calculation Formulas
E.4.3.1 Volume Calculation
V = volume (µl)
w = mass (mg)
Z = conversion factor (µl/mg)
e = evaporation loss (mg)
Evaporation loss can be significant with low volumes. To determine mass
loss, dispense water into the weighing vessel, note the reading and start a
stopwatch. See how much the reading decreases during 30 seconds
(e.g., 6 mg = 0.2 mg/s).
Compare this to the pipetting time from tareing to reading. Typically the
pipetting time might be 10 seconds and the mass loss is 2 mg (10 s x
0.2 mg/s) in this example. If an evaporation trap or lid on the vessel is used,
the correction of evaporation is usually unnecessary.
The factor Z is for converting the weight of the water to volume at the test
temperature and pressure.
A typical value is 1.0032 μl/mg at 22°C and 95 kPa. See the conversion table
in Appendix 1.
The value of the Z conversion factor depends on environmental conditions
(Appendix 1). Select the factor from the table according to the air pressure
and water temperature (recommended). The volume is more dependent on
the water temperature than the air temperature.
E.4.3.2 Inaccuracy
A = inaccuracy
= average volume
Vs= target volume (display value)
Thermo Fisher Scientific
Thermo Scientific E1-ClipTip User Manual 59
E.4.3.3 Imprecision
s =
=
n =
Vi =
E.5 Adjustment
standard deviation (µl)
average volume
number of measurements
individual measurement result (i = 1…n)
In the E1-ClipTip pipette there are two different ways to affect the adjustment
settings. The user can change the settings for Default calibration, which
affects all modes under the Presets menu. Or the user may create his/her own
special adjustments and store them in the pipette to be used in the Programs
mode for created dispensing programs.
Perform the calibration using the protocols of the desired application (section
D.4.) before starting the adjustment procedures. Adjustment can be made
for example, for liquids of different temperature or viscosity or for different
pipetting methods, such as reverse or multi dispensing. In the E1-ClipTip
calibration the max. volume always corresponds to the nominal volume
of the pipette while the min. volume always corresponds to 10% of the
nominal volume.
Note According to the ISO8655, the acceptance specifications mentioned in
this document apply only in the Forward mode. Typical performance values for
the stepper mode can be inquired from the manufacturer.
Note The user may adjust the device for the stepper mode by defining the one
point calibration in the Programs mode. See sections D.2.3, E.5.2, and E.5.3
for more information.
E.5.1 Changing Default Calibration Setting
All Presets functions are affected when the Default adjustment setting is
changed. The user may edit this setting excluding the name. The Default
calibration setting is always a 2-point calibration. Calibration volumes are
10% of the nominal volume and the nominal volume.
Note The user may lock the Default calibration setting with a password so
that the setting cannot be changed without authorization. See section D.3.1.4
for more information.
60 Thermo Scientific E1-ClipTip User Manual
Thermo Fisher Scientific
Note The user may check the date of the last made Default calibration setting
from the Calibration tracker. See section D.3.2.3 for more information.
Note It is advised that the performance values for the Default calibration
setting are defined according to ISO 8655 procedures in the Forward mode.
Caution When changing the Default calibration settings, all functions under
Matrix and Presets are affected.
1. Select
(Settings) and press
2.Select Calibrate and press
(Select).
(Select).
3.Select Default calibration and press
(Edit).
4. A notification will appear to warn about influencing all Presets functions.
Accept with
(Ok).
5. Change the Actual max. volume to correspond to the obtained calibration
maximum volume using
,
or the Volume editor.
6. Scroll to Actual min. volume and change the volume to correspond to the
obtained calibration minimum volume using
7. Press
,
or the Volume editor.
(Done) when the changes are ready.
8. A confirmation window appears. Accept with
Yes. (No) will return
you to the Calibrate menu.
9. The Defaults calibration setting has been changed.
10.Perform re-calibration of the device according to section E.4. to verify the
effect of new adjustment settings.
11.Repeat Steps 1-7 if necessary.
Note If the volume settings are not changed when (Done) is pressed,
a notification text will appear. Proceeding with (Ok) will return to the
Calibrate menu.
Note If only one of the volume settings has been changed when (Done) is
pressed, a notification text will appear. Proceeding with (Yes) will proceed
to confirmation and (No) will return to the Calibrate menu.
Thermo Fisher Scientific
Thermo Scientific E1-ClipTip User Manual 61
E.5.2 Creating Special Adjustments
The user can store up to 5 different special adjustments that can be used in
created programs to improve the application-specific device performance.
Created special adjustments only affect the programs that have been defined
to use the specific setting.
1.Select
(Settings) and press
2.Select Calibrate and press
(Select).
(Select).
3.Select Add new calibration and press
4. Select the type of calibration using
(Add).
and
: either One point or
Two point calibration.
5. Scroll to Name. Edit the default name using
(Rename). This opens
the character window where the cursor can be moved using the arrow keys.
Enter a highlighted character to the name by pressing
Press
6. Press
(Select).
(Done) when finished.
(Done).
7. In one point calibration set the Target volume using
,
or use the
Volume editor. After the Target volume set the Actual volume to correspond
to the obtained calibration volume.
8. In two point calibration the Target volume levels are fixed. Change the
Actual volumes to correspond to the obtained calibration volumes.
9. When the changes are ready press
(Done).
10.A window opens allowing the user to press the trigger.
11.A confirmation window appears. Accept with
(Yes).
12.A new adjustment setting has been saved to memory.
The stored special adjustments can be used in the Programs mode where they
can be connected to user-created programs (section D.2.3).
After connecting the special adjustment to a program, perform re-calibration
of the device according to section E.4.2 to verify the device performance.
Note The acceptance specifications in section E.4.2 apply only when water is
dispensed with the Forward pipetting technique.
Note The volume conversion factor Z in section E.4.3.1 applies only to water.
Conversion calculations for other liquids need to be done using the density
value of the dispensed liquid and applicable formulas.
62 Thermo Scientific E1-ClipTip User Manual
Thermo Fisher Scientific
Note The user may lock the special calibration setting with a password so
that the setting cannot be changed without authorization. See section D.3.1.4
for more information.
Caution The user must make sure that the special calibration setting is
suitable for the intended liquid transfer operation. Failing to do so may cause
serious dosing errors.
E.5.3 Editing Special Adjustments
The stored special adjustments can be edited by the user.
Caution When changing a stored special adjustment, the user-created
programs that have been defined to use the setting in question are affected.
1. Select
(Settings) and press
2.Select Calibrate and press
(Select).
(Select).
3. Select the adjustment setting to be edited from the list.
4. Highlight the
icon using
and
and press
(Edit).
5. Proceed according to section E.5.2. from Step 4 onwards.
6. Press
(Done) when the changes are ready.
7. A confirmation window appears. Accept with
(Yes).
8. After applying a stored adjustment setting in the Programs mode
(section D.2.3), perform re-calibration of the device according to section E.4.2
to verify the effect of new adjustment settings.
E.5.4 Deleting a Stored Adjustment Setting
The stored special adjustment can be deleted by the user.
Caution When deleting a special adjustment, the user-created programs that
have been defined to use the setting in question are affected. The programs
that have been defined to use the deleted adjustment will automatically be
changed to use the Default calibration adjustment setting. A notification of
the adjustment setting change will be displayed when the linked program is
used the next time. The notification will only appear once.
1. Select
(Settings) and press
2.Select Calibrate and press
(Select).
(Select).
3. Select the adjustment setting to be removed.
4. Highlight the
icon using
and
and press
5. A confirmation window appears. Accept with
Thermo Fisher Scientific
(Delete).
(Yes).
Thermo Scientific E1-ClipTip User Manual 63
F. TROUBLESHOOTING
The table below lists possible symptoms and their solutions.
Defect
Possible reason
Possible action
Leakage
Tip fitting incorrectly attached or loose
Re-attach/tighten the tip fitting or replace
with new tip fitting(s) using the tool.
ClipTip clips are bent
Discard the tip.
Tip fitting O-ring damaged
Change the O-ring.
Tip incorrectly attached
Attach firmly.
Foreign particles between the tip and
the tip cone
Clean the tip cones and attach new tips.
Insufficient amount of grease
on the cylinder and the O-ring or
foreign particles between the piston,
the O-ring and the cylinder
Single channel pipettes: Clean and
grease the O-ring and cylinder.
Incorrect operation
Follow the instructions carefully.
Tip incorrectly attached
Attach firmly.
Unsuitable calibration
Recalibrate according to the instructions.
Wrong tip
Use the correct tip.
Tip fitting incorrectly attached or loose
Tighten the tip fitting with the tool or
replace the tip fitting set.
Tip fitting incorrectly attached or loose
Open the clips manually with a small
sharp tool and pull out the tip. Tighten
the tip fitting with the tool or replace
the tip fitting set.
Battery too low
Recharge the battery.
Battery too low
Recharge the battery.
Pistons stuck
Single channel pipettes:
Remove the tip cone module. Move
the piston by hand or with the piston
removal tool.
Re-attach the module.
Inaccurate
dispensing
Tip not ejecting
No dispensing
Multichannel pipettes: Contact service.
Multichannel pipettes: Contact service.
Piston not connected in single
channel pipette
64 Thermo Scientific E1-ClipTip User Manual
Attach the module in service mode.
Thermo Fisher Scientific
Defect
Possible reason
Possible action
Not charging the
battery
Charger cable not attached properly
to the pipette
Detach and reconnect properly.
Charger not connected to
the mains voltage
Connect the charger to the mains voltage.
Pipette not placed properly into
the charging stand
Take the pipette out from the charging
stand and place it back again properly.
Charger cable not connected to
the charging stand
Connect the charger cable to
the charging stand.
Battery not installed
Install the battery following the
instructions in section A.3 Getting Started.
Note Do not perform troubleshooting procedures on the internal components
unless instructed by Thermo Fisher Scientific Technical Service personnel.
Warning If the corrective actions do not solve the problem, do not use
the pipette. Contact service.
Thermo Fisher Scientific
Thermo Scientific E1-ClipTip User Manual 65
Display
Notifications
The user interface of the E1-ClipTip electronic pipette displays various
messages in order to guide and assist the user. The most important
notifications are listed and explained below.
Display information
Probable cause
Solution
Battery power lost, press
Ok to set date and time.
Battery power was lost or battery
was empty.
Set the current date and time.
Invalid date. Press Ok.
Given date is not up-to-date.
Press Ok and set the current
date again.
Piston position error.
Press trigger to
empty tips.
Piston movement was not
accurate during aspirating or
dispensing due to mechanical
friction or blockage.
Press the trigger to remove the
friction or blockage. Caution!
If there is liquid in the tips, it
will be dispensed! Notice also
that the previous dispensed
dose may be inaccurate!
Contact service if the error
reappears continuously.
Piston position error.
Pipette is not serviced for a while
and mechanical friction prevents
accurate operation.
The piston needs to be
greased. Contact service.
Piston adjustment error.
Pipette is not serviced for a while
and mechanical friction prevents
reliable calibration of the pipette.
The piston needs to be
greased. Contact service.
Battery failure 1.
Battery is not connected.
Check that the connector of the
battery is attached properly.
Battery might be worn out,
outdated or damaged (battery
voltage was too low for
charging).
Contact service for a
replacement battery. Do
not use the pipette with a
defective battery.
Battery might be worn out,
outdated or damaged (battery
failed to charge).
Contact service for a
replacement battery. Do
not use the pipette with a
defective battery.
Battery failure 2.
66 Thermo Scientific E1-ClipTip User Manual
Thermo Fisher Scientific
Battery failure 3.
Battery might be worn out,
outdated or damaged (battery
overvoltage detected).
Contact service for a replacement
battery. Do not use the pipette
with a defective battery. Using
the pipette with a damaged
battery caused by battery failure 3
may cause a potential safety risk
(thermal runaway).
The position sensor
was not found.
Connect piston function in service
menu of single channel pipette
could not detect position sensor.
Repeat the Connect piston
function according to the
instructions. If it fails again,
then contact service.
Probable cause
Solution
Battery low. Plug to
charger.
Battery voltage level is low.
Charge the pipette. See the
instructions.
Special calibration of this
program has been deleted
and will be replaced with
the Default calibration.
The special calibration that
was used in the program in
question has been deleted.
If the special calibration was
deleted unintentionally, then
it has to be recreated. See the
instructions.
Dispensing might be
interrupted. Press trigger to
empty tips.
Battery power was lost
because battery is empty
or battery connector was
detached.
Press the trigger to the empty tips.
Caution! If there is liquid in the
tips, it will be dispensed! Notice
also that the previous dispensed
dose may be inaccurate!
Dispensing interrupted.
Press trigger to empty tips.
Pipette has been re-started
unintentionally because of
low battery level or some
other unexpected event.
Press the trigger to empty the tips.
Caution! If there is liquid in the
tips, it will be dispensed! Notice
also that the previous dispensed
dose may be inaccurate!
Changing Default
calibration affects all
Presets and Matrix
pipetting functions.
Default calibration has been
selected to be adjusted.
Be aware that Default calibration
is used in all Presets functions
and the Matrix function, and in all
of the user programs that are not
using special calibrations.
Display information
Thermo Fisher Scientific
Thermo Scientific E1-ClipTip User Manual 67
G. MAINTENANCE
G.1 Regular
and Preventive
Maintenance
For reliable daily operation, keep the E1-ClipTip pipette free of dust and away
from liquid spills.
Even though the E1-ClipTip pipette is constructed from high-quality materials,
you must immediately wipe away spilled saline solutions, solvents, acids or
alkaline solutions from outer surfaces to prevent damage.
It is recommended that you clean the case of the pipette periodically to
maintain its good appearance. A soft cloth dampened with 70% ethanol
solution is adequate. It is also recommended to check the tightness of
the tip fittings.
Caution Ethanol should not be sprayed directly on the pipette. This may
impair the transparency of the display window. Use only a moistened cloth.
Caution The user should verify the suitability of any other cleaning reagents
before proceeding. It is recommended to use only 70% ethanol for cleaning.
Caution Aggressive substances can damage the pipette or pipette parts.
Check for material compatibility before handling organic solvents and
aggressive chemicals with the pipette.
Warning Use a decontamination solution if any surfaces are contaminated
with biohazardous material.
Note It is recommended to use filter tips to avoid contamination of the inner
parts of the E1-ClipTip pipette.
68 Thermo Scientific E1-ClipTip User Manual
Thermo Fisher Scientific
G.2 Replacing Tip
Fitting and Sealing
Ring(s)
If the pipette is used daily, it should be checked every three months.
The servicing procedure starts with the disassembly of the pipette.
Caution The E1-ClipTip sealing rings 6 and 7 are wear parts. Clean them
after contamination, use of aggressive chemicals or heavy stress. Replace
the sealing rings if they are worn or damaged.
A
B
C
Picture G1.
Removing and replacing tip fitting(s) 5 and sealing ring(s) 6 and 7 in
single channel and multichannel pipettes
Single channel and multichannel models from 2-125µl to
50-1250µl with 96-format tip fitting
1. To remove the tip fitting, place the tool end without a metal rod of the tip
fitting tool C against the tip fitting. The tip fitting will guide the tool properly
into place. Turn the tool counterclockwise to untighten the tip fitting. Rotate
the tip fitting tool C and press the end with a metal rod through the tip fitting.
Take care not to damage the O-ring 7 inside the system with excess force.
Loosen the tip fitting with a tool and pull it out. Make sure that the O-ring 7
comes out with the tip fitting. See Picture G3 and Appendix 4.
Picture G2.
Thermo Fisher Scientific
Thermo Scientific E1-ClipTip User Manual 69
7
5
6
Picture G3.
2. Remove the used sealing ring 6, e.g., using the point of a disposable tip.
3. Place a new sealing ring by rolling it into place.
4. Make sure that the O-ring 7 is intact.
4. Place the tip fitting onto the tool end with a metal rod so that the screw
end is facing upwards. Place the O-ring 7 into the rod above the tip fitting or
make sure that the O-ring is at the bottom of the screw den of the cylinder.
Replace O-ring if necessary. Align the tool with the cylinder 9 and carefully
screw the tip fitting in by turning the tool clockwise. Stop the tightening when
you feel resistance. Rotate the tip fitting tool and tighten the tip fitting lightly
by using the end without metal rod.
Caution Be careful not to overtighten the the tip fitting. This may damage
the screw joint in the pipette.
Note If the tip fitting is tightened using the end with the metal rod of tip
fitting tool, the tool starts to slip. This may disform the tool and make it more
difficult to use.
Single channel model 0.5-12.5µl with 384-format tip fitting
1. Remove the tip fitting by hand turning it counterclockwise. Use the metal
rod end of the tip fitting tool C to remove the O-ring 7 from the cylinder den for
inspection. Replace the O-ring if necessary.
2. Place the tip fitting onto the tool end with a metal rod so that the screw
end is upwards. Place the O-ring 7 into the rod above the tip fitting or make
sure that the O-ring is at the bottom of the screw den of the cylinder. Replace
O-ring if necessary. Align the tool with the cylinder 9 and carefully screw the
tip fitting in by using two fingers until you feel resistance. Remove the tool
and tighten the tip fitting lightly by using two fingers.
Caution The user must make sure that the small tip fitting O-ring 7 is in place
before attaching the tip fitting. The tip fitting tool or a disposable tip can be
used to place the O-ring into place. Failing to check this may cause leakage
of the pipette.
Note The product package contains spare part sealing rings. Store them for
future maintenance purposes.
Multichannel models with 384-format tip fitting
The multichannel pipette models with 384-format tip fitting cannot be
disassembled by the user. See Chapter J: TECHNICAL SERVICE for more
information to service your pipette.
70 Thermo Scientific E1-ClipTip User Manual
Thermo Fisher Scientific
G.3 Disassembly
and Assembly
G.3.1 Single Channel Pipettes – Disassembly
1. Remove the tip fitting 5 as described in section G.2.
2. Remove the tip ejector 8 by rotating it counterclockwise.
3. Remove the cylinder 9 using a corresponding slot in the tool A. Turn
clockwise to open the screw joint and pull out the cylinder module
(Picture G4). Use the tool end 1 for models 12.5µl, 125µl and 1250µl and the
tool end 2 for model 300µl.
4.Select
(Settings) and press
(Select) in the main menu
of the pipette.
5.Select Connect piston from the list and press
Picture G4.
(Select) (Picture G5).
6. Press and hold the trigger down to drive out the piston.
7. Insert the piston tool B and pull out the piston 12. Release the trigger.
8. Turn the tip cone upside down and tap all the parts from it. You can check
the parts of each pipette model from the pictures in Appendix 4. Remember to
keep all the parts in order on the table for reassembly.
G.3.2 Single Channel Pipettes – Cleaning
Clean the piston, piston spring, and sealing rings with a dry lint-free cloth.
Clean the parts with a suitable cleaning solution by immersing item in a 70%
ethanol solution, for example, or wiping them with a dampened cloth. Dry
before assembly.
Grease the spring, sealing ring and piston with the lubricant that comes with
the pipette.
Picture G5.
Caution Do not grease the tip fitting sealing ring 6. This may collect dirt and
cause leaking of the pipette.
G.3.3 Single Channel Pipettes – Assembly
The pipette is assembled in the reverse order to disassembling. See the
model specific explosion pictures in Appendix 4 for assistance.
Model 0.5-12.5μl
1. Slide the spring 18, spring support 19 and sealing ring 20 on to the tube 17.
2. Slide the spring support 13, tube 14, bigger sealing ring 15, smaller sealing
ring 16 and previous tube assembly 17 on the piston 12.
3. Carefully slide the assembly into the cylinder 9.
4. Place the spring support 10 on to the other end of the spring 11.
5. Place the free end of the spring 11 against the spring support 13 installed
into the cylinder.
6. Carefully slide the assembly to the handle and screw the cylinder
clockwise until it stops.
Thermo Fisher Scientific
Thermo Scientific E1-ClipTip User Manual 71
7. Use the tool A to lightly tighten the cylinder into the handle.
8. Insert the tip ejector assembly 8 into the handle and turn clockwise until it
stops. You should feel a snap, when the tip ejector is correctly placed.
9. Insert the tip fitting 5 as described in section G.2.
10. Select
(Settings) and press
(Select) in the main menu of
the pipette.
11.Select Connect piston from the list and press
(Select).
12.Press and hold the trigger down to connect the motor coupler to the piston.
Models 2-125μl and 10-300μl
1. Place the spring support 10, spring 11, support 13 and sealing ring 15 on
the piston 12.
2. Carefully slide the assembly into the tip cone 9.
3. Insert the entire assembly into the handle and turn it tight by hand. Use
the tool A to lightly tighten the cylinder into the handle.
4. Insert the tip ejector assembly 8 into the handle and turn until the
assembly drops into the correct place. When correctly positioned, the tip
ejector only rotates 45°. Make sure that the tip ejector is turned in the
clockwise direction until it stops. You should feel a snap, when the tip ejector
is correctly placed.
5. Insert the tip fitting 5 as described in section G.2.
6.Select
(Settings) and press
(Select) in the main menu of
the pipette.
7.Select Connect piston from the list and press
(Select).
8. Press and hold the trigger down to connect the motor coupler to the piston.
Model 50-1250µl
1. Place the spring support 10, spring 11, support 13 and sealing ring 15 on
the piston assembly 12.
2. Carefully slide the assembly into the tip cone 9.
3. Insert the entire assembly into the handle and turn it tight by hand. Use
the tool A to lightly tighten the cylinder into the handle.
4. Insert the tip ejector assembly 8 into the handle and turn until the
assembly drops into the correct place. When correctly positioned, the tip
ejector only rotates 45°. Make sure that the tip ejector is turned in the
clockwise direction until it stops. You should feel a snap, when the tip ejector
is correctly placed.
5. Insert the tip fitting 5 as described in section G.2.
6. Select
(Settings) and press
(Select) in the main menu of
the pipette.
7.Select Connect piston from the list and press
(Select).
8. Press and hold the trigger down to connect the motor coupler to the piston.
72 Thermo Scientific E1-ClipTip User Manual
Thermo Fisher Scientific
Caution The user must make sure that the piston sealing rings are intact
before assembly and replace them if necessary. Failing to check this may
cause leakage of the pipette.
Caution The user must make sure that the small tip fitting O-ring 7 is in place
before attaching the tip fitting. The tip fitting tool or a disposable tip can be
used to place the O-ring into place. Failing to check this may cause leakage of
the pipette.
G.3.4 Multi Channel Pipettes
The user may remove and clean the tip fittings and sealing rings of 96-format
multichannel pipettes and change them as described in section G.2. if found
necessary.
384-format multichannel pipettes cannot be disassembled by the user. Only
the outside surfaces can be cleaned.
In case of malfunctioning or a suspicion of damage to the lower parts of
the pipette, contact the closest service representative (Chapter J. TECHNICAL
SERVICE).
Caution Servicing of the multichannel pipette handles should only be
performed by trained and authorized personnel. Disassembly of multichannel
pipettes may cause malfunctioning of the device if not executed by
a professional.
Thermo Fisher Scientific
Thermo Scientific E1-ClipTip User Manual 73
G.4
Decontamination
Procedure
The display, keypad, handle and lower parts of the E1-ClipTip pipette as well as
the tip fittings of 384-model multichannels can be wiped with decontaminants
that are recommended below. These parts must not be immersed in liquid.
Removable tip fittings (see sections G2 and G3 for disassembly) can
be immersed in the decontaminant solution according to the table below.
Afterwards the parts must be thoroughly rinsed with distilled water and
allowed to dry before reassembling.
Recommended decontamination solutions for the E1-ClipTip pipette.
Display and
keypad
Ethanol 70%
Virkon solution 1%
Sodium hypochlorite (5%)
Glutaraldehyde (2.5%)
Hydrogen peroxide (7.5%)
Handle
Lower parts
XX
X
X
X
X
X
X
-X
Tip fittings
and sealing
rings
X X
X
X
X
X
X
-X
X
: The parts are chemically resistant to the decontaminant.
-
: The parts are not chemically resistant to the decontaminant.
Caution The effectiveness of the decontamination procedure must be verified
by the user.
G.5 Autoclaving
Steam sterilization should be performed at 121°C (252°F) and 2 ata for
20 minutes. Sterilization bags may be used if needed.
Steam sterilization can be performed on the following parts:
With single channel pipettes
•• cylinder module
•• piston assembly
•• tip ejector assembly
•• tip fitting (both 96-format and 384-format tip fitting) and sealing rings
74 Thermo Scientific E1-ClipTip User Manual
Thermo Fisher Scientific
Caution The cylinder should be kept inside the tip ejector assembly during
autoclaving. The tip fitting should be kept detached.
With multichannel pipettes:
•• tip fittings (only 96-format tip fittings) and sealing rings
Other parts cannot be steam sterilized.
Caution The user must verify the effectiveness of the autoclaving.
After autoclaving, the tip cone and tip fitting must be cooled to room
temperature for at least two hours before assembly and any operations.
Before pipetting, make sure that the tip cone and tip fitting are dry.
G.6 Disposal of
Materials
G.6.1 Disposal of the Materials
Follow laboratory and country-specific procedures for the disposal of
biohazardous or radioactive waste. Refer to local regulations for the disposal
of infectious material.
Warning The tips can be potentially infectious. Dispose of all used
disposable tips as biohazardous waste.
Note The pipette should be regularly serviced according to the User Manual.
The pipette calibration and functioning must be checked after maintenance.
Use only original Thermo Scientific spare parts and ClipTips.
Avoid excess grease. Use only the grease provided with the pipette.
Thermo Fisher Scientific
Thermo Scientific E1-ClipTip User Manual 75
The pipette should be checked at the beginning of each day. Particular
attention should be paid to the tip cone.
It is recommended to 70% ethanol for wiping the pipette.
If the pipette is used daily, it is recommended to service the pipette every
three months.
G.6.2 Disposal of the Pipette
Follow the guidelines below for the disposal of the E1-ClipTip pipette .
Warning Decontaminate the pipette before disposal. Refer to section G.4.
Follow laboratory and country-specific procedures for biohazardous or
radioactive waste disposal.
Warning The used lithium (Li-ion) battery is regulated waste and must be
disposed of according to local regulations.
Dispose of the instrument according to the legislation stipulated by the
local authorities concerning take-back of electronic equipment and waste.
The procedures vary by country.
Pollution degree: 2 according to IEC 60664-1 *
Method of disposal:
• Electronic waste
• Contaminated waste
• (Infectious waste)
Regarding the original packaging and packing materials, use the recycling
operators known to you.
For more information, contact your local Thermo Fisher Scientific
representative.
*) The pollution degree describes the amount of conductive pollution present
in the operating environment. Pollution degree 2 assumes that normally only
nonconductive pollution, such as dust, occurs with the exception of occasional
conductivity caused by condensation.
G.7 Spare Parts
76 Thermo Scientific E1-ClipTip User Manual
The spare parts available for each pipette model can be found in Appendix 4.
Contact your local Thermo Fisher Scientific dealer for part orders.
Thermo Fisher Scientific
H. TECHNICAL DATA
Battery
Type:
Capacity:
Charging time:
Charging temperature:
Li-ion battery
1280 mAh
Approx. 2 h
0 to +40°C
Power supply unit
Type:
Input voltage:
Output voltage:
Switching power supply
100-240 V ~50/60 Hz, 400 mA
5.0 V 800 mA max.
Display
Type:
Size:
Resolution:
Color TFT-LCD
2.2”
176 x 220 pixels
E1-ClipTip pipette
Weight with battery
(tip not included):
Operating temperature:
Air humidity during operation:
Storage temperature:
Single channel pipette 190 g max.
Multichannel pipette 320 g max.
+15 to +35°C
20 to 85% rel. humidity
≤ 1 month -20 to +45°C
> 1 month -10 to +35°C
It is recommended to charge the pipette
every two months even if the pipette is
not used.
Thermo Fisher Scientific
Thermo Scientific E1-ClipTip User Manual 77
Materials
E1-ClipTip Pipettes
Material
Component
External surfaces of the upper parts:
PA
PMMA
ABS
polyamide
polymethyl methacrylate
acrylonitrile butadiene styrene
Exterior and interior of the lower parts:
PEI
PA
PVDF
EPDM
FVM
Steel
POM
PEEK
PVC
PP
Silicone
Brass
polyetherimide
polyamide
polyvinyldenfluoride
ethylene-propylene-diene rubber
fluorosilicone rubber
stainless steel
polyoxymethylene
polyether ether ketone
polyvinyl chloride
polypropylene
ClipTip Tips
Tip
Filters
78 Thermo Scientific E1-ClipTip User Manual
PP
PE
polypropylene
polyethylene
Thermo Fisher Scientific
I.WARRANTY
Thermo Scientific E1-ClipTip Electronic Pipette
Warranty Certificate
All Thermo Scientific™ E1-ClipTip™ electronic pipettes are guaranteed to be free of defects in material
and workmanship for a period of two years from the date of purchase.
Register Online at www.thermoscientific.com/pipettewarranty
Thermo Fisher Scientific will replace or repair the defective product upon prompt notification in compliance
with the following conditions. The warranty against defects in workmanship or materials will be honored
as long as the product was used in compliance with the instructions for use and care. The warranty does
not apply to products exposed to physical or chemical abuse.
The Warranty is subject to the following conditions
1.A 2-year warranty applies for pipettes that have been registered, and a 1-year warranty for
non-registered ones.
2.The warranty registration certificate and proof of purchase MUST be presented to Thermo Fisher Scientific
or its distributor when making a claim for replacement.
3.The customer must give notice to Thermo Fisher Scientific or its distributor in writing immediately after
discovery of the defect.
4.If requested, the product must be returned to Thermo Fisher Scientific or its distributor. The product
must be adequately packed and fully insured, and all shipping fees must be paid.
5.Our responsibility extends only to product defects. The warranty does not apply if, in the opinion of
Thermo Fisher Scientific, the product has been damaged by accident, misuse or chemical or physical
abuse – or by service or modifications by someone other than a service provider of Thermo Fisher Scientific.
6.During the Warranty period non-wearable parts are covered 100%. Non-wearable parts are effectively
parts that are designed to last for the life of the product. Wearable parts are parts that will wear under
normal operation (such as O-rings and battery). These parts are not covered under the Warranty.
7.Routine cleaning and recalibration are not covered under the terms of the Warranty.
8.Validity may vary by country. To check your country specific warranty claims, go to
www.thermoscientific.com/pipettewarranty.
Quality Statement
We hereby certify, that all Thermo Scientific E1-ClipTip pipettes released for delivery have been
manufactured and inspected according to our approved documents and procedures. During inspection
pipettes have fulfilled the Thermo Fisher Scientific’s performance specifications, which conform to
ISO 8655 standards. Before released for delivery, all pipettes are factory calibrated using purified water
under conditions given in the calibration report and adjusted to give the volumes as specified. Calibration
balances are regularly serviced and checked with weights traceable to national and international
standards. As a mark of this, a calibration report covering the test results is delivered together with
the pipette. Thermo Fisher Scientific Oy’s operation system is certified by a third party auditor and
conforms to the quality system standard ISO 9001 and environmental system standard ISO 14001.
WARNING! MOST COUNTRIES PROHIBIT THE SHIPMENT OF MATERIALS CONTAMINATED BY
RADIOACTIVITY OR HAZARDOUS ORGANIC OR CHEMICAL COMPOUNDS WITHOUT A PERMIT.
ALL PIPETTES MUST BE PROPERLY DECONTAMINATED BEFORE THEY ARE RETURNED.
Thermo Fisher Scientific
Thermo Scientific E1-ClipTip User Manual 79
J. TECHNICAL SERVICE
In addition to normal maintenance, it is recommended to service the
instrument regularly at least every 12 months by the manufacturer’s trained
service engineers. This ensures that the product is properly maintained and
provides trouble-free functionality. Contact the Thermo Fisher Scientific
technical service department for more details. See the list below for
contact information.
J.1 Packing for
Service
When sending the pipette for service, follow the guidelines presented below.
Warning Health risk from contaminated device. It is important that the
instrument is thoroughly decontaminated before it is removed from the
laboratory or any servicing is performed on it. Guidelines for decontamination
can be found in Chapter G: MAINTENANCE.
When you ship the instrument for service, remember to:
•• Inform about the use of hazardous materials.
•• Use the original packaging to ensure that no damage will occur to the
instrument during shipping. Any damage will incur additional labor charges.
•• Enclose a dated and signed decontamination declaration (request from
your service provider) inside and attached to the outside of the package,
in which you return your instrument (or other items).
•• Enclose the return goods authorization number (RGA) given by your
Thermo Fisher Scientific representative.
•• Indicate the fault after you have contacted your local Thermo
Fisher Scientific representative or Thermo Fisher Scientific’s technical
service department.
Refer to Chapter H: TECHNICAL DATA for details on storage temperatures.
80 Thermo Scientific E1-ClipTip User Manual
Thermo Fisher Scientific
J.2 Contact
Information
Technical Product Support
For technical product support, contact your local Thermo Fisher Scientific
dealer or the technical customer support.
USA:
Email: [email protected]
Europe and APAC:
Email: [email protected]
Major service locations and countries:
Australia
Thermo Fisher Scientific
Attn: Pipette Service Lab
4 Caribbean Drive
Scoresby, Victoria 3179
Phone: 1300 735 292
Email: [email protected]
Finland
Thermo Fisher Scientific
Unity Lab Services
Attn: Pipette Service
Rahtikatu 2
80100 Joensuu
Phone: +358 9 329100
Accredited pipette calibration available (FINAS)
France
Thermo Fisher Scientific
Unity Lab Services
Attn: Pipette Service Lab
Bd Sebastien Brant – BP 50111
F 67403 Illkirch Cedex
Phone: +33 3 88 67 53 30
Email: [email protected]
Accredited pipette calibration available (COFRAC)
Thermo Fisher Scientific
Thermo Scientific E1-ClipTip User Manual 81
Germany
Thermo Fisher Scientific
Unity Lab Services
Attn: Pipette Service Lab
Robert-Bosch-Strasse 1
D-63505 Langenselbold
Phone: +49 6184 906000
Email: [email protected]
Accredited pipette calibration available (DKD)
Japan
Thermo Fisher Scientific
Attn: Pipette Service Lab
C-2F, 3-9 Moriya-Cho, Kanagawa-ku
Yokohama-shi, Kanagawa-ken
221-0022
Phone: +81 45 453 9227
Email: [email protected]
Accredited pipette calibration available (JAB)
Netherlands
Thermo Fisher Scientific
Unity Lab Services
Industrieweg 13
4051 BW
Ochten
Phone: +31 204 877 030
Email: [email protected]
Spain
Thermo Fisher Scientific
Unity Lab Services
C / Luis 1, No 9
28031 Madrid
Phone: +34 91 380 67 33
Email: [email protected]
Sweden
Thermo Fisher Scientific
Unity Lab Services
Södra Långebergsgatan 30
Västra Frölunda
SE 421 32
Phone: +46 31 352 00
Email: [email protected]
82 Thermo Scientific E1-ClipTip User Manual
Thermo Fisher Scientific
Switzerland
Thermo Fisher Scientific
Unity Lab Services
Keltenweg 35
4460 Gelterkinden
Phone: +41 56 618 41 21
Email: [email protected]
United Kingdom
Thermo Fisher Scientific
Attn: Pipette Service Lab
Bishop Meadow Road
Loughborough, Leicestershire
LE11 5RG
Phone: +44 (0) 1509 555 494
Email: [email protected]
United States
Thermo Fisher Scientific
Unity Lab Services
Attn: Pipette Service Lab
2200 Friars Drive
Hudson, NH 03051
Phone: 800-345-0206
Email: [email protected]
If your country is not listed, refer to the Unity Lab Services web page.
http://www.unitylabservices.com/
or contact your local Thermo Fisher Scientific dealer to receive contact
information to your closest authorized Thermo Fisher Scientific pipette
service.
Thermo Fisher Scientific
Thermo Scientific E1-ClipTip User Manual 83
Appendix 1. Conversion Table
Value of the conversion factor Z (µl/mg), as a function of temperature and pressure, for distilled water.
Temperature
°C
Air pressure
kPa
80859095100101.3
105
15.0 1.00171.00181.00191.00191.00201.00201.0020
15.5 1.00181.00191.00191.00201.00201.00201.0021
16.0 1.00191.00201.00201.00211.00211.00211.0022
16.5 1.00201.00201.00211.00211.00221.00221.0022
17.0 1.00211.00211.00221.00221.00231.00231.0023
17.5 1.00221.00221.00231.00231.00241.00241.0024
18.0 1.00221.00231.00231.00241.00251.00251.0025
18.5 1.00231.00241.00241.00251.00251.00261.0026
19.0 1.00241.00251.00251.00261.00261.00271.0027
19.5 1.00251.00261.00261.00271.00271.00281.0028
20.0 1.00261.00271.00271.00281.00281.00291.0029
20.5 1.00271.00281.00281.00291.00291.00301.0030
21.0 1.00281.00291.00291.00301.00311.00311.0031
21.5 1.00301.00301.00311.00311.00321.00321.0032
22.0 1.00311.00311.00321.00321.00331.00331.0033
22.5 1.00321.00321.00331.00331.00341.00341.0034
23.0 1.00331.00331.00341.00341.00351.00351.0036
23.5 1.00341.00351.00351.00361.00361.00361.0037
24.0 1.00351.00361.00361.00371.00371.00381.0038
24.5 1.00371.00371.00381.00381.00391.00391.0039
25.0 1.00381.00381.00391.00391.00401.00401.0040
25.5 1.00391.00401.00401.00411.00411.00411.0042
26.0 1.00401.00411.00411.00421.00421.00431.0043
26.5 1.00421.00421.00431.00431.00441.00441.0044
27.0 1.00431.00441.00441.00451.00451.00451.0046
27.5 1.00451.00451.00461.00461.00471.00471.0047
28.0 1.00461.00461.00471.00471.00481.00481.0048
28.5 1.00471.00481.00481.00491.00491.00501.0050
29.0 1.00491.00491.00501.00501.00511.00511.0051
29.5 1.00501.00511.00511.00521.00521.00521.0053
30.0 1.00521.00521.00531.00531.00541.00541.0054
84 Thermo Scientific E1-ClipTip User Manual
Thermo Fisher Scientific
Appendix 2. Manufacturer Factory Specification Limits
E1-ClipTip Single Channel models
Cat. No.
Range
Volume
µl
4670000 0.5–12.5
12.50
6.25
1.25
4670020 2.0–125.0
125.00
62.50
12.50
4670030 10.0–300.0 300.00
150.00
30.00
4670040 50.0–1250.0 1250.00
625.00
125.00
Inaccuracy
µl
%
Imprecision
std µl CV%
±0.125
±0.063
±0.050
±0.75
±0.375
±0.30
±1.8
±0.9
±0.5
±6.0
±3.125
±3.0
0.050
0.050
0.050
0.25
0.125
0.10
0.45
0.225
0.15
1.625
0.813
0.6
±1.00
±1.00
±4.00
±0.60
±0.60
±2.40
±0.60
±0.60
±1.67
±0.48
±0.50
±2.40
ClipTip
0.40
ClipTip 12.5
0.80
4.00
0.20
ClipTip 200
0.20
0.80
0.15
ClipTip 300
0.15
0.50
0.13
ClipTip 1250
0.13
0.48
E1-ClipTip Multichannel models
Cat. No.
Channels Range
4671000 8-ch
0.5–12.5
4671040 8-ch
2.0–125.0
4671070 8-ch
10.0–300.0
4671100 8-ch
50.0–1250.0
4671010 12-ch 0.5–12.5
4671050 12-ch 2.0–125.0
4671080 12-ch 10.0–300.0
Thermo Fisher Scientific
Volume
µl
12.50
6.25
1.25
125.00
62.50
12.50
300.00
150.00
30.00
1250.00
625.00
125.00
12.50
6.25
1.25
125.00
62.50
12.50
300.00
150.00
30.00
Inaccuracy
µl
%
±0.313
±0.156
±0.150
±2.50
±1.25
±1.00
±6.0
±3.0
±1.5
±18.0
±9.375
±5.0
±0.313
±0.156
±0.150
±2.50
±1.25
±1.00
±6.0
±3.0
±1.5
±2.50
±2.50
±12.00
±2.00
±2.00
±8.00
±2.00
±2.00
±5.00
±1.44
±1.50
±4.00
±2.50
±2.50
±12.00
±2.00
±2.00
±8.00
±2.00
±2.00
±5.00
Imprecision
std µl CV%
0.200
0.150
0.150
0.75
0.80
0.50
1.8
1.2
0.6
7.5
3.75
1.88
0.200
0.150
0.150
0.75
0.80
0.50
1.8
1.2
0.6
ClipTip
1.60 ClipTip 12.5
2.40
12.00
0.60 ClipTip 200
1.28
4.00
0.60 ClipTip 300
0.80
2.00
0.60 ClipTip 1250
0.60
1.50
1.60 ClipTip 12.5
2.40
12.00
0.60 ClipTip 200
1.28
4.00
0.60 ClipTip 300
0.80
2.00
Thermo Scientific E1-ClipTip User Manual 85
4671090 12-ch 30.0–850.0
4671020 16-ch 0.5–12.5
4671030 16-ch 1.0–30.0
4671060 16-ch 2.0–125.0
850.00
425.00
85.00
12.50
6.25
1.25
30.00
15.00
3.00
125.00
62.50
12.50
±12.75
±6.375
±4.0
±0.313
±0.156
±0.150
±0.60
±0.30
±0.30
±2.50
±1.25
±1.00
±1.50
±1.50
±4.71
±2.50
±2.50
±12.00
±2.00
±2.00
±10.00
±2.00
±2.00
±8.00
5.1
2.55
1.7
0.200
0.150
0.150
0.27
0.30
0.21
0.75
0.80
0.50
0.60 ClipTip 1000
0.60
2.00
1.60 ClipTip 12.5
2.40 384
12.00
0.90 ClipTip 30
2.00 384
7.00
0.60 ClipTip 125
1.28 384
4.00
E1-ClipTip Adjustable Tip Spacing Equalizer Multichannel models
Cat. No.
Channels
Range
4672050 96 format, 8-ch 2.0–125.0
4672080 96 format, 8-ch 10.0–300.0
4672090 96 format, 6-ch 50.0–1250.0
4672100 96 format, 8-ch 50.0–1250.0
4672010 384 format, 8-ch 0.5–12.5
4672030 384 format, 8-ch 1.0–30.0
4672060 384 format, 8-ch 2.0–125.0
4672020 384 format, 12-ch0.5–12.5
4672040 384 format, 12-ch1.0–30.0
4672070 384 format, 12-ch2.0–125.0
86 Thermo Scientific E1-ClipTip User Manual
Volume
µl
Inaccuracy
µl
%
Imprecision
std µl CV%
125.00
62.50
12.50
300.00
150.00
30.00
1250.00
625.00
125.00
1250.00
625.00
125.00
12.50
6.25
1.25
30.00
15.00
3.00
125.00
62.50
12.50
12.50
6.25
1.25
30.00
15.00
3.00
125.00
62.50
12.50
±2.50
±1.25
±1.00
±6.0
±3.0
±1.5
±18.00
±9.375
±5.0
±18.00
±9.375
±5.0
±0.313
±0.156
±0.150
±0.60
±0.30
±0.30
±2.50
±1.25
±1.00
±0.313
±0.156
±0.150
±0.60
±0.30
±0.30
±2.50
±1.25
±1.00
0.75
0.80
0.50
1.8
1.2
0.6
7.5
3.75
1.88
7.5
3.75
1.88
0.200
0.150
0.150
0.27
0.30
0.21
0.75
0.80
0.50
0.200
0.150
0.150
0.27
0.30
0.21
0.75
0.80
0.50
±2.00
±2.00
±8.00
±2.00
±2.00
±5.00
±1.44
±1.50
±4.00
±1.44
±1.50
±4.00
±2.50
±2.50
±12.00
±2.00
±2.00
±10.00
±2.00
±2.00
±8.00
±2.50
±2.50
±12.00
±2.00
±2.00
±10.00
±2.00
±2.00
±8.00
ClipTip
0.60 ClipTip 200
1.28
4.00
0.60 ClipTip 300
0.80
2.00
0.60 ClipTip 1250
0.60
1.50
0.60 ClipTip 1250
0.60
1.50
1.60 ClipTip 12.5
2.40384
12.00
0.90 ClipTip 30
2.00384
7.00
0.60 ClipTip 125
1.28384
4.00
1.60 ClipTip 12.5
2.40384
12.00
0.90 ClipTip 30
2.00384
7.00
0.60 ClipTip 125
1.28384
4.00
Thermo Fisher Scientific
Appendix 3. ISO8655 Calibration Specification Limits
E1-ClipTip Single Channel models
Cat. No.
Range
Volume
µl
4670000
0.5–12.5
12.50
6.25
1.25
4670020 2.0–125.0
125.00
62.50
12.50
4670030 10.0–300.0 300.00
150.00
30.00
4670040 50.0–1250.0 1250.00
625.00
125.00
Inaccuracy
µl
%
±0.200
±0.200
±0.200
±1.60
±1.60
±1.60
±4.0
±4.0
±4.0
±16.00
±16.00
±16.00
±1.60
±3.20
±16.00
±1.28
±2.56
±12.80
±1.33
±2.67
±13.33
±1.28
±2.56
±12.80
Imprecision
ClipTip
std µl CV%
0.100 0.80
ClipTip 12.5
0.100 1.60
0.100 8.00
0.60 0.48
ClipTip 200
0.60 0.96
0.60 4.80
1.50 0.50
ClipTip 300
1.50 1.00
1.50 5.00
6.0
0.48
ClipTip 1250
6.0 0.96
6.0 4.80
E1-ClipTip Multichannel models
Cat. No. Channels Range
4671000 8-ch
0.5–12.5
4671040 8-ch
2.0–125.0
4671070 8-ch
10.0–300.0
4671100 8-ch
50.0–1250.0
4671010 12-ch 0.5–12.5
4671050 12-ch 2.0–125.0
4671080 12-ch 10.0–300.0
Thermo Fisher Scientific
Volume
µl
Inaccuracy
µl
%
Imprecision
std µl CV%
12.50
6.25
1.25
125.00
62.50
12.50
300.00
150.00
30.00
1250.00
625.00
125.00
12.50
6.25
1.25
125.00
62.50
12.50
300.00
150.00
30.00
±0.400
±0.400
±0.400
±3.20
±3.20
±3.20
±8.0
±8.0
±8.0
±32.00
±32.00
±32.00
±0.400
±0.400
±0.400
±3.20
±3.20
±3.20
±8.0
±8.0
±8.0
0.200
0.200
0.200
1.20
1.20
1.20
3.0
3.0
3.0
12.0
12.0
12.0
0.200
0.200
0.200
1.20
1.20
1.20
3.0
3.0
3.0
±3.20
±6.40
±32.00
±2.56
±5.12
±25.60
±2.67
±5.33
±26.67
±2.56
±5.12
±25.60
±3.20
±6.40
±32.00
±2.56
±5.12
±25.60
±2.67
±5.33
±26.67
ClipTip
1.60 ClipTip 12.5
3.20
16.00
0.96 ClipTip 200
1.92
9.60
1.00 ClipTip 300
2.00
10.00
0.96 ClipTip 1250
1.92
9.60
1.60 ClipTip 12.5
3.20
16.00
0.96 ClipTip 200
1.92
9.60
1.00 ClipTip 300
2.00
10.00
Thermo Scientific E1-ClipTip User Manual 87
4671090 12-ch 30.0–850.0
4671020 16-ch 0.5–12.5
4671030 16-ch 1.0–30.0
4671060 16-ch 2.0–125.0
850.00
425.00
85.00
12.50
6.25
1.25
30.00
15.00
3.00
125.00
62.50
12.50
±16.00
±16.00
±16.00
±0.400
±0.400
±0.400
±1.00
±1.00
±1.00
±3.20
±3.20
±3.20
±1.88
±3.76
±18.82
±3.20
±6.40
±32.00
±3.33
±6.67
±33.33
±2.56
±5.12
±25.60
6.0
6.0
6.0
0.200
0.200
0.200
0.40
0.40
0.40
1.20
1.20
1.20
0.71 ClipTip 1000
1.41
7.06
1.60 ClipTip 12.5
3.20 384
16.00
1.33 ClipTip 30
2.67 384
13.33
0.96 ClipTip 200
1.92
9.60
E1-ClipTip Adjustable Tip Spacing Equalizer Multichannel models
Cat. No.
Channels
Range
4672050 96 format, 8-ch 2.0–125.0
4672080 96 format, 8-ch 10.0–300.0
4672090 96 format, 6-ch 50.0–1250.0
4672100 96 format, 8-ch 50.0–1250.0
4672010 384 format, 8-ch 0.5–12.5
4672030 384 format, 8-ch 1.0–30.0
4672060 384 format, 8-ch 2.0–125.0
4672020 384 format, 12-ch0.5–12.5
4672040 384 format, 12-ch1.0–30.0
4672070 384 format, 12-ch2.0–125.0
88 Thermo Scientific E1-ClipTip User Manual
Volume
µl
Inaccuracy
µl
%
Imprecision
std µl CV%
125.00
62.50
12.50
300.00
150.00
30.00
1250.00
625.00
125.00
1250.00
625.00
125.00
12.50
6.25
1.25
30.00
15.00
3.00
125.00
62.50
12.50
12.50
6.25
1.25
30.00
15.00
3.00
125.00
62.50
12.50
±3.20
±3.20
±3.20
±8.0
±8.0
±8.0
±32.00
±32.00
±32.00
±32.00
±32.00
±32.00
±0.400
±0.400
±0.400
±1.00
±1.00
±1.00
±3.20
±3.20
±3.20
±0.400
±0.400
±0.400
±1.00
±1.00
±1.00
±3.20
±3.20
±3.20
1.20
1.20
1.20
3.0
3.0
3.0
12.0
12.0
12.0
12.0
12.0
12.0
0.200
0.200
0.200
0.40
0.40
0.40
1.20
1.20
1.20
0.200
0.200
0.200
0.40
0.40
0.40
1.20
1.20
1.20
±2.56
±5.12
±25.60
±2.67
±5.33
±26.67
±2.56
±5.12
±25.60
±2.56
±5.12
±25.60
±3.20
±6.40
±32.00
±3.33
±6.67
±33.33
±2.56
±5.12
±25.60
±3.20
±6.40
±32.00
±3.33
±6.67
±33.33
±2.56
±5.12
±25.60
ClipTip
0.96 ClipTip 200
1.92
9.60
1.00 ClipTip 300
2.00
10.00
0.96 ClipTip 1250
1.92
9.60
0.96 ClipTip 1250
1.92
9.60
1.60 ClipTip 12.5
3.20384
16.00
1.33 ClipTip 30
2.67384
13.33
0.96 ClipTip 125
1.92384
9.60
1.60 ClipTip 12.5
3.20384
16.00
1.33 ClipTip 30
2.67384
13.33
0.96 ClipTip 125
1.92384
9.60
Thermo Fisher Scientific
Appendix 4. Assembly and Spare Parts
* Available as a spare part. See model specific order numbers.
* 1062500
Service tool
* 1062800
Service tool
A
* 2215870 Tip fitting tool
C
B
* 12905600
Charger + Adapter EUR
  * 5.Tip fitting
* 12905590
Battery Lithium-Ion E1
Multichannel pipettes
7*
5*
6*
96-format models 125 µl and 300 µl
5. 11072080
6. 2214920
7. 1030060
Tip fitting 300
Tip fitting sealing ring 300 (12 pcs)
Sealing ring small 300
96-format models 850 µl and 1250 µl
5. 11072240
6. 2214945
7. 1030060
Thermo Fisher Scientific
Tip fitting 1250
Tip fitting sealing ring 1250 (12 pcs)
Sealing ring small 1000
Thermo Scientific E1-ClipTip User Manual 89
Single channel pipettes
0.5–12.5 µl
10
2–125 µl
* 42
* 42
10
11
11
8
8
12
12
7*
7*
5*
5*
0.5–12.5 µl
5.1064960
7.1030060
15.1030170
16.1030060
42.2215610
5–125 µl
5.11072080
6.2214930 3 pcs
7.1030060
15.1033380
42.2215590
6*
13
14
13
15*
16*
15*
17
18
9
19
20*
9
* 42.Tip cone assembly
90 Thermo Scientific E1-ClipTip User Manual
Thermo Fisher Scientific
10–300 µl
50–1250 µl
* 42
* 42
10
10
11
11
8
8
12
12
7*
7*
5*
5*
6*
6*
13
13
15*
15*
9
9
Thermo Fisher Scientific
10–300 µl
5.11072080
6.2214930 3 pcs
7.1030060
15.1033180
42.2215580
50–1250 µl
5.11072200
6.2215540 3 pcs
7.1033410
15.1033420
42.2215570
Thermo Scientific E1-ClipTip User Manual 91
Appendix 5. ClipTip System Compatibility Chart
ClipTip 125 384
ClipTip 30 384
ClipTip 12.5 384
ClipTip 1250
ClipTip 1000
ClipTip 300
ClipTip 200
ClipTip 50
Description
ClipTip 20
Order No.
ClipTip 12.5
ClipTip
F1-ClipTip Manual Pipettes
Single channels
4641170
4641180
4641190
4641200
4641210
4641220
4641230
4651170
4651180
4651190
4651200
4651210
4651220
4651230
4651240
4651250
4651260
4651270
F1-ClipTip 1-10µl
F1-ClipTip 2-20µl
F1-ClipTip 5-50µl
F1-ClipTip 10-100µl
F1-ClipTip 20-200µl
F1-ClipTip 30-300µl
F1-ClipTip 100-1000µl
F1-ClipTip 1µl fix vol
F1-ClipTip 5µl fix vol
F1-ClipTip 10µl fix vol
F1-ClipTip 20µl fix vol
F1-ClipTip 25µl fix vol
F1-ClipTip 50µl fix vol
F1-ClipTip 100µl fix vol
F1-ClipTip 200µl fix vol
F1-ClipTip 250µl fix vol
F1-ClipTip 500µl fix vol
F1-ClipTip 1000µl fix vol
4661110
4661120
4661130
4661140
4661150
4661160
4661170
4661180
F1-ClipTip 8-ch 1-10µl
F1-ClipTip 8-ch 5-50µl
F1-ClipTip 8-ch 10-100µl
F1-ClipTip 8-ch 30-300µl
F1-ClipTip 12-ch 1-10µl
F1-ClipTip 12-ch 5-50µl
F1-ClipTip 12-ch 10-100µl
F1-ClipTip 12-ch 30-300µl
•
•
•
•
•
•
•
•
•
•
•
•
•
•
•
•
•
•
Multichannels
92 Thermo Scientific E1-ClipTip User Manual
•
•
•
•
•
•
•
•
Thermo Fisher Scientific
ClipTip 125 384
ClipTip 30 384
ClipTip 12.5 384
ClipTip 1250
ClipTip 1000
ClipTip 300
ClipTip 200
ClipTip 50
Description
ClipTip 20
Order No.
ClipTip 12.5
ClipTip
E1-ClipTip Eletronic Pipettes
Single channels
4670000
4670020
4670030
4670040
E1-ClipTip 0.5-12.5 µl
E1-ClipTip 2-125 µl
E1-ClipTip 10-300 µl
E1-ClipTip 50-1250 µl
4671000
4671040
4671070
4671100
4671010
4671050
4671080
4671090
4671020
4671030
4671060
E1-ClipTip 8-ch 0.5-12.5 µl
E1-ClipTip 8-ch 2-125 µl
E1-ClipTip 8-ch 10-300 µl
E1-ClipTip 8-ch 50-1250 µl
E1-ClipTip 12-ch 0.5-12.5 µl
E1-ClipTip 12-ch 2-125 µl
E1-ClipTip 12-ch 10-300 µl
E1-ClipTip 12-ch 30-850 µl
E1-ClipTip 16-ch 0.5-12.5 µl
E1-ClipTip 16-ch 1-30 µl
E1-ClipTip 16-ch 2-125 µl
4672090
4672050
4672080
4672100
4672010
4672030
4672060
4672020
4672040
4672070
E1-ClipTip Equalizer 6-ch 50-1250 µl
E1-ClipTip Equalizer 8-ch 2-125 µl
E1-ClipTip Equalizer 8-ch 10-300 µl
E1-ClipTip Equalizer 8-ch 50-1250 µl
E1-ClipTip Equalizer 384 8-ch 0.5-12.5 µl
E1-ClipTip Equalizer 384 8-ch 1-30 µl
E1-ClipTip Equalizer 384 8-ch 2-125 µl
E1-ClipTip Equalizer 384 12-ch 0.5-12.5 µl
E1-ClipTip Equalizer 384 12-ch 1-30 µl
E1-ClipTip Equalizer 384 12-ch 2-125 µl
•
•
•
•
Multichannels
•
•
•
•
•
•
•
•
•
•
•
Adjustable Tip Spacing Equalizer Multichannels
Thermo Fisher Scientific
•
•
•
•
•
•
•
•
•
•
Thermo Scientific E1-ClipTip User Manual 93
Appendix 6. ClipTip Ordering Information
ClipTip Racked (non-sterile and sterile)
Order number
Description
Volume range
Color Coding
Qty
94410040
ClipTip 12.5
0.5-12.5 µl
Pink
10 x 96/rack
94410043
ClipTip 12.5, sterile
0.5-12.5 µl
Pink
10 x 96/rack
94410210
ClipTip 20
1-20 μl
Pink
10 x 96/rack
94410213
ClipTip 20, sterile
1-20 μl
Pink
10 x 96/rack
94410250
ClipTip 50
5-50 μl
Violet
10 x 96/rack
94410253
ClipTip 50, sterile
5-50 μl
Violet
10 x 96/rack
94410310
ClipTip 200
5-200 μl
Yellow
10 x 96/rack
94410313
ClipTip 200, sterile
5-200 μl
Yellow
10 x 96/rack
94410510
ClipTip 300
10-300 μl
Orange
10 x 96/rack
94410513
ClipTip 300, sterile
10-300 μl
Orange
10 x 96/rack
94410710
ClipTip 1000
30-1000 μl
Blue
8 x 96/rack
94410713
ClipTip 1000, sterile
30-1000 μl
Blue
8 x 96/rack
94410810
ClipTip 1250
50-1250 µl
Turquoise
8 x 96/rack
94410813
ClipTip 1250
50-1250 µl
Turquoise
8 x 96/rack
94410050
ClipTip 384 12.5
0.5-12.5 µl
Pink
10 x 384/rack
94410053
ClipTip 384 12.5, sterile
0.5-12.5 µl
Pink
10 x 384/rack
94410100
ClipTip 384 30,
1-30 µl
Violet
10 x 384/rack
94410103
ClipTip 384 30, sterile
1-30 µl
Violet
10 x 384/rack
94410150
ClipTip 384 125
2-125 µl
Yellow
10 x 384/rack
94410153
ClipTip 384 125, sterile
2-125 µl
Yellow
10 x 384/rack
ClipTip 384 tip
ClipTip Reloads (non-sterile and sterile)
Order number
Description
Volume range
Color Coding
Qty
94410217
ClipTip 20 Reload Stack
1-20 μl
Pink
10 x 96/insert
94410218
ClipTip 20 Reload Stack, sterile
1-20 μl
Pink
10 x 96/insert
94410257
ClipTip 50 Reload Stack
5-50 μl
Violet
10 x 96/insert
94410258
ClipTip 50 Reload Stack, sterile
5-50 μl
Violet
10 x 96/insert
94410317
ClipTip 200 Reload Stack
5-200 μl
Yellow
10 x 96/insert
94410318
ClipTip 200 Reload Stack, sterile
5-200 μl
Yellow
10 x 96/insert
94410517
ClipTip 300 Reload Stack
10-300 μl
Orange
10 x 96/insert
94410518
ClipTip 300 Reload Stack, sterile
10-300 μl
Orange
10 x 96/insert
94410717
ClipTip 1000 Reload Stack
30-1000 μl
Blue
8 x 96/insert
94410718
ClipTip 1000 Reload Stack, sterile
30-1000 μl
Blue
8 x 96/insert
94410718
ClipTip 1250 Reload Blister
50-1250 µl
Turquoise
8 x 96/insert
94410818
ClipTip 1250 Reload Blister, sterile
50-1250 µl
Turquoise
8 x 96/insert
94 Thermo Scientific E1-ClipTip User Manual
Thermo Fisher Scientific
ClipTip Filter tips
Order number
Description
Volume range
Color Coding
Qty
94420043
ClipTip Filter 12.5, sterile
0.5-12.5 µl
Pink
10 x 96/rack
94420213
ClipTip Filter 20, sterile
1-20 μl
Pink
10 x 96/rack
94420253
ClipTip Filter 50, sterile
5-50 μl
Violet
10 x 96/rack
94420313
ClipTip Filter 200, sterile
5-200 μl
Yellow
10 x 96/rack
94420513
ClipTip Filter 300, sterile
10-300 μl
Orange
10 x 96/rack
94420713
ClipTip Filter 1000, sterile
30-1000 μl
Blue
8 x 96/rack
94420813
ClipTip Filter 1250, sterile
50-1250 µl
Turquoise
8 x 96/rack
94420053
ClipTip Filter 384 12.5, sterile
0.5-12.5 µl
Pink
10 x 384/rack
94420103
ClipTip Filter 384 30, sterile
1-30 µl
Violet
10 x 384/rack
94420153
ClipTip Filter 384 125, sterile
2-125 µl
Yellow
10 x 384/rack
384 ClipTip Tips
ClipTip Filter Blister Tub Reloads
Order number
Description
Volume range
Color Coding
Qty
94420218
ClipTip 20 Filter Reload, sterile
1-20 μl
Pink
10 x 96/insert
94420258
ClipTip 50 Filter Reload, sterile
5-50 μl
Violet
10 x 96/insert
94420318
ClipTip 200 Filter Reload, sterile
10-200 μl
Yellow
10 x 96/insert
94420518
ClipTip 300 Filter Reload, sterile
30-300 μl
Orange
10 x 96/insert
94420718
ClipTip 1000 Filter Reload, sterile
100-1000 μl
Blue
8 x 96/insert
94420818
ClipTip 1250 Filter Reload, sterile
50-1250 µl
Turquoise
8 x 96/insert
ClipTip Empty Racks
94410219
ClipTip Empty Rack Small
ClipTip 20 µl and 50 µl
10 x 96/rack, no tips/inserts
94410519
ClipTip Empty Rack Medium
ClipTip 200 µl and 300 µl
10 x 96/rack, no tips/inserts
94410819
ClipTip Empty Rack Large
ClipTip 1000 and 1250 µl
8 x 96/rack, no tips/inserts
All ClipTip tips are certified to be free of RNase, DNase, ATP, and Pyrogens*
* Does not apply to empty racks
Thermo Fisher Scientific
Thermo Scientific E1-ClipTip User Manual 95
[email protected]
www.thermoscientific/cliptip
www.thermoscientific.com
thermoscientific.com
© 2013 Thermo Fisher Scientific Inc. All rights reserved. All trademarks are the property of
Thermo Fisher Scientific Inc. and its subsidiaries. Specifications, terms and pricing are subject to
change. Not all products are available in all countries. Please consult your local sales representative
for details.
Thermo Fisher Scientific
Ratastie 2, P.O.Box 100
FI-01621 Vantaa
Finland
1508890-01
96 Thermo Scientific E1-ClipTip User Manual
Thermo Fisher Scientific