Download Assistina 301 plus
Transcript
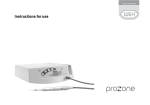
Instructions for use 301 plus Contents W&H symbols................................................................................................................................................................................................ 3 1. Introduction..................................................................................................................................................................................4 – 5 2. Unpacking........................................................................................................................................................................................... 6 3. Package contents.............................................................................................................................................................................. 7 4. Safety precautions............................................................................................................................................................................. 8 5. Description of the front side............................................................................................................................................................. 9 6. Description of the rear side.............................................................................................................................................................10 7. Commencing operation – First use................................................................................................................................................11 Commencing operation – Filling with W&H service oil / cleaning fluid.......................................................................................12 Commencing operation – Connecting the compressed air..........................................................................................................13 Commencing operation – Initial filling of the system..................................................................................................................14 8. Test....................................................................................................................................................................................................15 9. Function check – Function display, function check of the mechanical drive............................................................................16 10. Maintenance.....................................................................................................................................................................................17 Maintenance of transmission instruments with ISO coupling.....................................................................................................18 Maintenance of turbines........................................................................................................................................................19 – 20 Maintenance of air motors and air-driven dental scalers............................................................................................................21 Maintenance of transmission instruments T1 TITAN, T1 Turbines and SIRONA Motor SL..........................................................21 Maintenance of the FG chucking system of FG contra-angle handpieces..................................................................................22 11. Cleaning and disinfection .................................................................................................................................................................. 23 12. W&H accessories....................................................................................................................................................................24 – 25 13. Service......................................................................................................................................................................................26 – 30 14. Technical data..................................................................................................................................................................................31 Letter of indemnity.....................................................................................................................................................................................32 W&H contacts.............................................................................................................................................................................................33 2 W&H symbols WARNING! (Risk of injury) ATTENTION! (To prevent damage occurring) General explanations with no danger to persons or property W&H Service Data Matrix Code for product identification, e.g. in hygienic maintenance process Highly flammable! Avoid sources of ignition; do not smoke 3 1. Introduction For your safety and the safety of your patients This User Manual explains how to handle your W&H product. We must, however, warn of possible dangerous situations. Your safety, the safety of your team and of course the safety of your patients is of paramount importance to us. For this reason, it is essential to comply with the safety precautions on Page 8. Intended use Unit for cleaning the spray channels and lubricating the moving parts of dental transmission instruments, turbines, air motors and air-driven dental scalers. Misuse can damage the Assistina and involves risk and danger to user and third parties. Care and maintenance of the articles specified with W&H Assistina does not provide disinfection or sterilization. User qualifications The W&H Assistina unit shall be used only by those personnel who have received professional and practical training. In the development and design of the W&H Assistina, we have assumed the target group of users to be dental surgeons and their assistants. 4 Introduction Production according to EU Directive This medical product has been designed and manufactured according to EU Directive 93/42/EEC and applies to the unit > W&H Assistina in the condition as supplied by us. This declaration does not apply to unforeseen internal or external attachments or the like. Responsibility of the manufacturer W&H Dentalwerk Bürmoos accepts responsibility for consequences affecting the safety, reliability and performance of the Assistina only when the following directions have been observed: >The Assistina must be used in compliance with this User Manual. >The Assistina has no parts which are repairable by the user. Assembly, modifications or repairs may be carried out only by skilled persons authorized by W&H. 5 2. Unpacking Have the User Manual at hand. Take out the white and green funnels. Take out the service oil, cleaning fluid, suction filter and the optional accessories from the side compartments. Remove the turbine adaptor. Lift out the Assistina in the fibreboard box. Open the box at the tucked-in closure and remove the air hose from the cover. Remove the initial accessories. The W&H packaging is environmentally friendly and can be disposed of through specialist recycling organizations. However, we recommend that you keep the original packaging. 6 3. Package contents > > > > > > > > > W&H Assistina cleaning and maintenance unit (REF 00030125, 00030140) Suction filter, complete 4-hole turbine adaptor REF 02685000 Funnel, white, REF 02689300 Funnel, green, REF 02689400 Air connection hose 2 m, REF 02697000, complete Initial provision of 5 layers of fleece REF 02690300 2 spare seals REF 02680600 and 2 spare O-rings REF 02695700 User Manual with warranty card 7 4. Safety precautions It is essential that you comply with the following instructions > Place the unit only in adequately ventilated premises! > Keep your hands out of the inside of the unit during maintenance operations! > Fit the transmission instrument, turbine, turbine adaptor, air motor or dental scaler only when parts are no longer moving! (Damage to the drive, driver assembly, transmission instruments). > Always close the cover and waste disposal tray before starting up the unit. > Keep cleaning fluid/service oil away from the eyes! > Do not swallow cleaning fluid! > Keep service oil away from the skin! Cleaning solution and its residues are flammable. Flash point 25° C. Avoid sources of ignition! Do not smoke! Use only suitable tools Comply with the manufacturer's instructions for the maintenance of dental transmission instruments, turbines, air motors and air-driven dental scalers! Improper use Improper use, in addition to incorrect assembly, installation, modification or repairs of the Assistina or non-compliance with our instructions invalidates all claims under warranty and any other claims. 8 5. Description of the front side Filler hole / storage container for service oil Button to cleaning / maintenance process Filler hole / storage container for cleaning fluid Recess for adaptor press 2 sec./ cycle Fill level of service oil Fill level of c leaning fluid Indicator window for service oil Cover Waste disposal tray Indicator window for cleaning fluid W&H service oil W&H cleaning fluid 9 6. Description of the rear side Suction filter Quick release coupling for compressed air 10 7. Commencing operation – First use > Service oil must be at room temperature when it is poured in. > Never reverse funnels (white to white, green to green) and store them in a dust-free environment! > Check the filling level indicator! > Use only clean, filtered compressed air! Unscrew the two caps and remove the two transport seals (malfunction!)! The W&H cleaning fluid is aldehyde-free and nontoxic. It is biodegradable in waste water. W&H service oil represents absolutely no danger to health; correct disposal of residues is required. 11 Commencing operation – Filling with W&H service oil / cleaning fluid Unscrew the cap from the white storage container. Insert the white funnel. Add 250 ml of cleaning fluid. Add 250 ml of service oil. Close the storage containers for the service oil and cleaning fluid. Unscrew the cap from the green storage container. Insert the green funnel. 12 Commencing operation – Connecting the compressed air 02697000 Push the quick release coupling of the connecting hose into the coupling socket on the Assistina. Connect the compressed air line using the 1/8« screw connection. Fit the suction filter so that it is leak-tight. The built-in air filter in the connecting hose is only a fine filter. It cannot clean unfiltered and possibly contaminated compressor air. Dirty fine filters must be replaced. 13 Commencing operation – Initial filling of the system Pull the drip guard off the maintenance attachment and store it safely. 15 x 2 secs. Press the program button about 15 times for 2 seconds with a pause of 2 seconds between each actuation. Hold a cloth or tissue in front of the maintenance attachment. If no oil can be seen on the cloth or tissue and no cleaning fluid can be detected by its smell (alcohol), the supply lines are not yet completely full. 10 x 2 secs. Press the program button 10 times for 2 seconds. 14 8. Test > Do not connect any transmission instrument, turbine, air motor or dental scaler during the test! > If the adaptor is fitted on the maintenance attachment, remove it. Place a fleece inlay in the waste disposal tray. 1x 2 secs. Press the program button once for 2 seconds. Close the cover and waste disposal tray. Check that the fleece inlay is damp to ensure correct function. If it is not damp, repeat the process 2 to 3 times. Dispose of saturated fleece inlays as with cloths for surface disinfection. 15 9. Function check Function display Continuously monitor the function display! > Press the program button for 2 seconds. A green ball for the cleaning fluid appears in the right-hand window. > Release the program button. A green ball for the service oil appears in the left-hand window. After a few seconds, both balls will drop down again. Correct operation of the maintenance process is indicated by these two function displays. If ever the balls disappear during a program cycle, this indicates a malfunction. Function check of the mechanical drive > Fit a transmission instrument with a rotary instrument inserted onto the Assistina maintenance attachment. > Press the program button for 2 seconds. The maintenance cycle begins and the rotary instrument turns. If the rotary instrument does not turn, there is a malfunction. 16 10. Maintenance > First carry out the external disinfection and cleaning. > Carry out daily maintenance midday and evening prior to sterilization. > Use the adaptor REF 02679000 for maintenance of transmission instruments in those cases where the m anufacturer has allowed for removal of the treatment heads. With sterilization after every patient > Press the program button once With maintenance twice a day > Press the program button twice on each occasion An accurate dosage of W&H cleaning fluid and W&H service oil is provided for these maintenance processes. Additional pressing of the program button can cause too much cleaning fluid to enter the spray air and coolant channels! 17 Maintenance of transmission instruments with ISO coupling The maintenance program will be completed in about 35 seconds. > Pull the cover down. Press the red release button and pull off the turbine adaptor. Keep the adaptor in the recess. 1x 2 secs. With its spray exit nozzle directed downwards, push the transmission instrument onto the maintenance attachment up to the limit stop. Close the cover and the waste disposal tray. Press the program button once for about 2 seconds. Open the cover at the end of the maintenance cycle. Press the red release button of the maintenance attachment while at the same time removing the transmission instrument. Test run the transmission instrument. When the transmission instrument has been wiped over, it is ready to be sterilized. 18 Maintenance for turbines The maintenance program will be completed in about 30 seconds. > Use the turbine adaptor REF 02685000 with standard 4-hole connection. > Pull the cover down. 02685000 04713200 W&H turbines: Screw together the turbine adaptor and the adaptor. Adapters not suitable for use with turbine hose. 07014500 02690400 02685000 Other turbines: Screw the turbine adaptor to the relevant quick release coupling (e.g. adapter 02692000, 04713200 ...). 02685000 Turbines with >2-hole or 3-hole Borden connection and >spray air to drive air connection Screw the turbine adaptor to the turbine. Insert the turbine adaptor onto the motor attachment. Turbines with standard 4-hole connection: Screw the turbine adapter onto the respective turbine 19 Maintenance Push the appropriate adaptor onto the maintenance attachment up to the limit stop. 1x 2 secs. With its spray exit nozzle directed downwards, push the turbine with quick release coupling onto the adaptor until it engages. Close the cover and the waste disposal tray. Press the program button once for about 2 seconds. Open the cover at the end of the maintenance cycle. Press the red release button of the maintenance attachment, while at the same time removing the turbine from the adaptor. Test run the turbine. When the turbine has been wiped over, it is ready to be sterilized. 20 Maintenance for air motors and air-driven dental scalers The maintenance program will be completed in about 35 seconds. > Use the turbine adaptor REF 02685000 with standard 4-hole connection. > Set the rotary ring of the air motor to clockwise or anticlockwise running (no maintenance will take place in the »Zero« setting). > Carry out maintenance as for turbines (see Page 20). 21 Maintenance of the FG chucking system of FG contra-angle handpieces > Clean the chuck at least once a week. > Remove the rotary instrument. > Use the T1 adaptor 02693000 With its spray exit nozzle directed downwards, push the T1 adaptor onto the maintenance attachment. Initially, keep the cover open. Push the instrument onto the adaptor from underneath. Support the instrument at the edge of the cover. 1x 2 secs. Press the program button once for about 2 seconds. Press the instrument against the adaptor for about 10 seconds. Close the cover. Allow the remainder of the maintenance cycle to complete. 22 11. Cleaning and disinfection W&H recommends external cleaning of the Assistina > once a week or as required. > Use W&H cleaning fluid to clean the outside of the case. Clean the cover and the waste disposal tray > as required > Squeeze the cover slightly. > Remove the cover from its fixing. > Use W&H cleaning fluid to clean the inside of the case. > Clean the waste disposal tray in a thermo washer disinfector. 23 12. W&H accessories Use only original W&H accessories/spare parts or accessories approved by W&H Optional accessories 02676400 Drip guard for maintenance attachment 02679000 Adaptor for removable contra-angle handpiece heads 02680600 02685000 02689300 02689400 Seal 4-hole turbine adaptor Funnel, white Funnel, green 02690400 02691000 02692000 02693000 05204600 02697000 02699901 04713200 Adaptor for all W&H products with Roto Quick system Adaptor for Sirona T1 Classic transmission instruments Adaptor for Sirona T1, T2, T3 turbines Adaptor for cleaning FG chucking system and others Entran contra-angle head Air connection hose 2 m, with screw connection 6 x 4 mm Cover for long transmission instruments Adaptor for Multiflex®-System (Multiflex® is a registered trademark of KaVo Medizintechnik GmbH, Germany) 07014500 Adaptor Assistina Borden 24 W&H accessories 02675200 Air filter for air connection hose 02697000 02695700 O-ring for maintenance attachment 02670500 02675910 02680200 02680500 02690300 02694500 Filter pack 500 ml W&H service oil 1000 ml W&H cleaning fluid Pack of W&H service oil and W&H cleaning fluid Initial provision of 5 layers of fleece Fleece, pack of 20 25 13. Service Regular testing of Assistina Regular testing of function and safety is necessary: With each application: > Check the function display Once a week: > Check the filling level displays. >Check the O-rings on the maintenance attachment. >Change the O-rings in the event of visible defects or every two months. >Replace any missing O-ring immediately. Firmly squeeze the O-ring between thumb and forefinger and pull it off. Push on a new O-ring. Only O-rings in good condition and correctly positioned will ensure consistently safe and correct maintenance. Once a year: > Carry out a function check (Page 16). > Check the fine filter in the air connection hose for contamination. 26 Service The O-rings can be exchanged without the need for special tools. Grease-free fingers will facilitate this exchange. > Firmly squeeze the O-ring between thumb and forefinger to form a loop. > Pull off the O-ring. > Push on a new O-ring No. 02695700. 2 replacement O-rings No. 02695700 are attached here. 27 Service Renewing the filter pack > Do not touch the vents of the suction filter (risk of damage)! > Use the W&H Assistina for maintenance only when the suction filter with a fully serviceable filter pack is fitted. > Renew the filter pack in the suction filter after approx. 7,000 maintenance cycles (corresponds to the consumption of a 500 ml bottle of W&H service oil). Pull out the suction filter horizontally towards the rear. Take the filter pack out of its packaging. Press the filter pack on the frame in the filter case. Refit the suction filter so that it is leak-tight. Press out the filter pack using a suitable implement. Ensure that it is placed in the correct waste disposal. 28 Service Returns > If you have any questions, please contact your local dental dealers or one of our service points (see Page 33). > Always use the original packaging for return transport. 2 transport seals No. 02680600 are attached here. 29 Service Pull out the suction filter horizontally. Fit a seal in each filler hole. Screw on the two caps. Before emptying the first container, fit the transport seal on the second container. Disconnect the air connection hose. Fit the drip guard No. 02676400 on the maintenance attachment. Empty the cleaning fluid and service oil from the storage containers. Do not empty the containers simultaneously. The cleaning fluid and service oil must not be mixed! If its packaging no longer available: Ask your dealer for W&H packaging or use secure substitute packaging. 30 14. Technical data Height: Width: Depth (with filter): Weight: Air consumption: Noise: Flow pressure: Capacity: 223 mm 190 mm 415 mm 2.70 kg approx. 60 l/min. 63 dB (A) (at 50 cm distance) 4 bar to 10 bar (pressure regulation provided by integral automatic pressure regulator) 250 ml service oil, sufficient for approx. 3,500 maintenance cycles 250 ml cleaning fluid, sufficient for approx. 2,500 maintenance cycles 31 Letter of indemnity This W&H product has been manufactured with great care by highly qualified specialists. A wide variety of tests and controls guarantee faultless operation. Please note that claims under warranty can only be validated when all the directions in the Instructions for use have been followed. As manufacturer, W&H is liable for material or manufacturing defects within a warranty period of 12 months from the date of purchase. We accept no responsibility for damage caused by incorrect handling or by repairs carried out by third parties not authorized to do so by W&H! Claims under warranty – accompanied by proof of purchase – must be sent to the vendor or to an authorized W&H service point. The provision of service under warranty extends neither the warranty period nor any other guarantee period. 1 2 months warranty W&H contacts Find you nearest W&H service partner at http://wh.com Simply go to the menu option »Service« for full details. Alternatively please contact: W&H (UK) LIMITED, 6 Stroud Wood Business Centre, Park Street, St Albans, Herts AL2 2NJ, United Kingdom t + 44 1727 874990, f + 44 1727 874628, E-Mail: [email protected] W&H Impex Inc., 6490 Hawthorne Drive, Windsor, Ontario, N8T 1J9, Canada t + 1 800 2656277, + 1 519 9446739, f + 1 519 9746121, E-Mail: [email protected] W&H Impex Inc., 14300 Henn Rd., Dearborn, MI 48126, USA t + 1 800 2656277, + 1 519 9446739, f + 1 519 9746121, E-Mail: [email protected] W&H DENTAL-MECHANIK (ASIA) PTE-LTD., 18 Boon Lay Way, #10-94 Tradehub 21, 609966 Singapore t + 65 63168370, f + 65 63168371, E-Mail: [email protected] A-DEC AUSTRALIA CO. INC., Unit 8, 5-9 Ricketty Street, Mascot NWS 2020, Australia t + 61 2 83324000, f + 61 2 83324099, E-Mail: [email protected] 33 Manufacturer W&H Dentalwerk Bürmoos GmbH Ignaz-Glaser-Straße 53, 5111 Bürmoos, Austria t +43 6274 6236-0, f +43 6274 6236-55 [email protected] wh.com Form-Nr. 50458 AEN Rev. 015 / 09.06.2015 Subject to alterations


