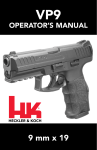
1
P9S
AUTOMATIC PISTOL
Caliber .45 ACP
P9S
Automatic Pistol
Caliber .45 ACP
Instruction Manual
HECKLER & KOCH, INC.
2148 Pacific Boulevard
Sterling, Virginia 20166-8903 U.S.A.
TEL. (703) 450-1900
TELEFAX (703) 450-8160
TELEX 7109550846
Heckler & Koch, Inc.
U.S.A.
WARNING: READ ALL INSTRUCTIONS BEFORE
HANDLING & USING THIS FIREARM.
Safety Rules
PLEASE READ THIS BEFORE HANDLING YOUR FIREARM.
The following safety rules are placed in this manual by Heckler & Koch, Inc. as an important
reminder that firearms safety is your responsibility. Firearms can be dangerous and can
potentially cause serious injury, damage to property or death, if handled improperly
1. Never point a firearm at anyone, or in any direction other than a safe one, i.e., downrange
2. Always treat all firearms as if they were loaded.
3. Keep your finger off the trigger until your sights are on the target.
4. Keep your finger off the trigger while loading or unloading the pistol.
5. Keep your finger off the trigger while pulling pistol out of the holster or holstering.
6. Be sure of your target and the back stop beyond.
7. Never give to or take a firearm from anyone unless the action is open.
8. Be sure that the ammunition you are using is factory loaded and is not damaged in anyway.
9. Before firing, remove the magazine from the weapon, lock the bolt to the rear and check
the barrel of your unloaded firearm for any possible obstructions.
10. Before firing any firearm unfamiliar to you, make sure that you understand how it
functions. Unfamiliarity can cause serious accidents. Attend a certified training course on any
firearm which you intend to use or with which you are not sufficiently familiar.
11. Wear hearing protection and eye protection when shooting your firearm.
12. Keep your hands and fingers away from the muzzle to avoid injury or burns.
13. Firearms and ammunition should be stored separately beyond the reach of children and
untrained or irresponsible adults.
14. Avoid the use of alcoholic beverages before and during any shooting.
REMEMBER: A FIREARM HAS THE CAPABILITY OF TAKING YOUR LIFE OR THE LIFE
OF SOMEONE ELSE! BE CAREFUL WITH YOUR FIREARM – AN ACCIDENT IS ALMOST
ALWAYS THE RESULTS OF NOT FOLLOWING BASIC SAFETY RULES.
This page left blank intentionally…
TABLE OF CONTENTS
NOTES:
19 of 19
Characteristics……………………………………………………...............
1
Handling the P9S Automatic Pistol……………………………………….
2
Safety………………………………………………………………………..
2
Filling the Magazine………………………………………………………..
3
Loading and Cocking the Pistol…………………………………………...
4
Unloading and Uncocking the Pistol……………………………………...
6
Firing…………………………………………………………………………
7
Field Stripping for Cleaning…………………………….………………….
7
Assembling the Pistol………………………………………………………
9
Care of the Pistol……………………………………………………………
10
Assemblies…………………………………………………………………..
11
Special Accessories………………………………….……………………..
11
Specifications………………………………………………………………..
14
Components of the P9S Automatic Pistol………………………………..
15
HECKLER & KOCH GmbH in Oberndorf/Neckar has a long tradition
and vast experience in the development and manufacture of automatic
small arms.
NOTES:
In particular the well proven Automatic Rifle G3, standard weapon of
the Federal German Army and the armed forces of numerous NATO
countries as well as the HK Weapons System which was developed
from it, are manufactured of quality materials in accordance with the noncutting method, the most economic and advanced method in modern
weapons technology.
And, of course, this also applies to the P9S Automatic Pistol
Characteristics
The P9S Automatic Pistol with double action trigger has a concealed
hammer and lateral cocking lever with uncocking safety. This highperformance automatic pistol is characterized by the polygon groove
shape of its stationary barrel and its recoil-operated roller-locked bolt
system.
This locking system has met with particular interest in modern weapons
technology. By breaking down the momentum in the bolt, the recoil
velocity of the slide is significantly reduced, and with it the perceptible
kick.
Gas cutting is largely eliminated because there are no pronounced
grooved and lands in the polygon barrel, resulting in increased projectile
velocity and notching resistance, and making it easy to clean.
In conjunction with the short distance between the upper edge of the
shooter’s hand and the axis of the barrel, the above characteristics
ensure that this pistol is extremely accurate and line up fast.
We were one of the first to recognize the excellent suitability of plastic
material for certain parts of our weapons and equipment. The high
resistance of the new plastics to extreme temperature variations has
proven to be of exceptional value, such as on the grips of military arms
for example. For this reason, the receiver of the P9S is covered
completely with plastic.
1 of 19
18 of 19
Handling the P9S Automatic Pistol
NOTES:
Safety
The safety can be engaged or disengaged by switching the safety
lever.
If the red mark is visible
the safety is off.
Fig. 1: Safety off
If the white mark is visible
the safety is on.
Fig. 2: Safety on
17 of 19
2 of 19
Filling the Magazine
Insert the cartridge under the magazine lips, base first, by pressing down
follower or the cartridge. The magazine holds 7 cartridges.
Fig. 3: Filling the magazine
3 of 19
16 of 19
Components of the P9S Automatic Pistol Cal .45 ACP
1
2
3
4
5
6
7
8
9
10
11
12
13
14
19
20
21
22
23
24
25
26
27
28
29
30
31
32
33
34
35
36
37
38
39
40
41
42
43
Front sight
Slide
Rear sight
Safety
Recoil spring
Barrel
Extractor
Locking rollers
Compression spring
Pressure pin
Compression spring for pressure
pin
Locking catch
Clamping sleeve
Compression spring
Firing pin spring
Firing pin
Spiral pin
Bolt head
Threaded pin
Compression spring
Catch bolt
Cylindrical pin
Bolt head carrier
Support
Sleeve
Raised countersunk head screw
Buffer housing
Plastic buffer
Stop pin
44
45
46
47
48
49
50
51
52
53
54
Disconnector
Cylindrical pin
Pull bar
Trigger lever
Spring for pull bar
Indicator pin
Spiral pin
Hammer
Stop pin
Spring for disconnector
Axle for hammer
55
56
57
58
59
60
61
62
63
64
65
66
67
68
69
70
71
72
Barrel catch
Insert piece
Trigger spring
Trigger
Compression spring
Catch bolt
Elbow spring
73
74
75
76
77
78
79
80
81
Threaded bush
Raised countersunk head screw
Trigger guard
Receiver
Safety catch
Elbow spring
Cocking lever
Catch
Countersunk screw
Bearing plate, left
Angle lever
Intermediate lever
Bearing plate, right
Shank
Compression spring
Magazine catch
Combat grip
*Raised head countersunk
screw
Magazine housing
Follower
Follower spring
Support for follower spring
Magazine floor plate
Ejector
Ejector spring
Pin for magazine catch
Flanged bush
Catch lever
Spring for catch
Loading and Cocking the Pistol
Only with the safety on!
First method
Insert a filled magazine into the closed weapon until the magazine
catch engages. Pull back slide all the way and let it snap forward.
This chambers the top cartridge from the magazine (Fig. 4).
Second method
Pull back slide all the way and press the cocking lever upward until
the catch engages the notch.
Now insert a filled magazine into the open weapon.
Either: Pull slide back and release.
Or: Press cocking lever downward.
In both cases the slide will snap forward and chamber the top cartridge
from the magazine.
Fig. 4: Pull back slide
With both methods the pistol is then loaded, the hammer is cocked and
the safety is on.
The indicator pin (Fig. 5) which can be both seen and felt at the rear of
the slide shows that the hammer is cocked. The protruding extractor
(Fig. 6) lets the shooter both see and feel that a round is in the
chamber.
*Use short screw in topmost hole of grip
15 of 19
4 of 19
Technical Data
P9S Automatic Pistol
Fig. 5: Indicator pin
Fig. 6: Extractor
Reloading when the magazine is empty
After the last round has been fired, the slide will remain in its rearmost
position. To continue firing immediately, simply exchange the empty
magazine for a full one and
Operating principle……………………………..
Action…………………………………………….
Feed……………………………………………...
Caliber……………………………………………
Recoil operated
Roller locking system
7 round straight magazine
.45 ACP
Muzzle velocity –Vo-……………………………
Muzzle energy –Eo-……………………………
approx 840 fps
approx 370 ft lbs
Length of pistol………………………………….
Height of pistol………………………………….
Width of pistol over grips………………………
Length of barrel…………………………………
Sight radius……………………………………..
7.6 in
5.4 in
1.3 in
4.0 in
5.8 in
Weights
Pistol, without magazine……………………….
Magazine, filled with 7 cartridges……………..
approx. 27.85 oz
approx. 7.78 oz
Either: Press the cocking lever downward, causing the slide to snap
forward.
Or:
Pull the slide back slightly and let it snap forward.
The pistol is again ready to fire.
Fig. 7: Reloading the pistol
5 of 19
14 of 19
Unloading the Pistol
Engage the safety!
Remove the magazine (Fig. 8). Pull the slide back all the way; cartridge
will be ejected.
Check to make sure that there is no round in the chamber. Permit the
slide to snap forward again.
Fig. 17: Adjusting the elevation
Adjusting the windage
Rotate the windage adjusting screw in the desired direction with the
screwdriver (Fig. 18):
Rotating clockwise moves the shot to the left
Rotating counter-clockwise moves the shot to the right
Each click shifts the point of impact approx. 0.4” to the left or the right at
a range of 27.3 yds.
Fig. 8: Press back magazine catch
Uncocking the Pistol
In loaded or unloaded condition. Engage the safety, press down the
cocking lever, pull trigger all the way back, permit cocking lever to
return slowly upward again, release trigger.
Should your thumb accidentally slip off the cocking lever, the hammer is
caught by the uncocking safety.
If the trigger is accidentally pulled, with the safety on, before the
cocking lever is depressed, the safety catch will then prevent the
hammer from striking the firing pin. Dry firing only with safety off.
If the pistol is to be carried ready to fire, disengage the safety again.
Fig. 18: Adjusting the windage
13 of 19
6 of 19
The hammer must now not disengage. If it does, it is set too finely and
the screw must be backed off further. If set too finely, the pistol could
double; if this is the case, turn back the fine adjustment screw even
further.
Firing
Firing with the hammer cocked
Pistol loaded (cartridge in the chamber).
Disengage the safety.
Pull the trigger; this will release the cocked hammer.
Light trigger pull = increased accuracy.
It is not possible to regulate the trigger pull.
Firing with the hammer uncocked and double action trigger
Pistol loaded (cartridge in the chamber).
Disengage the safety.
Pull the trigger; the hammer will cock until it is released. The relatively
light double action trigger permits the hammer to be cocked for the
first shot or to be re-cocked in the event of a misfire. The double action
trigger results in longer trigger travel and increased trigger pull.
Rotating clockwise reduces the engagement of the catch lever in the
hammer, rotating counter-clockwise increases it.
Field Stripping for Cleaning
Engage the safety!
Remove the magazine.
Pull slide back all the way and check to make sure that there is no round
in the chamber.
Permit the slide to snap forward again.
Press the barrel clamp in the trigger guard forward and upward.
Move the slide as far forward as it will go and lift off. (Fig. 9)
Fig. 16 Regulating the fine adjustment device
Click sight
To provide the target shooter with individual sights, a click sight,
adjustable for elevation and windage with 8 clicks per revolution was
developed by H&K.
Adjusting the elevation
Rotate the elevation adjusting screw in the desired direction with the
screwdriver (Fig. 17):
Rotating clockwise lowers the point of impact approx. 0.6” per click at a
range of 27.3 yds, rotating counter-clockwise raises it accordingly.
Fig. 9 Remove slide.
7 of 19
12 of 19
Assemblies (Fig. 14)
To remove the barrel, push it forward against the pressure of the spring
until it can be removed from the slide.
1 Slide
2 Barrel with recoil spring
3 Receiver
4 Magazine
Special Accessories
Trigger stop
The trigger stop for the P9S Automatic Pistol is located in the trigger
guard on the receiver and limits the trigger travel immediately after the
hammer has been released; it simultaneously interrupts actuation of the
double action trigger. The trigger stop must be swiveled away for firing
with the double action trigger. It can be loosened or clamped by means
of the screw (Fig. 15) and can be set as desired. (Must be performed
after setting the fine adjustment feature.)
Fig. 10 Remove the barrel
Fig. 11 Press against the locking catch.
To remove the bolt head, with one shank end of the barrel extension
between bolt head and slide, press against the locking catch until both
head springs forward and the bolt can be removed.
Fig. 15 P9S with trigger stop
Fine adjustment feature
A fine adjustment device can be installed in the receiver for increased
trigger travel precision.
The setting operation is best performed as follows:
Fig. 11 Press against the locking catch.
Remove the slide and cock the hammer. Rotate the setting screw
clockwise until the hammer snaps. Now back off the screw one half turn.
Replace slide, pull back all the way and let it snap forward again.
11 of 19
8 of 19
Assembling the Pistol
Care of the Pistol
Caution: Safety required that both rollers be in place in the bolt head
when assembling the weapon.
For cleaning, the pistol must merely be field-stripped as described on
pages 7 & 8.
To insert the bolt head, place its rectangular opening on the locking
piece (extractor towards the ejection port) and, as when removing, press
the locking lever downward with one shank of the barrel extension and
pull the bolt head back again until it engages.
The service life and the performance of your pistol depend upon correct
handling and proper, regular cleaning.
Push the barrel, with the recoil spring (wider end of spring facing
forward), obliquely into the hole in the slide against the pressure of the
spring (Fig. 12), then place the barrel entirely into the slide and permit to
travel back until the locking rollers engage.
The barrel must be cleaning after every shooting. Generally, cleaning
consists of removing dirt and moisture. Bright parts must be wiped clean
and lubricated lightly with oil.
Any commercial chlorine and acid-free solvent, gun oil or gun grease can
be used. It is best to grease the slide guide only lightly.
Fig. 12 Insert barrel
Place the slide on the receiver in such a manner that the front guide lugs
can engage the corresponding recesses in the receiver. Press the slide
into the receiver, pull back and let it snap forward again (Fig. 13).
Uncock the pistol and insert magazine.
Fig. 13 Place slide on receiver
Fig. 14 Assemblies
9 of 19
10 of 19